Author: jaesoon_admin

  • Why Your Dog Hesitates to Settle and How to Fix Rest Space Issues

    See your dog hesitate at her bed, circle, half-settle, spring up again—then pace the same awkward loop every night? It looks like odd energy, but the underlying problem almost always hides in the setup: a dog bed squeezed into high-traffic zones, surrounded by shoes, bags, and the fallout of daily life. Instead of relaxing, your dog fields every footstep, shuffle, and sudden grab for the leash—a rest area in name, but an obstacle course in practice. Here’s how the wrong bed placement and boundary choices quietly undermine your daily flow, and how a smarter arrangement stops the cycle cold.

    When “Settling Down” Never Quite Settles

    Routine means little when your dog’s rest spot is jammed against the day’s traffic. Picture a bed inches from the hallway, where keys rattle and backpacks drop. Your dog approaches, hovers at the edge, half-commits—never really claiming it. The moment you or anyone else moves past, she’s up, rechecking the room, neck craned and attention fractured. Even after a tiring walk, there’s no true rest: your dog wears out by degrees in the background noise of the home.

    • Dog stands on the rim of her own bed, just watching—never curling up for real sleep.
    • A passing family member or dropped leash makes her flinch up, alert to every shift in motion.
    • She might settle for a moment, but the return of footsteps or a shuffle beside her resets everything—again.

    Why It Adds Up: Routine Drag and Repeated Friction

    Each interruption looks minor—a nudge here, a hop up there. Ignore it too long, though, and these frictions stack to drag your whole evening down. In daily routines, their cumulative effect is loud:

    • Returning from a walk, you dodge around the dog bed blocking the doorway. The detour jostles your dog awake just as she’s winding down, stealing her calm and slowing your own routine.
    • During dinner, her bed is squeezed beside the kitchen, trapping her in the swirl of moving feet and dropped snacks—she’s up and shifting every time the fridge opens.
    • Even a “neat” space feels unstable—shoes wander, bags pile up, and your dog pauses, uncertain whether the patch still belongs to her at all.

    The cost isn’t obvious right away. But neither you nor your dog ever really reset—you both spend the week tracking small annoyances and restless energy instead of recharging. Sleep gets lighter, tempers shorter, patience thinner.

    Common Traps: When Rest Zones Blur with Everyday Life

    Most rest-area mistakes sneak in slowly, not as big failures but as layered compromise:

    • The “cozy” blanket goes next to the only free spot—smack in a doorway draft.
    • Dog bed shoved beside the couch, bracketed by bags and a drifting rain boot or two.
    • Toys collect, bowls inch closer, and soon the whole area is a cluttered “dog zone”—never truly for rest.

    The difference at first is invisible. After a few days, circling, pausing, and hyper-alert sleeping surface—triggered not by quirks but by beds that never get buffered from the day’s churn. The illusion of organization fades fast under real use: a rest area that looks tidy but keeps fracturing your dog’s attention (and yours) each time you cross the floor.

    The Ripple Effect: How One Weak Point Undermines the Entire Routine

    That badly placed rest zone does more than just clip nap time. The location’s weak point keeps popping up all day:

    • Morning scramble: reaching for your keys or bag, you sidestep the encroaching bed—spilling water, losing precious seconds, or knocking your dog off her rhythm before breakfast.
    • Cleanup limits: you want to wipe muddy paws fast, but towels stashed beside the half-sleeping dog are hard to grab—so you delay, fumble, or skip the cleanup altogether.
    • Bedtime hesitation: your dog stares at the bed, waiting for a clear “go ahead” from you, reading the ambiguous setup as a shared, uncertain space. She hovers at the edge rather than taking it as hers.

    The result: transition times get rougher. Walks end with double shuffles, grooming stops require detours, and the whole routine gets chunkier—slower, less reliable, more easily derailed by one wrong placement.

    Is It Energy, Mood, or Just the Wrong Place?

    If you blame your dog’s restlessness on her personality or “needs more exercise,” watch the routine: restless hovering usually signals the space itself isn’t truly buffered from background movement, sound, or the churn of daily objects. A bed sucked into hallway drafts, jostled by bags, or hemmed in by bowls can’t let a dog really switch off. Most owners find themselves nudging clutter away night after night, hoping their dog adjusts—only to see the same interrupted routine tomorrow.

    Resetting the Rest Zone: A Real-World Adjustment

    Improvement rarely means buying another bed—it’s about moving what you have off the beaten path and guarding its boundaries. Here’s the pattern that fixes it: shift the bed just an arm’s length—about a meter—off any main walkway and anchor it to a calm wall. Purge shoes, bowls, and toys from arm’s reach. A quiet corner is suddenly, almost instantly, a reliable signal: “Yours. Safe. Switch off.”

    The immediate difference is clear: your dog approaches, circles once, and folds into sleep—no unfinished hover or split attention. You notice how downtime goes from fragile to solid. Both of you stop bracing for the next interruption.

    How to Judge If the Rest Fix Is Working

    • Your dog lays down after a walk without sitting up at every sound—rest starts quickly, lasts longer.
    • The old “pop up and check” routine disappears; background movement no longer triggers a patrol or reset.
    • You move through daily tasks—grabbing keys, handling cleanup—without weaving around the bed or tripping on scattered gear.

    This shift isn’t about style. The bed’s location looks almost bland—but works on repeat, and the anxious resets and daily friction finally subside. You stop dreading the next evening reshuffle.

    Reducing the Churn: Everyday Tips to Keep a Rest Zone Stable

    No setup stays perfect—a week later, shoes inch back and items migrate. Prevent “creep” and keep the rest boundary firm with habits, not just good intentions:

    • Weekly spot-check: Remove anything (bags, laundry, toys) closing in on the bed before your dog acts out the friction for you.
    • Cleanup supplies nearby, never inside: Towels and wipes within reach, but not where they spill into the rest spot itself—so post-walk resets are easy but the zone stays undisturbed.
    • Use routine signals: If hovering, circling, or restless shifts return, look for the new invader—a basket, water bowl, or random jacket—that’s muddied the boundary again. Remove, reset, repeat.

    Forget “perfect”—focus on stable and predictable. A small bit of vigilance keeps the space smooth for both you and your dog. The payoff, every day, is fewer failed transitions and real rest that doesn’t constantly get lost in reset mode.

    A Setup That Feels Good—Even After The Tidy Look Wears Off

    The line between “organized” and “usable” is visible in motion. A bed moved just out of the human flow, shielded from stray shoes and bags, doesn’t just look better—it quietly unlocks a calmer whole-home rhythm. The dog chooses it without nudging, circling, or glancing at you for permission. And keeping that setup going isn’t an ordeal: often, it’s a two-minute move or a weekend declutter—not a big renovation. What you get back is a day with less sidestepping and a stop to the tiring pattern of constant adjustment.

    When the rest setup actually works, you stop noticing it at all. The difference isn’t in how stylish it looks, but in how little resistance it puts up during real use.

    Find more practical solutions for real-life dog routines at DogPile.

  • How Organized Outlet Zones Enhance Focus and Workflow Efficiency

    The hidden drain on focus: outlet area chaos

    Sit at any desk that looks clean at eight a.m.—and chances are you’ll still feel the friction hours later: a foot tangling in cable loops under the edge, your hand fishing for a charger lost behind adapters, a power brick nudging your chair-wheel. The hidden mess below or behind the desktop silently chips away at real productivity. An untamed outlet area isn’t just cosmetic: it creates constant, minor interruptions—cord snags, blocked plugs, a power strip you have to hunt for—dragging your focus out of any workflow that depends on quick device switches and uncluttered movement.

    Why the outlet zone matters more as the day unfolds

    Clear desktops give a false sense of readiness. Cables and charging bricks barely register until you reach for a new device, move your chair, or try to charge mid-task. Suddenly you’re leaning awkwardly, rerouting a mouse cable, or nudging power bricks with your foot. It’s never dramatic—just enough to break your rhythm or make you scoot your chair sideways again. By mid-morning, cables that started tidy have crept into your legroom, adapters have shifted against your wheels, and reach zones become a patchwork of small obstacles.

    It’s not about perfection—just about stopping repeated resets

    Forget catalog-worthy setups; what matters is whether today’s arrangement holds up when the work ramps up. A cluttered outlet area means seconds lost untangling, scanning for a plug, or yanking a charger out. Taken one at a time, these “micro-resets” are invisible. Stacked into each cycle of sitting, switching devices, refocusing, they start to rewrite the whole feel of your routine. The real goal isn’t visual tidiness—it’s sparing yourself the daily rework that piles up every hour you use the space.

    Visible order vs. actual workflow: the cable tray tradeoff

    Standard fixes—under-desk cable trays, cable boxes, bundled velcro ties—can clear the deck for a photo. But swap a device on short notice or need an unexpected charger? Suddenly you’re stooping under the desk, contorting arms around tray edges, or blindly tugging wires mid-video call. A hidden cable tray soothes the eye—until you need to change something fast and the access points fight back.

    Leave everything exposed and every device swap is instant, but chaos piles up: cords slide onto the desk, slack pools in your chair path, and the space you thought you saved gets claimed by clutter all over again. The gain in speed creates a slipstream for disorder that invades each task change.

    The balance: less visible mess, no access delay

    The real struggle is between keeping clutter hidden and still making function fast. If hidden storage slows you down, or open access leaves you on cleanup duty, that friction always comes back in repeated use. Every desk eventually finds its own balance—but the right spot isn’t chosen by the first visual impression. It’s revealed over days of real work: which solution resists drift, which creates new annoyance by the second or third reset?

    Clutter becomes friction: real breakdowns from everyday routines

    The cracks show up midweek. Where the chair rolls into a loose charging cable, where an adapter brick blocks your feet, or where changing just one notebook charger makes a whole tray sag and scatter. Let it happen once, and you’ll tolerate it. By the third or fourth round—you catch yourself walking more carefully, reaching more hesitantly, or pulling the whole tray loose by accident. The memory of these small breakdowns starts to steer how you act at your desk.

    If your day means switching between keyboard and sketchbook, swapping a tablet for a laptop, or alternating between sitting and perch-stool—these friction points multiply fast. What started as an organized desk at breakfast usually slides by lunch: shifted cables, a landscape of adapters, and less room for even simple moves like sliding in a notebook next to the keyboard.

    Do your setup decisions survive repeated use?

    The strongest setups aren’t the ones that look best just after a reset—they’re the ones that can survive the chaos of three, four, or five device swaps, the rush to recable for a call, or opening a new charger at the last minute. When your supposed improvement forces you to crawl or hunt each time, it’s not working for you. The actual test isn’t the nine a.m. surface—it’s the three p.m. reality after you’ve hit every little snag.

    The small change that finally “quieted” the outlet zone

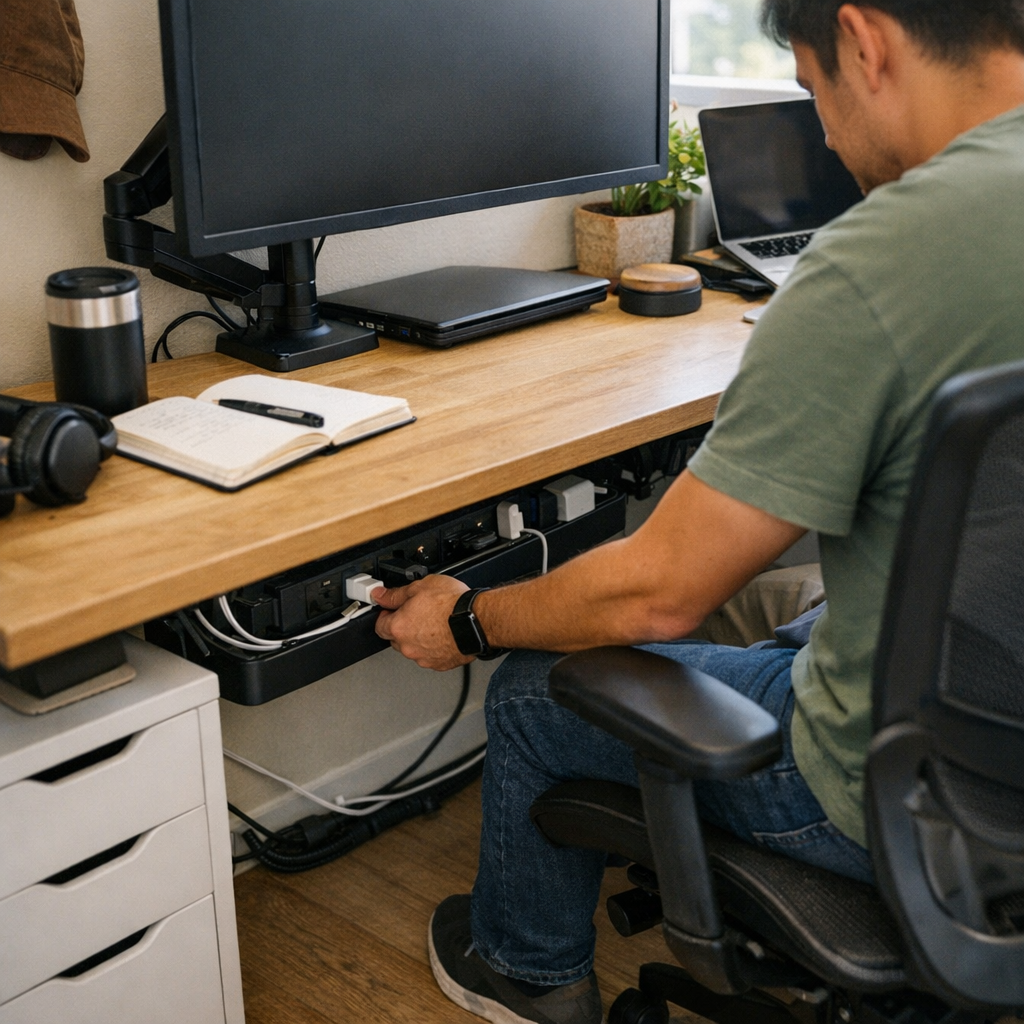
    Real improvement came from a small, structural tweak: mounting the power strip under the main surface but near the seated reach zone—not visually prominent, but no longer out of the way when switching chargers. Cable slack secured in a shallow tray at the front edge kept connectors off the floor but accessible without crouching or searching. Now plugs are always a reach away—no bending, crawling, or randomly tugging on cords under the desk. The adapters stop flowing underfoot, and cable friction fades out of your routine.

    This kind of fix barely registers first thing in the morning. By midweek, it’s unmistakable—no more tripping on loops, no adapters rolling around, and the reset at the end of a session is a five-second sweep instead of a run of untangling and plugging everything back in. The outlet area starts to disappear from your attention—until you try skipping the fix and realize the old friction creeps in again fast.

    A minor fix, but the daily routine shifts

    Designing with routine in mind ended the tedious cable dance: laptop swaps, notebook recharges, a quick conversion of the whole surface before a call—none of them bring back the old interruptions. Focus lasts longer; the desk lets you flow from one setup to the next, and reset isn’t a chore you dread each time.

    Quick Q&A: Real-world cable management answers

    What’s the fastest way to keep the outlet area neat but usable?
    Mount your power strip under the desk ledge but in arm’s reach, and anchor cable slack in a tray just ahead of your knees. You’ll avoid both surface mess and under-desk tangles, so every outlet is reachable without twisting, kneeling, or tracing cables by hand.

    Do cable trays or boxes work well for frequent device swaps?
    Only if you can actually reach and see what you need. If a tray is placed too deep or packed too tightly, even unplugging a laptop becomes a slow puzzle. Aim for trays that let you grab a plug without rearranging the bundle or guessing which cord is which—access always beats invisibility if you swap gear more than once a day.

    Why do scattered cables hurt focus so much?
    Every visible adapter or dangling cord is a cue to pause: you double-check elbow clearances, adjust your chair path, or take extra care moving between keyboard and notebook. A handful per week is minor. Dozens, every session, shave minutes and energy from focus before you even notice it’s happening.

    More than tidiness—movement and focus without the hidden reset

    The “quiet” outlet zone does more than look good. Your motions are freer, switching gear doesn’t kick up a reset, and the desk finally matches the rhythm of real work. The real breakthrough isn’t just visual order—it’s removing that constant, low-level struggle so your workspace keeps up with your routines instead of creating new friction points. Task-switching gets lighter, surfaces stay genuinely workable, and cleaning up no longer means starting over. Most setups fail not because they look messy, but because they hide problems that reappear by the second or third cycle of real use. Only by noticing where friction sneaks back in does steady improvement actually take hold.

    Explore the full WorkBasic collection

  • How Smart Pocket Placement Transforms Pet Travel Through Airports

    The gap between a “set” pet-travel bag and one you can actually use under pressure appears fast—usually when you’re four travelers deep in the security line, your pet shifting impatiently, and your hand lands on a zipper that opens the wrong pocket, again. What seemed organized in your living room starts feeling stubborn as you try to grab a leash, a wipe, or a waste bag without causing a standstill. That first awkward pause exposes it: a pet-travel setup that only looks ready at home can unravel into a repeated slowdown the moment you actually need speed, not order.

    Why “Organized” Isn’t Always “Ready” at the Airport

    Most pet-travel bags are photo-perfect before the trip—pockets labeled, every item visible, the logic clean. Problem is, travel never sticks to the plan. In real conditions—boarding queues, seat shuffles, gate checks—the test isn’t how neatly things pack, but whether you can pull what you need at arm’s reach. The visual order collapses as soon as movement starts, and it does so repeatedly with every stop.

    Each airport halt demands action: can you snag a leash in one move, or does the “organized” layout force a clumsy, multi-step search? Instead of a smooth restart, the bag that felt sorted at home fills each pause with a new hassle—shuffling, digging, overlapping pouches that slow down even small tasks. The pattern: your sense of control ebbs away, replaced by friction you never tested for at home.

    Quick-Access: Where Organization Succeeds or Fails

    The difference between a practical pet setup and a frustrating one shows up in those quick-grab moments—security checks, snack breaks, unexpected cleanup situations. The problem is rarely missing supplies; it’s that wipes, leashes, or treats are blocked, mixed, or pushed too deep when you need them most. That small barrier multiplies, especially after several stops.

    By the third or fourth airport pause, the snags are unmistakable:

    • Digging for a wipe while your pet wriggles away, hands full elsewhere.
    • Opening several compartments, only to see the right item buried under something you already moved twice.
    • Finding a seatbelt or handle blocking your “key pocket,” forcing a reshuffle on the spot.
    • Comfort and cleanup gear migrating out of reach, slipping deeper with each stop.

    Each added second spent rearranging drains focus and ratchets up stress—not just for you, but for your pet and anyone waiting on your movement.

    How Pocket Placement Shapes Every Stop

    Pet-travel setups designed only for aesthetics fall apart under real-life movement. Stacking wipes and waste bags below bulkier comforts, sealing gear in nested pockets, or placing essentials behind awkward zippers all seem neat—until you’re forced to grab mid-rush. These placement mistakes don’t show up until repeated movement exposes them.

    Some bags appear thoughtfully organized, but get sabotaged by their own structure: an access pocket obscured by a carrier handle or belt, must-grab gear pressed into corners by toted gear. The stress adds up quickly under airport pacing and a restless pet—what worked “in theory” becomes a block in practice, the cost measured not in mess, but in constant return to friction.

    The weak links in pocket placement and exterior access become obvious only through repetition—when grabbing essentials on the move starts to make your own bag feel like an obstacle.

    When Organization Doesn’t Keep Pace with Real Movement

    If your bag setup asks for more managing than your pet, you’re fighting your own gear. Repacking the same pocket at every stop, relocating treats after they slide, balancing dirty cleanup items on your knee, or abandoning “logical” pockets because they’re always blocked—these are all signals the layout isn’t built for return-to-movement handling.

    • Repeatedly repacking essentials you just used
    • Juggling pet and owner items for every single grab
    • Stacking cleanup and comfort items in a way that makes both slower to reach each time
    • Regularly switching storage spots mid-trip because the original logic fails under duress

    Every forced reshuffle or missed grab sharpens the realization: a bag that works only when untouched is a source of hidden drag. And the longer the trip, the more that repeated-access weakness stacks up—one mishandled item at a time.

    Real Adjustments: Small Changes, Noticeable Relief

    The fix isn’t perfection; it’s adjustment. After enough aggravating stops, real travelers rework their setups for reach, not just appearance. Moving waste bags and wipes to an always-open exterior pocket, for instance, lets you grab with one hand while steadying your pet with the other—no digging, no pause. Hanging a leash where you can snap it free without opening the main bag reduces the scramble-in-line anxiety.

    Does it end all interruptions? Never. Airport travel always has friction. But these small reassignments cut each hassle down. Shaving even seconds and freeing one hand during checkpoints lets you move at the rhythm of actual travel—not the neatness of your pre-trip “perfect pack.” This is not a magic solution. It’s a material difference that repeats with every stop, and it’s enough to convert a recurring hassle into a flicker of relief: a small, steady advantage for both you and your pet.

    Example: The Fumble-Free Security Stop

    Fast-forward to the actual checkpoint. The bag’s over your shoulder, your pet tugs, the line inches forward. Instead of fishing through three layers of snacks and latches, you pinch the wipe and leash from an exterior clip in seconds—no blocked zippers, no delayed handling, no extra apologies to the next traveler. Is it flawless? No. But it’s consistently less stressful, less embarrassing, and less likely to break your flow.

    The Overlap Trap: Where Owner and Pet Items Compete

    Many so-called organized bags fail because they treat owner and pet items as interchangeable. Your phone means treats get wedged in corners. Human sanitizer squeezes wipes off track. Pet paperwork, boarding passes, and snacks create a tangle that returns every time you open the “main” pocket. The overlap doesn’t just look messy: it forces extra movement, slows every stop, and piles confusion on urgency.

    The practical fix: design your pet setup with clear tiers. Pet-first front access for wipes, leashes, and treats. Owner gear pocketed off to the side so you’re not yanking one just to reach the other. Each item gets a repeatable “lane”—so movement, not just neatness, dictates your packing order.

    Resetting Your Travel Flow: From Pause to Progress

    Every airport stop is a progress test, not a still-life challenge. A bag is only as good as its repeated restart: can you actually grab what matters and move again without slowdowns? Frequent digging, double-grabbing, or reshuffling the same item again and again exposes a setup built for appearance, not for the break-and-go nature of actual travel. If your “organized” bag makes you stop just as often as any messier setup would, it is part of the problem—not the solution.

    Building a Travel Bag that Keeps Up with Real Use

    The strongest pet-travel setups aren’t the ones with the most features—they’re the ones arranged for repeated, one-handed reach. Look for:

    • Truly exterior, unblocked pockets for wipes, waste bags, and leashes
    • Single-action grab spots placed where pauses normally happen (side pockets, edge clips)
    • Attachment points you use every stop, not just once at the start
    • Pocket flow that physically separates comfort and cleanup—so the next move is always smooth, not another shuffle

    This approach isn’t about visual organization for its own sake. It’s about making sure that when travel throws interruptions at you, your setup resets fast and doesn’t trap you on repeat. That is what turns a pet-travel bag from “looks ready” into built-for-movement—and let you manage travel, pet, and your own sanity at the pace real life demands.

    Explore practical, seat-side ready pet travel setups designed for real repeated movement at PawGoTravel.

  • Why Lighting Designed for Real Homes Solves Everyday Shadow Problems

    The ceiling fixture you installed looks bright enough at first glance. But a week later, you slow your step at the stair landing, sensing the drop-off just outside the light’s reach, or you find yourself craning forward at the bathroom mirror to escape a slice of shadow that never seems to move. Rooms lit with a single flush or semi-flush mount might pass the “does this look bright?” test—but in daily use, uneven distribution, shadow lines, and sudden glare start to interfere with actual tasks. These aren’t dramatic failures; they’re the minor, repeated obstacles that quietly build up when lighting gets picked for the wrong reason—appearance, spec sheet, or quick installation—while real movement and sightlines go ignored.

    The Everyday Cost of “Easy” Lighting Installs

    The biggest lighting mistakes reveal themselves through routine—walking the same hallway after sunset, reaching for the edge of a work surface, or glancing at the mirror and seeing one half of your face almost vanish. That soft shadow by the stair edge or muddled corner in the laundry isn’t an accident of bad luck or “cheap fixtures”—it’s what happens when the fixture type and placement never matched what you actually do. Hallways and stairwells, in particular, seem fine until you reach for a handrail or turn a corner and realize you’re moving slower, feeling for edges the light doesn’t quite reach.

    Hallways nearly always reveal the shortcut. The typical flush-mount ceiling light offers broad, central brightness—but only from certain angles. Stand at a corridor turn or pause before the stairs: the center zone is lit, but the side walls melt into gray, and the floor’s edge feels half-guessed. It’s in these subtle moments—turning sideways to see where the hallway bends or catching your foot on a barely-visible tread—that the gap between “enough light” and “usable light” becomes hard to ignore.

    Where Light Lands: The Real Test Isn’t on Paper

    Brightness specs and catalog mockups fade as soon as real conditions step in. The width of a corridor, open doorways, or a row of backpack hooks instantly redirect, block, or cast new shadows across a space. The central fixture, perfectly balanced in an empty room, starts to falter when a shelf or closet interrupts its spread. Suddenly, crossing that hallway means one side of your body is well-lit and the other fades into obscurity, especially in the evening or when the sun shifts. The supposed “bright fix” leaves you moving more carefully—side-stepping shadow pools, glancing down for missed steps, or hesitating at the far end of a poorly-lit run.

    Bathrooms and Mirrors: Shadow Problems That Don’t Leave

    An overhead bathroom fixture lights the room but rarely helps at the mirror. Half your reflection slips under a shadow line, and rotating the fitting or swapping bulbs never quite fixes it. Every morning, you lean or twist—one shoulder in glare, the other in murk—just to get even lighting for shaving or checking details. That imbalance becomes habit. You stop expecting clarity until you try another bathroom set up right—vanity lighting flanking the mirror, shadows neutralized, every feature visible. The upgrade isn’t “extra”—it’s what’s actually needed for the space to work, every day.

    Pairing Placement with Purpose

    Strong lighting setups are never just about wattage or appearance—they hinge on whether each routine action is actually visible and comfortable from every angle that gets regular use. For a corridor, sticking with just a flush mount creates a tunnel with lit and unlit zones. Adding a wall sconce or two at walking height, even halfway down the hallway, breaks up the darkness, defines the stair edges, and smooths the transition between rooms. Suddenly, movement is steady, corners are mapped at a glance, and you stop inching along once the sun sets or you cross from a brighter zone into these in-between spaces.

    Task Zones: Lighting That Keeps Up With What You Actually Do

    In laundry rooms, mudrooms, and utility spaces, these differences stand out fastest. A single fixture in the center can never fully cover counters, nooks, or the spot where you always sort clothes. Try folding laundry during a cloudy afternoon: the far edge of the counter blurs, detergent bottles hide in a persistent shadow, and you find yourself shifting the wash basket into the limited beam—over and over. Or, stepping from laundry into a mudroom, you lose track of the landing as light falls off before your foot finds the threshold. Each time you reach for more light without thinking, the inadequacy of the setup becomes unavoidable.

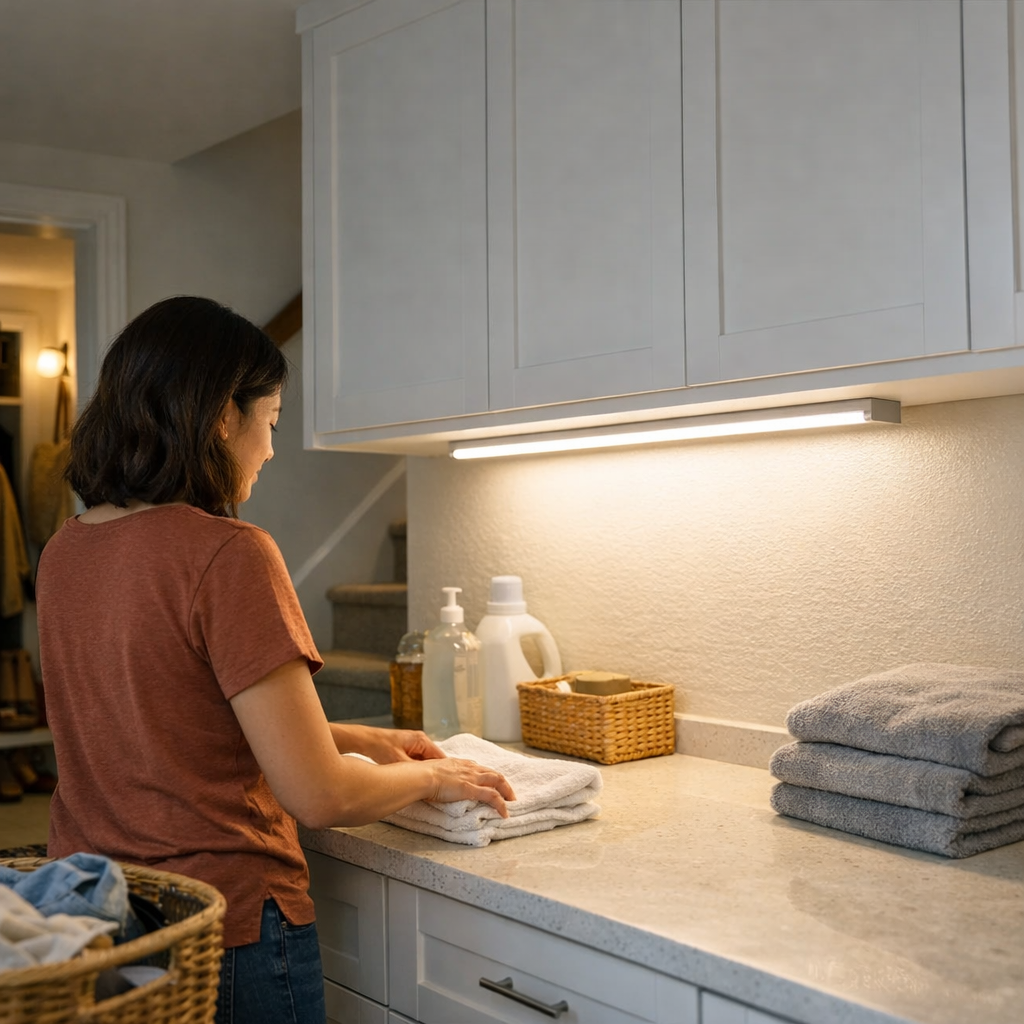
    Improvement isn’t about dumping more brightness in. Mounting a damp-rated, low-profile LED strip beneath an upper cabinet or along the back edge of a work surface wipes out the stubborn dead zone instantly—no extra fixture clutter, just precision. Every part of the counter lights up, lost corners reappear, and moving quickly between tasks means fewer stumbles or missed spots, especially when daylight is weak or nonexistent. The change is practical and ongoing, not decorative: visibility meets the shape of what you actually do.

    Why the Wrong Fixture Feels Good—Until It Doesn’t

    Poor lighting rarely fails all at once—its cost accumulates invisibly, through small repeated inconveniences. One fixture in the ceiling ignores blocked sightlines, problem corners, or areas where your routine piles up. Over weeks, you unconsciously brace yourself: squinting at the same dark counter, nudging a basket for better visibility, memorizing a shadowed stair edge where you keep slowing down. The “done” look wears thin, and the feeling of a truly finished, usable room never arrives.

    Lighting wants to be a one-and-done job. But living spaces evolve: furniture shifts, routines change, sightlines get blocked that weren’t an issue when you unpacked the fixtures. The result isn’t total darkness—it’s the quieter frustration of moving and working around persistent, avoidable blind spots.

    Targeted Lighting: Small Shifts, Large Relief

    You don’t always have to start over. The fix is usually targeted—placing light where struggle repeats, not where it’s easiest to wire or where bare bulbs make the gallery shot. One wall sconce at hallway height breaks up the gloom that a flush mount leaves untouched. A single under-cabinet damp-rated strip turns “search and fumble” into obvious, visible order in a laundry room or next to a utility sink. The right solution doesn’t chase brightness—it follows the path of actual movement and use, shaping the light around the routines that expose friction every day.

    Real-World Lighting Checks Worth Trying

    1. Walk your entire route—after dark. Before picking placements, take each main path—across the hall, up the stairs, over to the laundry—at night. Wherever you slow down, stretch your stride, or lean for clarity, that’s a sign the lighting shape needs changing, whether by adding a sconce at eye-height or placing a strip along a work edge. These points aren’t decoration—they’re navigation cues built into the structure of the space.

    2. In work areas, always pick damp-rated fixtures. Utility rooms and near-sink counters collect invisible moisture from splashes, washing machines, and steam. Regular fixtures corrode or dim sooner—while a damp-rated LED keeps its steady spread. The difference isn’t theoretical: it’s fixtures that keep lighting your routine instead of failing quietly after months of use.

    Lighting That Follows Your Routine—Not Just the Floor Plan

    The best lighting setups don’t compete with how you actually use the room—they adapt to it. “Easy” isn’t just a fast ceiling mount or the most “modern” surface cluster: it’s installing lighting that tracks each movement path, exposes every edge, and never leaves you working around shadow traps or squinting across uneven surfaces. A flush mount matches a low ceiling; a sconce adds definition along a wall run; a hardwired task strip clears the blind spots beneath cabinets. Over time, it’s these decisions—tied to layout, routine, and repeated friction—that turn stubborn inconvenience into seamless, safe use. Not once, but every single day.

    Lighting that respects the lived-in structure of your home clears up the small, costly annoyances that never make it to the punch list but undermine every routine. The fix isn’t more light—it’s targeted clarity, placed where you need it, lasting as long as you need. Practical, every-angle visibility always wins over empty wattage.

    http://www.lighthelper.myshopify.com

  • Choosing Multitool Attachments That Maintain Precision Under Pressure

    A multitool only feels “universal” until you’re halfway through a job and the wrong blade or sanding pad starts slowing everything down. On the site or in a tight garage, you don’t need to wait long for the difference to show up—by the second hour, a so-so attachment is muting every cut, eating through your grip, and leaving behind a swath of corrections for later. The right multitool accessory looks like a minor decision at the start. On a real job, it’s the hidden fork that splits the day into steady progress or slow frustration.

    When Your Multitool Meets Real Resistance

    Not all materials fight fair. The challenges don’t show up with soft pine. It’s when you butt up against ancient window trim or layered door jambs—glass-hard paint, splintery knots, gritty drywall dust—that a blade’s limits come out. Early on, every blade says it’s the “right one.” But as grit cakes up, cuts start drifting, and every edge loses sharpness, the issues get obvious: errant lines, messy reveals, and a tool that wants to jump out of your hands by the second or third board. That’s when an attachment decision you barely thought about starts punching holes in your workflow.

    Anyone who’s pushed a multitool across trim or through a patch of floor feels this: The first cut feels controlled. By board four, you fight blade wander, waste time re-sanding the edge, and start worrying about damage to finished surfaces. Hand fatigue sneaks in, grip gets tense, and the cut line you set hours ago is a memory.

    Look-Alikes in the Aisle, Night-and-Day on the Job

    Beneath the fluorescent lights, all multitool blades and sanding pads pitch the same confidence—universal fit, multi-material use, “all-day” durability. But the real judgment comes during the grind: when the paint is thick, the board is dense, and you have no room to stray off the scribe. Two blades boasting the same claim—diamond grit versus carbide tooth—might look interchangeable. Start running them through heat-soaked old oak, and the diamond grit keeps its line and stays cool; the carbide tooth bogs down, blurring the edge and littering the air with uneven dust.

    How Friction Compounds Into Cleanup

    Get a couple of attachments wrong and cleanup snowballs. One dulling blade makes an awkward cut, and suddenly five minutes of repainting or corrective sanding is tacked on. Fit and finish slip. When you break out the shop vac for the third time to chase paint chips and tooth debris, you realize the problem didn’t start with this mess—it started hours ago at the tool rack.

    Door Jambs: Where Efficiency Hits a Wall

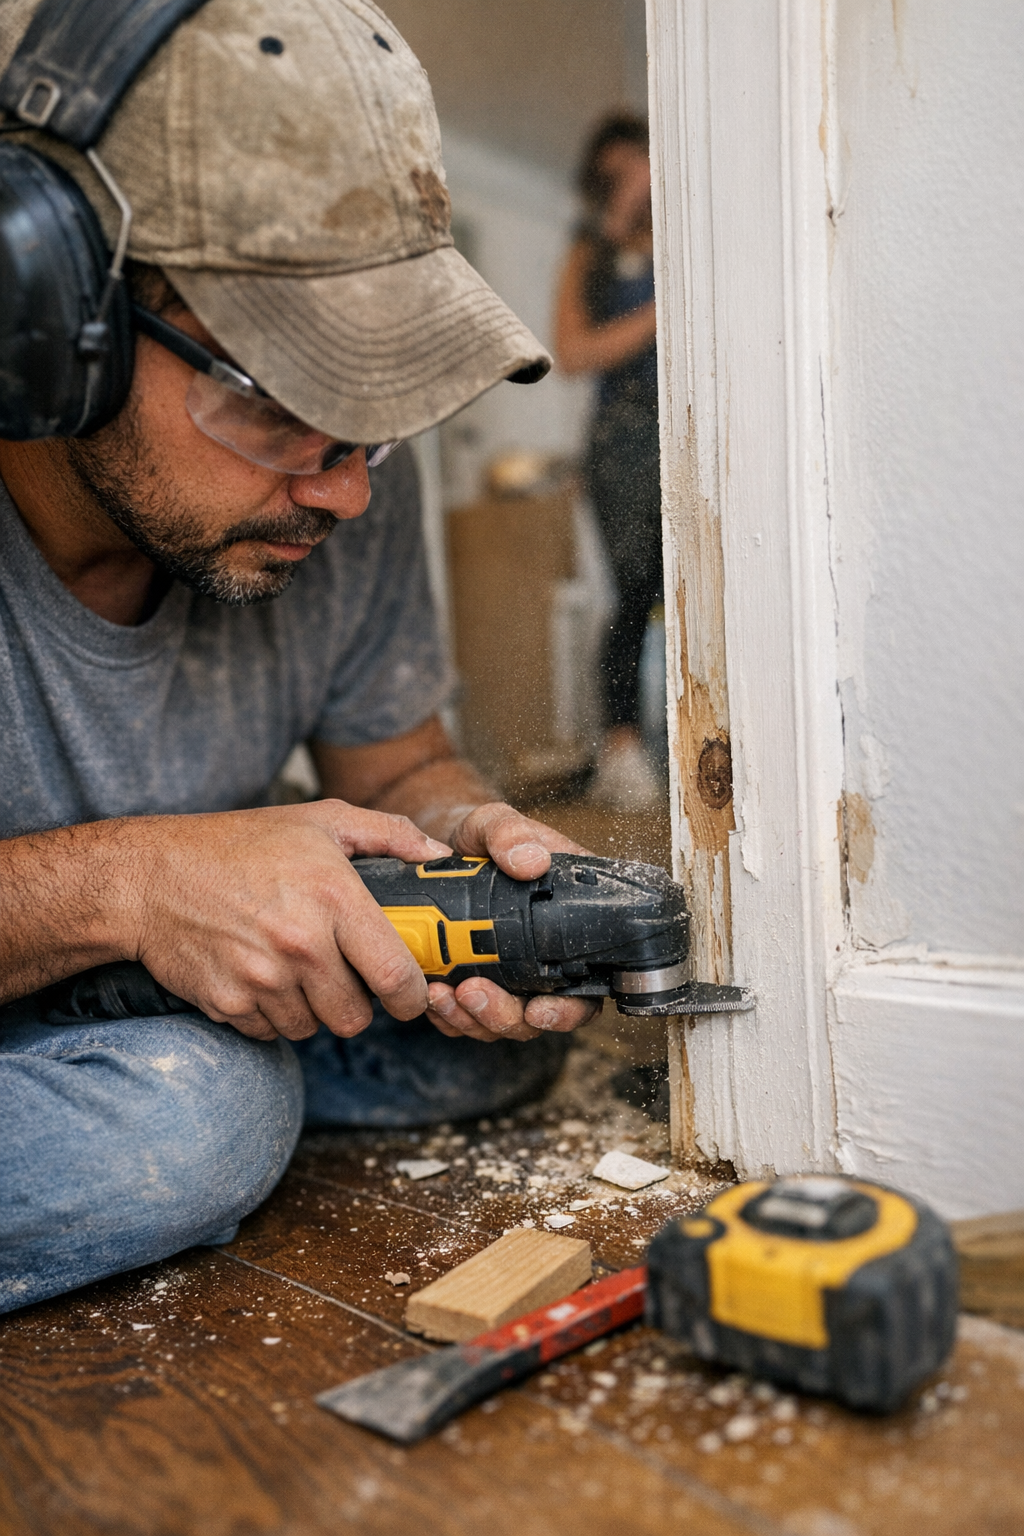
    Take on a door retro in a house that’s had forty years’ worth of repaints. A fresh blade feels great on the first jamb. By the second or third, that carbide tooth blade is vibrating hard, unable to stay on the line, splintering the edge and spitting chips onto finished floors. You spend more time wrangling the tool than actually cutting, then double it on patching, sanding, and cleaning up gouges that weren’t supposed to be there. The fallout isn’t just sore hands—it’s a project stuck in a loop of rework, frustration, and wasted energy you can’t afford in the middle of a busy job.

    This isn’t “just” frustration—it’s costly backtracking: ragged edges, bigger gaps to fill, a pile-up at prep and finish. Better blades or pads would have streamlined everything. Instead, a small miss in selection jams up the entire surface-to-paint workflow.

    What Really Changes When You Use the Right Attachment?

    In practical terms, here’s what you’ll notice instantly:

    • Reliable line control. A diamond grit flush-cut blade keeps tracking true even as you work through dense paint, knots, or layered materials—no drifting to correct with sandpaper later.
    • Reduced vibration and fatigue. Less shake transfers to your grip, making accurate cuts easier and cutting marathon sessions down to size. By the late afternoon, your grip and forearm still have something left.
    • No more runaway heat. Good attachments shed heat without warping or dulling, so you won’t deal with burned marks or that harsh overheated-metal odor fouling the workspace.
    • Minimal rework. Instead of hovering over the sander or caulk trying to patch ragged cuts, you hit them once and move on—spending a fraction of the usual time on slap-dash touch-ups.

    In one remodel, switching from generic blades to a job-matched diamond grit cut cleanup between jambs from several minutes down to under ninety seconds—often the line between keeping pace or getting left behind for the next crew.

    Quick Tactics to Save Time (and Hands)

    Keep spares ready. When resistance changes or you see that first haze of dust on the blade or sanding pad, swap it out. A fresh attachment is cheaper than messy rework—and makes a noticeable difference in pace.

    Don’t trust the packaging hype. The real test is always in action: how a blade handles old screws, how a sanding pad does after the fifth corner. The display isn’t your jobsite—the grind is.

    Sanding: Where Accessories Make All the Difference

    It’s the same problem with detail sanding: the wrong pad turns a late-day task into hours lost. Standard multitool pads choke on paint flakes and dusty filler, forcing switch after switch and keeping you miles from a finished surface. Orbital discs fare better on flats, but lack the angle for corners and edge work. Miss the right match and you wind up with burned edges, gummed-up pads, and surfaces begging for a redo—double the frustration, half the finish.

    Small shifts in pad quality, fit, or abrasive grade affect your momentum more than any “multi-use” claim on the rack. The right sanding pad keeps dust and drag away from your best effort.

    Workload, Not Hype: The Only Real Test

    What matters most is performance under pressure—not marketing promises, not how slick the packaging looks. The only metric that counts: how well does the blade hang in when old screws crop up, corners need shaping, or wrists start to stiffen four hours in? Field-tested choices—diamond grit for heavy-duty flush cuts, job-matched sanding pads for awkward detail—free you from the grind of constant correction and unnecessary fatigue.

    Next time you’re staring down dense trim, stacked jambs, or a stubborn sanding run, remember: a small swap at the start isn’t just faster. It means cleaner cuts, more precise results, less fatigue, and a jobsite that hums along—even when you’re pushing into overtime.

    http://gumboll.myshopify.com

  • Slim Hallway Cabinets That Keep Your Path Clear Every Day

    The daily squeeze: Why hallway cabinets often add to, not solve, crowding

    Hallway cabinets promise quick fixes—hide the shoes, stash the bags, clear the floor. But once daily habits start grinding through, most cabinets—especially bulky, deep ones—do the opposite. The surface looks tamed, but inside, every retrieval turns into a sidestep, a reshuffle, or a half-blocked pass. The real cost shows up after a week: the walking line narrows, corners snag bags, and a line of overflow creeps along the edge. Instead of a reset solving the mess, the reset itself becomes the recurring frustration. The right cabinet should unlock movement, not tighten the path. Yet most setups push items just out of sight—then leave you dodging last-minute piles or searching twice for the same set of keys. Anyone living with floor-pressure, delayed return flow, or growing hallway resistance knows: structure choices echo every day here.

    How too-deep cabinets quietly cause chaos

    What fits is no match for what gets stuck. Deep hallway cabinets seem efficient at first—they swallow clutter for a few days. But with real routines, their flaws pull forward. Wide doors swing open, blocking half the hall. Oversized depths become hiding zones, swallowing sneakers and burying a week’s mail. The official “home” for shoes or tote bags dissolves, and piles appear right near the cabinet’s edges. A cabinet only works if moving things in and out doesn’t create new friction—yet often, it does: two-handed retrieval, items wedged behind each other, and a growing reluctance to open doors at all.

    In daily life, you spot the signs—reaching once for shoes, then again because something toppled forward and blocked the tray; yanking open both doors just to unearth a single hat. Outward tidiness holds for a day or two, but uneven access builds up fast. Even a hallway narrowed by a few inches feels turned inside out—visitors and housemates both start rerouting their path.

    Why slimline cabinets change the setup

    Slender cabinets change what actually gets used. Go under 12 inches deep, and the difference is immediate—most of the footpath comes back. But the distinction goes deeper than geometry. With slimmer systems, the storage isn’t a dark cavity—it’s sorted by routine. Shoes land in shallow trays instead of tumbling together. Hooks bring high-frequency bags up off the pile and into reach. Dividers and trays for pocket debris stop things from pooling at the bottom. The effect isn’t just a neater look: items stay findable and the “put away” step becomes so quick, it rarely gets skipped.

    Instead of shoving through a single space, you use zones—everyday keys don’t mix with yesterday’s scarf, umbrellas aren’t buried behind shoes. Retrieval simplifies to a single movement, not a two-minute hunt. The cabinet almost insists on good return flow—a stray pair of boots stands out, not hidden in the void.

    Real-life friction: what broken hallway flow looks like

    Reset failures don’t announce themselves—they compound. Doors jam because they need more clearance than the hallway gives, bins behind them pile up, and the margin for “dropping something off” disappears. Shoes fail to make the shelf and start a wedge at the doorway. A scarf snags on a protruding hinge, gets stuffed to the back, and the next person can’t reach what they need. The real bottleneck isn’t the official “storage capacity”—it’s the interruption in movement. Once a hallway asks for extra steps or force just to get a bag, the gap between order and use shows up daily.

    The reset interval stretches. Picking up on the go slows, the reset gets deferred, and the path sheds inches to growing piles. The moment you’re nudging baskets aside, that’s the signal: the cabinet has lost command of the zone.

    Scene: The midweek retrieval struggle

    Wednesday mornings make the problem visible. The plan—“shoes in, bags out”—turns sluggish. Sneakers are wedged behind two mismatched pairs because deep storage encourages stacking, not sorting. A messenger bag has drooped sideways against a forgotten winter hat, blocking the only reachable tray. Every retrieval rattles something else: a shoe tips, a scarf is trapped, and the hallway ends up more crowded than before the “reset.” By the end of the week, nobody bothers with the cabinet at all—the promise of order has broken down under its own awkwardness.

    Why zone clarity matters more than total capacity

    Segmentation beats size—especially in shared spaces. Real improvement comes not from bigger cavities, but from better separation inside. One household swapped out a deep, undivided sideboard for a slim cabinet with fixed zones: flat shelves devote space for shoes low, bag hooks take the middle, a slim divider just inside the door handles daily toss-ins. Instantly, the farthest reach drops from an awkward lean to an easy arm’s length. Even during the early-morning rush, nothing bottlenecks—categories don’t mix, and even the messiest users can’t ignore when overflow appears.

    This setup works not because it holds “more,” but because it forces micro-resets naturally—shoes are lined, mail slips into the divider, overspill looks untidy right away. Instead of late-week resets, you get constant micro-fixes, almost on autopilot. The hallway stays open by default—not by policing habits, but by putting the pathway first in every design choice.

    Structuring for repeated routines—not just day-one order

    Most hallway cabinets sell the dream of hidden clutter—everything swept out of sight, at least once. But that calm falls apart if daily use asks too much: doors you can’t swing open in tight corridors, compartments too deep or fiddly to use under pressure. Here, even small design tweaks pay off. Semi-open fronts or glazed upper slots support rapid access—everyday shoes or a backpack are visible and fast to grab, reducing the temptation to pile at the edges.

    Everyday reliability comes from matching access speed to use frequency. Restrict a cabinet to just the essentials, and it stops overflow before it takes hold. When the seasons shift—winter gloves still hanging around as sandals arrive—the mismatch is obvious and easy to reset. Built-in feedback stops problems early, long before the hallway path is lost to accumulation.

    Real-world tips for longer hallway comfort

    • Prioritize depth over width: Cabinets under 12 inches deep protect the walking line and reduce trip risk without sacrificing basic storage.
    • Give every item a fixed home: Shoes land on trays or individual shelves, while bags and accessories get hooks or shallow ledges. Undivided bins just invite piles and drift.
    • Promote fast retrieval: Semi-open areas or glazed panels make everyday items obvious—less fuss returning them, less delay grabbing them again.

    Lasting hallway comfort depends less on what disappears from sight, and more on how movement flows day after day. The right storage setup doesn’t demand heroics to maintain. It just keeps the path open, the routines smooth, and the resets small enough that nobody notices them happening.

    Find resourceful hallway storage options and slim cabinets at Gridry.

  • Why Clever Closet Systems Often Fail in Everyday Use

    The first days after a new closet system goes in, it feels like the upgrade you’ve always needed. There’s that satisfying sense of order: baskets slide smoothly, everything sits in its own compartment, and for a moment, you believe the old chaos has been finally fixed. But then life returns—rushed mornings, laundry cycles, and last-minute hunts for that one missing glove. Instead of effortless function, something slower creeps in: bins blur, stacks topple, and what once looked perfectly organized becomes suspiciously hard to use. You start to notice the difference between a closet that looks tidy and one that actually keeps up.

    When “Organized” Begins to Get in the Way

    On day one, it’s show-ready—by week three, small battles appear. Dividers that seemed clever now block quick grabs. A bin for scarves and another for hats start swapping contents after a few hurried evenings. Shoes, once lined up in defined rows, nudge over their borders or get buried under tote bags. That “maximized” shelf hides a toppled stack behind other items, so grabbing a sweater means shifting half the pile just to reach what’s in back.

    The real scene? Belts curling over dividers, gloves mixed with hats, and the top shelf crowded with random overflow you meant to sort later. Each time you reach in, there’s a moment’s pause: did you tuck those mittens with the hats or shove them on the shelf for now?

    Pressure Points: When Daily Life Tests Your Closet

    The proof comes in daily use—a Tuesday morning late for work, the scramble for a favorite shirt, or the end-of-day toss into a crowded basket. Those deep bins that once held everything neatly? Now they hide socks under scarves, forcing you to dig. Shelves you “layered for efficiency” demand you move two stacks just to put away a single folded tee. And the more you hurry, the messier it gets—each micro-delay adding up until resets feel slow and frustrating rather than fast and natural.

    Before the Mess Spreads: Catching Everyday Friction

    Notice the little stalls: Are you double-stacking to squeeze in one more thing? Shoving divider panels just to find a home for something? Do bins and baskets develop their own logic—half bags, half hats, all jumbled? There’s no system failure, just a growing mismatch between how you live and how your closet wants you to behave.

    The biggest sign something’s off? The reset. What should be a quick “drop it where it goes” turns into untangling a pile, digging to the bottom of a bin, or—worst of all—leaving things on the floor or shelf edge because putting them away is now a chore.

    When Clever Systems Don’t Fit Real Routines

    Fancy features sell—tiered shelving, elaborate dividers, bins for every possible item. But if your storage setup makes you stop and think every time, it’s adding friction instead of removing it. Picking out anything becomes a puzzle: which bin, which section, which stack? That hesitation leads to slumped piles, baskets full of the wrong things, and forgotten corners where nothing gets put back. The system falls behind because it expects perfect habits—and daily life is anything but perfect.

    The Category Creep: Why Distinctions Disappear

    Every item has its place on Monday. By the weekend? Not so much. A scarf lands with the gloves because you’re in a rush. The neat pile of shirts leans after one too many quick grabs. Category boundaries blur, not because you’re lazy, but because rigid rules break under real pressure. The closet didn’t adjust to you—you had to adjust to it, and that’s where the cracks show.

    Subtraction Over Addition: Simpler Zones That Work

    The fix usually isn’t another layer of bins or dividers—it’s making things simpler and more forgiving. Claim a whole shelf for just one type of item, even if it seems a little empty. Leave open space for fast grabs and lazy returns. Fewer partitions mean you don’t have to remember where everything goes or undo a divider when you’re tired. Resets get easier; you don’t need to nudge or rearrange, just toss and move on.

    Think of overflow, too. Instead of cramming into three shallow trays, let hats take over one space, scarves another. There’s less time lost fixing mistakes or reorganizing, and you reclaim the sense that your closet works with you—not against you.

    Vertical Space: Use What You Really Need (and Skip the Rest)

    It’s tempting to fill every inch above the shelf with extra bins, but that often just hides things further. Instead, try racks that adjust as seasons change, or leave simple headroom for single-category stacking. If grabbing something means moving three other things, it’s time to rethink—clarity beats maximization almost every time.

    Signs Your Storage Is Slowing You Down

    How do you know your setup’s not serving you? Watch for these:

    • Pausing before grabbing or returning anything—second-guessing where it lives
    • Having to move or disturb a stack just to access what you need
    • Baskets overflowing or contents blending until categories disappear
    • Items drifting: sneakers in with the gym bag, tees mixed with pajama pants
    • Resets that feel like correcting a mistake, not simply restoring order

    The aim isn’t a closet that photographs perfectly—it’s one that recovers easily and speeds you up every single week.

    Let Daily Use Lead: Closets That Actually Work

    The most functional closets don’t look staged—they just work, again and again. When storage fits real habits, friction drops away: broader zones, fewer fussy subdivisions, and enough give for routines to flex. The system adapts to you, not the other way around. Maybe it’s not catalog-tidy, but you’ll always know where things are—and resets become part of getting ready, never a dreaded chore.

    For practical solutions rooted in real closets and the way you actually live, visit ClosetWorks.

  • Streamline Your Winter Car Setup for Faster, Safer Cold Starts

    That “organized” car interior you set up in the fall? Winter turns it against you, fast. The first real freeze, and you’re back in the car—hands numb, breath fogging—as you scramble to grab a cable or your gloves. Suddenly the system that looked clean and streamlined last week is costing you real time: cables wrapped around your ice scraper, gloves wedged under the seat, bins so densely packed you need to unpack half the contents to find a single item. The illusion of order collapses when cold pressure hits—and the silent reality is that what looked efficient through your window becomes an obstacle course when you’re rushed, cold, and late. This is what most “tidy” interiors miss: actual, repeated, winter-ready function. That’s where DriveWellSupply’s functional mindset isn’t just décor—it’s necessary design for real, winter car use.

    When “Neat” Isn’t the Same as “Easy”

    It’s easy to think “clean” equals “ready.” But on winter mornings, neatness doesn’t mean you can reach what matters. The cold amplifies every inefficiency: trying to untangle a cord with stiff hands, digging for gloves trapped under a setback organizer, yanking a floor mat back into place because it slid under the pedals overnight. What frustrates you isn’t the obvious mess—it’s organizers that block exactly the pocket you actually use, items scattered in the scramble, floor mats bunching just as you try to drive off. Control on paper means little if you’re fiddling with setup when seconds count.

    Cold Weather Exposes the Weak Spots—Fast

    Winter makes otherwise “good enough” setups cave in. Cables that stayed in place in October start snagging on wet boots or trapping salt. That storage bin that hid clutter in September now acts like a lid, forcing you to upend half the trunk for a glove. Even perfectly placed gear moves: organizers that seemed stable unstick and start sliding, and seat covers edge off their mountings with every slide-in on soaked jeans. The real giveaway? You start repeating the same fix. Phone cord tugged clear every morning, gloves mashed to one side, floor protector scooted back by your heel again. These aren’t first-use flaws—they’re structural gaps exposed by real, cold-weather driving.

    The Cost of Every Extra Step in Winter

    In winter, every extra movement is amplified. A coiled cable becomes a small delay; a bottle rolling to block your foot means another awkward reach; a lost mitten means a pause and a hunt with frozen fingers. These micro-mistakes don’t just annoy you once—they build, turning a “fast start” into a ritual of sorting and nudging and sweeping clear before you can even shift into drive. After a handful of freezing mornings, the priority shifts: you care less about how “neat” it looks and more about not repeating the same friction, trip after trip. Blocked access zones, “just-in-case” clutter, and overly tight organizers turn winter into a string of avoidable slowdowns.

    Why a Practice Run Shows What Breaks Down

    Any setup looks solid until you actually stress it, cold and tired, on a real winter morning. Try a pre-cold “dry run”: grab for gloves, scanner, charger, and see what refuses to cooperate when you move quickly. Suddenly the hidden flaw is obvious—a charging cord somehow jammed deeper than expected, the scraper buried under trunk bins, the gloves in that organizer pocket you “never” use. It’s not a theoretical test: it’s the difference between launch-and-go and a fumble at the worst time.

    An Example: Entry-Side Overhaul

    After too many mornings half-crouched chasing a scraper or freeing a cable from under the pedals, the solution was blunt: put winter tools where your hand actually moves first. Prioritize access over looks. Gloves and scraper stacked in the driver door, charging cable routed for one-motion grab, nothing loose near pedal zones, and nothing blocking the center of movement—not just “hidden away.” The proof: you step in, reach, and pull what you need without sifting through a pile or losing visibility in predawn light. It stops being a battle with the setup and becomes one less thing slowing you down—right when winter makes every minute harder.

    Reduce Clutter—Don’t Just Move the Problem

    Prepping for every “what if” easily backfires: bins packed tight look organized right up to the moment you actually need to reach something buried beneath the overflow. Winter penalties are harsher—every layer that blocks a cable, scraper, or glove just adds another step when you’re already cold. Ask, honestly, if each backup or “maybe” item got used last season. If not, clear it out: space near the main entry, charging port, and hot-access door pocket is more valuable than any backup you might use “one day.” The test isn’t how full the organizer is—it’s how little gets between you and what you need for every start, not just emergencies.

    Adjustments That Actually Matter

    Route Cables Where You Really Grab Them

    Reroute your main chargers through direct-access side pockets and away from pedal lines and floor paths. Avoid tucking cords under tools or seats; winter will inevitably pull them back out into awkward, underfoot spots. Clip or guide them where you actually reach—if you route for neatness rather than use, cold routines will unravel your best intentions by week two.

    Keep Essentials by the Entry Door

    Don’t hide gloves, ice scrapers, or your main pouch in the trunk or backseat just for clean lines. If your route means returning to your car in the dark, snow, or while carrying a bag, anything not within arm’s reach as you open the driver’s door is lost time. Set the cabin up so it fits your hand’s first move: open, grab, go. It’s worth breaking symmetry for faster, friction-free mornings.

    Fewer Extras, More Function

    Each nonessential that covers a charger, organizer, or scraper quickly becomes a liability mid-winter. If something blocks regular flow to a port or tool, it doesn’t get a seat up front. Review what lived in your bins last winter, and if you only touched it twice, remove it—essentials get the best space and everything else stays in reserve.

    The Real Upgrade: Function Over Nearly Everything

    True winter readiness isn’t about the tidiest cabin or the fullest organizer—it’s about a setup you don’t have to fight on the way out or back in. The real win: storage, cable setups, floor coverage, and inside organizers that let you move, reach, and reset fast, even when nothing is ideal. Test it before the freeze and fix what slows you down. A few sharp setup changes now save you a season of mini-mistakes when winter hits for real—and keep your car feeling like a tool, not a trap, no matter how many mornings you sprint back in.

    Find practical car-use upgrades at DriveWellSupply.

  • How Consistent Meal Zones Simplify Indoor Cat Feeding and Cleanup

    When you shift your indoor cat’s feeding corner—maybe to vacuum, to clear space before guests, or just to make the kitchen look more open—it often backfires fast. Your cat stands in the old spot, scanning the empty floor, expecting dinner on familiar ground. You, meanwhile, find yourself hunting for a bowl that’s now off to the side, mats dragged halfway toward high-traffic zones, and supplies not where muscle memory reaches. What started as a quick adjustment for tidiness quietly multiplies daily friction. The first move seems harmless, but by week’s end, you’re dodging water dishes near walkways, picking up crumbs from new angles, and both of you are just a step slower than before. The StillWhisker world isn’t about show setups—it’s about avoiding the compounding hassle created by setups that don’t stay put.

    The Ripple Effect of a Wandering Meal Zone

    Sliding food bowls or relocating the water mat might win back a bit of floor or keep a hallway open for an hour. But once the meal zone starts drifting, the routines that held together crack—quickly. Your cat’s habits, built on reliability, go out of sync. Suddenly, every mealtime means double-backing, confusion, or waiting. Not just for the cat, but for you: a bowl now blocks cupboard doors, water leaves drips in the path you just cleared, and cleaning supplies are always one room further away.

    • Your cat circles back to the old corner and lingers there, giving up speed and certainty with each misplaced bowl or mat.
    • Refilling water turns awkward—mat not where you expect, bowl awkwardly jammed next to chair legs, hand reaching for food with something always in the way.
    • Cleanup takes longer: crumbs scatter wider, water trails appear under furniture, and you wipe down spots that felt settled yesterday.
    • “Tidy” setups just trade one mess for another—surfaces still need extra wipe-downs, while wipes or spare food end up somewhere inconvenient when a spill hits.

    It’s rarely dramatic on day one, but the interruptions pile up. Meal times drag, walkways get blocked by supplies or dishes that haven’t found home, and leftovers keep showing up in corners you didn’t plan to check. Every extra move you make is a symptom: the setup felt right for the room but not for repeated use.

    How Setup Instability Builds Friction—One Move at a Time

    Routine likes repetition—and setups that drift erode that. Cats adapt, but not instantly. A shifting meal zone confuses them and drains your time with minor detours. Every time you clear a walkway or rearrange for guests, you invite a fresh mismatch between where the setup looks good and where it actually works. Movement between “cat zone” and “human zone” blurs: what’s meant to streamline ends up interrupting.

    • Morning: The bowl set aside for floor mopping lands in front of a cabinet. You reach to put it back, but it slides, food spilling under the fridge—another round of cleanup no one had time for.
    • Evening: Water bowl, dragged out of the walkway, leaves a wet streak you only notice barefoot on the next trip through.
    • Midweek reset: The mat bundled for vacuuming sits out of place a day longer than planned. Next feeding, crumbs and stray toys are scattered two steps further out, making containment impossible.

    Each “temporary” relocation breaks muscle memory for both cat and human. By the third or fourth move, the feeding area becomes a moving obstacle, never quite feeling like it belongs. You notice it most when you’re trying to move quickly—the old convenience is gone, replaced with a routine that pulls your attention sideways at every handoff.

    Why a Stable Feeding Zone Changes the Whole Flow

    A fixed meal spot stops the quiet chaos from creeping in. When the feeding zone anchors to one location—corner, counter edge, or alcove—the routine settles down. Cats land where they expect. Cleanup collects in one pattern: crumbs and spills are predictable, not roving annoyances. Supplies gather within reach of that spot, not scattered wherever you last hit pause. In small spaces or shared rooms, the benefit shows up immediately—a loop forms that you can run with less thinking and less backtracking.

    • Meals speed up, because both you and your cat are already in sync—no searching, less silent waiting, fewer missteps between bowl and bag of food.
    • Cleanup locks in, with messes local and wipe-downs on schedule. You know which corner collects spills, and stray residue stops showing up under chairs or behind doors.
    • Mats and bowls stay put, so you’re no longer kicking a dish into the walkway or straightening a mat every time you want to open a cabinet or cross the kitchen.
    • Supplies don’t wander, since you return the cleaning cloth, extra dish, or refill jug to the same reach zone after each use—mid-routine resets stop being a scavenger hunt.

    Positive Side Effects for Cat and Human

    Once the setup stops moving, tension evaporates. Your cat approaches with less hesitation, you recover minutes each morning, and feedings start to feel automatic. The pause for silent negotiation—cat at your heels, you with bowl in hand—happens less. Cleanup doesn’t get skipped by accident. The house feels less tangled: you spend less time redoing small chores, more time in a space that stays ready. It’s never about making life perfect—it’s about cutting the tiny, repeated losses from chasing a tidier look at the cost of function.

    The Cost of “Looking Tidy” over “Working Easily”

    Moving bowls or mats for the sake of a spotless floor might offer a cleaner photo for a few hours—but it rarely survives everyday life. “Hidden” meal zones and out-of-the-way setups often mean food tracked into main walkways, bowls left just out of reach when you need them, or mats blocking outlets and doorways. The appearance improves for a moment, but the snag returns by the next reset: you step over shifted dishes, hunt for wipes, and end up doing just as much (or more) routine repair than before. Each move traded a visible mess for a slower, less reliable flow.

    Boundary-Defining Tools: Why the Right Mat Matters

    The practical payoff comes from structure, not surface. A feeding mat with a real boundary—raised edge or grippy texture—holds bowls in place and keeps crumbs from spreading into the rest of the room. Spills don’t run wild; cleanup is a fast, repeatable action. The difference shows the moment something tips: instead of a water line creeping under chairs, you have an edge that contains, a zone that signals its use, and a mat that lifts out in one go. Choosing mats designed for easy wipe-down, fast lifting, and quick reset pays off over hundreds of repeats—it isn’t just for looks, it’s for keeping every reset simple and the meal zone stable.

    Practical Observations from Real Repeated Use

    • Crumbs gather where they can be swiped at once—instead of under every cabinet or along the baseboard.
    • Water stops migrating, reducing slip hazards in places you don’t expect and keeping wet paws (and floors) contained.
    • The area is quieter and visually less cluttered: you’re not tracking mess by sound (the rattling bowl under a chair or the splash of water near an outlet), but seeing the setup actually settle down.

    Small Adjustments, Tangible Payoff

    Keeping the meal zone anchored isn’t something you notice all at once—it’s the slow disappearance of repeated snags: feeds are smoother, cleanup gets cut to a cycle you can finish without guessing, and those mental lapses where mess reappears shrink away. The win isn’t pristine appearance, but the steady removal of friction from each day—a setup that stands up to repeated use rather than just surviving in between deep cleans. In a home where space and routines overlap, a meal zone that sticks to its corner solves more than just today’s clutter; it trims the invisible work that stacks up when setups drift and routines break. That’s the real StillWhisker difference—a choice that holds up after the third or tenth reset, not just the first.

    Explore practical feeding zone setups at StillWhisker.

  • How Smart Storage Designs Keep Small Yards Clutter-Free and Functional

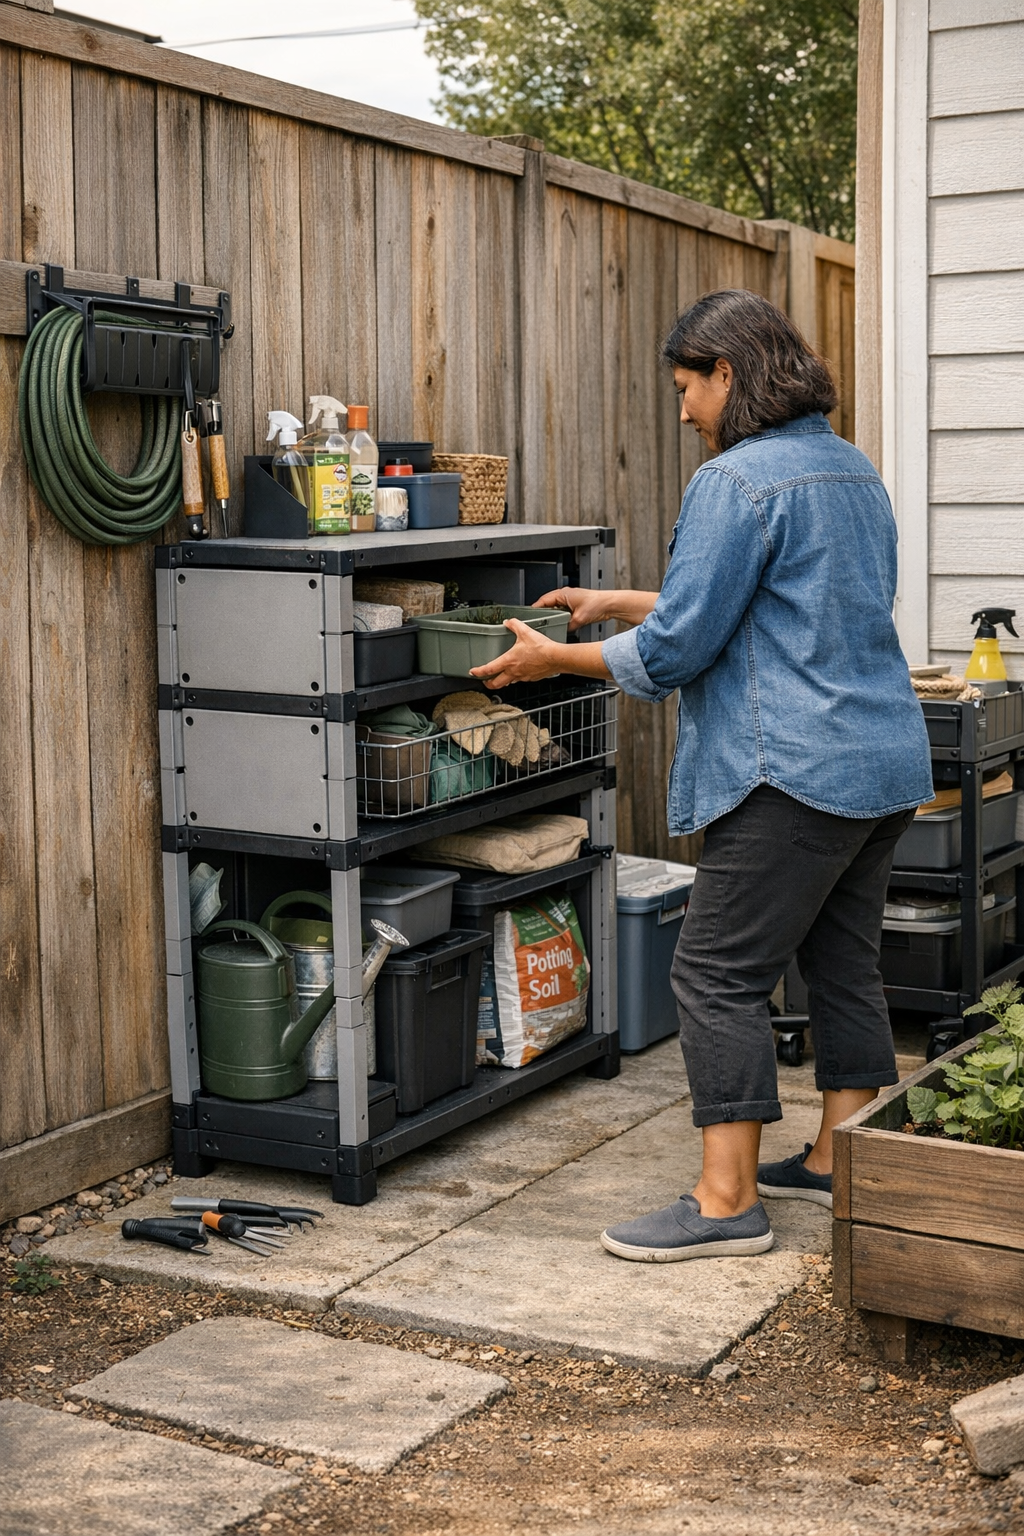
    Small backyards and skinny side yards don’t let storage mistakes slide. One lopsided chest or floor bin and suddenly everyday movement grinds down—footpaths shrink, trash bins get blocked, and what looked tidy on Sunday turns into a daily reshuffle by Tuesday. You notice it fast: the return path gets clumsy, corners start to swallow tools and balls, and what felt “organized” in theory now interrupts you in practice.

    Why “Good Enough” Storage Fails Fast Outdoors

    The illusion kicks in fast: stack two clean bins, clear the patio slab, line up a shelf, and it all seems sorted. But as soon as the week restarts, the old friction creeps in. Grabbing a soccer ball means shifting a mower; a scooter return jams the line to the gate; garden tools get buried under more “just for now” piles. Floor bins promised convenience but now cut the narrow path in half. Wall units installed a shade too high are ignored by kids, and open shelves designed for flexibility quietly tempt overflow to crash the walkway. The proof isn’t in the storage volume—it’s in the way the setup smooths or snags your routine.

    How the Wrong Setup Makes It Harder—One Move at a Time

    Picture the side yard acting as your main thoroughfare: bikes up from the garage, trash bins headed out, outdoor toys coming and going. Now drop a deep storage box at the end. Sure, it looked out of the way—on a diagram. But tomorrow, you’re taking an awkward detour just to pull out a helmet; two hands juggling the heavy lid, nudging sports gear just to close the thing. Suddenly, one returned scooter blocks the trash can, and your neat path fills with slow-moving clogs and “temporary” piles. Resetting means:

    • Moving two things to put one thing back.
    • Battling with stuff left out because putting it away isn’t worth the extra steps.
    • Watching the corner next to storage quietly fill with overflow that never really returns home.

    Momentum disappears. That subtle penalty—a nagging pause before returning something, a reluctant sidestep to reach the fence—isn’t about clutter, it’s about disruption. By the weekend, you’re not clearing up; you’re excavating what felt “organized” just days ago.

    The Consequence of Bad Boundaries in Tight Spaces

    Large yards can absorb sloppy storage. Tiny outdoor set-ups can’t. Every inch counts, and every misstep quickly becomes visible. A bulky unit on the ground quietly steals walking room. Any gap left “for later” pulls in overflow—turning into a default drop zone you keep meaning to sort. Without clear vertical zones, your return flow stalls; items drift across spaces, and no storage system really sticks.

    Two Walls, Two Outcomes

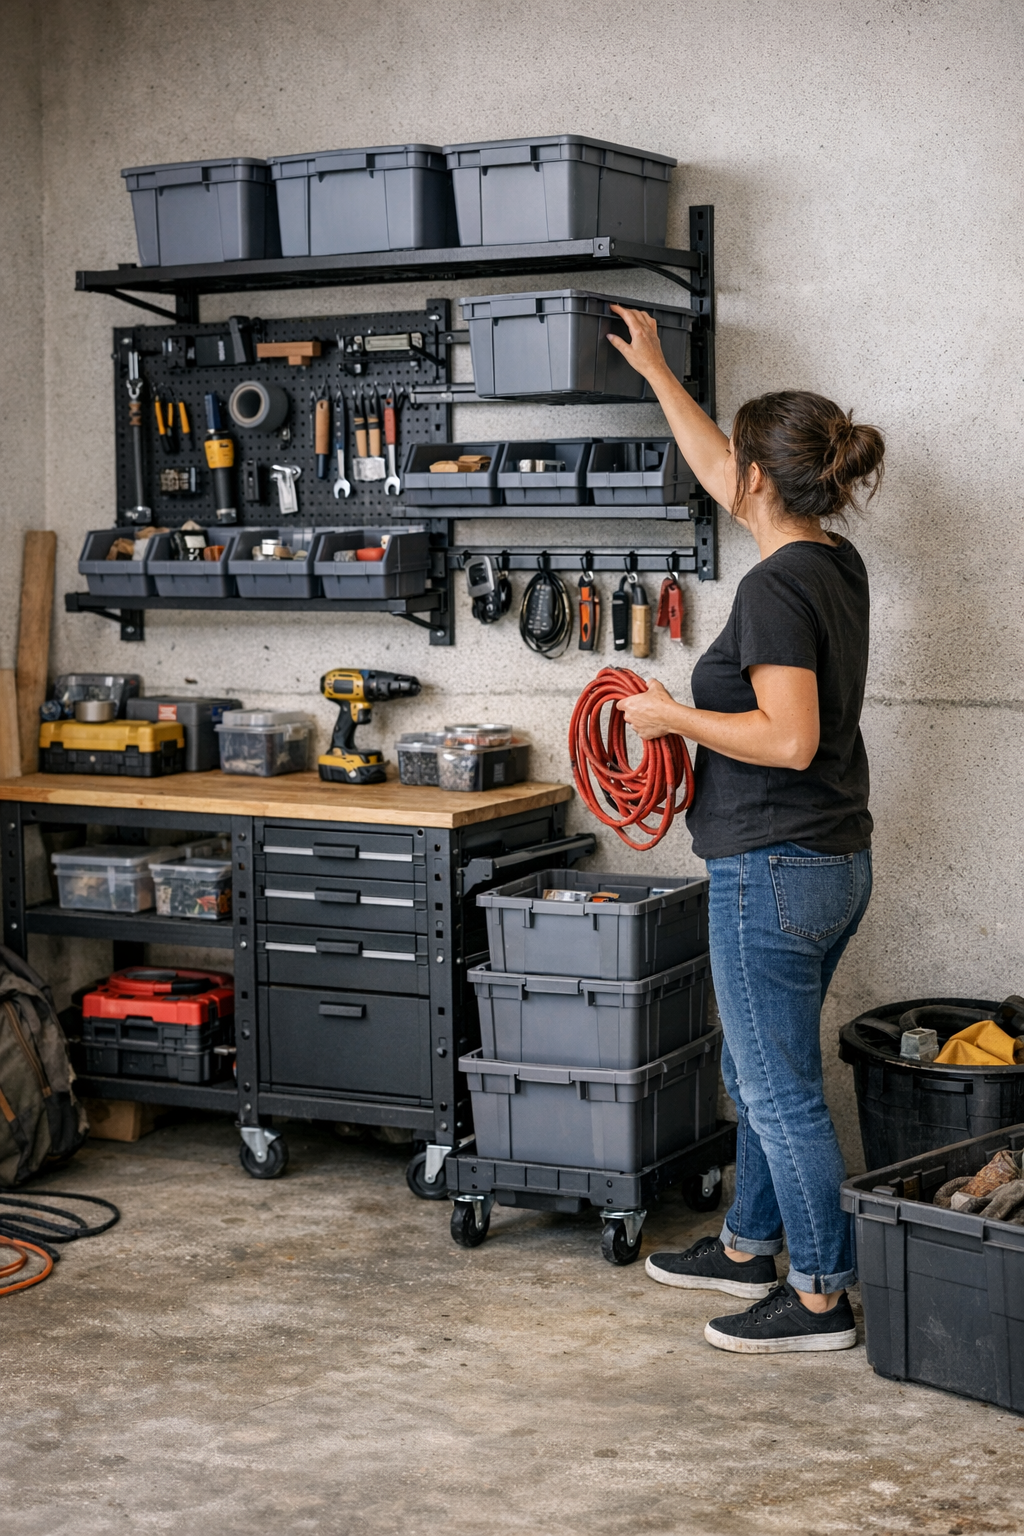
    Swap that chest for modular rails or racks, mounted at the heights you actually use. Now the daily loop changes: you come through the gate hoisting a bike, the helmet hooks back in one move, the ball drops straight into a sling at your side—done. No need to angle around a lid, no stash-pile in the way, no stretching for an upper shelf. Essential gear sits at natural reach, deadweight stuff goes up and away, and your walk-through stays open. There’s nothing decorative here, just a boundary that blocks clutter instead of your footsteps.

    How Setup Design Unblocks the Return Flow

    When storage is right where you need it, and doubly obvious on the way out, excuses vanish. You’re more likely to hang the hose, stash the padlock, and get the ball off the ground as part of the movement, not a separate routine. Simple wall hooks beat closed bins because there’s no lid, no lift—just a habit that happens in passing. Every extra step or lift gets skipped. That’s the difference between tools returning home and tools drifting to that one messy corner—again.

    Modular wall panels and slides bring you more than flexibility—they shrink the endless reshuffle. Adjust one section for winter boots, drop another lower for spring garden gear, shift rails when the kids’ routines change. It’s easier to keep the path open because storage adapts, not you. You’re not burning time shifting one pile to reach another or moving bins again just to take out the trash.

    Tip: Return Paths Should Guide Themselves

    Fix a hook at eye-height by the exit—now, helmets, leashes, and bags find a place without thought. Use slim basket slides low for kids, and dividers so that nothing “temporarily” spreads into the walking path. Set clear zones: daily gear close, occasional stuff up high. The easier it is, the less energy resets require—and even the most reluctant helpers can’t miss the logic.

    The Trap of “Looking Organized” Without Working

    Tidy at first sight doesn’t mean tidy in practice. Many setups fool you with symmetry or clean lines, but by Thursday, the layout breaks routine—forcing return detours, stacking new clutter, or asking you to explain the “system” every time a guest needs a ball. Real organization means each item has a self-evident path, especially at the end of a busy day. If reshuffling becomes standard, overflow always lurks, and the floor fills before the week is out, the unit isn’t working for real life—it’s working for appearances.

    In real outdoor setups, effective storage acts as a silent helper: never blocking your walk, never drawing you into slow resets, never asking for a rethink mid-week. Set up that keeps your flow clear by default—that’s when small yards start to feel spacious again, and one easy return matters more than a perfect first impression.

    See practical storage systems tailored for real outdoor spaces at TidyYard.