Author: jaesoon_admin

  • Choosing Outdoor Storage That Adapts to Small Yard Challenges

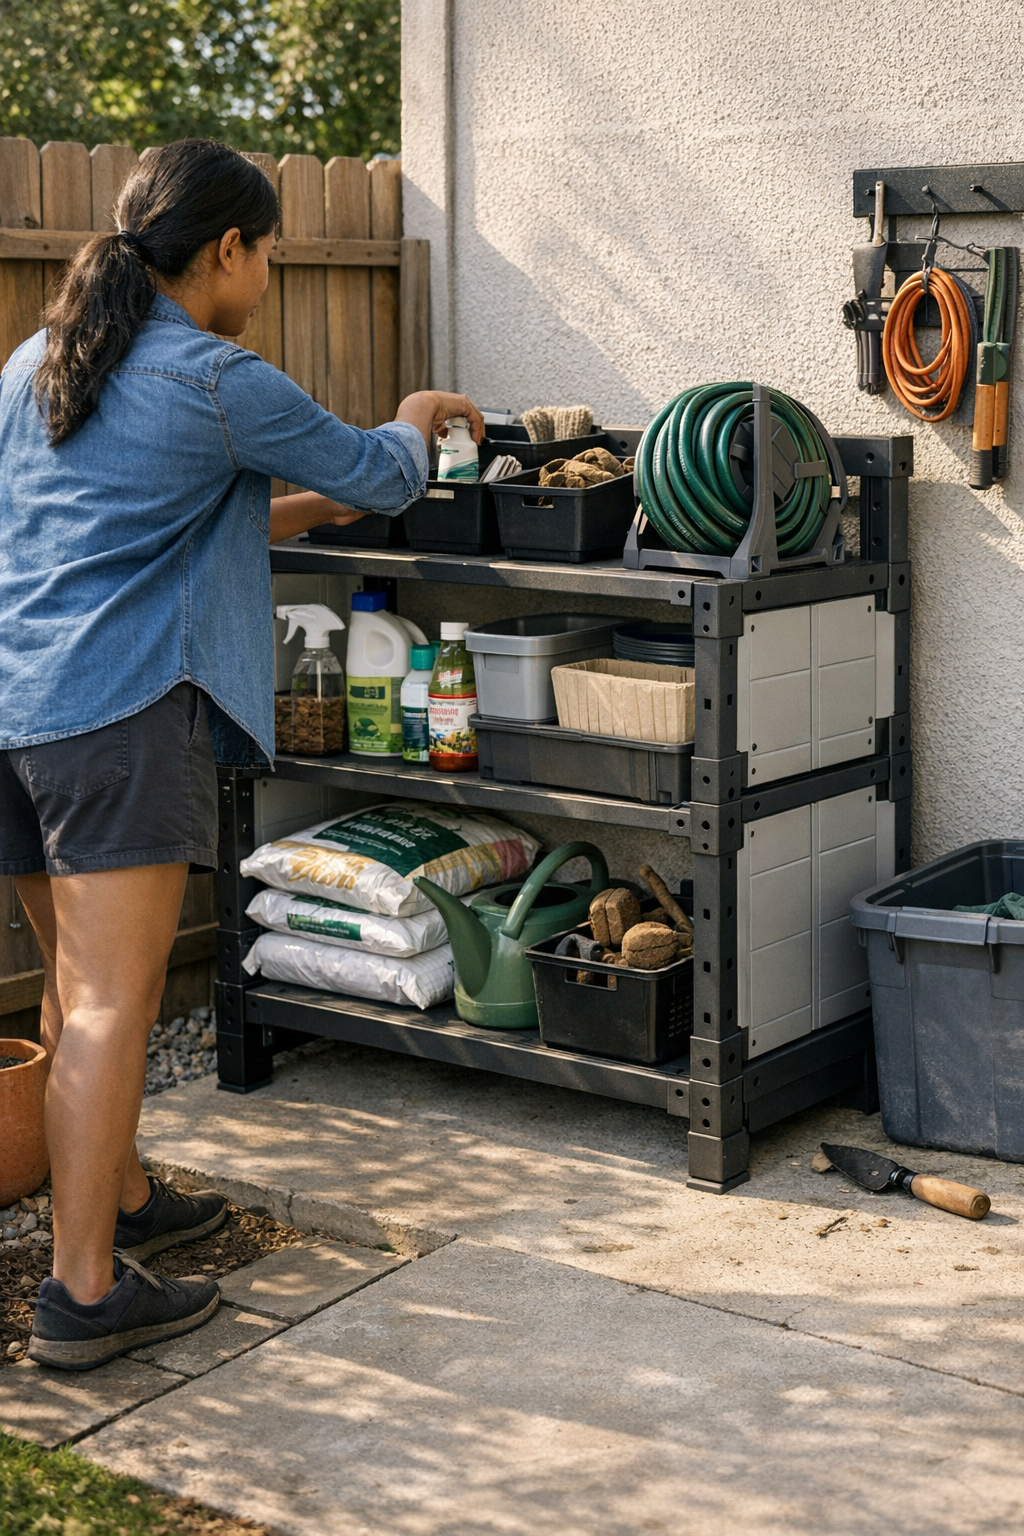
    In a small backyard or side-yard strip, setup flaws announce themselves fast—sometimes before the week is out. A promising wall rack, a bin tucked against the fence, a modular shed that supposedly frees up the patio: in photos, it all looks organized. In real use, one awkward lid or a single blocked path is enough to send the whole setup sideways. The real divide between wall-mount and floor-bulk storage isn’t about preference; it’s about which kind of reset-burden or bottleneck you’re going to fight every time you step outside to put something away.

    Why Setup Choice Hits Harder in Tight Spaces

    Wall systems and modular bins give you hope at the start. The plan is always simple: tools on the hooks, bins under shelves, overflow tucked into that “multi-use” shed in the corner. But after a few runs of real chores—hauling soil, swapping sports gear, juggling pool floats—you end up wading through old patterns: blocked paths, stacked-up piles, and a “just for now” spot that quietly expands until you can’t ignore it.

    Wall Storage: Works Until It Trips You Up

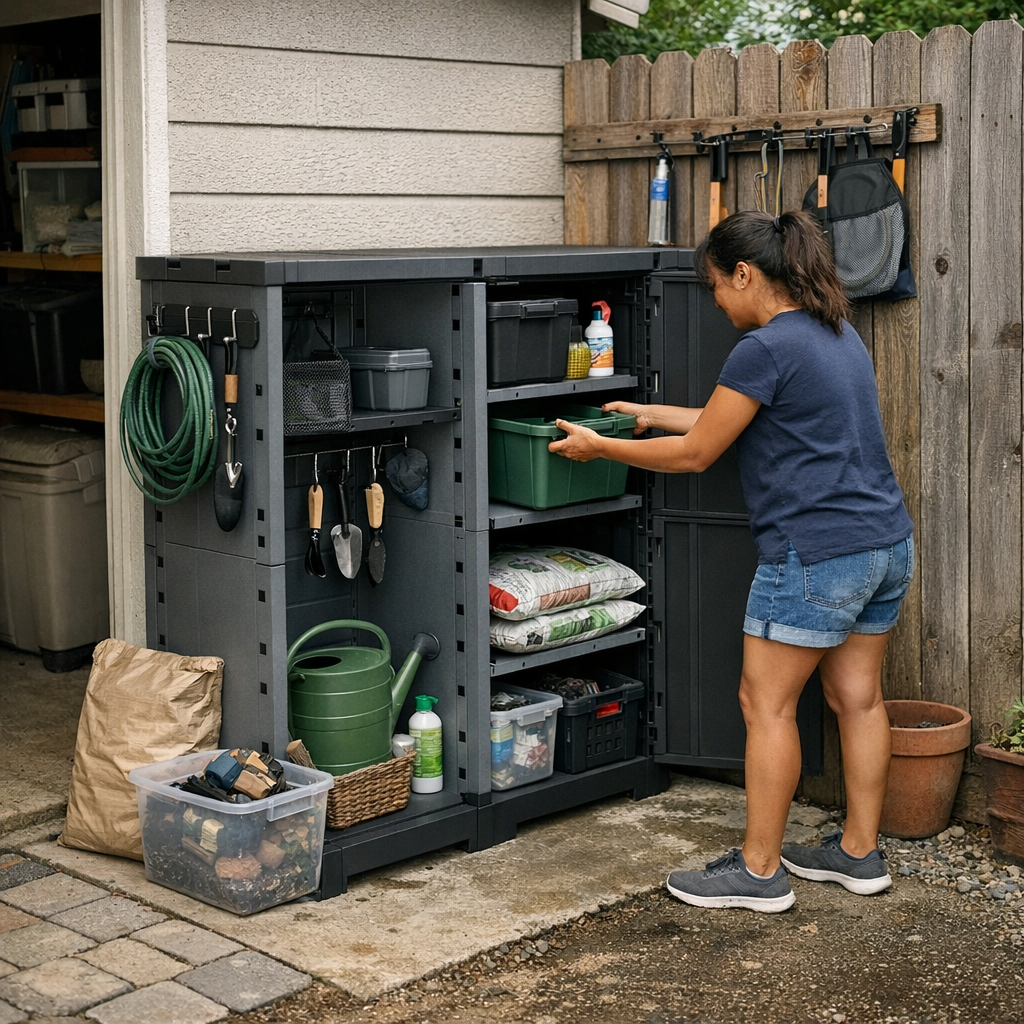
    Wall racks draw you in for a clear reason: they promise open walkways and vertical order. In a narrow side yard or up against the garage, you hang what you use most, reclaim the ground, and figure you won’t have to shuffle anything on a weekly basis.

    But then reality pushes in. Predictable routines shift fast, even with wall storage. A snow shovel suddenly has to swap with a soccer net. You add another long-handled rake or wedge in a kid’s scooter for the season, and before you know it, the clean line of hooks is tangled. It starts small: one batch of garden gloves dumped at the end, or an extension cord snaking below the baskets. Soon, heavy tools knock smaller ones onto the ground. Every “quick fix” skips a reset, and the pile underneath begins its slow, annoying sprawl—all from what was supposed to be a tidy, grab-and-go solution.

    Floor Storage: Bulk Meets Blockage

    Floor units—deck boxes, all-weather cubes, anything with a lid or a sliding door—seem like the fix for overflow. They do swallow bulk, but pay attention to the cost: the first time you try opening a heavy lid one-handed, or have to shift a box just to clear the gate, the space itself feels tighter.

    Containers line up neatly in the beginning, flush against the fence or the garage wall. But daily use pushes them out, and slowly, each one inches into the walkway. One bin blocks the hose spigot, another grabs the prime mower spot; removing anything becomes a two-step shuffle—nudge this, drag that, stop to untangle the mess left from yesterday’s workaround. Instead of freeing up the area, the storage units start stealing it back, one slow, habitual detour at a time.

    Modularity and the “Mobile-for-a-Minute” Effect

    The pitch for modular or mobile sheds is always adaptability. In theory, you shift bins or roll the entire unit aside when your routines flip: sports gear in, pool stuff out, or suddenly room for guests. It promises to turn every corner into temporary prime space. The catch? “Mobile” becomes “fixed” the minute something else gets parked in the way or the pieces grow too heavy to bother. Those wheels rarely move once a patio table pins the shed in place. Soon, stray balls are stuck behind a bin; a bag wedges itself between cube and fence, and a corner meant for flexible use devolves into a zone you avoid. The harder it is to slide things, the less you bother resetting—until mobility is just another word for clutter with handles.

    The Overflow Trap: How Small Spaces Collect Trouble

    Every outdoor setup creates its own weak spot, and in compact areas, these fill up fast. You’ll spot the overflow: gloves and packets sliding to one end of a wall rack, old hose nozzles lost to the back half of a deck box, bikes dumped into the fence gap after a rushed drop-off. If a single corner or shelf becomes the “put it here for now” zone, the mess multiplies—what looked organized last weekend now demands you pull half the setup apart just to get to the thing you need.

    Return Flow: The Test You Can’t Skip

    The real stress-test isn’t putting things away once—it’s putting them back again and again. Try hanging a trowel after digging beds: if it means wrestling last week’s leaf blower out of the way, you drop it “just this once.” Diving into a deck box for the bike pump? You move a heap of unrelated gear, promise yourself a future cleanup, then forget. Hooks get crowded, lids stay unloaded, “later” mounds grow. When each return takes extra steps, it’s only a matter of time before the whole system unravels.

    Map Storage to Your Actual Chore Flow

    Forget matching racks to the longest span of wall or parking your biggest bin wherever it fits. Watch how you actually move after each outdoor job. Do you come from the gate or circle the fence? Is the nearest wall where you walk after mowing? Sometimes two hooks near the gate beat a full-size bin in the far corner. Shaving off a few unnecessary steps makes resets automatic instead of a backlog waiting to happen.

    Looks Organized, Works Frustrating

    In any catalog, the system snaps into place: everything shines, nothing is blocked. Three weeks later, deck boxes crowd the mower path. Wall racks drop gear onto the walkway. The “just move it” shed sits cemented by garden chairs. Overflow piles lurk in dead corners until reset day turns into an afternoon project. The difference between “ordered” and “truly usable” is what happens under the slow, escalating pressure of routine: only the setups that survive rapid shifts and crowded returns avoid becoming a chore themselves.

    What Survives Daily Pressure: Tweaks That Actually Matter

    No setup’s perfect, and small spaces rarely reward big solutions. The best layouts in real-use backyards are the ones that:

    • Make returns simple—one thing back, nothing else blocked
    • Stay easy to reset—not needing a cleanup hour after every busy week
    • Adapt fast when the routine shifts—versatility only counts if you can use it without wrestling the whole system

    The goal isn’t showroom perfection. It’s a yard, alleyway, or patio strip where resetting after real use doesn’t sap your patience, movement feels natural, and corners stay open enough to stop “just for now” spots from snowballing.

    Try These Real-World Checkups

    • Reset check: After a week, can you get things back where they belong in two minutes, or is it another Saturday chore? If not, downsize, swap locations, or lose the least-used module.
    • Overflow pattern watch: Notice if the same hook, bin, or rack collects the clutter every week—shift the problem, not just the items.

    A storage setup isn’t proven by how well it fits at the start, but by how it absorbs daily friction without crumbling into chaos. If your yard stays usable, resets stay quick, and you aren’t dancing around your own storage, you’re already ahead of the catalog ideal.

    Shop all storage solutions at TidyYard.

  • Why Clear Storage Roles Make Your Workspace More Efficient and Predictable

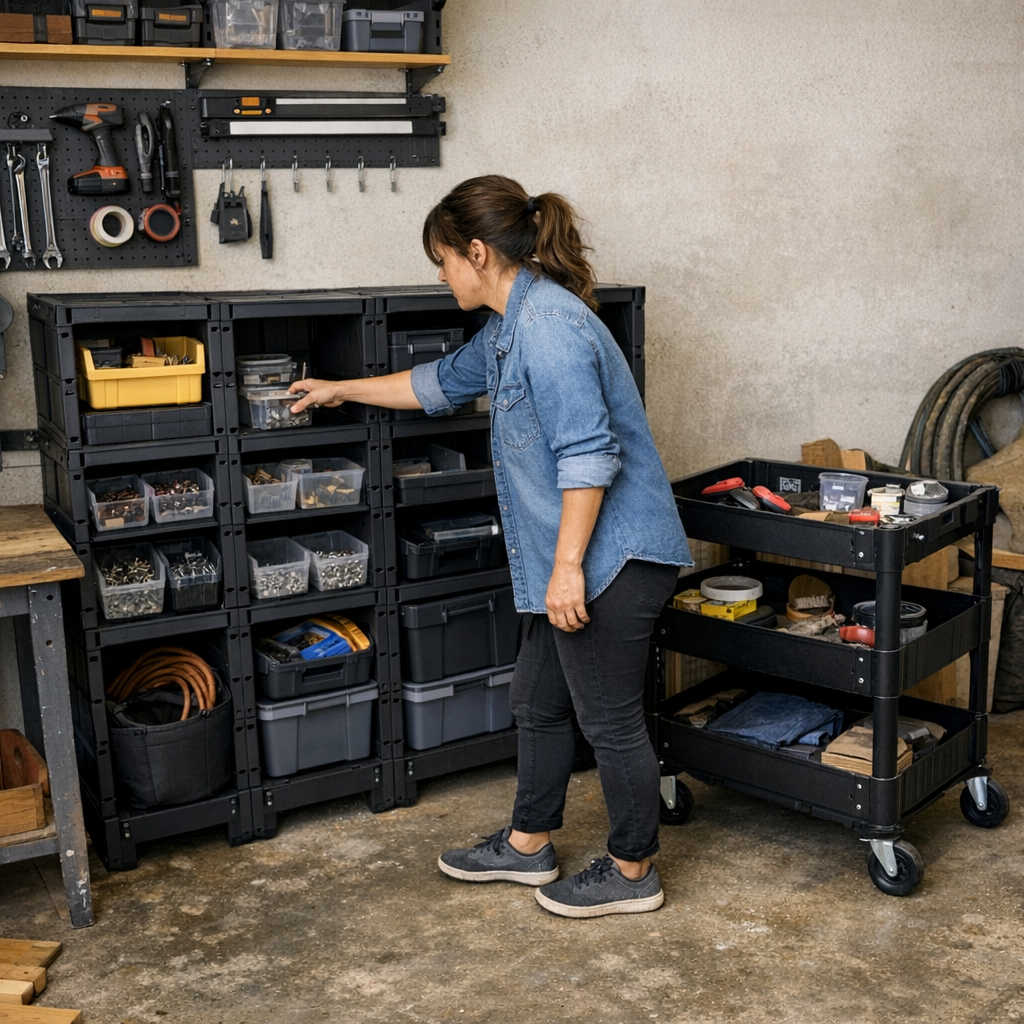
    The illusion of order doesn’t survive the first busy weekend. Step into a freshly organized garage, workshop, or tool corner—everything lined up: modular cubes hugging the wall, a floor chest and wall racks squared away, a mobile cart waiting by the bench. It looks “done.” But as soon as the real work starts—when you’re drilling, fixing, shuffling through half-finished projects—this tidy arrangement is suddenly on trial. Tools land wherever your reach stops. Hardware clusters in corners. The perfect plan, five minutes ago, is derailed by the pressure of actual use.

    Where Neat Setups Unravel: The Slow Creep of Daily Mess

    The first day after organizing is never the problem. The system breaks down quietly—one hurried session at a time. You drop a screwdriver “just for now” on the rolling cart. Unsorted screws build up on the nearest shelf, that “dead” nook in the back absorbs overflow, and clearing work surfaces becomes a pre-project ritual, not a rarity.

    This slow creep is subtle but relentless. Week after week, resets take a few more shuffles. Benches get cluttered with tools waiting to find their way home. Corners that should be open become catch-alls. What started as support for your projects ends up adding friction—until finding anything or even moving through the space gets slower and less predictable.

    When Storage Roles Blur, Routine Clarity Disappears

    Real efficiency comes from clear boundaries—but it’s these boundaries that fade first. Storage zones without a strict job end up tangled: carts, supposed to ferry active tools, become wheeled piles after just a couple projects. Floor chests wind up blocked by the boxes and odds-and-ends you told yourself you’d “sort later.” Even wall hooks and bins lose their purpose, hosting whatever no one had time to put away “properly.”

    Within a month of use, everything overlaps. A project stalls while you search for a measuring tape that never found its way off the cart. The cart can’t roll because clamps and sandpaper are stacked on top. Drawers fill with unrelated leftovers. Resetting order isn’t one step, it’s a multi-stage rescue attempt, and the supposed convenience of your layout begins to feel like a chore.

    Real-World Friction: Where Use Outsmarts “Looking Organized”

    On paper, modular bins and wall racks promise a place for everything. In practice, habitual shortcuts and real project speed expose every weakness:

    • The corner module morphs into a holding pen for “miscellaneous” clutter—because it’s unlabeled, everything ends up there.
    • The cart’s flat surface disappears under small tools, tape rolls, and scraps nobody wants to stash just yet.
    • Wall storage that should make things grab-and-go instead gets crammed; every quick reach nudges something else out of place, or forces an awkward shuffle.

    The setup still photographs well—until you notice how it’s actually used. Week by week, these micro-irritations stack up.

    Defining Roles: The Thin Line Between “Looks Right” and “Works Right”

    Clarity beats capacity every single time. After running through half a dozen setup cycles—reorg, work, reshuffle, frustration—I learned that having “a spot” for everything is useless unless it’s obvious and quick to use every single time. My own space, packed with cubes and a cart, looked organized but quickly revealed the same slide. Hardware never quite made it off the cart. Cords collected on the bench. Eventually, resets stretched out because there was never an automatic return flow—just wishful thinking and more piles.

    The failure wasn’t in how much storage I had, but in how slippery the boundaries were. The cart began as an “active tools” zone but quietly absorbed every stray thing; the cubes became background. Without sharp roles, even a well-planned setup is always at risk of collapse.

    Resetting Flow—The Small Rule That Changed My Shop

    I stripped the chaos back to one discipline: the cart is for current project tools only. Everything else gets returned to its labeled cube, no exceptions. I relabeled the cubes with giant, unmissable categories (“Hand tools—return every use,” “Hardware—no overflow”). I cleared a single, open path for the cart—no bins blocking its wheels, nothing to step over. It wasn’t Instagram-beautiful, but one week in, resets got simple. The cart was always clear by day’s end; anything still out triggered an automatic return. No more shoving aside stacks to roll the cart, no more confusion about what lived where.

    Suddenly, the difference was real: open space stayed open, nothing collected in “temporary” spots, and surfaces stayed useable instead of permanently cluttered. It didn’t just save time—it made working smoother, because there was less thinking and less chasing after missed tools or random debris.

    Spot the Warning Signs: Is Your Setup Dragging You Down?

    If you’re seeing these red flags, your storage isn’t delivering real support:

    • Every project starts with clearing off what’s left from the last round
    • Your “return zones” stay half empty, while benches and carts pile up with tools and parts
    • Resetting order means sorting three or four unrelated categories—every single time
    • Blocked paths, shuffled furniture, or “don’t go there” corners slow you down
    • Labels fade into the background or get ignored completely after a few days

    None of this is a random nuisance—it’s the direct cost of storage roles blurring and paths losing definition.

    Labels Alone Can’t Rescue a Weak Setup

    A label only works if the system behind it makes sense in motion. If a bin is the easiest place to dump overflow, a sticker won’t stop it from turning into a catch-all. True clarity happens before the label: the zone itself must be unmistakable and hard to misuse, even when you’re moving fast or distracted by the next step.

    Pursuing “maximum flexibility” is the classic trap—rows of interchangeable cubes or shelves that promise to fit anything but actually end up hosting everything at once. When boundaries are this vague, resets require double or triple the effort, and no amount of relabeling fixes the core problem. Every time the flow stalls, you’re forced to reshuffle and rethink rather than just work.

    Automatic Return: The Real Benchmark for a Working Layout

    The gold standard for any setup isn’t that it looks organized—it’s how little you have to intervene after repeated use. If, by the fourth or fifth project cycle, resets are down to one simple sweep and the cart, floor, and benches stay mostly clear, that’s true support. Setup friction drops, movement paths stay open, and “finding space” never requires a detour or quick fix.

    Bottom line: A clear, logical storage layout won’t banish every bit of friction, but it will keep the space working for you, not against you. Most setups fail in the small, boring battles—overflow in corners, blocked movement, resets that drag. Winning isn’t flashy, but it’s unmistakable: your workshop feels usable after the tenth round, not just after a photo-friendly re-org. That’s how arrangement turns into actual, repeatable advantage.

    Explore more practical storage setups at StackNest.

  • How Strategic Cat Bedding Placement Reduces Household Cleanup Challenges

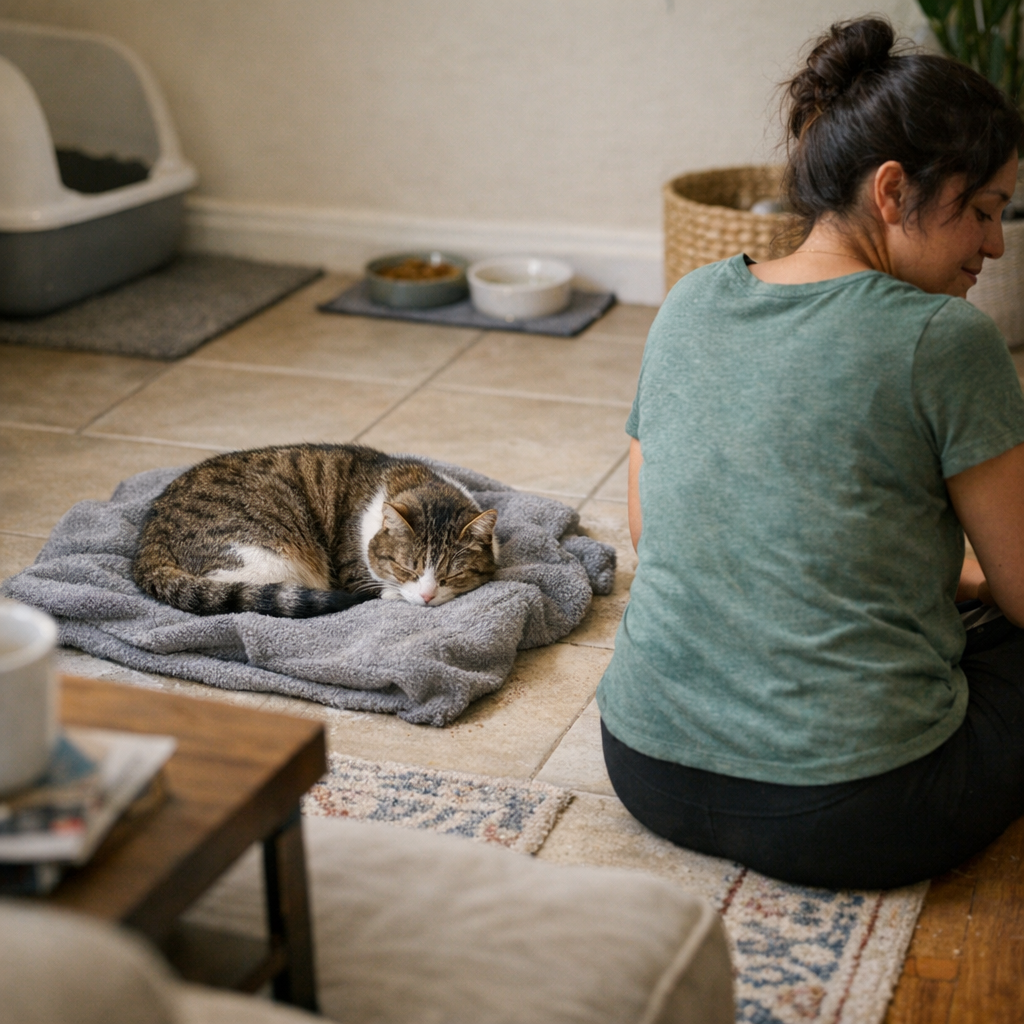
    Move your cat’s favorite blanket or bed just a few steps—closer to the food bowl, tucked against the wall, wedged near the walkway—and you’ll feel the shift within days. The comfort zone looks right at first: your cat finds the fabric, the corner looks cleaner, and the room breathes easier. But by midweek, small messes spill in—a rim of crumbs collected after breakfast, fur lines deepening at the floor edge, damp corners waving up after every water bowl refill. What was supposed to be “cozy” gradually turns into extra work: more shaking, more wiping, and more doubled-back trips with cleaning supplies. The difference isn’t just the blanket; it’s the spot, the pattern of traffic, and how well that rest zone resists the daily flow of litter, food, and movement. StillWhisker’s world starts where all this friction meets the real home setup—where cat rest, owner routine, and cleanup overlap or collide.

    When Comfort Collides with Cleanup: The Reality of Bedding Placement

    Most indoor cat owners try the classic move: rearrange a space, then set the bed or blanket in a fresh corner out of the way. For two days, it works—cat settled, corner “done.” Then routine takes over. Every morning meal leaks a handful of crumbs toward the edge. Litter tracks in underfoot after each box visit. A water refill splashes. Suddenly, cleaning means squatting to shake out bedding that now sits in the traffic lane, with hair and debris collecting exactly where you thought you’d finished.

    Problem signals show up faster than most expect. Noticed crumbs pressed into the blanket folds after a meal? Fur in the grain along the mat line? The single “easy” spot turns into a habitual interruption: bedding must be moved before you can feed, wiped before you can refill, and checked for damp spots even after casual spills. Each reset you add to keep this corner “comfortable” quietly turns into new routine friction.

    Comfort Zones Near Activity Hotspots: A Familiar Trap

    Rest zones sneak into active lines—classic mistake. Place a bed near the feeding setup, or against the loop between litter box and door, and you create a mess relay. There’s not always room to separate areas in smaller apartments, and the logic feels right for a day or two. By day four, what started as out-of-the-way now blocks sweeping, houses a seam of tracked litter, and hosts fur clinging tightly in the corners—requiring tools, time, and one more pass every single day. Padding “just outside” the kitchen seems clever until stray kibble, carrying paws, or a spat spills into soft material. Each tweak that makes a room look “cleared” can mask the routines that actually pile up daily work under the fabric.

    Daily Routines: Where Setup Friction Surfaces

    The gap between tidy setups and usable ones gets exposed after only a few cycles. Real repeated frictions include:

    • Food prep interrupted because the cat blanket keeps creeping over the bowl line—another sidestep, another fold reset.
    • Extra wipe-down that follows nearly every meal, because the bedding edge sits where food debris naturally drifts.
    • Blanket gets picked up again—litter trails now tangled in the folds after a box visit.
    • Vacuum bumps up against bedding touching baseboards—fur multiplies in the corners, just out of easy reach.
    • Bed looks fine until you find a damp patch at the edge: a water spill missed, now trapped in fabric that needs washing, not just shaking.

    Each isn’t catastrophic, but stitched together, they quietly convert one restful zone into a micro-chore that frames your whole routine. The “comfort corner” keeps asking for more resets than the old setup ever did.

    Why “Cozy Corners” Keep Becoming Cleanup Zones

    Mixing your cat’s rest zone with feeding or litter traffic lines constantly puts bedding in the path of the next mess. If your space is compact—studio, single walkway, open shared room—there’s little margin for separation. What seems solved one day becomes a collection point for scatter, fur, and crumbs as the week turns. Example: you move the cat bed into the dining nook—out of guest view. Now every post-snack return and litter dash flings debris straight into folds. In small homes, one leap or chase, and the bedding skids halfway across the room, making comfort impossible to separate from activity. The short-term “tidy” look comes at the cost of long-term lower workability.

    Small Shifts, Big Impact: What Actually Reduces Mess

    The only fix that endures past week one: create a buffer zone. Even a single tile, mat, or stretch away from food scatter and litter drifts changes the cleaning cycle. Move a bed out of splatter range, and you’ll spot the difference:

    • Blankets keep clearer—shake-outs are now less frequent and faster.
    • Fur collects in defined zones, instead of ghosting into every surface or wedging under chairs.
    • Crumbs and litter stay on harder floors or mats, not embedded in the fabric.
    • The reset cycle shrinks—less bending, less urgency, fewer duplicate wipe-downs.

    This isn’t about cleaning harder. It’s about placing rest spaces where everyday mess can’t take hold so quickly. Over time, your routine feels lighter, not more demanding.

    The Subtle Difference Between Looking Controlled and Feeling Easier

    Photos or first-day assessments fool nearly everyone. A corner with a freshly cleaned bed looks ready—until repeat use chips away at the surface. Maybe you chose a washable blanket, but it drags across the floor every time you try to vacuum or reset the mat. Maybe it’s soft and familiar, but you end up shifting it just to access a cabinet or cross the room. The first hint of extra work rarely shows up on day one, but it always returns by cycle three or four: stuck fur, missed spills, or a stretch of space that always seems just out of practical reach. It’s never just about good material or a “nice” look—it’s about whether that exact zone holds up once it’s hit by real daily routines.

    Fabric Makes a Difference—But Placement Does More

    Sure, materials matter. Tight-woven cotton handles fur and crumbs better than plush fleece, which acts as a magnet for litter dust and stray hairs. But no texture can win if bedding sits right in the path of daily scatter. Even premium fabrics lose against relentless foot traffic and repeated kitchen or litter passes. Placement—not product cue alone—keeps your setup from crossing the line into daily interruption.

    Adjusting Without Unsettling Your Cat

    Cats anchor to familiar zones. Move bedding constantly and your cat might avoid the “improved” spot or settle somewhere even less practical. The move should follow a clear signal: a cluster of fur or crumbs forming faster than you can reset, the routine suddenly getting slower, new furniture rerouting daily flow—or a visible buildup that cleaning can’t clear up. Nudge the rest item just outside the zone of mess, and both you and your cat get an easier reset without upending a comfort routine. Move with purpose; avoid endless readjustment.

    Practical Tweaks That Last Beyond the First Week

    When comfort and cleanup stop competing, you see it: the cat’s rest spot stops catching every stray mess, routines start to click, and you’re not pulled over by mini-jobs every time you walk by. That’s the difference between a setup that only looks under control and a structure that actually supports the way an indoor cat home runs in the real world. It’s not perfection—it’s fewer interruptions, less invisible work, and a comfort zone that stays functional after the novelty wears off.

    For practical products that make daily indoor cat life and home routines genuinely easier to handle, visit StillWhisker.

  • How Proper Storage Preserves Power Cleaner Performance and Longevity

    Every scar on a tool marks a job finished, an hour saved—or lost—when performance matters most. If you’ve grabbed an air-based power cleaner after a brutal sanding marathon, only to hear it wheeze and cough like it’s older than you are, you know it’s not just about dust in the corners. It’s about trust on the job. Because sawdust and drywall grit don’t care about your schedule, and a cleaner that fails in crunch time can turn a quick sweep before dinner into a scramble for fixes and backup gear you didn’t budget for.

    Where Airflow Fails You—And Your Schedule

    Every worksite veteran knows trouble rarely announces itself up front. You end a day saturated with dust and plaster chips, tuck the cleaner away, and assume the next shift will be a breeze. But come Monday, that familiar machine rattles, stalls, and blows more debris than it traps. Suddenly you’re behind, blaming your tools—or yourself.

    This isn’t some freak hardware failure. It’s the slow, silent toll from little lapses: dust caking tight channels, condensation trapped beneath a neglected filter, and soft gaskets set into odd angles from last night’s rushed shutdown. Before you know it, your post-job routine—the moments you swear will be faster next time—has ballooned into an afternoon spent scrubbing vents, prying apart sticky buttons, and piecing together a cleaner that should have been ready to run.

    Shutdown Shortcuts: When a Five-Minute Skip Becomes Tomorrow’s Headache

    It’s easy to treat shutdown as an afterthought: blast the main surfaces, coil the cord, slide it beside the miter saw, and forget it. But while you’re moving on, residue settles in. In cramped van bins or on concrete garage shelves, humidity and dust sneak into every joint. If you’ve run your cleaner hard—maybe after back-to-back drilling for cabinet handles or marathon belt sanding—every shortcut compounds. The airflow you’ll desperately need next time gets choked off, and tools that once purged a room in five minutes now limp through a half hour’s work, eating into the next task on your list.

    The difference isn’t subtle. One crew member vents his cleaner, another doesn’t. The next morning? One machine hums, pulling in offcuts and flakes from the first drill plunge. The other spits dust, jams on startup, and leaves you fiddling while everyone else gets back to work. That’s the moment lost prep comes back to bite—right when you need control, precision, and speed from your gear.

    The Real Cost of Saving a Minute

    Every time you rush that end-of-day routine, you push reliability off a little farther. A clump of grit in the intake isn’t cosmetic—it means more push, less pull, and that sinking frustration when you’re halfway through a tricky trim cut and the cleaner shrieks or stalls. That “five-minute save” surfaces as an unplanned hour later, eating your work momentum and testing your patience.

    On the Job: How One Skipped Step Snowballs

    Imagine: It’s 6pm, light fading, you’re wrapping up a kitchen remodel after a day of drilling shelf pins and beveling edges. Floors are a haze of sawdust, your gloves are lined with grit, and you want out. But tomorrow means finishing fast—fastening trim, dialing saws back in, not nursing a tool back to health. That veteran instinct kicks in: give the air cleaner a minute or two on low, filter loosened, just enough to burn off the hidden moisture and bits lodged deep inside.

    It doesn’t feel heroic. But the next shift, when you flip the switch and everything fires without complaint, you dodge the staggered, rough startup that robs you of flow. No mystery blockages. No delay while your crew waits for suction. Just the smooth payoff of prepping right—and knowing your cleaner’s pulling its weight as you rip through a fresh round of work.

    A Storage Routine You’ll Actually Keep

    Practical moves—not perfection—make equipment last:

    • Let the cleaner run on its lowest setting after major jobs. This blasts out stubborn fines, dries any trapped humidity, and prevents grime from hardening deep inside—especially after sanding MDF or punching through plasterboard.
    • Loosen, don’t yank, the filter if it’s staying in. That small step vents the system, so seals don’t dry out misshapen and controls stay light to the touch.
    • Give your tool a dry, cool, uncluttered nook—never jam hoses or clamps tight for storage. Keeping components aired out helps avoid brittle gaskets, seized clips, and those startup glitches that sideline the cleaner on heavy-use days.

    Neglect it for a month and you’ll feel it: toggles stiff, buttons catch, and suction falters when you expect power on command. Smooth control, fast starts—these aren’t accidental. They’re built on small habits that are easiest to ditch when you’re tired and rushed.

    Telltale Signs: Fix Friction Before It Kills Productivity

    Watch for subtle warnings in everyday cleanup: a sluggish grind on startup, suction softer than usual, a button that sticks for just a second too long. Chances are, dust blockages are quietly building inside. That’s more than a minor nuisance—it’s lost rhythm, especially in projects that stretch over multiple days or demand fast tool swaps between sanding, cutting, and clean-up runs.

    Make it routine every week or two: pull the filter, scan for color changes or airflow resistance—particularly after heavy drilling sprees, humid weather, or clouds of drywall debris. Catch friction early and you steer clear of the productivity spiral that comes from limping along with tool fatigue, not thinking about workflow until you’re already behind.

    The Payoff: Tools Ready on Demand, Not on Luck

    The point isn’t to win a prize for neat storage. It’s the confidence that when you’re bouncing from fine joinery to a burst of demolition—switching bits, blades, or batteries—your air cleaner is primed, not groaning through the basics. A few disciplined minutes at shutdown buys you freedom from headache starts, wasted mornings, and awkward workarounds. Build the habit now. In three months, when the schedule piles up and tools need to work, not whine, you’ll know it was worth every second spent doing things right.

    http://gumboll.myshopify.com

  • Pantry Shelf Risers Enhance Organization and Visibility for Cans

    A single row of cans on a flat pantry shelf feels organized—right up until midweek, when the routine breaks it down. What works on a calm Sunday—labels lined up, everything visible—starts slipping fast under real use. By Wednesday, the empty space from last night’s meal creates a gap; the next restock fills random holes; categories blur, and “organized” becomes an inventory guessing game. Instead of grabbing the ingredient you need, you end up shuffling cans around, re-checking if you actually have tomato paste, and double-handling the same spot. In a shared kitchen, the friction multiplies: nobody’s sure what’s missing, what’s old, or where anything actually belongs. Flat-shelf storage looks orderly at first, but under pressure—busy mornings, multiple cooks, rushed resets—it quietly falls apart.

    Where the Flat Shelf Fails under Real Pressure

    Flat shelves only “work” when barely touched. That initial tidiness—the front row straight, all labels out—vanishes as soon as anyone actually uses the zone. Taller cans hide shorter ones. Duplicates end up piled together. The front edge absorbs whatever can’t find a home: that stray can of curry paste, two identical lentil soups, another can tossed in when the system’s already sagging. Suddenly, even with shelf space left, you’re maneuvering around the clutter every time you cook.

    Reset friction is real, not rare. Find yourself scanning for something you were sure you bought? Lifting cans to see labels? Reach twice for the same thing, only to give up and open a backup cabinet? Flat shelves turn a simple grab into a small scramble—especially when stock is mixed, items are different heights, or more than one person is using the space. Zones merge, categories drift, and the system that looked sorted the day you arranged it starts slowing you down every single week.

    How Repeated Use Exposes Design Weakness

    Most pantries don’t fail because of space—they fail because their design can’t handle motion. Deep shelves invite back-row overflow: what gets used least slides forward, what you want disappears behind. Resetting means lining up cans by hand, checking for doubles, and digging out expired stock—again and again. The effort isn’t just inconvenient; it quietly trains everyone to abandon the system for speed.

    If you’ve ever had to move half the row to reach the can behind, or reshuffle everything because an off-size tin blocked the flow, you know what slow leakage really feels like. The more you touch the shelf, the worse the pattern drift—categories mix, overflow areas start spreading, and time gets lost not just to searching, but to endless, partial repairs that never truly hold up.

    Shelf Risers: Forcing Order to Survive Weekly Use

    Panty shelf risers aren’t just for looks—they reroute both the visibility and the hands-on flow of your actual shelf. The stepped design raises the back row, making cans visible that would otherwise vanish for weeks. One glance scans everything; grabbing an item from behind doesn’t trigger a domino of shifting cans. Categories stop bleeding together, labels stay obvious, and restocks follow a side-to-side rhythm instead of becoming a slotting puzzle.

    After you’ve installed risers and put them through multiple real resets, the difference becomes visible. Nothing slips out of sight just because it’s in the last row—restocking is one motion, from newest at the back to oldest at the front. The riser matches standard can height, so your “soup,” “beans,” “stews” zones don’t end up in one collapsing stack. Day-by-day use holds the system in place, instead of unraveling it by Thursday.

    What Gets Easier—and More Reliable—Over Time

    Pantry risers earn their keep where most systems fail: repeated, distracted grabs and shared use. During a fast meal-prep, the logic stays visible. Even if someone else restocks or returns items out of order, categories stick—broth isn’t mixed with beans just because one can was shorter. The next time you face grocery day, you scan, slot, and move on—with no two-handed shuffle, no hidden losses at the back edge. Fewer resets, less time thinking about the system at all, and almost no surprise duplicates weeks later.

    Zones stay visible without policing. When every can has an assigned tier, accidental merges decline, so you lose less time refinding “where that thing used to go.” Even the front edge of the shelf resists becoming a general parking lot—elevated steps discourage dropping overflow in easy reach, so the path stays clear instead of shifting toward overflow chaos.

    Details That Decide Whether It Holds Up

    Shelf risers work best when you respect can height. Mix short tuna tins with tall soup cans on one step and the old problems come back: hidden labels, toppling rows, frustrating reach-arounds. The actual fix? Group cans by similar height, use adjustable risers if your usual stock varies, and sort before you set up. Protect the stepped view, cut down on hidden stock, and the rest of the system sustains itself with little daily effort. In active pantries—families, roommates, anyone with weekly churn—risers buffer category drift and keep both inventory and path cleaner. The difference is measured not by photo-perfect lines but by the slow drop in restock labor, duplicate buying, and lost cans each month.

    Function First: Not Just for Show

    Perfect-looking shelves mean little if the system can’t hold up under repeated use. Flat rows and unsorted baskets survive one big reset, then collapse under week-to-week pressure. Shelf risers prove their value less by their appearance than by how rarely you’re forced to start over. Less crowding, fewer hidden items, cleaner visible lines—these aren’t aesthetic wins, but durable changes that keep the pantry working for people who use it daily and don’t have time to make the zone look good just for a photo.

    Visit Gridry for practical storage solutions

  • How Proper Wall Light Support Prevents Visual Clutter and Mood Disruption

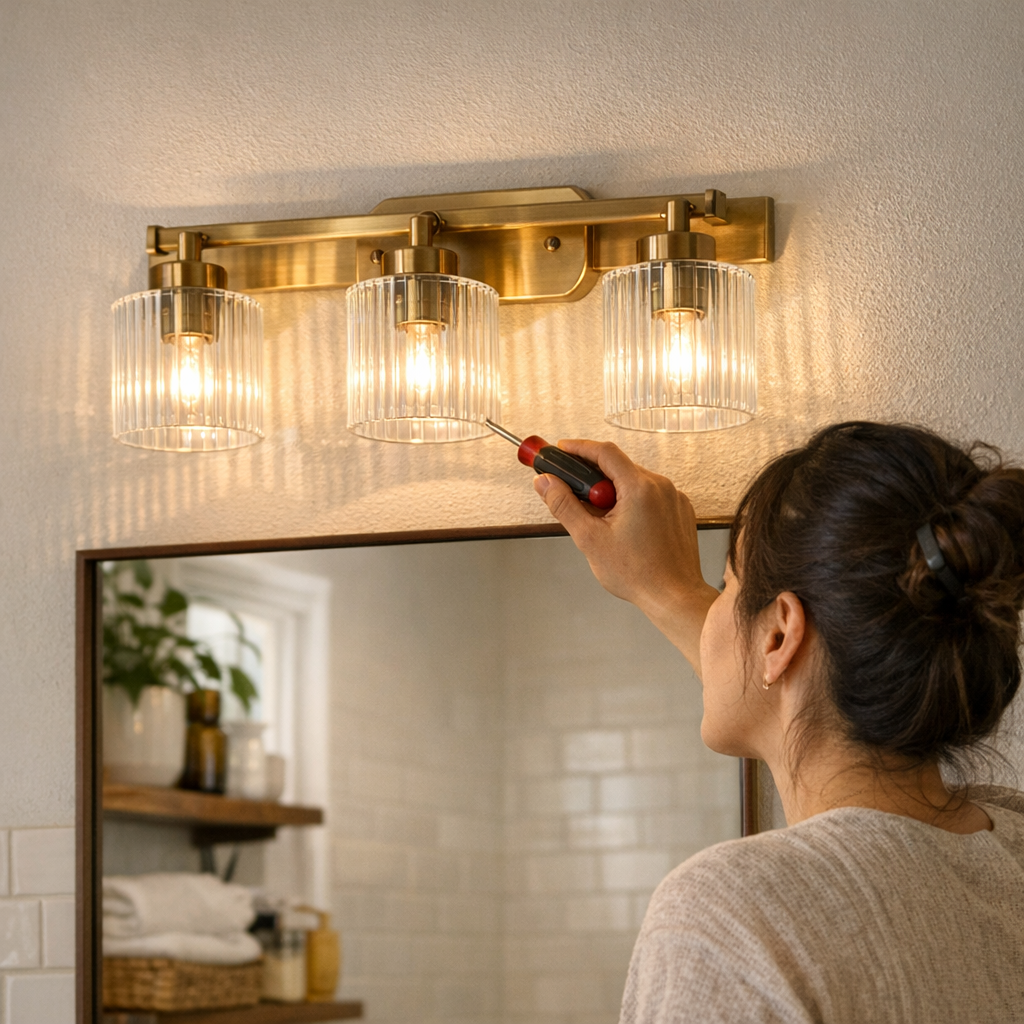
    Wall lighting isn’t just about making a room look tidy—it’s supposed to make work and everyday routines feel easier. But the promise of a clutter-free workspace falls apart fast if you ignore bracket depth, cable route, and what happens once you actually start living with the fixture. What looks minimal for a week can turn frustrating as cables drift out of hiding, glare stripes cut your desk, or one support decision leaves half the work surface shaded and the rest just as interrupted as before.

    When Clean Lines Fade Into Distraction

    On Day One, mounting a slim wall light makes the workspace look almost resolved. Desk clear, wall sharp, everything feels aligned. But almost immediately, practical frictions surface: glare splashes across the work edge you actually use, the outer half of your desk lands in shadow, and the cable you thought was hidden becomes the feature your eyes find first. By the end of the first week, these details aren’t just visual—they change how the space is used. You start angling books toward the center, nudging chairs to escape dim corners, or storing panels to prop up a cord that refuses to stay put. The clean look decays into routine corrections you didn’t sign up for.

    This is the visible difference between “looking organized” and “feeling comfortable long-term.” A bracket pressed flush to the wall can shrink the light’s reach, making you rely on backup lamps. A cord routed too loosely starts swinging out, interrupting your sightline with every movement. Every fix—moving a lamp, re-angling the fixture, tuck after tuck of cable—adds low-level distraction. Over time, the setup starts to feel like a series of failed shortcuts, not the simple upgrade you imagined.

    Where Wall Lights Actually Make Sense

    Wall lighting pays off in rooms where ceiling fixtures dominate or desk, shelf, or floor space is tight. Shared home offices, narrow passages, and odd corners near bookshelves or doorways are prime candidates. The best setups use wall-mounts to open the view and keep surfaces flexible. But even in these spots, daily use exposes shortcuts. If the beam doesn’t reach the work edge, dusk means leaning into unlit patches. A shallow bracket stops the light short, leaving the far end of your workspace permanently dim. And any exposed cable—especially across a blank wall—will hijack the look and make the install feel busy, not clear.

    Routine Use: Where Friction Shows Up

    The real tension surfaces in repetition. Notebooks shift, calls start, and you repeatedly avoid the dim edge. You end up relying on clamp lamps pitched just out of the frame. Each time you walk in, the cable is the route your eye traces—never the light. That ‘invisible’ support becomes a permanent variable, interrupting the supposed order. A wall setup chosen for looks alone breaks down as soon as habits meet reality.

    How Support Choices Shape Comfort—Not Just Appearances

    Mounting a light flush for aesthetics can quietly shrink usability. Pulling a fixture too close to the wall will throw the working surface into half-shade, making you hunt for add-ons—a backward step from the first goal of wall mounting. Let a cable snake loosely down the open wall and each day brings more visible friction, with your focus shifting to exposed plastic instead of the surface below. “Minimal” setups that ignore support and cable logic start to require extra work just to hold the illusion.

    True calm comes from support that fits real movement and use—not just a tidy photo. Even a bracket only 10 or 12 centimeters deeper can pull light fully across the desk or reading edge, finally making those areas usable again. Cable channels, conduit that blends to wall color, and thoughtful cable routes—especially behind shelves—cut visual noise before it starts. These are small choices that prevent the entire setup from slipping back into disorder.

    Small Adjustments That Make a Lasting Difference

    Consider a typical snag: a shared workspace with an unlit desk edge that stays stubbornly dim. Swapping a shallow bracket for a deeper one brought the fixture out just far enough to send light where hands, pens, and displays actually go—no backup lamp needed. Redirecting the cord behind a row of bookshelves and hiding it inside a wall-toned channel cleared the sightline. These tweaks didn’t deliver a sudden transformation, but routines stopped grinding. Tasks stopped being interrupted by setup awareness. Lighting worked, and attention moved back to the work surface instead of cable anxiety.

    Practical Cable Management—What Actually Works

    Cable details, if left exposed, don’t just clutter—they can undermine the fixture itself. The most reliable approaches are direct:

    • Paint-matched cord covers: Run the cable inside casing finished to fade against the wall. Visibility drops, attention resets to the lighting, not the wiring.
    • Behind-furniture routing: If shelving lines or bookcases are nearby, route cables hard against, or behind, these blocks. Your major sightlines stay undisturbed.
    • Built-in or surface cable channels: Some wall lights arrive ready-made for integral routing. If not, adhesive cable tracks set the lines where you need—out of view and under control.

    None of these solutions feels ornamental; all require slightly more upfront intent. The difference is immediate: a day-to-day work zone that truly stays clean, not just staged once for a photo.

    The Pattern You Want to Avoid

    Setup regret almost always traces back to shortcuts—fixtures chosen for appearance, not for beam reach or cable path. Once uneven light or a stray cord enters the routine, the whole room starts performing for the wrong reasons: dark zones, harsh spots near monitors, and cords creeping back into view. These aren’t one-off annoyances. They become the new “normal” until your supposed upgrade simply repeats the old desk clutter—in another form.

    What Makes a Wall Light “Liveable” Over Time?

    Everyday support is the test, not first-day neatness. The most workable wall fixtures are the ones where bracket choice, cable management, and beam direction match how you occupy the space:

    • Light coverage reaches all the key surfaces—no shadowy edges, no dead zones under shelves or next to walls
    • Wiring stays out of main sight lines—either hidden or genuinely backgrounded by color and placement
    • Bracket depth is chosen for practical use, not just wall geometry
    • The system stays visually quiet even as you rearrange or add new routines

    The Real Payoff: Lighting That Stops Needing Attention

    Rooms with order that holds up for months—where light and support choices stand up to daily friction—didn’t get there by luck. The difference is design and bracket placement that pre-empt distraction, plus cable management that vanishes in daily experience. The result isn’t showroom perfection, but a background you stop noticing because nothing tugs at your routine anymore.

    If your wall lighting still pulls you into setup tweaks, or you keep fighting small points of glare, cable drift, and uneven light, check the bracket, the beam’s landing zone, and especially how cables shape what you see and do. Those practical changes will outlast any fixture style or finish, and make more difference than two hours spent on décor.

    Find lighting setups, mounting accessories, and support solutions designed to make these changes easier at LightSupport.

  • Why Over-the-Door Storage Fails Without Strong Hinges in Busy Entryways

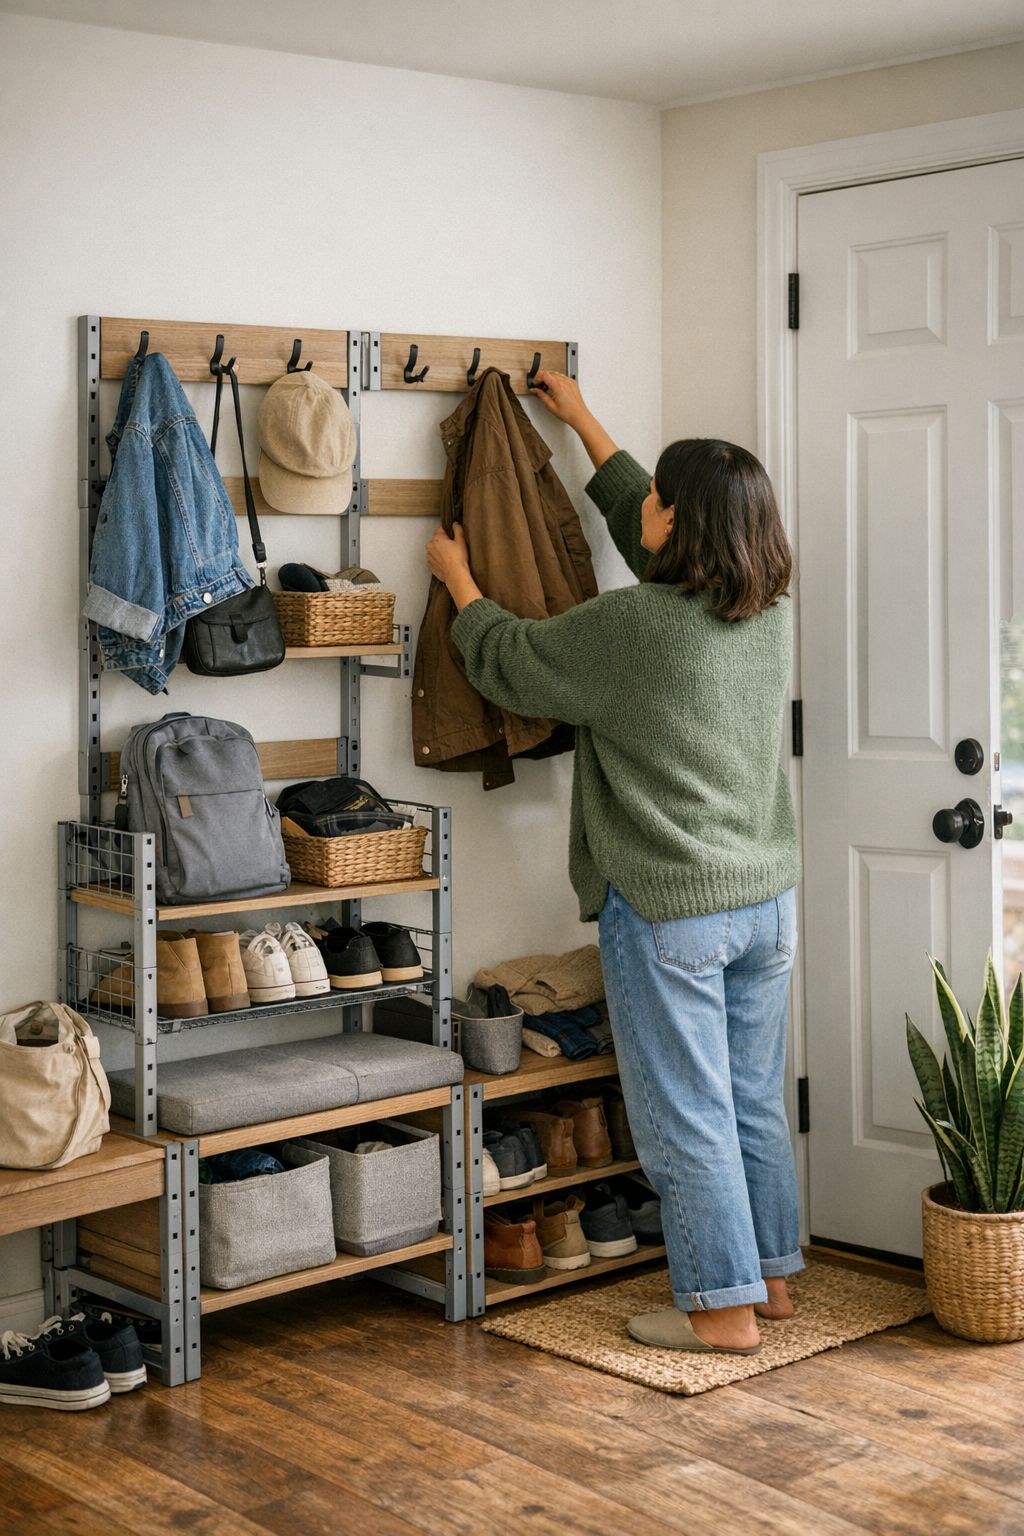
    Hang an organizer over your entryway door and things look handled—until daily use exposes the cracks. Bags start stacking, shoes crowd pockets, and every extra coat adds weight you barely notice until the hinge sags, the door sticks, or the rack slumps sideways. These aren’t just minor annoyances: each pass-through increases the pressure, turning a quick fix into a chronic clog at your most-used threshold.

    Where Over-the-Door Storage Falls Short

    On paper, over-the-door racks promise a slim, vertical answer to chaos. But the load doesn’t stay vertical or tidy for long. The real weak link is the door itself: every backpack and muddy boot you stack hangs off fragile hardware not designed for this shifting weight. Soon, the edges catch, the door scrapes, and racks shift or slip. The zone that once looked clean doubles back into problem mode, often without you seeing it happen.

    Most people discover the failure mid-rush. A child dumps a heavy bag in a stretched pouch, a wet umbrella plugs the far side, and the door jams halfway open. The “quick fix” morphs into constant resets—slide the rack back, unstuck the hinge, gather fallen shoes. Every effort to restore order just adds to the underlying tension. What began as vertical, accessible storage now doubles as a slow-motion breakdown that blocks your entry, spreads bags across the floor, or forces you to adjust the rack every other day.

    Real-World Threshold Friction: The Rapid Breakdown

    Entryways aren’t galleries—they’re collision zones for gear, shoes, and daily returns. Real use means rushed exits and hurried drop-offs: two bags trade places with slippers, lunch boxes and mail mix in the same pocket. An over-the-door rack absorbs all that, but with each load shift, the moving door gets heavier, less stable, and more likely to warp or jam. You notice it in stiff swings or a door that suddenly never closes flush. Over weeks, hardware loosens, fabric stretches, and the limited floor space beneath the rack fills with overflow that edges back into your pathway.

    Unlike wall hooks or a stable bench, these racks force you into a loop of quick drops, immediate errors, and awkward resets. Shoes slide out after a rushed swing; bags droop lower as slots stretch beyond spec. The “organized” look survives a day or two before you’re shuffling bags off the threshold, picking up dropped sneakers, or nudging a jammed door while heading out. The more you use it, the more it interrupts the exact flow it’s supposed to support.

    Why Hardware Fatigue Often Wins

    Entry doors swing open and shut hundreds of times a week—enough for even a few extra pounds to do damage. Heavy racks weigh on hinges that aren’t built for it; every layer of gear amplifies how much stress gets transferred to screws, pins, and joints. Creaky movement, doors that hang off-axis, or the need to pull hard just to get in signal that something’s gone wrong already. Cold, wet seasons—fresh with boots and dripping coats—only accelerate this wear. Shared spaces and older doors show these breakdowns fastest: racks walk down the door, screws loosen, and before long, you’re trying to unjam an overloaded threshold just to walk in with groceries.

    Once the rack starts to slip or tilt, access shrinks, bags catch on the frame, and daily use means constant correction. The repair cycle—readjust, retighten, pick shoes off the floor—becomes part of your routine, not a rare fix. That’s not a storage solution; it’s a source of ongoing friction occupying your main in-and-out lane.

    Comparing Lifespans: Over-the-Door vs. Anchored Storage

    When you compare the aging curve, anchored setups win. Wall hooks, slim cabinets, or utility benches ground the load—bags and shoes get their place, but the door stays unburdened. Resetting is faster, with items going straight to their proper zone instead of dangling and drifting. If guests arrive, if winter gear takes over, or if kids start leaving sports bags daily, the wall absorbs the chaos, not your main passageway.

    Anchored storage isn’t just neater; it keeps movement through the entry clear and cuts the reset process down. Shoes slide under a bench without clogging the path. A wall-mounted rack absorbs bags without pulling on moving parts. When the layout shifts—more gear, surprise weather, weekend visitors—the fix holds, and the domino effect of pileups and repairs never gets rolling. You go from rerouting every return to a threshold that invites gear drop-off without betraying you an hour later.

    Reality in Motion: Resetting vs. Reshuffling

    Real mornings pile on small interruptions: shoes dropped where the row ends, bags half returned, a backup of umbrellas left swinging in the way. With an overloaded door rack, a simple return—like stashing a single scarf—means finding a free slot, untangling something, or pausing to jostle pockets back into line. The more gear, the less stable everything feels—and the more likely you are to drop items back onto the floor “just for now.” That “for now” quickly becomes a new normal of blocked passage, with clutter creeping from the door to the surrounding floor.

    Switching to a wall anchor or slim cabinet changes the pattern. Drop-offs become direct: shoes go under the bench, bags slide onto a hook, and nothing’s dangling in the way. Resetting takes seconds, not a series of nudges and corrections. The flow between dropping gear and moving on feels natural, reducing the daily buildup of friction and making the pileup at the threshold a problem of the past.

    Small Tweaks for Stronger Entryways

    Try these realistic changes to cut down on threshold chaos:

    • Stop loading the moving door. Wall-mounted racks, sturdy hooks, or a compact cabinet near the entry shift bags and boots onto solid structure, keeping walkways open and hardware stress-free.
    • Reserve over-the-door storage for light, low-friction items. Scarves and hats won’t warp a door, but backpacks, boots, or sports gear will shorten hardware life and turn resets into repairs.
    • Watch for early warning signals. A sticking latch, a door that hangs wider, racks slipping lower—use these as cues to rework placement before a small issue blocks your only path in or out.
    • Make returns frictionless. The easier it is to drop off shoes or bags in their place, the less likely piles will settle by the door. This keeps your pathway open for real movement, not storage overflow.

    Structure Over Surface: Lasting Setup Wins

    The best entryway isn’t the tidiest at first glance but the one that holds up under repeated, busy use. Durable setups—like anchored benches, wall-mounted shelves, and vertical cabinets—make movement easier and clear buffer space for drop-offs and pickups in real motion, not just on organizing day. Surface neatness fades fast if it’s packed into a moving part; true order comes from choosing layouts that leave the routine unblocked and shrug off both daily gear and the next reset.

    The goal isn’t just order—it’s a threshold that absorbs chaos and bounces back, day in and day out.

    http://www.betweenry.myshopify.com

  • Choosing Between Wire Shelf Baskets and Solid Bins for Pantry Organization

    A pantry shelf rarely fails on day one. It unravels on busy mornings when you’re reaching blindly for breakfast bars, or on grocery day, when new snacks force old ones deeper into the shadows. A shelf system that looks sharp after a weekend reset quickly shows its cracks as real life drags baskets and bins out of order—fast. It’s not just about starting organized; it’s about whether your setup survives the third restock, the daily grab-and-go, the inevitable snack raid when nobody wants to cook.

    Wire Baskets vs. Solid Bins: Holding Up Under Daily Pressure

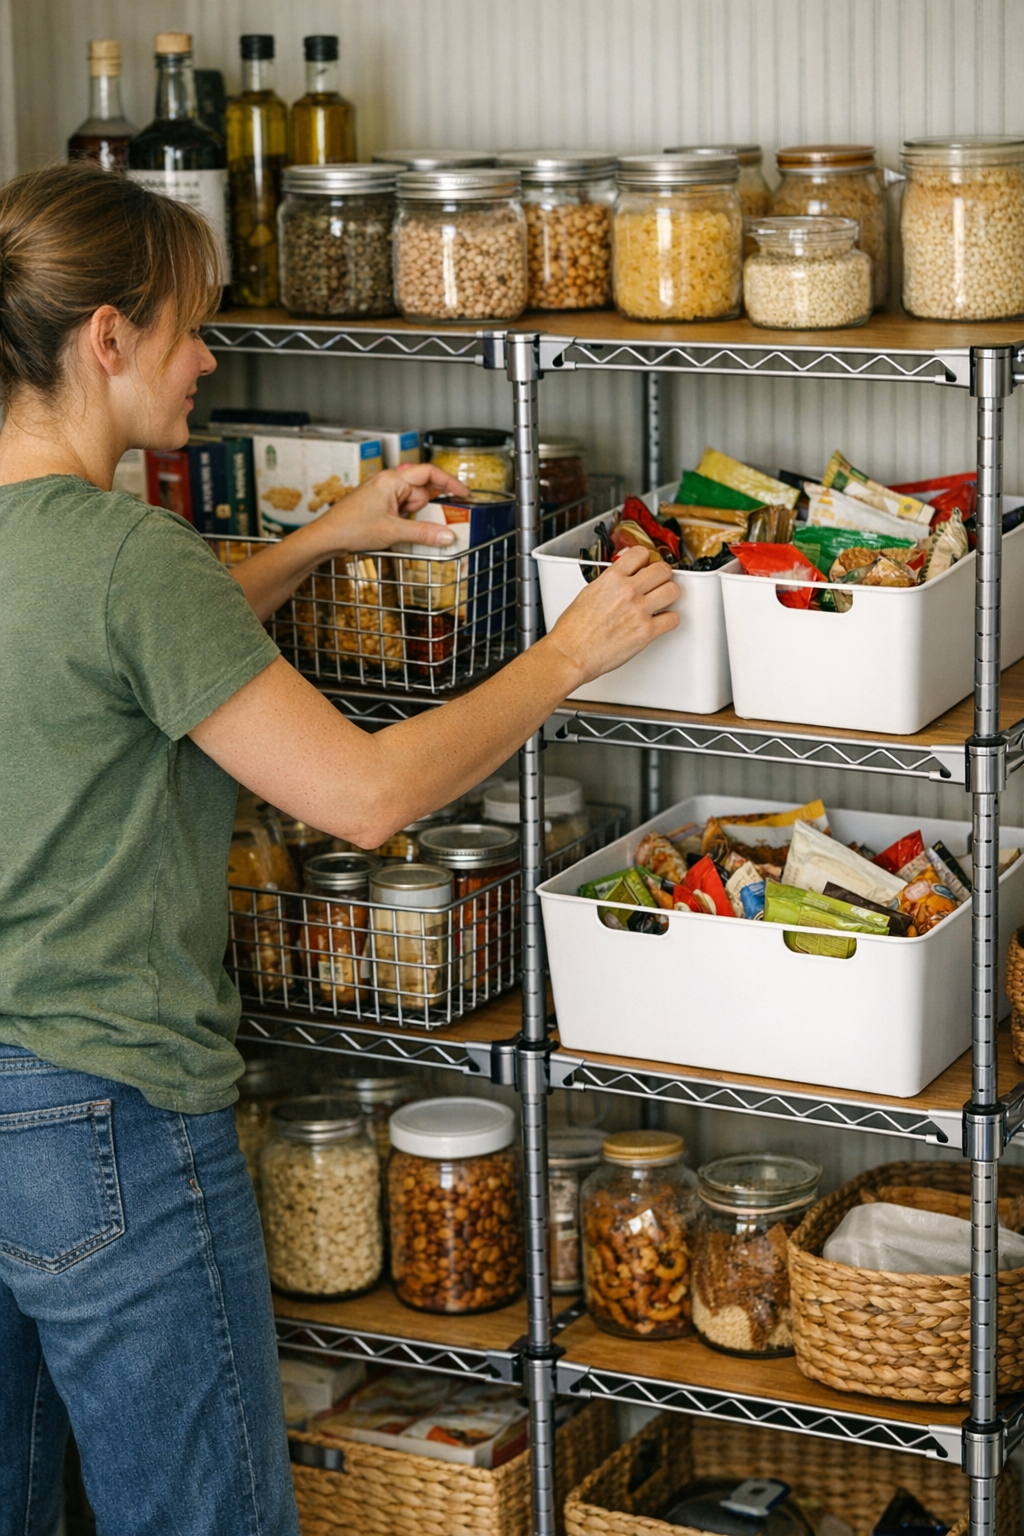
    At first glance, wire shelf baskets and solid bins both offer promise. Wire baskets seem perfect for keeping cans and tall packages upright and visible. Solid bins, by contrast, promise to corral the flood of snack bags and small packets that would otherwise drift everywhere.

    But the friction starts almost immediately—

    • Wire baskets put everything on display, but loose packets slip through gaps or tip sideways, falling into a puddle at the bottom or even onto the floor.
    • Solid bins trap the chaos, but quickly become a mixed bag of forgotten food—old snacks hiding under newer ones, with no easy way to see what you have without digging.

    That promise of neatly drawn lines and controlled categories fades as soon as family routines hit. By midweek, containers meant to bring order end up reshuffled, overloaded, or hiding more than they reveal.

    Where Storage Fights Back: The Subtle Ways Shelves Undermine You

    The surprises pile up. You reach for rice, but end up shifting three cereal boxes aside. You hunt for fruit snacks, only to find the pouch slipped through the basket wire and disappeared behind the pasta. Solid bins, meant to prevent these escapes, turn into a hiding place where a single lost tortilla or energy bar resurfaces weeks later—if at all.

    Resets don’t last unless the container matches the contents: The urge to just toss stray packets in wherever there’s room creates disguised clutter—a bag sticking out above a bin lid, overflow snacks lined up in front, a row so tightly packed you can’t see what’s behind. Overstuffed bins turn category clarity into a guessing game. Before you realize, a five-minute shelf reset becomes a frustrating ordeal of pulling out entire drawers just to find Tuesday’s lunch snacks.

    The Real Signs of a Failing Storage Setup

    You can spot the failures by late in the week:

    • Shelves still look neat from a distance, but actually grabbing what you need takes two, three, even four steps or shuffles.
    • Overflow starts to stack up at the edges—loose chip bags perched on top of bins, rarely used items stuffed into corners “just for now.”
    • What was supposed to help you move quickly now slows you down. Each reset reveals new “surprises” buried since the last one.

    This isn’t just a problem for pantries. It’s laundry shelves packed so tight you need to move detergent to get to the dryer sheets, or closet baskets where folded shirts sprawl into piles after a few pulls. The false calm of an organized shelf only lasts as long as your routine doesn’t test it.

    Making a System That Survives Real Life

    The solution isn’t more containers—it’s the right container, with a clear purpose, in the right spot. The sweet spot? Combining wire baskets and solid bins, but giving each a strict job:

    • Wire baskets for sturdy, upright packages—things that stand on their own and don’t slip through cracks. Group by type: cans together, cereal together, baking goods on their own shelf.
    • Solid bins for loose, small items that otherwise scatter or collapse. Assign each bin a single category and resist the temptation to mix. The snack bin holds only snacks. If it stops fitting, snacks go elsewhere—not jammed in and forgotten.

    This isn’t about matching a magazine photo. It’s practical: categories stay obvious, items remain visible, and putting away groceries—especially for someone who isn’t you—becomes a no-thinking routine instead of a guessing game.

    When Mixed Storage Actually Works

    After a few weeks, the upgrade is clear. No more grabbing a bin and finding last month’s lunch bars at the bottom; no more watching half your snack supply migrate behind the baskets. The shelf edge still looks straight, but the real win is inside: you reach for something, and it’s right where it should be. Resets happen fast because you’re not re-sorting a lost-and-found—just putting each thing back in a spot that still makes sense.

    Small rules make big impact: Don’t let any container overflow. Leave enough room to see everything at a glance. If you start stacking bags on top or in front, it’s time to thin out or split the category. The difference in speed and clarity piles up, week after week.

    Adaptable Shelves, Everyday Routines

    Pantry friction reveals a wider lesson: Your shelf setup only works if it stands up to your actual habits. Bins and baskets are tools, not magic. What matters is how clearly they serve a single role, how easy it is to return something without thinking, and whether you can tell—within seconds—what’s missing or about to run out.

    Check back in on your setup a few weeks after resetting it—not for the staged look, but for honest traffic patterns and growing piles. The best containers are the ones your routine doesn’t defeat.

    Discover storage solutions that work with your routine—not against it—at ClosetWorks.

  • Streamlining Cat Care: Practical Tips to Reduce Daily Routine Friction

    Calm Pets, Everyday Friction: What Actually Gets in the Way of Daily Care?

    The reality of pet care isn’t the rare mess or the nervous pet—it’s the grind of small hold-ups that undercut every routine. Even with a calm, easygoing dog or quietly settled cat, the core friction isn’t about big failures. It’s the moment when you reach to wipe a bowl and realize the cleaning cloth is missing, or you bend down to refill water and run into a block of clutter, turning a basic task into another round of shuffling. In homes that look organized, these “almost fixed” setups keep tripping daily care, quietly stretching two-minute resets into long, scattered chores. This is the difference CalmPetSupply addresses: not with decorative solutions, but by reading real daily patterns and removing friction at the start.

    Where Calm Hides Setup Mistakes

    A relaxed pet will sit patiently as you kneel in front of the feeding area, but that patience often conceals the gaps in your setup. The bowl seems clean, but you spot a coffee mug parked in its space. The brush is almost always there—except when it isn’t, and the memory of leaving it by the couch flashes only as your hand lands on an empty spot. Routine feels calm, but at the exact moment you need a tool, the setup fails to follow suit.

    Instead of crisis, these are the small slip-ups that stall the day. “The supplies are here!”—yes, but the cloth is a room away, so the wiping waits. The towel is somewhere “obvious,” if that means somewhere you’re not. As the pet’s behavior stays smooth, your own routine takes the hit, bogged down by small but repeated roadblocks.

    Real Scenes: Small Delays, Bigger Drag

    • Mealtime Reset: You feed the pet, want to clean the bowl, and—no cloth. It’s with the laundry, so cleaning is skipped. Next time, you’re scraping dried kibble off the rim, spending longer than you meant and feeling one more thing left half-done.
    • Water Refill Interruptions: The bowl’s almost dry, but the refill bottle is behind stacks of cleaning products. A quick task becomes a shuffle through a cupboard, a spill, a sigh, and more minutes lost—all for what should have been a clean, fast refill.
    • Grooming Tool Shuffle: Brushing before bed gets paused—again. The brush isn’t by the rest station but tucked near the sofa from last night’s quick touch-up. You skip it, reminding yourself to look tomorrow, already picturing the fur that will collect by morning.

    The Hidden Cost: Routine Friction Accumulates

    Each abandoned reset and every mislaid tool compounds—energy drops, jobs pile, and “neat enough” turns to unworkable. Morning order masks the slow build of dried food on bowl edges and crumbs under mats. The kit that was “easy to grab” ends up buried after three days of not returning it to the right place. Calm pets keep the mood steady, but under the surface, you’re retracing steps, undoing tangled routines, and feeling every shortcut boomerang later in the week.

    These broken setups don’t blow up—they drag on. Minutes melt away repeating actions: shifting bowls, wiping after the fact, hunting for a cloth instead of just using it. Over the course of a week, what started as “fine” becomes a low-level frustration that makes pet care heavier than it should be.

    Function or Visuals: What Matters in Routine Ease?

    A space can look organized while making every reset harder. Bowls stacked neatly in a crate impress guests, but now you unstack and restack for one quick cleaning, slowing down the whole process. Cloths stashed in deep drawers vanish in the moment they’re needed. Everything appears under control, but the smooth routine you want stays just out of reach. New setups might feel like an improvement for a few days, but when the week grinds on, the friction returns—often stronger, now harder to ignore.

    A Simple Fix: Closing the Loop on Small Delays

    The fastest wins in pet care come from making key items unmissable at the moment you need them. Hanging a towel hook right inside the food cabinet means any bowl wipe is a zero-effort step—not a side quest. You’re not scheduling cleaning, just doing it on the fly, avoiding buildup and streamlining resets. When bowls, refill bottles, wipes, and brushes each have their own spot, the slow trickle of missed spots and setup drag finally lets up.

    This isn’t about making routines perfect—just smooth enough that friction falls away. The setup stays in sync with how the day actually unfolds, instead of demanding you double back or stretch out tasks you’d rather finish fast.

    Observing Friction in Your Routine

    Notice where your own flow breaks down, not just where clutter builds. Where are you repeatedly searching or delaying resets? If wipes drift out of zone, or grooming brushes never land where you use them, the cool surface order is hiding hidden drag. The early warning isn’t mess—it’s one too many small trips, one too many hunt-and-retrieve pauses, and one too many jobs that wait until later because a tool’s just out of reach.

    The Difference Between Tidy and Easy-To-Use

    A calm pet makes the house feel easier. But the real test is what happens when energy drops and schedules compress. Does your setup bend with you—or break? True function isn’t about hiding items or keeping appearances, it’s about trimming every wasted step from the routine: tools in reach, cleanups fast, no doubling back, no missed basics recirculating every day. The shift happens not with a big redesign, but when what you need is right there, ready for another round.

    When reset friction drops, the real calm isn’t just in your pet’s posture—it’s in the way your own day keeps moving, clutter recedes, and resets no longer feel like interruptions you dread or delay.

    Explore tools and tips for easier pet care routines at CalmPetSupply.

  • Why Your Carry-On Setup Fails During Unpredictable Travel Moments

    A carry-on bag that looks meticulously organized at home often fails when it hits real airport flow. The moment you hit security trays, boarding queues, or document checkpoints, those tidy pouch grids and stacked cubes become a test—can you actually get your hands on what you need, fast? That “ready” feeling in your living room dissolves the first time you reach for a passport and hit a wall of overlapping pouches, or unzip for a charger only to spill half a snack bag. Travel doesn’t reward good packing form; it exposes the difference between setup that only looks orderly and a carry-on that slides through repeated reach, retrieval, and repack without friction. When every airport movement is a countdown—tray moving, line pressing, plane filling—finding the right item without stalling matters more than arranging it perfectly.

    The Unseen Friction of a ‘Visually Ready’ Bag

    Visual order is a setup you see, not a system that moves with you. At home, color-coded organizers, stackable tech sleeves, and slim wallets seem travel-proof—until a sudden document check or revised gate number shoves your planned sequence out of order. Instead of a quick handoff, you’re rooting for a boarding pass but landing on a power bank, or peeling up snack sleeves stuck over your passport. Every checkpoint, boarding call, or seat entry repeats this friction—tiny roadblocks that add up. What you thought was efficient at the start morphs into a menu of delays: more stops, more digging, more public repacking, with each loop making order harder to maintain.

    When ‘Organized’ Backfires Mid-Trip

    Failure signals show up immediately—not after hours, but on the first round of airport movement. At TSA, your liquid pouch is trapped underneath headphones and a tangled charger. In the boarding line, impatience builds as you hold things up, shuffling notebooks to reach your ID. By the second or third access cycle, the bag that impressed you at home becomes a cluttered guessing game, where retrieving a simple document means fidgeting through layers, blocking the flow behind you, and messing up your system further with each rushed repack. The pattern is clear: when every retrieval creates more disorder, the setup loses its promise of control.

    How Compartment Overlap Turns Into a Bottleneck

    Packed-in multitasking pockets easily create roadblocks in action. Nest a document sleeve under a tech pouch and you’ll pay for it the first time your ID is called and everything slides out at once. Share an “essentials” pocket between snacks, cables, and receipts, and you’ve set up the next spill during a fast check. The real-world effect isn’t theoretical—it’s a loop of micro-stalls:

    • Wrong pouch, wrong moment: You open two or three before hitting the one you need—contents exposed, order lost.
    • Transit shift: Cables and chargers shift, blocking zipper paths and jamming up quick access points.
    • Out-of-sequence return: After two live cycles, your “organized” layout breaks down—key items drift out of position while less-used pouches migrate to the top.

    The result is not just hassle—it’s repeated slowdowns at every choke point, from lining up for security to dropping your bag under the seat, with each interruption building on the last.

    Scenes from Real Airport Movement

    Security Tray Transfer: Where Setup Weakness Shows Up

    At security, the test is brutal and public. If your liquids kit is buried under backup pouches or tangled in tech cords, you’re forced to unpack in the moving tray, fumbling with layers as the bins stack up and travelers behind you get impatient. Every extra reach or rearrange exposes a weak packing link—what worked for a flight checklist can unravel in seconds under airport pressure.

    Gate Change Scramble: Access Can’t Be Optional

    Repacked after document checks, bag zipped—new gate announced. Standing up, you face a time squeeze and realize that the accessible pocket for your boarding pass is blocked by a cosmetic bag or tech pouch that slipped out of line. The clean packing logic that made sense in your living room now clogs the works the moment the travel routine becomes urgent.

    Seat Entry and Overhead Bin: The Quick-Access Mirage

    As you squeeze into a tight seat, your bag snags on the aisle. The so-called “quick access” pouch can’t unzip without spreading half its contents on your lap or the floor. If a cable crosses the entry point, you end up forcing the zipper, bending your charger, or closing up with loose items. Neatness returns after repacking, but the underlying layout keeps fighting against fluid movement, and every return to the compartment demands another fumble.

    Why the Same Traps Keep Returning

    Organizers help—until each access forces a reshuffle. Stack cubes or use dividers, and you’ll still find yourself shifting gear just to reach one commonly used item. What starts as control ends up as chore: a repeated cycle of pause, shuffle, and rebuild. With each brief stop—security, snack break, inflight battery hunt—your organization resets visually but gets messier to use, pointing out that the system wasn’t built for actual access. Frustration surfaces not during packing at home, but at the third, fourth, or fifth reach when you stop caring about neatness and start wishing the right item would just land in your hand.

    Travel exposes what a static setup can’t handle: repeated, uneven access under real-time pressure, loose order that crumbles with real use, and a layout that slows down every checkpoint instead of clearing the way.

    Resetting Your Setup for Repeated Reach

    Every Item Needs Its Place—For a Reason

    The only layouts that hold up in the field are ones built on purpose, not appearance. Travelers who separate tech gear, documents, and essentials into truly dedicated, consistently placed sections find their setup holds under pressure. One outer pocket assigned for documents will do more to speed your airport time than any catchall space that claims to handle everything. Set a predictable spot for each core cycle—no improvising, no last-minute cram. This stops the overlap and makes each return fast and reliable, not just neat at rest.

    Split your setup with use in mind: one defined location each for documents, tech, and small on-the-move extras. Build a packing habit around these repeated access points—a quick boarding pass pull, a security tray liquid check, a charger grab that never blocks your passport. Every time you return something mid-movement, it lands back in the same place—no second guessing, no reshuffle.

    Packing for Real-World Flow, Not Just Good Looks

    The setups that survive aren’t just compact—they’re the ones you can reset blind after a rushed check. This means straight zipper access for boarding passes, tech cables routed far from crucial documents, and the discipline to quarantine essentials instead of mixing “convenient” with “urgent.” A carry-on that works is one you can enter and exit over and over during a normal trip without a cascade of mess, pause, or lost time. The difference is not only visual—it’s the freedom to move through trays, gates, and aisles without your bag tripping you up.

    When Setup Improvement Makes the Real Difference

    Airport movement isn’t about getting it right once. It’s about reliability under repeat, often unpredictable, pressure. A good setup won’t solve every inconvenience, but it limits the points where you get stalled—removing backup at security bins, fumbles at boarding, or aisle crowding during repacking. Each smoother retrieval isn’t just a time saver—it’s the difference between steady progress and a trip punctuated by needless slowdowns and tension points. In practice, the only carry-on that works is the one you reach into—over and over—without it ever reminding you where it went wrong.

    If you’re ready to reset your routine for real movement—not just visual order—find carry-on solutions built for access, not just appearance, at CarryOnSupply.