Author: jaesoon_admin

  • How Thoughtful Pet Travel Setup Eliminates Repeated Doorway Delays

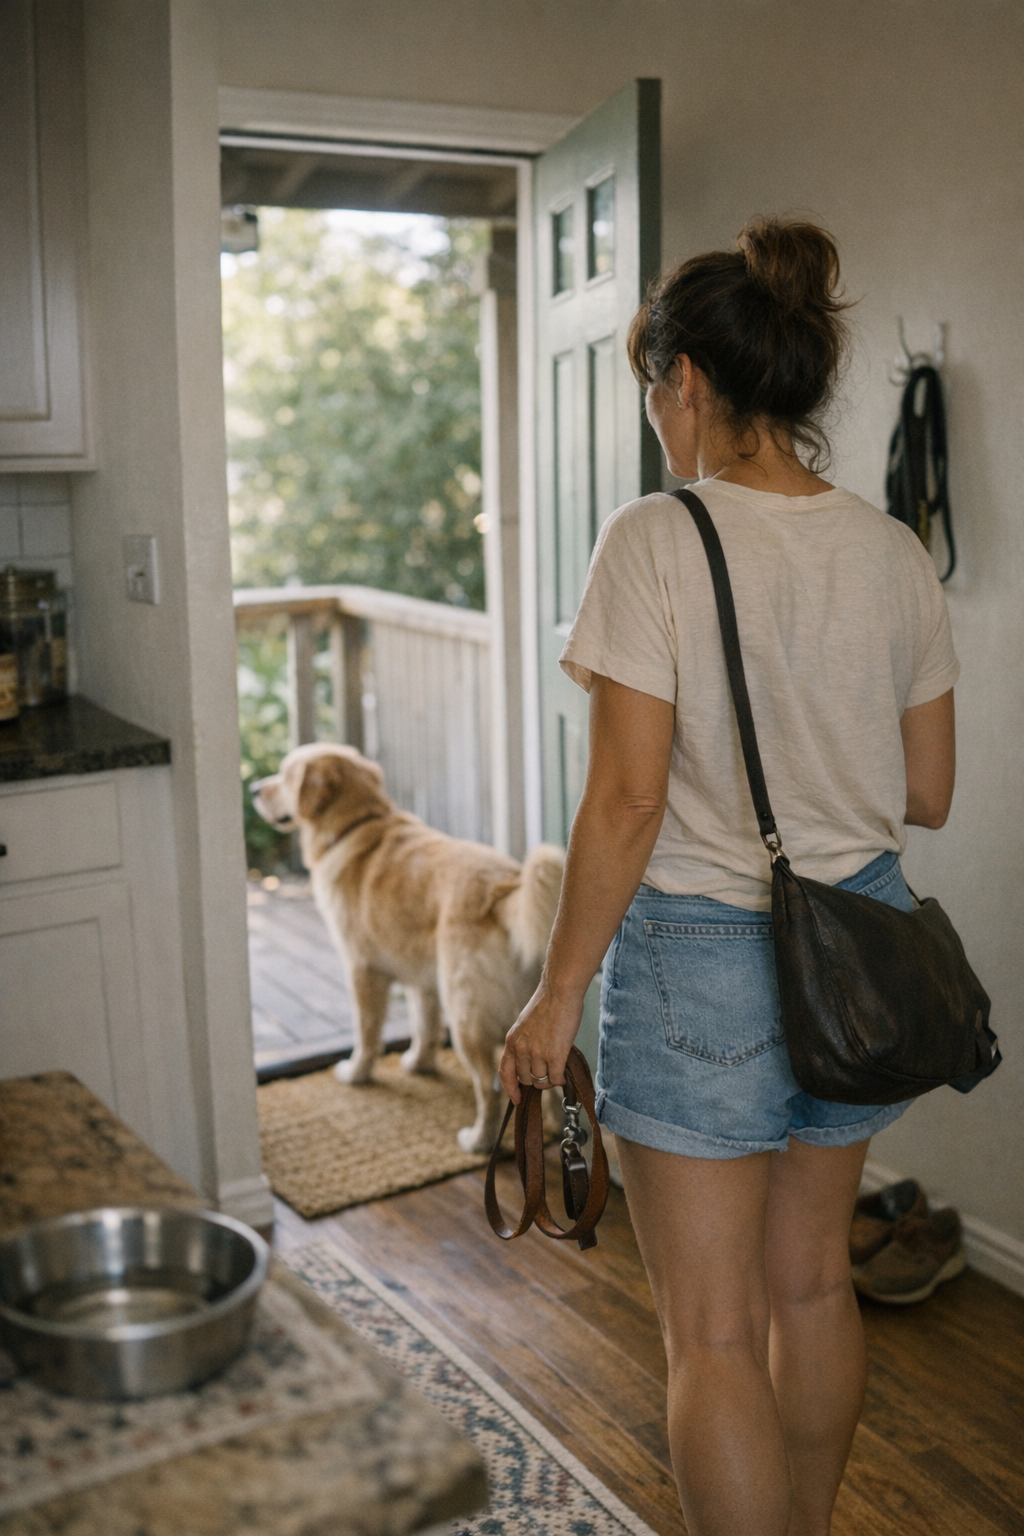
    A pet-travel setup that looks perfect at departure can unravel within a single stop. The carrier’s zipped, the leash is ready, wipes and bowls are packed—yet after the first quick errand or rest break, the same neat system becomes a source of slow, repeated interruptions. Each time you stop: you reach for wipes but find them buried; the leash pulls free with a tangle; comfort gear meant to soothe your pet now blocks the bowl you suddenly need. These aren’t catastrophic failures, but enough tiny delays stack up, quietly wearing out both your patience and your pet’s. What started as organized prep turns into a cycle of awkward reshuffling, especially when your trip isn’t just point A to B but a string of pauses, entries, and fast restarts. PawGoTravel’s world stands directly in this gap—where carried “order” collides with seat-side, repeat-movement friction.

    The Surprising Gap Between “Looks Ready” and “Works Quickly”

    Your gear might look “set”: a carrier waits by the door, water bowls are stacked, wipes tucked in, leash carefully clipped. Pause after pause, however, the reality breaks through. By stop two or three, you’re shuffling for the leash but end up gripping a blanket, or you flip open a pocket to hunt for wipes you thought would be easy to grab. Bowls slide under a comfort toy, or a clip hooks onto something else mid-movement. The problem isn’t laziness—it’s the difference between organizing for show and structuring for fast, repeated access. Real use always exposes the mismatch.

    The Invisible Cost of Repeated Tiny Delays

    Every time you’re forced to hesitate—door open, pet waiting, hands hunting—another layer of friction gets added to your trip. These aren’t just one-off annoyances. They multiply across stops, gradually making the travel feel burdensome, even if you can’t point to any single disaster. That “ready” feeling drains away. By the third or fourth stop, delays and small tangles interrupt not just the flow but also your focus on your pet’s comfort and your own rhythm.

    How Travel Patterns Expose Setup Weak Points

    These setup failures show up most obviously in repeated-use conditions—errand runs, multi-leg car rides, or those hotel check-ins after hours on the road. The worst friction isn’t dramatic; it’s that scene where you open the carrier, reach for wipes, and discover they’re wedged behind a folded blanket. Or your pet’s water bowl—meant for a fast drink—now requires pulling out half the gear just to reach it. The cleanup, the bowl access, the leash grab: all become slower and more frustrating with each repetition. There’s always one item out of sequence, one pocket buried, one section blocking another, so every re-entry to the car (or pause at a rest area) needs a quick, tedious reshuffle.

    Micro-Scenes That Stack Up

    • Hunting for wipes through layered pouches while your dog pulls at the harness.
    • Untangling a leash from a bowl handle at every single exit.
    • Digging past a comfort blanket you used “just once” but now blocks half your gear.
    • Your pet is ready to move, but you’re left fiddling with the travel setup yet again.

    Individually, these are minor. On a whole trip, they stitch together into a pattern of drag and delay—quiet but persistent reminders that looking organized isn’t enough.

    Why “Organized” Isn’t the Same as “Accessible”

    Most pet owners believe tidiness equals efficiency: everything stacked with intention, all pockets filled. The actual limit appears the moment things are no longer as packed—but actively used. After stop one, the wipes get pressed to the bottom, the leash ends up threaded through the water bowl handle, and the bottle you placed just “right” now needs extra steps to retrieve. With every new stop, the structure falls more out of sync with your movement pattern. The issue isn’t forgetting gear, but a setup that forces extra steps each time you reach, reset, or try to keep your pet calm while digging for the right item.

    Repeated-Use Scenarios That Challenge the Setup

    • First stop: wipes, leash, and bowl present just as packed—invisible friction begins.
    • Second stop: wipes drift below a comfort layer, leash slips behind another section, bowl buried deeper than planned.
    • Third stop: visually, everything’s still “together,” but grabbing a single item is noticeably slower, and the irritation increases. You adjust—sort of—but the pauses accumulate.

    By the last leg, the original neatness is an illusion. The real weak link isn’t what you brought, it’s how your setup fights your actual stop-and-go routine. Each slow pocket or blocked item is a quiet penalty, paid in repeated movement and focus.

    Real-World Adjustments: Small Changes, Big Relief

    The most powerful upgrade isn’t more pet travel gear—it’s persistent, friction-free access in real motion. Experienced travelers spot the real trigger point: assign every high-use item its own always-accessible spot, with no exceptions for “symmetry” or initial aesthetics.

    • Wipes get an uncovered outer pocket—never shared, always reachable as soon as you open the carrier or reach in from a car seat.
    • Leash lives on a clip that remains exposed and untangled, allowing you to grab and go with one hand while managing your pet with the other.
    • Bowl sits in a compartment that’s never under a comfort toy or your own gear, even if the setup looks less streamlined from the outside.

    One owner’s routine—moving wipes from beneath two layers to a plain outer pocket—shaved every stop’s delay from fifteen seconds to five. Not a huge change once, but a total transformation after several stops, turning unpredictable hunting into almost automatic movement. The difference shows every time you re-enter the car or pause at a stop: the trip keeps moving, instead of resetting your patience from scratch.

    Recognizing the Hidden Signs of Setup Friction

    Notice yourself digging, sliding, or unclipping the same things again and again? That’s not a harmless quirk. It’s structural constraint creating repeat interruption. If your gear looks clean but always requires unclipping a pouch or bypassing the same folded blanket for wipes, the setup is adding predictable slowdown. The true sign isn’t a dramatic snag—it’s the repeated shuffle and the quiet dread of knowing you’ll need to pause (again) for the same fix.

    Practical Steps for Smoother Pet Travel Movement

    To adjust for real repeated use, focus on:

    • One-item-per-pocket, visible layout: No stacked or double-layered spaces for essentials like wipes, leash, or bowl. Every grab should be possible with one move.
    • Single-hand, standing access: Can you get the core items with the carrier on your car seat or while parked, without unzipping half the bag? If not, that’s your friction point.
    • Test after movement, not just at home: Check your setup’s weakest pocket or section after two or three routine stops. Wherever you slow down or hesitate—that’s exactly the place worth redesigning.

    The best travel layout stays out of your way. The right structure isn’t what looks pristine at the start, but what lets you restart movement after each stop with zero mental or physical drag. Over weeks of errands or a full road trip, these micro-adjustments add real calm and consistency—without the constant “fix” that most setups demand.

    Lasting Improvements Come from Everyday Use

    The real shift happens when you stop arranging just for departure and start mapping your gear to your travel rhythm—pausing, reaching, restarting, repeating—across real conditions. The perfect setup isn’t about filling every pocket or getting a showroom look; it’s about anticipating where friction creeps up and neutralizing it before it stacks into your routine. Each trip is smoother not because you packed more, but because your carrier or bag now fits the way you and your pet actually move—leaving you with fewer slowdowns, cleaner re-entries, and a travel experience that doesn’t need constant, fussy correction.

    For practical, ready-to-adjust pet travel gear that fits repeated use—rather than just the start of the trip—visit PawGoTravel.
  • Choosing Indoor Bulbs That Prevent Heat Build-Up in Small Spaces

    Most indoor lighting issues aren’t about brightness—they’re about what accumulates after the lights have been on for a while. In real bathrooms, hallways, utility corners, or stairwells, a fixture that seemed perfect at install starts to reveal its edge: the mirror fogs before anyone showers, air in passageways grows dense after just a few crossings, or the bathroom vanity feels sticky before you even finish your routine. These aren’t quirks—they’re signals that the bulb’s heat output is quietly working against you, quietly layering discomfort into spaces designed for movement and clarity. Replace “well-lit” with “mildly oppressive” and the difference in daily function is anything but subtle. In rooms meant for repeated, purposeful use, bulb-generated heat is often what makes the difference between a fixture that blends in and a setup you quietly try to avoid.

    Why Bulb Heat Is an Invisible Friction Point

    Bulb heat doesn’t announce itself during installation. A new flush mount, semi-flush, or wall sconce often looks right and covers the space—until routines press in. It’s easy to glance at wattage, color temperature, or fixture style and assume the job is done. But in confined spots—small bathrooms with sealed doors, laundry nooks boxed in, low-ceilinged hallways—every hour of bulb time leaves its mark. Incandescent and halogen bulbs trade some of their inviting warmth for a slow-release heat load. In rooms with nowhere for warm air to go, that’s the crack in the armor: surfaces capture and radiate heat, condensation forms earlier, and what started as a clear, lit space now drags at every pause or passage.

    Everyday Friction: How Overheated Fixtures Disrupt Flow

    The Corridor That Becomes a Gauntlet

    Picture a hallway just wide enough to pass through, fixed with flush ceiling lights or close wall sconces. For the first few passes, the lighting seems to work: floor is lit, shadows are pushed out. But by mid-afternoon or evening, each walkthrough brings a weight—literal heat hanging in the corridor. You start speeding up to avoid the overhead warmth, or simply avoid the route altogether. The space has light, but loses its ease of movement. The wrong bulb turns a clear path into a spot you dodge.

    Mirror Clarity Breaking Down Before the Steam

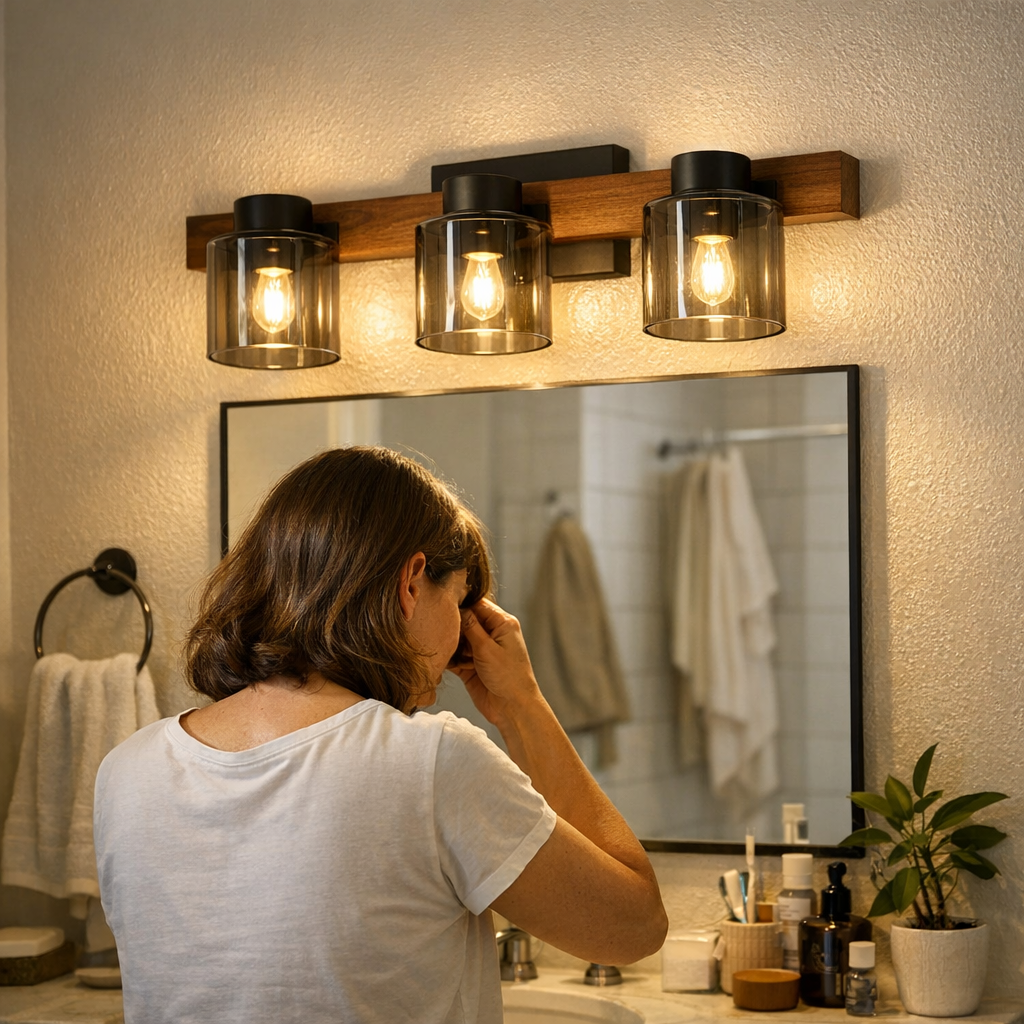
    At the bathroom vanity, a flush mount lights the glass well—at least early on. But after a couple of grooming routines, you notice it: fog at the edge of the mirror, well before any steam. The air above the counter grows restrictive. It’s not mechanical failure, ventilation, or humidity from a shower; it’s bulb heat pooling over the glass, setting off the fog before the water even runs.

    Laundry and Utility: The Chore Zone Turns Heavy

    Inside a laundry room with low airflow and a semi-flush ceiling light, the effect feels cumulative. Each cycle with the light on builds up warmth until the walls themselves seem to clamp down. Folding feels stuffier, ventilation acts too slowly, and even short tasks start to tire you out. The brightness is there. The room is “usable.” But the experience becomes quietly strained—another case of heat, not just light, making chores harder.

    How Low-Heat Bulbs Change the Routine’s Texture

    LED and compact fluorescent bulbs cut the cycle of collected heat, making rooms feel usable no matter how often the switch flips.

    LEDs in particular release only a sliver of the heat produced by old-style bulbs. This single choice keeps the ceiling, wall, and air around fixtures from sliding into stuffiness—so morning prep, laundry rounds, or stair crossings feel ordinary, not like battling a dense zone in your own house. It’s a change that often goes unnoticed in the moment but means, a week later, surfaces remain neutral and movement feels as easy at hour five as it did at minute one.

    Spotting the Absence of Irritation After Switching

    Swap a standard 60-watt incandescent for an LED over a stair landing and see what’s missing: that hotspot you once dodged on every busy evening. Now, crossing floors doesn’t require a quick escape. Illumination stays steady, but the creeping warmth that used to stake out the top stair is simply gone—visibility remains high without creating new obstacles.

    Task Areas: When Heat No Longer Lingers

    At the mirror or the laundry counter, eliminating bulb heat means less edge-fog, fewer mirror wipes, and no sense of invisible exhaustion at the end of use. Instead of light making the space slightly more difficult—to see, to pause, to use—you get routines that finish as cleanly as they start.

    Quick Diagnosis: Is Heat Your Real Lighting Problem?

    Do this: after your fixture’s been on for a while, carefully touch near (not directly on) the mount. If you feel warmth radiating, or if stuffiness builds up in tight spaces faster than expected, the bulb is likely overloading the room with heat. Common signals:

    • Mirror edges fog or streak before the bathroom steams up
    • Hallway or stairwell air starts to press in after a few crossings
    • Rooms need long, awkward cooling after you shut the light off

    These issues surface fastest in low-ceiling, poorly vented, or high-use spaces—especially where repeated routines keep the light on longer or require frequent stops and starts.

    Small Swaps That Remove the Drag

    • Install LED or compact fluorescent bulbs in enclosed fixtures— they dramatically cut excess heat without sacrificing visibility or control.
    • Confirm fixture compatibility, especially with damp-rated or sealed flush mounts—an easy oversight that can cause other headaches.
    • Combine efficient bulbs with better airflow whenever possible—a cracked door, quick vent fan, or shorter “on” cycles all reinforce the cooling effect.

    The smartest fix is the quiet one—where your bathroom, hallway, or laundry zone feels completely unremarkable after hours of use. No residual weight, no early fog, just a space that never interferes with the routine.

    Lighting That Keeps Pace With Repeated Routines

    Good indoor lighting never calls attention to itself; it lets you move, pause, shave, fold, and cross through as if the fixture simply wasn’t there. Poor lighting—especially from high-heat bulbs—forces a choice: put up with subtle extra effort or start resenting every pause for fogging, glare, or thickened air. The real test is repeated use: the stair turn that’s no longer a barrier, the bathroom mirror that stays clear, the laundry counter that doesn’t sap focus at the end of the day. Bulb choice shapes every one of those moments.

    Choose bulbs for actual repeated rhythms: minimize heat, check your fixture match, and watch how the room feels as routines stack up. The best lighting upgrade is the one that removes invisible obstacles—keeping your space not just “lit,” but genuinely hassle-free to use every time.

    Explore more at LightHelper

  • Anchored Cable Management Transforms Your Desk Workflow Efficiency

    A desk can look spotless and still trip you up—especially when cable chaos hides under the surface. If you connect and disconnect devices every day, you know the pattern: you reach for your notebook and a cable drags across your arm. Sit down in a hurry, and your charger clips your chair or pulls tight at your ankle. Try shifting your keyboard or clearing space for a notepad and a forgotten cable blocks, snags, or yanks itself back out of reach. Each small interruption breaks your flow. The desk still looks right, but feels stuck. Over a day—or a week—these friction points pile up, proving that visible order does not equal easy work. The wrong cable setup turns even the neatest shelf or clean sweep into a reset loop you never quite escape.

    What Actually Changes When Desk Cables Are Properly Anchored

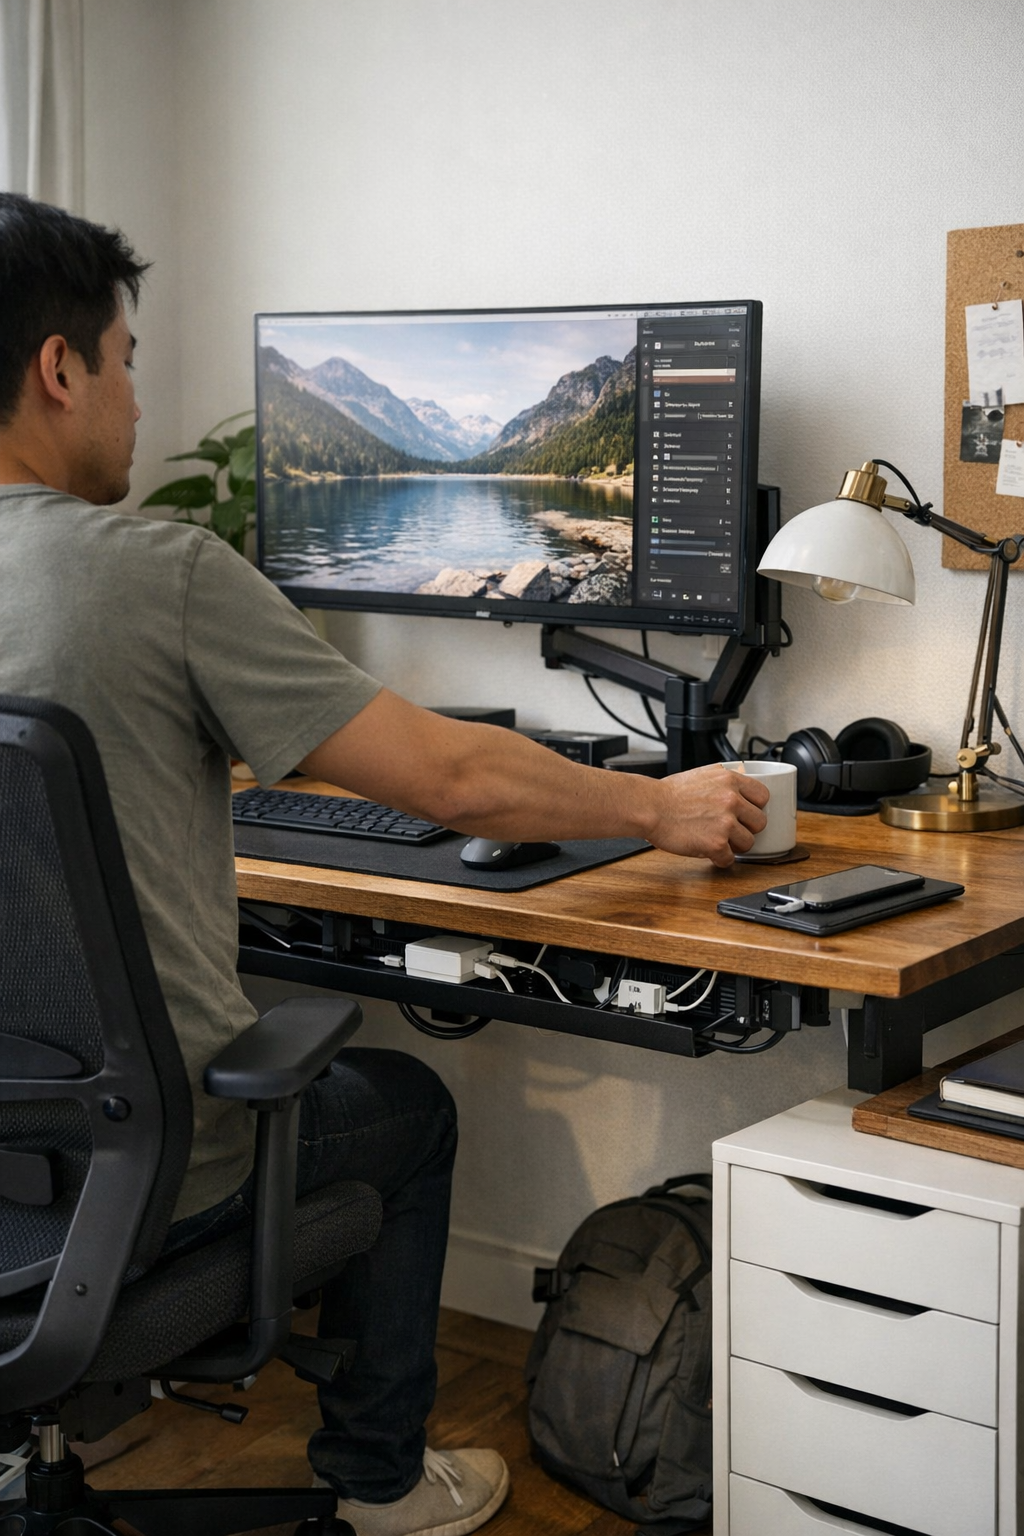
    When work pressure kicks in—shifting from email to sketching, charging a phone, flicking on a lamp—the difference between tidy cables and true usability shows up immediately. A guided cable path isn’t just about appearance; it keeps cords from sabotaging your routine at exactly the wrong moment. An under-desk tray keeps power lines out of the way when you roll your chair or reach for a drawer. A cable box takes the cluster off the desktop and out of leg space. Clips, magnetized or mechanical, stop connector ends from falling behind the desk just as you need them. Each anchor fits someone’s real work: trays for fixed setups or shared desks, clips for fast device swaps, boxes for hiding the clutter but potentially slowing quick changes. The improvement is obvious when task speed rises—your charger’s just where you left it, your lamp never shifts off target, and the “quick plug” actually is quick.

    The Difference Between Looking Organized and Working Smoothly

    It’s easy to fall for a desk that looks calm—until work starts and old irritations reappear. Mid-project, you slide your notebook beside the keyboard and a loose cord drags back into your writing space. Shift your mouse and suddenly the pad is hooked on a headphone cable. These aren’t rare mistakes; they’re signals your cable path doesn’t match your reach or routine. Tucked cables may look clean but still block your natural move set.

    Any time you pause to nudge a cord or clear space for your hands, your desk layout is taking from your attention, not returning it. True cable anchoring—tray, clip, channel—erases these micro-pauses and lets devices and hands move as expected. The improvement isn’t just in calm; it’s in every cycle you don’t have to reset.

    Real Desk Moments: How Setup Choices Save or Burn Energy

    Consider where cable bottlenecks usually show up: the rear corner, where phone chargers, lamp cords, and USB hubs tangle below the sightline. It feels clever at first to drop everything behind the edge. But the price shows itself quickly. Mid-task, a gentle tug for your phone drops your lamp cord over your papers. Swap a device, and the charger vanishes under the desk. Each recovery means digging, unplugging, fishing—work interrupted, focus scattered, small resets breaking the day. Even small repeated detours can wear you out.

    This is where structural change—the right under-desk tray or a disciplined row of cable clips—does more than tidy. The cable can flex, but never slip into the wrong spot. No charger yanks; no lamp off-balance. Even when you move fast, the fallout never spreads across your usable space. A steady cable track blocks predictable annoyances, so you stop losing energy to the same reset.

    Case Study: From Loose Drop-Offs to a Desk That Stays Ready

    One user gave up on chasing cables and added a fixed tray underneath. Lamp wires and chargers routed directly out of reach—the “dead zone” along the desk edge became a buffer for hands and notes. Suddenly, drawers opened without hitting tangles, connectors stayed visible, and nothing rolled behind the surface. The biggest change didn’t show up as a perfect photo, but as the list of problems gone missing. Opening the drawer no longer jerked a power cord loose; retrieving a charger was instant, not a mini scavenger hunt. In a few weeks, the pattern was clear—no more routine resets, no more slowdowns for the sake of “order.” The real win was not having to think about it at all.

    FAQs: Anchoring Your Cables Without Overcomplicating the Desk

    How do I pick between cable boxes, trays, or clips?

    Let your work style decide. If you reroute or unplug often, clips keep cords accessible and flexible. For hiding clustered adapters or hub lines, cable boxes work—but they can slow fast swaps. Under-desk trays organize multiple cords in one sweep beneath, which is best if your main desk devices rarely change. For setups that shift with the workday, mixed use—trays for power and clips for chargers or headphones—gives the best blend of stability and speed.

    How can I tell if my cable setup isn’t actually helping?

    Watch for red flags: digging for a missing cord, straining around cable clusters to open a drawer, pausing to untangle mid-task—these all mean your “organized” look is still costing you time. If cables invade your reach, block motion, or require regular rescue, better anchoring is due.

    Can cable management fix small monitor or lighting annoyances?

    Yes—many monitor drift and lamp angle problems start with cables anchoring the wrong way. Unsecured wires pull screens slightly off-center or nudge a lamp out of the sweet spot. Guided, anchored cables hold these settings steady, cutting down the slow slip that builds up posture strain.

    When Setup Matches Habit: Why Guided Cords Bring Everything Together

    The strongest change from real cable anchoring isn’t style—it’s reliability under pressure. When you route cables to fit your actual work, each move stays predictable, even when sessions get busy or device swaps pile up. The best system is the simplest one that matches your actions: clips only where you reach most; trays deep enough for all chargers you leave overnight; boxes where the mess matters more than instant access. Each day that cords stay “almost” right but drift out of line, you lose a little flow—hesitant reaches, extra attention, fragmented focus. Once cables match your pace, the desk surface stops demanding resets and starts making work easier, no matter what you plug in next.

    If you want a setup built for real movement, not just tidy optics, start with cable guides and give every anchor a job. Your desk will feel more stable, your routines less fussy, and each work session will launch straight—a surface that keeps up instead of holding you back.

    Explore the full WorkBasic collection

  • How Smart Yard Storage Keeps Your Outdoor Space Guest Ready Effortlessly

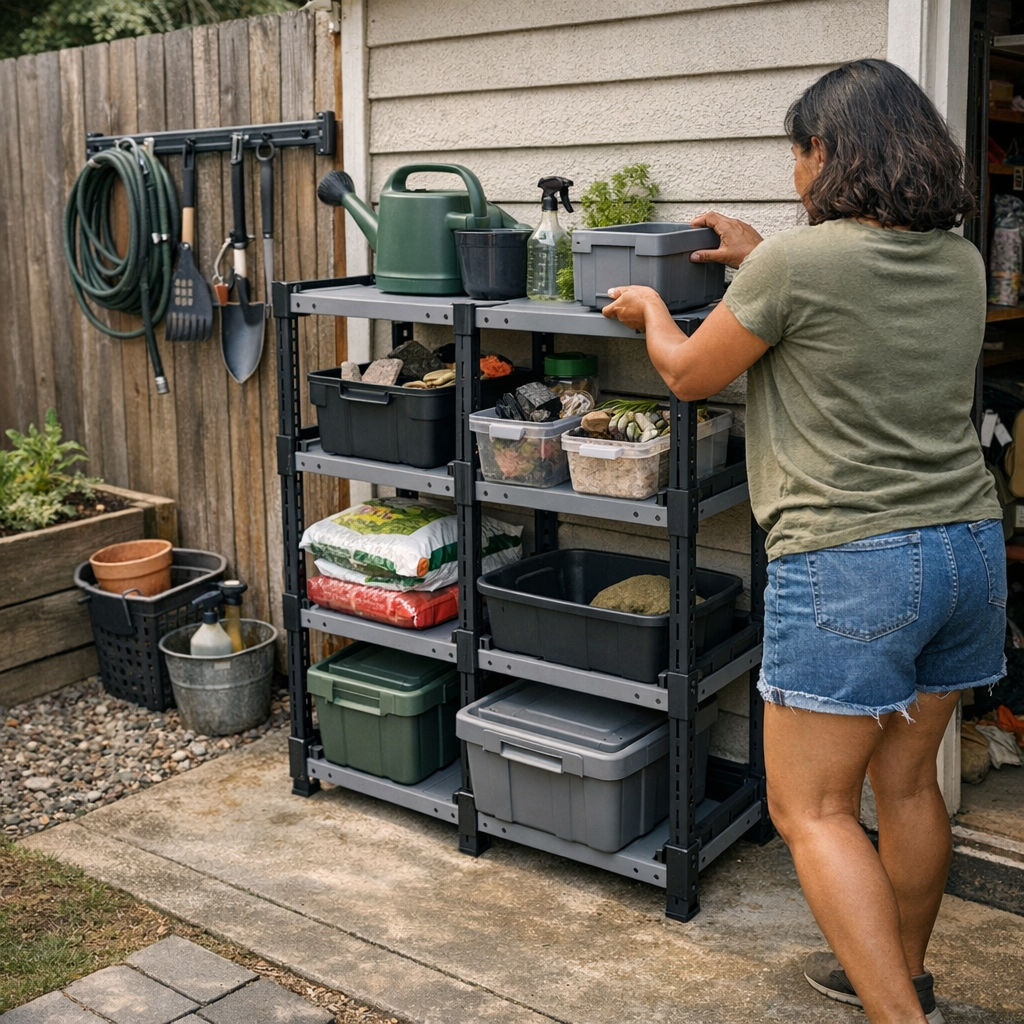
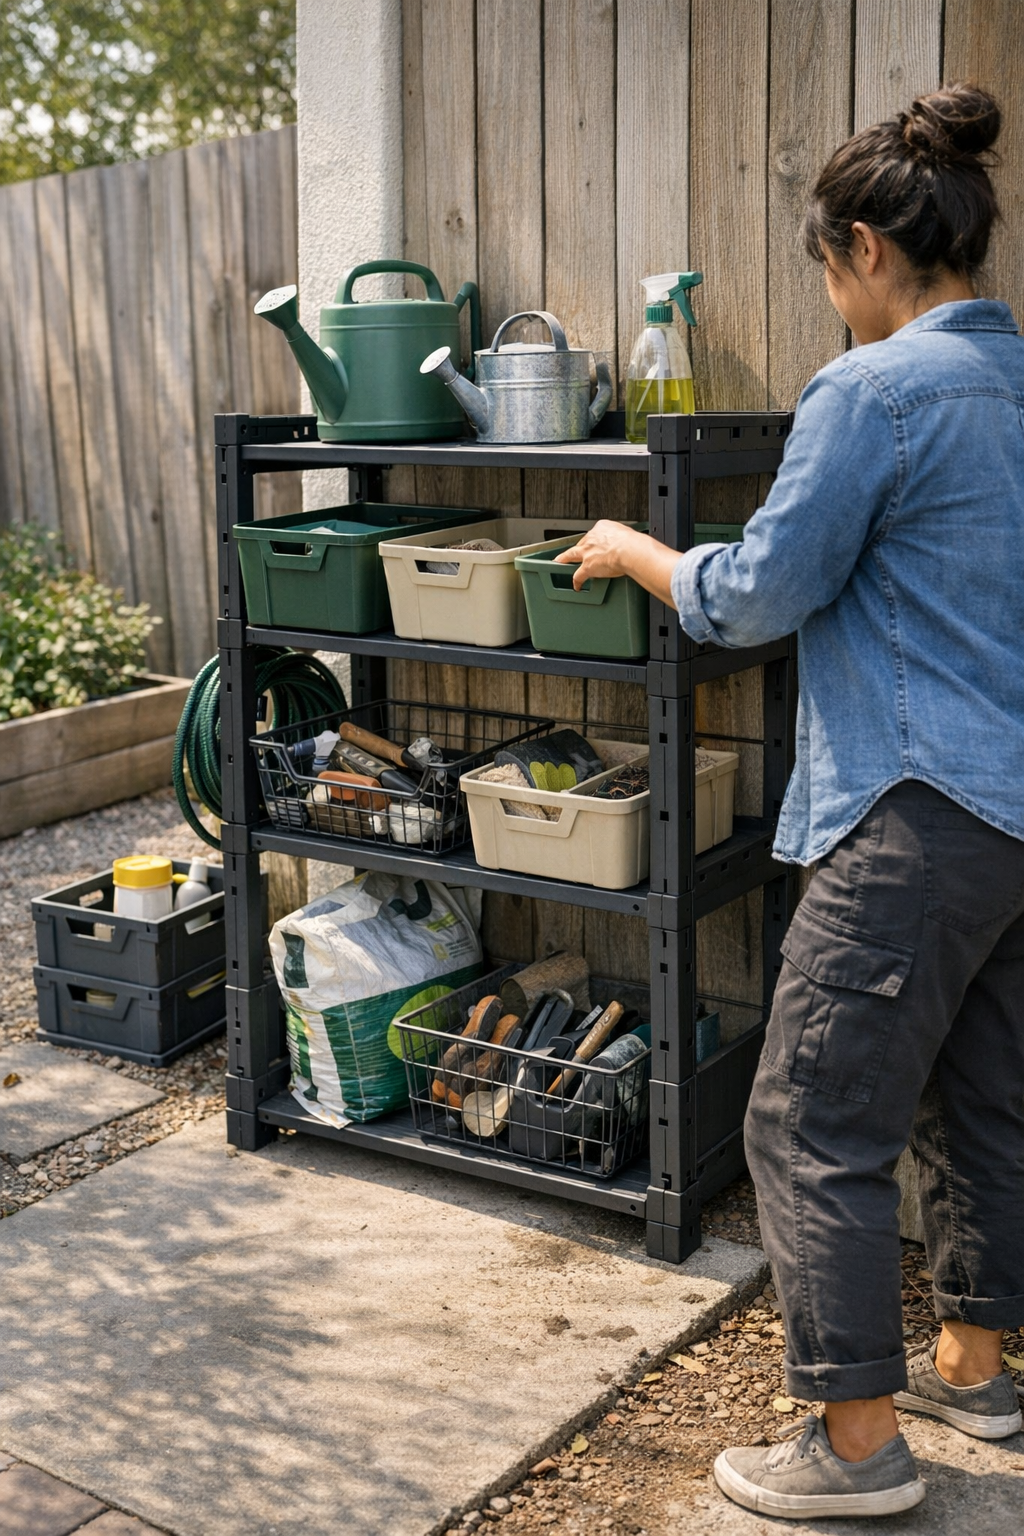
    Spot the pattern in any real backyard, side yard, or garage edge: New racks or bins arrive, and for a few satisfying days, every tool and ball has an assigned spot. The patio paths clear. Suddenly, the area looks ready for company, for projects, for anything. But give it three weeks. A rake leans where you meant to walk. Overflow piles shadow the side-yard wall. The lidded bin that seemed like the answer now hides your best hand trowel behind a jumble of forgotten hoses. Returning one thing means dragging two others across the floor or bumping into the overflow you promised to deal with last weekend. Outdoor organization doesn’t fail in a single day; it’s in these slow but steady resets—where once-slick setups reveal their weak points, one blocked path and awkward shuffle at a time.

    Why Most Outdoor Setups Fall Apart

    Yards don’t become unworkable overnight. Instead, everyday friction creeps in quietly: tools left “just for now” behind bins; folding chairs wedged near the garage doorway; gloves tossed over a fence rail with every good intention. Resets that should take seconds turn into little projects, then into tiring chores put off until “later.”

    The problem usually isn’t what you own—it’s how easy it is to restore order after each use, especially when the routine keeps changing. An awkward modular shelf, a too-deep cube, or an unmovable rack may look perfect on setup day, but these quirks force micro-reshuffling every time you need to grab (or return) something fast. The interruptions are small but relentless. Tools disappear into the void, walkways narrow again, and before you notice, the floor fills with another round of “temporary” clutter that somehow never leaves.

    Where Setups Lose Their Grip: The Return Bottleneck

    The wrong kind of storage turns every reset into a hassle. Supersized bins swallow gear but also bury what matters. Slim wall racks promise visibility, but exposed shelves start showing mini-disasters after one busy afternoon. To fish out a spade, you end up shifting a stack of folding chairs blocking the shed door. A single umbrella forces a strategic shuffle just to free your gardening tote. That “five-minute tidy” balloons into more time messing with your storage than using what’s inside.

    Open wall systems reveal the chaos as it happens. Everything is visible, but that also means every rushed drop or unfinished return is fully on display. Start cramming gloves, dog toys, or coiled hoses onto any available hook, and your promising rack quickly becomes an impossible shelf of twisted piles. The visibility is a double-edged sword: useful for quick access, but proof when resets slip.

    • Leaning a shovel “just for now” and blocking access to the only bin you need next.
    • Folding chairs gracefully stacked after an event—until someone wedges them over the storage drawer and blocks every return.
    • Hand pruners lost in a deep cube, invisible until you empty half the contents onto the patio stones.
    • Walkways and corners near the garage or fence slowly collecting buckets, gloves, or garden bags—each one a minor obstacle that quietly grows.

    Every ignored friction point is a missed reset, and every missed reset makes the next one harder. Reshuffling becomes expectation rather than exception. The difference between an organized yard and a clutter magnet lies in these small, repetitive jams—not in how tidy the space looked on day one.

    When “More Storage” Means More Trouble

    It’s a tempting mistake: go bigger, go deeper, hide the mess out of sight. But oversized containers cause silent chaos. Instead of quick returns, you end up fishing through the bin for the one tool that’s sunk to the bottom. Layered storage becomes a scavenger hunt. The result? Mess that grows out of view and resets that get postponed until the next “big” sort—usually after something breaks, disappears, or that patio project finally demands action.

    Contrast this with shallow racks and open, wall-mounted shelves designed for steady use:

    • Each tool and toy is visible—no more than one layer deep, no room for “out of sight, out of mind.”
    • Overflow doesn’t hide; you spot it as soon as it creeps in, so the area never slips fully off track.
    • Resets shrink down to quick, small corrections—often literally a few steps and seconds, rather than a twenty-minute scramble.

    The trade-off: You see your stuff, for better and for worse. But the very lack of cover forces more deliberate returns and catches issues before they spiral. The right friction, in the right place, nudges you to fix small problems now instead of dragging them out for later.

    Trouble Spots in Real Yards: Practical Scenes

    The Garage Edge Logjam

    After guests leave and tables fold, the pile that lands near the garage wall becomes a blockade almost instantly. That low rack for rakes, shovels, or sports gear gets walled in by folding chairs you meant to move “in a minute”. Returning a single yard tool now means sliding two chairs out, so the tool stays out too. The next time, the pile is bigger—and you’re less likely to bother.

    The Fence-Line Overflow

    Wall-hung racks make sense—until a heavy garden week. Now the rack is overloaded: gloves on top of hoses, hand tools jammed beside wonky balls, yesterday’s project leftovers squeezed anywhere they’ll fit. The clutter is right in your line of sight, but so is the inertia, as even one extra item starts the whole layer shifting and no one wants the job of putting things back “the right way.”

    The Narrow Side Yard Trap

    That tight zone between the house and fence is a classic dead spot. Deep bins make promises—“just group it all”—but even medium-sized pots, extension cords, or hose nozzles vanish behind bags of soil. Nobody notices missing gear until the next use, and the area drifts back into being a vertical junk drawer. Swapping deep bins for a single, shallow wall shelf kills the hide-and-seek: you see what’s there, and have to return items properly or nothing else fits. Neglect becomes visible tension, and that’s usually all it takes to avoid letting piles form in the first place.

    Design That Keeps You Ahead—Not Behind

    Start with this test: For high-use zones—especially garage edges, side-yard strips, or fence walls—limit storage depth to eight inches or less. This one decision guarantees you never bury what you need. Shallow cubbies and racks cut off the retreat of clutter, making it clear where overflow starts and forcing a reset before the mess spreads into your walking path.

    Tight drop zones are another unsung benefit. Racks or bins by doors should fill up quickly—that pressure is good. It shouts for action (“deal with this”) before the overflow snowballs into a reset that needs hours instead of seconds. Corners where storage never quite works can be reclaimed with vertical shelves or narrow racks, converting the “last resort” dump into a clear, managed nook rather than an excuse for structural mess.

    Here’s What Actually Changes With Smarter Setups

    • No more gatekeeping clutter: Returning a single spade doesn’t require a minute of shifting chairs or clearing a path to the wall.
    • Quick, routine resets: End-of-day or post-project clean-up becomes a series of tiny habits, not an all-Saturday ordeal.
    • Less guessing, less hiding: Everything is either where it should be, or obviously out of place—so regular upkeep happens automatically.
    • Setup that reinforces your habits: Hard-edged storage zones and right-sized shelves force a check-in—a visible nudge before small chaos spirals into major pileup.

    Staying in Front of the Mess (Without More Work)

    No setup can freeze time. Outdoor areas are always in motion, especially in multi-use yards with frequent projects or family traffic. But the goal isn’t perfection; it’s building a layout that can take the churn. Shallow racks, visible shelves, and clear, hard storage boundaries stop hidden buildup before it starts. Instead of waiting for the next big rescue, you’re nudged into small, frictionless resets that actually stick. Less time searching, less energy dreading the tidy-up, and more space that works the way you move—not just the way it looks in a catalog photo.

    For outdoor setup ideas made for real routines and real friction, visit TidyYard.

  • Rearranging Heavy Items Improves Garage and Workshop Efficiency

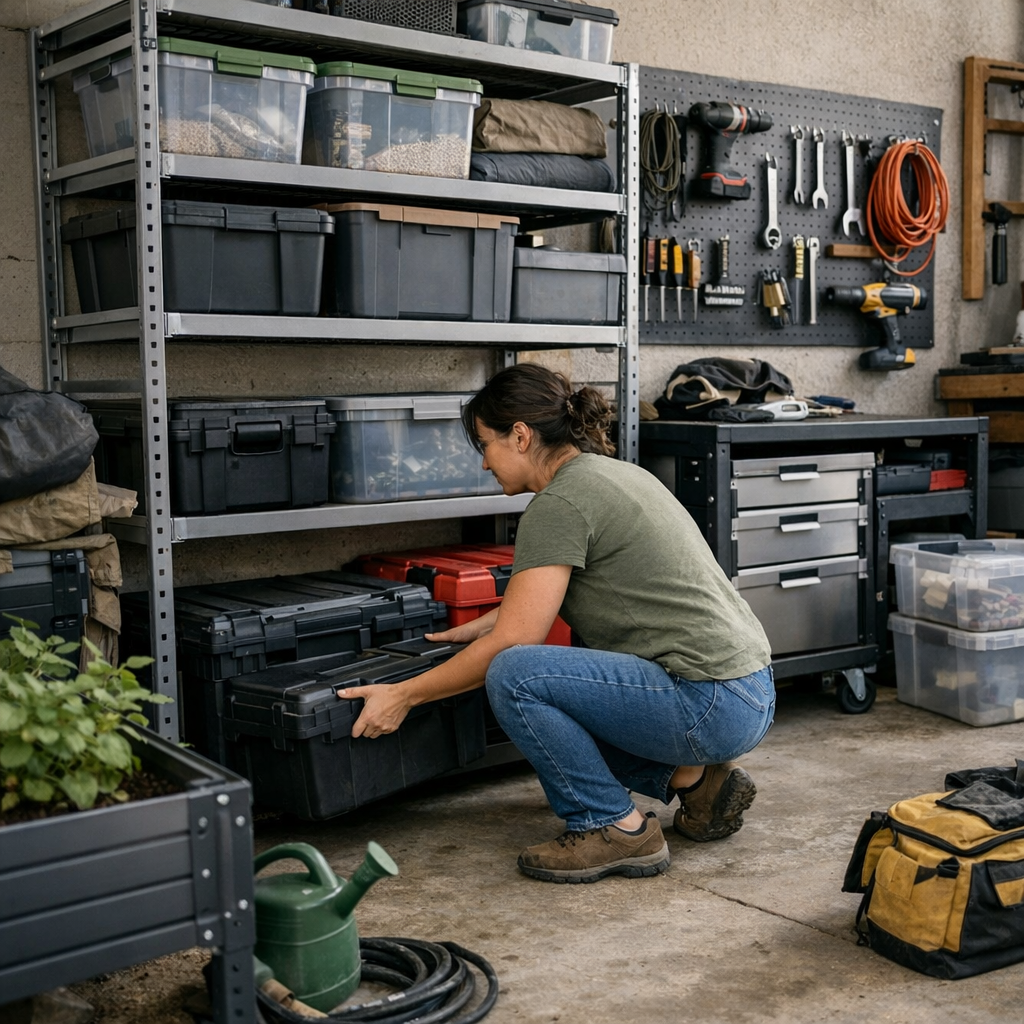
    Every garage or workshop user knows the moment: You walk in, already picturing the tool or bin you need, only to freeze in your tracks. On the surface, the shelving looks organized—a place for everything and everything in its place. But as soon as you go to haul down a heavy box or reach for a container you actually use, the problems show themselves: a muscle-straining reach overhead, a cart wedged into your walk path, or an overloaded spot you have to reshuffle just to get to what you want. Items pile up “just for now” because putting them away is a hassle, and before long, order gives way to slowdowns and shortcut stashes. The setup that seemed smart is now quietly getting in your way.

    Heavy Items Up High: The Hidden Drag on Everyday Flow

    On day one, most storage looks perfect. Floor-to-ceiling shelves, modular wall panels, racks that make the most of every square foot. But then, the daily routine settles in. The biggest, toughest storage bins—bags of sand or seed, bulky power tools, overflow tubs of hardware—get nudged upward to make way for small, often-used gear in the “prime real estate.” It’s not intentional; it just happens, shelf by shelf, as you live with the setup.

    Before you know it, every big lift means:

    • A clumsy, careful reach or a stretch that leaves your shoulders and wrists aching
    • Piling awkward bins on already stuffed upper shelves, risking a dangerous wobble or spill
    • Shifting carts out of the way just to get to one edge of a unit—then having to move them again to reset
    • Workbenches and corners filling with “temporary” overflow that lingers for days

    When Inefficiency Becomes the Routine

    These small delays—the slow retrieval, the avoidance of putting things back, the sidesteps and stacks—stop feeling temporary. They become how you use your garage. What once looked organized now feels like it’s working against you. You catch yourself stacking bins on the floor to avoid the awkward reach, or leaving a heavy toolbox mid-walkway because its “home” is now too much trouble to access.

    When an ‘Organized’ Setup Starts Interrupting Your Projects

    It doesn’t take long for these layout issues to pile up. Picture a garage with tight vertical storage or a workshop wall fitted with smart-looking shelves. Everything has its slot—until it becomes clear the system is backward. You’re crouching to snag a lightweight tarp but have to hoist a dense case above your head, or notice the cart meant to roll away never gets put back because the aisle keeps narrowing. Every trip for a tool becomes a shuffle-and-shift routine: slide a bin off a stack, twist around a bulkhead, nudge the cart, just to get your hands on a daily-use item.

    The Cycle of Clutter and Reshuffling

    This is how corners become dumping grounds: a few rushed returns, a bin set aside “just until later,” and a growing pile-up as heavy items end up anywhere there’s a gap. The floor space gets tighter. Resets slow down. You find yourself doing a dance—one box off, two boxes on—just to close up for the day. That well-planned shelf system now invites crowding, not clarity, and blocks the quick movement that fueled the original layout idea.

    Breaking the Cycle: Anchoring Heavy Storage Where It Belongs

    The real breakthrough? Give every heavy, high-demand bin and toolbox a prime spot between knee and waist height. Shift the lightweight, rarely used gear up and out of the way, but keep bulk and weight firmly in your natural reach zone. Suddenly, what took three steps or an awkward lift is just a straightforward drop or pick-up. There’s less hesitating, less balancing, and no question of where things go after use.

    The Immediate Upgrade: How Realignment Feels in Practice

    This isn’t theory—it’s a dramatic shift in daily function:

    • Heavy bins now return to a shelf you can actually reach, without overthinking the grip or bracing for a twist
    • No more stacking overflow at the very spots you need to keep clear—like the ends of your workbenches, or right where you park a cart
    • Mobile gear slides into place, instead of being stuck out or blocked by bins that should never have left the “easy zone” in the first place

    Once the big stuff lives down low, the resets speed up. You stop making “temporary” piles by the door or halfway across the garage. No bin looms overhead, waiting to tip. Each shelf’s job becomes obvious—and you stop treating the room as a puzzle to solve every single day.

    The Look and Feel of a Zone That Actually Works

    No, you won’t win showroom points for design minimalism. That’s not the goal. A functional garage or shop with correctly placed heavy storage lets you:

    • Move end to end without detours, even when every zone is in use
    • Finish fast—return big items to their place in seconds, not minutes
    • Keep odd-shaped gear and overflow out of the way, with high and corner shelves holding only what’s truly light or seasonal
    • Walk in tomorrow ready to start—not steeling yourself to restack yesterday’s “good enough” returns

    Visual order matters, but what really keeps you coming back is function. That’s the difference you feel: a quick, instinctive drop onto the right-height shelf versus a tired, reluctant stack “anywhere it fits.” Work becomes smoother because the setup finally matches how you actually move, not just how the storage units look on a diagram.

    Tip: Protect the Prime Real Estate for Heavy, Daily-Use Items

    Every time you redo or expand, lock in this one habit: keep the zone from knee to waist open and reserved for your heaviest, most-used gear. Put light, awkward, or “occasional” stuff up high or deep in corners. Check that carts, bins, and top-offs can be returned in one step, not four, so the whole area works every time you use it—without a round of Tetris just to get started or finish up.

    The Real Payoff: From Packed to Purpose-Built

    Over weeks and projects, the benefits stand out: no more blocked aisles, no more slow starts, and no frustration at the end-of-day reset. The setup doesn’t just hold more—it frees you to keep using the space, season after season, without the low-grade battle against your own storage choices.

    So if you’re planning a modular update, a tracked wall, or a rolling bay, aim for access. The best feeling isn’t a storage area that just looks “full and finished,” but one you can actually use again and again—right in the middle of your real life.

    Find practical storage solutions built for repeated real use at StackNest.

  • Why Short-Burst Cleaning Fails to Solve Indoor Cat Mess Challenges

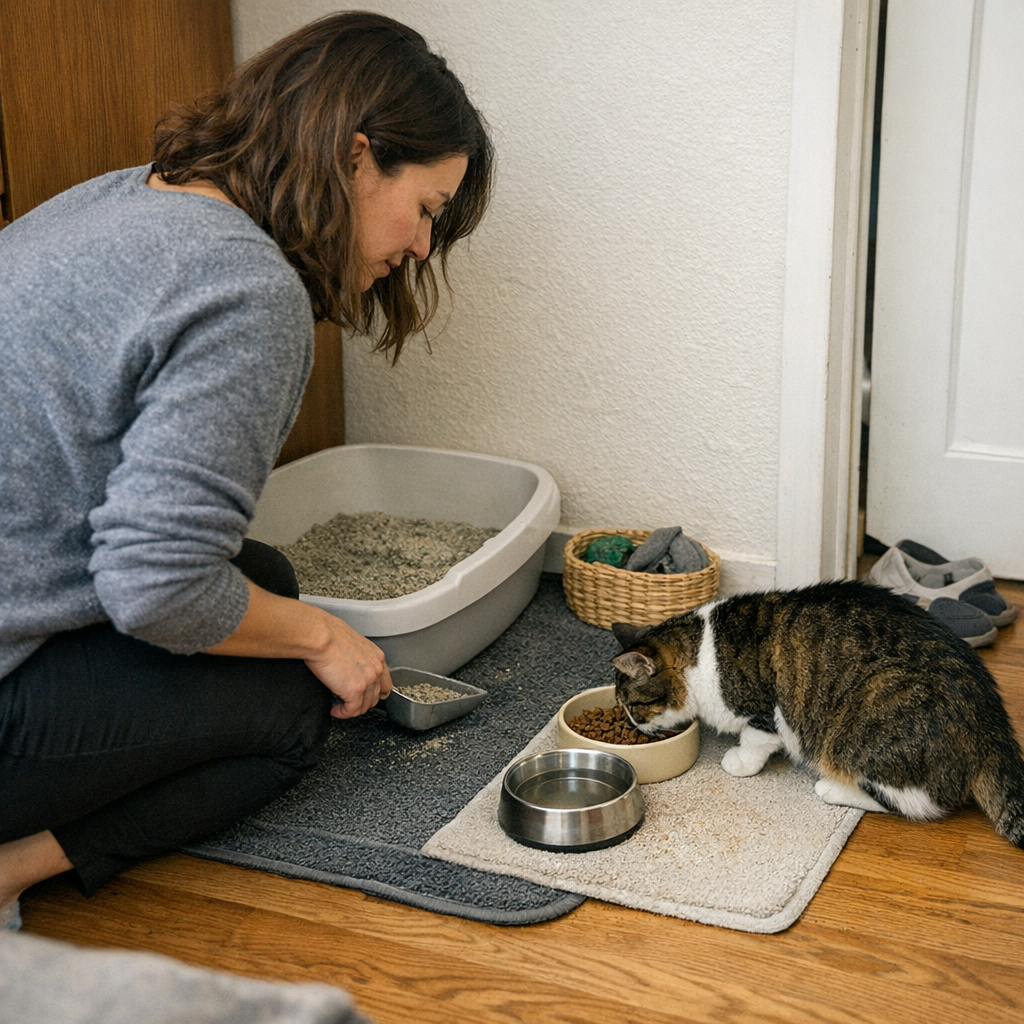
    Every indoor cat owner knows the routine: You spend five minutes making the feeding setup look orderly, push a cloth around the litter box edge, step back for a last look—and for a moment, the room feels settled. But by dinner, the same stubborn mess has returned. Kibble shows up tucked tight along the baseboard, a crescent of litter rebuilds just outside the box, and droplets arc away from the water bowl where cats and feet have both passed through. This isn’t chaos, but it’s a slow drip of annoyance—the constant, low-grade reset that no “quick cleanup” really erases. What feels handled at noon just circles back by night, highlighting how layout, not effort, keeps the mess returning in exactly the same frustrating ways. In the StillWhisker world, the problem usually isn’t how clean the space looks in the moment—it’s whether the structure actually stops the cycle or quietly resets it for tomorrow.

    The Illusion of Control: Why Repeated Messes Keep Coming Back

    Short cleaning bursts—wipe, scoop, straighten—promise a room under control. But walk through two, three, or five days in a row and the same pressure points reappear: scatter at the mat’s edge, water sneaking under the bowl, crumbs drifting behind feeding spots. No matter how fresh the reset, the same tiny messes signal a setup that’s looping you back to the start. “Under control” is only surface-level; underneath, crumbs reaccumulate in grout lines, litter escapes under mats, water stains creep up again. The invisible load isn’t about disaster but about quiet, repeated effort—that creeping sense that the same areas always need one more pass, draining your energy in barely noticeable increments.

    Where Friction Lives: Pinpointing Problem Spots in Real Use

    Certain zones always register the wear and tear:

    • Litter trails crossing into walkways: Even a mat can’t guarantee granules stay put—repeat steps create the same arcs of escape, always in the same spots.
    • Water bowl splash zones: Drops wander out, especially when the bowl hugs a wall or sits just off a travel path, leaving tracks you notice too late.
    • Kibble escape routes: Small, overlooked corners hoard stray food, impossible to clear unless you hunt behind every line and ledge.
    • Toy clutter in shared spaces: Toys always migrate toward feet, clogging walkways and making quick resets yet another repeated job.

    Most friction is invisible at first glance—that’s why it returns so easily. Spot cleaning fixes the present, not the pattern. Come Thursday, you’ll be retracing your Monday steps, right over the same micro-messes the last cleanup left behind.

    “Presentable” vs. Actually Easier: The Hidden Cost of Masking Effort

    A room that looks neat after cleaning can still demand twice the upkeep. You wipe the water bowl edge at lunch, again at dinner; you scoop litter remnants only for the same grit to creep back into the same crack before the weekend. Effort doesn’t disappear—it repeats. Calm surfaces only mask the slow drip of chores you shouldn’t have to redo. This is the real cost of setup friction: a space that demands constant resets, not because it’s messy, but because the structure subtly restarts the mess every time.

    Everyday Breakpoints: When Structure Invites More Work

    Litter Spaces That Reactivate Themselves

    The classic trap: a litter box tucked against a cabinet, mat beneath, out of the way. On day one, it’s clean and efficient. By day three, a dotted trail of litter curls into corners and under doors. Every sweep feels routine—grab, clear, reset—but by Friday, you’re cleaning the same path, because nothing stopped the escape route. The structure looks settled but loses the battle against repeated use, always inviting the mess to reinstall itself exactly where you cleaned before.

    Feeding and Water Areas: Tiny Shifts, Big Changes

    Take the water bowl—pushed close to the wall to save space. Each refill runs a trickle along the baseboard. By Wednesday, a stain or sticky patch marks the spot, even if you’ve kept up with daily cleaning. Food bowls shoved near high-traffic zones mean runaway kibble edges into main walkways, no matter how often you sweep.

    Structural trade-offs show up fast:

    • Bowls and mats that appear tidy but make in-between wiping harder than it should be.
    • Mats a hair too small, letting the first mess slip past the edge and become part of the floor routine.
    • Rest corners that look cozy but block quick cleanup—crevices where fur or crumbs linger between resets.
    • Grooming tools hidden “out of sight,” but out of reach when the right moment hits and fur is mid-shed.

    Nudging the Home Setup: Practical Placement Tweaks That Make a Difference

    Reducing recurring mess doesn’t take more effort—it takes smarter setup, so cleanups don’t pile up twice a day. A few measured changes can disrupt the whole cycle.

    Moving Boundaries: Out of the Way, Not in the Path

    Shifting feeding mats and litter boxes even a few inches off the main walkway keeps spills and drifts contained. When a bowl sits out of the walking lane, water stays on the mat where it belongs. A simple six-inch adjustment can mean the difference between multiple daily wipe-downs and one that’s enough—or eliminate the old mess entirely.

    Mat Sizing and Edge Management

    Upsize the mat, pick a strong lip. Place it so litter drops stay put instead of making the leap to seams or footpaths. Instead of gathering grains throughout the house, you’re scooping up five at the edge—never fifty past the mat.

    Interception, Not Decoration

    Don’t let mats serve as background props. Look for structure and texture that interrupt, not blend. Placement trumps appearance; a mat that fits the look but misses the action will be useless by day two. If the edge doesn’t capture, you’ll see the same evidence outside it after every reset.

    Refill and Access Flow

    Notice reach on repeat: Can you fill the bowl without moving three things? Can you grab the scoop without a search? Setup friction often starts with one slow task—moving clutter, sidestepping blocked spots, losing minutes to rearrangement. Streamlined access is as much about mental load as visible cleanliness; if you’re muttering while refilling, something is off in the structure.

    When Quick Cleaning Hides Bigger Setup Gaps

    Spot-cleaning delivers order for a moment. But when litter, crumbs, or water keep showing up in the same place, you’re fixing a symptom—never the cause. Mess happens in patterns. If cleanup turns into a daily déjà vu, the setup is quietly undermining every reset. When you’re doing the same chore twice a day, every day, it’s not just a mess problem—it’s a structure problem, and it wants more of your time than it gives back.

    Cleanup That Doesn’t Stall the Room

    Practical setups for indoor cats are a constant trade: cat comfort needs, human reset speed, room flow. A mat that’s plush for a nap can slow cleaning; a rest corner that’s inviting for the cat is an obstacle for a human in a rush. The real breakthrough comes with a setup that absorbs a missed wipe, not one that falls apart. If your feeding corner still looks managed after you skip a turn, or your litter zone contains mess for another cycle, structure is finally lightening your daily load. If skipping a cleanup unravels the room, the setup is quietly costing you more—every time.

    Everyday Indicators: Is Your Setup Working?

    • You reach for the scoop and it’s exactly where it should be. No hunting, no drawer shuffle.
    • The mat catches every spill, so you skip the midweek shift—there’s nothing outside the lines.
    • Water bowls stay steady, neither creeping into corners nor leaking into walkways.
    • Toys are corralled the first time—not hidden under furniture until next week.
    • Litter stops at the mat, no longer refilling the same tired gap under the cabinet.

    Watch for the signal: if “clean” resets fade too quickly, there’s friction left in the bones of your setup. Better structure means less repeated work and fewer surprises between reset and real calm. For setups that last longer before unraveling, click through to StillWhisker for practical, tested options built for real indoor-cat homes: StillWhisker

  • Why Impact Drivers Lose Power During Cold Outdoor Projects

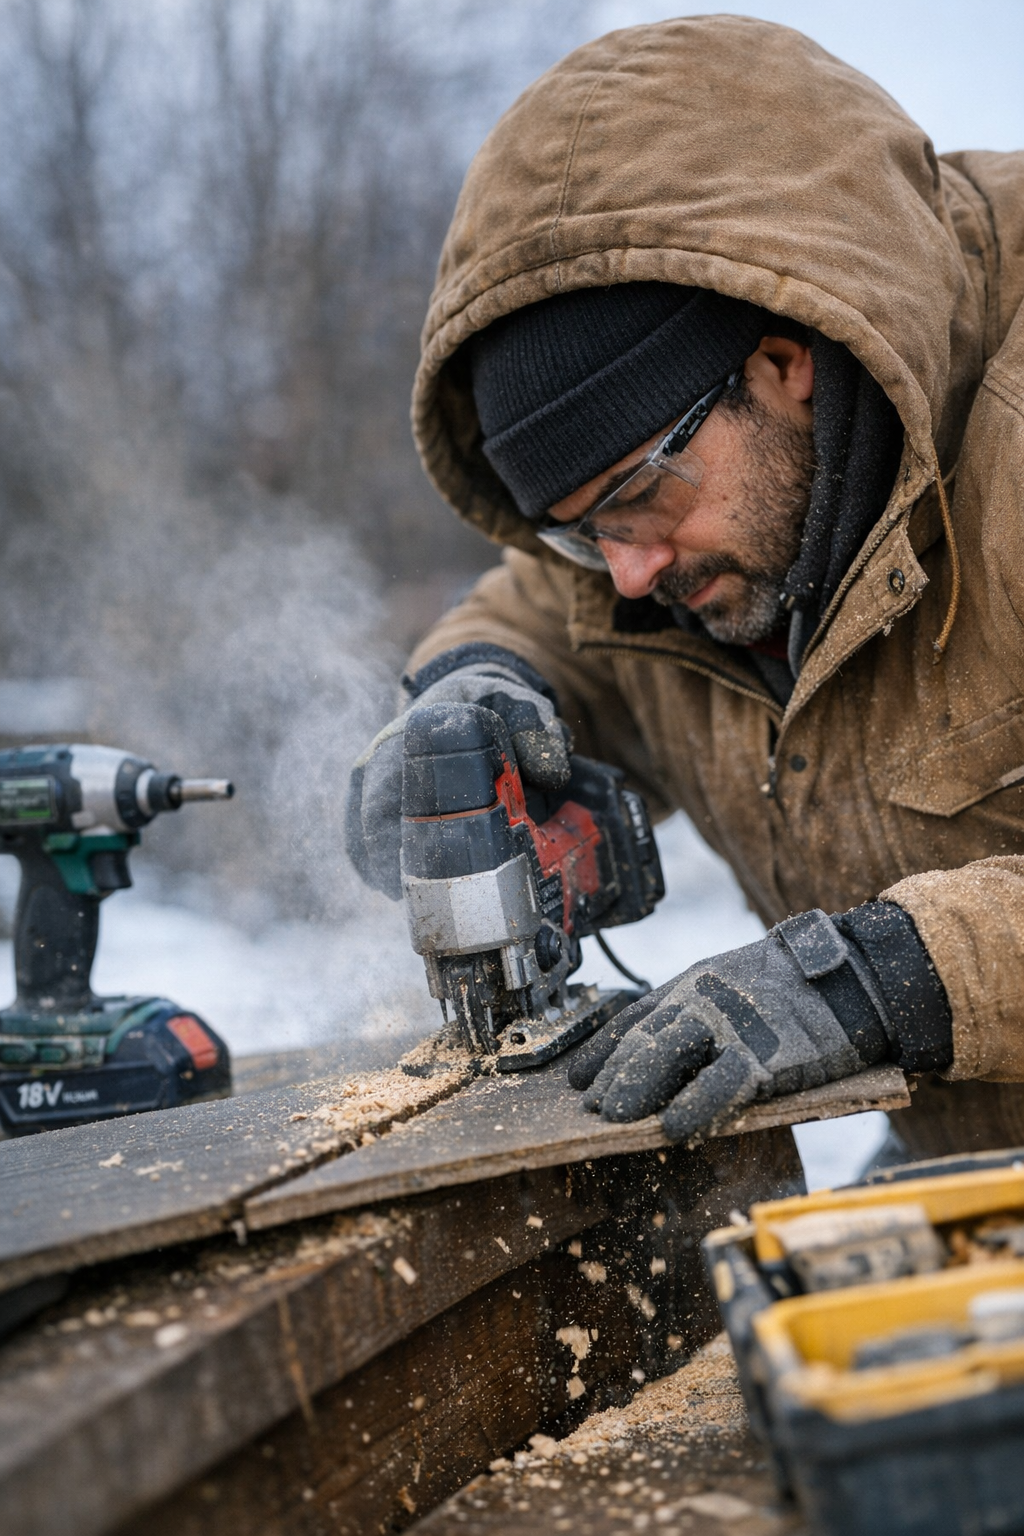
    Winter doesn’t just cool the air—it tests your tools, your grip, and your patience from the first cut. Step outside with your impact driver or jigsaw while frost still lingers on the boards, and the job feels different almost immediately. The machine’s usual rhythm is thrown off: a gritty vibration in the handle, edges that start to feather and chip, maybe an engine note that drops into complaint halfway through a plank. Every task—whether you’re ripping fiberboard under a bare bulb or driving anchors into cold vinyl—puts your setup on notice. In this weather, small mistakes in tool or accessory choice aren’t hidden; they get amplified every hour you work.

    Where Winter Problems Begin: The Cut That Shifts

    Say it’s 7am. Tools charged, fresh blades slotted in, you dig into the day’s first stack of siding or sheet stock. The initial passes are crisp—lines hold clean, effort is predictable. But by board three or four, the lag creeps in. Battery output slips as the cold eats at lithium chemistry. A blade that felt sharp now drags slightly, leaving stringers behind. The sawdust turns sticky, riding the teeth longer. You find yourself leaning harder into the work, correcting as you go, burning up energy just to keep cuts straight.

    Miss these early warnings—slowed drive, ragged kerf edges, a muted pitch from your power tool—and you’re suddenly facing sanding chores, fudge lines, or seams that don’t close without a fight. The drag on your wrists and elbows sneaks up, long before your bucket of bits runs empty.

    Why Power Tools Fade Faster in the Cold

    Chill doesn’t just numb your hands. Inside your impact driver, cold temperatures bog down battery performance and thicken lubricants. Your jigsaw blade flexes less on each pass, amplifying friction where the teeth should be clearing chips. That drag isn’t imagined: a metal blade that glides in July can smoke or bind before lunch in January, especially in poplar, MDF, or pressure-treated lumber.

    Sometimes the clues are immediate: the blade scorches during a simple crosscut, or the driver stalls halfway through a fastener. Other times, it’s cumulative—more force needed for every plunge, until your control slips just enough to scar the workpiece or lose your intended line.

    The False Confidence of the First Few Cuts

    Don’t trust a tool just because it opens strong. Warm batteries fade quicker, and steel dulls faster when each cut is a battle against cold. The first five passes can be smooth, but by the time you’re halfway down a plank or repeating a sequence, the noise changes—a harshness, a buzz that builds in your palm. This is when cleanup doubles and your margins shrink. Savvy tradespeople don’t wait for a total stall; they watch for the moment control softens, and make the pivot before the tool falls behind the material.

    Cold Jobsite Reality: What Really Happens

    Picture a February morning siding install. You’re cutting out 200mm window reveals—a tight plunge, repeated ten dozen times. At first, the saw tracks true, each pass almost routine. By board six, though, the tool’s shoes skip, jigsaw dust gathers in clumps, and suddenly that battery warning feels much closer. The blade, once snappy, hesitates at the start of each pierce. Your cutlines blur, squares go crooked. Are you tired? Maybe. But more often, it’s the combination of a chilled blade losing bite and a depleted battery stumbling under strain that throws your control off course.

    This is where practical routines beat brute force. Swapping to blades made with extra cold flex holds speed and shape longer. Taking 20 seconds every couple boards to brush out the kerf keeps things moving, and a deliberate slowdown—say, cutting at 120mm/minute instead of rushing—prevents particles from packing. The payoff is clear: fewer chewed-up edges, less tool bounce, less end-of-day hand fatigue.

    Reading the Small Stuff: Signals Before Trouble

    Catastrophic failures—broken tips, jammed drivers—are rare. What really undermines your session are the stealthy cues: your grip grows tense by board ten, the cutline wobbles mid-plunge, extra dust hangs up and scorches as the blade passes. Each is a nudge: the tool is struggling, its accessories losing pace. Experienced crews tune into these details early, shifting course before the job turns into a slog of corrections.

    Picking Tools That Don’t Quit (and Habits That Matter)

    Shop shelves can make every blade and bit look equal. They aren’t. Two identical-looking jigsaw blades can have wildly different stamina by noon; one meant for warm shops, the other reinforced for cold, abrasive cuts. When you hit denser stock, the wrong blade burns hot, leaves fuzzy lines, and makes you fight with every inch. A blade meant for the chill keeps its flex and bite, holding straighter and cutting cleaner through cycles of dive, back, and repeat.

    Same for drivers—bits that handle fine indoors can start to slip, chew, or cam out in frozen fasteners. Cold-adapted accessories keep predictable performance, especially with repeated battery swaps and heavy use. The difference, across a project, is a handful of easy finish panels instead of another hour spent reworking corners.

    Quick Routine Shift: Cleaner Cuts, Less Strain

    Keep a stiff nylon brush in your pocket. Give every kerf a swipe out after two or three cuts—especially when chip-out or dust buildup gets obvious. Combined with a slight slowdown in your feed rate, this keeps jaws from clogging and blades from overheating, which means less smoke, less vibration, and steadier control until the day’s done.

    Spotting the Early Drop: How to Catch Power Fade

    Your driver won’t beep out a warning, but you’ll feel it:

    • A newfound coarseness as the blade stutters across a cut
    • Unexpected vibration in materials that were smooth an hour ago
    • Sawdust piling along cutlines instead of clearing clean
    • The tool’s tone deepening under pressure, especially in thicker or colder stock

    Catch these signs early and adjust: swap in a winter-rated blade, clear your kerf between passes, keep your cut pace steady and responsive. Don’t chase yesterday’s tempo—match your rhythm to what the work and tool tell you right now.

    Staying Ahead of Winter Wear

    Cold weather exposes every weakness—in your routine, your gear, and your patience. Ignore the small adjustments, and you’ll be repairing chipped corners, reaching for batteries faster, or rubbing sore wrists before shift’s end. Pay attention early: change out blades before they stumble, clean your path, drop your run speed a notch. The reward is visible—fewer splintered edges, cleaner seams, and less fatigue crossing the finish line. In a winter jobsite, the difference is clear not in the first pass, but in how much energy and time you save when it’s time to pack up.

    Visit Gumboll for tools, accessories, and cold-ready jobsite gear.

  • Choosing Hanging Closet Organizers That Keep Belts, Ties, and Scarves Neat

    The closet organizer test doesn’t reveal itself on setup day—it starts with that seventh morning of real use, when your weekday rush begins to unravel the system. You think you’ve solved clutter with a hanging organizer: every belt in a slot, scarves folded neatly, ties lined up. But by the next week, stress points surface. Hooks jam with extra layers. Ties spill into scarf territory. That slim organizer that looked calm in pictures now slows you down as items overlap or bury one another. What claimed to bring order stands between you and a fast, frictionless start to the day—just when you notice it most.

    Setup Looks Organized—But Does It Survive Repeated Use?

    Closet accessories hide quiet chaos behind surface neatness. Matched hangers, rows of hooks, and a labeled tie rack can look like true progress. But as soon as you’re running late, real flaws appear: you reach twice for the same belt, slide scarves aside to release a trapped tie, or fight through crowded returns from yesterday’s hurried drop-offs. “Organized” shifts into “awkward obstacle course” under pressure, even if the area appears crisp from the outside.

    The trouble isn’t appearance; it’s whether your organizer absorbs daily mess or just disguises it. When pockets crowd or categories blur, resets take longer, and the cost—tiny, repeating delays—shows up each morning, compounding unnoticed until it’s routine to fumble through old mistakes.

    Routine vs. Reality: Organizer Failure Under Pressure

    The best organizers aren’t those that win points for tidy grids, but the ones that still make sense after ten rushed uses. Hanging organizers with shallow slots or simple dividers promise quick access, but without real separation, “category drift” is inevitable. Cubby walls sag, pockets stretch, and soon belts, scarves, and lanyards nest together—every quick return creating new confusion.

    Picture the weekday: you’re in a rush, reaching for a favorite tie. Instead, your hand comes away tangled in scarves that slipped into the slot. Belts in a single hook merge with keychains and jewelry, morphing a simple organizer into a dense, frustrating cluster. Instead of faster access, you now face repeated reshuffling—an organizer demanding more management than the chaos it was supposed to tame.

    Wall Storage That Looks Right But Blocks Real Movement

    Hanging organizers can appear efficient—using wall space, saving drawer digging. But design gaps quickly surface. Fabric pockets collapse, oversized shelves encourage piles, and catches intended for one item start holding clusters. One pocket absorbs overflow; another sits ignored. Worse are organizers that swing from doors or dangle awkwardly, blocking your path and blocking access to shoes or lower storage—forcing you to open one section just to sidestep another.

    The net effect? The closet “saves space” only on paper. In practice, the organizer forces unnecessary movement, mixes items, and leaves high-traffic spots crowded while others become dead zones. The very products chosen to increase efficiency end up creating unpredictable, hard-to-fix slowdowns.

    Category Drift: Subtle Disorder With Real Costs

    Disorder doesn’t explode overnight—it creeps in, day by day, as small missteps accumulate. Packed pockets and slack dividers gradually turn into a collection zone for everything that doesn’t quite fit. You start each week with clear lines, but by midweek, categories have slid into one another. Shared closets make this worse: two sets of hands return things quickly, returning scarves to the “belt” spot or dropping necklaces on the edge of shelves. By Friday, your Sunday reset is a distant memory, replaced by minutes lost to re-sorting.

    What Gets Return Flow Working Again?

    The first real fix isn’t more compartments, but stronger boundaries. Rigid or deep, clearly defined cubbies shut down mingling—each belt, tie, or scarf claims its own zone. Suddenly, grabbing a tie is a one-move task, even under weekday pressure, and returns are obvious: no guessing or awkward shuffling, just a direct path back to where the item actually belongs. When the storage matches your routine, resets shrink to near zero, because the system defends itself from chaos during real use, not just at setup.

    Practical Tip: Physical Dividers Matter Most

    No matter how slim your closet space, a solid separation—even a few centimeters—can keep categories from bleeding together. Hanging organizers with open compartments almost invite drift, but choosing systems with built-in cubbies or modular inserts helps organize by habit, not effort. Each accessory returns to its home, staying visible and touchable, instead of vanishing into a crowded pile.

    When Looks Hide the Underlying Logjam

    A slimline organizer can look space-saving, but if you’re always peeling one accessory away from another or clearing overflow just to zip the closet, the setup undercuts its own promise. One pocket becomes a chronic catch-all; other spaces fade from use. Technically, everything is stored, but every attempt to retrieve or return something costs an extra step or an undoing of yesterday’s jumble. Visual neatness is meaningless if your routine gets stuck on the same hitch every time the tempo rises.

    Don’t Let Each Morning Repeat the Same Mistakes

    Real organization isn’t a fixed display—it’s an answer to movement, speed, and real-world returns. If a closet system can’t handle messy handovers, fast retrievals, or shared zones without breaking down, its “neatness” is only skin-deep. Storage setups that enforce category lines—through edges you can feel, not just see—make resets shorter, keep loses rarer, and protect against those hidden bottlenecks that quietly drain your time. Ignore the subtle downsides, and you’re simply rearranging inconvenience week after week.

    For storage components that keep real-world routines flowing—without disrupting the rest of your closet—explore Gridry’s practical organization options here.

  • How Small Changes in Dog Feeding Areas Improve Daily Routine Flow

    Every morning, there’s a snag you never planned for: after breakfast, your dog stands by the kitchen mat, hesitating. You grab the leash, but the dog just circles the bowl, unsure, delaying the move toward the door. One pause doesn’t matter—until it does, every day. Suddenly, the simple feeding-to-walk routine gets stuck here: one dog waiting for a cue that never comes, one owner stepping and re-stepping over the mat, the walk always bumping into the next obligation. The whole setup looks tidy, but actually moving from eating to outside keeps falling apart in practice. You keep reorganizing bowls and mats, but each morning, you both get delayed by the same awkward transition that just won’t smooth out—proof that one overlooked detail can break the whole dog-life flow DogPile was built to improve.

    The Quiet Slowdown: How a Small Pause Turns Into an Everyday Snag

    At first, that extra loop by the bowl feels like nothing—a blip you blame on stray kibble, a sleepy dog, or your own rushed timing. But day after day, the “post-meal limbo” digs in. Instead of gliding from food to front door, you both get stuck: the dog lingers, you reach for a leash left just out of reach, and your clean handoff becomes a standoff. It’s a pattern now. The rhythm falters, you’re eating your own breakfast with one eye on your dog, and both of you are a few minutes late getting outside, your morning schedule already under pressure from a friction point that doesn’t belong there.

    It doesn’t announce itself with chaos. It seeps in with small, repeated drag: the dog delays, then doubles back, you keep grabbing for the leash behind a pile of boots, and what should be a two-second reset now eats up the buffer you thought you had. The longer it lasts, the less “organized” your kitchen corner feels—no matter how clean it looks, the flow keeps breaking down right in the middle of your morning routine.

    Why Do Dogs Pause? The Subtle Impact of an Unclear Transition

    It’s easy to blame the dog’s mood, age, or quirks, but most post-feeding stalls happen because the setup hides the next move instead of pointing to it. When the bowl sits out of line with the exit, or the mat blocks the clearest route, the cleanest-looking feeding zone sends a scrambled signal. Your dog circles, you both glance around, and nobody’s sure where to go. All it takes is a bowl too far from the door, a mat that becomes a sticky waiting spot, or a leash hook that always requires stepping around something—these are the invisible tripwires that slow a routine without ever making a real mess.

    An Example From the Everyday Grind

    Think about Tuesday: meal done, dog is ready, you’re aiming for “quick exit.” Except the bowl is still in the kitchen’s far corner, mat in the footpath, and the leash is wedged behind boots. You squeeze by, fumble for the leash, and lose momentum. By the time you finally open the door, you’ve added three extra steps and lost trust that this routine will ever be frictionless. Tidy storage doesn’t remove the block if it’s not in the path you actually use. That repeated reach or detour starts small, but the cost is real: breakfast gets colder, shoes get scuffed, and both human and dog feel the morning jam up before it even really starts.

    It Looks Tidy, But It’s Not Working: When Organization Isn’t Enough

    You can declutter, fold mats, and color-coordinate your leash rack, but if the flow from food area to door keeps stalling, all you’ve built is a display instead of a fix. In real homes, you keep hearing: “I put everything away, but I still step over the mat to get the leash,” or “The bowl has a spot, but the dog stalls, staring at me and the wall.” What you see as “organized” is masking the fact that the bowl, mat, and leash aren’t working together to move you forward—they’re slowing you down, one silent pause at a time.

    Setup Friction: Where the Routine Actually Trips

    This is not about clutter—it’s about the minor, repeated hurdles: a leash that requires an awkward reach with a full mug in hand, wipes tucked away from the actual walk path, a mat that blocks the fastest exit, or a bowl left in the spot that turns your dog’s finish into another circle. This kind of friction doesn’t scream for a dramatic fix—and that’s why it keeps coming back each morning. The weak point isn’t how the setup looks; it’s how it fails under repeated, real-use conditions.

    Making a Micro-Adjustment: Shifting the Bowl, Resetting the Flow

    One overlooked nudge usually does more than a weekend overhaul. Shifting the food bowl and mat six inches closer to the hallway made a bigger difference than any “reset” ever promised. Suddenly, the dog’s focus lines up with the exit, not with the empty bowl. That end-of-meal circle disappears, and with one move—eat, walk—you cut out the hesitation. The mat stops acting like a speed bump, and the routine regains flow. It saves less than a minute, but it also saves your patience. The kitchen end of the feeding zone isn’t designed to look perfect—it’s set up to clear the path. That’s the signal of the DogPile world: routines made easier not by more stuff, but by better arrangement for how you really move.

    How This Small Change Pays Off—And What It Doesn’t Solve

    No, your dog won’t sprint out the door every time. One tweak doesn’t erase all hesitation, but it does change the pattern: now, feeding cues walk time, not another round of doubt. The leash is still yours to grab, but you both know what comes next. The improvement doesn’t show up in style photos, but you’ll feel it the next morning you’re running late—flow matters most when you have the least time. If small adjustments feel invisible, check your mood after a week: less repeating, more moving, fewer delays layered into your day.

    Other Spots Where Setup Quietly Slows You Down

    The feeding-to-walk choke point is only one weak link. Most routines hide traffic jams in plain sight:

    • Leash Storage: A hook or bin that’s technically “organized” but never easy to grab if your dog bounces or your hands are busy. A leash caught in the boot cluster turns quick access into slow untangling, every single morning.
    • Cleanup Supplies: Wipes that are “there somewhere,” but placed so you’re drying paws by the wrong entry or doubling back into the kitchen with a wet dog, realizing only too late that grab-and-go wasn’t built in.
    • Toy Overflow: Play zones slowly migrate into your walking lane. Now, two toys are underfoot on the way to the door—forcing you to sidestep or scoop as part of every exit, not just after a play session.
    • Rest Corners: The softest bed always ends up right where you need to cross. The dog loves it; you step over it four times a day, breaking stride after every outing. A cozy corner can create its own bottleneck if it crowds the main route you actually use.

    The setups aren’t broken—they just choreograph extra steps that sap time and calm out of your day. That’s the quiet difference between “looks organized” and “works smoothly”—and you only notice after enough slowdowns pile up.

    Resetting the Feed-to-Walk Routine: Practical Tips

    1. Trace the Dog’s Movement, Not Just the Room Layout

    Watch your dog from bowl to exit—where does the extra loop start? Are you forced to step across their path, or reach across their waiting spot? These seconds matter. The actual path tells you more than any storage plan or tidy line ever will.

    2. Move (Don’t Redesign) One Item at a Time

    You don’t need a full makeover. Slide the bowl toward the door, move the leash bin where you naturally reach as you pass. Eight inches in placement can erase hesitation that no new organizer will solve. Stick to micro-moves so you can see which one changes the pattern—skip the urge to rearrange everything at once.

    3. Signal the Next Move: Use a Clearer Cue

    Uncertainty is a delay multiplier. A short phrase, gesture, or even a visual “go” cue (like nudging the bowl away or pointing at the door) links the finish of one task and the start of the next. You’re training the flow, not the dog.

    4. Observe How the New Setup Holds Up Over Time

    The only test is repeat performance. If a change only works for one day, it’s not fixed yet. Watch for the old pattern to sneak back: if you’re still seeing the same delay after a week, something else is out of line. The true signal is less stopping and less second-guessing—for both of you.

    Recognizing the Signs: When a Routine Needs a Tiny

  • Why Stable Cable Management Transforms Your Lighting Setup Experience

    A “clean” lighting setup often unravels the moment daily life returns. A desk lamp placed with care, its cord tucked along the edge, looks resolved for a week—until a rolling chair brushes the cable loose or the next charger crowds the outlet. Suddenly, the tidy surface is broken: a curling cord now hooks ankles, blocks a drawer, or trails dust under the work light. You don’t have to look for the clutter; you feel it every time you adjust your chair, reach for something below, or catch your foot on a wire that’s supposed to stay out of sight. That tension—between looking finished and actually staying usable—defines whether your lighting and support setup helps or keeps dragging you back to the same fixes.

    When a Tidy Lighting Setup Isn’t Enough

    Even the best LED panel, task lamp, or under-shelf light looks flawless on day one. But setups change in ways that static photos can’t show: a small chair shift, an extra device, or one deep sweep under the desk brings every supposed “solution” into test. If you rely only on cables hidden by surface placement or adhesive clips, a single nudge or the warmth from a power supply weakens your arrangement. The result? A wire once beautifully concealed now droops or curls into walkways and work zones. Rooms that collect real use—shared offices, family study corners, multipurpose tables—expose every shortcut in cable management. What looks resolved on Monday is already slipping by week three, and everyday movement makes the disorder more obvious, not less.

    Everyday Friction: What Unmanaged Cables Really Do

    Loose cords from lamps or panels are more than visual noise—they actively reshape routines. If you’ve ever had to pause mid-edit to steer a chair around a snagged cord, or back up from a shelf because a wire pulls taut under your hand, you know the disruption isn’t theoretical. In shared rooms, these disruptions multiply: lamps unplugged by passing feet, chargers tugged from place by kids, cables trailing across dusting and cleaning paths that signal “not really set up.” An exposed drop under an open shelf means you hesitate each time you store or retrieve something, and a cord draping off a shared table means each user has a new interruption to solve. The more traffic and turnover in the room, the faster a lazy cable solution becomes the new source of daily hassle.

    “Hidden” Only Until Something Moves

    Slim fixtures and plug-in accessories promise a low-profile look, but “out of sight” rarely survives the real habits of a workspace. A cable pressed flat behind a shelf edge or run along a baseboard with a cheap adhesive will keep its promise for a handful of days—until vacuuming, kids, pets, or bag handles disconnect it. The calm illusion is snapped; a wandering cord returns to view, crossing the same clear table you thought you’d finally resolved. The more active the space, the more precarious any cable route that depends on being left alone.

    Real Room Example: When Good Setups Break Down

    Imagine two side-by-side workstations, both originally installed with slim LED lighting and tidy cable runs. In the first week, each looks sharp—no wires on show, surfaces stay open. But life starts to pull at the setup: headphone swaps, laptop moves, under-desk organizing. On one desk, a weak adhesive bracket lets go, dumping a cable where feet slide or bins shift. That desk now hosts small, persistent failures: a shifting light every time someone nudges under the desk, an unexpected unplug when a bag catches the wire, or a slow buildup of clutter in the open. The other desk uses screw-in clips and locked cable runs. Over time, even as chairs roll and routines bend, nothing shifts, catches, or interrupts. Only then do you realize which setup you can ignore—and which one keeps demanding corrections.

    Why Anchoring Outperforms Hiding

    An anchored cable stays predictable, even as everything else in the room changes. Relying on pure concealment—tucking wires behind or under with only tape or adhesive—sets a countdown until the next surprise tangle or slip. Clipped or bracketed cables, mounted along walls, under worktops, or behind solid support points, handle dozens of daily disruptions without needing to be re-fixed. Every shortcut you take for appearance over anchoring piles up, leaving future-you a maintenance loop instead of a solved setup.

    Small Fix, Big Relief: A Mid-Desk Clip

    One simple, targeted change often resolves the pattern of nuisance. After months of chasing a lamp cable under a shared work table—pushing it back after every chair adjustment or cleaning—the installation of a single screw-on clip between the wall and knee zone kept cords up and away for good. The difference isn’t just visual calm; suddenly you’re free to add another light, plug in extra devices, or clean quickly without new tangles appearing. Once the route is anchored, the work surface serves you, not the cable’s latest drift. This minor, precise fix erases repetitive friction without needing a full overhaul or invisible miracle solution.

    Questions That Shape a More Usable Setup

    How much cable management does a room actually need?

    Just enough to keep every wire off moving surfaces, pathways, and visible room edges—no more, no less. Any cord that repeatedly crosses into a cleaning zone, desk edge, or walk path needs its own anchor. “Invisible” is a weak goal if it trades away the ability to move freely without snag or surprise.

    What can I do if running cables behind furniture isn’t possible?

    Work with what your room’s lines actually allow. Use slim surface-mounted channels, tough clips, or even bracketed runs to lead cables tight along desktop edges, shelf undersides, or baseboards—never across open zones. Consistency beats all else: a straight, anchored cable is quickly forgotten, while a wandering or slumped cord becomes the room’s persistent weak spot. Order matters more than invisibility here.

    Do cable color or cover type actually change usability?

    Matching cable color to wall or furniture can subdue visual clutter, but movement control trumps all aesthetics. The material matters only once you’ve anchored the cable mechanically, not just concealed it. What makes a setup functional is not how the cord looks, but how reliably it stays where you placed it, regardless of daily shifts.

    Making Quiet Improvements: What Really Works?

    Chasing total cable invisibility creates a fragile setup. Satisfying lighting and support systems are the ones that handle cleaning, new tech, chair rolls, and changing routines without shifting out of order. The real win? A few well-chosen clips or channels, a bracket on the right surface edge, and a cable route so regular you forget it exists. This isn’t about a showroom look—it’s about not being interrupted by the same fix each week, and feeling like the room is set up to work with, not against, you.

    One Small Tip: Reroute for Calm, Not Just for Looks

    If a cable keeps reappearing or blocking your movement, redirect it behind a non-movable anchor—along a desk leg, shelf bracket, or wall edge—and lock it in. Perfect invisibility is a myth in real rooms, but a cable that never strays restores calm immediately. Stability, not concealment, is what lets you stop thinking about cables at all.

    A lighting setup that works lets you adjust, clean, or reroute devices without re-fighting the same cable every time. The best support structure disappears from your routine not because of how it looks, but because it stays silent—steady, anchored, and ready for whatever your space needs next.

    Find practical indoor lighting and support solutions at LightSupport.