Blog

  • How Washable Runners Cut Down Litter Tracking Near Entryways

    When a litter box gets parked near the entryway, the plan sounds simple: keep the mess locked in one corner. But by midweek, most setups start to fall apart—especially if you have to dodge gritty patches while grabbing your keys or make a last-second broom run after guests track debris through the main hallway. What looked “contained” on day one is now a slow-motion chase: stray litter creeping past the mat’s edge, fine grit clustering beyond the intended zone, and the welcome mat turning into a daily battlefield. If you’ve ever shuffled around a stray clump while putting on shoes or discovered crunching underfoot during a midnight water run, you’re already familiar with how fast the entry-litter problem outgrows its borders—sometimes by the end of the first real weekend.

    Why Entryway Litter Zones Stop Feeling Contained

    Most people start with a mat: neat, squared to the box, edges sharp, the zone “defined.” On paper, it should work—paws land on the mat, loose bits drop, cleanup contained. But watch after a few rounds of cat-to-bowl and human walkthroughs: grit picks up and rides past the mat, collecting in odd places. By day three, those invisible specks solidify into real clusters you feel before you see—a row of particles halfway to the living room or a dusting by the food dish. The friction point always emerges fastest where traffic and litter overlap.

    A cat’s post-box route is anything but predictable. Sometimes it’s a zigzag exit; sometimes paws jump the mat entirely and head straight to the food area. Meanwhile, human feet cross through on autopilot, spreading the debris even farther. Add food and water setups nearby, and there’s no pause—the litter zone and feeding zone blur together. Suddenly, resets become reactive: a frantic sweep every time you realize granules have reached the hallway—or a guest arrives, and the only clean-up tool is whatever’s closest.

    Cleanup That Keeps Interrupting the Day

    The main frustration isn’t always the visible mess; it’s a setup that looks correct in a photo but can’t go three days without blowing its cover. Here’s where that gap between “tidy appearance” and “routine proof” becomes clear:

    The Compact Mat: Looks Right, Fails on Repeat

    Small mats do their job—at first. Sweep, align, wipe: the litter stops right where the mat ends. But as the days stack up and routines layer over one another, the edges fail. Gritstacks build just beyond the mat: from the spot you always cross to refill the bowl, to the path the cat takes to their next nap spot. Each trip—cat or human—nudges those micro-clusters further into the house. The mat’s boundary is only visual; the real border is where the next inconvenience appears. By then, “litter area” has shifted all the way to the rug under the dining chair or under the water bowl you thought was safe.

    This is the tradeoff: a space looking managed after a reset, yet never making it through the day without another sweep. The more the day unfolds, the more the same mess returns right after you thought you’d cleared it.

    Overlap Zones: Feeding, Play, Litter Collide

    Where feeding, entry, and litter zones pile into one stretch of floor, the cleanup problem multiplies. Mats might overlap with water corners, toy storage, or the only route to the kitchen—meaning there’s always more than just litter: stray kibble, splashed water, toy fuzz, and litter grains mix. Mat edges collect everything, making the “boundary” a catch-all that never fully empties. Missed debris finds a way underfoot, fusing with whatever didn’t get swept last time.

    This is why, when the mat reaches its limit or the wipe stack gets buried, you spend less time relaxing and more shuffling, moving mats for access, and double-sweeping. Reset moments offer relief, but it’s fleeting—the cycle restarts with every routine. Constant spot-cleans keep you from ever having the “contained” feeling last beyond a single tidy-up.

    Washable Runners: Expanding the Zone (and Breathing Space)

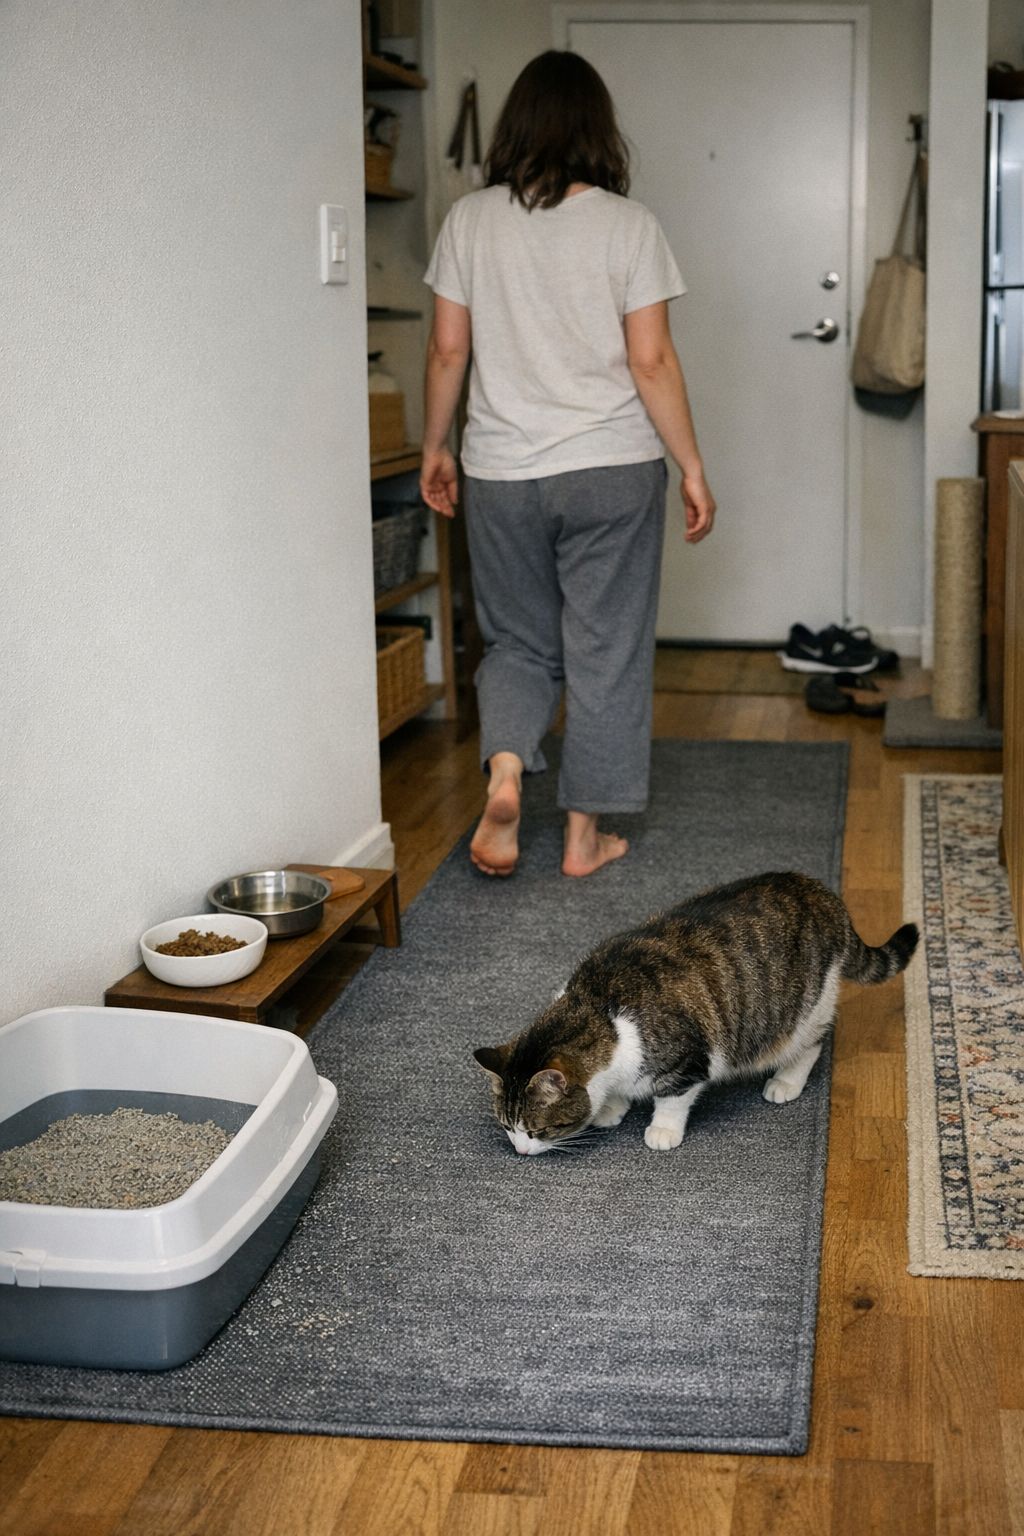
    Trading a compact mat for a washable runner isn’t about making the setup look fancier—it’s about shifting the cleanup burden from constant, scattered micro-cleans to a single, more forgiving surface. Runners stretch those few extra feet that matter: covering not just “where the paws land” but the actual traffic pattern from litter to feeding to door. Suddenly, granules don’t break past in a single leap; there’s room for the mess to settle and get stopped—before it reaches the rest of the home.

    In practice, the first week reveals the shift: the pile-ups don’t reach the hallway, and the mat doesn’t need hourly attention. Most of the mess gathers along the runner, making it easier to tackle in one grab—either a shake-out before heading to take out the trash or a toss into the wash with the rest of the week’s laundry. Raised seams or textured ridges work as speed bumps, catching the finer debris that once escaped with every step. The result isn’t perfect, but you notice: cleanup becomes a regular slot in the week, not a string of unscheduled interruptions.

    Washable runners transform more than just the coverage area. They break the reactive cleaning pattern—no more cycles of sweeping after every pass. Instead, you get a longer stretch of time before anything slips through, and a single wash or shake resets the whole high-traffic path. It’s less time spent chasing a mess that never quite clears and more time with a genuinely usable shared space.

    Practical Placement: Why Coverage Beats Size

    You don’t need a full-length hallway runner, but you do need smart placement. It’s not the amount of matting—it’s whether it actually stops the problem. Track how both cat and human move across the area. If the path hooks around a corner, an L-shaped runner or two connected mats work better than one big rectangle. If your cat launches behind the coat rack but you always step through the main center, overlap your coverage so both real routes get blocked. Runners work only when they fit the actual rhythm, not just the imagined “straight line” version of your setup.

    When the Runner Alone Isn’t Enough

    Some homes need layered defense. Maybe your space is tight or toy scatter is a bigger headache than the litter itself. In these cases, use the runner as your main filter, but add a small mat under the water dish or a quick-grab wipe caddy at the edge. The goal isn’t maximum flooring—it’s covering every real escape point for mess, so you aren’t forced into extra resets or re-cleaning the same spots every time the play zone erupts.

    Reset Flow: Making Cleaning Easier to Stick With

    The big payoff isn’t just cleaner floors—it’s that resets finally stop being a hassle. Old mats mean awkward shake-outs (and half the dust floating back). Runners let you grab and shake hard, then toss straight into the wash when it fits your laundry schedule. No pausing mid-morning for a broom run. No bending down to spot-treat a surprise pile. Most reset moves collapse into one step, making it practical to keep up with the mess without the irritation of doing all your cleaning “out of order.”

    The first real sign: you catch yourself walking past the entry without needing to check for grit, knowing the runner has it covered. On rushed mornings or after an intense play burst, one sweep or shake is enough—that time saved adds up, and so does the sense that the cleanup is finally fitting the routine (not disrupting it).

    Downside and Repeated-use Realities

    No setup stops every particle. Washable runners aren’t magic barriers. There will still be days when a muddy paw or messy feeding session leaves you with extra work. Sometimes a stray clump escapes, or tracking happens anyway, especially during rearrangements or busy days. What changes is the scale: the “emergency” cleanups shrink, the space near the entryway stays calm longer, and each reset holds up through more regular use. Bare feet, shoes, and scattered toys don’t drag as much mess into your living room—or worse, into the bedding. The friction point—that sense of always being a step behind—eases, even if it doesn’t disappear.

    This is the actual shift: surfaces look managed, but—more importantly—they hold up through real daily traffic.

    The “Before and After” in Daily Home Use

    Picture a narrow apartment entry: door, shoes, box, bowl, all crowded close. Day one: mat under the litter box, everything looks clean. Day three: residue dots already showing up by the food bowl, dust trailing toward the hall rug, and one toy batting debris further. Resetting means moving items out of the way—maybe twice a day—while the same spots keep refilling with grit.

    Change to a runner, and the routine shifts. The walkway from box to room becomes the barrier. The grit stalls out on the textured strip, with far less making it to the bowl or crossing into the main living space. Cleanup happens as a single check-in, not a scramble after every crossing. Resetting, once a time-crunch, now fits the weekly laundry rhythm without


  • Understanding Circular Saw Blade Wobble and Its Impact on Cut Precision

    The real cost of crooked cuts isn’t just wasted material—it’s that slow build of frustration and lost time as simple projects mushroom into edge repairs and touch-up tasks. In the thick of shop work, you rarely spot the root cause right away. A wobbling saw blade doesn’t announce itself with sparks or shrieks—it chips away at your results, quietly turning precision layouts into post-cut headaches that pile up faster than sawdust on the shop floor. Whether you’re fitting finish panels for a client, banging out repeatable cabinet pieces, or ripping plywood on a makeshift table in the garage, you expect your saw to track straight. But plenty of blades stamped “precision” start to drift under the pressure of dense material or the wear of a long day.

    The Hidden Tells: Spotting Blade Wobble Early

    The earliest signs of blade wobble are easy to overlook. Maybe it’s a faintly uneven whine, a puff of dust from the side, or an edge that looks clean until you go to join panels. What starts as a hairline wave in your cut builds momentum: fence-guided rips ripple, panel joints reveal daylight, and that tight, easy assembly you counted on starts demanding filler and sanding you never budgeted for.

    Why does it happen? It’s usually not about blunt teeth. Blade plate warping, an out-of-round arbor hole, or simply uneven mounting pressure can all set up the shake. You’ll feel it creep in most clearly during:

    • Batches of sheet goods—cutting more than one panel at a time, or dialing in matching parts for cabinetry.
    • Ripping tight-grained or thick hardwoods—where resistance exposes any hint of blade flex.

    If you let a fluttery cut slide (“it’s just some plywood, right?”), the misalignment quietly compounds. By the time you catch it, half your work is already in the fix-it bin.

    When Specs Lie: Why Not All “Precision” Blades Cut the Same

    Put two fresh blades side by side and they look nearly identical—same tooth count, same carbide shine, even the same weight in your hand. But under real pressure, differences emerge fast. Slice through a clean pine 1×4 and nearly any blade behaves. Start feeding it Baltic birch or a dense sheet of MDF, though, and the rigid blade keeps humming true while the flexible one starts to wander.

    The stiffer blade glides a clean, steady line—almost like the saw’s on rails. The weaker plate starts vibrating, chatters out chips, and tracks away from your fence. Soon, you’re babysitting the wood, adjusting position between every run, and picking out splinters where the exit tearout shows up. What seemed like a small difference in “feel” becomes a domino of lost time, wasted panels, and strained joints halfway through assembly.

    Shop Reality: The Moment Precision Slips

    Picture a Saturday morning: you’re cutting finish faces for a built-in. Rail stops are set, layout is dialed, cuts are flying. By midday, you’re dry-fitting—and the joints should snap tight, but instead they show a wobbling seam or an odd tactile bump where the panels meet. You question your skills, the saw, even the plywood. Only after swapping in a blade with extra lateral stiffness does your edge-to-edge fit snap back into place, gaps close, and those unplanned sanding rounds vanish. That little change in the saw’s feedback—the early hint of wobble—was the first warning you missed. Ignore it, and you’re locked into tedious rework before you even realize what happened.

    Blade Plate Thickness: The Hidden Difference-Maker

    The spec that rarely gets spotlighted? Body thickness. Most pro blades run a plate around 1.7 mm thick. Upgrade that to 2.2 mm and you feel it—not just in stability, but in the confidence to feed denser stock or run longer rips without steering corrections halfway through. Real-world tests? Measurable kerf wander from plate flex drops to almost nothing—less than half a millimeter over a full meter’s cut.

    In the shop, that translates into edges you can trust: crisper kerfs, minimal chatter, less side-dusting, and almost no need to rethink your assembly sequence. Thicker blades do ask a bit more from your saw’s motor, but the uptick in control saves you from double-cutting, patching, or—worse—remaking panels because the first ones refused to line up.

    A Fast Way to Detect Wobble (Before Your Day Unravels)

    Cut after cut, it’s easy to rationalize flaws—until your stack of parts won’t fit. Whenever you change blades, or sense a subtle shift in cut quality, do this simple check: Spin the blade by hand. Watch closely—

    • Are tooth tips weaving, side-to-side?
    • Any soft “click” or rolling catch in the sound as it spins?

    A true blade will hold a single, unwavering path. If you notice drift, don’t gamble with reassembly—remount or swap it. Dullness won’t always wobble a blade, but increased friction and heat from a blunt edge exaggerate any imbalance, and that’s when problems scale up fast on the job.

    Real-World Blade Performance: More Than Just “Sharp”

    Anyone can sell you a “sharp” blade, but that won’t keep your workflow smooth. Out in the grit and noise of actual builds, it’s the blade’s ability to lock into its own path, resist deflection under load, and keep every cut on course that determines whether your cut list stays ahead of schedule—or falls apart at assembly. Blades with proven stiffness reward you twice: less waste now, and less fatigue later, because you’re not fighting the tool for control or spending hours sanding out mistake edges.

    Don’t lose stretch after stretch of work to barely-visible wobbles or tiny kerf shifts. A stiffer, slightly thicker blade isn’t a cure-all, but it’s often the line between productive momentum and watching a project stall because your parts no longer fit. The best shop habits don’t just chase “sharp”—they pay attention to what the blade’s telling you, before small problems multiply into a full afternoon lost to fixes. Check your blades. Trust your instincts. And don’t underestimate how much less effort and frustration you’ll face with even a small upgrade in blade quality—especially when the pressure’s on and deadlines don’t wait.

    Find reliable blades and saw accessories built for real shop demands at Gumboll.

  • How Small Cat Habits Turn Simple Care Into Ongoing Chores

    In a typical day, it’s not the dramatic escapes that trip up pet care—it’s the tiny interruptions that slip in when your cat darts under the bed or your dog noses behind the sofa. Each dash isn’t just a game of hide-and-seek; it’s a cue for routines to stall: grooming brushes stranded in the wrong room, water bowls sitting half-clean, towels missing when spills hit. What starts as a cleaned-up corner quickly unravels as basic tools drift away from the spot you actually use them. The difference is visible by midweek: unfinished resets, delayed wipe-downs, and one missing towel quietly building friction into what should be a simple reset. A CalmPetSupply home isn’t just tidy at a glance—it’s set up so the next-needed item is never a room away when another disappearance throws off your flow.

    Minor Disruptions, Major Ripples

    You start to refill your cat’s water bowl after breakfast, only to spot a line of fur on the rim—and yesterday’s brush parked beside it, forgotten after a quick swipe. The cleaning towel? Nowhere nearby; it’s still draped to dry, out of reach when crumbs scatter. Each of these small oversights costs only seconds, but together they start chaining into a loop: tools settling in odd places, mats left unwiped, litter tracked beyond the pet zone. Every time your pet vanishes, you find yourself detouring, grabbing what you need from somewhere else, and breaking focus just to finish a basic reset.

    The Chain of Half-Finished Chores

    Indoor pet care routines only look invisible because they stay smooth—until an extra disappearance or misplaced item throws off the sequence. After every return, the same cycle repeats: topping off water, sweeping stray kibble, hunting for a scoop missing from its station. That morning-tidy area dissolves quietly as the day goes on. Mats that start flat collect fur or shift out of place with each return. Supplies that should sit ready instead scatter—brush on the sill, towel under a pile, scoop across the apartment—so every care moment gets nudged just off track.

    Those small gaps become time sinks. Place the brush in the wrong spot after a rushed grooming, and you’re delaying the next swipe until later. Let wipes migrate to the wrong bin and one quick clean-up turns into a trip across the house. Even when everything looks decent in the main zone, there’s a catch: the real drag comes when just one tool is missing at the moment you need it.

    Spotting Repeated Friction Points

    Patterns expose themselves the more you repeat these routines. Is the brush missing every time food goes down? Do you fight through stacked supplies for the water jug? Find that the pet towel’s always joining the laundry, only missing just when spills matter? These aren’t emergency failures—they’re pressure points that show up in the busiest slots: after work, doing late cleanups, juggling pet and human meals. The friction of hunting for the right item, wiping surfaces too late, or retracing steps for a forgotten towel makes simple care spiral into a longer, more draining chore.

    Use Scenes: Real-Life Chore Interruptions

    You get home, try to feed the cat, and spot an empty water bowl—but the refill is blocked by a storage bin no one put back right. While topping up, you dodge litter that escaped the half-finished earlier sweep. The dustpan? Not by the mat, but buried behind stacked food bags. Or, reaching for the brush after your cat’s return, you realize it wandered to the living room last night. These aren’t disasters, just a steady drip of inconvenience: the kit is “there,” but never ready at the pressure moment. One misplaced item, one unfinished step, and soon, every routine feels a beat too long.

    The Subtle Difference: Tidy vs. Ready

    Most setups hide clutter but don’t eliminate friction. Food bins filled, toys corralled, floors clean—but try a mid-day water refill, and you’re bending under the sink for the bottle or digging for a towel that’s taken a walk with the laundry. Grooming gear in a basket looks neat, but if it isn’t right where you wipe down or brush, tomorrow’s job just circles back. Visual order is not function: a tidy look won’t stop those interruptions from dragging out the same steps, again and again.

    “One spot for everything” sometimes just shifts the problem sidewise—the brush out of sight also means it’s out of reach, and the storage caddy “organized” by the door leaves you walking the pet gear circus between zones. Even in a mostly tidy space, repeated drag collects at one unpatched weak point. You see it each time a step is skipped or a wipe-down is postponed.

    Reducing Routine Drag: One Adjustment at a Time

    The fix isn’t piling on more storage—it’s closing the distance between where you are and what you need. Try a wall hook above the bowl for the brush, a towel rack by the entry, or a shelf at pet-height for wipes. When tools return to a “first-reach” spot—not a nearby bin or the next room—resetting takes seconds, not minutes. Ignore minimalism for now; instead, anchor each tool at the point of first interruption.

    Start with the annoyance that comes up the most: the step you skip, the detour you dread, the gear always out of place. Adjust just one of these and the surrounding chores often fall into line. Do it before everything feels out of order—wait, and scattered gear will keep stretching today’s cleanup into tomorrow’s delays.

    Trusted Routines That Stay Simple

    Routines fail first from the smallest slips: a mat that shifts away, a water bowl only half refilled, a grooming brush missing when the rush hits. Notice what you repeat for the wrong reason: setups that only look organized but fall apart in the middle of a real day. Giving each core tool a home within arm’s reach—always, not just sometimes—restores a flow that keeps you ahead of the next interruption. Pet care will always bring the unexpected, but a setup that closes those everyday gaps starts to feel as calm at 10pm as it looked at 8am.

    Each time you notice yourself pausing mid-routine—circling back for a towel or stepping over clutter—the real solution is not more gear or energy. It’s finding and fixing the spot where looking “put together” falls short of actually making care easier. It’s these small, right adjustments that keep the week’s mess from turning into ongoing routine drag.

    See what works smoother in your own daily flow at CalmPetSupply.

  • Why Carry-On Packing Breaks Down on the Way Home and How to Fix It

    Every organized carry-on looks ready for anything—right up until the first real test. That crisp setup: grid of packing cubes, zipped pockets, folders stacked neatly, offers the illusion of total control. But give it an airport—one security line, one gate change, a few reach-and-replace scrambles—and the cracks start showing before you even board. The wrong item surfaces; must-haves get buried; just as pressure climbs, your access gets slower, not smoother. What begins as order, fast becomes a new kind of travel drag—hidden until your bag sees real, repeated use.

    The Hidden Flaws of “Departure Order”

    The classic hotel ritual—everything boxed, grouped, and zipped into place—seems rational. Devices lined up in one sleeve, documents pocketed, cables coiled with care. Yet, on the move, perfection unravels fast. The first time you need your passport—standing at a cab or a checkpoint—you’re already peeling back layers, second-guessing where things went. Outside that neat hotel room, “organized” turns into shuffled layers, and what looked efficient now feels like friction multiplied across real airport routines.

    Packing Neatness vs. Access Pressure

    The tidy departure map doesn’t survive the airport shuffle. Chargers migrate, snacks wedge themselves above your critical tech, and the outer pocket—once Passport Central—is now a snarl of wrappers, scribbled receipts, and tangled cords. The original plan collapses under each new addition or last-second repack; needing one thing means unpacking three, slowing you down just when moving faster would matter most.

    When Order Fails Under Real Movement

    This tension plays out in a hundred tiny scenes: unzipping pouches in the security queue while people sigh behind you; digging elbow-deep past a shaving kit to reach a boarding pass; pausing in the aisle as you reshuffle half your bag just to show one document. The system you built for clarity now ensures every needed item takes its own small detour—adding up to frustrating, repeated delays.

    Checkpoint Stress: Where Structure Gets Exposed

    No moment exposes packing mistakes quite like airport security. At each checkpoint or boarding shuffle, you become a test case for your packing logic. Tray after tray, a passport slipped under a charger or a pouch that slumps below what you need becomes a mini-obstacle course. Suddenly, a “neatly organized” setup just means more steps to get anything out.

    How Quick Access Slides Out of Reach

    Sections marked “quick access” at first? They sink, literally, under the day’s debris. The outer pocket meant for travel docs slowly turns into a dead-drop for whatever you had in your hand last. Each reach turns into a blind grab—snags, cables, wrappers—leaving you second-guessing every placement, and slowing down for one more zip, one more hunt.

    Boarding Lane Fumbles

    Final boarding, and here’s the familiar script: carry-on swinging by your side, one hand searching for a charger or snack, the other balancing everything else. Quick entry gets derailed; you stop mid-aisle, blocking traffic while digging for a ticket now buried beneath travel detritus. What was meant to hide disorder now hides access. You notice who moves smoothest: it’s not the best-packed, but those with one clear reach for the essentials.

    Why Perfect Packing Rarely Survives the Return Trip

    Leave home with everything sorted; return with each pocket a mix of survival improvisations. New receipts mingle with socks. That “temporary” snack now lives in the document sleeve. By the time you’re chasing a connection or waiting to reclaim your bag, the failure is obvious: it isn’t how neatly you packed, but how quickly you can get to what you actually use that determines if your system works under pressure.

    Access Over Appearance: The Shift That Actually Helps

    The difference-maker isn’t another clever pouch. It’s giving up on restoring showpiece order for your return and making practical, in-transit access king. Before checking out, strip away performance packing habits. Gather only what you’re guaranteed to use—passport, boarding pass, critical tech and charger, sanitizer, snack, maybe a mask—into a single outer access point. It refuses perfect symmetry, but under travel stress, you’ll spend zero time searching, and skip the failed “quick tidy” before every hand-off.

    One-Zip Control: The Hidden Upgrade

    By clustering all essentials in an accessible front pocket or section, you slash the number of movements at every checkpoint and gate. One zip. One reach. Everything else—rolled t-shirts, backup pouches, hotel folders—stay untouched. The visual appeal of the main compartment is untouched, but you’re no longer sacrificing flow for neatness when things get crowded or time gets tight.

    The Repeat-Use Reality: Smoothness Beats Symmetry

    Pure order works for photos and first impressions, never for real, repeated travel. An organized carry-on doesn’t guarantee you’ll glide through security or boarding if every access point triggers a domino effect of repacking. With every trip cycle, the demand for smoother operation exposes the limits of “perfect packing.” Real travel chips away at pretty order until only functional setups survive.

    The Case for Sacrificing “Perfect” for Practical

    Most travelers try to recapture initial neatness before the flight home, only to block direct access to what the airport will repeatedly demand. A better rule: access beats aesthetics, especially under stress. Instead of reshuffling for looks, front-load the stuff you’ll grab most. If outer pockets fill with chaos but nothing important is lost or delayed, that’s a travel win, not a packing failure.

    Simple Setup, Real Change: What to Try Next Trip

    Skip the mirror-image repack—run a fail-proof exit check:

    • Relocate every must-grab item (passport, ticket, tech, charger, mask, wipes, snack, pen) to one instantly reachable outer section, even if it looks a little more lived-in.
    • Ignore the urge to restore “departure order”—if one-zip access works, don’t mess with it for appearances.
    • Use each trip to adjust: if you kept reaching for something tucked away, give it a better spot next time. Each leg is a live test.

    In the end, the best carry-on setup isn’t the neatest—it’s the one that keeps you moving through real travel strain with the least interruption. Order matters, but friction (or the lack of it) matters more in the long run.

    For more practical travel tools that survive real-world carry-on routines, visit CarryOnSupply.

  • Choosing Wardrobe Organizer Towers That Work in Narrow Closets

    By week two, a wardrobe tower installed in a narrow closet often reveals its real character. At first, everything stacks and fits—the install day snapshot promises order. But the daily churn of grabbing, returning, and reshuffling starts highlighting the flaws: shirts shoved onto shelves barely within reach, piles collapsing against edge panels, socks slipping behind baskets. What seemed “just right” on paper becomes the source of delays, repeat grabs, and silent frustration—especially when the layout eats up reach or crowds items into blind corners. Every reset gets heavier and less precise, each deviation a bit harder to fix. The closet is technically full, but the space no longer works naturally with your routine. That’s when storage stops just being storage, and becomes its own kind of obstacle course.

    Where the Tower Starts to Show Its Limits

    The smallest measurement error becomes a multiplier in real use. In narrow closets, even a centimeter lost to a too-wide tower or an intrusive side panel intensifies friction—especially as “quick returns” pile up. A sweater folded in haste falls out of place by Tuesday. The bottom shelf, hidden when doors are open, becomes the last stop for shoes or extras, collecting chaos behind a facade of order. Instead of shelving items, you’re squeezing, tilting, double-stacking, and—inevitably—leaving things out. Routines stall: the shirt you need is blocked, so you start using the easier (messier) surface. What was “organized” is now a zone of traffic jams and shifting piles.

    Every strained reach, every time you fish an item out from behind a panel, is a micro-failure in the system’s design. Overflow creeps onto the floor, return flow breaks down, and the closet’s capacity—no matter how stacked—shrinks in practice. That clean tower face now feels like a wall you work around, not a storage tool you work with.

    The Subtle Costs of a Tight Fit

    Flush symmetry trades visible order for hidden inconvenience. A tower that butts up to closet walls and lines up perfectly seems efficient until you try to live with it. Suddenly, sliding out a shirt means scraping it past a side panel. Hangers snag. Stacks migrate unpredictably as you pull from one side and return to another. It’s almost always the left edge that hides a crumpled scarf, or the right where socks disappear. Shared closets magnify the tension: one person’s quick return undoes another’s careful stack; backpacks slide into shoe piles. The system looks sorted for days; it feels less sorted every morning.

    Blocked Access—The Real Routine Breaker

    Daily resets punish setups that ignore access paths. Front-only shelves or deep, boxed-in cubbies slow you down: extracting a shirt means shifting three others, opening a second section, or accepting that some stuff just won’t go back where it belongs. Overflow sneaks behind panels—even when “hidden”—quietly sabotaging any shot at real order. The more you try to keep up, the more you end up working around the design, not with it. Eventually, resets grind to a halt and the system sheds its usefulness, item by item, pile by pile.

    Open Sides: A Practical Shift in Usability

    Open-sided or dual-access towers aren’t about style—they’re about survival during chaotic weeks. Shelves open on the side let you reset without disturbance: slip in a shirt from the edge, rescue a fallen sweater before it lands on the floor, keep categories visible even when life is anything but predictable. Suddenly, the morning scramble doesn’t turn into a scavenger hunt or another miniature reshuffle project. Overflow shows itself—no longer hiding until “clean up day”—and gets handled quickly. Dual-access means you debug issues faster, bending less, and retracing steps far less often. The closet responds to your routine, instead of enforcing its constraints.

    After a month of using a setup with true side access, most floors stay almost clear. Repeated fixes are minor, not major. Even with competing schedules or a family’s shared use, categories drift less and resets stop ballooning. The improvement isn’t just visible—it’s routine, in the best way.

    Measurement Matters More Than You Think

    Measure closet width at the top, middle, and bottom—use the smallest reading. Then subtract a centimeter or two for breathing space. That gap sounds like a concession, but it’s your buffer against the jammed, scraped, and stalled resets that undermine every “full width” tower. The slightly smaller setup pays back every time you slide a basket or return a shirt without wrestling the whole row. Less friction equals more reliable maintenance, and less stuff finding its way onto the floor.

    When “More Storage” Isn’t More Usable

    The temptation to maximize shelf count with the widest possible tower usually backfires. Every added centimeter of unit width beyond comfortable reach shrinks what you can actually use. Corners become dead zones for off-season shoes or toppled stacks. More isn’t more: it’s just harder to scan, slower to reset, and increasingly hostile to the mixed items and quick changes that real routines demand. Sometimes, a bit less shelf space or a modular, open-sided build delivers true gain—faster retrieval, easier returns, and less time wrestling with overflow each morning.

    What Really Keeps a Closet Usable

    What you can see, you can fix. Prioritize structure over capacity: shallow shelves, visible divisions, and open edges keep maintenance quick and error recovery nearly instant. Deep cubbies, concealed drawers, and closed baskets lure you into overstacking—then punish you with mixed zones and slow return flow. If you’re always shifting piles, bending awkwardly, or lifting something just to access what’s behind, the system isn’t matching your daily pattern. The best setups foreground visibility and reach, not just neat stacks or “hidden” storage.

    Pay special attention to the edges and the lower zone—these are the first places mess creeps in. If your hand struggles to reach or your items migrate behind view, the structure is working against you. The closet that’s simplest to reset is the one that won’t force you to pause, rearrange, or move on “just for now.”

    Recognizing the Difference: Looks Sorted vs. Stays Workable

    There’s a gap between “looks good after install” and “works after a week of life.” Closets organized for show rarely survive the test of midweek chaos. It’s that second phase—the bounce back from a messy Tuesday, the quick rescue of a shirt from zone-collision, the absence of hidden piles on the floor—that tells you whether your organizer tower is helping or hindering. True usability shows up in every stress test: one-handed retrieval, two-minute resets, categories that don’t blend by Thursday. Installs fade, but a structure designed around real habits subtracts friction, not just surface clutter.

    For more practical inside-storage solutions that work for real lives, visit Gridry.

  • Managing Plug-In Lighting Accessories for Flexible Indoor Spaces

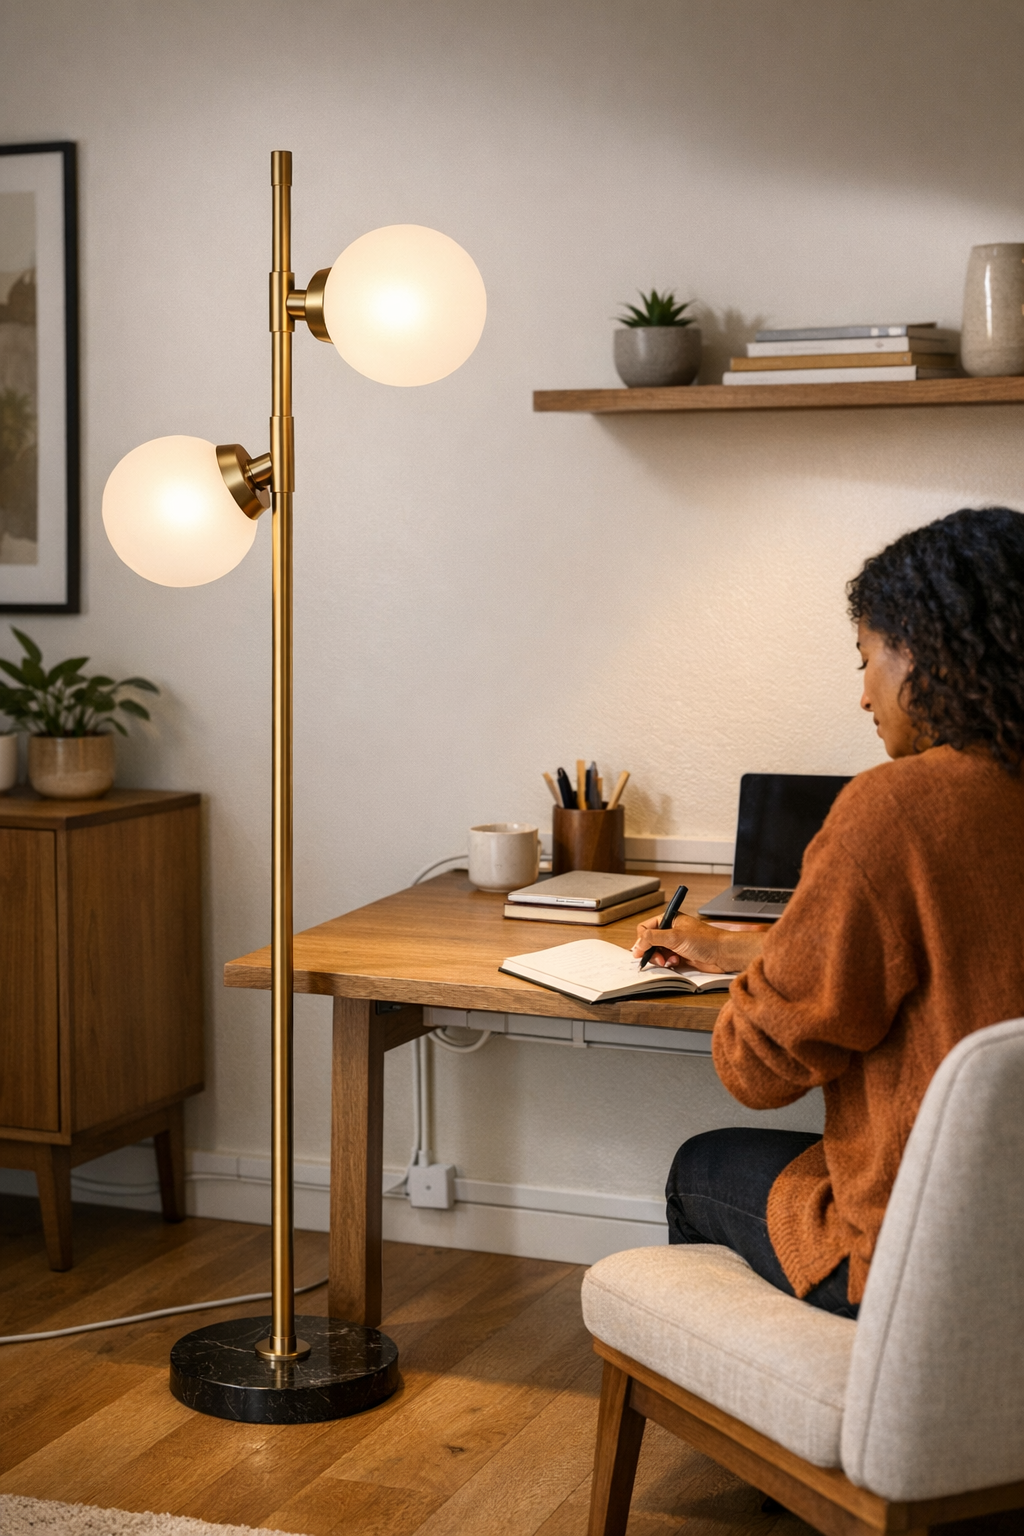
    Plug-in lighting promises instant brightness for any desk, shelf, or shared table—but it’s the mess and movement underneath that decide if it actually works day after day. That neat first setup doesn’t last. As soon as the second charging cable tangles with your lamp cord, or you catch yourself rerouting a loose extension for the third time in a week, it’s clear: flexibility can mean constant, low-level disorder. The cable tucked behind the monitor drags into view each time you reposition your laptop, and the lamp you placed for zero glare at night greets you with a blinding angle the next morning—not because you did anything wrong, but because portable setups are always one small shift away from another interruption. Real comfort with plug-in lighting depends less on surface tidiness and more on whether the system stands up to the friction of repeat use in a real room.

    Why Plug-In Lighting Is Flexible—But Fragile Under Daily Use

    The main draw is obvious: plug-in options are fast, adaptable, and require almost zero commitment. A clamp lamp on the bookshelf, an under-cabinet strip, or a portable desk light lets you reshape a space fast—no holes, no long-term decision, just plug and play. For a table that toggles between dinner, work, and kid projects, or a corner that dumps you from office to reading zone in seconds, you get real freedom to adapt.

    But over time, daily routines expose how quickly that freedom frays. Cables start tracing awkward detours—dangling across walkways, crowding shelf edges, always hunting for the nearest outlet. You might fix the lamp cord on Monday, but by Thursday it’s crossing your coffee zone again. An extension head sticks out behind the couch, forcing you to step up and over, or you find a panel light’s adhesive back starting to let go after a little too much repositioning. These aren’t just eyesores: every stray cable, every misaligned clamp is a repeat friction point—reminding you that “portable” often means “constantly managed.”

    How Clutter, Glare, and Cable Management Interrupt the Routine

    A lighting setup can look clean in the morning and feel like a hassle by the afternoon—especially in active rooms or shifting work zones.

    • Missed edges: An under-cabinet light might brighten the middle of your counter, but the dim edge where you actually chop or prep means you’re always readjusting. Illumination that skips the real work area adds drag to what should be a simple routine.
    • Sudden glare: That night-friendly lamp becomes an eye-straining bright spot at sunrise, sending you back to fuss with angles, shade position, or even switching it off to dodge the shine. Lighting that needs this much babysitting doesn’t disappear into the background.
    • Surface invasion: Clamp lights and slim stick-ons drift—one loose bracket, and the “clear” table now demands a nudge before you can set down your bag. The line between supportive and intrusive shrinks fast as parts slide, cables slump, or pieces creep into daily pathways.

    By Friday, a desk that looked organized on Monday is crowded with the fallout—adjusted lights, visible cords, clutter that’s less about mess than about constant small interruptions.

    Real-Life Setups: When Flexibility Becomes a Hassle

    Consider a multipurpose home office: a conference zone by video call all morning, then a homework hub in the evening. You set up plug-in work lights—easy, adaptable, no drilling. Within days, the freedom unwinds: extension cords turn into trip hazards, a clamp lamp slides out of range just as you join a call, and that “minimal” setup means stray wires greet you every time you cross the room. Each fix lasts a little shorter than the last.

    Or a compact kitchen with an adhesive under-cabinet strip—the prep surface stays bright for a while. But repeated cleaning loosens the strip just enough for the cable to drop into view, making each meal cleanup another reminder that stick-on solutions are rarely set-and-forget. The promise of flexibility comes with a price: every re-angled task, each wiped surface, gives new chances for wires, shadows, or detachment to break your flow.

    How Small Fixes Improve Day-to-Day Use

    Tidiness with plug-in lighting isn’t about making the space prettier; it’s about removing obstacles you bump into over and over. In one desk setup, swapping a loose extension for a slim, surface-mounted raceway did more than hide a line: it stopped chair legs from catching wires every time someone stood up. Elsewhere, adhesive cable clips lined along the back edge of a shelf kept lighting cords from slumping into the workspace—making cleaning easier and signaling fewer “readjustment” days.

    Even minor repositioning—rerouting a clamp lamp cord behind a bracket instead of across a desk—can quiet down distractions. None of these fixes are magic. The lamp stays “portable.” But the room stops reminding you, every few hours, where the setup isn’t working. That’s the line between a solution that’s flexible and one that’s quietly, repeatably functional—ready for change but solid until you actually need to move it.

    Tip: Commit to Cable Paths, Even If the Light Isn’t Permanent

    Don’t leave cords roaming for later. Lock in your cable path—along the baseboard, hugging a desk frame, or tucked in a corner—using cable clips, adhesive guides, or a low-profile raceway. It’s fast insurance: visual calm, less chance of snagging, and a setup that interrupts you less during normal shifts of bags, chairs, or daily sweeps.

    What Actually Holds Up Over Time?

    This is where most setups falter: by week two, is the lighting still doing its job without new friction? Plug-in gear will always move a bit—weighted bases and better clamps stretch the fix further, but any exposed wire or loose anchor invites another disruption. There is no truly “maintenance-free” portable setup. Stability means choosing which interruption you can live with and actively designing out the worst: cords you must dodge, brackets that need nudging, or task lights that flare up at the wrong hour.

    Choosing the Right Plug-In Accessories for Real Spaces

    Clamp lamps, adhesive panels, low-profile under-shelf strips—these are easier on your walls and simple to swap out when you need to relocate. But their real value shows when you prioritize secure grip and built-in cable guidance. That up-front detail matters: fewer resets after cleaning, less time untangling, and fewer evenings spent adjusting what looked “minimal” but acted unpredictable. The cable route and anchor method are what decide if your room just looks neater, or actually works better all week.

    Find a Balance Between Flexibility and Order

    Daily friction sneaks up if you sidestep it in the name of flexibility. The best plug-in setups aren’t invisible; they’re reliable and tuned for how you really move, clean, and work. Ditch the idea of a perfect showroom look if that means more cable drift or repeated fidgeting. Instead, double down on cable routes and stable mounting—especially for shifting desk edges, shared shelves, or any zone that changes roles by the hour. The goal isn’t just a cleaner line, but a lighting system that feels resolved each day—even after a week of unpredictable routines.

    http://www.lightsupport.myshopify.com

  • How Smart Organization Transforms Your Pet Travel Routine Effortlessly

    The real test of any pet travel setup starts when the trip stops being new—right around the third or fourth repeated stop, when the same moves keep coming back and the “just-in-case” bag starts fighting back. What looks organized on your kitchen floor—zippered pockets, sorted treats, stashed toys—gains weight and friction in real use. Suddenly, the wipes are hidden under a nest of squeaky toys. The leash tangles with yesterday’s bowl. Pulling out snacks scatters items meant to be separate. On every repeat, the system that was “ready” drags you into new mini-delays: reaching the wrong compartment, pulling out too much, wasting time on cleanup instead of moving. Even the best-seeming setup starts working against you, not with you, once routines become muscle memory and you want speed, not order for its own sake. PawGoTravel doesn’t just sell carriers—it designs around these fault lines.

    What Happens After the Setup’s First Impression Fades

    The gap between “neat” and “actually easy” shows up as soon as your travel pattern repeats. Maybe you’re aiming for a post-park rinse or a quick snack at your usual roadside pull-off. Now the routine is leash, bowl, wipes, treat, seatbelt—same objects, same order, again and again. If your gear buries the quick-grab items beneath comfort add-ons, you end up digging or moving stacks. Wipes end up wedged behind toys. A bowl shifts out of reach, making quick stops into scavenger hunts. The bag is never empty—just always out of order, and every reach feels slower. Speed drops, energy drains, and the prepared look hides the slow-burn drag of managing the same five items three different ways.

    How Setup Friction Creeps In—One Stop at a Time

    A travel bag feels like a solution only until real repetition exposes every weak point. The first stop—fine. By the second or third, the leash is a tangle magnet; bowls move somewhere less sensible; cleanup wipes take a back seat to treats or blankets. A comfort item meant to reassure ends up blocking the main zipper. These aren’t emergencies—they’re compounded minor failures, each one stacking into a frustrating cycle. The “organized” bag quickly becomes the main cause of slowdowns, not a shortcut for the routine.

    Familiar Routines, Familiar Frustrations

    Breakdown is most obvious where you know the drill. At the park exit or trailhead, your pet’s moving at full speed—and you’re pausing to unjam a zipper or grope for those mystery-location wipes. A leash caught behind fabric, a wipe bag crushed beneath stray snacks, a comfort toy now blocking the only direct pocket: each stutter isn’t catastrophic, but the pattern is stubborn. Four stops later, the whole setup “looks packed” but throws up interference every time you go to move. It’s a manageable mess, but the repetition makes it unavoidable: no single flaw, just a cumulative sense that you’re starting over on every grab.

    The Return of One Persistent Weak Point

    Some trouble spots keep resurfacing. Water bowls, which start out in easy reach, migrate under toys. Cleanup gear always present, never perfectly handy. Small tools or supplies wander out of their “zone.” Stops don’t vanish—they build up physical and mental drag, every step a little heavier, every reset a little more crowded, like invisible clutter multiplying inside the bag.

    Dividing Access: The Small Change That Lifts the Routine

    Eventually, the difference between an “ordered” bag and a “usable” bag is impossible to miss. The real upgrade? Outfitting quick-access items—wipes, bowls, leash—into dedicated side or exterior pockets only you touch during movement. Deep-storage comforts stay sealed inside. This single adjustment halves the time (and effort) to grab what you actually need at a curb or seat edge. The essentials live where you need them, not wherever they landed after last use. Instead of the whole kit getting scrambled, your go-to supplies are insulated from the churn. Each return to the car or the sidewalk gets faster—less fumbling, less shuffling, fewer mistakes during the ordinary stops that make up actual travel.

    Seat-Side and Street-Side: Handling in Motion

    Clean separation of quick-access and storage zones transforms transitions. Mid-movement—dog half-in, half-out, leash in one hand—there’s no digging or risk of dumping blankets just to reach wipes. Outside, at fast reward moments, you aren’t lost in comfort gear just to locate the bowl. This split isn’t theory: with every repeated stop, the gain in speed, calm, and control builds. You start noticing fewer dropped items, shorter pauses, and a more reliable return to movement, across every phase of a routine trip.

    Managing Overlap: When Owner and Pet Items Collide

    Owner essentials always find their way into pet space. Phone chargers, sunglasses, and grocery receipts sneak into the very pocket meant for wipes or leashes. The more comfortable you get with the routine, the higher the odds of accidental crossover: wires by the snacks, wallet under a pet blanket, keys trapped with comfort toys. Every forced overlap—cleanup pouch fighting for space with headphones—turns a simple reach into another reset. Reliable structure means every zone (pet, owner, comfort) has a reason, and every movement stays predictable. You stop thinking, and just act—because the setup forces less chaos, not just less clutter.

    Real-World Shortcuts That Stick

    Where Should You Really Keep Wipes?

    Wipes belong in a dedicated, outside-facing pocket, always separate from snacks and toys. Done right, grabbing a wipe should take two seconds, even with a leash in hand and the car door open. If you’re using two hands or opening the main bag, friction is already winning.

    How Do You Keep Leashes Tangle-Free?

    Clip your leash to an exterior ring or hang it from a visible loop outside the bag. This single shift slashes tangles—and ends the routine of fishing the leash out of a mess of blankets or chasing stray treats around the seat.

    Why Does the Bag Feel Heavier After Several Stops?

    It’s not new gear—it’s handling drag. Bowls wander into the main pouch, comfort layers ooze into quick-grab spaces, and every “one-time” overlap sticks unless you intervene. Honor the original structure at every reset. The lightest-feeling setups don’t just look clean for a photo—they resist slide and tangle through every interruption, no matter how many stops you make.

    The Payoff: A Setup That Stays Light in Use, Not Just in Looks

    After enough real-world trips, you stop believing in one-and-done packing. A workable pet travel setup isn’t “organized” in a static way—it stays ready by keeping friction zones cut off and repeated motions free. Quick-grab layers for action, comfort gear sealed for later, owner items kept from migrating—every reach, pause, and restart runs smoother because the bag is built for movement, not just storage. The difference isn’t theory; it’s time, energy, and comfort returned to you and your pet with every repeated outing.

    Keep your next trip working for you, not against you, with setups designed for real repeated use. Explore more pet travel solutions at PawGoTravel.

  • Why Marking Drill Holes with Tape Ensures Perfect Lighting Alignment

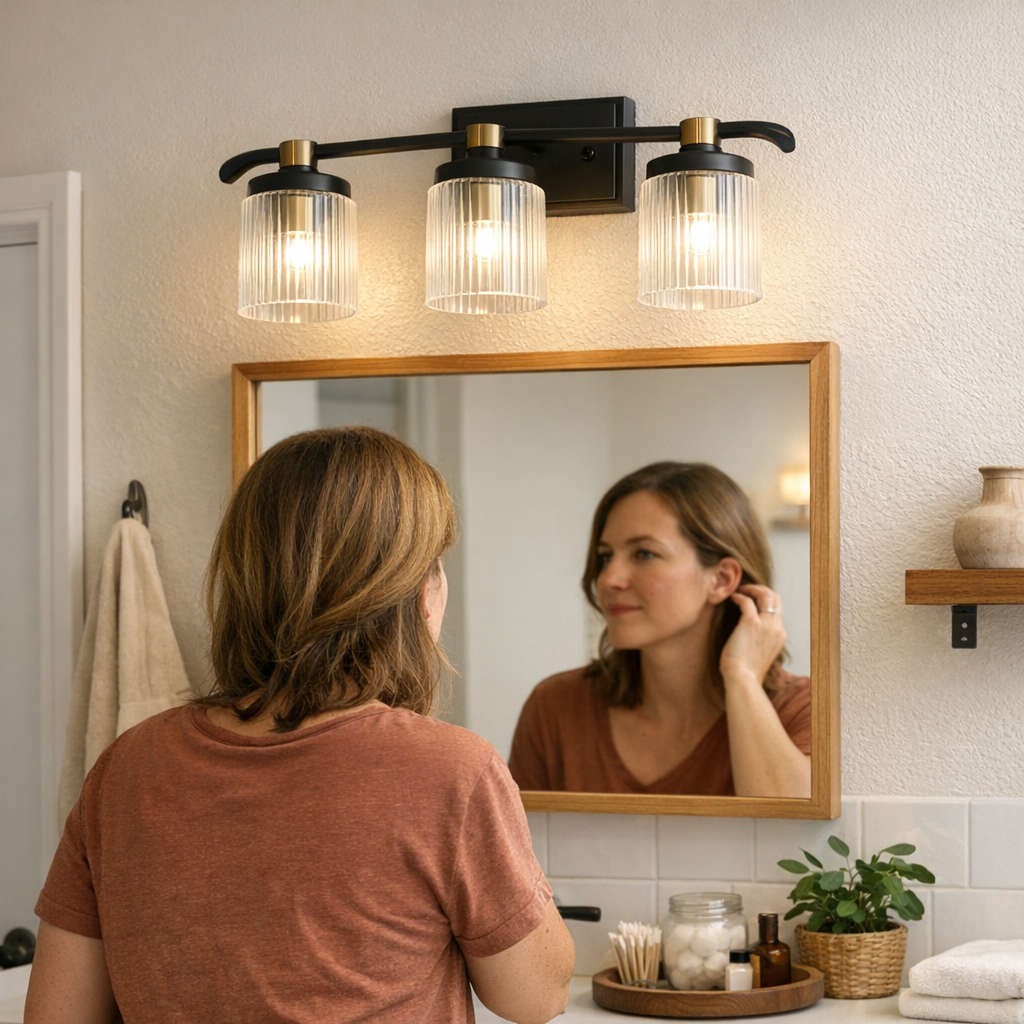
    You install a new flush mount, wall sconce, or bathroom light and expect a finished upgrade—until you step back and see it: the faint tilt, uneven glare across the mirror, or a shadow slicing through the one spot you use every day. Small misalignments at install—the kind that slip in from “eyeballing” or quick measurements—don’t just look sloppy. They shape the room: task areas go dim, stair landings gather dark patches, and daily movement gets awkward. In real-world lighting—hallways, vanities, laundry rooms—a few millimeters off at the start means years of living with fixtures that never feel quite right.

    The Hidden Gravity of a Few Millimeters

    Indoor lights rarely fail dramatically; they fail in the margins. A ceiling panel that’s even slightly skewed throws shadows where you fold laundry. A bathroom mirror catches glare on one half, leaving the other in semi-darkness. Spaces that look bright at first click feel tiring after a week, simply because a misplaced light throws off routines. Repetitive annoyance creeps in—lingering at a stair turn to find your footing, leaning to one side at the mirror for even light, or shifting groceries around for a well-lit countertop. These aren’t one-time irritations; they’re baked into the space by the way drill holes were marked in the first place.

    Every small error grows when the routine sets in. By the third or fourth pass up the stares, or the tenth time you notice your face half-shadowed at the vanity, you realize these quirks aren’t going anywhere. That’s when tiny miscalculations become noisy, everyday friction—avoidable, but now part of the room.

    Why Tape Marks Change Lighting, Not Just Looks

    Lighting isn’t just about hardware or style. What matters most is how that fixture’s position matches up with how the space gets used again and again. Tape marks—simple painter’s tape, not a fancy tool—are where intention gets checked against reality. Without them, lines go crooked, shadows stretch the wrong way, and glare jumps into view from exactly the spots where you stand and move.

    Marking with tape beats memory and visual guessing by:

    • Making real perspective visible: Tape lets you check the intended position exactly from where you’ll walk, turn, or do work—so you catch problems before drill bits leave scars.
    • Protecting small spaces: In narrow baths or corridors, just a little off-center becomes a glaring flaw. Tape helps lock in the right spot on the wall or ceiling, where the fixture actually serves the room’s pattern.

    Real Scenes: Seeing the Problem Emerge

    Small Bathrooms: Every Inch of Light Counts

    Picture a bath where the mirror’s edge nearly kisses the wall. Hang the vanity light by feel, and you’re stuck leaning at an angle each morning—one side of your face bright, the other in shadow. You stop noticing the room and start compensating for it, shifting with the fixture’s mistake every single day. It isn’t just a cosmetic miss—it’s built-in inconvenience at the most-used zone.

    Hallways: Subtle Shifts, Immediate Effects

    Hallways and entries survive on a single fixture. Mount it without taping the mark and, over time, you find the left wall’s always gloomed, or the right side stays washed out. Movement patterns twist: you hug the bright side, rush past the shadows. A minor mounting slip interrupts flow for years—until you finally face a rework.

    Laundry Rooms and Task Areas: Glare and Shadows

    What looks “centered” from the doorway can mean constant shadow at the folding table, or glare bouncing straight into your eyes by the second load. Under-cabinet lights seem promising, but a guessed placement leaves the best working edge dark, making you angle every dish or shuffle piles just to see clearly. A room can look well-lit but still blind or strain you right where it matters.

    The Cascade from Small Errors

    The difference between “it looks finished” and “it actually works” comes down to placement. Tape marks are a small step that turns potential errors visible—before the drill locks them in. Without that check, routine failures start stacking up:

    • Ceiling lights or sconces show a tilt that grows more obvious every day
    • Work surfaces stay in the shadow, no matter how many bulbs you swap
    • Mirror zones collect uneven glare, making tasks awkward instead of easy
    • Fixes mean patched drywall, paint, and more time lost—never fully restoring the surface

    In small rooms and flexible-use spaces, these flaws are amplified. Once you’ve lived with them, “almost straight” becomes a persistent defect burned into your routines.

    A Small Habit for Consistently Usable Light

    The most functional lighting is invisible in everyday use—you don’t have to sidestep shadows, lean for clarity, or wonder why one spot never feels comfortable.

    Getting there isn’t about expensive fixtures or complicated plans. It’s this: mark center and edges with tape, transfer marks to the surface, and review from every real angle you’ll use. Hold the fixture in place, check for off-kilter shadows or glare, and adjust before drilling. In corners and tight runs, a centimeter is the make-or-break difference. This habit pushes chronic little problems—odd tilts, dim edges, fixed glare—out of your routine for good. You notice best not because the lighting wows you, but because nothing interrupts; the room finally matches how you move, see, and work.

    Practical Tips for Lighting Precision

    • Choose blue painter’s tape—it stands out, peels off cleanly, and won’t pull paint.
    • Mark your spots from use-perspective, not just stand-in-front drilling. Get to where you’ll actually need light.
    • For fixtures with multiple screws, measure between tape but also double-check by visual alignment—since walls and ceilings aren’t always as straight as the level suggests.
    • Before committing, hold up the fixture (even loosely) to spot which way shadows or glare land, and tweak placement if needed.

    Lighting that Works, Not Just Lights Up

    Good tape-based marking doesn’t show off when the switch flips. Its value is felt later: a hallway that just stays evenly bright, a mirror that doesn’t force you to lean, a laundry counter that stays lit no matter the hour. The best setups “disappear” because they don’t draw attention—they clear the path for whatever you’re doing, without constant correction.

    Lighting isn’t about wattage or bold new styles; it’s about whether the space actually works at the points you use the most. Painter’s tape isn’t a shortcut—it’s the everyday tool for getting usable, satisfying light without drama, mess, or expensive second tries.

    Find more practical indoor-lighting solutions at LightHelper.

  • Optimizing Cable Placement for Seamless Desk Workflow and Efficiency

    You spend an afternoon threading cables behind trays, dropping cords into cable boxes, clipping everything tight for that showroom-clear desktop. But fast forward a week: you reach for your phone charger in the middle of a call—nothing. The headset cable you need is buried out of reach. It’s not the chaos of a messy desk that slows you down—it’s the invisible drag when the right cable is out of line with the way you actually move. Over and over, you’re forced into awkward stretches and pauses, proof that a workspace can look organized but still work against the way you use it. At a glance, your desk is tidy—but your workflow tells another story, full of stops, resets, and fumbled access.

    Why a Tidy Desk Can Still Disrupt Your Workflow

    Visible order does not equal functional flow. Smooth cable runs tucked behind drawers or sealed tight in trays might pass an inspection, but the daily grind reveals their weakness: when the cable you need doesn’t land where your hand naturally goes, your workflow sags. It’s the difference between a desk that photographs cleanly and one that keeps up with real, rapid switching—keyboard to notebook, monitor to manual sketch, tablet to charge. Hidden cables turn simple tasks into a parade of stalls, especially in home offices pressed for space or on shared surfaces where every extra reach matters.

    The little things build up: a charge cable ends just out of easy reach, or an under-desk tray blocks you from plugging in at the critical moment. Instead of supporting your routine, your “solution” forces endless micro-fixes. You either give up and let cords spill over the edge for speed, or you waste extra minutes each night resetting the illusion of control. The clean look slips—often by the end of day one.

    Real-World Friction: Small Disconnects All Workday Long

    It’s not just about looking clutter-free—it’s the mismatch between setup and movement that grinds down efficiency. You hop between a laptop and a docked monitor, with a meeting live on one and a backup device recharging on the far corner. You reach for a cable and realize it’s wedged under a tray—or just half an inch too short. Each switch means fishing, rerouting, or dislodging your careful cable control—turning small shifts into repeated failures.

    If your cable plan is built on appearance at rest, not movement in use, you’re designing friction right into your workflow. That “clean” cable run for your main monitor becomes a blockade when you need to plug in a recorder, or transition quickly from tablet to laptop without breaking pace.

    How Workflow Changes Expose Cable Placement Weaknesses

    Long stretches of focused work, or days packed with back-to-back calls, lay bare these gaps. One moment you’re gliding across tasks; the next, you’re craning your wrist, shifting trays, or unintentionally yanking a cable from its constraining clip. As you toggle devices—plug in, unplug, charge, move—the endpoints creep forward, cables pile at the desk front, and the compact look unravels. Resets multiply; any time gained on “tidy” dissolves on the next device change.

    Eventually, you face a choice: keep the surface free and slow yourself down, or let the cables escape their designated hideaways and get real work done. Either way, the compromise signals that the original layout was built for looks, not for motion.

    The Breakthrough: Matching Cable Endpoints to Real-Life Reach

    The real fix comes when cable management follows your hand, not just your eye. Placing a charging cable so it lands just inside natural reach from your keyboard beat every other upgrade or organizer. This 14-inch shift turned out to be the change that actually sped up the desk—not more gear, not stricter order. No more deep fishing for a cord trapped behind a tray, no more momentary stumbles mid-action. The visual calm stayed intact because there was nothing left to put back; the desk simply kept up.

    Frequent transitions—charging one device, swapping to another, connecting an accessory mid-flow—became unremarkable, which is the goal. The desk looked organized, but felt faster because the structure finally matched how and where you move, not just how you want it to appear for an hour or two.

    Building for Real Use: Practical Cable Placement Tips

    Cable Clips: Prioritize Movement, Not Just Neatness

    Anchor cable clips along the route your hand follows—whether that’s within a hand-span of the keyboard, at the desk’s front edge, or by your most-used device dock. Even a two-inch reposition can turn a desperate search into a single, fluid motion.

    Cable Routing: Hide Strategically, Never Completely

    Under-desk trays, cable sleeves, and bins work best when they follow your hand’s daily return points. Don’t squeeze a cable so deep into a tray that only a stub is left out—surface just enough cord at your regular contact zone. This one allowance can erase repeated crawling under the desk or stretching for an inch more slack.

    Watch for Over-Organizing: When Order Creates Its Own Mess

    Overdoing it—locking every cable far out of sight—usually backfires in two work cycles. Every time you need to plug in, you’re forced to unthread or haul out the cord, ending with every cable right back on the desk’s edge after a day or two. A rigid system that pleases the eye at 8am falls apart through the reality of six or seven real transitions.

    Scenes from a Better Setup: How it Feels in Use

    Tune cable endpoints just once and you see the difference: device changes don’t scatter cables across the workspace, there’s less drag after a long session, and nothing prompts an evening reset. Even a compact desk or shared surface starts to keep pace—no re-routing cords, no surprise knots mid-project, and no drawer or tray fighting for elbow room. The best setups don’t draw attention; they simply vanish from conscious thought and stay out of your way.

    Flawless isn’t the goal—adaptable is. The setups that win aren’t perfect by photo, but invisible in action: you shift seats, move between notebook and keyboard, pivot monitors, yet the cables stay out of your thinking and off your to-do list.

    Quick FAQ for Real Desk Troubles

    • Where’s the best spot for cable clips? Right along the pathway your hand travels to plug and unplug the most-used devices—not in the far-corner or tucked behind deep storage, but within a natural wrist’s reach.
    • How do I keep cables hidden without creating slowdowns? Surface a short run at your most frequent contact point, with the rest tucked away. Opt for a visible blend, not a total conceal.
    • Most common cable setup mistake? Hiding cable ends for a pristine look, then repeating the same cable rescue all day as disorder creeps back and every swap becomes a battle against your own system.

    Bottom line: A desk isn’t “organized” unless it actually fits the way you move through real work—full of shifting devices, quick swaps, and occasional surprises. Cables that land at your real reach zone feel obvious in use and invisible to your routine. If you’re still untangling, resetting, or fishing for the same cord daily, your setup is signaling it needs a structural change—not another minute spent hiding the problem.

    Explore the full WorkBasic collection

  • How Protecting Your Dog’s Post-Walk Rest Eases Evening Stress

    Step through the door after a walk, unclip the leash, and within seconds, a quiet standoff starts: your dog drifts toward his bed, ready to sprawl, but the house is never really on pause. Shoes left by the mat, a damp leash over the banister, stray toys blocking the hallway—routine signals you should handle “just one thing” before sitting down. But skip your dog’s first ten minutes of post-walk rest or let the setup drag him back into your orbit, and the price shows up fast: pacing in the kitchen, toys skidding underfoot, a dog rooting through cleanup supplies while you’re still trying to reset from outside. Calm looks possible, but friction keeps sneaking in from how the home actually works, not how it looks on paper. This is the tension most owners ignore—until it shapes the entire flow of their evening, every single day.

    Why Post-Walk Rest Is More Than Downtime

    That first block of stillness after a walk is the hinge for the rest of your evening. On the surface, it’s nothing—just a dog sprawled in the corner, eyes half-shut, the house quiet for a moment. But if the pause breaks—even for a call, cleanup, or a too-soon dinner rush—the interruption keeps echoing: the dog gets up, patrols for dropped scraps, scatters toys across walkways, or jumps back into the thick of action. The underlying drag doesn’t come from the visible mess, but from a routine that refuses to settle, doubling the effort it takes to regain momentum the minute the reset gets skipped.

    How Small Misses Create a Larger Tangle

    You barely notice the first miss: a package arrives; the dog’s eyelids lift. You sweep the hallway; the whine starts up. Even a simple check of your phone can bleed distraction into what should have been off-limits calm. Each break seems harmless—a quick look, a short round of laundry, a footpath cleared. But together, these interruptions turn evenings into an obstacle run: poorly timed chores collide with canine restlessness, and everything from meal prep to bedtime takes double the focus just to keep together.

    Common collision points:

    • Dog circles the kitchen in search of food while you struggle to clear counters, wipe paws, or reach for a bowl without stepping over toys.
    • Every trip to grab wipes or towels is delayed—supplies might be nearby, but you’re already playing catch-up with a dog blocking your path.
    • Playtime turns manic, or the evening feels filled with more barking and pacing than anything resembling “settled.”
    • Instead of a predictable post-walk calm, your home slides into repeated micro-resets—always one step behind, even though supplies are within reach and the bed looks inviting.

    The Background Fade: Why Owners Write Off Rest

    The most common reason dogs don’t get a real post-walk pause? Stillness looks like nothing needs protecting—dog is down, bed seems fine, room is tidy, so every other errand wins out. But a “clean” space doesn’t keep routines smooth if every reset gets interrupted. Owners often trade ten minutes of protected calm for the illusion of productivity, only to find more sudden outbursts, longer pre-bed wind-downs, or chaotic play creeping back as the real tax on evening flow.

    Interruptions Add Up: Scenes From Real Life

    Routine pressure points are easy to spot once you start looking: The moment after a walk, you slip off your shoes, tug the leash free—and your dog is sizing up which space is actually his. Will the phone buzz, starting a hallway pacing loop? Will the vacuum jar him out of calm before he’s even had a chance to lie down? Each misplaced noise, each blocked spot, leads to a dog ping-ponging from room to room, scooping toys into busy walkways or trailing you for scraps. Meanwhile, you’re slowed by toys underfoot, towels just out of reach, or a dog parked exactly where you need to step. The tidy setup stops mattering if the function falls apart under normal movement.

    The tension isn’t about coddling. It’s about seeing that even in a room that looks “finished,” rest that gets broken by everyday movement—feet shuffling, chores ramping up too soon, cleanup bins that aren’t truly reachable—drags the entire evening back into disarray.

    Simple Changes That Deliver Noticeable Relief

    A full overhaul is rarely needed. A minor, focused reset often makes the difference: move the bed out of main traffic strips, shift the bowl to a silent corner, or pause chores for a short stretch until your dog has uncoiled from walk activity. The real gain isn’t in appearance, but in not having to manage or reassert calm every fifteen minutes.

    Tangible differences when you protect the slot:

    • Kitchens and walkways stay open—for humans and dog—when rest happens clear of foot traffic, not right at the threshold.
    • Supplies like towels, wipes, or toys wait in reachable, low-friction spots, reducing scramble and repeated reshuffling as soon as you’re back in the door.
    • Knowing the routine—ten or fifteen protected minutes first—stops the mental checklist from spiraling, and the whole evening regains predictable flow.

    Your dog actually rests. You don’t trip over loose gear. Meals get made with less interruption, and the bedtime ramp-down doesn’t relapse into a late burst of “forgotten” energy. Nothing’s flawless; dogs still adjust and life will still break pattern. But less evening energy gets wasted on fixing what a small, deliberate layout change could have prevented.

    Beds and Placement: Making Calm the Default Option

    No bed is calm by itself. It’s where it lands—and how easily your dog can stay there undisturbed—that matters more. Corners behind the kitchen table or along the hallway tempt fate: people pass through, towels pile up, toys creep into the wrong zone, and rest gets trimmed down to chance. A low-traffic spot—even just off the bedroom, away from the main rush—lets your dog stay put without being chased up by every routine ripple. If your dog’s bed lies across the only route to cleanup supplies or dinner, he’ll be in motion as much as you. If reaching for the leash in the morning or drying muddy paws after a walk means waking a dog who just got settled, that’s a sign setup is working against you, not with you.

    Resetting When Things Get Tangled

    No kit or plan can anticipate every post-walk curveball. Dogs track movement—and pileup can happen anytime routine background noise spikes. But once you’ve seen how a solid rest block after walks stops the cycle of pacing, tripping, blocked paths, or a wound-up night, the upside of a protected pause is hard to ignore. When evening flows start feeling messy or energy splinters into too many urgent tasks, scan those first ten minutes after walks. If chores, bed placement, or hallway clutter keep throwing friction at the calm slot, reset: shift the bed, slow the rush, temporarily block a passage. Reliable calm comes from removing obstacles, not adding new rules or organizing for looks alone.

    How Much Rest, and What Matters Most?

    There’s no universal “correct” number—most dogs settle in 10 to 20 minutes if the spot is protected and familiar. It’s not about precision, but repeatability. The easier it is for both owner and dog to drop into real post-walk calm, the less old, messy energy bounces back.

    What This Looks Like After Repeated Use

    Let post-walk calm become habit, and small improvements stack up:

    • Dinner moves faster; no blocked hallways, fewer scattered toys, and less scrambling for a misplaced towel.
    • Reaching for dog gear—leash, wipes, toys—actually takes less time, because each item has a home you can reach without stepping over the dog or his stuff.
    • Movement through the home—dog and owner alike—loses that friction from repeated resets. No more double-backing, sidestepping, or negotiating toys underfoot just to get things done.
    • Routine cleanup, feeding, or rest resets feel manageable—not just less messy, but actually easier, with less risk of routines unraveling under pressure.

    The difference slips in quietly: it’s a little less tripping, a little more flow, and a block of calm that resets everything else. It’s rarely perfect, but suddenly, it’s not about fighting the setup. Instead, it’s about a small adjustment—bed moved, chores paused, towels within reach—that changes the whole evening’s shape. For more practical, daily-life dog setups, see the collection at DogPile.