Category: Lighting & Work Setup

  • Why Lowering Under-Cabinet Lighting Improves Everyday Visibility and Comfort

    The promise of a “clean” lighting setup rarely survives a week of real use. That crisply mounted under-cabinet or slim shelf light looks perfect the day the cables disappear and the fixture hides behind trim—but friction quickly returns. Every time you chop vegetables or reach for supplies along the rear edge, you’re chasing shadow lines, glaring at the cabinet face, or stretching awkwardly to catch what the lighting missed. The setup that seemed finished now interrupts your routine, and the surface that looked resolved by mid-afternoon snaps back to frustrating reality by nightfall.

    Why Clean Looks Don’t Always Translate to Clear Working Light

    Minimal lighting installs—tight under-cabinet strips, flush LED bars, slick linear fixtures—are sold for their vanishing act. Wires vanish. Brackets recede. The counter or shelf glows evenly—until you actually start using the surface. That’s when the real issues appear: glare thrown off shiny trims, shadows swallowing the back edge, and core work zones left frustratingly out of reach. The crucial strip of workspace—where you set down a mug, review a manual, or hunt for a missing part—fades into gray.

    Lighting fixed high and hidden solves visual clutter but creates new obstacles. Reach under a low cabinet or deep shelf, and the front half is overexposed while the far side recedes into shadow. A setup praised for its seamless look reveals its limits the first time you have to adjust your position just to read a box label or grab a tool without guessing.

    Shadow Lines and Dim Corners: Where Streamlined Installations Fall Short

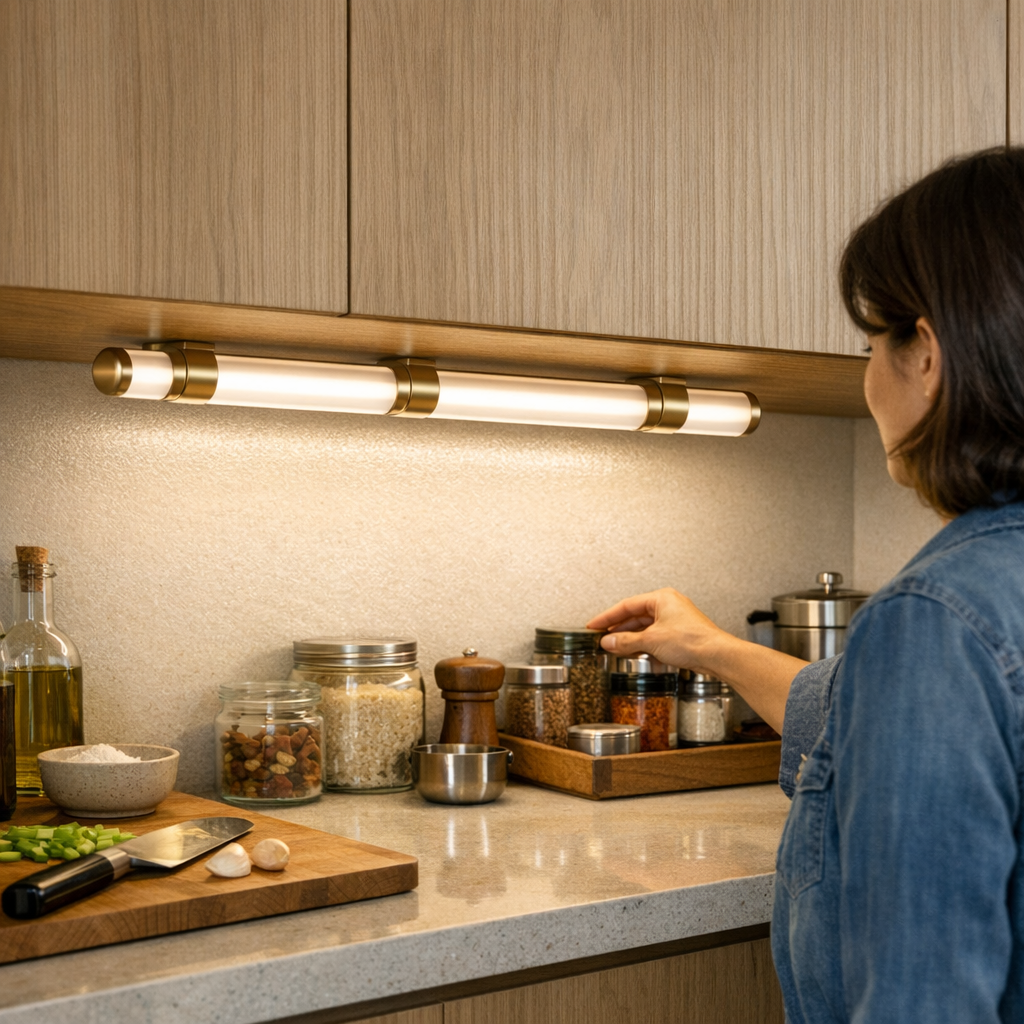
    The problem shows up in the same way, every day: hands cast dense shadows onto the space you need most, while the well-lit foreground distracts from what’s actually missing. In a kitchen, the place you rest a spoon or line up spices never feels fully visible. On a workbench or shared desk, small hardware and paper piles blur into the dim rear, forcing repeated shifting and squinting. Lighting that scores on looks stumbles on use—especially where routines keep circling the rear corners, not just the clear center stripe.

    These are not one-time annoyances. A week in, you’re adjusting your angle, dragging in another lamp, or leaning closer against the cabinet edge—proof that a setup considered “minimal” doesn’t always keep up with real-world movement or reach. The discomfort isn’t glaring, but it’s persistent: a subtle design flaw that keeps inviting workaround after workaround.

    Lowering the Fixture: The Simple Adjustment That Brings Real Clarity

    There’s a small, specific fix: Lower the under-cabinet or shelf-mounted light just 4–5 centimeters below the surface lip. This one shift releases the beam’s reach, pushing the light field all the way to the back wall or inner shelf edge—filling the shadow zone where hands, labels, and tools actually land. Suddenly, detail returns where it matters. The contrast between front glare and rear murk fades; the space behind jars, bins, or devices emerges as naturally usable.

    This isn’t about amp-ing up brightness or flooding surfaces. It’s about beam direction—preventing a fixture designed for stealth from robbing the very clarity it’s meant to deliver. Lowering the light doesn’t sabotage neatness; it corrects the balance between invisible hardware and visible function. The difference is tangible from the first meal prep or project night—no more faked minimalism that quietly drains productivity.

    Real-World Scene: Where the Lighting Position Pays Off

    Picture this in use: By day three, you’re prepping dinner under a flush-mount strip. Each time you slide a tray or scan for a label, your wrist blocks the light, forcing mid-task reads and guesswork at the back. You start angling yourself sideways or switching on a phone light. Drop that strip a modest notch—and now the far row of bottles, the onion skin, and even scattered crumbs fall plainly into view. Labels are legible without head-tilts. There’s no more moving twice to finish one task. The light covers the job, not just the décor.

    Shared Desks and Work Surfaces: Where Minimal Looks Can Slow You Down

    Kitchens aren’t the only danger zone. On workshop shelves, classroom desks, or shared counters, the same tight-mount setups leave half the surface ambiguous. Lowering a fixture turns a row of shadowed bins or half-lit paperwork into a clearly visible workspace—the near edge ready for fast grabs, the rear edge free of lurking details. It also fixes the annoying problem of partners or colleagues repeatedly shifting the lamp or hunting for what they can’t quite see. The area now matches intention: work moves forward instead of circling lost in half-light, without the pause to chase every shadow with a flashlight.

    It’s easy to credit a surface for looking less cluttered. It’s more convincing to count how much less you have to adjust after a fixture drops into its effective zone—quiet measurable difference, not just visual promise.

    Slim LEDs and Cable Placement: Balancing Neatness and Performance

    Some setups resist adjustment out of fear of cable mess or “visible” lighting. But slim LED bars and smart cable routes make this concern smaller than the headaches of living with half-lit surfaces. Pin cables tight along seams and supports; they fade from awareness faster than the persistent strain of missing screws or misread labels. A fixture that sits slightly lower does become more physically present, but in daily use, what stands out is the absence of friction: no more leaning, no more compensating, no mental note to “fix the light someday.”

    A visually minimal bracket or cable that fails in routine use is less “clean” than a slightly visible support that keeps your workflow seamless. Practicality wins—within days, the truly invisible element is the annoyance you’re no longer working around.

    How Small Adjustments Turn Into Lasting Routine Improvements

    Lighting setups that look perfect at install often turn into silent routine traps by week’s end. The easiest fix—lowering a mount—turns a kitchen, study, or work zone from “picture-ready” to genuinely usable. Glare softens. Blind corners fill in. Cables, if routed correctly, recede alongside brackets into the room’s structure. The best lighting support helps not by staying unseen, but by putting every label, handle, and edge within easy reach—cutting the lag between setup and fluent everyday motion.

    Minimal never means invisible at the price of comfort. The small, visible shift—a light dropped to the right level, a cable tucked clean but not buried—changes the room without ever getting in your way again. Most routines don’t need perfection; they need light that moves with them. That’s the difference between “perfect look” and real support.

    Find more practical lighting and support solutions for real indoor routines at LightSupport.

  • How Structured Cable Routing Enhances Desk Usability and Workflow Efficiency

    The line between a desk that simply looks organized and one that actually holds up under real work pressure shows up the moment you need a cable fast. You reach for your charger—that’s when the “tidy” surface fails: the cable has already slipped to the floor or vanished behind a pile of folders, forcing you into awkward reaches or a full crawl under the desk. Repeated drops, tangled lines, and off-balance surfaces create small setbacks that chip away at your session. A loose charger is more than a minor mess—it’s a daily test of patience and an invisible drag on workflow.

    Recognizing the Cable Problem Before It Slows You Down

    A charger left to dangle is more than stray clutter; it’s an early alarm for routine breakdowns. Even after a morning reset—pens lined up, papers stacked, cables coiled—the illusion cracks by lunchtime. By day’s end, your hand goes searching for a vanished charger, first on the surface, then behind the monitor, maybe finally under the desk. Each time, the “simple” search interrupts your working flow, piling on seconds and low-grade irritation. What feels minor on Monday turns into a repeated roadblock by Thursday.

    The hidden cost: snapped focus, bent connectors, cables yanked by moving notebooks, the charger’s heavy smack as it hits the floor again. The setup looks clean but never feels ready.

    Why Quick Cable Fixes Rarely Hold Up

    Temporary fixes always tempt: loop the wire over a monitor arm, wedge it under a mousepad, let it rest just out of sight. For a day, it works. After that, gravity wins. A device swap or erase of a whiteboard drops the cable again. These “solutions” create their own mess: the charger ends up bent at odd angles, cables knot with each new item you move, and what was once at hand now requires a daily scavenger hunt. Routine work becomes an obstacle course of stops and resets.

    The trap is obvious in hindsight: saving steps now simply moves them later, multiplying small, distracting resets across every round of work.

    How a Small Change in Routing Produces a Big Return

    Real desk improvement rarely means buying bigger trays or hiding everything. The fastest difference comes from anchoring just what keeps causing friction. An adhesive cable clip, set a thumb’s width—about 4 centimeters—from the desk edge, locks the charger in place: it stays visible, always in reach, no matter how often you plug, unplug, or shift your notebook. You stop losing minutes to cable fishing and dragging wires back into place.

    Just this correction does the following:

    • Stops the charger from dropping each time you shift a device
    • Keeps the cable exactly where muscle memory expects it to be
    • Makes tidy resets between tasks almost instant—no searching, no untangling, no crawl under the chair or desk

    It’s not about perfect concealment; it’s about stable cable points that survive repeated transitions—writing, typing, plugging in, shifting back to your screen. Your desk looks less cluttered, but more importantly, it works without interruption.

    Where the Friction Usually Pops Up

    There’s a pattern to cable chaos: jotting notes with a charger loose, a single gesture shoves it beneath your folders; in the clutter of task switching, the charging head slips out of reach—again. Slide a notebook forward to make more space, only to drag the cable halfway off the desk. Even when longer lines get stashed in under-desk trays, short chargers become harder to grab if you’re unplugging multiple times per day. The point isn’t to hide every trace—it’s to have the charger always right where your workflow pivots, matching how—and how often—you use each device.

    Practical, Repeatable Desk Scenarios

    Picture a compact workstation: laptop in the center, external monitor pitched at an angle, a tablet parked on the right edge, keyboard sharing space with stacks of notes. You switch between typing and sketching, phone pings, you reach—cable falls, notebook catches, everything in your way for a task meant to take seconds. By early afternoon, the time lost to wrangling basics adds up.

    When you anchor the cable, the routine transforms quietly. Plug in, unplug, reset for a call, jot down an idea—no dropped wires, no rummaging. The right cable returns to hand every time not by accident, but because the desk reroutes your reach just enough that distraction never has time to build.

    What Actually Changes Across a Workweek?

    The upgrade isn’t dramatic and that’s its strength. The hassle leaks out of the week, little by little:

    • No more crawling under your chair for a charger after every device swap
    • Chargers stop bending or losing grip from being twisted behind the monitor
    • Folders and notes don’t push cords out of play during rapid task shifts
    • Surface resets become smooth, quick, and routine—delays drop away, and flow returns faster at every session’s restart

    You only notice how often you used to get interrupted by how quiet and frictionless the day becomes—the charger just works, and the problem vanishes into the background.

    FAQ: What Desk Users Keep Asking About Charger Cables

    How do I stop chargers from sliding off my desk?
    An adhesive clip or channel right at the desk’s working edge makes all the difference. Place it where your hand goes when reaching for the device you charge most often. Retrieval becomes automatic—you stop losing time and patience to repeat hunts for a fallen cable.

    Will hiding cables in a tray make it harder to plug and unplug devices?
    Yes, for short, frequently moved chargers, trays can get in the way. Under-desk trays work best for the cords you rarely touch. For daily chargers, surface-edge clips strike the balance—orderly, but never out of reach or a hassle to reset. Don’t hide what you need to grab on the fly.

    Does combining cable boxes, trays, and clips really help?
    It works if you separate constant-use from rarely used cables. Store heavy, long lines out of sight in trays or boxes; keep your main charger secured on the surface with a clip. Added systems are only helpful if they don’t force you back into slow workarounds during high-traffic device changes.

    The Real Win Is in the Routine, Not Perfection

    Locked-in cable routes aren’t about showroom looks or desk envy—they mean you stop thinking about the cable at all. Every structured touchpoint frees up your focus, removes tiny setbacks, and lets your desk flex with repeated switches, resets, and bursts of work. The real signal of improvement? Not how the surface looks at 9 AM, but how quickly it goes from chaos back to ready after every full cycle of use. The cable you use most isn’t buried, blocked, or halfway to the floor—it’s where you need it, session after session, mistake after mistake, reset after reset. Explore the full WorkBasic collection

  • Why Flat Ceilings and Single Lights Often Fail Your Home’s Lighting Needs

    Rooms often look bright but fall short when it matters. A new flush-mount ceiling light can make a hallway or laundry room glow in photos—yet in routine use, frustration sets in fast. Shadow pools gather behind doors, stair landings fade at the edges, and half your reflection is lost to dark bands in the mirror. Every day, the central fixture promises brightness, but basic movement—bending at a cabinet, carrying laundry, reaching for a switch—exposes the weak coverage. The gap between looking “lit” and seeing what you need grows wider the more you actually use the space.

    Where the Light Fails—Not in Design, but in Use

    Most rooms start with that “bright enough” feeling. A single flush ceiling fixture—a standard for hallways, laundry corners, bathrooms—spreads light in a broad, flat circle. But as soon as sunlight fades and the day’s routine kicks in, the compromise becomes hard to ignore. The weak spots aren’t design mistakes; they’re a mismatch between how light is delivered and how rooms are used in practice.

    • Take a stair turn at night: that missing handrail or stray slipper blends into the gray, right where the ceiling light’s reach fails.
    • Walk a hallway: the center line stays visible, but step off path—toward a coat hook or baseboard—and clarity drops, hesitation follows.
    • Face the bathroom mirror: overhead glare sharpens the tiles but cuts half your features into shadow, no matter how new the bulb.
    • Stack laundry near a side vent: full brightness in the ceiling, yet the floor edge hides socks and lint in persistent dusk.

    Single-point, central lights rarely match the reality of movement, corners, and task lines. Each time your routine bends away from that fixture’s aim, the difference shifts from a small annoyance to a daily interruption.

    Lighting Friction That Repeats Every Day

    A ceiling fixture covers basics, but the cracks show fast in real routines. Most people develop odd workarounds: you tilt at the mirror for better face light, move slow down a half-shadowed stair, or use a phone flashlight to double-check along a wall.

    • Carrying a laundry basket past dusk? Your arms cast their own shadows and the floor turns unreliable—missed socks or stubbed toes waiting along that dim margin by the vent.
    • Cleaning up? Clutter and dust hug the baseboards or vanish behind the trash can, untouched by the main wash of light overhead.
    • Shaving, tweezing, or putting on makeup? The upper glare creates harsh contrast, forcing you to lean or angle uncomfortably, rarely seeing yourself clearly all at once.

    It’s not parlor-trick inconvenience; it’s repeated, invisible drag. Guests or photos don’t notice, but you do—every time you try to finish a chore and hit a patch the ceiling light never really touches.

    Chasing Shadows: Common Problem Zones

    Certain spots in nearly every home keep echoing the same problem: central ceiling light does not follow the habits, edges, or angles that matter in real life.

    Hallways and Corridors

    Evenly lit overhead, but as you walk, the side walls and corners slip away. Anything dropped near the wall is instantly hard to find, and the walk itself feels easier at noon than at 9 p.m. The main bright spot stays centered, while routine use happens in the dimmer outskirts.

    Stairways and Landings

    Hauling a box upstairs? Sudden shadow at the turn means you check your footing by habit, not by sight. Reflected glare from light paint makes riser edges and step depths harder to judge, upping the risk of hesitation or stumble—especially late in the day.

    Laundry and Utility Spaces

    The ceiling glows, but baseboard shadows hide stains, and an out-of-sight sock sits beside an appliance for days. Corners and under-cabinet runs never fill in, no matter how high-wattage the fixture claims to be. Each week’s “quick clean” misses what the main light can’t reveal.

    Mirror and Vanity Zones

    Ceiling lights drop all illumination downward, deepening shadow on cheeks and under the chin. No angle at the counter feels fully visible. Even premium bulbs can’t fix the core setup: light that doesn’t land at eye level leaves grooming plagued by partial clarity.

    Real-Life Fixes: Lighting That Follows Your Routine

    Turning a “lit” room into a usable one rarely means adding more watts. The real shift happens by placing wall sconces, hardwired task fixtures, or low-profile supplementary lighting exactly where the ceiling’s spread leaves a vacuum—along walls, near task edges, or at mirror height.

    A Laundry Hall Example: Small Fix, Big Impact

    Picture a narrow pathway to the laundry closet. A new flush-mount ceiling light makes it look finished, but under the elbow bend at a vent, shadows linger. Installing a slim wall sconce, placed at turn level and halfway down, resets the feel. Now, grabbing a basket or picking up stray clothing, you find nothing left behind at floor level. The change isn’t dramatic in the doorway, but during actual use, it immediately removes mishaps and second-guessing.

    Mirror and Vanity: Lighting Where You Look

    For grooming, ceiling-only lighting always cheats you out of balanced visibility. Putting a hardwired wall fixture or vanity sconce at face height erases the split-shadow look, letting you work in true clarity—no more awkward posture or missed details. You see your features as they are, not in two-tone halves.

    How to Spot Trouble Spots in Your Own Space

    Solving lighting friction doesn’t require a renovation. Take a slow walk through your rooms at night, with only the installed fixtures on—ditch the phone flashlight, ignore boost from windows. As you move:

    • Pause when you instinctively squint, lean, or stall—those are immediate cues for where light is failing your routine.
    • Check dim bands along wall edges, at stair landings, near floor vents, or under cabinets—any area you instinctively skirt or avoid during chores.
    • Watch your face at the mirror. If shifting your stance is the only way to see both sides evenly, it’s a sign a true task or vanity light is missing at eye level.

    Details missed repeatedly are never just a bulb problem. Light that feels bright in the air but leaves dark, awkward corners needs aim, not extra output. A compact wall light or fixture at the edge does more than any ceiling upgrade alone.

    Why Real Lighting Satisfaction Comes from Repeated Use

    Many rooms trick the eye into “looking” bright, but comfort and clarity only build up over weeks of routine. The test isn’t an empty room—it’s every repeated step or chore: late-night walks through a corridor, side sweeps in the utility nook, daily checks in the mirror. Each exposes the central light’s blind spots, making clear why relying on one fixture turns into recurring friction.

    Step back: how often are you squinting, shifting or slowing down for a patch left dim by the ceiling setup? The more often it happens, the more value there is in adding a wall sconce, task light, or vanity fixture at real working height. Most rooms never need a lighting overhaul—they need light that tracks the messes, movements, and mirrors that actually matter. Once you see the pattern, options open: a better-lit hallway, a mirror that shows your whole face, a laundry corner that stops swallowing socks.

    See what real-world lighting can do for your hallway, utility, bathroom, or mirror zone at LightHelper.

  • How Thoughtful Lighting Placement Eliminates Shadows in Workspaces

    The real trouble with work area lighting doesn’t show up during installation—it shows up on the second, third, and tenth time you use the space. That new LED bar or low-profile desk lamp might look clean and organized out of the box, but the first full work session exposes what photos can’t: a dim strip right where your wrist rests, a perfect bracket that blocks your favorite pen, or a cable setup that snags as soon as you move your charger. You find yourself shifting, squinting, or nudging things back to “usable”—again and again. The spot that seemed fixed in place keeps losing focus as shadows and glare drift across your work. A setup that looks streamlined on install day can still create headache points that slow you down every day after.

    Why Brightness Isn’t the Whole Story

    Many lighting setups fail not for lack of light, but for the way that light lands—or doesn’t—on what you actually do. The room feels bright at first because the LED panel or task lamp floods surfaces with white, but real friction starts: glare on a glossy notebook, the far edge sliding into murk, cables crossing spots your arms or keyboard move through. Even a “minimal” cable run can sabotage you if it means unplugging something just to roll your chair or spread out a binder.

    Lighting that looks smooth on day one reveals its cracks with use. Paper piles stack up in the only shadow left. You slide out a laptop and a bracket blocks where you want to rest your wrist. A small detail—a misaligned bar, an exposed wire—becomes a repeated disruption, no matter how finished the setup looked to start.

    Small Setup Decisions, Big Day-to-Day Impact

    It’s the subtle friction that eventually dictates what gets used and what silently exhausts you. A cable dragging two inches too far into your work zone might seem minor until it brushes your hand thirty times a day. A lamp base claiming one corner at install time soon claims your patience, as its bulk or reach pushes your papers—and your focus—aside. These aren’t just passing annoyances. Shifting things back, looking for clean light, or hoping the charger stays put—each invisible delay adds up, draining your momentum.

    Over days and weeks, these “minor” mismatches outlast whatever visual order the room had at the start. Fatigue sets in, not from the tasks themselves but from nudging the gear, battling unpredictable dim bands, or never quite having a desk edge you can settle into without adjustment.

    Desk Edge Woes: When Clean Looks Don’t Equal Comfort

    A typical open desk or shared table often hides its weak points until the routine sets in. Overhead light seems strong enough—until you pull a chair to the end seat and discover half the work surface is in shadow, or the laptop catches a sharp glare. Passing notes means chasing the last patch of light, or rotating items just to read your own handwriting. The tidiest surface, with cables zipped and fixtures flush, ends up forcing you to work around dead zones and hot spots instead of through the actual work.

    This is where setup logic matters more than surface appearance. You notice the “finished” look doesn’t hold up when the cable bracket creates a ridge under your palm or the light that once looked perfect now throws shadow on every shared seat. Comfort drifts as soon as you start using the space for real tasks—showing just how quickly a visually resolved setup can fall short of lasting usability.

    The Real Difference: Task Lights and Placement That Hold Up

    The setups that stay comfortable through a week—or a month—are built on thoughtful task lighting and support placement, not just strong bulbs or cosmetic order. You recognize them because:

    • Light lands exactly where hands meet work and screens—not just creating a general zone but eliminating the shadows and glare at the business end of every motion.
    • Edge-mounted LED bars, low-profile under-shelf strips, or side-track lights keep illumination consistent even when you spread out materials or shift your seat, keeping the actual working edge clear—not just the center “design” area.
    • Cables don’t just disappear visually—they’re routed out of traffic zones, tucked along unused ledges or behind shelf faces, so they don’t reappear every time you plug something in or drag a pad across the desk.

    What breaks through is the lack of little repairs. After the first few uses, you realize you’re not compensating for the setup—no empty spot at the desk edge, no recurring tangle, no lighting zone that needs re-aiming when your work routine shifts.

    When Task Areas Shift, Lighting Should Adapt

    Few work surfaces stay static. Some days the main work zone moves to the edge, or you share the space for a project. Adjustable arms, sliding bars, and pivoting task lamps make a practical difference by letting lighting coverage follow your routine—not force your routine to fit the lighting. The same “fixed” overhead light or desk lamp you trusted at install can leave you squinting at the margins just because you sat two feet farther out.

    Lighting that fits your real movement changes everything: A wall-mounted strip, adjustable bracket, or under-shelf panel, when installed for the way you actually use the area—not just its layout—gets rid of dim patches and surprise glare. Cables that move with gear, not against it, mean you’re not one device swap away from a disruption. The goal is less fixing, more working, even when the task or layout changes midweek.

    Everyday Visibility: Clarity Where You Actually Work

    The most dependable sign of a right-fit lighting setup? You stop noticing it—because you’re never pausing to fix shadows, move cords, or dodge glare. Clarity follows your hand from the middle to the edge; brackets and cables vanish from mind because they stay clear of your movements. When a setup blends into your routine, you know you’ve solved not just appearance but function.

    Spaces wired for “maximum brightness” or cable visual order may look right until repeated use exposes creeping glares, shifting shadows, and tangled support. Prioritizing true edge visibility, movement paths, and cable logic yields a work zone that holds up beyond first impressions—a place where you can just work, not manage the setup every time you sit down.

    Real-World Tips for Day-to-Day Lighting Comfort

    • Mount LED bars or slim task lights just forward of the desk or shelf edge to erase the “blind spot” where hands, tools, and notes collide with awkward shadows.
    • Route cables behind mounting hardware or under shelf lips so movement stays clean—no more split-second hand snags or visible tangle creeping back into view.
    • Check and re-adjust light positions when changing hardware or routines—don’t let one-time setup decisions set traps for your daily workflow.

    The real test: After a week, is your setup reducing distraction—or quietly creating more? Choose lighting and support logic that disappears into your routine, and you’ll replace constant correction with real focus.

    Visit LightSupport for practical lighting and support setups fit for real repeated use.

  • Why Cable Management Fails When Your Desk Finally Moves

    Your desk looks organized—until you actually start working. That tidy surface hides its limits the moment you reach for a notebook, slide open an under-desk drawer, or nudge your monitor for a call. One tug, and a power cord locks up your chair, a hidden cable slips from its channel, or a charger yanks loose just as you’re mid-task. The difference between a desk that photographs well and one that works well shows up fast: what seems orderly at first glance often unravels the minute you move, shift, or reset across your workstation.

    Workstations that Look Tidy but Don’t Feel Smooth

    Minimal doesn’t always mean usable. In compact desk setups—especially with multiple monitors, laptops, and storage units—the surface can look disciplined while still fighting you at every turn. Grab for a notepad beside your keyboard and find your hand blocked by a rogue charger. Swivel your chair only to feel resistance as a power cord drags behind a leg. The friction isn’t abstract:

    • You push back but a taut cable stops your chair halfway.
    • You reach under the desk for storage, but an extension cord jams the drawer before it opens.
    • Shift the monitor for a closer look and suddenly the tidy bundle of cables uncoils—mouse, keyboard, adapters all shifting loose onto a crowded desktop edge.

    These aren’t rare hassles—they’re the micro-stalls that break flow: a typing rhythm interrupted, an extra move every time you need to grab a pen or plug in headphones, a reset forced on you because cables designed only for looks can’t handle constant shifts. Underneath that calm visual order, desk function uncovers its true weight.

    Hidden Cable Paths: Why Out of Sight Doesn’t Mean Out of Mind

    Most cable “solutions” hide problems until you need to work. Cords routed flat behind the monitor or zipped up in sleeves look sharp for a week—then routine use exposes weak design. Swap devices or unhook a charger, and a hidden cable snaps tight, yanking something off the edge. That cable sleeve tucked under the lip? Now it blocks a drawer from opening all the way. Cable boxes stacked with adapter bricks quickly become puzzle boxes, forcing you to pull half the cords just to get one device connected.

    • Invisible cable runs twitch loose every time you unplug, making it harder to trace what belongs to what.
    • Sloppy cable trays or overstuffed boxes rattle and spill the moment you swap for a new device.
    • Anchors set for aesthetics restrict real movement—requiring a full rewire just to add a monitor arm, USB hub, or task lamp.

    The real test isn’t hiding cables—it’s surviving repeated motion. If your desk resets, device swaps, or even lunch breaks regularly trigger cable snags, the system isn’t built for living use. Showroom neatness rarely survives daily readjustments or new adapters landing mid-cycle. Every fixed path risks becoming a friction point when real workflow changes directions.

    Where Cable Setups Start to Fail: Real Routine Friction

    It rarely fails at the start. Trouble usually surfaces hours into the workday: after a few cycles of notebook checks, device swaps, and positioning tweaks:

    • The mouse cord snags against the edge of a notebook—suddenly your pointer jumps.
    • Monitor cables stretched “tidy” flicker or cut out when you angle the screen mid-meeting.
    • Phone chargers drawn across the desktop form speed bumps for your elbow or block a clean notebook push.

    These interruptions don’t stop work, but they build fatigue—a slow leak of attention every time you pause to untangle cords or sidestep a blocked drawer. Sometimes, that new under-desk drawer does less to clear clutter and more to trap a cable snake just out of comfortable reach.

    Mini Case: The Drawer’s Revenge

    Example: Mount a slim under-desk drawer to contain pens and sticky notes, only to discover your external drive’s cable now hangs squarely in its path. Slide the drawer open and—snap—the drive disconnects. Every attempted fix (reroute, tuck, tape) repeats the friction. Why? That cable path never accounted for the daily motion of storage access. Across thousands of desks, this is the hidden cost of “clean” setups that ignore real movement.

    What Actually Changed My Desk’s Repeat Performance

    What made the friction break wasn’t obsessively tying every cord. It was adding a single under-desk tray—as an anchor, not a hiding place. Power and USB lines ran through it along the desk’s back edge, but near my everyday reach points (right-hand keyboard corner, storage drawer edge), I left slack. Devices I plugged or unplugged daily got room to move. Cables only got anchored where they never needed to flex.

    The difference showed up after a week:

    • No more losing charging cables behind the desk edge—swaps stayed within instant reach.
    • The mouse pad and keyboard area stayed clear, no matter how often I reset or rearranged nearby gear.
    • Coming back to the desk, I never had to fish a cord from behind a chair leg or knock loose a lamp base again.

    The main gain wasn’t cosmetic—it was the erasure of micro-stalls at every movement. The desk adapted to recurring workflows, not just the first-day setup. Over time, I needed fewer resets, had faster transitions, and the desk kept supporting work instead of working against it.

    FAQs: Diagnosing and Fixing Real Cable Friction

    How do I know if cable structure is slowing down my desk?

    If every monitor shift, chair move, or drawer pull triggers a snag or an unplug, your cable setup is the problem—not your habits. A tidy look means little if the smallest adjustment reveals built-in resistance.

    Why does cable mess come back so quickly, even after I fix it?

    Hiding cables isn’t the same as supporting access. Cable runs that ignore actual hand, device, and drawer moves will always migrate back into view, or block the next adjustment. If you reset more than once a week, something about the path doesn’t match the workflow.

    Should I anchor cables everywhere or leave more slack?

    Anchor only along stable stretches—back edges, fixed monitor arms. Anywhere you interact, swap, or plug/unplug regularly (front corners, drawer zones, charger ports) needs managed slack. Too much anchoring blocks real-world movement and guarantees headaches later.

    Beyond Tidy: Setting Up for Real Movement

    If your desk only works in a photo, it doesn’t work. The mark of a strong setup isn’t “hiding” everything on day one—it’s seeing your desk handle resets, device switches, or long-session shifts without snags rising back. The most reliable cable management adapts to the flows you repeat, not just the ones you plan. Every time you return to the desk, you should find what you need where you expect—without negotiating with cord drag or drawer blockages.

    In the end, you know a better setup not by what you see, but by how rarely cables interrupt your day. The winner isn’t clean—it’s the workstation that quietly keeps up, week after week. When structure mirrors real workflow, the desk becomes not just organized, but finally functional.

    Explore the full WorkBasic collection

  • Why Geometric Centering Fails in Everyday Indoor Lighting Placement

    “Centered” lighting fails fast—just not where you notice it first. On day one, everything can look right: a flush-mount ceiling light square in the hallway’s middle, a sconce precisely above the bathroom mirror, a bright pool in the living room’s core. But week after week, friction piles up. The hallway that looked “done” now asks you to reach blindly for that lost shoe in the closet’s gray corner. The bathroom’s centered fixture leaves your face half-lit, half-vanished every morning. Even the living room’s glow can form islands of glare and dead space—the chair you actually sit in somehow always on the edge of the brightness, never at its heart. Lighting that fits the room’s geometry rarely fits the way you move, work, or see.

    Why the Geometric Center Rarely Matches Real Life

    The measured, centered fixture feels logical—flush mount or sconce, right in the blueprint’s crosshairs. In the real world, symmetry promises evenness but delivers a brand of inconvenience you only discover after repeated use. Rooms ignore the neat math: Sinks sit off-center, closets eat space at one end, and your daily routines—shaving, grabbing towels, taking the last stair—cut right across the “plan’s” blind spots.

    Take a narrow hallway—drop a ceiling light in the geometric middle, and the closet at one end stays in shadow every time you need it. Each night, it’s the same: you cross into darkness, floor vanishing, searching by feel. In the bathroom, a wall light centered to the vanity—not your reflection—means mornings spent squinting at the bright half, guessing at the shaded half. The flaw isn’t in wattage or style. The flaw is lighting to a diagram, not to the way people actually use and cross each space.

    When Blueprint Lighting Creates Everyday Friction

    The trouble with “design-perfect” lighting shows up in small, accumulating failures:

    • Stair turns: The landing is in shadow, even though the fixture is centered on the plan—making each descent or climb hesitate at the same dim patch.
    • At the mirror: As you lean closer, the light splits your face: one side is all glare, the other side fades out—never balanced, always annoying.
    • Night hallway walks: The path glows in the middle but drops off on one side, or by the closet, or at the far door. You adjust your route or slow down every time.
    • Kitchen counters: Under-cabinet lighting leaves your usual work edge in stubborn shadow—the place you chop, pour, or sort is always just out of reach of clean light.

    These aren’t mere annoyances. They break the rhythm of a room. Every time you shift, stoop, or squint for better clarity, it’s not the bulb failing you—it’s the entire approach. Rooms aren’t meant to be posed; they’re meant to be used, and lighting fixed to abstract centers keeps interfering with routine comfort.

    Small Shifts, Big Difference: Adapting Fixtures to Real Use

    You don’t always need new fixtures or complex rewiring to escape central-lighting traps. Much of the time, comfort returns with a simple adjustment: moving a fixture a few inches, splitting up the coverage, or realigning toward actual activity zones.

    Bathroom Mirror: Sync the Light, Not the Plan

    If your main sink and mirror are offset on a long counter, a perfectly centered ceiling fixture lights the room but leaves your reflection lopsided. Nudging that flush mount even two inches closer to where you stand at the mirror balances the field—no side lost in shadow, every shave or face wash clear-eyed. The entire experience sharpens without a single extra lumen, just a smarter placement.

    Hallway and Closet: Cover the Movement, Not Just the Geometry

    In a narrow corridor, a lone mid-point light leaves each end washed in gloom. Adding a second flush mount near the closet or nudging the original toward the storage zone can finally erase those persistent pockets of dimness. Suddenly, grabbing laundry at night, the darkness isn’t a second obstacle. The room shifts from “lit everywhere but where you need it” to “always clear where you move most.”

    What Signals a Poor Lighting Center?

    Lighting can meet all the drawing rules and still betray you daily. Common signs:

    • Glare in the mirror above an offset sink, blinding one side and shadowing the other—never a full, clear view
    • Consistently dark ends by closets, cabinets, or doors, no matter how many times you swap the bulb
    • Always needing to tilt, lean, or step off-mark for clear sight—folding, brushing, sorting, or cleaning
    • Light lines directly in your eyes when passing through a hallway or alongside a cabinet run, not above or behind where it helps most

    If you’re always compensating—bending, squinting, pausing—the “right” center on paper is wrong in the real room. That’s not a quirk; it’s correctable misalignment.

    Realignment: How (and Where) to Shift Lighting for Better Comfort

    Room comfort starts with matching light to movement, not floorplan geometry. Here’s where small changes make outsized differences:

    • Stair landings and corridors: Shift a flush mount toward foot traffic or install a second fixture at the landing; focused clarity matters more than general glow.
    • Mirrors and vanities: Adjust wall sconces or over-mirror lighting to match your stance, not the counter’s full width—a single inch’s move can banish repeated shadow.
    • Task counters and under-cabinet areas: Align fixtures or strips where you prep or read most, not just in the center; mark activity, not symmetry.
    • Hallway ends and storage nooks: Illuminate where you actually pause or put things away; these dead zones are where abstract “centering” gives itself away every time you use the space at night.

    Lighting for Life: Turning Measurement into Usability

    Reliable comfort in any room isn’t about mathematical perfection. It’s about whether every step, turn, and task happens in steady, clear, shadow-free light—not just under a broad haze in the middle. If your lighting never makes you squint, hesitate, or guess, the setup is tuned to your real routine, not just the architect’s plan. Sometimes that means nudging a flush mount, adding a semi-flush near the stair, or giving the laundry corner a dedicated light—small structural decisions that eliminate recurring inconvenience.

    When the lighting in your home finally follows you—rather than forcing you to track the blueprint’s center—you’ll notice. Not in the way a guest notices, but in the absence of hesitation and in the ease of daily repetition. Centered lighting looks organized; well-placed lighting feels right, every time you cross the space.

    http://www.lighthelper.myshopify.com

  • How Early Glare Control Transforms Your Work Area Lighting Experience

    A desk setup can look streamlined—a neat lamp, clean lines, no visible clutter—and still wear you down, day after day. Glare streaks across your monitor, your eyes dart to a cable looped across the edge, and your “solved” setup quietly demands small, constant fixes: adjusting the lamp’s angle, scooting your seat, stacking papers just to block a reflection. What seemed carefully arranged at first becomes a source of interruption, not focus. When lighting and support don’t match real working habits, friction accumulates in every session, no matter how established the routine.

    Why Glare Keeps Sneaking Back, Even in “Solved” Setups

    Glare isn’t just an occasional inconvenience—it’s a regular intruder that returns as soon as you begin using the space. A desk lit by an overhead panel or a sleekly mounted lamp may look like a productivity win, but the moment screens light up or hands move through paperwork, the cracks show: a bright patch tracks across your documents, or your monitor turns into a mirror for the ceiling light. Initial satisfaction fades when the setup ignores the surfaces you actually interact with.

    The real issue isn’t which lamp looks best or how well you’ve hidden cords—it’s whether the light falls where you actually work. If your lighting stays fixed on looks instead of alignment, stray glare or murky shadows creep in. Each day brings the same fight with distraction: surfaces washed out, reflections that pull your eyes away from what matters, and the kind of lingering discomfort that isn’t obvious until the workday stretches on.

    Workspaces That Look Right, But Act Wrong

    Plenty of setups appear “finished” but reveal their weak spots once you start working. Ceiling panels flood the space and erase dark corners, but that blanket light often bounces straight off smooth desk surfaces or screens, etching a bright stripe across your primary view. This isn’t a rare failure—it’s the new normal by afternoon: sunlight shifts, ambient panels stay fixed, and you start reaching for folders or tilting your laptop just to regain usable real estate on your desk.

    Task lamps promise targeted clarity, but that’s only true if their brackets and shades are tuned perfectly. Slide one just a little off, or route a cable without thinking through sightlines, and you’ve traded general glare for sharp, creeping shadows—or a cable that distracts before the work even starts. The setup may look clean, but you’re still dodging problems every hour.

    Scenes From a Real Worktable: Two Approaches, Two Problems

    Picture a shared worktable: Overhead, a ceiling fixture casts wide light; below, an under-shelf strip clicks into place with minimal brackets. Both setups seem intentional. But the ceiling-lit side collects hot spots as the afternoon fades—laptop screens reflect glare from angles that never showed up in the morning, and paperwork picks up harsh lines that shift as you swap seats. Meanwhile, under the shelf, the light stays controlled and single-directional, but its reach is short—the far side of the table loses definition, so anyone sharing materials ends up squinting at patches of shadow or stretching to pull things into the lit zone.

    “Filming” the setup for photos might hide the drift, but in real use the weaknesses resurface. Each improvement solves one problem but quietly creates another, and you’re left with a space that functions worse the longer it’s used without small, targeted adjustments.

    What Actually Moves the Needle on Glare

    After weeks of nudging angles and dodging glare stripes, the first real breakthrough isn’t a brighter bulb. It’s an adjustment you feel in workflow: a glare shield clipped onto the lamp, knocking out harsh streaks across key documents; the bracket tweaked just enough to push light away from the screen, not onto it; a cable redirected to trace the desk’s back edge instead of the hand path. Not a design overhaul—just enough friction removed in the right spot.

    The effect isn’t dramatic in photos, but at your desk it’s obvious. No more reaching for folders as makeshift shields, no more flickering annoyance from cable shadows, no more ritual adjustments before every session. The workspace finally works with you, not against you—the real goal for any lighting or support setup.

    Common Signals: When Glare and Cables Haven’t Been Tamed

    • Eyestrain begins not with intensity, but with steady, slow build-up during routine tasks.
    • Bright streaks or shifting patches show up on screens or documents, just as you’re trying to focus on details.
    • You catch yourself stacking objects or moving equipment simply to dodge a persistent glare spot.
    • Visible cables or oddly placed brackets claim your attention, breaking focus more than actual clutter.

    If you’re constantly searching for “the right spot” to work, it’s rarely due to mood or habit—it’s almost always a mismatch in lamp angle, light support, or cable placement.

    Why Fixing the Support System Is as Important as the Light Itself

    The weakest link in any desk setup isn’t always the bulb. A cable draped across open desk, a bracket that shines more metal than sense, or a lamp arm set at just the wrong height can undo hours of planning. Every visible cable or misplaced support throws new lines and shadows into your routine. Support structure isn’t cosmetic—it shapes the entire field of view, redirecting attention (and frustration) with every misplaced element.

    Test this: After you set up “tidy” cable runs or new support hardware, sit at the level you’ll actually work—not standing, not looking down from above. A cable that’s invisible in profile view often turns into a visible annoyance right at eye level, introducing distraction where you most want focus.

    Putting the Space to the Test: What Holds Up Across a Week?

    A good lighting or support setup isn’t measured by how crisp it looks the first day—it’s defined by what stays invisible after a week. If you’re still sliding your monitor every afternoon or ignoring half a shared table, something isn’t supporting real use. Satisfying setups are the ones that “disappear”—no need for daily cable shuffles, no fighting a moving glare stripe, no adjusting lamp heads just to make a piece of paper legible.

    Small interventions last longest: a shield that cuts hot spots, a simple bracket realignment, a cable held flush against support bars. None radically alter how the workspace looks, but each one shrinks the list of things that slow you down, hour after hour. Most setups don’t fail all at once—they slip, quietly, where support or alignment hasn’t matched routine reality.

    From “Looks Good” to “Lives Better”: A More Reliable Approach

    The difference between a setup that “looks good” and one that’s truly workable is invisible in most catalog photos but obvious in daily use: no glare arcs sneaking onto your screen, no cables drawing your eye, no surfaces left just a little too dark or too bright. Address lamp angles, cable lines, and support details before friction becomes routine—adjust them during real tasks, not just at setup.

    A week later, what stands out isn’t the clean look, but the silence: no more fiddling, no more small, predictable annoyances, just a space that holds steady as the day changes. That’s when you notice your lighting and support are finally doing their job—by staying out of your way.

    Find practical indoor lighting, cable management, and support solutions at LightSupport.

  • Anchored Cable Management Enhances Focus and Streamlines Desk Workflow

    A desk that “looks” organized can still wear you down if every reset drags a cable into your reach zone or forces a clumsy workaround. You’ve seen it: the desktop is spotless, monitors lined up, but power cords migrate across the workspace every time you slide your chair back in, or a headphone cable reappears under your forearm just as you get going. That silent cable drift isn’t just messiness in disguise—it’s a micro-interruption that stacks up, breaks your focus, and exposes gaps between visual order and functional flow. The desk may photograph as “clean,” but if you find yourself chasing charger wires or correcting cable paths multiple times a day, your setup isn’t actually working for you.

    The hidden cost of drifting cables

    Cable drift doesn’t just ruin the look—it chips away at your routine, one interruption at a time. If power cords hang loose, or you catch a USB cable while reaching for a notebook, that tiny catch disrupts your pace and stalls the work you started. Swap devices, pivot your chair, or tilt a monitor and the cables reset themselves in your hand space again. The cost isn’t just appearance—it’s the loss of a clear, ready work area. Over time, what’s supposed to be simple access—plugging in, grabbing the right connector, keeping the edge clear—turns into an endless loop of fixes that slow every transition.

    How “organized enough” can still fail in daily use

    Trays, clips, and sleeves can make a surface look sorted for a few days, but repeated use exposes the limits. Twist your screen mid-call or slide a work notebook closer, and unanchored cables rebound into cleared zones, brushing your hand or hovering exactly where you meant to write. Add too many clips, and you flip the problem—removing or swapping a device becomes a slow un-snapping sequence, not a fast plug-and-go. Order for its own sake can work against the real goal: a desk that adapts and stays predictable even as you move and multitask.

    The trouble is, most cable “management” aims at appearance, not cable behavior. Adhesive clips lose grip after a week of use or heat; desk-top sleeves soon gather crumbs and dust, and start to block charging ports. True predictability comes from under-desk trays placed right in the active zone—not locking cables so tightly you’re stuck, but anchoring them where drift stops being a problem. When cable movement is actually intercepted—not just hidden—routine plugging, grabbing, and switching finally stops feeling like a chore.

    Where workstation setups start to break down

    If you cycle between dual screens, a laptop, and stacks of paperwork, cable slippage usually shows up before lunch. You leave for a call, return to a cord now sprawled under your mouse, or nudge a monitor only to have an HDMI line swing into your notes. None of these disruptions ruin your setup—but each one pulls you out of the zone just enough to derail smooth work. The more times you clear the same spot, the less organized your routine actually feels.

    By late afternoon, the side effects are obvious: you’re shifting cables instead of working, untangling power just to reset, and steering your mug around wires that crept back while you were away. “Organized” doesn’t deliver if cables can’t be trusted to behave the same way, every time you start your next session. True flow depends less on a tidy surface and more on cable paths that don’t change unless you want them to.

    An anchored cable tray: the smallest change, the biggest difference

    Switching from scattered surface clips to a single anchored cable tray under the desk broke the reset cycle at my own workstation. Adhesive clips always gave out just when things got busy; sleeves at desk level became another spot for dust and cord creep. Installing a tray exactly two inches from the back edge of the desk kept charging lines accessible but kept slack hidden. Now, only cable ends poked out, the monitor base stayed uncluttered, and notebook space no longer vanished under coiled wires. Desk depth felt bigger. Snack plates stopped balancing on top of tangled chargers.

    The change wasn’t about making things “look” neater—but making the 30-second reset after each project disappear. Instead of untangling and clearing clutter, it’s now: pull the cable, plug in, done—no extra step, no drift, no overnight surprises. After two weeks, I stopped even noticing where my cables lived. That missing friction is the mark of a setup that finally works: real attention returned to the work, not the fix.

    Practical checkpoints for your own setup

    How can you tell your current cable control is slowing you down?

    If you’re pushing wires out of the way whenever you type, tracking power cords in your side vision, or stopping to reroute the same cable after every break, you’re working around a hidden distraction—no matter how smooth the setup looks on camera.

    Can too much cable management make things worse?

    Definitely. Over-tight trays or wrapped-up sleeves turn a flexible desk into a rigid grid—good luck swapping devices or reaching a USB mid-task. The target isn’t freeze-dried order, but steady predictability and fast access. The best-anchored trays keep cables from breaking into your routine but flex when your devices (and your workflow) require it.

    What’s the most common desk mistake?

    Mounting trays out of reach, or letting loose sleeves spin across the top surface. Either makes access worse—or does nothing once cables return to their old habits. Smart placement puts trays inside your actual reach, intercepting cable swing but not burying the ends. That’s how the edge stays clear and device swaps stay effortless.

    What matters most: does your desk “feel” easier after each use?

    The real marker for cable control isn’t the day it’s installed—it’s after your routine puts it to the test, over and over. If setup tweaks mean less time spent clearing space, less untangling, more sitting down and starting work, you know the structure is earning its place. Every small failure—like a charger that takes too long to grab or a line that creeps back into your writing zone—is a sign that function still lags looks.

    Perfect cable setup isn’t invisible—it’s unnoticeable because it no longer interrupts. When your cables finally stay anchored, and reach space goes unbroken the whole day, you have a desk that delivers real flow behind the appearance. That’s where workstation friction actually vanishes—and where “organized” finally means easy.

    Explore the full WorkBasic collection

  • Avoid Costly Lighting Mistakes by Marking Fixture Placement Thoughtfully

    Most indoor lighting mistakes don’t announce themselves all at once. They reveal their flaws every time you reach the stair landing and hesitate because the next step disappears in dimness. The bathroom mirror looks well-lit—until morning hits and you’re forced to lean or squint just to shave or see both sides of your face evenly. What looks “done” at first glance quickly exposes glare, blind spots, and shadow patches as soon as you begin your daily routine.

    Where “Good Enough” Fails: When Repeated Use Uncovers Awkwardness

    You can meet measurement guidelines and still end up with lighting that sabotages daily comfort. The blueprint might check out. But when you pace the same hallway every night, the slight dark edge at each end creeps in. Cross the living room and realize that one reading chair stays in half-shadow, no matter how many times you nudge the lamp. Or step into the bathroom and watch the difference: one cheek bright, the other sunk in grayness, the result of a “centered” fixture that never took real reflection lines into account.

    These aren’t dramatic flaws. They’re subtle annoyances that stack up. A semi-flush ceiling fixture, placed a few centimeters off center in a corridor, can cast a persistent shadow you learn to avoid without even thinking. A wall sconce on the stairway, installed a touch too high, leaves the lower steps unlit—enough to make you slow down at the turn. These mistakes don’t show up in still photos, but they wire themselves into daily movement: small hesitations, involuntary squints, extra steps just to find clear visibility.

    Mirror Lighting: Shadow Imbalance and Persistent Glare

    No flaw draws attention faster than the bathroom mirror that throws your face into uneven light. Vanity lights, “properly” installed by number, can create persistent shadows or a direct glare line slicing across your eyes. The visible imbalance is instant—one side washed out, another left dull, the effect only growing worse if the fixture sits just a fraction too high and bounces straight into your sightline. Every basic task—brushing, shaving, makeup—becomes unnecessarily awkward, all for want of a few centimeters’ difference in placement.

    The Real Cost: Patching, Scarring, and Recurring Frustration

    Missing the mark with lighting isn’t a quiet mistake. Every attempt to fix it—moving a flush mount, realigning a sconce—leaves patched holes in drywall, visible blemishes, or mismatched paint spots that don’t quite disappear. Even a small error can haunt you: you see the patch each time the light turns on, or find yourself still pausing at the same dim spot. The result is a space that looks finished but never feels fully comfortable, with each workaround becoming part of your routine.

    Movement Paths Overrule Measuring Tape

    The difference between “good” and “actually good” lighting comes down to how the setup follows movement, not just where the tape measure says a fixture belongs.

    If you only mark placements by drawing lines on paper, you’ll miss the spots that matter—where your shadow always falls as you lean over the kitchen sink, or where the stair sconce fails to reach the bottom tread. The practical fix is simple, but often skipped:

    • Mock up live placements: Hold the fixture or tape it temporarily where you think it belongs.
    • Walk every path: Take the routes you’ll walk at night—hallways, stairs, kitchen routines, mirror moments.
    • Check from use angles: Open doors, move along counters, use the space as you do in real life, and watch for surprise shadows or stray glare.

    It’s rarely more than a two-centimeter correction that solves the persistent shadow or erases the daily squint. One exact scenario: a bathroom mirror lit perfectly head-on when standing straight, but the moment you open the door or lean sideways, a dark wedge appears. Shifting the fixture mark just slightly can dissolve these phantom shadows, saving you that morning frustration for years to come.

    Minor Shifts, Major Difference in Daily Flow

    Tiny misalignments nag more the longer you live with them. In the laundry room, the flush mount positioned closer to the door might leave the wall cabinet in constant shadow—a hassle that gets under your skin each time you reach for supplies. In kitchens, even bright rooms expose their weaknesses if the under-cabinet strip misses the working edge or leaves a corner dark. Food prep slows, and what’s supposed to be bright, usable space becomes another task to work around.

    Spot the Signals: How Misaligned Lighting Shows Itself

    You don’t need an expert’s eye to notice when your lighting isn’t working. Watch for:

    • Hesitating at a stair turn because the bottom vanishes into shadow
    • Turning or ducking at the bathroom mirror to dodge a harsh shadow line
    • Shifting your desk or seat to avoid glare cutting across your work
    • Crossing a hallway where the light seems to vanish near the far wall
    • Reaching for a counter or sink edge that’s never fully lit, even in a bright room

    These aren’t one-off inconveniences—they become part of your daily pattern if left unresolved.

    Avoid Repeating the Patch Job: Check Placement in Real Time

    Don’t gamble on perfect placement from a drawing alone: Test fixtures in their real positions before final installation. Use painter’s tape or a temporary hook, turn on the light, and walk the space. Let shadows, sightlines, and coverage show their truth before you ever put a hole in the wall or ceiling.

    Spending ten minutes to check—before anchors and drills—can save you hours of repairs and years of eye-rolls each time the glare or shadow returns. Minor tweaks in mockup allow you to catch the persistent annoyances early, instead of living with them day after day.

    Lighting for Real Life: The Difference Between “Bright” and Truly Clear

    A room can look finished and still force you to pause, squint, or step around the same awkward shadows forever. The setups that actually work anticipate movement, task spaces, and the risk of uneven spread—so you don’t find yourself dodging the same problem every time you walk through or look in the mirror. Hallway flush mounts that cover both ends, stair sconces that light every tread, under-cabinet lights that reach the full work area—these get chosen for how the space is used, not just how it looks when empty and new.

    Start with the flow of daily life—where you stand, walk, reach, and look—then mark fixture locations to fit those behaviors. Spaces lit for real use don’t just look good; they feel easier every day, with no hidden friction or puzzling shadow trying to trip you up.

    For practical lighting that fits real life, see the full range at LightHelper.

  • Why Flicker-Free Bathroom Lighting Matters Beyond Moisture Ratings

    “Damp rated” on a bathroom light sounds like protection. It ticks the moisture resistance box, satisfies code, and lets you install above a shower without worry. But if you spend a week actually using the space—shaving, cleaning, scanning the mirror—you notice something compliance doesn’t fix: the light pulses, flickers, or keeps your eyes working harder than necessary, even with a fresh install. That reassuring label does nothing for the slow headache or the jitter you spot at the tile edge after three early mornings under those LEDs.

    Moisture-Resistant Lighting Isn’t the End of the Story

    Most buyers assume a humidity-proof fixture checks every bathroom lighting box. In practice, moisture defense solves only half the problem. What hardly rates a mention until you notice it yourself is the subtle, repeated flicker that many LED setups introduce.

    This is rarely glaring at first. A soft pulsing hovers at the edge of a mirror or runs along the grout—barely there until you catch yourself squinting by Thursday, or realize you’ve started tilting your head trying to spot details that should be obvious. The headache is never sharp, just steady, and it drags into each routine.

    The Everyday Effects of Subtle Flicker

    Imagine a shared bathroom on a tight morning: one person leans close for beard trim detail, while another slides bottles or wipes toothpaste and surveys quick results. The overhead is technically bright—lumens look fine on paper—but something is off. Each glance into the mirror scatters with a shimmer at the reflection’s edge or a twitch down the backsplash.

    That first week, you catch yourself missing spots, struggling to see flecks on counters, or feeling your eyes scramble as you move past the sink. The pace slows for no clear reason—small tasks now take attention, and a supposedly minimal setup leaves the space quietly irritating.

    Why “Rated” Lighting Leaves Gaps in Daily Comfort

    The disconnect is structural. Damp ratings mean the hardware won’t fail from steam, but they do nothing for the driver inside—a silent player. If the driver is poor or the dimmer is mismatched, you get microscopic current fluctuations. The result: double reflections and micro-shadows that build, day after day, into visible strain.

    Glossy tile and mirrors make it worse. What seemed minimal and crisp on install day—flush mounts, hidden screws, cords tucked above the plane—now leaves vision scattered and details slippery. Every clean line is undermined by visual instability during the routines that fill a bathroom’s real schedule.

    Symptoms During Real-World Use

    • Flicker in mirror edges: Trouble focusing while shaving or doing fine grooming, with moving reflections that seem off but are hard to catch in stillness.
    • Pulsing, unstable shadows across counters: Surfaces look clean one way, then shift with each pass of the sponge or scan for small dropped items.
    • Visual fatigue: Low-level discomfort builds quietly; routine minutes near the sink accumulate into tired eyes or a tense brow by midday.

    This isn’t catastrophic failure—just steady, quiet resistance that saps comfort and makes daily activities slightly more taxing.

    Replacing Flicker: Small Change, Big Relief

    Switching to flicker-free, integrated LED drivers delivers something lost in most “rated” installs: visual calm that doesn’t break with every movement. Suddenly, edges are stable in the mirror, the countertop reads clearly under any angle, and you aren’t forced to keep readjusting your gaze to make things out.

    The space doesn’t look fancier, but staying tidy gets easier—spots and streaks stand out at once, tasks compress into fewer motions, and you don’t think about the light after two days of use. A neat install goes from decorative to functional, improving life with less daily drag.

    Common Pitfalls: Rating Without Stability

    Buying by label alone means trading one friction for another. Maybe you’re safe from moisture—but stuck with a flicker you can’t solve by moving toothbrushes, swapping bulbs, or nudging the vanity. Some try dimmer swaps, layering in diffusers, chasing “compatible” bulbs—most land right back at the same lingering problem: agitation that builds under regular routines.

    Don’t Stop at Damp Rated—Look for Flicker-Free

    If you want to avoid a repeat problem, filtering only for “bathroom rated” is a trap. Look for fixtures or hardware that claim “flicker-free” operation—and check for real mentions of LED driver quality, not just an all-clear for steam. Best-in-class options confirm stability at all dimness levels and after months, not just on day one. Reviews matter most when they come from users a few weeks in, not just right after installation.

    If you install yourself, avoid mixing random dimmers with flicker-free LEDs—those combos almost always degrade over time, even when they first look correct.

    It’s Not Just the Bathroom—Why This Applies Everywhere

    Flicker is not limited to bathrooms. The same issue repeats under kitchen cabinets, along shelf runs in a workroom, or above a home office desk. A rated fixture might seem sleek and bright at setup, but after a few late nights at a cluttered desk or elbow-deep baking at the kitchen counter, you’ll find the same jitter—especially wherever surfaces reflect or tasks demand clear, edge-to-edge visibility for small or fiddly work.

    Practical Moves for a Calmer Setup

    • Target flicker-free fixtures for any place you’ll use repeatedly—not just main bathrooms, but kitchen prep surfaces, workbenches, or reading nooks.
    • Aim for light that covers mirror and counter edges evenly—not just centered brightness. Clarity at task edges saves time.
    • Test your setup after real routines, not just five minutes after install. Spend a week, and watch for subtle shimmer or eye fatigue.
    • If something still nags, revisit connections, dimmer pairings, and cable runs to spot points where instability creeps in despite good hardware.

    Everyday Lighting: The Hidden Impact of Calmer Fixtures

    The best lighting setups rarely shout—and yet, their absence is felt in everyday friction: missed spots, jittery reflections, edge discomfort. No “damp rating” sticker fixes a fixture that wears you down by Thursday. Make structure and stability work for you, not just for compliance. The difference is a bathroom (or kitchen, or desk) that doesn’t just appear finished but actually feels easy to live with, no matter how many times you flip the switch.

    Find real, flicker-free lighting and practical support solutions at LightSupport.