Author: jaesoon_admin

  • Why High-TPI Blades Are Essential for Cleaner, Precise Saw Cuts

    You’re hunched over a stubborn section of trim, saw humming, and realize with each pass that your choice of blade isn’t just slowing you down—it’s tearing your finish to shreds. It’s not until you drop the reciprocating saw and scan the splintered edge, the paint flakes, the ragged fibers that you understand: the blade in your hand just rewrote your afternoon. Now it’s extra sanding, touch-ups, and maybe a return trip to make things right—just because the right blade wasn’t in place when the job started.

    Where TPI Makes or Breaks the Cut

    In theory, picking a reciprocating saw blade is routine. You rifle through your bag, grab whatever isn’t bent, maybe check the label: “wood and metal,” “fast cut”—they all look the same before you start. But repeat trim removals, precision window fits, or tight jamb notches will show you the truth. The difference between a low-TPI and a high-TPI blade goes from invisible to everything in about three cuts flat.

    Low-TPI blades are demolition hammers—they make fast work of bulk cuts and nail-filled debris, eating up framing, and knocking down problem boards. But walk that same blade along visible trim or a delicate casing and you’re in for headaches: splintered edges, chipped paint, chewed-up surfaces begging for filler and far more sanding than the job deserves.

    High-TPI blades are for jobs you don’t want to do twice. Each tooth slices less material, slowing the cut but upping control—producing cleaner lines on window stops, crown, and baseboard. If you’ve ever stared down a feathered, splintered cut bleeding through your paint, you know why it matters. High TPI lets you guide the saw without carving scars you can’t buff out.

    The True Test: How Blades Behave in the Cut

    No one pauses mid-job to analyze a blade’s tooth count. But the work itself exposes what the packaging never said. Blades snap into place the same way; only the trail they leave behind is different.

    Real-World Side-by-Side Cuts

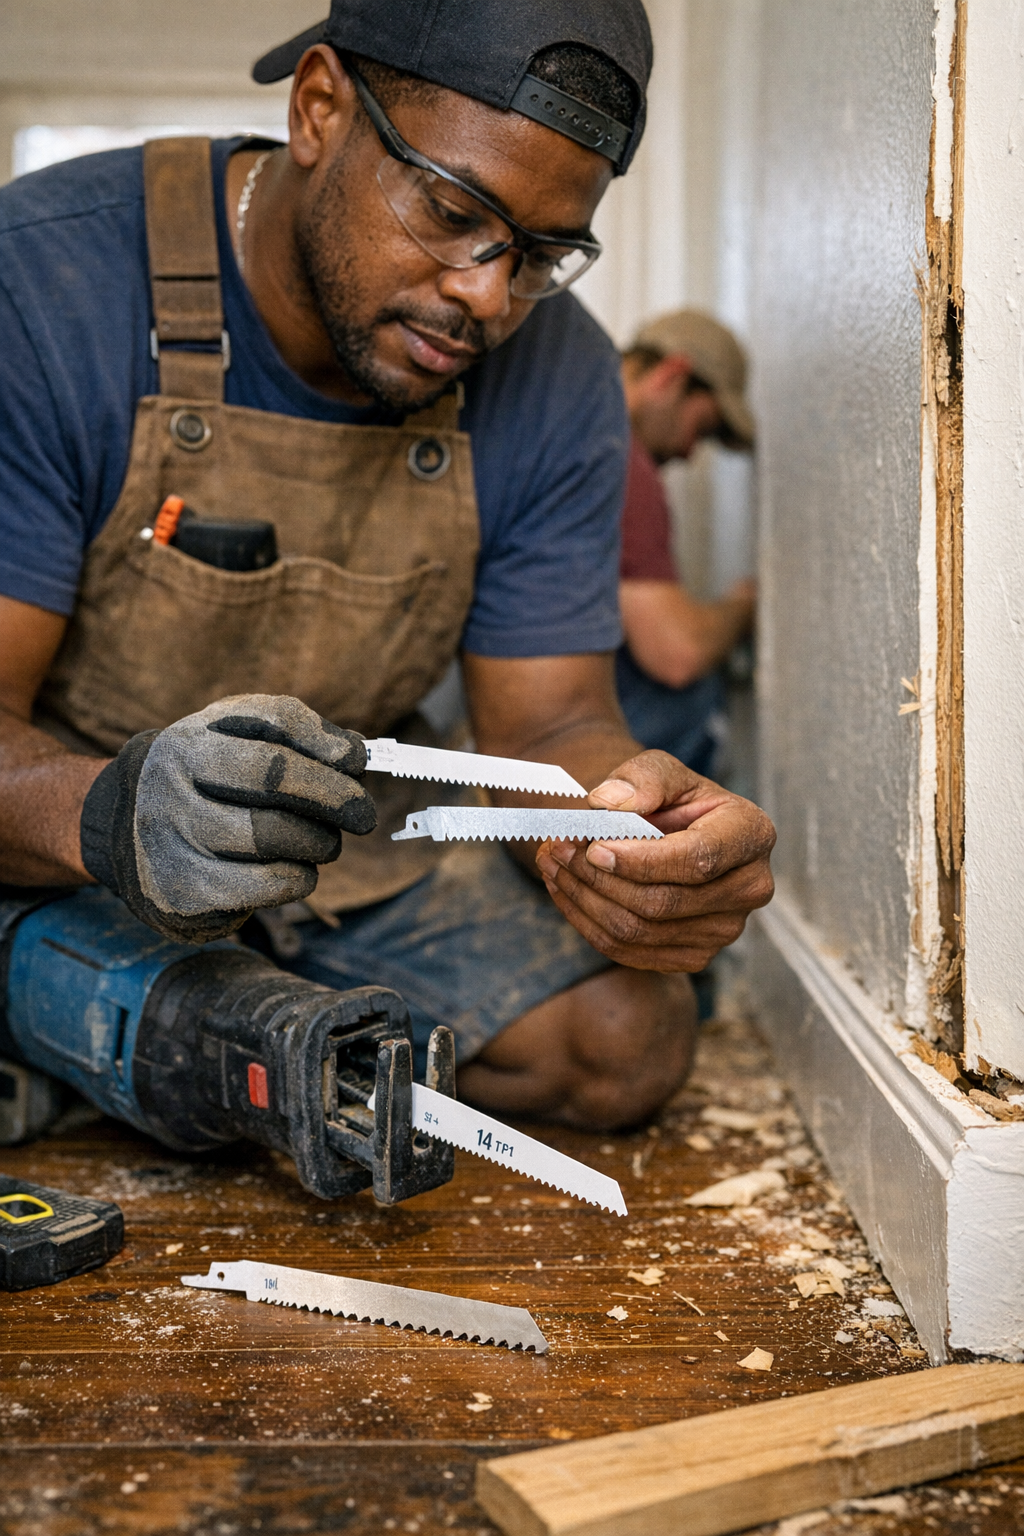
    Push a 14-TPI blade through pine trim and the feedback is noticeably smoother—a quiet hiss as the teeth eat cleanly. The saw’s vibrations drop, and the blade tracks with control, letting you follow tight pencil marks, easing the saw’s weight instead of fighting it.

    Now switch to a chunky 6-TPI blade. The start feels faster, but control fades. The tool bucks with each pull, chewing up big chips and leaving ragged kerfs and runaway splinters behind. Run your hand down the edge and you’ll feel every chipped grain waiting to print through paint or snap off under pressure.

    Afterwards, the real cost hits. With a fine-bladed cut, you’ll probably get by with a minute or two of light sanding. Go coarse and you’ll break out filler, scrapers, and curse as you try to erase what the blade already ruined. It isn’t theoretical—the extra labor piles up on every project, stretching timelines, burning through patience, and raising the odds that even your best patch will be the weak point for the client or inspector later.

    When Detail Work Meets Jobsite Reality

    You’re pressed for time, squeezed between painted drywall and a baseboard someone else shot in place decades ago. You reach for speed—a demolition blade, quick and dirty. The board pops off, but the edge is shredded, and the wall now sports a fresh scratch. Now you’re prepping the patch, sanding out torn fibers, and wishing you’d thought twice. Your knees ache, and every trip with the sanding block steals minutes from the next job.

    Swap in a 14–18 TPI blade. Yes, the going is slower and you feel the resistance, but you’re rewarded with a cleanly severed edge, no splinters, and a trim board ready for paint or reinstall in half the script repair time. The difference isn’t that you’re suddenly perfect—it’s that you save the only resource you never get back on site: time.

    Tweaking Your Routine: The Small Adjustment That Pays Off

    The best pros you meet have already made peace with the right blade for the job. There’s always a favored set clipped somewhere—a 6-TPI for smashing out rough material, and a 14-TPI for anything worth seeing again. After enough gouged shelf ends and chewed-up jambs, you learn: slower, finer, steadier blades can erase more headaches than any finish nailer or new sanding pad.

    Measured edge splintering dropped from 3mm to barely over 1mm—cut after cut, just by swapping to high TPI and giving in to a patient pace. This isn’t some shop secret. It’s ordinary jobsite logic: invest a minute in the right tool, cash out thirty on every patch and rework you never have to do.

    Common Questions—and Where Pros Draw the Line

    Does a high-TPI blade last longer in demolition?

    Absolutely not. High-TPI blades dull down fast when fed drywall nails, buried screws, or construction debris—they’re for precision, not punishment. Reserve them for those finish edges. Demolition eats blades, so let coarse ones take the hit.

    When should I skip high-TPI blades?

    Leave them on the bench for waste removal. If you’re ripping out rot, hacking through dirty studs, or blazing through sandwich materials, pick a coarse blade. High TPI will slow the process and just gunk up under pressure.

    Is it smart to swap blade types mid-project?

    Yes—if you plan ahead. Start rough with low-TPI for bulk removal, then drop in high-TPI blades where clean edges count. Waiting until splinters show up isn’t a time-saver; by then, you’re stuck fixing what can’t be truly hidden. Scope the finish work first, match your blade, and swap with purpose.

    The First Cut Writes the Schedule

    After running through piles of blades and endless offcuts, the math stays simple: choose your blade, choose your cleanup. Demolition jobs thrive on speed and coarse teeth. But for every hour you spend sanding, smoothing, and disguising damage, it’s the first poor blade choice calling the shots. Pausing to swap to high TPI wherever appearance or fit matters is the difference between a proud walkaway and another late night on your knees.

    Less regret, less fatigue, more jobs done right the first time—sometimes, all it takes is thinking as much about the small accessory as the big tool in your hand. If you’re tired of sanding out mistakes, start with a better blade, and let every next step run smoother.

    Visit Gumboll for proven blades and practical jobsite tools.

  • How Structured Adjustable Pantry Shelves Improve Daily Kitchen Organization

    The gap between adjustable and fixed pantry shelving isn’t obvious during that first impressive restock. It reveals itself in the second week—when you’re digging behind a row of left-leaning snack boxes to find a missing jar, or reaching over a tilted cereal box crowding into the can zone. Suddenly, the “flexibility” sold by moveable shelves becomes the frustration of a self-shuffling pantry: categories blur, return flow slows, and the tidy wall system that looked so efficient now hides items behind each other in a growing patchwork of improvisations.

    When Flexibility Starts to Add Friction

    Adjustable shelves look like the smart move for any changing kitchen. Need more space for tall olive oil or an awkward cereal value pack? Shift a tier, drop a divider, or nudge your rows—done. This promise hooks busy households trying to wrangle mixed groceries and surprise bulk buys. But under daily use, flexibility can backfire fast: every slot modified “just this once” creates an uneven grid, disrupting category lines. One shelf goes up for a double-high pasta box—now the jars below slide toward the back. Someone presses soup cans side-by-side instead of stacked, shoving boxed grains to the corner. What’s flexible during installation becomes a setup that demands resets after every grocery run, making it harder to spot what’s running low or where anything actually belongs.

    The Quiet Spread of Category Drift

    The real danger with endlessly flexible shelving isn’t obvious misplacement—it’s subtle, progressive “category drift.” Start with cans, grains, snacks each in their neat vertical slots. By Thursday, an oversized cereal box pushes snacks sideways; someone stacks cans three deep and squashes the grains; by Friday, unlabeled bulk items or half-empty boxes fill every open inch. Overlap piles up. Kids hunting for snacks rip open the wrong box, drop bags behind jars, or return things wherever a gap opens. A partner rebuilding tomorrow’s lunch shelves granola bars on top of tomato cans, hiding dinner staples under breakfast leftovers. In a week, every shelf’s boundary is fuzzy, and essential items vanish into mismatched rows or rogue overflow stacks along the edge.

    After a Week: The Illusion of Order Collapses

    After five days, the pantry feels like a collapsing map. Fixed “homes” for cans or jars are replaced by whatever will fit under the next available slot. Restocking morphs into blocked movement: to put away groceries, you have to shuffle a row, unstack an awkward column, or clear a jammed section collecting overflow. Often, the very actions meant to maximize space—moving shelves up or down, squeezing boxes next to jars—hide things or create spillover bins at floor level. Unopened snacks get buried, duplicates multiply, and the number of steps to find anything increases. What started as a flexible system now takes more time to reset and slows every retrieval, triggering a rushed search through mismatched stacks instead of a simple grab-and-return routine.

    Fixed Shelves: Inflexible or Reliable Backbone?

    Fixed pantry shelving gets dismissed for wasting space or lacking options, but a rigid system does something crucial: it forces lasting zone boundaries. That means a row for cans remains a row for cans—even if there’s a sliver of air above them. No matter who stocks the pantry, the core layout doesn’t drift. You grab tomato sauce, and it’s still exactly where you left it; cereal comes off the shelf without shoving past other categories; pasta is never wedged behind snack bars. Yes, some space goes unused above shallow rows, and yes, an odd-shaped box might not fit. But this very constraint enforces daily shortcuts: less time spent shuffling, less chance for items to hide, and clearer return flow after every meal prep. The real friction comes only if a shelf is set so far off that major categories simply can’t fit at all—a much rarer problem than the daily micro-shuffles of adjustable setups.

    The Actual Reset: Using Flexibility With Deliberate Limits

    The most stable pantries blend a handful of adjustable shelves—set for rare changes and tall items—with committed, unchanging zones for categories that don’t shift weekly. The real shift comes the moment you stop treating every shelf as open to change. Cans double-stack in one definite row, always visible. Snacks line up in a single neat sweep, not drifting up or down. Jars get their own consistently spaced tier. After this re-anchoring, shelf moves aren’t an easy, impulsive fix but a scheduled event: maybe once a season or when an inventory really changes. The difference is stark: no one spends Saturday morning playing shelf Tetris, and restocking means replacing, not rebuilding. Retrieval becomes automatic—not a puzzle—regardless of who did last night’s cleanup.

    Critical Tips for Preventing Creep

    Enforce clear “homes” with physical or visible barriers. Use shelf dividers or minimalist labeling—simple, non-negotiable slots for main item categories. This way, a shelf’s assignment survives creative restocks or hurried breakfast rushes. Even if someone improvises once or twice, the main zones remain unmixed–and everyone quickly gets the signal when things start creeping out of bounds.

    Limit shelf moves to planned resets. Don’t let the “adjustable” label encourage constant tinkering. Set a calendar reminder for realignments (a new school year, or peak holiday stock-ups); otherwise, the system should hold firm. This single habit blocks the slow grind of category drift and the accumulation of overflow piles in unplanned corners.

    From Shelf “Perfection” to Repeat-Use Order

    The real test for a pantry isn’t snapshot aesthetics—it’s whether the system can survive a full week of unpredictable use. Does it let you grab three quick ingredients with one hand while holding a phone, or does it force you to play a guessing game with hidden rows and shifting bins? Behind every setup that feels organized after seven days is a structure that absorbs routine mess without letting boundaries dissolve. Whether your pantry lives in a full-wall alcove, a slivered utility closet, or a make-do kitchen nook, the setups that win always defend zone clarity and daily pathways over micro-optimized shelf height.

    The smallest adjustments make the biggest difference: a fixed shelf line for the highest-use category, a non-negotiable snack row, a “no pileup” rule enforced with a divider or discreet label. Flexibility has its place—but only when used sparingly, not as a default escape hatch every time a new item comes through the door. A reliably organized pantry isn’t about looking perfect. It’s about resetting with less stress, finding things without friction, and making drop-offs and retrievals nearly automatic—no matter who’s rushing through the kitchen next.

    Explore more practical storage setups at Gridry.

  • Optimizing Work Area Lighting for Clear and Comfortable Task Spaces

    The real test of workspace lighting isn’t how a setup looks on day one—it’s how it holds up after days of routine interruptions, overlooked cables, and stubborn shadows at the desk’s edge. That first week, even a new LED strip or low-profile lamp seems like progress. But the pattern starts: you angle a desk lamp for the fourth time in one afternoon, dodge a line of glare bouncing off your laptop’s bezel, or catch a loose cable with your elbow every time you reach for a pen. It’s never just about adding more lumens; real clarity means shaping light and support so they solve the drag points you actually face—where you sit, write, plug in, and move, hour by hour.

    How Good-Looking Setups Come Up Short in Use

    A tidy lighting install rarely survives unscathed when real routines return. Cables tucked for the photo become a tangle the moment you route a new charger. Fixtures “hugging” the shelf edge leave awkward shadows that creep across paperwork by late afternoon. The bright spot covers half the desk—never the half where your hands are actually working. Instead of a streamlined workspace, you get a surface sliced into glare, dim patches, and cable clutter—no matter how resolved it looked fresh out of the box.

    Everyday friction piles up quietly: an arm grazing an exposed bracket, your mouse snagging a hidden cord, or a desk lamp base that blocks the only spot big enough for your notebook. Overhead lighting claims daylight color, but you still have to shuffle between islands of brightness and shadow. Each awkward mounting choice or misrouted wire becomes a permanent speed bump, making a so-called “minimal” workspace feel crowded and resistant to actual work.

    Where Lighting Fails: Surface Gaps and Shadow Traps

    Lighting that sells itself in catalog photos can undermine you at the desk. An under-shelf strip staged for symmetry often throws light too far back, leaving the front of your workspace dim. A slim bar running tight along the wall fades before it reaches your papers. Task lamps fixed at one angle let shadows hover where you need edge clarity most—usually where tools, reference sheets, or a secondary monitor push past the available light. The surface still looks clean, but the daily use is marked by squinting, repositioning, and chasing brightness that never lands where you want it.

    Even small misalignments—just an inch too far back or forward—mean constant adjustment: shifting your chair, pulling notebooks into a usable patch, or stacking objects to catch the right angle. Clean lines and tidy photos dissolve by midweek, revealing what the lighting scheme missed: reliable, shadow-free use across the whole desk, not just the zone pictured in a staged shot.

    Glare and Dimness: Everyday Annoyances

    Glare and dim corners linger, no matter how “upgraded” the fixtures sound. Overhead lights rarely map neatly onto a segmented desk or multi-use kitchen counter. The working center glows, but edges where details matter—margin notes, stacking trays, supply bins—stay washed out or reflective. The fix isn’t amplifying the whole room but targeting: a lamp with an adjustable head or a slim support bracket allows you to melt shadows and steer light where the task keeps moving. Without that, every switch of task reveals a spot you still can’t see clearly.

    Cables and Supports: The Quiet Aggravation

    Even when light placement seems right, unmanaged cables and brackets create a constant, distracting presence. A power cord draped across a desk’s live edge snags sleeves, collects dust, and never stays tucked after the first rearrangement. By week two, that invisible cable clip you noticed only during setup becomes the reason your chair nicks a wire or your laptop charger is never quite in reach. Exposed routes and poorly placed brackets disturb the surface flow, pulling attention from the work to the hardware every time you tidy up.

    Real cable management means low-profile brackets tucked just below reach lines, clips guiding cords tight to furniture legs, and tethers that never intrude on writing or mouse movement. Well-chosen supports aren’t about visual minimalism for its own sake—they free your movement without reminders, keep tool storage usable, and erase the loop of “which cord is in my hand?” every time you need to change a device or clean the desk.

    Support Placement: Looks Versus Function

    A bracket or support can look flawless after installation but fail the usability test immediately. You only realize how intrusive that “minimal” fixture is when your elbow hits it for the tenth time, or you can’t lay documents flat because the support hardware claims your only clear spot. Long term, even tiny mismatches between hardware location and task space become ingrained annoyances, making the most stylish setup quietly difficult to live with.

    The solution isn’t a bracket you never see—it’s the mount or support you stop noticing because it aligns with how you really use the surface, not how the room was staged for a photo.

    What Actually Changed My Space: One Practical Switch

    The tipping point for my own desk wasn’t a new fixture—it was swapping the old fixed under-shelf light for a movable desk lamp, bracketing it with a wall mount, and hiding cables with clips just below my reach. Suddenly, the light tracked with my workflow, the cord never flicked my bag off the edge, and the illuminated area reached both my notepads and the laptop’s far keyboard. Even on a crowded day, I had enough usable space for another person without sharing glare or blocking a task zone.

    Incremental, targeted lighting and support shifts compound into the difference between a space that just looks neat and one that’s friction-free across days—not just the first hour after setup.

    Real-World Q&A: Troubleshooting Common Lighting Friction

    Why is my work area still dim despite a new overhead light?

    Ceiling fixtures broadly light a room but leave working surfaces patchy, shadowed, or uneven. Direct, task-focused lighting—like a desk lamp or under-shelf mount—aims brightness right where your hands, eyes, and tools are. That targeted beam makes surfaces actively usable rather than just visible from a distance.

    How do I know if I have glare or just not enough light?

    Sharp reflections, forced squinting, or “hot” spots are clear signs of glare—usually from misdirected beams or glossy work surfaces. An overall dull workspace signals light that’s too weak or distant. To fix glare, steer light across the surface, not at your eyes; for dimness, bump either fixture proximity or beam spread, not just bulb strength.

    Does cable management really affect routine comfort?

    Yes. Unkept cables snag, make cleaning clumsy, and force you to notice them before you notice your work. When cords are routed flat, clipped tight, and kept out of reach zones, you stop thinking about them entirely—a usability upgrade you only feel when the chaos is finally gone.

    Lighting and Support Decisions That Quietly Hold the Room Together

    Sustainable improvement doesn’t come from piling on more light or chasing the slimmest fixture—it comes from small, repeated adjustments: targeting light, anchoring supports, laying cables so flat they vanish from memory. Over weeks, these shifts separate “looks done” from “never interrupts.” If you find yourself shifting lamps, moving piles for a clear inch of light, or wrestling the same cable every day, the setup is costing more attention than it saves.

    Effective lighting and support recede into the background, holding the space together so you can focus—not by reaching perfection, but by solving the daily patterns that keep interrupting you.

    www.lightsupport.myshopify.com

  • Adjusting Your Cat Care Routine to Prevent Feeding Area Clutter

    Daily pet care routines can look functional on the surface—until that one small gap turns every reset into a hassle. You reach for the bowl, but the matching scoop is missing. The towel you counted on is balled up in another room. Before you’ve restocked water, your cat’s circling the feeding spot, tracking in crumbs and distraction. These interruptions aren’t just background noise; they quietly multiply, turning feeding, water refills, or quick cleanup into drawn-out chores that drag across the day. If the system looks tidy yet can’t handle repeated use, it isn’t working for you—or for your pet.

    Recognizing Feedback in Small Interruptions

    When your cat or dog reappears before you’re even done resetting, it’s not random—it’s a live reminder that your routine’s structure doesn’t match real use. Especially in high-traffic moments like busy mornings or the after-dinner rush, the smallest lag can unravel everything: water gets spilled as your pet nudges for their dish, a half-wiped mat picks up new stains, the space never fully resets. Even if you manage a reset, a towel stashed too far means wiping gets skipped, and the “clean” space is always a step behind the next spill.

    Where Routines Start to Slip

    The cracks aren’t usually dramatic. Supplies are technically present, just parked one step too far, or always under, behind, or mixed in with other household stuff. Maybe the brush for bowls gets hidden behind a cleaner, or you leave a towel out awkwardly because your pet needed space and now it lingers, cluttering countertops. Food bowls drift out of feeding areas and take up space in hallways. Toys, wipes, stray lids cluster on surfaces you share—and suddenly every pet reset overlaps with another part of your day, never quite clear or frictionless.

    Scenes From Real-World Daily Use

    Mornings are the worst for friction. You try to power through: refill water, grab food, snag the mat for a quick wipe—except the lid’s blocked behind yesterday’s mop, or the scoop’s stranded by the backyard door. Meanwhile, your cat strolls back, stepping onto a wet patch you just cleaned, scattering fur or crumbs mid-reset. The pet area looks fine in a static photo but forces double-backs and missed steps in motion—so you run late and the routine’s still not done.

    Fast-forward to night: you’re trying to close out with one last check, but a damp towel hasn’t dried or the scoop’s gone missing (again). Every delay—for one simple item—requires backtracking. Instead of a smooth reset, you get a string of stop-gaps, with cleanup and supplies always half a step out of sync. Over a week, this starts to bleed into the rest of your living space, with pet gear trailing into rooms where it doesn’t belong, and “cleanup” never quite sticking.

    The Difference Between Tidy and Truly Smooth

    A tidy pet area can hide how many steps aren’t working. Visible order looks good for guests or quick photos, but if your wipes are buried, bowls take two trips to gather, or towel hooks are across the room, you pay in repeat effort. So-called “organized” feeding setups can start shedding wet spots, stray crumbs, or used towels in every cycle. The sign you’re falling behind isn’t a big mess—it’s the recurring pause, double-check, or slow frustration that keeps coming back with each reset.

    Solving the Weakest Link in the Care Cycle

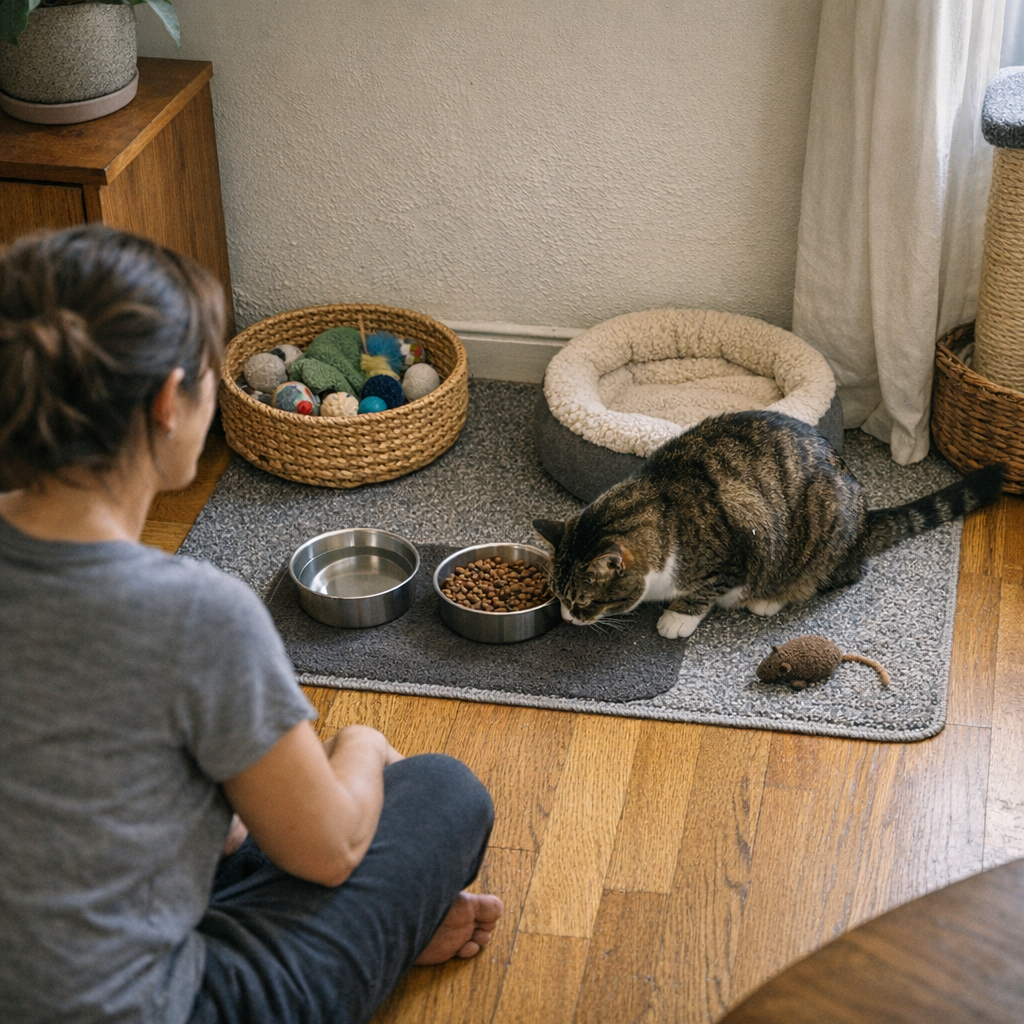
    The routine breaks exactly where the reach-for-it moment goes wrong—an awkward drawer, a supply lost in clutter, one must-have item never where you need it. Mounting a microfiber towel on a wall hook beside your feeding zone puts it in easy view. Keeping a scoop or bottle on an open shelf means you can wipe, refill, and reset before your pet disrupts the flow. The contrast is immediate: the cleanup finishes in real time, instead of waiting for you to retrace steps or search for essentials left too far away.

    Sudden interruptions stop scattering your attention, and “pet cleanup” doesn’t leak into the rest of your day. Even one small item, positioned better, flips the routine from scattered to streamlined—a background job you finish by reflex, not as a series of stops and starts that never really end.

    Routine Resets: From Cluttered to Manageable

    What makes pet care wear you down isn’t one glaring mistake—it’s dozens of tiny, unresolved frictions: lids never at hand, towels draped and forgotten, wipes in another room, that last bowl not clean at the right moment. Most so-called problems are just patterns that never get fixed. Move the weak point—hook, shelf, bin, bottle—where you can always reach it, and let reset tasks finish before your pet interrupts. The goal isn’t spotless “for show” organization but a reset you don’t have to fight through each time.

    The most reliable comfort doesn’t come from appearance, but from a setup able to handle your pet’s real pace and your daily speed. The right shifts—switching out one shelf, catching which item always breaks your flow—keep your setup flexible even on messy days. When pet care fits your actual movements, not just an organized look, each routine runs lighter and less likely to slip behind.

    See what shifts when supplies actually live where you move, not just where they fit neatly: CalmPetSupply.

  • How Carry-On Bags Gradually Lose Order During Multi-Day Trips

    The carry-on bag that stays neat during home packing almost never stays friction-free once you’re actually moving through airports. What looks precise in your living room—a row of tidy pouches, chargers looped and tucked—starts breaking down with real-world use. The small annoyances don’t explode at once; instead, the flow grinds slower with every checkpoint grab, gate shuffle, or seat entry. Documents that were perfectly filed get buried after one rushed search. That quick-access pocket you trusted for your passport is now blocked by tangled headphones. Suddenly, a carry-on that seemed ready for anything loads you with seconds of interruption in the moments you can least afford them. This is the repeated-use friction CarryOnSupply is built to reduce.

    Order Fades by Day Two (and Shows Itself by Day Four)

    At home, your system looks untouchable: cables with their chargers, passport slotted, toiletries zipped away, every organizer snapped into place. That barely survives one cycle of airport reality. By your second or third major reach—digging out electronics for security, handing over a passport at a crowded checkpoint, folding away headphones before takeoff—the entire setup starts shifting. Cords wedge themselves under jackets; documents drift beneath a charger pouch; that ultra-thin organizer slides just enough to block something else. These aren’t dramatic errors—just an accumulation of micro-shifts you only notice under pressure.

    Repeated Reaching Is What Breaks “Home Order”

    Picture this: between flights, you dive for your boarding pass. The zipper glides open, but now you have to push aside a cable pouch that’s pinched the passport sleeve, and headphones have slid over toiletries. Instead of a simple reach, you’re using both hands, blocking the aisle, the tempo of travel slowing down while a line grows behind you. Visually, it still passes the “organized” test. Functionally, the cracks show whenever you’re forced to reach one step further than expected.

    Why “Perfect” Packing Falls Apart With Real Use

    At home, packing is calm. Compartments slot in and out, every item mapped to a pocket, every zipper running smooth. But try running this system through five real repackings—once in a cramped bathroom stall, again on the terminal floor, and maybe in a hurry at your gate. Tightly stacked pouches jam instead of sliding. The document sleeve you depended on gets pushed down by one stray cable. That impromptu charger drop means now it’s sandwiched between two bigger pouches and throws every reach-after out of sync. The difference between organized-at-rest and organized-in-motion starts showing up with every repack in a real travel setting.

    The Real Cost: Interrupted Flow, Not Visual Mess

    Most travel organization fails by barely-noticed degrees: slowdowns, repeated searches, two zippers instead of one, or your essentials drifting one pocket too far. You open an outer pocket for headphones but find a charger blocking the way; documents hide under the tech pouch you stuffed in hurriedly. Each “quick fix”—shoving a pouch back into place or switching documents to a more reachable spot—pushes something else out of alignment. The more often you need something, the slower it is to pull, until you’re pausing on routine grabs. These seconds multiply—especially on the day you actually need speed.

    Pressure Points: Where Travel Rhythm Stalls

    The difference between tidy and actually usable shows up fast on real airport floors:

    • Security trays: Items intended for smooth retrieval come out clumped. Three objects jam together, and you repack worse than before under pressure.
    • Seat entry: Once-slim organizers now bulge wide, catching on armrests as you try not to block the aisle—especially awkward on full flights.
    • Overhead-bin search: A charger for headphones or a stick of gum migrates just out of easy reach; what was a quick pull now requires taking out half your bag.

    Every one of these moments exposes the gap between organized storage and in-motion access. What survived the initial pack loses reliability under real pressure—just where an orderly carry-on was supposed to help.

    Learning From Mid-Trip Disarray

    Frustration builds quietly: high-frequency items—passport, charger, sanitizer—don’t stay in their assigned slots. Every boarding or security stop, you’re reaching, finding a pouch drifted, second-guessing quick-reaches, pausing to figure out which zip-path leads to what. When frequent-use essentials cross over into deeper pockets or merge with tech gear, every movement feels heavier and duller. The flow of travel is interrupted not by chaos, but by repeated minor blockages—the exact thing most customers try to cure with better organizers and quick-access gear from CarryOnSupply.

    One immediate shift: Instead of organizing by category, switch to packing by actual retrieval sequence. Group on-the-go items—passport, tickets, headphones, sanitizer—into a flat, shallow compartment, not stacked in a deep section. Slot key documents into a dedicated back panel, never buried with tech pouches or toiletries. This cuts down on multi-zip hunts and second-guessing—on your next rushed checkpoint, you’ll spend fewer motions on retrieval, and less time worrying what slipped out of order.

    One Change That Eases the Cycle

    After enough real-world reaching, most travelers end up dividing by use: everything needed at security in its own space, boarding items together, long-haul items sealed away. For example, transitioning essentials to one zipped top section (flat, with nothing overlapping) drops retrieval time whether you’re in line, finding a seat, or halfway through a layover. Keep travel documents away from swelling charging kits and headphones packed separately from toiletries. This isn’t some magical fix—but the pressure relief is noticeable. On day four, you open a section and still find your essentials within easy grab range—not lost or merged into stretched-out compartments.

    Adapt for Movement, Not Just Order

    Flawless starting setup fades fast—especially if you need to access, repack, and move multiple times in a day. Loose chargers, too-large toiletry kits, layered document sleeves: all are common friction points, blocking zippers, drifting across compartments, interrupting the grab-and-go flow. “Good organization” without repeated correction simply hides the creeping misalignment that blocks you at each checkpoint or boarding call.

    The fix isn’t dumping everything for a full reset at every stop. Instead, target the drift-prone gear—your quick-access core—before it slows you down. Nudge back what’s slipped. Streamline your top and outer sections for what truly needs to be reached in the rhythm of real travel, not just for a packing photo. Expect shifting, and learn what items always break the flow so you can prevent blockages before they start costing you time and attention when lines or pressure rise.

    Less Reset, More Fluid Use

    The reason to rethink your setup isn’t competing for the “most organized bag”—it’s to build a carry-on that flexes under real repeated movement. You’ll know you’ve nailed it when the bag stays usable on day four, through unexpected security lines and tight boarding windows—when you can grab what you need without pausing or scrambling under pressure. That is the difference between a setup that just looks neat and one you actually depend on, even through repeated trip legs and airport routines.

    Shop practical solutions and in-transit carry-on tools at CarryOnSupply.

  • Creating a Stable Outlet Zone to Keep Your Workspace Organized and Efficient

    Cable chaos doesn’t wait for clutter—it starts as soon as the first device connects. Even on a desk that passes for “organized,” the order collapses under normal use: power strips creep out of reach, charger cables bunch around desk legs, and every new plug-in sends adapters wandering or slipping off the edge. By the end of a single week, what looked like a reset surface becomes a trap for wasted motions—chasing the right cord, crawling for the power strip, bumping a loose cable loose with your chair. Visible tidiness fools the eye, but real friction begins the moment your hand can’t trust the outlet to stay where you left it.

    Where the Calm Outlet Zone Really Matters

    Hiding clutter is not enough if the parts you actually use won’t stay put. A hidden but loose power strip is only quiet until you reach to plug something in—then it slides, tips, or drags a tangle of cords toward your feet. One tug throws the whole outlet zone into confusion, leaving you half underneath the desk, reconnecting a cable that was fine seconds ago. The difference between a work-ready setup and one that just looks neat, but refuels this cycle of interruptions, is unmistakably sharp if you’ve ever rolled your chair just enough to scatter your chargers again. Unless the core—where outlets and cables regroup—stays anchored, each attempt to streamline slips right back into disorder.

    Why Temporary Desk Fixes Don’t Stick

    Every surface cable clip, stick-on tie, and “quick fix” is temporary at best. Photo-ready tricks last just through the video call. By midweek, monitor arms have shifted and dragged wires behind them, shared cords have been tugged off-balance, and any exposed cable path gets caught by feet or backpack straps. You’re left tracing which cord crosses which, digging for a wayward adapter halfway under the center drawer, and untangling what yesterday seemed sorted. This is more than aesthetic failure—it’s burnt time, recurring with every minor reset, until you notice how much work it steals back in small jolts of hassle.

    Surface Order vs. Repeat-Use Stability

    A handful of cable ties or a strategically cropped desk shot can create the illusion of control. Real stability only becomes obvious after full cycles of use: a “clean-looking” desk drifts off course the first time you adjust a monitor, while an anchored cable tray shields cords from daily bumps. The result is quiet—even boring—reliability: connections wait at hand, and the desk doesn’t need your time to recover after every session.

    Noticing the Weak Points: Real-World Setup Friction

    Watch how the breakdown happens in use: plug in a laptop and the power strip travels with it; grab your notebook and the charger cable flies off the corner; push back your chair and your foot yanks out the monitor supply. None of this is unusual. The more devices and people share the space, the more the flaw repeats, eating into your flow without ever becoming a single dramatic collapse. Only when you anchor the outlet zone—a tray mounted under the desk surface, a deep box fixed behind the legs—do the small frictions stop dictating the pattern. Cord paths stay predictable, connections land in reach, and hand-to-plug access is always where your muscle memory expects it.

    Compounding Disruptions: When Setup Choices Add Up

    No single snag ruins a workday, but the sum is what steals your focus. Each awkward reach below the desktop, every rescue of a cable mid-task or rerouted adapter, adds invisible seconds to the clock. Anchored cable flow gives those seconds back—not by winning a style contest, but by refusing to repeat the same breakdown, hour by hour.

    What Anchoring Outlets Changed About My Workflow

    Trading a sliding, floor-level power strip for a mounted tray seemed minimal—until it stopped daily patchwork repairs. Before, every chair shift sent cables skittering, and every morning started with a small reassembly ritual just to get the monitor and laptop powered up. That never-ending reset faded after I fixed a tray behind the desk’s rear edge and let the cords hang in loose, short loops: enough movement to flex, but not enough slack to tangle or slip. Returning to the desk stopped meaning scanning for dropped adapters or re-plugging bent chargers. The reset happened automatically—the workspace actually awaited use, instead of demanding one more fix.

    Some Real-World Clues Your Desk Needs an Anchored Outlet Zone

    • You chase lost cables behind the desk more than once a week.
    • Your power bar slides sideways or backward after almost every use.
    • Plugging in a fresh device twists, unseats, or knots other connections.
    • Other users move chargers and leave the whole zone rearranged.
    • Long sessions start and end with your chair snagging, loosening, or stressing crucial cords.

    If two or three of these happen in your week, the outlet zone is almost certainly floating—never fully “organized.” Quick fixes do not hold: adhesive clips peel away, cable ties loosen, and even adapters shift whenever the desk itself wobbles or a drawer closes.

    FAQ: Anchoring Outlets and Cables for Real Work

    How do I keep cables and power strips from sliding or falling?

    Cable trays or cable boxes mounted to the desk frame—or directly to the underside—lock cables in place for every task. Anchored setups eliminate the crawl for dropped connections and keep your key adapters present at the surface. Lightweight adhesive clips, even strong at first, rarely hold up against daily reach and adjustment in high-traffic areas.

    Loose or Fixed: Should the Power Strip Move?

    Loose strips might appear flexible, but every adjustment demands another round of untangling. Mounting the strip under the desktop, or inside a drawer unit that opens toward your main reach path, creates an always-accessible zone. The cords stay reliable; you stop playing tug-of-war each time you need an open socket.

    What if multiple users need the outlet zone?

    Shared cable trays or cable boxes work best when installed with space for multiple device types. Cable routes should branch out gently, not overlap, so one person’s move doesn’t disrupt the whole setup. This means chargers and adapters remain accessible, regardless of who last used the station, and the outlet zone holds its shape throughout the day.

    The Practical Payoff: More than Clean Looks

    Anchored outlets deliver consistency, not showroom perfection. You stop rescuing cables and simply get back to work, no matter how often the rest of the desk changes. Small desks, shared setups, and high-volume device switching see the contrast first: the difference is not a prettier workstation, but one you stop having to adjust. Anchor power and cable flow once and the result is fewer resets, less lost time, and an end to the slow drain of scattered interruptions every work session.

    Explore the full WorkBasic collection

  • Recognizing Hidden Tension in Your Dog’s Daily Routine and How to Fix It

    After breakfast, the kitchen usually looks quiet—but a “still” dog doesn’t always mean a routine that works. Is your dog sprawled on the mat, or just pausing until the next minor interruption? It’s easy to assume one deep sigh or a gentle flop means all is well. Yet, right after breakfast, problems begin to creep in: the food bowl slides out of place, the leash isn’t where you need it, or you catch your dog pacing the same corner—signals that the day’s routine is already losing momentum. To the eye, everything seems tidy. But under the surface, small frictions repeat: misplaced bowls, off-center mats, delayed wipe grabs. Every one slows what should be a smooth transition and bends the morning toward the inconvenient.

    What Looks Calm Isn’t Always Comfortable

    Most mornings start the same—kibble poured, water wiped up, expectation set that your dog will settle nearby as you finish coffee or pack a bag. Sometimes the pause is genuine. Other times, the signs start immediately:

    • The dog never really stretches out, shifting position again just when you think they’ll rest.
    • Eyes flick quietly to the hallway, timing the next moment you step away or the leash comes out.
    • A bowl nudges off the mat, inch by inch, trailing small puddles or crumbs through your path.

    This low-level agitation isn’t loud or dramatic. Instead, it gradually builds—the dog’s routine never fully “lands,” leaving you to pick up slack with each pass-through. That makes the next transition (heading out, prepping gear, or starting clean-up) feel less like a fresh start and more like working around unfinished business.

    The Repeating Little Friction That Adds Up

    The real trouble isn’t chaos; it’s the pileup of minor annoyances. Over a single week, you find yourself putting the bowl back in the center every morning—or shoving toys away from the door before a walk. The feeding mat drifts, cleanup towels vanish to the wrong spot, or you detour around “just tidied” obstacles. One or even two of these isn’t a problem. But on repeat, these small detours fatigue your flow, nudging every routine into something you manage rather than trust. By Friday, you’re making two or three micro-adjustments for every single transition—stalling momentum, dragging down both your energy and your dog’s mood.

    Recognizing Early Warning Signs

    A truly settled routine shows in the dog, not the decor. After breakfast, the right signs are a loose posture, slow breathing, and little to no movement after the meal. If you see your dog constantly shifting, glancing toward exits, poking the bowl, or looping along a rug edge, those aren’t quirks—they’re signals the setup is off, and both you and your dog will be paying for it later in the day.

    Real-Life Example: The Subtle Bowl Drift

    Imagine this: after feeding, you sit down, only to find—again—the bowl halfway off its mat twenty minutes later, a perfect trail of crumbs behind. The first time it happens, you move it back without thinking. By midweek, you realize it’s a cycle—bowl, mat, water dish, every one out of place. Maybe your dog circles from the rest area to the kitchen looking for something solved yesterday. By the time you want to go out, there’s hesitation—your walk is stuck in limbo while you adjust, redirect, or coax the dog back into focus. The pattern repeats: tidy in the morning, off-kilter by ten, resetting again before noon.

    Surface Order Isn’t Enough

    It’s easy to fall for the look of a clean routine—scrubbed mats, wiped bowls, bins closed, nothing visible out of line. The real test comes not on the first pass, but the eighth: when a leash is buried behind a bowl, the towel you need is across the house, or the food dish drifts so you have to step around it to grab your shoes.

    • Leash hooks mounted out of reach mean two extra steps in and out, every single walk.
    • Cleanup towels that always land at the wrong end of the hall leave you wiping muddy paws only after tracking prints inside.
    • Bowls that can’t stay put tumble into your morning path, so you dodge them while handling your own breakfast.

    No matter how clean it looks, a routine that interrupts itself isn’t set up for daily life—it just keeps demanding micro-resets from you.

    The Reset That Actually Changes the Routine

    The most telling change isn’t big or expensive—it’s a deliberate reposition after use. Try re-centering the food bowl on the mat right after feeding; no slid corners, no backward tilt. Suddenly, your dog stops circling, the resting stretches last longer, and the leash unhooks without a second thought. That tiny, predictable act cuts friction before it multiplies—no more making up for tense transitions five times before lunch. The difference isn’t perfection; it’s that your space stops knocking you off balance over and over.

    Why the Little Details Make a Big Difference

    Daily setups aren’t about picture-perfect arrangement—they’re about taking pressure off both you and your dog during the actual, messy flow of living. Key details:

    • Routine stickiness: A clear, consistent arrangement helps the dog truly relax—no need to check, shift, or search.
    • Less “searching” behavior: When bowls and beds land in the same place every time, your dog isn’t nudging, pacing, or looking over their shoulder every five minutes.
    • Fewer daily interruptions: Setups built for reach mean wipes, leashes, and toys appear right when you need them, not after three circles of the room.

    Friction That Hides in the Routine

    A routine that looks calm often hides its real snags under neat surfaces. Ask yourself:

    • Are you stepping over a food bowl to grab a leash?
    • Returning from a walk and scrambling for a towel—not finding it until dirt is already everywhere?
    • Finding toys near the entryway again by lunchtime, despite a morning clean-up?
    • Pushing a bed or mat aside just to start some other part of your day?

    These aren’t random inconveniences—they’re routine design flaws replayed, turning simple transitions into repeated work. Let them ride, and the day shifts from living together to managing constant interruption—energy drains you don’t notice until they’re stacked too high to ignore.

    How to Spot and Fix Your Own Routine Weak Points

    Smoother routines start with noticing what breaks first—not what looks messy, but what repeatedly makes the next action slower or less direct. Use these checkpoints:

    • Monitor repeated shifting: If your dog moves more than twice after breakfast before settling, they may be nudging at the setup itself—so change the bowl’s alignment, widen the mat, or slightly adjust rest areas and see what improves.
    • Watch your own corrections: If you’re re-centering bowls, re-hanging leashes, or re-folding towels more than once a morning, tally those resets. If a week goes by and you’re still repeating them, the routine—not your attention—is faulty.
    • Streamline “at reach” access: If a cleanup or walk item is never exactly where your hand goes first, move it. Arrange wipes, leashes, small brushes, or extra towels so you don’t step around clutter or double back.

    When Setup Outpaces Visual Order

    What wins over time isn’t a tidy picture after cleaning—it’s setups that un-burden each step of daily use. That means:

    • Every core item returns to its zone after use. Bowls stop blocking walkways, mats stay put, beds hold their corner—nothing migrates back into your path hour after hour.
    • Supplies are truly reachable at need. Leashes, wipes, and fresh toys live where hands (and paws) reach naturally, not just where they look best.
    • Your dog’s main space stays open even when you’re busiest. No leaking toys, stranded towels, or bowl detours break the flow between “done” and “on to the next thing.”

    The payoff isn’t instant perfection but a steady drop in repeated drag, strain, and half-finished resets. You don’t fix the same glitch over and over. The day starts to flow—clean, reset, and set to repeat—without all the invisible tension points slowing you down.

    The Takeaway: Reset Routines Before They Reset You

    The routines that actually work aren’t the tidiest—they’re the ones that stop making you fix the same thing ten times before noon. In the DogPile world

  • Why Smart Packing Beats Minimalism for Stress-Free Pet Travel

    The travel bag that looked “just right” on your living room floor rarely feels that way at the first pit stop. You load up, zip everything neatly, and head out—then, at the moment you need to grab the leash or wipes fast, you find yourself rifling past a blanket or a crumpled water bottle instead. Organized packing quickly fails the actual test: how quickly you can reach essentials, how cleanly you can shift from pause to movement, and whether your “ready” kit actually stays ready when pet and owner needs collide again and again mid-journey. Pet travel isn’t about squeezing down gear or making the bag look minimal. The real difference shows when travel routines repeat—and gaps in structure start slowing you down.

    When a Neat Bag Becomes a Travel Speed Bump

    You know the script: every item has its pocket, everything zips shut perfectly, the carrier stands upright on the passenger seat. At the first break, you reach for the leash—but your fingers come up with a bag of snacks. Fast grab-and-go for wipes or bowls turns into a digging session. The “minimal kit” exposes its blind spot: at every seat-side stop, items have shifted or hidden themselves under something else. What looked sorted at home now means a shuffle each time you pause—wasting seconds as your dog gets fidgety, or you wonder why you’re unpacking half the setup just for one item.

    Every repeated reach reveals fresh friction: A quick stop becomes a juggling act—side pockets blocked, compartments tangled, nothing where your muscle memory expects it. Each micro-delay adds up. The more your trip reminds you something is “almost” easy to find, the more your organization feels like an obstacle.

    Compact Doesn’t Always Equal Easy Access

    Packing lighter sounds smart until your essentials bottleneck in your own bag. Trimming gear is only useful if high-use items don’t wind up at the bottom. When the leash gets lost under treats or wipes disappear between layers, every pause demands reshuffling. Shrink the kit all you want—if the structure forces you to keep moving things around, you’re still stuck at every stop, not streamlined.

    Typical Travel Tension Points

    • Leash or bowl on demand: Your dog’s ready, you’re still hunting through three types of gear.
    • Post-walk cleanup: You can almost see the wipes, but another item blocks every reach.
    • Back-to-back use: That one item you need gets buried deeper each round, unless your setup keeps it on top—always.

    Short errand runs and long road trips both expose the same flaw: overlapping items, tangled access, and a sneaky repack cycle that catches you every single time. The intent to “travel light” quietly backfires when every return to movement requires a reset.

    Recognizing the Hidden Repack Cycle

    The friction isn’t always loud, but it’s always there. Grab the leash, come up with the wrong thing, and suddenly you’re thinking about your bag instead of the next step. Wipes migrate under spare toys, bottle pockets sag with unused items, and what looked “ready” now demands mental notes and re-sorting. You start doing mini-unpacks at every pause—unlayering, searching, cramming, and feeling the structure drag instead of supporting your pace.

    This slow-down creeps in: what started as “a quick break” becomes a scramble at every seat-side stop, especially as the day wears on. The setup that promised order starts leaking time and patience with every interrupt—dog waiting, owner shuffling, travel flow breaking down.

    Where Practical Structure Outperforms Minimalism

    No packing system is flawless, but real-world travel always exposes which layouts cut the friction—and which just look tidy for photos. Prioritize setups that put high-turnover gear where you can grab them without thought, even after repeated stops. Neatness is nothing if every return means searching for the basics all over again. Examples that work in the wild:

    • Leash clipped on an outer loop: Instantly accessible, never buried, never mixed with other items.
    • Wipes in a hard-to-miss side pouch: Grab with one hand, return without fuss—no competing contents.
    • Collapsible bowl by the seat edge: Unblocked by treats or accessories; you don’t have to tip out the bag to hydrate your pet.

    Refining anchor spots for these core items quickly shifts your experience from “where did I put that?” to smooth, repeatable action—even if the rest of the bag isn’t perfectly packed. Each routine grab-and-return gets tighter. You’re no longer handling the bag; you’re handling the trip.

    One Small Change, One Big Difference

    Picture the usual pause: highway shoulder, hot weather, your dog pacing in the back. Instead of tipping the bag sideways or wrestling the zipper mid-tension, you pluck the bowl from the outer pocket, and the leash is clipped in reach of your seat. Hydration and control, handled in one motion. No digging, dumping, or “hold still, almost there” frustration. Multiply those seconds saved by every stop, and the difference isn’t just convenience—it’s the entire rhythm and mood of your trip shifting toward calm and prepared.

    Spotting Which Items Need to Be Front and Center

    The true test is repetition. After even a handful of trips, weak points surface fast—which item are you always moving out of the way, which keeps getting misplaced, and which drives your pet to impatience just before you solve the basics? Anything you use on every stop—leash, bowl, wipes, waste bags—deserves its anchored, direct-to-hand position. If you’re still wondering where something went, or moving the same object twice per stop, your setup isn’t supporting you—it’s forcing constant adjustment.

    Avoid overlap zones where pet and owner gear collide. Separate out the “grab this first” group from everything else—no matter how unfussy it looks. Clean, single-purpose sections trump Instagram order when real travel pressure hits. If only one thing triggers repeated interruptions, that’s your signal to reassign its home, not just repack more tightly.

    “It Looks Ready”—But Does It Feel Ready?

    This difference stares you in the face on every restart: either your hand lands on the leash and the wipes, or you trip up—one more delay, one more scramble. The best carrier, bag, or pouch only earns its keep if it matches the way you actually move. Consistent return spots, zero need to empty a compartment for one small thing, and never letting cleanup gear migrate to the bottom—all add up to less friction every single time you get moving again. That payoff gets bigger with each trip, not just the first outing.

    Realistic Improvement, Not Perfection

    You can’t fix every inconvenience, and some trips will expose surprises no kit can fully control. But every smoother routine, every grab that happens where you expect it, and every restart that requires less thought, proves the structure is finally helping—not just looking organized. Preparation gets you started, but the way your travel layout handles real-world repetition is the only test that counts.

    If your pet-travel setup keeps making you pause, shuffle, or question your packing order, it’s time to look at structure before adding new gear. In repeated use, the setup that lets you move fastest—without rethinking, reshuffling, or doubling back—always beats the one that simply packs the smallest or looks the most composed at rest.

    For practical, repeat-ready pet travel gear, visit PawGoTravel.

  • How Headlamps Solve Hidden Lighting Problems in Indoor Workspaces

    A room can look bright and still make every routine harder. Flush mount ceiling lights, semi-flush fixtures, and wall sconces all promise “full-room” illumination—until you’re hunting for a lost washer under the cabinet or fighting a shadowed corner at the end of the hallway. The real test isn’t how a fixture looks the first day; it’s whether you still need to drag your phone flashlight out after the third time a glare hits your eyes just as you lean over the work surface. That’s when the failings of ceiling-only setups and even new wall lights become obvious: glare kicks up near mirrors, corners stay dim, and a bright room still interrupts the flow of basic tasks.

    When Everyday Tasks Reveal the Gap in “Even” Lighting

    A routine week doesn’t test your fixtures when you’re standing in the middle of the room—it’s when you’re down low by the washing machine, tracing a pipe in a bathroom corner, or stretching across a kitchen run. The first day, a flush-mount ceiling panel looks like it covers every inch. But try wiping under a cabinet edge or fixing a bolt near the wall, and you’ll find yourself shifting for a better angle, only to be handed more shadows or sharp glare exactly where you need clarity. That’s when the showy spread of a ceiling fixture collapses into work-arresting guesswork and you start keeping a flashlight nearby just to finish what should be routine.

    Shadowed Corners and Blocked Sightlines: The Quiet Culprits

    Rooms rarely feel “too dark” overall—it’s the steady friction at the edges that wears you out. A kitchen looks brilliant standing at the doorway, but the counter’s front edge vanishes once you lean in with a cutting board. A bathroom vanity’s twin sconces balance the mirror…until you turn sideways and one cheek disappears into uneven shadow. Hallway lights spread outward but leave the moulding along the floor pale and the corners cold. Each time your body, a shelf, or a tool blocks the beam, you get a visible streak of uncertainty—a line between what’s merely lit and what’s actually usable when your routine moves off center.

    The Reality of Repeated Use: Why Fixed Fixtures Hit a Wall

    The trouble isn’t a single dark spot—it’s the way every small flaw stacks up. Sorting laundry under shallow cabinets exposes the same blind angle, week after week. Each shadow means a slower search, a missed stain, a pause to aim your phone light. Chores stall out mid-step not because you lack a fixture, but because the placement was designed for an empty room, not an occupied task. As soon as natural light drops or your hand breaks that fixed beam, you move from “looks bright” to “routine interrupted.” Few rooms feel balanced for both appearance and movement.

    Movement Makes All the Difference

    Static lights force you to fit their narrow conditions. Step toward the edge of a hallway or shift position at a vanity and the lighting changes beneath you: glare at eye-level, sudden shadow on the counter, the stair landing dropping into dimness right as you take the turn. The catch is always location—what’s lit for show is rarely aligned with your hands, your eyes, your next step. That’s why a bright-looking space can leave you redirecting, ducking, or hunting for better light rather than simply finishing the task.

    How a Headlamp Breaks the Cycle of Frustration

    Adding a headlamp solves what static fixtures cannot reach. Instead of flooding the whole room with more watts, a headlamp tracks your gaze, flipping the usual search for clear light: wherever you need focus—an appliance label, a jammed clamp, a stripe of grime on tile—the light arrives. Suddenly pointing, twisting, and tracing under a cabinet or around a corner stop involving acrobatics or extra gear. The best improvement isn’t cosmetic, but practical—wherever your vision goes, the light keeps pace, and the friction vanishes.

    Real Impact in Real Spaces

    No overhaul required: placing a headlamp by the laundry machines or on a shelf in the utility zone means usable, targeted light on demand. In repeated use, the differences aren’t about style, but flow and function:

    • Instructions on appliances stayed readable, even as evening light failed.
    • The back corner under the cabinet—once always missed—became visible through the entire cycle.
    • Working with both hands free, tool tips didn’t disappear behind your arm or produce surprise glare.

    In one laundry area, this simple fix eliminated the usual pattern: no more groping for dropped bits under a shelf, no more guesswork finding a misplaced stain. Tasks sped up not because the room seemed brighter, but because the old mistakes—missed dirt, lost screws—slipped away.

    Why Mobility Matters in Task Lighting

    Even “task” fixtures like under-cabinet strips or wall sconces only win if nothing gets in the way. Their impact drops fast if an arm, object, or shelf runs across the beam. That’s the real annoyance of fixed solutions: the angle you need is never quite lined up, and rerouting your routine slows progress. A headlamp breaks that trap by tying the beam to your movement. You get two free hands, zero shadow surprises, and the flexibility to shift without losing clarity—key differences when a job repeats over and over.

    Useful Tip: Keep Lighting Tools Where the Friction Is

    Place your lighting where frustration repeats. Store your headlamp on a hook inside the utility cabinet, clipped to a shelf by the washer, or right above the hallway kink where shadows ambush your eyes. Don’t bury the solution; put it at the heart of the problem zone, right where the edge of routine blurs into inconvenience.

    The Practical Payoff: Fewer Mistakes, Smoother Routines

    This is not just about adding brightness—it’s about clearing invisible obstacles that ceiling and wall setups leave behind. With mobile, targeted lighting, time spent readjusting, double-checking, or retracing steps drops fast. The basement corner and laundry cupboard may never glow like a catalog photo, but on a weeknight, the change is obvious in what goes right, not how things look. When friction drops, tasks actually finish, and the space finally keeps up with the pace you need.

    For real solutions to the most persistent indoor lighting annoyances, see what works in actual homes at LightHelper.

  • Why Twice-Yearly Car Kit Checks Keep Your Gear Ready and Reliable

    Every organized car setup eventually hits the same wall: it doesn’t stay organized once real routines take over. Gloveboxes, center consoles, and trunks can look dialed-in on day one—chargers lined up, wipes within arm’s reach, trunk bins snapped shut. But by the second week of commutes, errands, and backseat scrambles, that tidy system buckles under actual use. Chargers slip behind cupholders. Emergency kits get buried. The wipes that were “right here” last Sunday vanish just when someone spills their coffee. An interior that looks calm in a photo still trips you up when you’re rushing, juggling groceries, and reaching for the item you always need fast.

    Where Organization Fails in Real Driving

    The real difference isn’t appearance—it’s how your setup stands up to daily motion and surprise needs. Most car organizers and storage kits work fine while the vehicle is parked. But as soon as your week kicks in, their weaknesses show up where it counts. Consider:

    • End of a double shift: Reach for a charger and find nothing but a tangle of cords, snack wrappers, and yesterday’s receipts jammed in the console you “just tidied.”
    • Grocery run with a half-full trunk: One sharp stop sends your trunk bin sliding; first aid gear and mail scatter across the floor in a second.
    • Repeated pickups: That last bottle of sanitizer drops to the floor and stays there, always out of hand when needed, until you find it wedged under the seat during a rushed cleanup weeks later.

    It’s not that storage failed on day one; it’s that most organizers can’t handle the churn: kids shoving bags, grocery loads hitting floor mats, random dog leashes tangling with seatbelt buckles. Every repeat trip pokes holes in your “system” until quick access collapses and routine use becomes a series of workarounds.

    Friction During Quick Stops and Busy Weeks

    The pain points show up when you least expect them—most obviously during those quick re-entries or after-work stops when you don’t have patience left. A storage system that made sense on a slow Sunday becomes a mess when:

    • You’re diving into the car with arms full, but the trunk organizer blocks quick unloading
    • Phone charging cables are always underneath something else, and untangling them eats up your next five minutes
    • Wipes are “in the car” but buried under a hanging sunshade or pressed behind a seat cover, forcing an awkward reach as someone waits

    At first, these are quick irritations—an extra six seconds here, a mild scramble there. But with every repeat, small annoyances stack into real obstacles. By the tenth reach or the next time you brake hard, you’re not just delayed—you’re reminded that this setup actually interrupts your day. What started as a fix becomes just another source of scramble. Unseen clutter creeps back, coverage shifts off target, and those daily frictions keep you from trusting your own layout.

    The Cost of Drift and Invisible Mess

    Car organization fails slowly—then hits all at once, always when it matters most. Under real pressure (late morning, pouring rain, dying phone battery) things go missing, slide out of reach, or clog up what should be quick access. Typical pressure points:

    • Chargers slip down door pockets or beneath seats, never there when the battery dips red
    • First aid kits blend in with manuals and shopping bags, invisible when you’re in a hurry
    • Floor mats bunch at the pedals or trunk bins pitch over in a fast turn, leading to everything spilling into corners you don’t clean for months

    The real hazard isn’t one huge mess, but a repeated breakdown: floors crowded with wrappers, charging cables twisted around gear levers, or cleaning wipes lost until the season changes. The earlier sense of order just converts your mess into a new obstacle, and fixing it now means dismantling yesterday’s “solution.”

    Spring and Fall: The Simple Reset with Real Impact

    Rebuilding access isn’t about chasing some perfect state—it’s about regular, realistic resets mapped to your actual driving rhythm. A smart twice-yearly check—in spring and fall, like maintenance—matters more than the most detailed first setup. When you put these resets on the calendar, you catch:

    • Lost or drifted items tucked in odd places
    • Supplies that expired or wore out under real use
    • Where daily-use items bottleneck your flow, and which “essentials” can move to lower-access zones

    Example: The “front seat stash” often mutates into a dump zone for tape, receipts, old snacks, and forgotten cables, crowding out actual must-haves. Shift anything used less than weekly to the trunk or a cargo bin—yes, even if it means stretching an extra few inches at the back on rare days. Suddenly, you restore reach for wipes, cords, and chargers that really earn a spot up front. The payoff feels small the first morning—faster access, fewer double-checks on entry—but after a month, the difference is obvious every time you jump in or pack up at speed.

    What a Functional Reset Looks Like

    The reset itself is quick, but it pays off daily. The pattern:

    • Toss out dead batteries and dried-out wipes—most of us carry at least one expired pack or useless spare
    • Pull every charging cable, test them, and toss/reorganize the ones that never seem to work in the rush
    • Empty pouches and pockets; what gets used weekly stays, the rest moves or goes—no matter how tidy it looked in theory
    • Pull containers from the trunk, shake them out, vacuum underneath, and re-anchor anything that slid or tipped during sharp driving
    • Repack strictly by routine: high-access items in arm’s reach, rainy-day or “just in case” stuff back by the spare tire

    You don’t win a magazine-cover interior—but you regain trust in your car’s logic. The glovebox might still be crowded, floor mats might show wear, but you actually find the things you reach for. Chargers are alive when you need them. The old “where did that go?” scramble becomes a once-a-season nuisance, not a twice-a-week frustration.

    Closing the Gap Between Order and Use

    The tipping point isn’t more gear—it’s matching layout to what you really grab, move, clean, or charge in real weeks, not in a staged photo. Cars only stay “organized” when the work matches use: items that matter in reach, less-used kits packed deep, cables routed where they get used, not just where they look good. If you stop at “looks tidy,” drift always returns and friction follows. Give yourself two real structure checks a year, and you’ll spot hiding spots, failed pockets, or cable snarls before they slow you down on a bad day.

    With practice, resets become less about chasing order and more about defending your own routine. Mess still returns—just not as a sneak attack. You stop feeling surprised when supplies slide or chargers vanish, because you correct for those patterns before they cost you during crunch time. That’s what separates a car that looks finished from a car that actually keeps up, even when life doesn’t slow down.

    Find more gear and practical car-use solutions at DriveWellSupply.