Blog

  • Travel Light, Stress Less: Master Packing with Carry Supply Tips

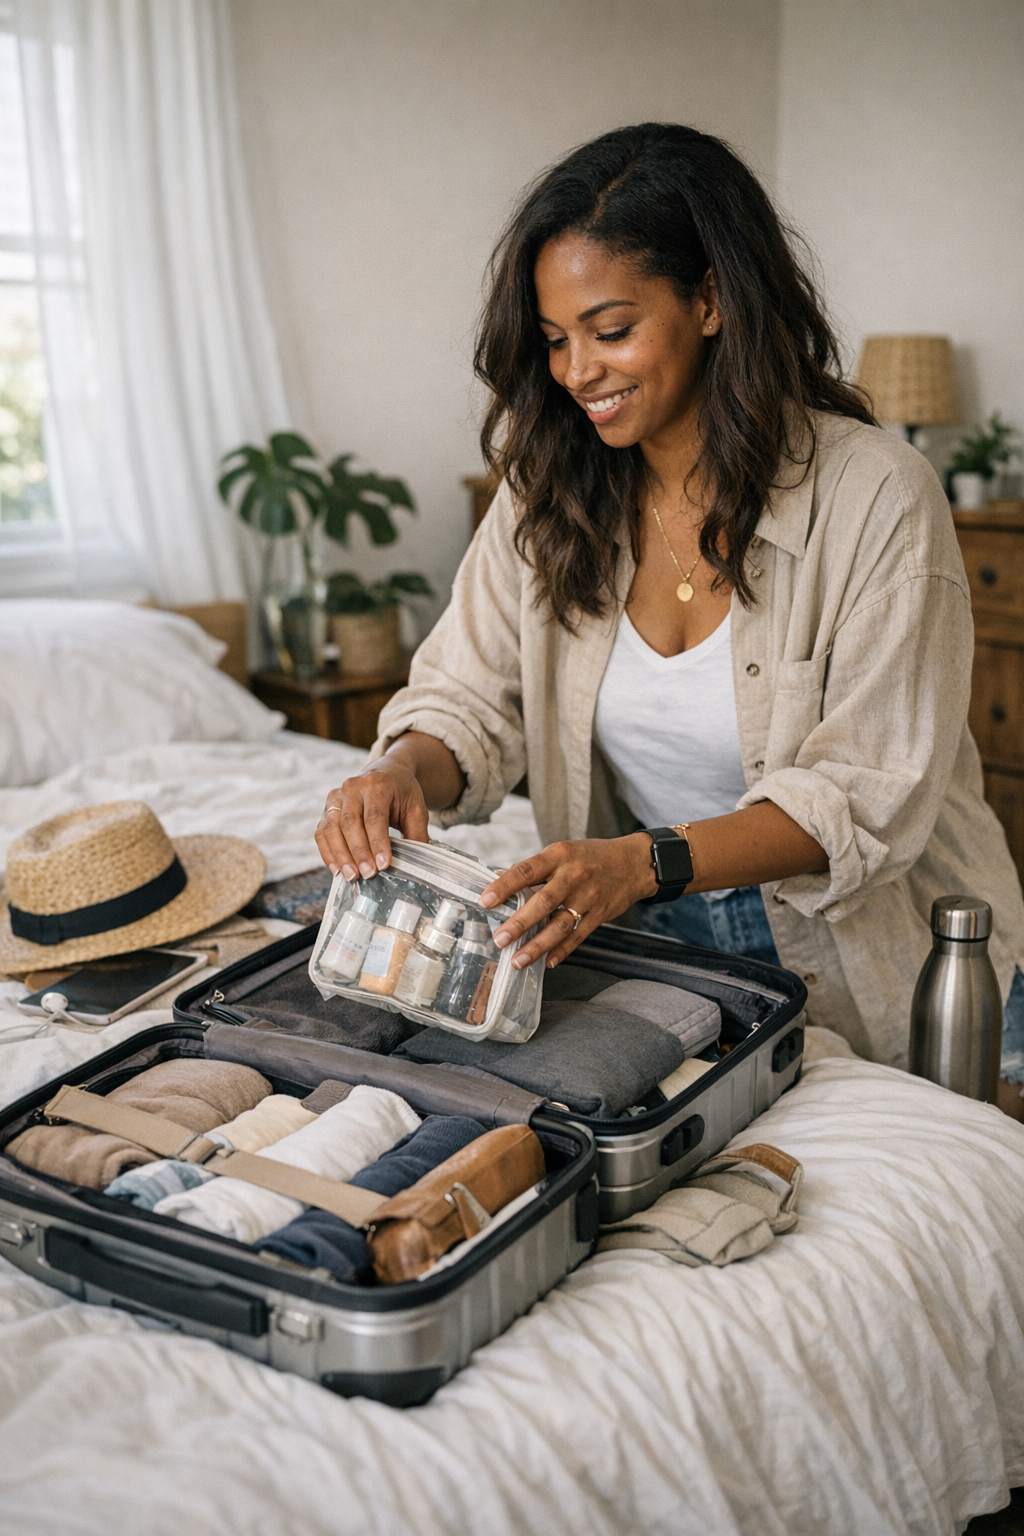
    It’s always a bit odd, that quiet buzz the night before a flight. I find myself pacing around my room, shoes out in a tidy row, suitcase on the bed with clothes scattered nearby. Packing doesn’t feel like a chore these days—not since I got used to bringing just what’s necessary. There’s something satisfying about folding shirts and holding that extra sweater for a second, deciding if I really need it.

    My carry-on is always the same one, a kind of trusty sidekick at this point. The zipper slides open, and I remember the last time I overpacked: lugging a heavy bag up the escalator at JFK, trying not to drop socks at security. Now I take it easy, and it makes a difference. I like knowing exactly what’s in my bag before I head out.

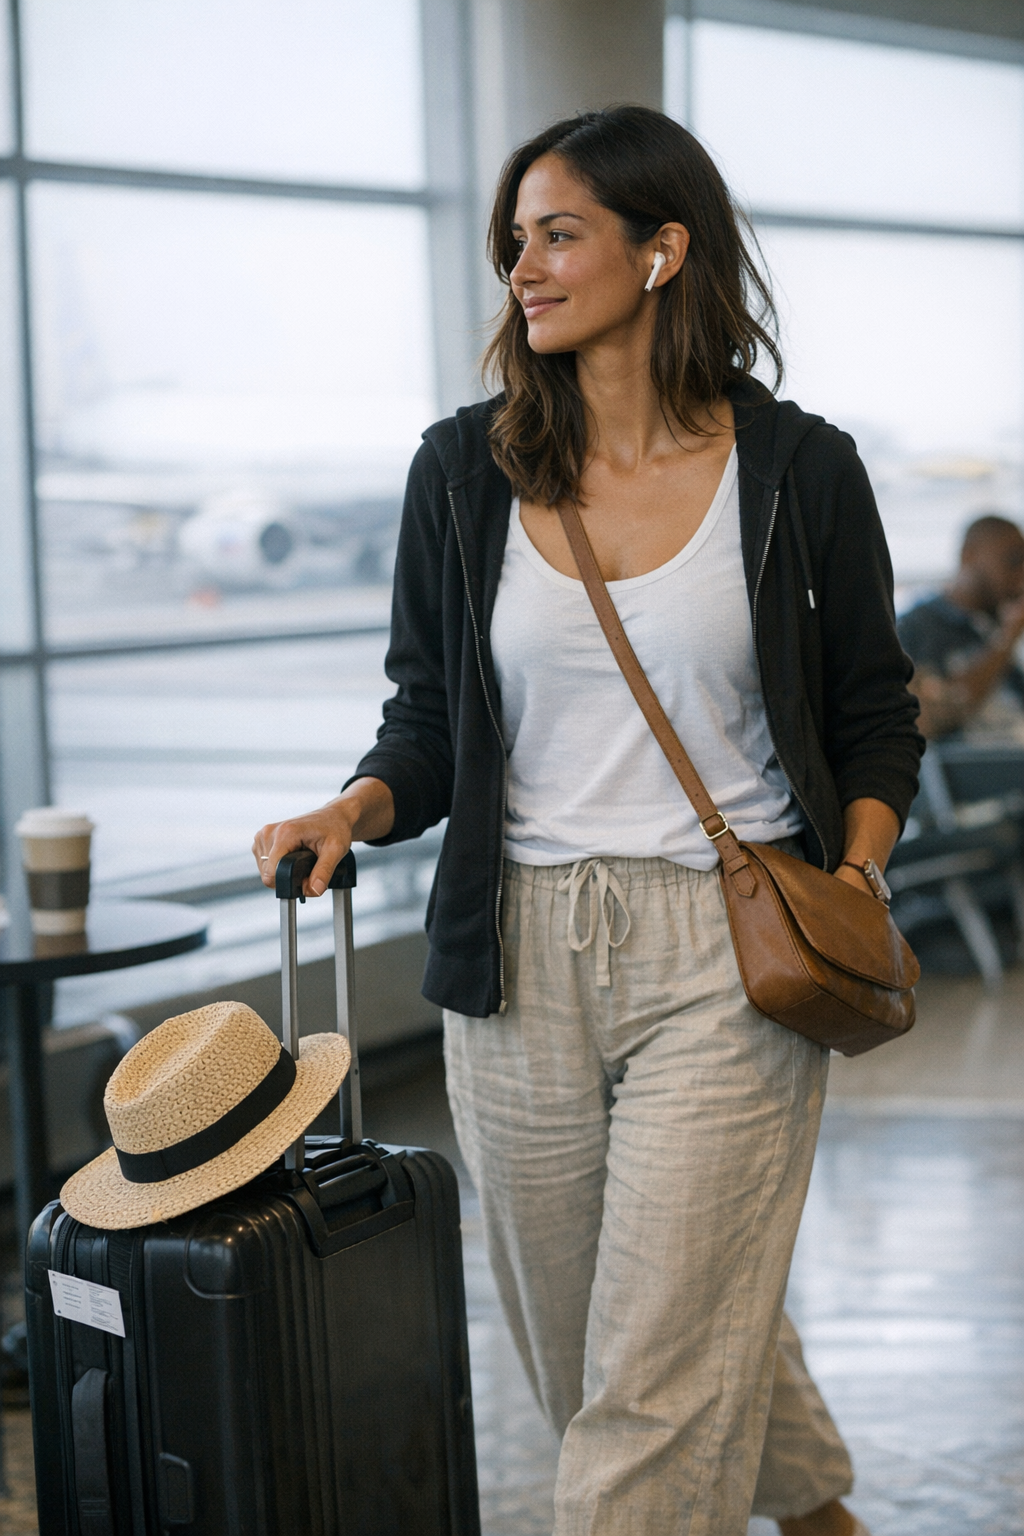
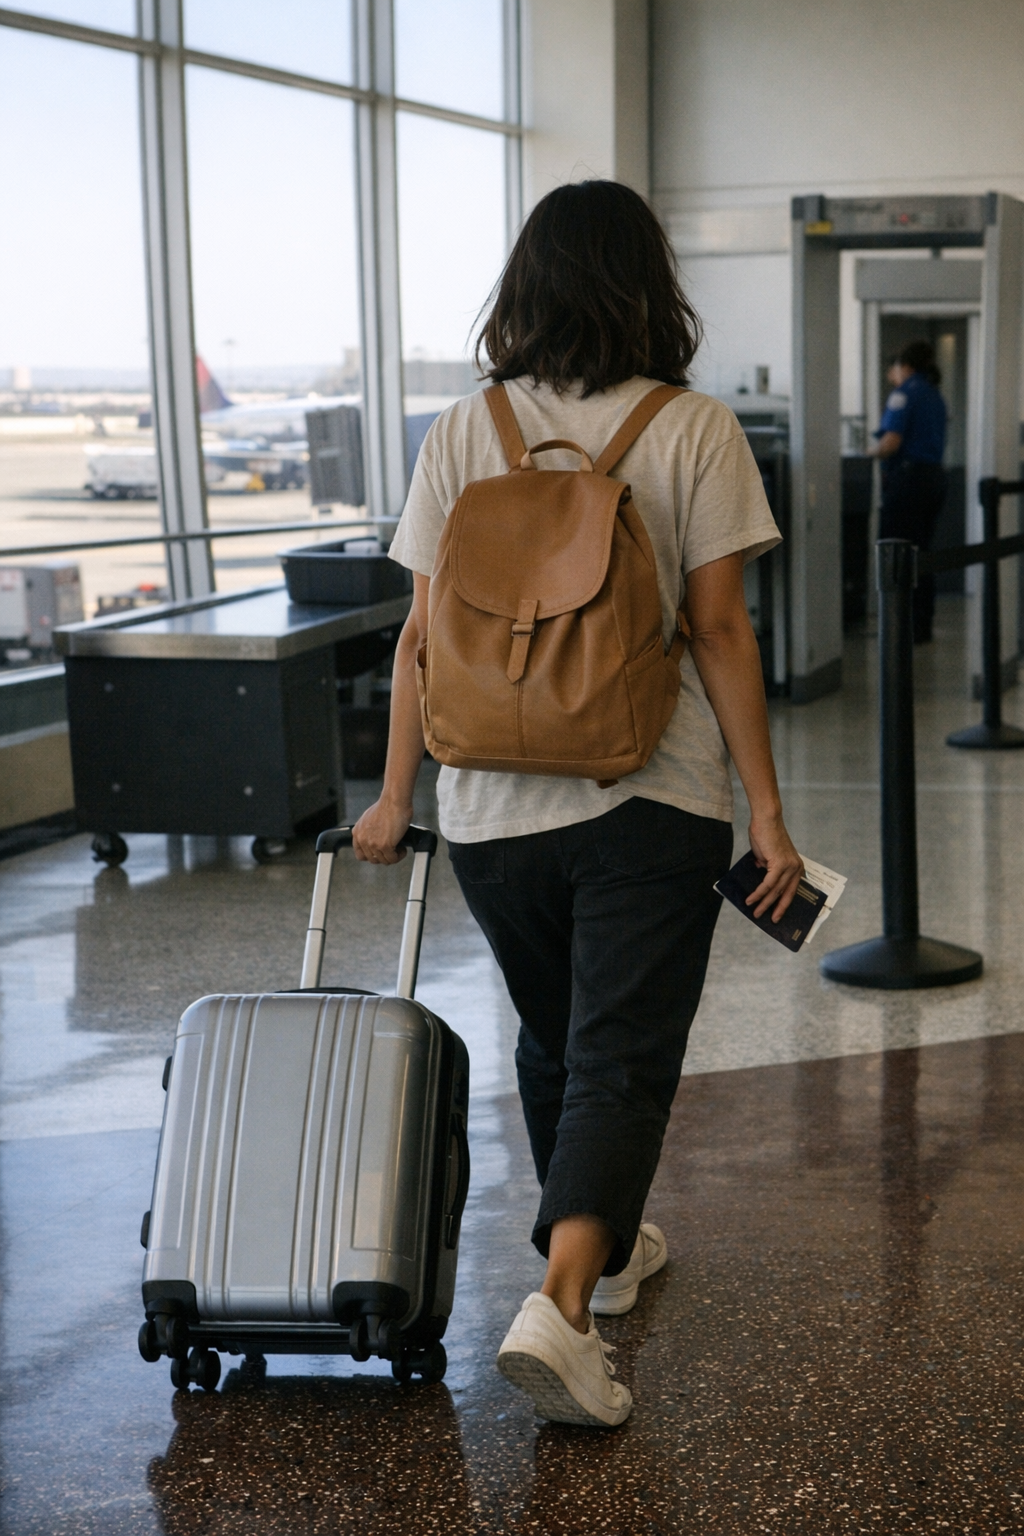
    Early morning comes, and I’m in a cab, window cracked for the cool air, city just waking up. At the airport, I watch travelers weave between each other—some overloaded, others gliding along with just a small bag. I’m not the lightest packer, but I’m definitely closer than I used to be. My carry-on rolls behind me without effort, and I feel ready for whatever comes up.

    Security is always its own little circus. I spot a guy wrestling chargers and gadgets from an overstuffed backpack, stuff tumbling into the tray. My own setup is simple: laptop, book, pouch of chargers. Years ago, a friend said, “Traveling light is the only way to stop losing things.” I didn’t really get it until I started packing this way. Also, these little routines got easier once I started picking up good gear—simple, well-made stuff, like the kind you find at Carry Supply.

    After security and the usual belt-shuffling, I settle at the gate. There’s a nice lull—people hanging around, waiting for boarding. My bag slides under the seat, and it’s easy to reach everything I want. I pull out a scarf and a notebook, happy that nothing’s lost in some deep pocket. I jot down a line or two, notice the morning sunlight moving across the terminal, watch how people handle waiting.

    It’s the small packing habits that help. A pouch just for headphones means no tangled mess. Socks always in the same outer pocket. A paperback book that doubles as a cookie tray. None of it feels like work anymore—just a routine after enough trips and mistakes. I actually like airport downtime now; there’s a comfort in having what I need in reach.

    The flight is calm, which I always appreciate. I stash my bag without trouble—no struggle, no sideways glances from the crew. Water bottle, pen, gum—they all have a spot. Once I’m settled, it’s easy to relax, with nothing to chase or search for above the clouds.

    On arrival, I move through the airport in a bit of a daze, glad my bag isn’t weighing me down. No need to wait at baggage claim—just out into a new place, ready to go. I notice how these habits—packing a certain way, using the same bag—make things a little smoother, take the edge off travel.

    Sometimes I think of the first time I found a site that seemed made for people who like things calm and simple. Picking gear that works and lasts just means less to worry about, and I can usually find what I need at places like Carry Supply.

    Later, in another lounge, I rest my hand on the old carry-on again and think about all the places it’s been. There’s always a little nerves before the return flight—crowded gates, late announcements, the slow taxi to the runway. But once it’s time to repack, putting souvenirs and memories into the bag, I feel settled in the routine. Even if things aren’t perfectly organized on the way home, that’s just part of it.

    At the gate, boarding pass in hand, I look around at other travelers—some with just a backpack, some loaded with tags from everywhere. Everyone has their own rhythm. Having a well-packed bag doesn’t solve everything, but it definitely makes the ride more comfortable.

    So when it’s time to roll the suitcase down another jet bridge, I just remind myself—lighter is easier. And if I need to switch something up next time, or just want to see what’s new, there’s always Carry Supply for a quiet browse. In the end, less stuff means more peace, and what matters most is already with me.

  • Why Your Morning Setup Could Be Your Biggest Safety Risk

    There’s a familiar silence in the workshop just before the day’s first cut or carve. The tools lie still, the benches are uncluttered, and for a fleeting moment, the urge to dive straight in feels irresistible. Whether it’s the pressure of a looming deadline or the repetitive nature of the task, the temptation to bypass the initial steps never fades. Yet, experience shows us that the most costly mistakes—and injuries—rarely happen mid-project. They happen right at the start, during those hurried setups we often skip.

    Why the Beginning Matters Most

    Statistics and injury reports from workshops nationwide tell a consistent story: severe accidents are rarely caused by sudden tool failures or freak accidents. Instead, most incidents trace back to simple oversights and hurried habits. Missing safety glasses, forgotten dust masks, or turning on a saw before securing the material properly—these are common, preventable scenarios.

    The problem often begins with a mental shift. When we’re running late or stressed, our mind races ahead, eager to complete the task. This impatience is more than just a feeling—it affects our body’s posture, decision-making, and attention to detail. Gloves don’t make it onto hands, hearing protection stays tucked away, and critical safety checks become an afterthought. The result? A small misstep with potentially serious consequences.

    Real-World Consequences of Skipping Setup

    Imagine a carpenter rushing to catch up after being delayed. He powers up a router before fastening the wood securely. The piece kicks back unexpectedly; a slip occurs, turning a small mishap into a medical emergency. Hours are lost, pain is endured, and the setback is much larger than the initial delay ever was. This scenario plays out far too often, underscoring a simple truth: No haste is worth compromising safety.

    It’s also worth noting that “setup” isn’t just mechanical. It’s equally psychological—how you prepare, position yourself, and ready your mindset before the first cut. When you take time to move slowly and mindfully through this phase, you avoid rushing and the errors it invites.

    Turning Safety Into Habit Through Ritual

    Safety equipment like glasses, gloves, and respirators are only effective when used consistently. The key isn’t owning great gear—it’s embedding their use into your routine until it becomes instinct rather than choice. The master craftspeople I’ve observed approach setup almost like a ritual. They check their protective shields, adjust their gloves, and ensure guards are in place long before a tool powers on.

    One tactical approach that’s proven its worth is creating a visible, step-by-step setup checklist. Posting it on your workbench or near the machine keeps essential safety actions tangible—not just mental notes that get lost when nerves hit. Steps like verifying hearing protection, confirming goggles’ fit, checking respirator cartridges, and testing safety guards transform safety into a repeatable process.

    A Practical Tip: Stage Your Gear Everywhere It Matters

    Try this simple yet powerful adjustment: keep your core safety gear right where you use it. Stashing gloves, glasses, and masks on a shelf across the room practically invites you to skip grabbing them. Instead, place a dedicated tray or basket on each workstation, so safety equipment becomes as accessible as your tools. The ease of reaching for gear removes friction and helps turn “putting safety on” into a natural step.

    Refresh Your Approach When You Feel the Rush

    When you notice impatience creeping in, pause and take a moment to recalibrate. A quick breathing exercise or a brief mental checklist can help—you’re reminding your brain and body to slow down. Restoring this calm helps you slip back into the mindset that makes conscientious setups second nature, not a chore.

    This small mental refresh can dramatically reduce those skipped steps. Over time, it becomes a powerful internal cue that balances productivity with safety. The goal is rhythm—a repeating pattern that aligns your physical actions, mindset, and environment.

    Real Results From a Small Change

    One winter morning, overwhelmed by a packed schedule, I almost started sanding without my respirator. It was stored on a distant shelf, just far enough that rushing pushed me to forgo it. That day I moved the respirator to the workbench itself. Almost immediately, not only did I wear it every time, but my apprentices began following suit—no reminders needed.

    Within a week, a friend who heard about this simple shift copied the idea. The reduction in “almost forgot” moments was striking. This anecdote highlights how minor environmental tweaks can translate into meaningful safety improvements.

    Final Thoughts: The Lasting Value of Taking Your Time

    The majority of shop injuries don’t stem from ignorance. Experienced woodworkers know the dangers—they just sometimes let impatience carry the day. Your best defense is respecting the setup process as the critical foundation for every project.

    Before your next task, take a deep breath and survey your bench. Is your safety gear staged and ready? Have you mentally prepared? Those few extra moments spent on setup are priceless compared to the time and pain lost to injuries. Remember: the safest shop is the one where preparation is never rushed.

  • Pack Smart, Travel Light: Your Perfect Carry-On Essentials Guide

    The days before a trip always feel a bit in-between, like I’m already halfway out the door. I find myself moving around the apartment, folding shirts, rolling socks—the packing routine has its own quiet rhythm. These days, I keep it simple: a small carry-on open by the window, sunlight stretching over its neat compartments. I’ve let go of cramming too much into a checked bag. Now I just choose a few basics, fit them into the carry-on, and leave the rest behind. It feels like a small way to sidestep old travel chaos.

    This approach got its start a while back, when I stumbled across Carrysupply while getting ready for a trip. Their bags have that same pared-back, just-enough vibe—solid and straightforward.

    On travel day, the cab shows up before sunrise. I like the early quiet. The streets are empty, and the city lights fade as the sky lightens. At the airport, everyone’s in a hurry, dragging big bags, scanning the signs, hunched and tense. I remember that old nagging worry—did I forget something, will the zipper make it one more time? But with just my small bag, it’s easier to go with the flow.

    Security still drags on. There’s always a line. I watch a mom untangle headphones for her kid, a teenager balancing coffee on top of a suitcase. When it’s my turn, I slip my shoes off and send my carry-on through—nothing stuffed in weird pockets, just what I need. It’s nice not to be juggling a bunch of bags or digging for a boarding pass under things I didn’t need to bring. My bag is easy to manage and keeps up, no fuss.

    There’s something about having your essentials sorted, nothing extra weighing you down. Snack, book, scarf that doubles as a blanket—they all fit, and that’s enough. Heading to the gate, I finally notice the little things: people napping, the smell of coffee, the low hum of conversations and anticipation.

    Boarding used to feel like a scramble. People wrestling their suitcases into overhead bins, squeezing past each other with too many apologies. Now, I slide into my seat, tuck my carry-on under the seat, and have everything within reach. There’s no worry about lost luggage or waiting forever at the carousel. Keeping it simple makes the whole thing easier.

    Up in the air, the clouds start to break apart outside the window. I open my bag and pull out a notebook. Everything up here is quieter, the buzz of the cabin, the distant sound of coffee being poured. I write a few notes, stretch out, and realize I haven’t lost or forgotten anything. That order from packing carries through, and it makes the trip feel lighter.

    After landing, I walk straight off the plane—no waiting by the carousel, no hunting for my bag in a sea of lookalikes. I just head out, the little bag on my shoulder reminding me I have what I need. On the metro into the city, I catch my reflection: I look less stressed, maybe even a bit more hopeful. Next trip, I’ll stick to the same plan—pack what matters, travel light, and keep airport stress at bay. In those small choices, the trip always feels a little better.

    Even after getting home, that easy feeling sticks around. There’s a sense of traveling lighter, both in stuff and in spirit, and it’s hard to ignore. I keep coming back to the same routines that make heading out and coming home a little easier. For anyone feeling the same pre-trip tension, a bit of thoughtful packing really does help. And if you need a place to start, Carrysupply is worth a look.

  • Why Pros Never Skip This Simple Safety Gear Habit

    Why Every Seasoned Professional Double-Checks Their Safety Gear

    Walk onto any construction site or into a busy workshop, and you’ll quickly notice the difference between the seasoned professionals and those less experienced. The pros maintain a calm confidence that comes not just from skill but from cultivating the right mindset around safety—especially the habit of diligently checking their safety gear before every task.

    At first glance, wearing safety gear might seem straightforward: put on your glasses, gloves, harness, or mask, and get to work. But safety professionals know the difference lies not just in wearing the gear but in taking the few extra moments to ensure it’s fitted correctly, intact, and ready to perform exactly as designed.

    The Cost of Complacency on Job Sites

    It’s easy to slip into a false sense of security after years on the job, especially when performing familiar tasks. However, many accidents happen during those brief moments when safety checks are skipped, often because the task feels “quick” or “routine.” These small lapses can have big consequences.

    Safety equipment isn’t just a legal formality—it’s a vital line of defense against unpredictable risks. Without thorough checks, gear that appears functional may fail when you need it most.

    The Mindset That Sets Pros Apart

    What truly distinguishes experienced workers is their mindset towards safety. They acknowledge that protective equipment can degrade over time or be misapplied. Straps may loosen, lenses can crack, and seals on respiratory masks might fail. Early disregard for these details invites serious injuries.

    Understanding the Technical Standards and What They Mean for You

    Professional safety equipment complies with rigorous standards, such as ANSI Z87.1 for safety glasses and EN 361 for full-body harnesses. For example, ANSI Z87.1 glasses must withstand the impact of a 6.35mm steel ball dropped from 1.27 meters—think of a heavy metal chip ricocheting unexpectedly.

    However, a certification only ensures protection if the equipment is in good condition and worn properly. A tiny crack in a lens or a loose buckle on a harness can completely negate certified protection, turning standard gear into a liability.

    Practical Gear-Checking Tips Every Worker Should Know

    Harnesses: Fit Is Everything

    A properly adjusted harness distributes the forces during a fall primarily through the thigh and sub-pelvic straps, reducing strain on shoulders. If it’s slack, these straps can shift dangerously, causing serious injury. A simple test is to check whether you can fit a flat hand between the strap and your leg—if you can, it’s probably too loose. Tighten until snug but comfortable.

    Gloves: Check for Tears and Wear

    Regularly examine your gloves for small tears, thinning material, or worn seams. Any compromise can allow splinters, shards, or hot materials to penetrate, putting your hands at risk.

    Safety Glasses: Look and Feel

    Run your finger along the edges of your glasses to detect cracks or chips. Even tiny imperfections can fail under impact, allowing debris to reach your eyes.

    Hearing Protection: Effective Seals Matter

    Ensure earplugs or earmuffs seal properly. An incomplete seal dramatically reduces noise reduction, leaving your hearing exposed to harmful levels during long shifts.

    Respiratory Masks: The Proper Fit Test

    A simple fit test involves covering the mask with your hands and exhaling. No air should leak out around the edges. Only then can a mask filter at the specified levels, such as N95’s 95% particle filtration efficiency.

    A Real-Life Lesson: Why Rushing Safety Checks Can Cost You

    Consider the story of a welder with over 20 years of incident-free experience who once skipped a goggle inspection during a quick repair. He missed a hairline crack in the lens, which shattered when a hot spark impacted it, causing a minor burn beside his eye. The incident was a stark reminder: every rush, every skipped check, invites risk.

    An Actionable Habit: The Top-to-Toes Physical Check

    Before picking up any tool, establish a routine to physically engage with each piece of your protective gear. Don’t just glance at your safety glasses—slide your finger over them. Don’t just look at your gloves—give them a tug. Snap your harness buckles firmly into place. Fit your mask and confirm its seal. This tactile check only takes seconds but reinforces safety as a physical habit rather than a mental afterthought.

    Refresh Tip: Reboot Your Routine with a Safety Buddy System

    Sometimes, routines become automatic to the point of mindlessness. To keep your safety checks sharp and avoid complacency, team up with a coworker for cross-inspections. Having someone else confirm your gear’s condition reinvigorates the process and helps catch oversights you might miss. This small adjustment boosts accountability and keeps safety front and center.

    The Consequences of Improper Gear Use: A Roofing Crew Story

    In one roofing scenario, a worker hurriedly secured his harness too loosely before climbing. When he slipped and fell, the loose harness caused dangerous pressure to concentrate on his thighs and lower abdomen. He was suspended for several minutes, suffering numbness that required medical attention and kept him off work for days. The incident transformed what could have been a minor accident into a serious injury—all because of improper fit.

    Discipline—Not Luck—Keeps You Safe

    Ultimately, the difference between a learner and a master is discipline. Double-checking your safety gear may seem basic, but it’s the solid foundation upon which advanced skills and site safety rest. Developing it into a non-negotiable habit reduces the chance of preventable accidents.

    Adopt a mindset where your gear gets as much respect as your tools and craft. The minute you start rushing or skipping checks is the moment danger creeps in. Staying consistent ensures you’ll almost never have regrets about overlooked protection.

  • Why Ignoring Moisture in Tanks Risks Long-Term Damage

    Understanding Why Moisture Builds Up Inside Air Compressor Tanks

    In every garage or workshop, certain noises become routine: the hiss of draining compressed air, the hum of the air compressor, and the clatter of tools. While some sounds fade into the background, the hiss that comes when you drain your air compressor at the end of the day deserves your full attention. Moisture buildup inside your compressor tank might seem harmless if overlooked, but over time it invites corrosion, weakens your equipment, and can jeopardize the quality of your work.

    Air compressors are hardworking machines that constantly draw ambient air from their surroundings. Along with that air comes humidity — invisible water vapor suspended in the atmosphere. When the compressor pressurizes this air, that vapor condenses and collects as liquid water inside the tank. Think of the condensation on a cold glass of soda on a hot day; your compressor tank experiences a similar buildup from the inside.

    In climate conditions with moderate to high humidity or significant temperature fluctuations, water accumulation inside the tank happens quickly. Even a small home compressor can collect a half-cup or more of water within one week of regular use. In my own experience working with compressors in environments where the relative humidity exceeds 50%, I’ve collected up to 200ml of water after a few days of intermittent use.

    The Consequences of Letting Water Stay Inside the Tank

    At first glance, water pooling inside a compressor’s steel tank may seem inconsequential. These tanks are built thick and tough to withstand high pressures—often rated around 150 PSI (10 bar) for residential models. However, the relentless presence of water sets the stage for a slow but steady degradation process.

    • Corrosion and Rust Formation: Moisture is the primary cause of rust inside steel tanks. Once water is trapped inside, oxygen and moisture create the perfect conditions for corrosion to develop, causing pitting and flaking over time.
    • Structural Weakening: Rust tends to form at the bottom where water settles. This hidden corrosion gradually eats away at the steel, compromising tank strength and safety—a danger that often goes unnoticed until significant damage occurs.
    • Contaminated Compressed Air: Rusty water and debris can enter the compressed air stream, fouling tools and finished products. I’ve personally witnessed how rusty water expelled from a compromised tank can ruin paint finishes and delicate coatings in spray applications.
    • Increased Wear on Tools: Moisture-laden air accelerates wear on air tool components such as gaskets, seals, and moving parts. Lubricants degrade faster, leading to costly tool failures and downtime.

    Real-World Experience: How Regular Tank Draining Prolongs Life

    Over the years, I’ve seen air compressors outlast their expected lifespan when owners were diligent about draining the tank. Conversely, I’ve encountered tanks that became paper-thin, rusty hazards hidden behind a deceptively solid outer shell because their moisture was neglected.

    One of my early compressors lasted about ten years thanks to consistent draining. Usually, we drained it whenever we remembered—often enough to remove almost all the water each time. When I later bought a new unit but neglected this habit, a rusty, weakened tank formed within just two years. The base corroded, paint peeled away, and tapping the tank produced a dull knock rather than a solid ring.

    That experience taught me the critical importance of accessibility: placing the tank so the drain valve is easy to reach is the best preventive measure. In many setups, the drain is awkwardly positioned underneath or on the rear, which invites procrastination. By moving mine to a more convenient spot near where I coil my air hose, draining became a natural part of the shutdown routine.

    How to Properly Drain Your Air Compressor Tank

    Draining is a simple yet essential maintenance step. Here’s what to do:

    1. Turn off and unplug your compressor to ensure safety.
    2. Locate the drain valve at the tank’s lowest point.
    3. Open the valve slowly, allowing water and moisture to escape. If necessary, tilt or rotate the tank slightly to help discharge all trapped water.
    4. Catch the moisture in a shallow pan or container—water may be clear or brownish from rust particles.
    5. Close the valve securely once you see no water coming out.

    Emptying every drop of moisture is critical. Even small puddles left in the tank can reignite corrosion. The process typically takes less than one minute once you get into the habit.

    Pro Tip: Refresh Your Routine

    One practical habit change I recommend is placing a small reminder near your compressor’s power switch with a note like “Drain tank after use.” This nudge helps embed the task into your shutdown process, especially during busy periods when draining feels like an extra chore. Pairing this reminder with a reachable valve location makes skipping this crucial step unlikely.

    Why Frequent Draining Makes a Measurable Difference

    Regular daily draining can extend a compressor tank’s working life by 2-3 years in typical home or small business environments. Even if you use your compressor lightly or intermittently, draining weekly is beneficial. Moisture can accumulate rapidly during short bursts, especially in humid climates.

    For professionals and heavy users, investing in an automatic drain valve or an inline moisture separator can add protection. But the most effective safeguard remains a consistent manual draining habit supported by accessible hardware.

    Wrapping Up: Protect Your Compressor with Simple Maintenance

    Moisture inside your air compressor tank is an invisible threat that quietly undermines the integrity of your equipment and the quality of your work. Making draining part of your daily or weekly routine takes seconds but protects your investment for years. An easy-to-reach drain valve combined with a simple reminder turns this maintenance task into an effortless habit.

    Ultimately, the longevity and reliability of your compressor depend as much on routine care as on how it’s built. Whether you’re a casual hobbyist or a full-time professional, fostering good draining habits is what separates reliable machines from expensive surprises. As you finish your next project, ask yourself: did you drain the tank? If not, now is the perfect time to start.

  • The PSI Secret That Keeps Your Air Tools Running Strong

    There’s a quiet moment in every garage or workshop when the air compressor kicks on, filling the space with its steady hum and promise of power. For many, it’s just background noise. But for anyone serious about pneumatic tools, that sound signals the start of something crucial: the right PSI setting.

    Why PSI Matters More Than You Think

    PSI, or pounds per square inch, measures the force of air your compressor delivers. It might seem like a basic number to adjust—just crank it up for more power. However, every air tool has an optimal PSI range, often listed on the tool itself or in the manual. Exceeding that range isn’t just unnecessary; it can damage your tool and ruin your work.

    For years, I believed a higher PSI meant better performance. I pushed my impact wrench to break loose stubborn bolts and my nail gun to fire nails with authority. What I ended up with were jammed tools, leaky hoses, nails punched through wood, and costly repairs. The hidden cost was the accelerated wear on seals and moving parts inside my tools, shortening their lifespan.

    Understanding the PSI Sweet Spot for Your Tools

    Different pneumatic tools require different pressures:

    • Finish nailers: Usually 60–100 PSI
    • Spray guns: Often 40–60 PSI

    Setting a tool rated for 60 PSI at 100 PSI not only risks internal damage but can cause performance issues such as blown-out trim or inconsistent finishes.

    Match PSI to Your Tool’s Needs

    It’s a simple rule: set your compressor’s regulator to the lowest pressure requirement of the tool you’re using at that moment. If you switch between a spray gun needing 45 PSI and an impact wrench that prefers 90 PSI, adjust the regulator accordingly for each task. This step might feel like an inconvenience, but it’s vital for long-lasting tools and quality work.

    Real-World Example: When Lower PSI Made a Big Difference

    Last winter, I was replacing baseboard trim using my old air nailer. Out of habit, I ran my compressor at 100 PSI. By midday, the nails were tearing through the trim heads, and the nailer began leaking air. I reduced the regulator to the recommended 60 PSI, and immediately the nails set flush, air leaks stopped, and the compressor ran quietly without constant cycling. The tool felt like new again, delivering reliable performance.

    Common PSI Mistakes to Avoid

    A frequent error, especially among newcomers, is running all tools at tank pressure, typically 120 PSI or more. This can cause soft-seal components to wear prematurely, resulting in seal blowouts, valve failures, and early replacements.

    How Excessive PSI Harms Your Tools Internally

    Each pneumatic tool relies on seals, o-rings, and internal valves to harness bursts of compressed air effectively. When run above the recommended PSI:

    • Seals and o-rings wear out faster due to excess force
    • Valves become gummed up, reducing performance
    • Tools lose efficiency and eventually fail prematurely

    By dialing back the pressure to the tool’s ideal range, you reduce strain and let your equipment perform as designed, lasting longer and working more precisely.

    Practical Tips for Managing Your Air Compressor PSI

    Check Regulators and Tools Before Every Job

    When setting up, notice that most compressors have two gauges: tank pressure and regulated output. Focus on the regulated output gauge—it shows the air pressure delivered to your tool.

    Adjusting PSI Step-by-Step

    1. Turn on the compressor and let it reach full tank pressure.
    2. Attach your tool and hose.
    3. Turn the regulator dial until the output gauge reads at or just below the tool’s recommended PSI.
    4. Start at the low end of the range and increase pressure incrementally if needed.
    5. Test tool performance and adjust accordingly, but never exceed manufacturer recommendations.

    Label and Color-Code Air Lines

    If you operate multiple tools requiring various PSI, consider color-coding hoses or labeling quick couplers with their pressure ranges. This precaution prevents accidental damage from overpressurization.

    A Refreshing Perspective: Slow Down to Save Time

    It’s tempting to rush through your setup and dive into work. However, taking an extra minute to verify and fine-tune your PSI settings pays off. Tools aren’t indestructible; they need the right environment to succeed. By slowing down and respecting each tool’s pressure requirements, you actually save time by avoiding repairs and subpar finishes.

    Also, when switching tools, allow the compressor a moment to stabilize—gauges can lag, especially on older models. This simple habit ensures you’re delivering the right pressure consistently.

    Conclusion: Consistency Is Key to Tool Health

    Your air compressor is a powerful ally but demands attention. Giving your tools exactly the pressure they need—not more, not less—extends their lifespan and improves your work quality. Before every job, check the PSI, adjust the regulator carefully, and maintain your hoses and fittings.

    Protecting your investment isn’t about hovering over every part—it’s about creating the right conditions for reliable performance. The next time you start your compressor, ask yourself: have I set the correct PSI today? A small adjustment could add years of service to your tools and leave your work looking sharper.

  • Why Your Rivet Head Won’t Sit Flush—And How to Fix It

    Understanding the Challenge of Flush Rivet Heads

    Have you ever spent significant time aligning your rivet gun, confident that everything is set correctly, only to find the rivet head sitting proud instead of flush with your material? This is a very common frustration encountered by anyone working with aluminum, sheet metal, or plastics. It’s not just a matter of aesthetics either—improperly seated rivets can snag on clothing, compromise structural integrity, and give your work a less professional appearance.

    At its core, a rivet is a simple fastener: a shank, a mandrel, and a head. When you pull the trigger, the mandrel draws the shank to create a riveted joint. Ideally, this process creates a smooth, flush rivet head. However, you might often notice a small dome or bulge instead, where the head never fully seats against the surface. Identifying why this happens and how to prevent it can save time and frustration on any project.

    Common Reasons Why Rivet Heads Don’t Sit Flush

    Mismatched Hole Size

    The most frequent culprit behind a rivet head that doesn’t sit flush is a hole that doesn’t precisely match the rivet diameter. If the pilot hole is even slightly larger than recommended, the rivet will expand unevenly inside the material. This uneven expansion, called “blooming,” prevents the rivet head from compressing fully against the surface.

    For example, using a 1/8″ (3.2mm) rivet with a hole larger than 3.2mm can cause the shank to push through unevenly rather than spreading uniformly to anchor properly. On the opposite end, a hole that is too tight can prevent full insertion, leaving the head away from the material surface and causing a raised head.

    Material Thickness and Surface Condition

    Material layering plays an essential role. If you have a thick bottom layer with a thinner top layer, the rivet head might not seat because the softer or thinner layer flexes or compresses unevenly. This results in a gap between the rivet head and the surface.

    A practical example is riveting a 1mm aluminum panel onto a 3mm backing plate. The aluminum’s softness and thinness often let the head ride above the surface, even with the correct hole size, due to uneven compression.

    Incorrect Nosepiece or Tool Issues

    It’s easy to overlook the importance of matching your rivet gun’s nosepiece to the rivet size. Using a smaller or larger nosepiece than specified can misalign the rivet during installation, preventing the head from sitting flush. Additionally, dirty or worn jaws inside the rivet gun can grip the mandrel off-center, further complicating proper seating and causing a proud rivet head.

    Simple Steps to Achieve Flush Rivet Heads Every Time

    Use the Reverse Drill Bit Technique to Eliminate Burrs

    One of the most effective but overlooked tactics is to reverse-spin your drill bit through the hole after drilling. After you drill your pilot hole with the drill spinning forward, reverse the direction and spin the bit backward for several turns.

    This quick action cleans off burrs and tiny raised edges left by the forward drilling. Burrs can prevent the rivet head from sitting flush by acting as a tiny barrier under the head, akin to placing a microscopic washer where it’s unwanted.

    This method costs nothing and takes only a few seconds, but it significantly improves rivet seating and surface finish. It’s especially valuable when drilling aluminum or soft metals where burr formation is common.

    Maintain Proper Hole Size

    Always verify that your pilot hole diameter matches the rivet manufacturer’s specifications. A high-quality brad-point bit for metal can improve hole accuracy. If you work regularly with specific rivet sizes, consider investing in dedicated bits optimized for those sizes.

    Keep Your Rivet Gun Clean and Matched

    Regularly clean the jaws of your rivet gun by blowing them out with compressed air and checking for signs of wear or contamination. Matching the nosepiece to the rivet diameter is crucial for proper alignment and force distribution. Avoid using mismatched parts to prevent uneven rivet compression.

    Refreshing Your Approach to Riveting: Focus on Surface Preparation

    Beyond hole size and tool maintenance, reevaluate your material handling before riveting. Surfaces must be flat, clean, and clamped tightly together. Even a slight gap between sheets or layers can cause rivet heads to sit proud. Taking an extra moment to clamp or use hand pressure ensures layers remain flush throughout installation.

    This preparation shift not only improves rivet finish quality but helps prevent long-term issues such as loosening or corrosion caused by uneven stress.

    Additional Tips When Dealing with Persistent Raised Rivet Heads

    • Upgrade Rivet Quality: Choose rivets compliant with industry standards such as DIN 7337 or ISO 15977. These standards guarantee appropriate deformation characteristics for reliable seating.
    • Inspect for Tool Wear: Old or poorly maintained rivet guns can misalign the mandrel. Periodically service or replace worn parts, especially if you notice a pattern of elevated heads.
    • Test Material Flats: If working with warped panels, try to flatten or support them with jack screws or clamps before riveting.

    Why Getting It Right Matters

    Flush rivet heads are about much more than beauty—they prevent catches and snags on wiring looms, gloves, or clothing. Raised heads can also become stress points, potentially leading to cracking or failure in applications subject to vibration or impact.

    The difference between a “good enough” rivet and a perfectly seated one can impact product durability, user safety, and overall quality perception. In industries like automotive upfitting or ceiling grid construction, these details separate less desirable outcomes from professional craftsmanship.

    Conclusion

    Don’t let proud rivet heads slow down your projects or diminish your work quality. Start by making the simple but effective reverse-drill step a part of your routine to clear burrs. Double-check hole size, tool condition, and material flats. Maintain your equipment diligently, and respect the subtle nuances of layered materials. With these adjustments, you’ll be rewarded with clean, flush rivet heads that look great and perform reliably.

    Ultimately, the seemingly small details in preparation and tool maintenance distinguish a skilled craftsman from a novice. So before you move on, pause and check your rivet finish—your attention to this detail is the first step toward building something that truly lasts.

  • The Little Rivet Fit Mistake That Undermines Your Build

    Few frustrations compare to the sinking feeling you get after spending hours assembling a structure—whether it’s a metal frame, a custom rack, or a fence panel—only to later discover that your joints are coming loose. If you’ve ever used a rivet gun, you know the slow, creeping worry: did I pick the right rivet size? Did I overlook something?

    It turns out, one of the most common but overlooked causes of weak, unstable joints is using rivets that don’t fit properly—either those that are too small or the wrong length. What seems like a minor mismatch can seriously weaken the integrity of your entire assembly.

    Why Proper Rivet Size Matters More Than You Think

    At first glance, rivets come in countless sizes and styles. They’re all designed to hold materials together, right? Yes, but only if the size matches the application closely. Getting precise matters.

    For example, imagine using a 3.0mm diameter rivet in a 3.2mm hole. That mere 0.2mm gap means the rivet’s shaft cannot grip the hole’s edges securely when expanded. Even though the rivet’s back flares out, the reduced contact weakens the shear strength by 20–30% compared to a perfectly fitted rivet. Similarly, if the rivet is too long or too short for the material’s thickness, the end may not flare out properly, resulting in a loose, vulnerable joint that can come undone under stress.

    It’s a subtle mistake, but it can have big consequences—wobbly racks, rattling signs, and panels that loosen with time. The joint may look solid initially, but the wrong rivet size sets you on a path toward failure.

    The Common Challenges in Selecting Rivets

    Choosing the proper rivet is rarely straightforward for several reasons. First, holes drilled into sheet metal or other materials are often slightly oversized. The drill bit may wander, or the sheet may flex during drilling—creating a gap that’s larger than the nominal hole size. This means a rivet sized to the hole may feel loose.

    Second, manufacturers’ grip range specifications—the thickness of material a rivet is designed to accommodate—assume ideal conditions. Real-world factors like paint layers, rust, or dirt can increase thickness, pushing your rivet toward the upper limit of its grip or beyond. This can prevent the rivet from expanding correctly and fully securing the joint.

    How to Ensure a Proper Rivet Fit Before Setting

    One simple but effective trick is to physically test the rivet’s fit before you pull the trigger on your rivet gun. After pre-drilling, insert the rivet and try gently wiggling it in the hole. If it rotates or moves side-to-side, that’s a red flag. A loose fit means the rivet won’t grip tightly once set, resulting in potential failure later.

    If you spot looseness, you have two main options: select a rivet with a slightly larger diameter (if the hole allows), or adjust your hole by drilling a replacement location or resizing the hole to create a snug fit. Avoid forcing a larger rivet into a hole that’s too small; this risks damaging your materials or the rivet itself.

    In cases where a snug rivet fit isn’t possible, consider switching to mechanical fasteners like nuts and bolts, which can accommodate a range of material thicknesses more reliably.

    Practical Tip: Compare Drill Bit Size and Rivet Diameter

    To minimize guesswork, examine your tools and supplies closely. For instance, a 4.0mm rivet ideally fits into a hole drilled with a 4.0–4.1mm drill bit. The hole should not exceed the rivet diameter by more than a fraction of a millimeter. If you find a hole is too large, don’t settle for the next rivet size up without confirming it fits properly.

    Getting familiar with your drill bits, rivet diameters, and grip ranges—and confirming the compatibility of these elements before assembly—can save hours of frustration and rework.

    Refreshing Your Approach: Don’t Rush, Inspect with Care

    It’s tempting to overlook fit details when you’re under time pressure or have limited rivets on hand. But a quick moment taken before setting rivets can prevent a world of trouble later. One mindful inspection can turn a shaky structure into a sturdy, long-lasting build.

    A great way to boost your confidence is to incorporate a systematic “fit check” step into your assembly process. Before squeezing the rivet gun trigger, make it standard to test the rivet’s movement in the hole. This small habit shifts your energy from reactive fixes to proactive quality control—an approach that pays off every time.

    Real-World Example: When a Fence Panel Taught a Hard Lesson

    Last summer, I helped a friend reattach a fence panel after it was damaged by high winds. In a rush, we used leftover rivets that were slightly undersized for the thick, painted steel posts. Though initially secure, after just three weeks many joints had loosened and rattled dangerously. We had to redo the entire work to ensure stability.

    Since then, I’ve been ever diligent about testing rivet fit ahead of time. The simple habit of “wiggling” the rivet in its hole before setting has saved countless hours and eliminated the need to redo joints.

    Additional Tips for Stronger Riveted Joints

    • Use the correct rivet type for your materials: Aluminum rivets for aluminum sheets, steel rivets for steel—material compatibility matters for durability.
    • Clean holes thoroughly: Remove rust, paint chips, and debris before assembling. Imperfections not only increase grip thickness but also interfere with rivet expansion.
    • Use the recommended rivet gun pressure settings: Excessive force can deform rivets; insufficient force leads to incomplete expansion.

    Conclusion

    The biggest single contributor to weak riveted joints is the failure to account for proper rivet size and fit. Even a slight mismatch can reduce joint strength significantly and lead to frustrating loosening over time. The good news is this is an easily avoidable mistake.

    Make it a habit to inspect and physically test rivet fit in every hole before setting. Compare hole and rivet sizes closely, don’t force mismatched parts, and be willing to adapt your approach—a quick size swap or hole adjustment will pay off with durable, reliable joints.

    Small checks mean big peace of mind, saving you from expensive and time-consuming repairs down the road.

  • Why Do Oscillating Blades Dull So Quickly? Insights Revealed

    Understanding Why Oscillating Tool Blades Lose Sharpness Quickly

    Oscillating tools have become an essential part of many workshops and DIY toolkits. Their unique ability to make precise cuts, work in tight corners, and handle various renovation tasks makes them invaluable. But a common frustration among users is how often their oscillating tool blades seem to wear out or dull prematurely—even when using quality blades.

    It’s tempting to blame the blade manufacturing quality or the brand, but the reality goes much deeper. Blade dulling is often the result of how the tool and blade interact with materials and how the tool is used during the job rather than inherent flaws in the blades themselves.

    Blade Types and Their Limitations

    Oscillating tool blades vary by material and tooth design, which directly affects durability and performance. Most common blades are made of high carbon steel (HCS) and are intended specifically for cutting wood, plastics, or drywall, with typical teeth per inch (TPI) ranges of 13 to 18. Using these blades for other materials, especially tougher ones like metal, leads to rapid dulling.

    For cutting metal, blades marked “bi-metal” (BIM) or “multi-material” usually have higher TPI (18–24) and incorporate tougher steel alloys or manufacturing processes that enhance durability. Still, even bi-metal blades will wear quickly when exposed to hardened fasteners, embedded nails, or abrasive components like gravel and grit.

    A practical example comes from a DIY professional who was puzzled by blades dulling unusually fast. It turned out he was cutting recycled flooring containing tiny gravel particles—and those microscopic abrasives decimated the blade teeth. Checking and clearing the work area before cutting made a remarkable difference in extending blade life.

    How Usage and Technique Impact Blade Longevity

    Oscillating tools operate at rapid oscillations per minute (OPM), often between 11,000 and 21,000. This fast movement generates a lot of friction and heat. Users often unknowingly press down too hard, assuming this will speed up the cut. However, that extra pressure actually increases friction, causing the blade to overheat.

    Heat buildup affects the temper and hardness of the blade edge. You might notice the blade turning a bluish color or otherwise discoloring—signs that it’s losing effectiveness. Instead, applying moderate pressure, about as much as you would use when writing with a thick marker, lets the blade cut efficiently while clearing debris and reducing heat.

    On long or tough cuts, it’s beneficial to make the cut in short bursts lasting 20 to 30 seconds, allowing the blade to cool between passes. Some professionals even keep two blades on hand, alternating them to maintain a cooler operating temperature.

    For instance, while helping trim baseboards, one tool user initially pushed aggressively and ran the tool at maximum speed, wearing out the blade halfway through. Changing tactics—lowering the speed, easing pressure, and letting the blade do the work—extended the blade’s life significantly and improved cut quality.

    Refresh Tip: The Power of Controlled Speed and Pressure

    It may seem counterintuitive, but slowing down and lightening your grip often results in cleaner cuts and a blade that lasts longer. The key takeaways are:

    • Use light to moderate pressure—just enough to guide the blade without forcing it.
    • Set the tool speed within the recommended mid-range (usually between 11,000 and 16,000 OPM).

    This approach minimizes heat buildup and keeps your tool and blades operating smoothly. It’s worth experimenting with pressure and speed adjustments on your next project to see improvements.

    Material and Angle Matter More Than You Think

    Aside from blade quality and pressure, the type of material being cut has a major influence on blade life. Using a wood-only blade on metal or composite materials is a short path to a worn-out edge. Always ensure your blade is appropriate for the material—bi-metal for metal, carbide-tipped for tough laminates—and avoid forcing blades through incompatible materials.

    The angle at which the blade contacts the material is another factor. If the blade meets the surface squarely—at roughly 90 degrees—the cutting action is most effective. Angles that are too steep or shallow can increase friction on a few teeth unevenly, causing premature wear or chipping.

    Regular Inspection and Maintenance

    Taking a moment to examine your blade every few cuts can save you time and money. Look for chipped teeth, discoloration, or signs of dullness. A dull blade requires more pressure and effort, which compounds heat and accelerates wear.

    By catching early signs of blade degradation, you can swap out a blade before it negatively impacts the quality of your cuts or risks damaging the material being worked on.

    Summary: Smart Techniques to Maximize Blade Durability

    Oscillating tool blades are built to handle tough jobs but have limits affected by blade type, material, pressure, speed, and cutting angle. Proper technique transforms a frustrating routine of rapid dulling into a smooth operation where blades last through the entire project.

    • Choose the right blade for your material: HCS for wood/plastics; bi-metal for metal; carbide for hard laminates.
    • Use controlled pressure—similar to writing with a thick marker.
    • Set tool speed within the recommended mid-range rather than full throttle.
    • Maintain a 90° blade angle on the material surface.
    • Inspect blades regularly for wear and replace before issues escalate.

    Mastering these practices will extend blade life, improve cut quality, and reduce frustration. Small changes in how you use your oscillating tool add up to big savings and better results over time.

    For more insights on tool maintenance and cutting techniques, explore our oscillating tool blade collection.

  • “Master Travel Ease: Organize Essentials, Breeze Through Airports Smoothly”

    It always starts with packing. A few hours before my flight, I settle in and start folding clothes, the quiet outside broken only by traffic in the distance. There’s always a little anticipation as I drop in each T-shirt or book—knowing these choices will shape the days ahead. But at some point, I pause and ask myself: what do I need on hand, right away? Boarding pass, passport, headphones, maybe some gum. They end up scattered at first and then organized into one spot. Back in the day, I’d just jam everything into random pockets or the outer flap of an old backpack, only to fumble through everything at security.

    These days, travel feels a bit smoother. The city starts to glow as morning arrives, and at the airport there’s a mix of hustle and waiting—families navigating the maze of stanchions, solo travelers at kiosks, announcements echoing overhead. My carry-on rolls beside me, easy to pull along, and I remember how many times I tangled with clumsy bags before switching to a better setup. For those who are curious, this is the carry-on that actually solved those issues for me: carrysupply.myshopify.com.

    Having everything essential in one reachable pocket is a relief. That familiar zip—knowing exactly where things are—is a small win. As the TSA line moves, I barely have to think before grabbing my ID and boarding pass. No digging, no stress. In a busy airport, that tiny advantage makes a big difference.

    The boarding area always feels like its own little world: shiny floors, power outlets occupied, everyone just waiting, quietly united by the shared goal of getting on the plane. My carry-on is at my feet as I scroll through photos, handle emails, confident that my essentials are still right where they should be. Near me, an older couple shuffles through maps and tickets. A kid is sending a toy plane between chairs. I can’t help but appreciate how much easier mornings are when I don’t have to search for basics like my passport or wallet.

    Once I’m on the jet bridge, things quiet down. The outside world fades, replaced by recycled air and the shuffle for overhead space. I lift my bag, store it above, and settle into my seat. My headphones are easy to reach, right where I left them, and I slip into the steady background noise of the plane.

    Up in the air, I look for that first new thing out the window—fields, clouds, maybe a glimpse of coast. It’s a nice break from rushing around, a simple reminder of why I travel: to actually enjoy what’s new and leave the hassle behind. After enough trips, you learn that small annoyances like lost minutes or misplaced chargers add up fast. Sorting out the basics ahead of time really can make everything go smoother.

    After landing, everyone starts grabbing their stuff for the exit. This is when having a simple system pays off. As I click off my seatbelt and get ready for passport checks, my documents are already where they should be. Nothing’s lost or missing. Getting through customs and finding my way feels a lot easier without scrambling for loose ends.

    The city outside is a mix of new sounds, streets, and faces. I pull my carry-on behind me, the rhythm of travel as familiar as always. Each time I unzip that go-to pocket—even just for train fare—I’m reminded how much small routines shape the comfort of a trip.

    Evenings always bring that low-key nostalgia as a trip wraps up. I repack, slipping in some souvenirs, gifts, and memories from the week. I think about how the little habits, like using one organized pocket, quietly influenced the whole experience. With sunset comes that last walk through the terminal, another security line, and I realize just how easy it all feels when you’ve got the details figured out.

    Honestly, I’m convinced travel is less about making big leaps and more about finding little ways to move calmly through new places, with your basics in reach and mind clear. If you want to know exactly where I got the carry-on I finally trust, here’s the spot: carrysupply.myshopify.com.