Blog

  • How Smart Outdoor Storage Transforms Yard Work Into Quick Tasks

    The satisfaction of a freshly organized deck box or storage bench is always short-lived when real life returns. That neat little setup by the back gate, along the garage, or wedged into a patio corner will pass the “looks good” test for exactly one rainstorm, one busy Saturday, and three half-finished projects. Then the cracks show. Now the “organized” space is stalling you out—tools clatter under pool floats, garden gloves pile up against winter salt, bin lids need prying, and suddenly getting one thing means moving three. What used to feel under control now feels tight and slightly sabotaged, like the storage is quietly running out of patience before you do.

    The Subtle Shift from “Organized” to “Obstacle”

    The problem never announces itself: it just creeps in. Three weeks of normal Saturday yardwork and the walkway is narrowed by an “extra” tote, the garden bench traps the trash bin, and that fence-line chest becomes landfill for every “just this once” drop-off. This isn’t random mess—it’s the slow, relentless friction of storage that doesn’t adapt. What looked smart for a static photo becomes a speed bump in actual use, making you reshuffle and route around your own setup with every visit.

    The bins and boxes aren’t failing—they’re just building in resistance, step by step. Every time you “just put away” one thing, it blocks something else. Deck boxes become a game of unpack-the-closet. Wall rails become clutter displays nobody touches. Over time, you don’t beat clutter—you just reshape its path, letting it rebound in new corners and behind new lids. Daily movement gets slower, more awkward, and subtly more annoying, even if the space still looks fine from the patio door.

    Where Good Setups Break Down: Real Moments in Outdoor Storage

    Retrieving One Tool Blocks Access to Another

    You step onto the deck to grab a hand pruner—simple. Except the pruner is under a tarp, squeezed beside three gloves and last week’s hose. You dig, dump, and finally unearth it, only to realize you’ve started two new piles outside the box. Routine chores become minor projects, and in a few days, unused tools stay out just to skip the hassle. The “system” works—if you never change it or rush it.

    Wall Space: Used, But Not Always Useful

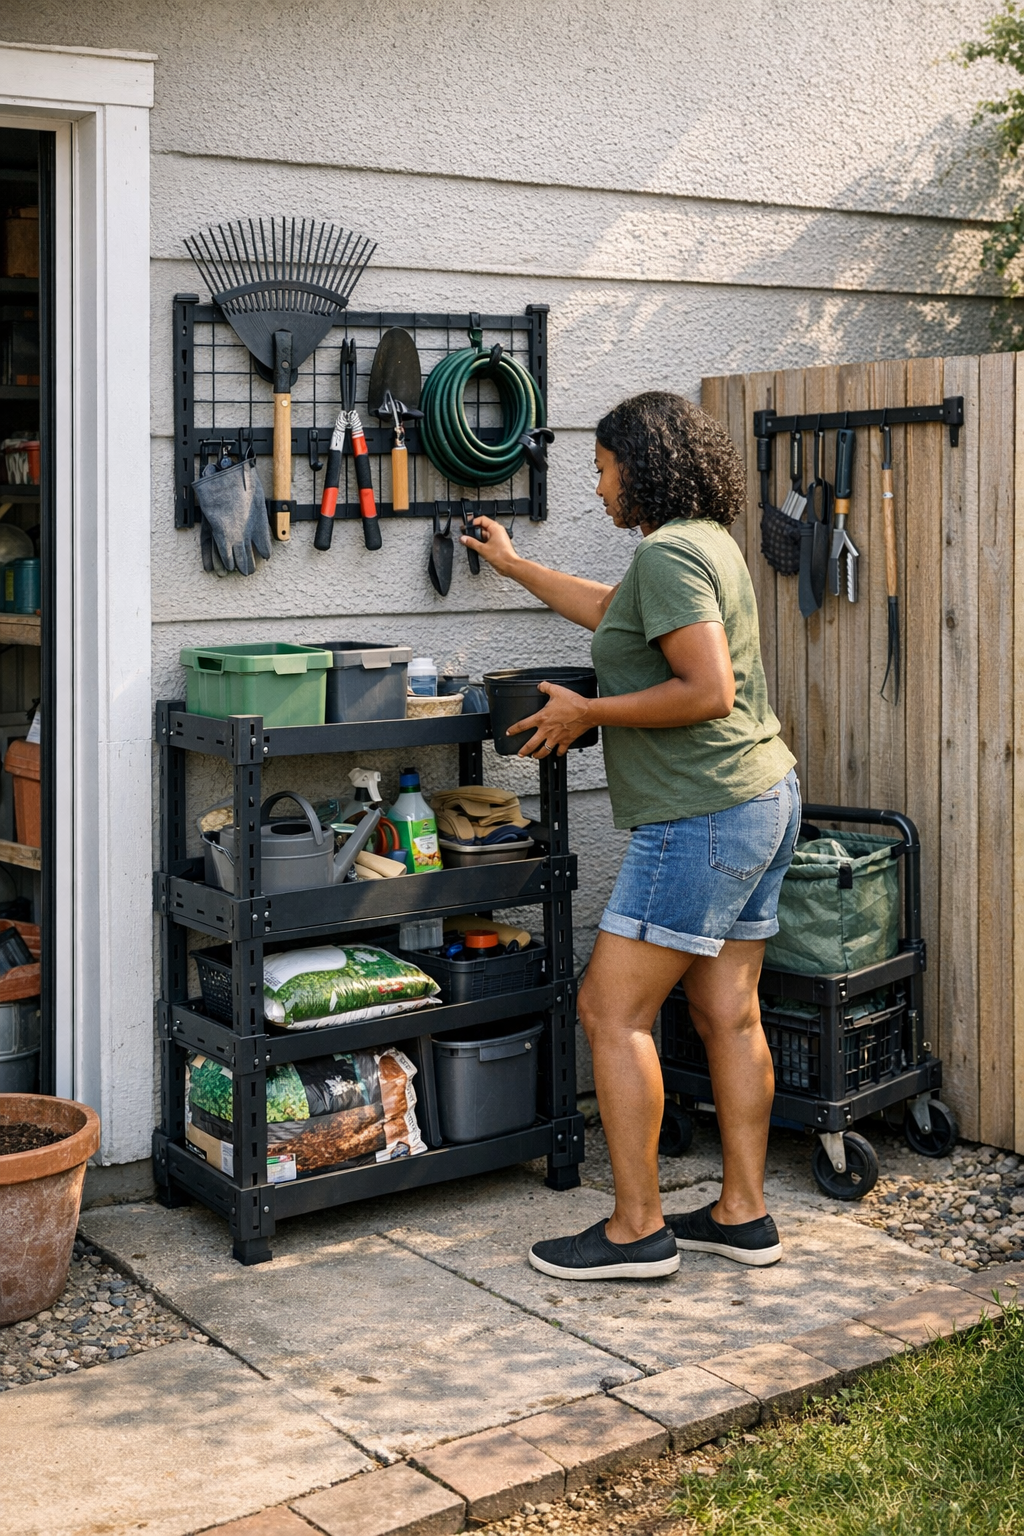
    Wall racks arrive looking efficient, but if half the hooks are behind the storage gate or set above your line of sight, they quickly turn into untouchable displays. The gear you actually use—pruners, loppers, sturdy gloves—drifts right back to chairs, steps, and door handles. The grid promises easy access, but if you need to dodge a ladder or rearrange hanging tools for one rake, the wall is just another obstacle, not a solution.

    Overflow Finds Its Own Zone

    Every setup has that inevitable overflow zone—the patio’s awkward far corner or the trunk of concrete behind the compost bin. It’s where “just for now” piles live indefinitely, where folding chairs and sand toys linger after a storm, and where bins dragged away from the main path quietly become permanent. Once overflow claims a spot, gear leaks out along the fence line and piles start rerouting traffic—dead space breeding more dead space.

    When the Layout Interrupts the Routine

    True frustration builds when storage asks for more work than it saves. Returning the trimmer shouldn’t mean rolling back a storage bench. Putting away the hose shouldn’t force a deck box reshuffle. When resets demand extra steps, even small ones, your outdoor routine unravels: tools stay out, hoses snake through footpaths, gloves pile up on any chair within reach. It’s not neglect—it’s a layout that never matched your pace in the first place.

    Give it a season and you spot it everywhere: there’s a fence chest on week one, but by July, the fence line is a parade of bikes, tools, and leftover planters. The piece that “fit perfectly” now asks you to slide, lift, and nudge just to reach what you use daily. Each return becomes a detour.

    Designing for Access, Not Just Appearance

    The Value in Open Storage and Smart Walls

    Deep deck boxes and closed benches promise to contain mess but often become the black holes that create it. Open shelving or wall grids look busier but keep your essentials both visible and instantly reachable. These setups aren’t showroom pretty, but they spare you from routine obstruction: grab, store, done—without reorganizing half your setup just to return a pair of pruners.

    When high-use tools live on a slim rail at standing height, you move right through the job—no bin unstacking, no puzzle-box resets. A mobile caddy that rolls out beside you and tucks instantly away can keep project clutter from trailing into every yard corner. On busy days, these choices determine whether a quick trim is a ten-minute chore or a drawn-out session wrestling with your own storage.

    One Thing at a Time: The Rule for Reset Speed

    If your storage setup demands three moves for every return, it isn’t built for actual use. Retrieval and return should mirror each other: one grab, one drop, zero rearrangement. Wall hooks at arm’s reach, bins shallow enough to see everything, and modular trays that prevent over-stacking all speed up the flow. Anything that tacks on extra steps will quietly start collecting “waiting-to-be-put-away” gear—and that’s how setups fail, even if they never technically run out of room.

    The Real Test: Return Flow

    The difference between a space that works and a space that nags is never the first week—it’s the fifth evening in a row when you have to cram in a fast cleanup or reset. The best setups bend to unpredictable routines: spring mulch days, late-evening tool drops, gear trashed by rain, last-minute tidy-ups before guests. They keep footpaths clear, push overflow back to the fringes, and make tidying as simple as tossing gloves on a hook or rolling the caddy out of sight.

    Watch for this pattern: If the same item lingers out three times in a week, your storage isn’t the problem—you’re just being honest about how much work it asks. Move high-use gear to grab-and-go positions: eye-level pegs, easy side rails, shallow bins. Save the closed bench or deep box for things you rarely need—holiday lights, rainy-day tarps, backup hoses. Let your flow shape the storage, not fight it.

    When Setup Matches Routine, Outdoor Work Gets Easier

    The goal isn’t flawless order or magazine-cover neatness—it’s a setup that forgives the blur of real outdoor use. You’ll still find a spatula on the fence post or a stray trowel on the patio, but you won’t have to wrestle your own system just to put things away. Strong setups don’t eliminate clutter; they shrink the effort required to reset. The real win is a space where outdoor projects stop feeling like a battle against your storage, and tomorrow’s reset still feels possible—even after the busiest day.

    Find practical ways to build outdoor setups that can actually keep up with you at TidyYard.
  • Mastering Reciprocating Saw Control for Cleaner Demolition Cuts

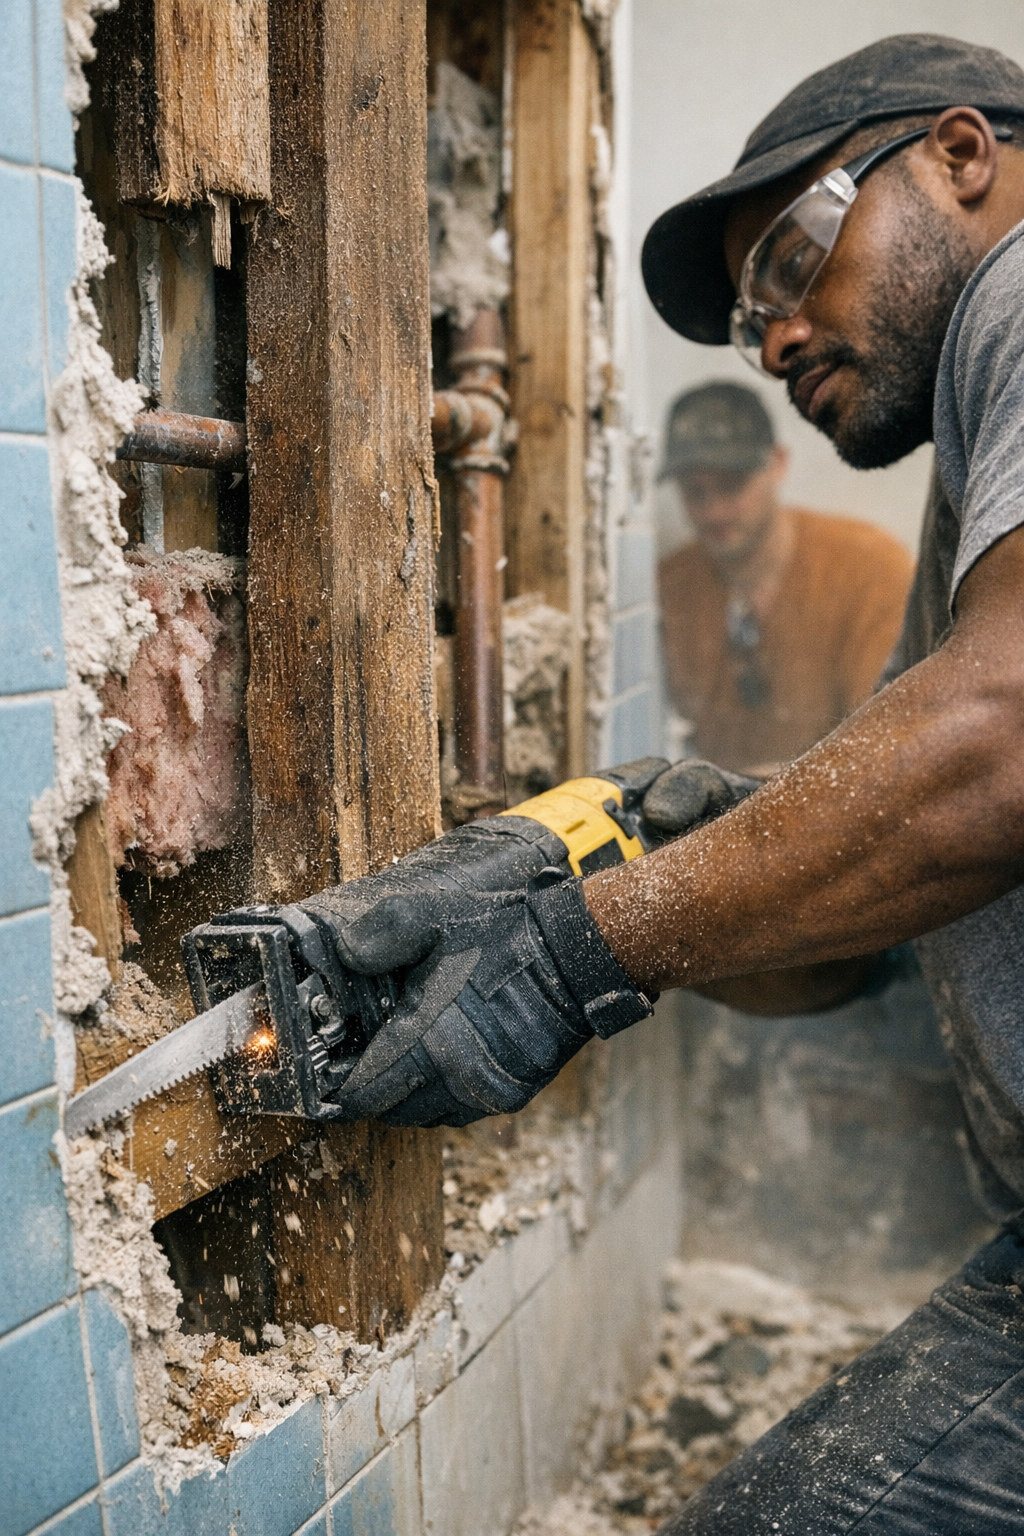
    There’s a familiar thud of disappointment that hits every time your so-called “clean cut” turns into another repair job. You line up your reciprocating saw, start strong, and by the end of the cut, you’re patching splintered edges or filling gaps you didn’t plan for. The frustration isn’t just about rough lines—it’s about wasted time, extra cleanup, and the nagging sense you’re wrestling the tool instead of working with it.

    Why Good Cuts Go Bad as a Project Progresses

    That first pull through drywall is effortless. The blade hums, the dust drifts, and you’re reminded why demolition sometimes looks easy on camera. But as the day stacks up—moving from open space to awkward angles, from fresh wood to mystery studs loaded with old nails—that sense of control starts to fade. A shoe that’s floating a quarter inch off the workpiece doesn’t seem like a big deal at first, but several cuts in, the difference is hard to miss: lines wobble, vibration doubles, and you’re reaching for patching compound yet again.

    It’s not about getting one cut perfect. The real challenge shows in the third stud, the fifth section of drywall, the endless parade of oddball framing. Over a long session, neglecting shoe pressure turns minor wander into a recurring headache—especially when every “just a little off” line adds up on finishing day.

    When Shoe Bracing Fails, Repairs Stack Up

    Picture the scene: You’re halfway through a window demo, shoe pressed firmly on the sill. Then you hit a patch of buried fasteners, your grip slips, and for just a moment, the shoe lifts. That’s all it takes—suddenly the blade kicks, tracks off line, and you’re left staring at ragged plywood and splintered trim. One lapse in pressure becomes a half-hour erased, with repairs eating into any progress you thought you’d made.

    The problems multiply. With each floated pass, heat builds in the blade, fasteners deflect the cut, and the tool jerks in your hand. By afternoon, what began as basic demo feels more like triage: chasing crooked cuts, filling torn-out openings, and sanding away the evidence. Bracing isn’t just a technique—skip it, and the mess compounds fast.

    Shoe Bracing: The Simple Shift That Pays in Precision

    The pros know the difference: steady, deliberate shoe pressure. Anchor the saw’s shoe flat against the surface every time, and you gain control back from the tool—managing vibration, steering the blade, keeping the line from drifting with every kick or snag. It transforms cuts from jagged prodding to smooth, predictable progress—even when fasteners try to jerk you off course.

    Take a simple experiment: ten quick cuts through framing old pine, some with the shoe braced, some floating. Where you hold steady, deviation hugs the line—barely 2mm of drift, even if you clip a hidden brad. Float the shoe on that same series and it’s a completely different story: wander, splinters, and up to 6mm swing per cut. That difference might sound small, but multiply it over a hundred feet of framing, and your finish work adds up fast—painfully so when sanding arm fatigue kicks in.

    Scenario Check: Cutting in Tight Spaces Behind Tile

    Bathroom renovations bring the worst: cramped angles, hardback tile, and rusted lath nails that defy clean cutting. Here, even one dropped bracing hand on the final inch means the blade veers, chipping more backing than you planned. Apply focused shoe pressure with the other hand close for balance, and you’ll feel the tool settle and the cut smoothing out. That discipline—feeling the shoe, not just the vibration—saves full sheets of tileboard and keeps you off the phone for another last-minute materials run.

    Blade Choice: Where Speed Can Ruin the Finish

    No trick of technique rescues a bad blade—what you load matters. Low TPI blades are made for fast, aggressive demolition in soft woods, but every jump in speed risks more harsh chatter, chipped edges, and flex when you meet hidden nails. For finishes that’ll actually disappear behind paint or tile, higher TPI steel is the unsung hero: a little slower, but the result is fewer ragged ends and less of those “whoops” edge moments that nobody enjoys patching. Use the rough stuff for raw framing, save the finer teeth for visible lines—your putty knife and sanding block will thank you.

    Spotting Cut Drift Before It Becomes a Disaster

    The signs show up fast: sudden blade chatter, dust collecting thick on the good side of the line, or those early inches where the blade starts pulling away before you even reach the far stud. Any of these should trigger an immediate pause—a habit check to reset your shoe, realign, and change grip before you commit to a full cut you’ll regret.

    Reset, Every Time: The Five-Second Demolition Habit

    Taking five deliberate seconds before each cut—flattening the shoe, bracing your stance, breathing—pays in ways you’ll notice later, especially under tough work conditions. Whether you’re overhead, cutting at odd angles in tight soffits, or pushing through repeated stud walls, that constant reset fights off slip-ups. The result? Less rework, fewer patch jobs, and less wear on both you and your tools.

    Winning the Cleanup Game: How Bracing Shifts the Whole Day

    Tool control is more than just a good habit—it’s the hidden secret to finishing jobs with clean edges and less dust. Braced shoe pressure means fewer seams to fill, less material chewed up, and a noticeable drop in that end-of-day fatigue that sets in after too many fix-its. Stay disciplined with every cut, and the reward is real: straighter lines, shorter cleanup, smoother finishes, and more time to move on, instead of circling back for another round with the sandpaper.

    See the practical lineup at Gumboll for jobsite-ready saws, blades, and accessories built for real-world repeat work.

  • How Smart Carry-On Organization Reduces Travel Stress and Delays

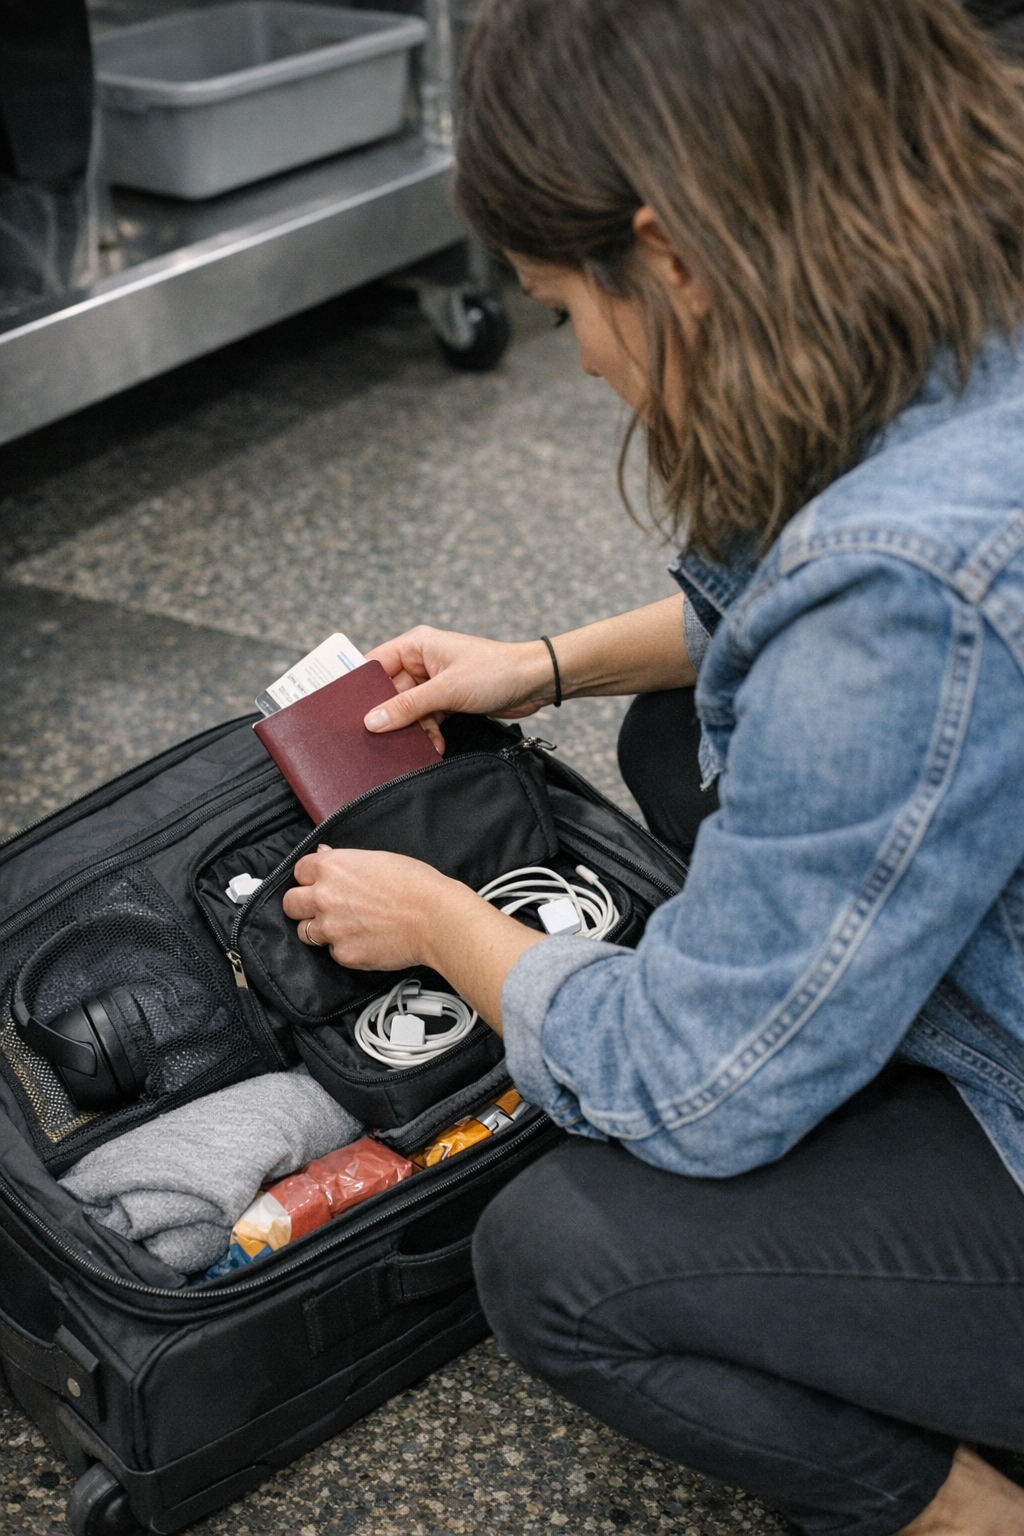
    The weak point in your carry-on setup never shows up in your living room—it attacks mid-trip, always when you need speed the most. You close your bag at home, every item locked into its space, and walk out feeling ready. Then security hits, boarding calls, terminal sprints—the first real reach for a passport or charger in a crowd breaks that order immediately. The flaw isn’t visible until the pace picks up, lines close in, and the smallest delay—unzipping twice, fumbling through a mixed pouch—becomes a routine frustration. The carry-on that looked controlled at home is suddenly an obstacle, forcing extra rummaging or repacking when you’re just trying to keep up.

    Why Orderly Packing Doesn’t Guarantee Easy Access

    Every traveler has watched their “perfect” home packing melt into a hassle at the first checkpoint. Neatly stacked cables and passports slump together; that streamlined pocket turns into a blind search when a security agent asks for your ID. The airport exposes a reality that home organization hides: visual order doesn’t block friction. Chargers slide under documents, snacks hide behind cords, and every “catch-all” pocket becomes a slowdown the first time you need one specific thing—especially when standing, pressed for time, or moving with one hand free.

    The Hidden Cost of Overlapping Access Patterns

    On the packing table, grouping “frequent essentials” in one go-to spot seems efficient. At the airport, it’s exposed as a design flaw: jamming tech and documents together forces you to untangle cords just to get at your boarding pass, or move a granola bar to find your passport. Every overlap between categories is a subtle, recurring snag. What started as a logical main pocket drags the trip into a loop of micro-hesitations—each reach for an item becomes a mini-chore, especially under pressure. The setup that looked minimal now imposes a cost: repeated interruption whenever access actually matters.

    Real-World Triggers: When Carry-On Structure Fails You

    Security: Where the Overlap is Exposed

    Security trays force your hand. You reach for the passport and pull out headphone wires instead. One tug on a charger sends documents sliding out, scattering smaller items across the tray. Someone in line beside you resets their bag in seconds; you’re still double-checking for missing items as the trays pile up. This is where a single mixed pouch, once “justified” at home, becomes a slow-motion mess.

    Boarding and In-Seat Access: The Stationary Headache

    Boarding lines drag and the difference in structure is clear. Some travelers unzip a visible sleeve, flash documents, and drop them back without breaking stride. When your own layout means flipping through wrapper-filled pockets, wrestling open secondary zippers, or even stepping aside for a repack, the price of that all-in-one compartment is impossible to ignore. Quick access is blocked not by disorder, but by too much in one place.

    Mid-Trip Retrieval: Rummaging and the Repacking Spiral

    Once in your seat, trying to grab headphones brings out a cable tangle, loose snacks, possibly your passport. Every retrieval jumbles the previous order; each repacking is messier than the last. By the time you land, “efficient” storage translates into a layered, tangled bundle that delays hotel check-in as you search yet again for essentials you swore were under control.

    Direct Access: How Separation Solves the Repeating Problems

    True travel relief surfaces after just a few use cycles: when you separate items by how and when you actually reach for them, friction drops away. Grouping by event—security, boarding, in-seat—not type or size, means each access is cleaner, every routine is faster.

    Practical setup example: A single dedicated sleeve for travel documents. No chargers, snacks, or headphones inside—just what you’ll show repeatedly. Tech cables are sealed away in their own pouch; comfort items (like an eye mask) get their own spot, nowhere near documents. Now, reaching for a passport means one quick unzip and zero detours. Headphones are found minus the cord-web. Each routine—checkpoint, seat setup, snack break—moves without unnecessary crossover, and the bag stays workable even after multiple shuffles or transfers.

    Recognizing and Fixing the Sneakiest Weak Point

    This overlapping-access problem wins by staying hidden through small, repeated slowdowns. Your bag doesn’t look wrong—it simply grows more clumsy to use, one checkpoint or seat change at a time. The worst setups stay photogenic but quietly sap your attention and time; every quick grab becomes a small decision; every reset—however tidy—makes you work harder, not smoother.

    Once you strip out all layered paths, micro-hesitation fades. You stop pausing at every checkpoint. You don’t have to trace which zip holds the passport, or repack mid-aisle after missing one item. The outcome isn’t flash—it’s a bag tuned so your mind tracks the trip, not the next hidden pocket or tangled reach.

    How to Make Setup Work for Real Travel

    • One zip, one function: Assign each pouch, pocket, or sleeve a single repeated-use purpose—documents, tech, comfort items. Don’t double up.
    • Group by rhythm, not appearance: Resist clustering by look or size at home. Instead, group by movement: ask what you’ll need repeatedly in line, at your seat, or in a security tray.
    • Check after each stage: After running security or boarding, did you need to open two bags for one thing? Did anything else fall out by accident? Use this as your friction test.
    • Tweak, don’t tolerate: If you find yourself repacking more than once per segment, shift the setup—documents out of tech pouches, chargers given a solo spot, travel docs always in a visible, quick-access sleeve.

    The Bag That Works—Not Just Looks Good

    Most carry-on setups unravel after a few rounds of real movement. The winning bag is not the one that promises everlasting neatness, but the one that keeps retrieval direct and friction low after repeated cycles of standing, lifting, and retrieving—without the need for a full reset. Each trip row—from curb to seat to hotel counter—will test your layout.

    What matters isn’t a photo-perfect interior, but a structure that makes each access shorter, every retrieval cleaner, and the bag itself less of a focus than your trip. The visible win isn’t order, but time saved, awkward moments avoided, and one less carry-on decision stealing your attention every two gates. The right setup pays for itself in motion, not just looks.

    Visit CarryOnSupply for carry-on travel tools designed for real movement.

  • How Wall Lighting Transforms Room Function Beyond Ceiling Fixtures

    Ceiling lighting makes rooms “look” finished—but leaves desk edges, shelves, and shared tables annoyingly dim. You set up the space, mount a single fixture, and for a moment, it feels resolved. But the promise of general brightness fades fast. Repeated use exposes what the photos hide: the center glows, while everywhere you actually reach—the far side of your desk, the ends of your shelves, the edge of a group table—slips back into shadow. It’s not just one missed spot. Every day, you stretch for a paper and lose it to a dim edge. The shelves you meant to use vanish behind silhouettes. Instead of feeling organized, the room starts demanding small workarounds just to stay usable.

    The Surprising Limits of Ceiling-Only Lighting

    Mounting a ceiling fixture feels like a shortcut to a clean, cable-free room. In reality, overhead-only setups almost guarantee friction where you least want it. The surface may look uncluttered, but it’s a trap that repeats on real days, not just move-in day:

    • Desk edges stay dim—papers slide just past the light, tools roll into unseen patches, and you start dragging items closer to see them.
    • Glare grows persistent—ceiling light bounces off screens or glossy tables, forcing you to shift your seat or shield your eyes just to focus.
    • Blurry perimeters—room edges merge with shadow, navigation feels subtly uncomfortable, and multi-use spaces reveal awkward, underlit stretches.

    This isn’t atmosphere—it’s the ceiling fixture’s central output failing at the edges. During work, reading, or prepping, the border zones become a problem. The difference between “looks bright” and “works everywhere” isn’t cosmetic: it decides whether you end up fixing the setup or working around it every day.

    Compensating for Bad Light: The Common Workarounds

    No one accepts dim edges forever. Annoyance turns into habit-forming fixes that don’t really solve anything:

    • Dragging table lamps across the desk to chase shadows—then stumbling over cables each time you get up.
    • Shifting your chair to monopolize the bright patch, leaving half the surface underused and making shared work frustrating.
    • Threading power cords across worktops or under tables just to force a little more light into a neglected corner or shelf.

    Minimal on paper but cluttered in reality: lamps colonizing every open spot, cords visible before you notice the room. You spend minutes each day re-aiming lamps, unwinding cables, and still find corners you can’t use without extra improvising. The supposed “neatness” of central lighting turns into a daily loop: what edge will you wrestle with today, and how much can you fix on the fly before giving up?

    The Real Fix: Bringing Light to the Edges

    Wall lighting, under-shelf strips, and mounted task lights change not just what you see, but what you can actually reach and use. Vertical lighting—targeted just above a desk, along a shelf, or around a room’s edge—unlocks areas that overhead light keeps underlit:

    • Visibly frames the room’s border—nothing slips into the gray. Every inch of the desk or shelf becomes available, not an afterthought.
    • Reduces glare shifts—task and wall lights balance out the harsh ceiling glare, making it possible to look at screens or documents for hours without fatigue.
    • Cuts clutter instead of spreading it—a wall sconce or under-shelf light manages cables out of sight, ending the daily crowd of lamps and unsightly extension cords across your work zone.

    The result is immediate: the desk edge stays as useful at night as it is in daylight, without cable chaos. Walking by a shelf, you spot what you need on the first glance. In meetings or projects, people don’t battle over the single lit spot or knock over a lamp just to see their notes—everywhere is usable, not just the center patch.

    A Real-World Example: From Dim Corners to Clean Borders

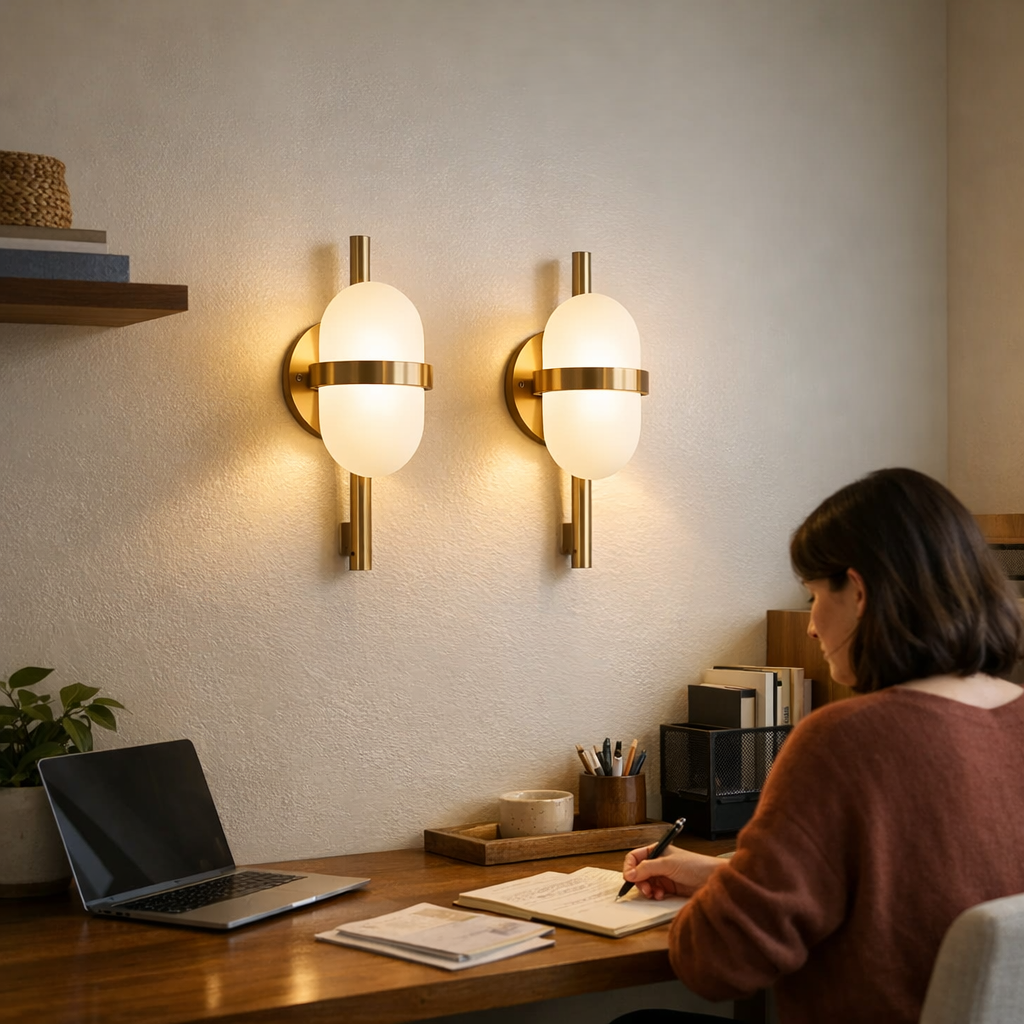
    Picture this adjustment: two pared-back wall sconces, mounted 15 inches above your desk, angled out just enough to wash the whole surface. Before, the far side was a lost zone—where things disappeared into darkness. After, the entire four-foot run of desk is evenly lit. You notice, not just once, but every time you work:

    • Papers tracked across the entire desk stay visible—no more collecting stacks into the “bright” patch and ignoring the rest.
    • Cable lines run behind the mounts, stay put, and fade out—no loops snaring sleeves or trailing toward the floor.
    • The tug-of-war with desk lamps ends. You’re not adjusting, re-aiming, or adding another fixture just to reclaim a surface edge. The light lands where your hands do.

    Why Edge Clarity Beats Appearance Alone

    What fixes the setup isn’t just mounting a fixture to look finished: it’s edge clarity that transforms use. In actual routines—grabbing something from a shelf, glancing down a desk, or prepping materials for the next task—it matters whether you can trust the lighting to show everything. Edge visibility shrinks clutter, demotes cables to the background, and makes routine resets automatic. When perimeter clarity holds, organization is an everyday baseline, not a project you have to redo every week.

    Small Adjustments with Big Impact

    You don’t have to overhaul everything to see the shift. One slim wall light, a plug-in strip under a shelf, or a slight bracket reposition can reveal the hidden capacity of a room. Getting the fixture at the right placement stops a string of daily hacks. These aren’t touch-ups—they’re what finally stops the room from fighting back when you use it for real work.

    Lighting That Keeps Up with Real Use

    Where routines repeat—shared offices, reading corners, dining tables—the right lighting support gives edges actual purpose instead of dead zones. Treating the perimeter as valuable means less scrambling, fewer cable traces, and fewer hours spent “fixing” the layout. The step from visually neat to consistently usable is simple: stop ignoring the edges. When lighting support follows the forces of daily use, the room stops demanding attention—and quietly works the way you needed from the start.

    Find practical wall lighting, mounting solutions, bracket supports, and under-cabinet options at LightSupport.

  • How Simple Cloth Placement Transforms Your Daily Pet Care Routine

    The weakest link in any daily pet-care routine is rarely a missing product—it’s a towel not where you need it, a brush buried under clutter, or a wipe-down delayed because cleanup supplies are too far from the daily path. The real drag shows up after meals, water refills, or muddy returns from outside: you reach for a cleaning cloth or scoop and run into a block—something left in the way, or the needed item still damp or missing. These small missteps don’t look like failure, but over a week they chip away at the routine, turning quick resets into slow ones, and leaving messes to grow in corners nobody wants to deal with later. CalmPetSupply lives in this territory—refining the difference between setups that only look tidy and those that actually, reliably keep pace with real daily care.

    Where Routines Slow: The Cost of Out-of-Reach Basics

    Picture the usual start to morning feeding: dog eager, bowls stacked, but the food scoop’s behind a water jug and the cleaning cloth is MIA—maybe damp on the counter from last night, maybe in the wrong room altogether. Before you finish, a stray nudge scatters kibble. No towel within arm’s reach? The crumbs stick around. You tell yourself you’ll get them later, but later rarely comes. What should take seconds now drags out, and the next meal starts on top of yesterday’s mess.

    Initial order fades quickly. Supplies meant to be close migrate: towels left in the laundry, brushes parked on a random shelf, or a backup cloth that’s walked to the living room and stranded there. Each recovery costs movement. Once a setup forces you into even one extra lap for a basic item, that friction repeats. Shared spaces make it worse—cleaning supplies drift, chores get interrupted, and every grab for a simple tool turns into another sidetrack.

    Small Gaps Build Up: Delays and Overlooked Messes

    Every time a cleaning cloth, fresh towel, or grooming tool isn’t right at the care spot, two frictions multiply: more small messes are left behind—water by the bowl, scattered food, paw prints into the hall—and every would-be quick reset becomes a job you hesitate to start. Searching for the right towel leads to grabbing a paper napkin or skipping upkeep; midnight wipe-downs get put off when you realize the only available cloth is still drying or out of sight.

    The pattern repeats: at bedtime, you plan to clean up the feeding mat, but the towel’s still in the laundry and you wave it off till morning. One missed reset turns into dried buildup that needs scrubbing later—and the cost is more effort, not just more time. None of this signals a broken routine, but every out-of-place tool creates another small gap that compounds through repetition.

    Visible vs. Functional Organization

    There’s a test for whether setup works: can you grab the cleaning cloth without moving three things or opening a bin? “Looks organized” is shallow if the actual cleanup step is slowed by baskets, closed shelves, or towels buried behind other supplies. Entry shelves hide backup cloths, but right after a soggy walk—when you need a dry towel in two seconds—that tidiness breaks. Muddy footprints spread further every time you hesitate at the point of use.

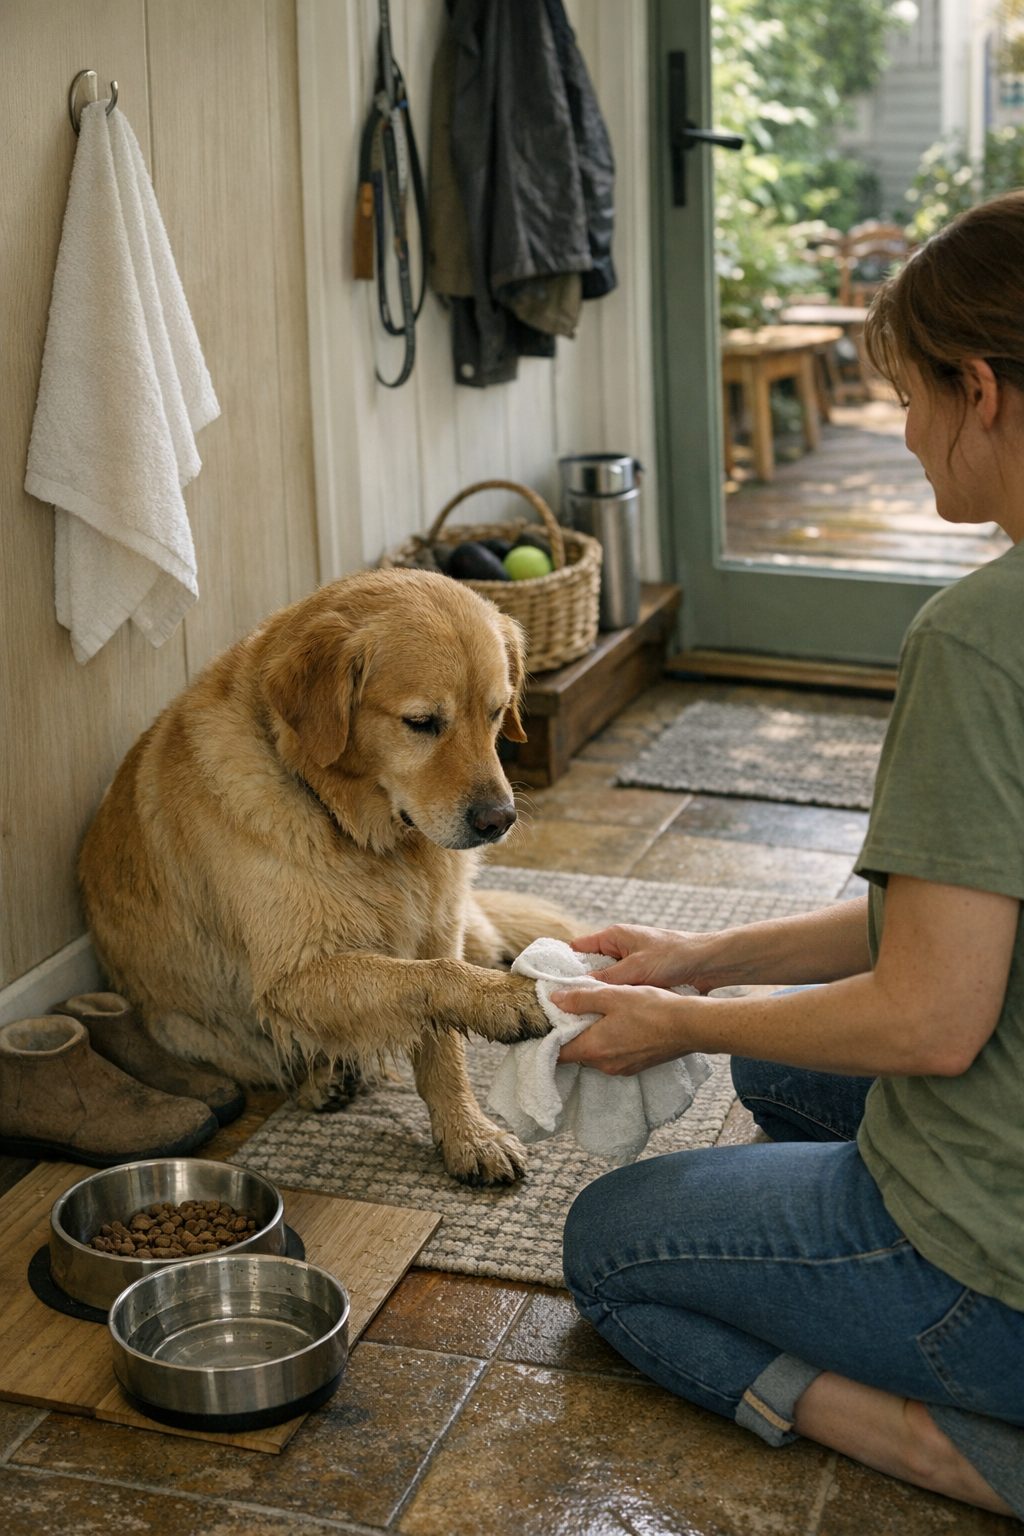
    The real fix is basic and visible—hang a clean towel on a wall hook at the care zone, not hidden away “for neatness.” When supplies stay in plain sight and in arm’s reach, there’s nothing to search for, nothing to dig out, and resets shrink to a swipe instead of a scavenger hunt. It’s less about storage, more about flow—the setup should put every basic right in the path, not behind one more barrier.

    Real-World Use: From Repeated Pause to Routine Flow

    Compare two setups: One hides the towel in a kitchen drawer, an extra detour every meal. You walk past the pet, dodge a stray toy, and break the flow just to clean up—the routine gets slower, and soon the messes linger because “I’ll do it next time.” In the sharper setup, the towel hangs beside the bowl, always dry, always visible. Spills are wiped as they happen, no buildup, no catch-up days later.

    This logic applies everywhere: keep grooming brushes where you actually brush, waste bags at the door, water refills just above the bowl. When nothing needs to be fetched from another room, late-night checks, after-walk wipe-downs, and midday resets blend into regular movement instead of breaking stride or getting postponed. Not every step vanishes, but repeated stops do.

    The real gain: invisible to outsiders, but in your week, fewer interruptions, no stalled resets, and pet areas that hold their order with less decision fatigue.

    The One Weak Point: When Efficiency Loses to “Acceptable Enough”

    There’s always a snag. Maybe clean towels are well placed, but they only get swapped out once laundry is done—so you reach for one just to find it damp. Toys pile on top of cleaning cloths and block them mid-routine, or a bin looks tidy but buries daily-use items under rarely-used backups. Each slip saps speed. Cleanliness that seems “good enough” starts letting chores slide, with resets only happening when you finally run out of workarounds.

    The steadiest routines keep fundamentals close, visible, and dry—no digging, no delay, no ambiguity. Even when life gets busy or the week is messy, the core supplies don’t migrate or vanish, and skipped resets don’t become chronic. Order isn’t just for show; it’s for unbroken use.

    Practical Placement: Steps to Smooth, Repeatable Care

    Hang a clean towel or two right at every care point—beside the bowls, at the main door, in the laundry zone, or next to the litter box. Ditch deep bins and closed cabinets for daily-use basics; hooks or open shelves let you see at a glance what needs restocking before a damp or missing towel ruins the next reset.

    Rotate towels after each heavy mess—mud, wet paws, sticky spills—and allow dry-food crumbs or simple wipe-downs to go a little longer if needed, but always keep backup cloths within one step of use. A generic kitchen towel works in a pinch, but only if it’s equally accessible—not folded away with the linens.

    The split between routines that keep up and routines that fall behind isn’t the gear—it’s the reach. Every supply that lives right in the line of use shrinks the daily drag. Nothing fancy, just a structure that works even when everything else is too hectic to think about.

    Find daily-ready cleaning cloths, storage basics, and quick-access care goods at CalmPetSupply.

  • How Small Changes to Door Setup Can Smooth Your Dog’s Morning Routine

    Most dog owners know the sound of a door clicking shut doesn’t just mark leaving or entering—it marks a change in the whole flow of the day. Your routine might look organized from a glance: leash on the hook, bowl in its spot, floor mostly clear. But if your dog stands frozen near the door, circles the entryway, or waits for permission that never comes quickly enough, the weak point is obvious. Every morning, small annoyances stack up: reaching for the leash and finding toys in the way, returning after a wet walk only to discover the wipes are across the room, squeezing past a bed that sits too close to the threshold. Tidy in theory, but each step gets snagged by invisible friction built into the setup. The slower your transition, the more each day makes you feel it. Here’s what actually starts to drag—before you’ve even poured your coffee.

    The Unseen Morning Bottleneck

    The trouble isn’t just where the door is. It’s how every routine is forced to pivot around it. Most owners don’t really clock what’s off until their dog hovers at the door, stalling for cues in that blank space after it shuts. Instead of a clean shift to feeding or walks, you get a clutter of circling, sniffing, or just hanging by the entry, never quite moving on. These aren’t just lost seconds—they slow the whole chain. By the time you’re done nudging your dog forward, grabbing supplies from two spots, and untangling the leash from under the bed, the “quick morning” turned into a waiting game you didn’t intend to play.

    You catch it in little signals: a dog reluctant to leave the doorway, that glance back at the closed door, or hesitation between steps. Once you notice, it’s impossible to ignore—your setup isn’t smoothing the way, it’s quietly training both of you for delays.

    Routines That Stall Before They Start

    Picture the pattern: you close the door, ready to start the next thing, but your dog hovers in the entry—still on standby. You reach for the leash, but it’s tangled with a toy or partly pinned under a stray mat. After a wet walk, the wipes are across the threshold, so you’re forced to cross the dirty floor twice—wasting time, adding mess. One inconvenience is nothing. But every repeat makes this stop-start rhythm the new normal. Instead of entering the day, you and your dog rehearse the same shuffle: waiting, moving things, pausing at the bottleneck until everything is reset for the next round.

    How a Closed Door Becomes a “Wait Here” Cue

    Dogs know patterns. Door closes, energy stalls—soon, the entryway becomes a holding zone instead of a passage. It’s a checkpoint where your dog waits for a signal that comes too late or not at all. Again and again, the closed door prompts lingering, double-backing, circling, and hesitation even after obvious “go ahead” cues. The result: every transition gets stretched, not because of training but because the space pushes your dog into a “wait here” loop instead of a clear move-on.

    This is how routines turn sticky. The entryway may look calm, but each repetition builds stop-and-go habits. The dog’s presence at the threshold keeps things on hold, making the difference between routines that flow and those that stall right out of the gate.

    Repeated Friction in Real Time

    This isn’t just a morning phenomenon. When beds or mats overlap with the door’s path, every return home forces awkward negotiation—careful not to pinch the edge, careful around the dog, careful stepping over scattered toys. The doorway fills with tiny obstacles. One extra step, one bed push, and you’re slower every time. Even in a tidy setup, too much within reach becomes the enemy of quick, predictable movement—especially when you’re rushing to reset the space before work or guests.

    The Difference Between “Looks Fine” and “Works Smoothly”

    You organize the entryway: hooks for leashes, bed flush against the wall, bowl not blocking the door. On paper, nothing’s wrong. But the friction hides in plain sight:

    • Bed just close enough to turn the doorway into a default hangout—so your dog waits in limbo rather than resting elsewhere.
    • Towel for muddy paws placed nearby, but awkward enough to grab that the floor gets tracked anyway.
    • Water bowl close enough to trip over during a quick exit or return—making a “good” setup one more thing to dodge when time is tight.

    It’s the routine that feels slow, not the room that looks messy. Each step back from a walk or meal becomes a mini project: move this, shift that, call the dog again, then finally start the real next task. The drag isn’t visible—but you feel it in every delay and repeated correction.

    The Impact of Small Frictions Stacking Up

    Every return is a test: bed still in the swing path means you sidestep or nudge it each time; dog pauses at the entry, so you’re giving repeat instructions instead of moving forward. Over days, these patterns train both owner and dog. Your entire morning starts to stretch, your patience wears, and the “new routine” is built around waiting by the door. The weak point sticks, no matter how good the rest looks.

    Tweaking the Setup: Simple Changes, Real Differences

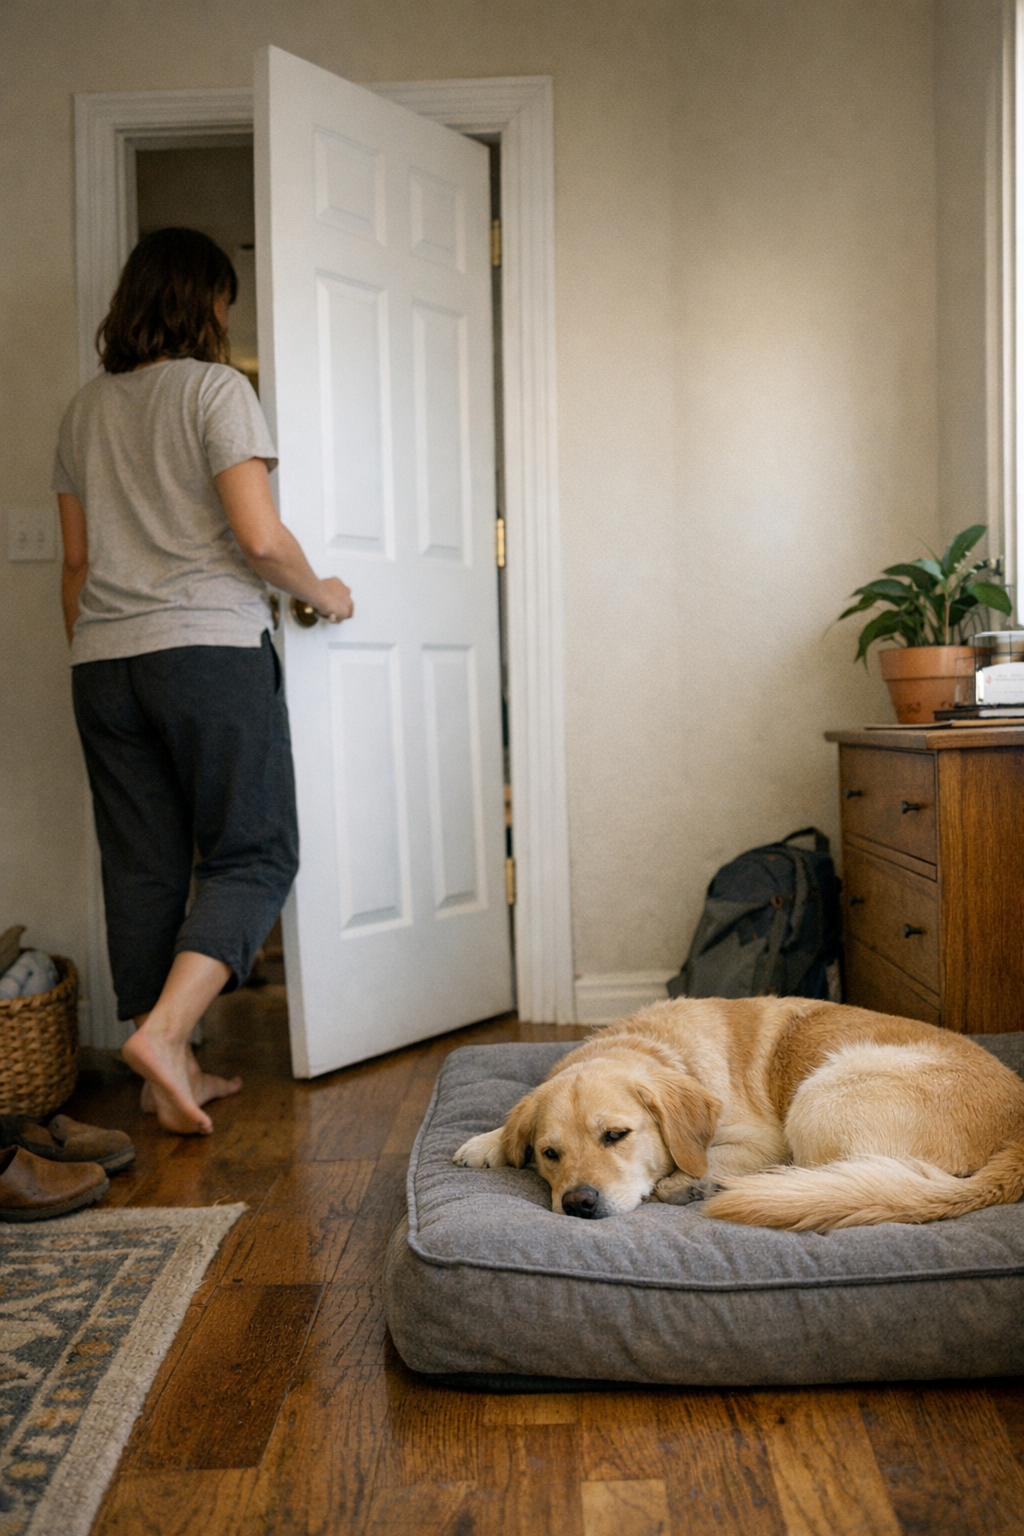
    The answer often isn’t complicated. The most effective change? Rotating the dog’s bed lengthwise against the wall, with space clear of the door’s swing—suddenly, no more indecision at the entry, no more door checks, no need for repeated reminders. The dog’s path is direct: door closes, bed is right there, and lingering at the threshold quietly disappears. Cleanup after walks? Now supplies are next to the exit, instead of requiring backtracking across the floor.

    A New Pattern That Reduces Waiting

    This small shift replaces a “wait for action” zone with a settle-and-reset cue. Instead of using the doorway as a holding pattern, the dog sees a clear space away from foot traffic—the cue is to move on and relax. That new routine bluntly reshapes everything: feeding starts faster, you get out the door sooner, and “wait by the door” fades into the background. The same space does more; the invisible drain is gone.

    Seeing the Routine From the Dog’s Point of View

    To a dog, that bed or mat near the door is a signal: “Don’t relax yet, action is still coming.” Even if the area looks organized, rest doesn’t happen until the physical layout actually clears a path forward. Every pause at the threshold is really the setup talking back—reminding your dog to hang tight, circle, or hover close, instead of dropping into a true reset. That hesitation repeats, rooting a pattern that’s hard to undo just by rearranging items visually.

    Making Calm an Easy Default, Not an Exception

    The best signal isn’t about enforcing “good behavior.” It’s about making rest easy and obvious—clear, physical permission for your dog to quit waiting and let you continue the routine. Once the bed, bowl, toys, and supplies actually support flow instead of crowding it, repeat interruptions fade without you having to micromanage. The day runs quieter, and the difference—less circling, fewer reroutes, no extra steps—shows up fast.

    Spotting the Weak Point—And Addressing It Early

    Letting the “door hover” slide is like accepting a yellow traffic light that never switches. The cumulative effect: meals get nudged later, walks start less smoothly, downtime becomes about managing delays rather than actually resting. The weak point isn’t dramatic, but it multiplies—quiet, persistent drag until the whole routine feels one notch rougher than it should.

    The actual fix is deliberate, not elaborate. Give the rest spot its own clear, inviting zone—no crowding the door, no waiting in the way. Reinforce calm there after each return or door close, and watch as the bottleneck at the entry gives way to a smoother, more reliable rhythm.

    What’s Actually Changing in the Day-to-Day Flow?

    Soon, you’re giving fewer reminders, dodging fewer obstacles, and actually moving on right after the door shuts. Cleanup between walks is easier: towel is by the threshold, wipes are within reach, bowl isn’t the first thing your heel hits coming in. The space stops demanding little corrections and actually helps you reset—one move per step, not a cascade of minor interruptions. Visitors may not notice the difference, but your routine will.

    Paying Attention to Where Friction Hides

    Most setups get organized to look right, not to work right. “Bed here, bowl there, toys in a bin”—but the invisible roadblocks only clear out when the entire daily path runs smooth for both human and dog. The problems—waiting in the doorway, slow resets, item-blocking—disappear only once the arrangement sends a clear signal. Instead of letting the threshold decide what happens, design your setup to tell both of you what step comes next—no room for uncertainty or pause.

  • How Thoughtful Cable Management Transforms Your Workspace Stability

    A desk can look organized at eight a.m.—drawers closed, trays in line, cables tucked into a neat coil. But all it takes is a morning of device swaps, a quick notebook grab beside your keyboard, or a single phone charge, and suddenly cables are dragging across your reach, knocking pens off the edge, or knotting under the surface the instant you adjust your chair. If your clean desk keeps ambushing you with surprise cable catches or a dangling charger tangling with your leg, the setup isn’t working as well as it looks. Without real cable management, every reset is an obstacle course—and the clean-up never holds past lunch.

    Why cable friction wins, even when your desk looks tidy

    Surface organizers and drawer units fix visible clutter, but cables resist easy order. Every ordinary move—plugging in, pulling a device closer, adjusting your monitor—turns unmanaged cords into active friction. Loose lines swing into your elbow space. Power cables drag behind trays, slowing every pull of the mouse or keyboard. Moments lost untangling, pausing mid-task to unhook a catch, or scanning for the right charger are small, but they derail your focus and pile up over the week.

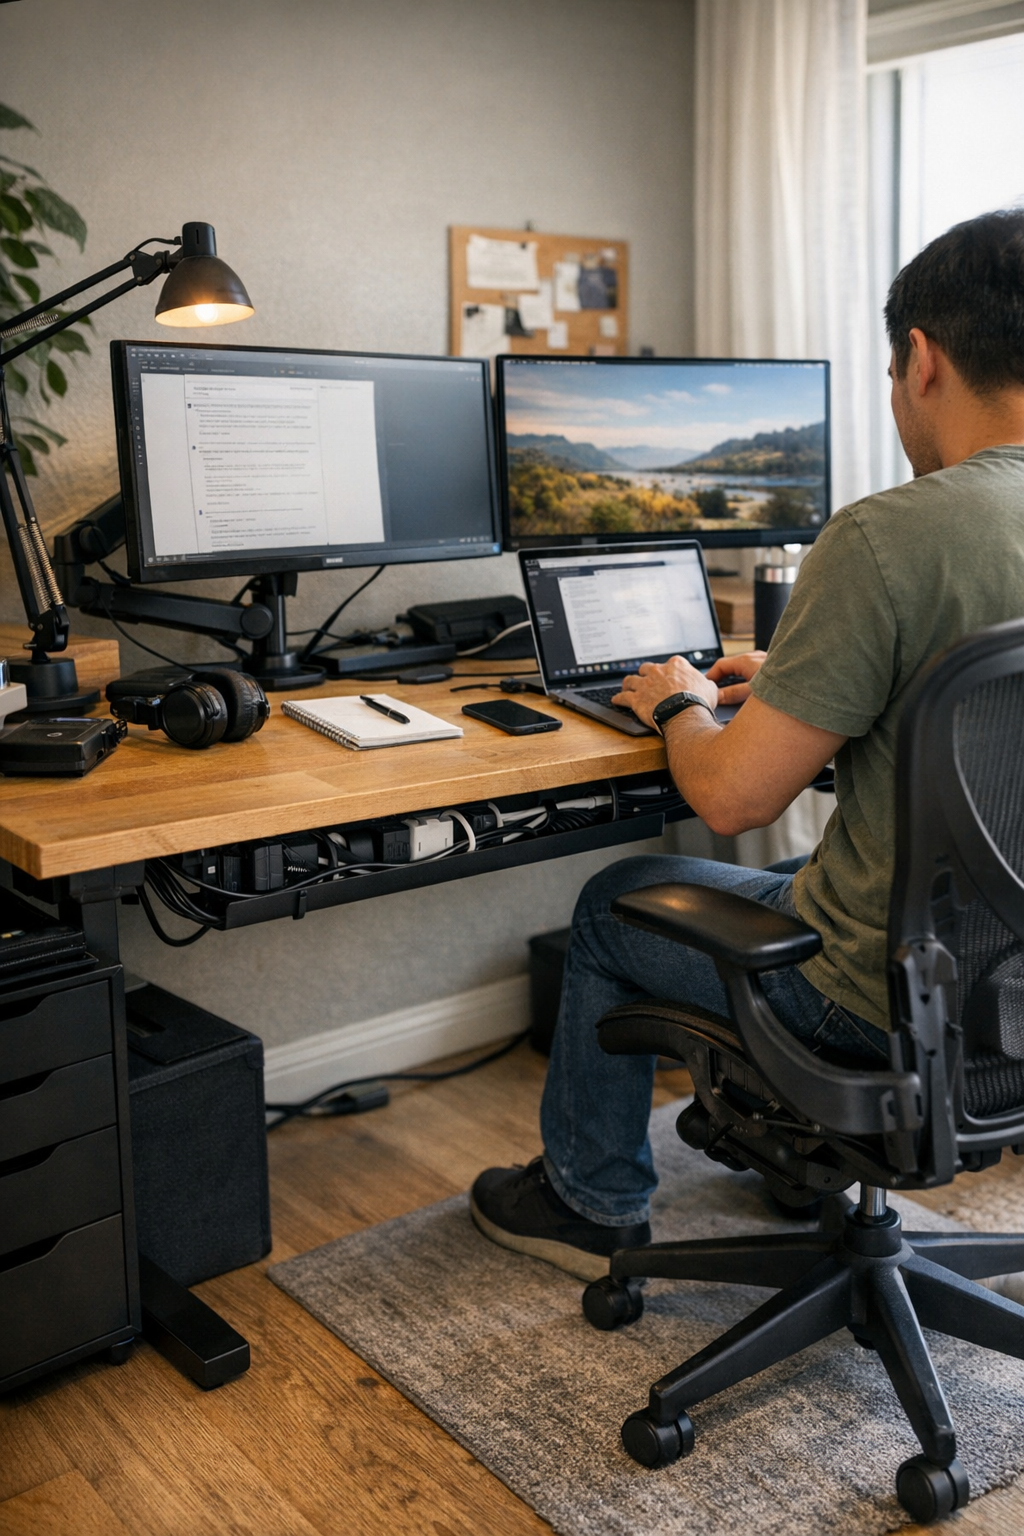
    Even with adjustable arms or under-desk storage, cables often invade the exact zones you need clear: the stretch for your notebook, the reach under a riser, or the pathway between leg space and foot rest. Trays, clips, and boxes might look disciplined at noon, but they rarely last through a day of plugging and unplugging. By late afternoon, most workspaces settle back into low-level cable chaos—just neat enough to pass, but never easy to use.

    Surface fixes vs. the test of actual cable movement

    Most “tidy” hacks struggle when the setup is in motion. Looping cables into a box or securing them in snap-on clips streamlines photos, not work. Try swapping out an external drive or shifting your screen toward the window and you’ll find yourself wrestling those same cables again—nothing about your reach paths or movement zones has changed. The more often you switch devices or reposition gear, the faster the surface fixes unravel. It’s not about being tidy for inspection; it’s about whether you can actually move through your routine uninterrupted.

    This is where under-desk trays and sleeves come in. Instead of organizing by hiding, you route cables on a path that matches how you use the space—anchoring them below, letting them flex just where you need connection, and keeping both knees and elbows unblocked. Devices plug in without reaching under a mess. An open desk edge and a monitor arm feel usable, not booby-trapped. Installation takes real attention: anchoring both ends, checking that nothing sags into leg space, measuring the distance so cables stay taut but not tight. The payoff is clear fast—no more pausing as a cable swings loose or snags a drawer, and no slow accumulation of cable spill under the desk.

    The daily test: Cables move, the desk should keep up

    Real workstation setups are rarely static. If you work between dual monitors with a laptop dock perched at the margin, or shift from typing to note-taking beside your keyboard, you know how easily one loose cable can break the flow. Drag a notebook out, swing a drawer open, or roll your chair back—and a single USB or HDMI cord flops into your path, forcing another micro-reset. The desk looks fine, but you burn time after every small adjustment, tracing and unkinking lines, nudging the dock back, or retrieving a fallen charger. By midweek, you’re repeating these moves by muscle memory—the untidy desk beneath the tidy surface.

    When cables follow a set route—anchored in a tray or sleeve, ending only where you connect—friction drops away. You can slide your chair, flip open a drawer, or adjust screen angle without having to hunt for a lost cable or rescue a charger from underfoot. The improvement isn’t cosmetic; it’s stability that survives actual use, day after day, not just at morning reset.

    What committing to cable management really shifts

    It took one too many tangled mornings to finally anchor every core cable in a slim under-desk tray. The thickest cord—a heavy monitor line—got locked behind the tray, immune to swings or accidental snags during even the deepest desk reset. Setting the tray five centimeters off the back edge put every connection within easy reach, while eliminating any chance for cables to pile up dust or slip below. Suddenly, charging a phone or moving the monitor started and ended in seconds. No more dragging a cord across the desk or unplugging the wrong device by accident. Each move—screen tilt, chair pivot, second keyboard plugged in—happened without a single cord interrupting the motion.

    The change was obvious in action, not just in looks: even as the workflow grew hectic—files scattered, hardware swapped, monitor arms repositioned—cable friction simply vanished from the routine. Tasks reset smoothly, and maintenance dropped to the background. Reaching to grab a notebook or spinning a drawer open never triggered the familiar cable-snag reflex.

    Quick troubleshooting for live cable issues

    • Constantly re-anchoring cords? Target both ends with under-desk trays or adhesive mounts. Give just enough play for device movement, but not enough slack for bunching or dangling in the active workspace. Surface boxes only mask the friction, not fix it.
    • Frequent device swaps? Lean on drop-in or open cable trays, not closed channels. These let you reconfigure cables on demand without overhauling the whole desk each time.
    • Ignoring cable nests under the desk? Tangles below gather more than dust—they snag feet, block casters, and gradually strain ports and connectors. Addressing the mess under the surface prevents both sudden interruptions and the slow build-up of wear.

    Recognizing real improvement—not just a neater look

    Winning at cable management isn’t about chasing an empty desktop; it’s about a desk that stops fighting your every move. The true sign: you switch from one device to another, adjust your chair, or reset for a new work session without a single cable entering your thoughts or blocking your path. It’s the absence of that recurring pause—the one where you wonder why you’re detangling again, even though everything looked organized at the start of the day.

    The best workstation setups become invisible—because they don’t force you to think about them. If a tidy desk still pulls at your sleeve, interrupts your reach, or makes you second-guess a quick device plug-in, start by tracking the cable paths. Removing recurring cable friction unlocks the benefits of every other desk upgrade—so each part can finally do its work, no matter how many times you reset.

    Explore the full WorkBasic collection

  • How Modular Wall Systems Transform Workshop Flow and Efficiency

    Spaces don’t fall apart overnight. The slow disaster in most garages, workshops, or catchall utility corners happens in plain sight—creeping in, not in a single event, but through routines that quietly bend and crowd the area week after week. Day one, everything feels ordered: gear on wall panels, shelves loaded, tool carts docked, overflow hidden inside cabinets. Then the cracks appear. Carts migrate into footpaths. Tools go missing in their own home. The line between “it fits” and “it flows” becomes clearer with every blocked step and every project you put off just to clear space.

    Why Clutter Isn’t the Real Villain—It’s Friction That Kills Productivity

    It’s easy to judge a setup by its storage capacity, or how peaceful it looks behind closed doors. But in practice, utility isn’t about hiding. It’s about movement—can you reach what you need without a detour, and put it back in seconds without debate? Every extra sidestep adds up. Each time a tool lands “just for now” on the nearest cart or bench, that’s a sign: the system isn’t supporting your routine, it’s subtly getting in the way.

    The friction sneaks up. The once-clear aisle now requires bumping a cart aside just to grab a wrench. Cabinets, originally flush to the wall, block off flow when their doors open into narrow walkways. Simple retrievals become slow dances around corners and obstacles, and resets stretch further out because each return is another mini-task, not a smooth motion.

    When Order on Paper Breaks Down in Real Life

    Blueprints give you “a place for everything.” In daily use, you meet the compromises head-on. Maybe the garden cart “fits” between the mower and the shelving—until you try weaving through with bags of soil, stepping awkwardly or shifting the cart out of the way each time. What should be a passing thought (“I’ll move this later”) turns into a cycle: more items pile up in mismatched zones because putting things back is always slightly more involved than it should be.

    Those micro-hesitations and daily workarounds are signals from your setup. Every time you pause—move a bin, consider where to stash a tool, or let something rest in a “temporary” spot—it’s your system adding resistance. Over time, those small problems lead to a major slowdown. Returning tools becomes a chore, and you catch yourself working around your own layout instead of with it.

    Cabinets, Carts, and Wall Racks—Why Looks Aren’t the Same as Usability

    Closed cabinets and storage chests give that tidy, uniform finish—at a cost. The process to retrieve a tool becomes: walk over, open the door, remember which drawer, dodge around spilled-over carts, and reverse the whole thing just to put it back. It feels functional, but those extra movements eat away at momentum. If every cabinet arc or drawer pull blocks part of your only walkway, the space isn’t working for you.

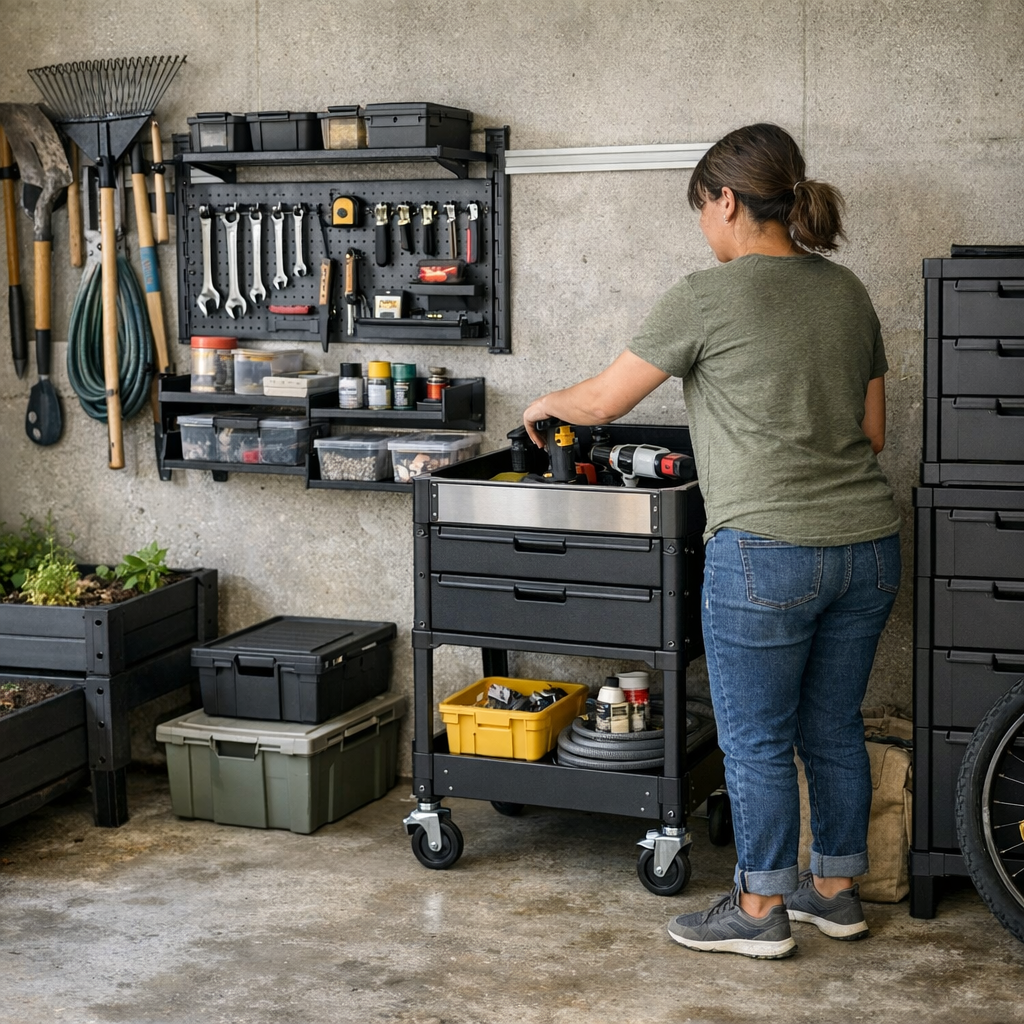
    Open wall racks and modular panels look messier but tell a different story if they’re tuned right. When hooks actually match your grab-and-go tools, resets shrink to near-zero. Glance up, tools at eye level—done. But overload the panel or ignore your real rhythms, and you’ve just pushed the mess where everyone can see, compounding friction and making resets even trickier.

    Small Shifts That Reshape the Space

    Most improvements aren’t sweeping overhauls—they’re tight, specific moves. Raising a utility rail by 10 inches can clear a crowded bench and put your go-to tools where you naturally reach. Replace low shelves with a single horizontal panel, and suddenly your cart glides through clean space that isn’t blocked by bins or corners. The shift feels physical: no more shuffling, no pausing to reroute. The difference? Resetting the space nearly disappears from your mind because nothing interrupts the flow.

    Keep an eye on dead corners—if a certain spot always collects stray items, it’s likely serving the wrong purpose. Mount a basket or drop in a slim bin right there, and overflow vanishes without fanfare. The best tweaks are subtle, but their effect on daily friction is immediate and ongoing.

    When Routine Struggles Signal a Layout Problem

    You feel it before you see it: tight corridors, carts squeezed out of alignment, that “one spot” where everything lingers on its way elsewhere. Reaching for a tool and finding a stack blocking access is not just a minor hassle—it’s a red flag that the arrangement is piling on extra steps. If you hesitate—or regularly wage small battles to get at what you need—it’s time for a reset, not just more storage.

    Ask yourself: Was yesterday’s clean-up a smooth glide, or a multi-step puzzle? Were you caught moving three things to put away one? If your process is a constant reshuffling act, the system is leaking efficiency and inviting new clutter with every use.

    What Actually Makes a Setup Work—Not Just “Appear” Organized

    Strong setups erase decision fatigue. There’s no sorting, no debate—just reach, use, and put away on autopilot. This isn’t about hiding every tool, but about actually aligning high-use items with open paths, keeping doors and corners clear, and tucking rarely-used supplies into deep-storage zones that don’t disrupt your rhythm. Resets get so quick you stop noticing them.

    Pay attention the next time you’re working—are you thinking about the project, or are you strategizing how to maneuver through the space? The less mental effort spent managing storage, the more productive (and less stressful) your routine becomes.

    Quick Setup Stress Tests and Practical Zone Fixes

    • Reset Timer: Wrap up a regular job and clock how long it takes to return everything. If it’s over a couple minutes or involves repeated shifting, focus on that zone’s layout.
    • Walkway Audit: Stand in the main path—can you cross it without sideways steps or stops? Even a foot-wide cleared lane, gained via wall-mounts, opens the whole space up.
    • Overflow Hotspots: Notice where piles always reappear. Add a grab bin or customized rack right there, so overflow lands where it makes sense rather than choking other areas.
    • Favor Habit Over Hype: Tailor setups around what you actually reach for, not just what looks sharp in a catalog. If the system can’t flex with your routines, no amount of sleekness will fix the friction.

    Forget aiming for a space that’s just “organized.” Focus on a setup where moving, grabbing, and putting things back is frictionless—where nothing blocks your rhythm and overflow stops piling up in dead corners. The reward isn’t just a cleaner look; it’s reclaiming the time and mental bandwidth lost to constant rearranging and reset delays.

    Explore modular storage and organization solutions at StackNest

  • Why Structured Entryway Storage Beats Open Bins for Busy Homes

    The moment you finish clearing the entryway, real life ambushes the system you worked so hard to set up. It takes just one rushed Monday morning for shoes to migrate out of their neat line, for tote bags and backpacks to reclaim the bench, and for the “catch-all” bin by the door to swallow stray keys, gloves, and mail. What starts as a hopeful setup unravels in real use: the rows widen, the piles build, and a misplaced leash or solo glove triggers the same last-minute search—again. With each unplanned drop or hasty return, the entry loses its order and returns to its default setting: high-traffic clutter, blocked passage, and slow, distracted exits.

    When Day-to-Day Use Overwhelms the Setup

    Open bins and trays seem practical in theory—just drop and go. But in repeated, rushed routines, those wide-open containers turn into collection points for clutter and temporary “just for now” placements. Monday’s backpack lands on top of Sunday’s shoes; Tuesday adds lunchboxes; by midweek, the bin hasn’t just filled—it’s collapsed as a usable system. Now, every trip through the threshold means digging through mixed layers: gloves hidden under yesterday’s mail, keys stranded beneath a soccer cleat, and a leash that’s migrated out of sight just when it’s needed most.

    The Real Cost of a Collapsing Drop-Zone

    No one schedules time to retrieve lost things in the entryway, but daily friction adds up. The penalty isn’t just visual mess—it’s a routine slowdown, especially in moments under pressure. You’re sent scrambling for a glove at the last second, shuffling bags off the bench to make space, or squeezing around stray shoes that have drifted into the traffic lane. What was meant to simplify departures instead creates resistance points that waste time and attention exactly when you’re heading out the door.

    Why Open Storage Breaks Down in Real Entryways

    In nearly every home, the entry is a squeeze point—part path, part drop zone, always at risk of overflow. Benches that promise a place to sit become landing strips for gear that never fully leaves. Floor bins seem smart on move-in day, but once daily use begins, they’re quickly buried by the very things they’re supposed to organize. The travel path tightens as shoe rows spill out and bags settle wherever there’s space. Returning one extra item can block a small hallway, and a “temporary” dump next to the bin sticks around all week. Even wall racks that look great during a reset can’t stop bags or coats from drifting back to benches or the floor once actual routines reassert themselves.

    Temporary Fixes, Permanent Interruptions

    The cycle is familiar: an overflow bag perches “just for now” on the edge of the bench, a couple of shoes wait by the door for tomorrow’s use, and suddenly, these stand-ins become permanent obstacles. Each pass-through adds one more item left slightly out of place, until navigating the space means bumping, stepping sideways, or moving things just to walk through. Resetting the zone gets postponed—until the buildup forces a messy, inconvenient reshuffle right before guests arrive or someone needs to rush out the door. Would-be “easy access” devolves into semi-permanent blockages and extra work every single day.

    Structure: The Quiet Fix for Repeated Friction

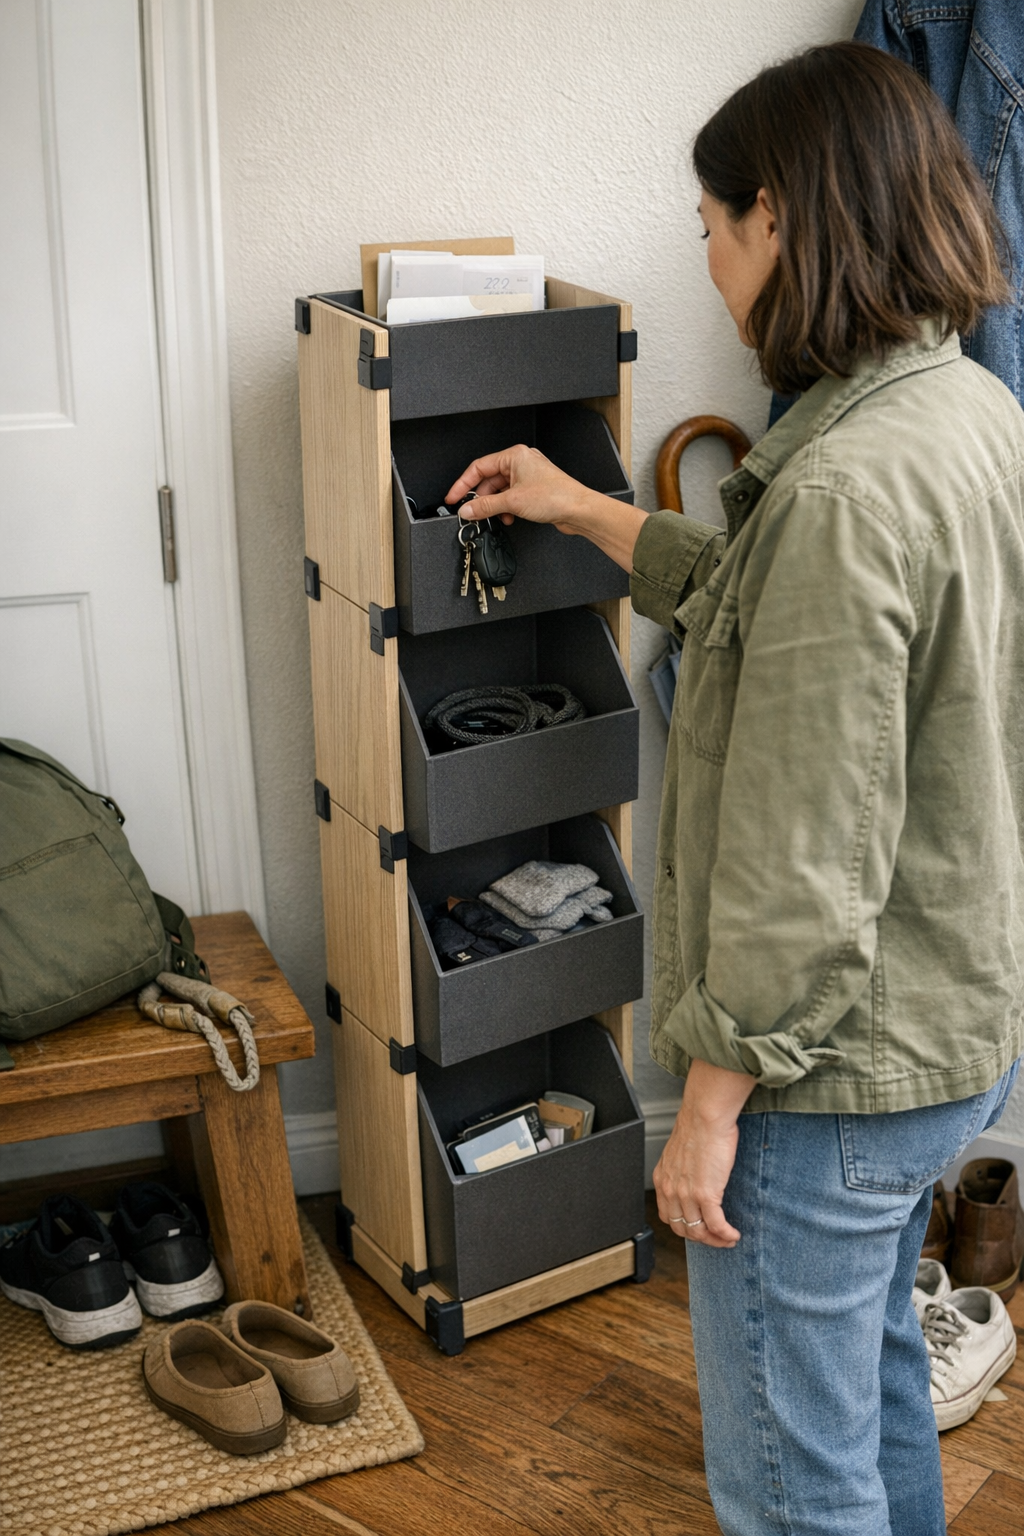
    Open options collapse under the pressure of daily routines, but structured solutions reintroduce control. Adding real structure—through modular cubbies, vertical racks, or labeled slots—turns a dumping ground into a working system. Every key category gets a physical boundary: keys go in a slot, not a heap; gloves fit the top compartment; shoes are corralled in defined rows instead of pooling by the door. The magic isn’t the formality—it’s the way each belonging gains a reliable address, cutting out the constant hunt, the pile reshuffles, and the stalled movements these all trigger in a cluttered entryway.

    Turning Dump Zones into Designated Zones

    • On re-entry, you drop your keys straight into a labeled slot, not a slushy communal bin.
    • Gloves slip into their top cubby, bypassing the cycle of being crushed beneath backpacks or groceries.
    • Shoes aren’t scattered in a loose row along the wall or blocking the walk path—they live upright, side-by-side, always visible and reachable.

    The result is plain: less tripping, no more bench buried in yesterday’s bags, and the access lane staying, for once, actually accessible. Resets are faster because less has drifted out of place—nothing is hiding, and nothing has to be rescued or re-sorted just to leave or return.

    Real Entryway Moments: Where Structure Pays Off

    Picture the weak points: weekday mornings, arms full of work bags, lunchboxes, or groceries, kids scattering in different directions, the dog ready to bolt out the door. The wrong setup means someone’s stopped, shuffling through a pile for the missing leash or tripping over a wedge of shoes in the path. But when structure sorts the entry—leash in its own slot, kids’ shoes in their vertical rack, mail stacked where it won’t vanish—chaos doesn’t stick and access doesn’t stall. Movement through the zone stays clear, even at peak times. Instead of the entry acting as a bottleneck, it works as a checkpoint: everything needed, nothing in the way.

    The payoff: Fewer missed items, less last-second scrambling, and movement that isn’t constantly blocked by spillover gear. When the bench is empty enough to sit on, when walkways hold the line against clutter, and the dog leash is never buried, the system is truly working for your routine—not adding hidden work to it.

    Small Adjustments, Noticeable Uptick in Ease

    Even one or two changes—like a wall-mounted rack for leashes, or vertical shoe slots near the door—can break the old pattern. Labeling storage by category tightens the return flow: everything gets put back right, and nothing disappears into the heap. For small or high-traffic entryways, this category clarity and vertical separation stop the midweek slide into confusion and save time on every pass-through.

    The Real Difference: Looks Nifty vs. Works Every Day

    Entryways that just look organized offer a false finish. What matters is whether the setup survives actual routines—bags dropping, shoes multiplying, hands full, resets delayed. Systems that merely “hold” items buckle under pressure, but a single layer of added structure—modular cubbies, wall hooks at the real-use height, or a vertical shoe rack—changes how the space performs after the first wave of daily use. The right storage doesn’t just tidy the view; it keeps the pulse of the threshold clear before the next scramble, so routines stay fast and friction stays low—even if perfection is always a few steps away.

    See more practical entryway storage solutions at Betweenry.

  • Streamline Cat Care by Storing Supplies Right Where You Need Them

    The difference between “running smoothly” and “wearing thin” in any indoor-cat routine usually starts with one small mistake: putting the essentials just out of reach. Grab the food bowl, and you’re suddenly making a side trip to the bathroom to hunt down the scoop. You’re topping off water from the kitchen while the refill jug sits hidden under the hall sink—just distant enough that you skip it until the next complaint. It doesn’t look like a problem at first, but by midweek, those indirect routes—fetching litter from a closet, tracking down wipes across two rooms, sliding back boxes—turn every reset into an interruption. Surfaces still appear calm, but underneath, each refill or cleanup brings back the hassle of split routines and missed steps. What passes for “organized” on day one quietly becomes a friction loop by Friday in any real home with a cat. StillWhisker setups are built to break that cycle early.

    Why Does Point-of-Use Storage Matter So Much for Cat Supplies?

    The drag on your time—and your patience—doesn’t show up in a single, glaring mess. It shows up in the disruptive pauses: standing in one room while realizing you need something stored two rooms away. Stashing supplies in closets keeps your place looking tidy for visitors, but as each detour stacks up—especially on repeat—you start working around your own setup, not with it. The real friction isn’t just the extra steps; it’s the routine losing all flow.

    • You reach for the kibble scoop, but it’s buried in a bag outside the room. Now your cat is persistent, and you’re sidestepping paws while searching drawers.
    • The plan was to wipe scattered food after breakfast, but the wipes aren’t here. By the time you return with them, crumbs have multiplied—and so has your annoyance.
    • Litter tracking appears at the doorway, but the handheld vacuum isn’t where it should be. The odds of leaving it “for later” climb sharply each time you need to dig for a tool.

    Each interruption seems minor, yet together they unravel any appearance of control. The cost isn’t just time lost—it’s the silent buildup of avoidable friction, dragging routines from automatic to laborious.

    The Hidden Tradeoff: Looking Clean vs. Working Smoothly

    We all want living spaces that look settled and calm—especially with pets around. But there’s a catch: hiding litter behind closet doors, stashing scoops in drawers, or relegating water jugs under utility sinks keeps rooms looking bare at the expense of function. When you separate supplies from where you actually need them, each routine picks up invisible baggage—a few extra steps, a few delayed resets, a little more “not now” every day.

    Here’s the pinch: the more attractive your hidden storage, the more likely your system quietly adds work on the back end. An organized closet feels neat until you’re detouring for something the moment you need it, while a caddy right beside the box or bowl looks slightly busier but keeps routines on track. What works better isn’t what hides more, but what shortens the distance from intent to action—without forcing yet another round of “I’ll tidy this up later.”

    Common Spots Where Supply Placement Breaks Down

    • Litter Storage: Litter bags shoved in a back closet force you into hauling refills at awkward moments—making last-minute top-ups and emergency resets feel like chores worth postponing.
    • Feeding Tools: The bowls might always be in place, but the right scoop or measuring cup often migrates out of arm’s reach, turning what should be a one-hand motion into a two-room expedition.
    • Water Refills: If the jug or pitcher isn’t right at the water station, bowls run low longer, and fresh water gets delayed—right up until the cat starts announcing the problem.
    • Wipes and Cleaning Supplies: When cleanup wipes or vacuums aren’t right near the scene, small messes linger or spread; you catch yourself crossing the house to fetch them and sometimes just let the spot wait, “just for now.”
    • Toys and Rest Mats: Toys and mats drift steadily toward high-traffic zones. If there’s no easy drop spot at hand, objects collect under furniture, triggering that familiar “search and rescue” routine every week.

    Real-Life Routine: How Small Gaps Add Up

    Picture a standard morning: you reach for the food scoop but it’s with yesterday’s litter bag in the hallway. By the time food’s down, you spot kibble on the mat edge—except the wipes are deep in the bathroom. When you get back, your coffee is colder, and the scatter has made its way across the floor for a second lap, courtesy of impatient paws.

    A five-minute routine has turned into fifteen minutes of reshuffling, solely because supplies aren’t anchored where resets happen. None of this looks dramatic, but multiplied by days and weeks, it frays the line between “well-organized” and “always one step behind,” even if everything looks calm on the outside. Visually, the room reads clean; practically, it’s an obstacle course of micro-delays.

    Group Supplies by Task, Not Just Appearance

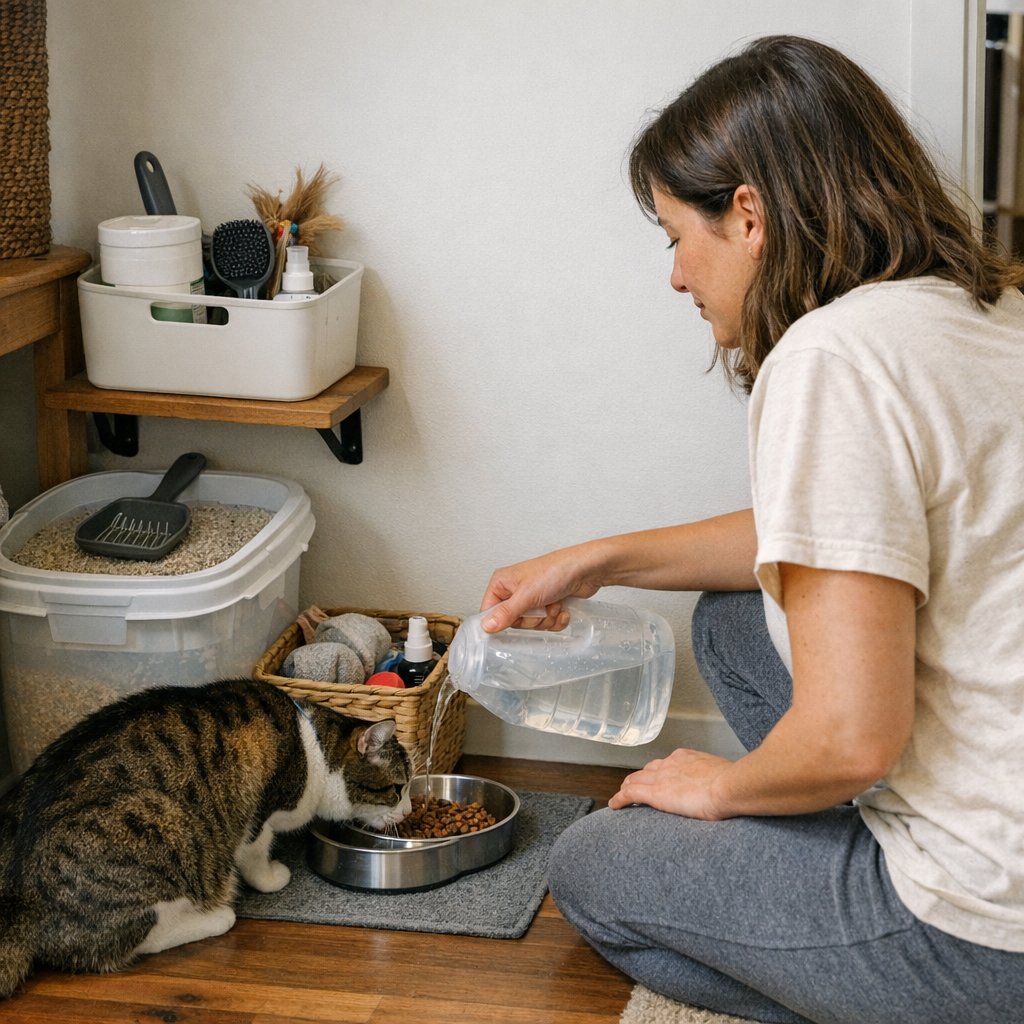
    Bare counters and hidden bins look organized, but only if you ignore the slowdowns. The setups that actually survive repeated use are built around where each task starts or finishes—not just what looks calm. Stash a sealed tub under the box, keep wipes and scoop together in a basket or caddy you can grab with one hand, and accept a little visible “clutter” in exchange for a routine that doesn’t drop you out of stride.

    • Litter, scoop, and wipes within arm’s reach of the litter box—preferably in a bin or caddy you can carry or clean out without scavenger hunts.
    • Feeding cup, spare food, and cleaner slotted right by the food station—a slim bin under a table wins in tight spaces.
    • Water jugs belong next to or above the water bowls, not across the house. A closed basket or shelf neatly tucks it away while keeping it present enough you never skip a mid-day top-off.
    • Keep a tray or shallow basket near the main play area—grab-and-drop toy returns cut down on the spread and lessen the “where’s that ball?” spiral.

    The goal isn’t hiding every sign of pet life—it’s to make each reset quick enough that tomorrow’s mess never becomes an excuse to let today’s slide.

    Examples of Structure That Withstand Real-Life Use

    Practical storage doesn’t need to look custom-made. An airtight bin under the box saves you two-thirds the time of refilling from a closet down the hall. A lidded basket shelved above means wipes and bags are there at the instant you spot the mess, not fifteen minutes later. For feeding, a caddy tucked just under the feeding zone corrals scoops, spare mats, even brushes—so you stay on track instead of peeling off for missing tools at every step.

    One rule holds up: choose containers or baskets that open with one hand and can be closed without fighting the lid. Snap tops, slide-outs, or baskets that don’t jam are worth more than any fancy box—especially when a tail or paw has made you a little clumsier on the fly. Systems that stay easy in daily movement are the only ones that hold up when routines are repeated under pressure.

    Bumping Up Against Small-Space and Shared-Space Limits

    In apartments or tight homes, hiding supplies feels mandatory—until the first time you stall out mid-routine because a bin is out of reach or a lid needs a free second hand. A closed basket in open shelving near the box or food area holds the line between calm and clutter, but too much effort to access, and you’ll soon skip the process “just this once.” Those skipped steps always boomerang by week’s end.

    The best setups balance tidiness with single-step reach-in access: containers that don’t require untangling or clearing other items first. In shared rooms, restrict supplies to a dedicated bin or basket per major cat zone; otherwise, you’re chasing your own system from room to room in a daily shuffle. Order that asks for too much obedience won’t last.

    How to Spot the Early Warning Signs of Inefficiency

    • You keep interrupting your own day to chase supplies, or tidying messes that would have vanished if tools were closer.
    • Tools left for visual calm keep migrating back to the spot they’re used—clearly trying to fix the routine you won’t admit is broken.
    • Water bowls drop below “fresh” before you notice, and litter refills get delayed until the last possible moment, not because you forget—but because the storage location adds resistance.
    • Cleanups happen only after problems are visible, never as part of your natural reset rhythm—showing your structure is built