Blog

  • Why Car Organization Fails Over Time and How to Fix It

    Most cars only look organized until the third or fourth time you have to get in and out in a single day. That’s when the small breakdowns start—right as you’re juggling your phone, charger cable, a bag, and whatever’s rolled into the footwell since yesterday’s drive. The problem isn’t obvious the first time. It’s obvious when you reach for your phone as you settle in, only to twist awkwardly around a seat edge or fish under a mat for a charger line that’s suddenly out of sight. The neat appearance slips the moment routine use collides with your car’s real layout.

    Where Daily Routines Uncover Hidden Friction

    That new organizer, dash pocket, or console tray looked like a fix—until you actually started using it day-to-day. Neatness can fake reliability, giving you just enough satisfaction to ignore the coming slowdowns: blocked cables at the seat rail, loose bottles trapped under mats, or your phone wedged deep in a pocket you can’t reach without twisting. These aren’t chaos. They’re the small, recurring frictions that quietly waste seconds, unsettle your motion, and make you think twice about even keeping things tidy.

    Repeated Reach, Same Snag

    If you drive daily, you know the script. Every time you return from errands, you aim for quick re-entry, hoping your phone and charger will be in reach. Instead, you find the cable knotted around a floor anchor, or your phone hidden so deep in a compartment you have to dig and twist—just to grab what you use most. It barely slows you down the first time. But after several stop-start cycles, the frustration isn’t minor; it’s the main reason clutter creeps back and “organization” starts to mean extra hassle.

    Visual Organization vs. Everyday Flow

    A car that looks organized isn’t always easier to live with. Even purpose-built organizers and low-profile bins can create new points of friction where you least expect them:

    • Cables routed “out of sight” now snag under moving seat tracks every time you reset your position.
    • Floor mats catch bottles or wrappers under their edges, shifting debris with every brake and turn until cleanup feels endless.
    • You tuck your phone away for neatness, then have to reach blindly across a gear shift—sometimes dragging the charging cord into a new tangle at every stoplight.

    These aren’t dramatic failures, just a pattern of subtle slowdowns—from unloading groceries to answering calls—caused by setups that value appearance over repeated-use flow. Visual neatness, on its own, hides friction lines that real routines keep finding and exposing.

    Why Clutter Creeps Back

    The setups that demand reshuffling to touch the basics—phone, charger, sunglasses—become self-defeating. Instead of unblocking your path, they bury what you need under what you’re trying to keep hidden. Within a few days, your high-use items migrate to “temporary” surfaces and door pockets, turning even the most organized car into a patchwork of quick fixes and repeated trade-offs.

    The Cost of Overlapping Paths

    Notice how everything compounds on a busy Saturday: back-to-back errands, someone else adjusting your seat, and every zone competing for reach. The charger cable ends up wedged under a newly moved seat; your cleanup wipes now block the only free charging port; containers drift into footwells, demanding a shuffle before you can even get in. This is when the difference between a thought-out setup and a surface “fix” gets brutally clear. Overlap between storage, charging, and loading zones turns each retrieval into another tangle, doubling the time you lose in routine motions.

    When Every Attempt Slows Down

    The hidden friction isn’t the initial mess—it’s every extra second spent untangling or shifting things mid-flow. A phone mount inches loose after each drive, a bin slides into foot space, or a cable vanishes behind a seat bracket—none of it seems big alone, but layer them together and you’re less likely to bother keeping anything tidy.

    What Actually Improves Daily Car Use?

    The difference comes down to setups built around use, not just appearance. Changing a cable-trapping side pocket for a wide charging tray alongside your main seat makes repeated entry startlingly easier:

    • Your most-used items—phone and charger—live in plain reach, right beside you, never buried or grabbable only at a stretch.
    • Cable routes stay intentionally clear of footwells and seat rails, so loading a bag or sliding into the seat doesn’t drag a cord into a new knot.
    • The return path for high-use items is obvious and repeatable—no guesswork, no hunting.

    This is how real friction stays out and your car stays usable. The magic isn’t in having more bins; it’s in having the right paths and placements that hold up through actual, repeated motion. The best setups shrink the cleanup loop and stop clutter from sneaking back in by giving each item an uncontested home that doesn’t block what you do next.

    Recognizing When Your Setup Needs a Rethink

    Signals that your structure is failing are rarely visible from the driver’s seat alone. Notice the moments you’re untangling a cable for the fifth time in one day, shifting a container with your knee every entry, or hunting for your phone at the end of every loop. If these cycles repeat, it’s not a “clutter” problem—it’s a layout problem. Neatness hides friction, but real function always finds a way to reveal itself through repeat annoyance.

    Out of Sight, Out of Reach?

    Pockets and cubbies that keep things hidden often slow you down when it counts: essentials mix with junk, and each reach gets just a bit clumsier. If grabbing your charger or wipes feels like an ordeal, or if you find yourself dreading the process of stowing the same “regular” items, you’re working against your own car—regardless of how tidy things look right after a reset.

    Building a Structure That Lasts

    The most reliable setups aren’t minimalist or flashy—they’re structured around what you truly reach for, and they stay stable after dozens of routines, seat changes, and weather shifts. When must-have items always land in a visible, unblocked spot with a repeatable path back, clutter doesn’t get to creep in. Place those high-use objects just outside busy “travel” corridors; route cables so they can’t snag or disappear; give up on perfect concealment if it means repeated slowdowns later.

    Adaptability Over Perfection

    No single organizer, mount, or cover solves everything, and most setups fail not from lack of tools but from mismatched structure. Focus on alignment: charging, loading, dropping off, everyday cleanup—each needs an unblocked lane. That’s what keeps your car genuinely easier to live with, even after five errands, one passenger, or another round of forgotten water bottles under the seat.

    For more practical solutions and car-use improvements, visit DriveWellSupply.

  • Why Re-Checking Lighting After Power Restores Ensures Safer, Clearer Spaces

    Most indoor lighting problems wait until routine kicks in. A hallway looks bright at a glance—but one step in, your heel slows at a shadowed stair edge or faded landing. In the bathroom, overhead bulbs promise “full illumination,” but the moment you reach the mirror, glare hits your eyes or your reflection slips into shadow, making basic grooming awkward rather than effortless. These aren’t rare annoyances—they’re clear signs that lighting comfort doesn’t come from wattage or first impressions, but from how a fixture lines up with actual, everyday use.

    Why Lighting Problems Hide in Plain Sight

    Rooms fool you at installation. The day a new fixture goes up, the lounge, corridor, or stairway reads as “complete.” But routines expose misses: a semi-flush hallway light shines straight down, casting the center bright but leaving corners dim and alcoves in shadow. A bathroom sconce looks gentle from afar but suddenly throws unwanted glare right into your morning routine. These misses don’t announce themselves on day one—they trip you when you’re moving fast or relying on habit, not when you’re standing still admiring the upgrade.

    The problem isn’t brightness—it’s coverage and direction. The wrong fixture leaves part of the room underlit, shadows in high-use corners, or glare where your eyes need comfort. You spot it only when you resume real patterns: walking the hall at midnight, using the kitchen counter, or leaning in close at the bathroom mirror.

    Hallway and Stair Lighting: Looks Bright, Moves Slow

    Hallways and stairs are classic for this. Stand at the entrance and the area looks flooded with light. Start walking, and you slow down at the landing or stair turn, feeling the edge blur into shadow or the wall go dim. The trouble isn’t how much light—the trouble is where it falls. Ceiling fixtures often create a bright central spot but miss the critical path around corners or onto each stair’s edge. Subtle shadow bands make people hesitate or miscalculate footing.

    If you want safety, don’t just assess standing still. Walk the actual route in real lighting—notice where you slow, hesitate, or feel a step less visible. Often the fix is not buying another fixture, but tweaking placement—a broader flush mount over the bend or repositioned ceiling light to hit the stair wall directly, softening those trouble spots and keeping pace steady.

    Vanity and Mirror Zones: Where Glare and Shadows Sneak In

    Bathroom lighting reveals its real character the first morning you use it. Over-mirror bars and ceiling globes often leave cheeks and eyes blanched while jawlines vanish into shadow. Glare jumps back from the glass right at eye level. The mirror appears well-lit from a distance, but up close, details drown or shift into awkward shadows. Daily tasks, from shaving to makeup, become a small battle against the light instead of a seamless step in the morning.

    The solution isn’t just dialing up bulb wattage. The gain comes from structural change—lensing that smooths the throw of a fixture, or a wall-mounted vanity light long enough to balance horizontal and vertical shadows. When the right light softens and broadens at the right height, grooming stops feeling like guesswork in a spotlight.

    Shadowed Work Surfaces: When “Bright Enough” Isn’t Useful

    Kitchens and laundry rooms often fail the real test: task surfaces end up shadowed by your own body, even in “bright” rooms with modern panels. You stand at the counter, hands in the path of a ceiling beam, and the chopping board falls half in gloom. Reach for detergent, and the shelf edge is lost in murk. People slide sideways or settle for “good enough” visibility—until the next time a task slows down or a knife hesitates mid-chop.

    True fix? Don’t flood the room—target the actual working line. Under-cabinet or fixed task lighting makes the countertop, sink, or laundry shelf not just visible but easy to use from any angle, at any time. Problems vanish not with more light, but with better-placed, purpose-driven light.

    Real Patterns, Real Friction: The Cost of Everyday Interruptions

    Lighting failures aren’t always dramatic—they chip away gradually: a hallway walk that’s “almost fine” until one section feels risky at night; the daily workaround to dodge glare at the sink; hands casting their own shadows over a workspace that only seemed bright enough. These repeats have a cost: minor hesitation, eye strain, and a steady undercurrent of inconvenience that becomes background irritation.

    If your routine feels interrupted or awkward where the room “should” be covered, you’re witnessing the weak spots in real time. Most homes are left at “good enough” once the room registers as generally bright. But the difference between “lit” and “fits your life” is noticed only when routines expose the same shadow lines and glare points, again and again.

    Practical Fixes: Focusing on Placement and Structure

    Patching these gaps doesn’t mean adding endless fixtures. Improvement comes from noticing real-use patterns and refining coverage: swapping a narrow spot for a broad flush mount in a corridor, choosing a damp-rated sconce for horizontal light in the bathroom, or adding strip lighting beneath cabinets instead of hoping overhead bulbs will reach. Payoff is practical: smoother hallway crossings, safer stairs, no more dodging the mirror, and work surfaces that stay clear without awkward maneuvering.

    Tip: Test setups with real routines. Walk the hallway at night. Lean in at the mirror. Prep food or fold laundry as you normally do. Where you squint, pause, or sidestep, that’s your structural clue—not just a sign for brighter bulbs, but for smarter placement or fixture shift.

    Lighting That Adapts to Real Use—Not Just the Paper Plan

    Good lighting isn’t measured by empty-room brightness, but by what stops being awkward in daily use. The first days after power returns, or after new installs, are prime for catching the spots where the plan falls short—before those hidden shadows and glare patches settle into your norm. An adjusted fixture, a new zone of coverage, can change the story of how a space is used—making light feel less like a static backdrop and more like a responsive tool for actual living.

    For practical, repeat-use focused indoor lighting—covering hallways, stairs, vanities, work zones, and all the lived-in corners where light needs to pull its weight—visit LightHelper.

  • Prevent Masonry Drill Bit Overheating with Carbide Tips and Proper Technique

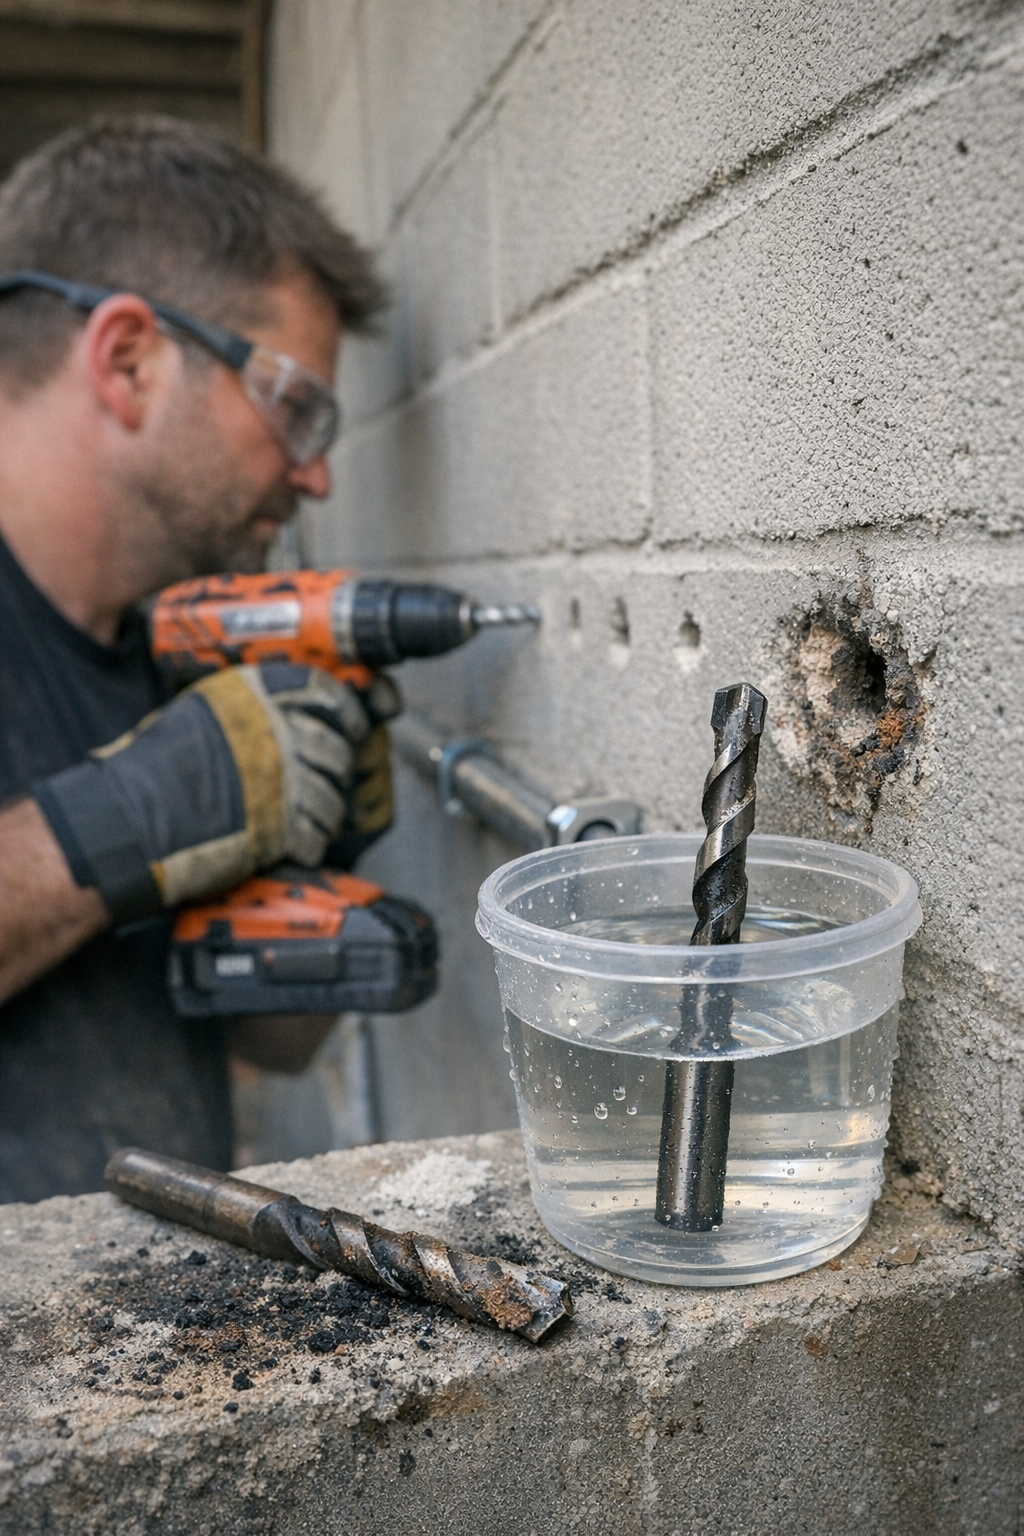
    Halfway down a row of concrete block, your drill buckles, the bit smokes, and progress grinds to a halt. You started clean—anchors ready, a fresh bit that looked promising in the lineup. But by hole seven or eight, every push on the trigger feels heavier. Dust comes out black and gritty, the bit’s tip is too hot to touch, and that perfect paint finish is left scarred by ragged holes. Most crews have lived this shift: what seemed like a routine string of fixings turns into an hour spent patching, swapping dull bits, and wishing you’d grabbed masonry-rated gear.

    The Subtle But Brutal Gap Between Bit Types

    On the bench, “all-purpose” and masonry-labeled bits look nearly identical. Toss either in your kit and you might not think twice—until you put them into real material, back-to-back. The first handful of holes into concrete tends to hide the difference. Steel bits blast through soft surfaces and even tease you with early success in block. Then, as soon as you’re locked into a repetitive run, their limits reveal themselves: the drill starts to whine, you force the tool more, and the bit edge starts to fail from heat soak not visible at first glance. Suddenly, instead of drilling, you’re stuck in a loop—bit stalls, holes get uglier, and your work tempo falls apart.

    Why Heat and Vibration Steal the Job from You

    Masonry work generates relentless heat—fast. Drill bits meant for wood or metal aren’t built for this: their edges overheat, metal blunts out, and dust turns dark within minutes. As temperature climbs, you feel more resistance, the tool starts wobbling, and your holes lose their precision. It’s not just about progress—now your anchors risk shifting or slipping. Even one ragged entry can lead to patching, redrilling, or worse, leaving behind a weak fastening point you’ll worry about long after cleanup.

    Carbide-tipped masonry bits are different for one simple reason: they’re made to stay sharp through the heat. The carbide edge cuts cleaner, dissipates heat faster, and resists vibration. You keep your rhythm, and holes stay true—so you’re patching less and moving faster, without burning through your forearms or your bit stash.

    Quick Scene: Swapping Bits, Feeling the Real Change

    Try blasting three holes in old brick with a basic steel bit. The drill labors. Dust is burnt. The result? Jagged, chipped entry points and paint you’ll have to fix. Switch to carbide mid-job—immediately less vibration, the noise smooths out, and round holes actually hold anchors snug. You finish faster, and the wall looks like you planned it—not like you fought with it.

    When Good Drilling Starts to Go Bad—Spotting the Decline in Real Time

    Picture it: fastening conduit runs, spacing brackets evenly along that block wall. Early on, every anchor seats cleanly. But as you move down the line—especially if you’re stubbornly sticking with a worn or generic bit—the problems compound:

    • The drill growls and chatters, fighting the material at each new hole.
    • Acrid heat rises—burnt dust, scorched bit tips, and the unmistakable smell of overheated metal.
    • Entry points chip out, paint flakes, and the holes drift off-round or widen unpredictably.
    • Dust gets gritty, black, sometimes even clumps or fuses inside the hole, making each pass harder than the last.

    By hole ten, you’re juggling patch compound and swapping bits, hoping you haven’t ruined the finish or the day’s schedule. Anchors sit loose. You try “wobble-drilling” to get through—but you know it’s a shortcut you’ll pay for when those brackets get checked down the road.

    Working On, Not Against, the Wall: How Carbide Bits Change the Game

    When you switch to carbide-tipped gear and add a rhythm of short pauses, everything clicks back into place. Trusted job habits make the improvement obvious:

    • The bit keeps its edge—hole after hole, 20 or more, with far less chatter or pressure needed.
    • Pausing briefly to brush out packed dust or tap the bit free keeps holes cool and sharp—five seconds you gain back tenfold by skipping later repairs.
    • Feel it in your hand: steadier runs, fewer tool surges, and predictable cut speed the whole way down a bracket line.

    When the bit stays sharp, the tool does most of the work—not your wrist, not your patience, not tomorrow’s patch list.

    Field Habits That Actually Save Time

    Here’s what separates a smooth run from a struggle:

    • Clear dust every few holes. Packed debris acts like insulation—trapping heat, blunting your bit, and ruining hole quality fast.
    • For relentless block or old concrete, dip the bit in water or use a mist sprayer. It’s a two-second move that stops overheating before it starts, giving you a real shot at making one bit go the distance.

    For a handful of holes in newer brick you might skip these. But facing a row of block or jobs where finish quality matters, these tricks mean less downtime, fewer broken bits, and walls that don’t betray the battle fought for every anchor.

    Real-Life Questions About Bit Overheating—Answered

    Why do my bits burn out so fast in concrete or block?

    Dense masonry builds heat inside holes way faster than wood or drywall. Standard bits can’t ventilate or deal with constant friction—they dull, slip, and burn, sometimes inside ten holes. Masonry-rated carbide bits, plus mid-job pauses, stay working longer and avoid that mid-job collapse.

    How can I tell a bit is cooked—before it ruins the wall?

    The drill starts dragging, vibration rises, and burnt dust or scorched tips show up quick. You’ll often smell a sharp, burnt odor before noticing visible damage. When these signs hit, stop—cool the bit, clear the debris, and don’t try to muscle through, or you’ll create more work later.

    Is water dipping just for pros, or does it help on basic runs?

    If you’re knocking out a couple holes in soft material, water isn’t always worth the fuss. But if you’re tackling a long line in older block or stubborn concrete, a quick dip or spritz between batches can extend bit life and preserve finish—actual time saved, not just for show.

    No Hype, Just Fewer Headaches and a Cleaner Result

    No drill bit is magic, and nothing bypasses wear forever. But in the chaos of real jobs—walls that aren’t perfect, anchors spaced by tape measure and instinct, paint that actually matters—the right bit, sharper drill rhythm, and small cooling habits take the fight out of the work. Instead, you keep your focus, your tools last, and the job wraps up without the telltale scars of a fight lost to heat and haste. Lose sight of these basics and you’re not just fixing ugly holes—you’re losing time, money, and trust in your own work.

    Explore Gumboll’s selection of masonry-rated bits and real job gear at http://gumboll.myshopify.com

  • Choosing Between Wall-Mounted and Floor Outdoor Storage for Lasting Use

    Every outdoor storage area looks organized on day one. But the real test kicks in after two weeks—a mower that blocks the side yard path, a batch of wet tools balanced on the garage edge, or bins creeping back into the space you swore would stay clear. What turns once-neat storage into an obstacle course isn’t just clutter habits or lack of square footage—it’s how the setup fails to keep up with actual, repeated use.

    The Hidden Reset Burden of Wall Storage

    Wall-mounted storage delivers that initial promise: tools in a row, open shelves, fresh space underfoot. It’s easy to believe the problem is solved—until real routines return. One not-quite-dry hedge trimmer takes over an entire shelf “just for today.” A muddy rake leans against the wall, never meeting its intended hook. By the third or fourth week, folding chairs have migrated—one on the wall, one by the stairs, neither fully stored but always blocking something else.

    Return friction sneaks in, day by day. The more awkward it is to rehang or stack an item, the more likely it’s left somewhere in-between—a bucket on the ground, a pair of garden shears exiled to a corner. Hooks get overloaded. The prime slots that once held seasonal gear get swamped with daily-use clutter. Soon, your “everything on the wall” plan feels like working around a fence line of half-returned, half-forgotten stuff that never quite goes away.

    Spotting the Setup That’s Working Against You

    • Leaning tools: Are shovels, rakes, or hoses forever propped at the edge of the wall rack, waiting for “next time” to get put up? If putting things back always feels like a small effort, the reset burden is already collecting in your routine.
    • Half-returned gear: Is there always a soccer ball, cooler, or pile of pool toys camped out on the patio steps or just inside the gate? If items block your movement or gather in not-quite-out-of-the-way spots, your system is slowing you down.
    • Stray bins and overflow: Bins meant for hooks end up on the ground. Dead corners become the default dumping zone. Over time, the “floor stays clear” promise collapses, and the layout forces a shuffle each time you walk through.

    Each tiny snag means a small reset, and those resets add up. Instead of one clear-out at the start of summer, you’re renegotiating with your own storage every weekend, just to keep the path open.

    Where Floor-Based Units Quietly Win

    Floor storage is rarely pretty—but in the spots where movement matters, it saves you. Lower friction, faster returns. Drop muddy boots in a bin. Stash a hose loop in a chest. There’s no balancing act, no puzzle to solve each time. That difference is loudest on weekends—when guests, kids, or yard projects pile up, the path by the garage stays open because items go straight into a bin or chest, not scattered across three different places.

    Bulky gear and folding carts get contained, not orphaned at the edge of the wall system. The area stays usable, not showroom-tidy but clear enough to haul groceries, find your tools, or let the dog through without tripping over last week’s project.

    When “All Up Off the Floor” Fights Your Routine

    In tight outdoor strips—side yards, patio edges, or that narrow wedge between fence and house—it’s easy to believe that wall hooks alone will solve everything. But with several people (or pets) using the area, overflow finds its own way down. See planters or garden carts “stored” a foot off the system, hoses looping across the walkway, bins squatting in corners. The more you squeeze floor space, the more you end up blocking flow. Movement stalls, objects pile up, and the sparkling vertical system quietly starts sinking the entire zone back into daily shuffle.

    Return Flow: The Make-or-Break for Real Use

    The test isn’t a perfect “after” photo, it’s the fourth week of busy routines. Are you slotting gear back where it actually belongs—or detouring to the easiest landing spot out of impatience? Floor units and modular chests survive the cycle-pressure: the fast returns, odd-shaped items, dirty tools that no one wants to fuss over. Wall setups hold up if you only ever use the same few tools, the same way, every time. But the moment your real gear list expands—bikes, chairs, project leftovers—you see hesitation: “Should I reshuffle the whole system tonight, or just set this here for now?” That’s the gap where clutter returns.

    Recognizing What Actually Works—Not Just What’s Tidy

    Reality check: You come home with groceries, and the footpath is blocked by a pile of bins and a chair that never went back up. Walk to the mower—first, slide the coolers out of the way, scoot aside last week’s balloon weights. The system didn’t fail on day one, but bit by bit, it puts your routine on pause every time you just want to move through. The loop resets: organize, shift, work around, promise a seasonal cleanout that keeps getting pushed back.

    Adding a single floor bin or modular chest breaks this loop. Now you can drop a muddy pair of boots, fold and stash a chair, or park garden toys the moment you’re done. No unnecessary lifts, no puzzle-solving—just a clear return flow that keeps the area open. Tidiness follows from convenience, not from occasional resets.

    Strategy: Pair, Don’t Just Pile Higher

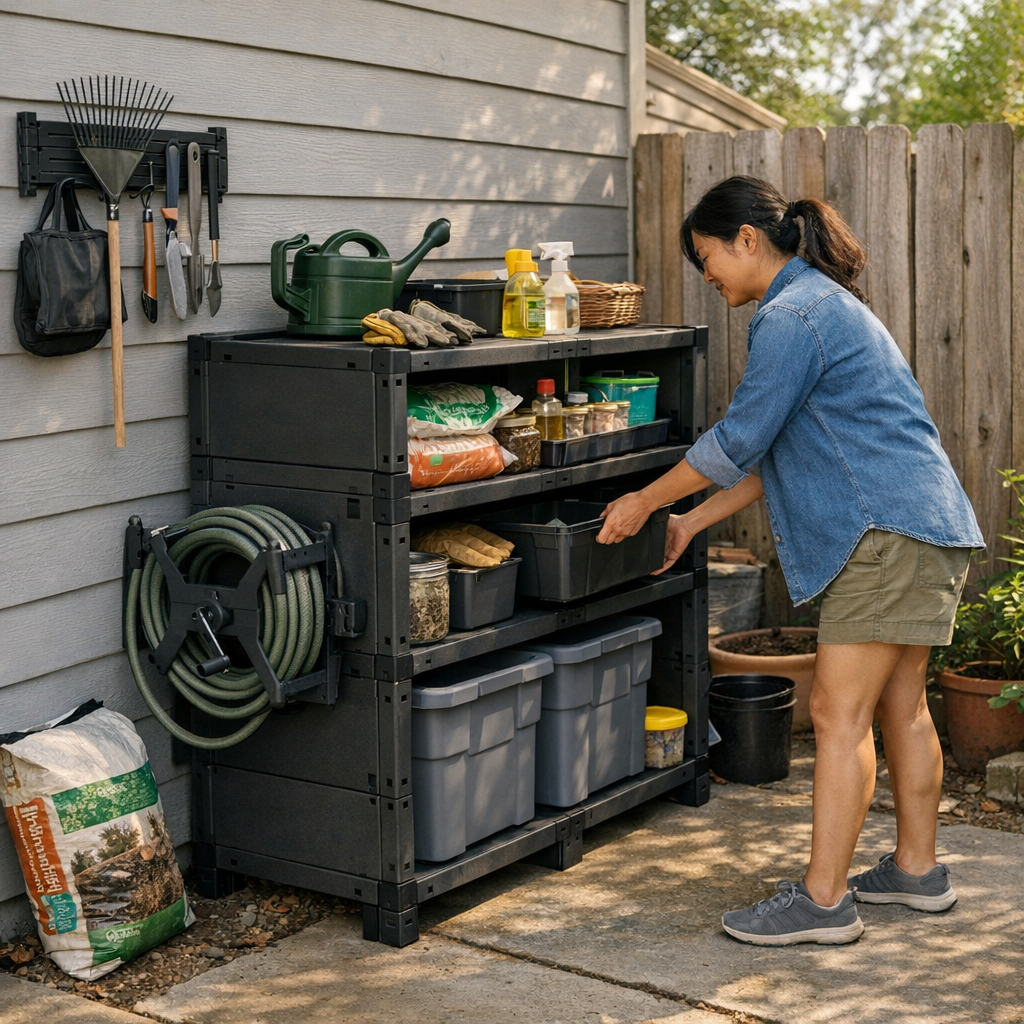
    Instead of building up another row of hooks, combine a single wall rack for your core tools—what absolutely needs to hang—with one or two floor-based containers for everything that won’t sit neat. Now, the tricky and oversized gear lands where it belongs, not at the foot of the steps or in the path to the side gate. In real family yards or busy garden zones, a catch-all bin outperforms the fantasy that “everything up” will keep working once life gets busy again.

    Let Your Routine Lead the Setup

    No system fixes everything. But the right outdoor storage setup erases the small frictions you feel daily: gear that always lingers at the edge, paths that keep blocking, corners that never truly clear. Watch where your own returns actually collect. Which items demand easiest possible drop-off, and which can live neatly hung? Setup that follows these patterns is the setup that holds, even when nobody wants another reset.

    The difference isn’t a photo-op finish—it’s how the space actually moves after a normal week. Let real use—not just a clean floor—drive your next change.

    Explore TidyYard outdoor organization solutions

  • How Evening Resets Keep Pet Care Counters Clear and Clutter-Free

    The real test of a daily pet-care setup isn’t whether everything looks tidy after a Saturday reset—it’s whether you can actually feed, refill, or wipe down without dodging yesterday’s clutter, blocked access, or stray tools after any ordinary use. In small homes, it takes just one round of feeding or grooming for pet gear to start invading shared counters and kitchen zones. Even with a fair effort, supplies barely land where you left them, and the “quick reset” quietly turns into a series of interrupted motions: shifting a water bowl for the coffee pot, pushing a grooming brush away from dinner prep, or returning a damp towel to its supposed spot before someone else needs the sink. You don’t need another organizer. You need a system that is easy to keep up with once the daily cycle repeats—something the CalmPetSupply world has learned by seeing care routines break down even in the neatest looking spaces.

    When Pet Care Routines Quietly Slip

    Resetting feels simple: refill, wipe, toss the brush back, hang the towel. But in daily reality, the steps that seem invisible upfront start to stack as the week moves on. What’s a five-second delay on Monday turns into a bowl left drying by Thursday, or that same brush “just for now” sliding into meal prep territory.

    One missed water-bowl put-away is fine, but three nights in, that same bowl sits just close enough to the counter’s edge to cause a H2O spill during someone’s late coffee fix. The grooming brush gradually claims a semi-permanent spot next to the knife block. A half-damp pet towel crawls toward the laundry pile, half-folded, never quite making it there. The mental notes to “reset later” never feel urgent—until every single surface becomes a half-pet-zone, and your shared space is full of reminders that pet care routines have quietly slipped.

    It’s not about big chores. These are stacks of micro-misses that nudge your space off course—and every skipped check-in makes tomorrow’s basic care slower, less smooth, and more frustrating.

    The Cost of “Almost Ready” Setups

    Many pet routines limp along in a state of “good enough.” The cleanup sponge is theoretically handy, but you have to move two treat bags and a food scoop to get to it. The bottle meant for water refills is clean but never actually back in reach when you need it. The grooming brush, if not returned instantly, ends up in the traffic lane, so when the next shed-hair moment hits, you search or reshuffle—again.

    Over the week, this friction builds. Five seconds here, thirty there, and suddenly pet care means digging for basics instead of just acting. Leave wiping to the next day and you’ll confront crusted rings around the water bowl; skip returning the towel to its actual home and you’ll watch it crawl right back into the busiest spot by dinnertime.

    Spaces that “look clean” often just disguise the migration of tools. If your towel doesn’t always go back on the same hook, or the brush’s storage spot competes with pantry items, clutter doesn’t vanish—it just keeps circumnavigating into prime real estate. It’s a cycle: the prettier the setup, the easier it is for one weak link to restore clutter and slow down your routines.

    How Small Misses Stack Up in Shared Spaces

    Shared spaces magnify every missed reset. Leave a water jug near the coffee pot once, and morning prep becomes a game of shifting items until you have actual surface to work on. Skip just one after-walk supply return, and a leash coils itself into the evening laundry scramble.

    Each out-of-place pet item isn’t just visual—it’s friction. The food bowl drifts out from its wall spot. The grooming brush floats onto the dining table. Suddenly, every quick routine diverts into cleanup, and the after-walk unwind gets rerouted by a hunt for that brush or a scramble to clear the feeding space before guests arrive.

    The outcome: care steps slow down, pleasant spaces feel hijacked, and the supposed “simple” routine is never a one-step reset. The effort shifts from helping your pet to battling lingering, shifting pet gear.

    Making the End-of-Day Reset Automatic

    The only real change comes when late-night resets aren’t skipped. Designate unmissable drop zones—a lidded bin under the counter, a compact hook behind the door, a storage caddy within arm’s reach of the bowl’s spot. These spots aren’t about decoration. They make it more likely that everything returns to where you’ll actually grab it again, not just where it “should” go.

    Station a low-profile towel or sponge right where you feed or refill. Wipe, put away, done—eliminate the pause that leads to “I’ll deal with it in the morning.” The difference isn’t one big clean; it’s dozens of micro-motions that now fit in flow instead of stacking up. This is how CalmPetSupply setups make the repeat work disappear, so your night counter resets aren’t undone by morning.

    When every piece returns to its real home, tomorrow’s care actually gets easier. No silent messes, no new chores, no “missing one basic” crisis when the pet’s water runs unexpectedly low at 11pm.

    Balancing Comfort and Consistency

    Plenty of setups get an initial win: the counter looks better, the mess is corralled. But move feeding gear to a closed shelf and it takes one extra step to refill, so gear drifts back; use a decorative bin for brushes and toys, and the distance from daily reach means the brush never really migrates back to its “home.”

    If you spot towels stacked but not put away, scoops flip-flopping between surfaces, or refill bottles just out of quick reach, recognize these as symptoms that your system is slowly adding extra work with each pass. Small delays become routine drags. The baseline should be smooth, not another pause before care actually happens.

    The Difference: Looks Tidy vs. Works Smoothly

    Tidy spaces feel satisfying for an hour. But a setup that works for daily pet care means you find every basic—bowl, towel, scoop, brush—where you need it, even after several messy rounds. The best systems are nearly invisible in action: the counter is clear at night and still clear after morning feeding, with no leftover gear sneaking into your flow.

    A smooth home pet-care setup doesn’t pretend the friction isn’t real; it just stops giving clutter a second chance. The right drop zone, return habit, or wipe-down anchor flips the day from “prepping around the pet mess” to “reset and done.” In the CalmPetSupply world, function wins over decorative “order”—and the best setups are the ones you barely have to think about, even when you’re wiped out from a long day.

    See how a real-world, keep-up-with-it setup looks at CalmPetSupply.

  • Why Carry-On Bags Fail to Maintain Travel Momentum During Transfers

    The real test for your carry-on comes when you’re halfway between flights—passport check, security line, boarding zone—moving fast and reaching for essentials that seemed perfectly placed at home but now feel buried under layers of “good organization.” A carry-on bag that looks tight and logical on the packing table quickly exposes its weak points during airport transfers. You reach for your boarding pass and end up unzipping three pockets. Your phone charger, once nested “efficiently,” is now lodged beneath snack wrappers and a toiletry pouch. The outside still looks neat, but inside, every access moment pulls the setup a step further from ready.

    The Illusion of Order: When Neat Packing Doesn’t Hold Up

    It’s easy to believe in the “stack and sleeve” method—each device, cable, and document tucked into its own pouch. But as soon as you’re moving between terminals, the logic starts breaking down. The problem isn’t overflow; it’s layered access. Waiting at security, you realize your charging cable is trapped below a divider, your passport is wedged with headphones, and your outer pocket—“reserved for quick stuff”—is now an overflow zone of half-used sanitizer and transit leftovers. Quickly, the meticulously packed interior starts forcing scattershot repacking with every checkpoint.

    Access Gaps Between Packing Table and Gate

    At home, every item has its slot. In line at the gate, the system collapses under real pressure. That wallet you tucked deep for “security” now means digging with people waiting. Your charger is easy to spot until you need it mid-transfer, only to realize it’s inside a zippered tech pouch wedged under a knit hat. Small retrieval delays stack up. One missed reach becomes a reset—every essential is now harder to extract and harder to return.

    The Real Test: Multiple Transfers, One Bag

    Switch planes twice and your bag’s structure gets exposed. The difference is sharp: you step off one flight, squeeze past crowds toward your connection, and scramble for documents and headphones—one hand full, the other occupied, nowhere to set the bag down. If your setup depends on deep stacking and nested organizers, this is where you lose efficiency. Boarding calls, ID checks, and snack runs demand single-move access, but instead, you’re left juggling and risk misplacing essentials just to stuff everything back before someone else edges you out in line.

    Trapped by Your Own Neatness

    This isn’t overnight chaos—it’s a visible drift. Every checkpoint leaves the inside less ordered than before. Snack wrappers slide into tech sleeves, a cable migrates to a deep corner, a passport gets sandwiched where it shouldn’t. Your bag looks composed but packs more confusion at every stop, and every new transfer makes the last attempt at order feel hollow.

    Where Most Setups Break Down

    Most “organized” carry-ons are built for static order, not moving travel. Multiple zippered dividers, stacked organizers, or pouches separated by logic at the kitchen table turn into practical obstacles at checkpoints. What you need most—passport, charger, boarding docs—ends up split, stacked, or hidden just when speed matters. Seat entries, overhead bin grabs, and quick gate checks? Every time the pressure is on, you’re blocked by your own layers, juggling or reordering the bag on the fly.

    Why Layered Organizers Slow You Down

    Organizer-heavy builds seem smart until the fifth reach in thirty minutes. It’s never “too much stuff”—it’s too many decisions, too deep a structure. Which pocket? Which sleeve? One wrong choice, and you’re forced into a partial unpack, sifting through pouches and stalling in the process. A tight, clever system at home becomes a drag every mile further from the packing table; essentials move further away just when you need them closer.

    Spotting the Warning Signs: When Your Bag Adds Drag

    Carry-on drag is hard to ignore once you know the cues:

    • You end up with a handful of loose items after every tray pass or boarding call.
    • A document or cable takes so long to extract that you need to stop, unpack, and re-pack in public.
    • Key essentials repeatedly resettle into deep, inconvenient layers—forcing multiple re-reaches for the same thing.
    • One quick retrieval sparks a full-on reset: what should be a five-second grab becomes a multi-step shuffle, every time.

    Not dramatic failures—just constant, low-level interruption that saps pace and energy bit by bit, every transfer.

    How a Quick-Access Setup Changes the Flow

    The shift is simple but sharp: dedicate a flat, outer pocket—no overlap, no stacking, no double zippers—for high-frequency items only. The essentials you need through every phase—passport, charger, earpods, travel docs—live here, unburied. When tested in real airport movement, the difference is immediate:

    • Security trays are prepped in seconds: one reach, all essentials out, zero digging in main compartments.
    • Impromptu checks and seat entries no longer trigger a mini-repacking—credentials and gear come straight to hand.
    • No more cascading resets—every access returns the inside to “ready,” not “almost together.”

    After two transfers, the downgrade in visible order paid off in real movement: what looked less “packed” actually worked better. Traffic flows past instead of around you. The airport stops draining momentum over tiny, repeated friction.

    Questions Frequent Travelers Ask (and the Real Answers)

    Minimizing Disruption During Layovers

    Q: How do you minimize disruption during layovers with a carry-on?
    A: Only the things you reach for most go in the outer, unstacked zone—no hidden layers, no deep stacking. Priority is immediate, single-move access for the essentials, not locked pouches buried for the sake of neatness.

    Organizer-Heavy Setups: Why They Falter

    Q: Why do organizer-heavy setups become harder as the trip goes on?
    A: The more you stack, the more every retrieval triggers partial unpacking. Each checkpoint introduces disorder as the “logical layers” shift, making repacking slower and essentials harder to track with every leg.

    Seeing the Signal: When to Rethink Your Layout

    Q: What’s one signal your current setup is slowing you down?
    A: If you leave every checkpoint juggling or repacking in public—even after small access—you’re carrying a layout that resists movement instead of enabling it.

    Packing to Move, Not Just to Look Neat

    Perfect order at departure can’t keep pace with airport reality. Real travel flow comes from setups that anticipate repeated, on-the-move retrieval—not just clever storage. If your routine needs constant reset—always shifting, always re-layering—something needs to change. Prioritize single-motion access, reduce overlap, let a bit of mess show if it saves time and friction. In the end, workable beats Instagrammable, and your carry-on shows its strength not in how it looks when zipped up, but in how it lets you move and reach what matters after hours in transit.

    CarryOnSupply

  • How Small Changes in Dog Bowl Placement Improve Feeding Calmness

    Feeding time looks simple—bowl down, food in, dog eats. But if you keep noticing your dog hesitating at the bowl—shifting weight, pausing mid-chew, glancing back whenever someone walks past—the real problem isn’t pickiness, it’s setup friction. Small, repeated interruptions turn a supposed routine into a slow-motion scramble: food goes untouched, play gets pushed back, and you end up nudging your dog along instead of moving on with your day. The space you set aside for eating isn’t working with your routine—it keeps getting in the way, but not loudly enough for you to call it out. DogPile is all about those pressure points. If feeding keeps snagging—if the routine never feels settled—there’s probably a better setup hiding in plain sight.

    When the Setup Looks Fine but Still Creates Friction

    Feeding areas can look organized and still fall short when routines repeat. Bowls line the wall, the location is neat, but if your dog is circling or stalling near the bowl, it’s not about food or attitude. It’s about location. Too close to the hallway, too exposed to movement. Mornings get crowded fast: people cross for coffee, a quick door slam, a burst of kid energy. Suddenly your dog faces distractions at every bite, flinching when shoes scrape or someone grabs a jacket. The “easy” setup stalls, stretching a two-minute snack into a drawn-out shuffle.

    Instead of calm feeding, you get constant darting glances and a meal that never quite finishes until the traffic dies down. Every time you walk by, you reset the process. A setup that looks clean still breaks down under real home pressure—especially when your dog’s back is exposed to repeated movement or noise.

    Repeated Hesitation Is a Setup Problem—Not a Quirk

    It’s tempting to blame a slow meal on your dog’s mood, but daily stalls mean structural friction. Dogs are always alert to movement or sound—especially during feeding. When meals become unpredictable, dogs struggle to relax, and you’re left running interference instead of letting the routine run itself.

    Example: The breakfast trap. You set the bowl down where you always do. But this morning, it’s a few inches closer to the kitchen entry. Suddenly, your steps for coffee or your partner’s phone grab turn the space into a bottleneck. Your dog approaches, pauses, sniffs, then backs away if someone passes. With every interruption, the meal window stretches and your morning flow tumbles—play gets pushed off, the routine starts fraying, and one wrong bowl position derails the next hour.

    Spotting Micro-Frictions Before They Undermine the Routine

    There’s rarely a dramatic collapse. It’s a matter of inches or a shift in traffic: a kitchen that’s calm at noon but chaos at six. Many owners don’t spot the pattern until it gets baked into daily life—now you anticipate the stall, you step around the bowl, you expect the hesitation. That’s when small friction becomes routine drag. If you catch it now—a glance back, a repeated backward step—you can cut off the chain reaction before it turns feeding into a daily detour.

    Everyday Example: A “Clean” Setup with a Persistent Weak Spot

    The bowl’s tucked under the wall, away from the main walkway. Then after dinner, the whole household rushes between the mudroom and living room. The dog steps up, then pulls back as someone sweeps past—laundry in hand, broom off the hook. The same meal that should flow quietly now stalls and restarts, the dog sniffing, waiting, dodging back to the bowl over and over. Each pass keeps the pause alive. On paper, the setup works; in practice, daily rhythm wears it down.

    It’s not about obvious mess—no spills, no toppled bowls. But after a week, you notice you’re always reminding your dog, reshuffling foot paths, or propping the bowl somewhere new. The difference between “looks good” and “works every day” only shows up when you watch what actually breaks under routine use.

    Subtle Adjustments: How Small Changes Can Rescue the Routine

    You don’t need a major overhaul—an extra six inches or a sturdier backing can change the whole flow. Move the bowl just clear of the walkway or set it near a solid wall, and suddenly the dog settles to eat without a hitch. The payoff is real: no more mid-meal “come back!” calls, no more blinking at why feeding is dragging. The new spot may only be a corner removed from the main lane, but it holds the rhythm in place. Routine returns. Ten minutes and the bowl’s empty, cleanup doesn’t trail into the kitchen, and you’re not resetting five times because a towel was too far or someone needed to reach for recycling.

    The change feels small—one adjustment, one habit. It puts routine support over visual neatness. Less stress, less owner-side interruption, fewer small negotiations just to get one thing done.

    When Tidy Looks Isn’t Enough: The Difference Between Visual Order and Real Ease

    It’s easy to admire a bowl lined up perfectly with the floor tile and food measured to the scoop. But when you keep dodging toys to refill, or move the bowl after dog water splashes halfway to the door, that neat setup just makes the routine slower. An organized appearance doesn’t guarantee smooth daily function. The need to grab a wipe, hunt for a towel, or push the bowl back into place—each signal means ease is missing. If small snags keep stacking, the “clean” look is just hiding the day’s extra drag.

    The Domino: How One Weak Point Interrupts the Whole Day

    Frictions around mealtime don’t stay contained. A slow meal pushes back the walk, a messier reset steals minutes from the evening, and soon the rest of the routine is bumping along—never disaster, but never quite right. You feel it most when you realize routines take longer, you’re nudging the dog more often, or your cleanup window keeps shrinking—even though nothing “looks” wrong.

    Walk-in example: After a muddy stroll, you manage the leash, shoes, and wet paws at once. The bowl is by the door—meant for quick feeding. But boots pile up and the towel lands on the same hook, blocking your access just when cleanup needs to be quick. Instead of a fast, hungry dog-to-bowl moment, you both stutter-step around each other. The “convenient” spot becomes the backlog. Repeat it daily and “fine on paper” never feels smooth in reality.

    Reading Your Dog’s Clues: What Hesitation Actually Says

    If your dog repeatedly stops mid-bite, scans the room, or leaves food untouched when someone walks past, chances are it’s your setup—not your dog’s appetite. Movement, noise, line of sight, even how backed-up the bowl feels—all signal comfort (or tension) to your dog. When you try new foods and nothing changes, or the same pause happens every day, routine friction is quietly running the show. The dog is reading the space—and asking for change you might not see until you focus on where the trouble starts.

    • Stopping mid-meal to check over a shoulder
    • Backing away from the bowl during movement nearby
    • Delays when the bowl sits in an open or traveled space
    • Less hesitation when the spot is moved from traffic or buffered by a wall

    Resetting the Routine: Practical Tweaks for Everyday Calm

    Feeding isn’t a stand-alone ritual—it’s a pressure point in your daily chain. If the layout supports confidence and quick access, you both get a smoother reset. Don’t chase perfection, chase stability: a consistent, semi-protected spot stops friction in its tracks. Make sure nothing crowds your dog’s bowl when traffic peaks—solid backing, no crossing feet, no competing reach for towels or toys. Watch the difference: feeding, cleanup, and post-meal flow click into place with less effort, and the mental friction fades for both sides.

    Most effective spots aren’t the flashy ones. Try a wall-cushioned corner, a few feet from where shoes pile up, or anywhere that makes access possible without blocking the day’s next move. Once settled, resist reorganizing unless friction returns. The shift isn’t always dramatic—but minutes and micro-interruptions vanish. Less owner effort, more actual routine.

    Recognizing Setup Friction—And Deciding When Change Is Needed

    Just because a setup looks tidy or “almost works” doesn’t mean it’s good enough to keep. True comfort comes from routines that don’t need repeated nudges, bowl slides, or workarounds. When pauses, repeat steps, and tiny resets dominate your morning or evening, it’s not just inconvenience—it’s lost time and lost calm. Spot the friction, choose function over first-glance order, and reset before the cost adds up.

    Find practical feeding-space resets and solutions for real daily use at DogPile.

  • How Linear Ceiling Lights Solve Common Workspace Lighting Problems

    Ceiling lights promise a finished workspace—until routine use exposes what’s actually unsolved. The desk looks clean, the panels line up, but after a week or two, the comfort cracks start: glare over the screen, dim strips at the far edge, or stubborn shadows under a shelf you use every day. The ceiling stays uniform, but reaching for what you need still brings back awkward cables and uneven light.

    The Problem With “Finished” Ceiling Lighting

    Step into any “ready” workroom: lights overhead, desk surfaces staged, everything seemingly planned. Yet by the end of the first month, a familiar discomfort returns. Ceiling panels that made the room look seamless end up spotlighting glare right where you sit, or leave the back third of your work surface faded and easy to avoid. The difference shows not in brightness numbers, but in small, daily disruptions: screen reflections, awkwardly reached power strips, and the recurring appearance of table lamps meant to be “temporary.” Everything on the surface seems stable, but every session makes the mistake clearer—light that pleased your eyes on day one quickly fails the real test of use.

    This isn’t a dramatic collapse—it’s a pattern of small, persistent hassle. One side of a shared desk feels usable while the other always loses out, as shadows cross the work area no matter how you shift. A shelf that needs to be bright stays dimly out of reach. Moving your monitor, adding another lamp, or trying to reposition a panel doesn’t solve it—if anything, exposed cords and workarounds pile up until the “tidy” setup is visibly cluttered again. The desk won the ceiling game but keeps losing at the surface, session after session.

    Linear vs. Panel: Why The Difference Matters During Real Use

    Panel and linear ceiling lights claim the same territory: a “resolved” overhead appearance. But the lived results often split in two. Panels spread soft light broadly—but mostly at the center, fading at the edges where you actually need coverage for reading, detail work, or shared surfaces. Once tasks move to the outside, the shortfall is clear. It’s not obvious at first, but over time, under-lit desk edges and shadowed perimeters become a daily inconvenience you can’t ignore.

    Here’s the real divide: Wherever a work zone meets a wall or stretches across two users, panel lights rarely reach every inch. That leaves the edges dim, so you and a coworker either bunch in the middle or set up rival lamps—cable mess and new glare included. “Finished” overhead look, but now surfaces turn into problem zones: one end useful, the other a home for drifting cables and unread papers. The problem isn’t lack of lumens, it’s the mismatch between clean ceilings and real, reachable tasks.

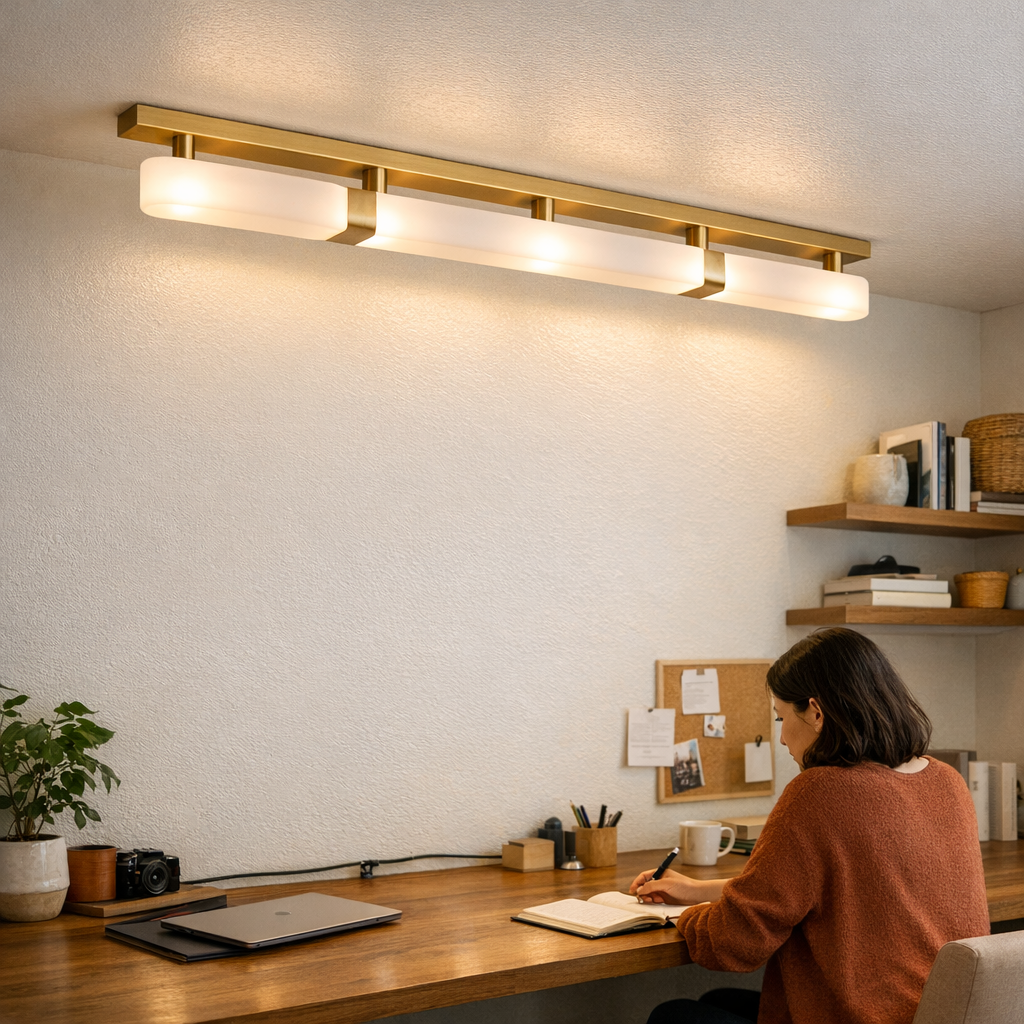
    Linear fixtures, especially when installed parallel to the desk edge, flip this outcome. Light follows the length of the surface, so the whole depth is activated—no dead edges, no “good” vs. “bad” seats. You use both sides of the table, not just the sociable middle, and the full span stays equally readable. Instead of layering on more add-ons, one support solves the job at the structural level, giving you practical, everyday relief, not just a neater overhead.

    Everyday Friction: What a Poor Setup Really Means

    Repeat annoyances expose system failure—here’s how it adds up with most panel setups:

    • Your laptop always needs nudging to the brightest strip, while the outer desk edge gets ignored or left dark.
    • Shared spaces ration “good” light, so one user habits the shadow, or both jockey for the bright spot.
    • Clamp-on or clip-on lamps multiply cords, crowd power strips, and tangle setups just to light the edge.
    • Reconfiguring shelves or rotating lights never fixes the persistent shadows along the work-back or wall.
    • None of this is dramatic, but every session, something feels compromised—appearance wins, routine loses.

    It’s not a hardware defect, but a real mismatch between ceiling calm and surface confusion. Desks look composed once, but as soon as you’re actually searching for notes, plugging in a charger, or setting up side-by-side, the problems repeat: shifting shadows, odd glare, exposed cabling intruding where you wanted clarity. These little dysfunctions become the rhythm of your room, replacing order with improvised solutions and never quite solving the strain around cords, corners, and coverage.

    The Real-World Shift When Lighting Is Oriented For Use

    Consider a real adjustment: After steady frustration with shadows and cord nests on a shared workbench, switching to a linear fixture—mounted just out from the wall and parallel to the work surface—immediately killed the recurring dimness at the back edge. Suddenly, every seat along the table was equally usable, and reading across the whole surface felt natural. No one needed to angle extra lamps just so a notebook was visible; stray power cords faded under the desk, not dragging across the top. The visual calm finally matched the routine: work areas stayed tidy because the main light now reached what people actually touched and read.

    At first, not everything looks transformed—but over each week, the improvement deepens. Gone is the shuffle of moving lamps, chasing the last unlit inch, or overloading outlets for the sake of a brighter edge. No more dealing with blind spots, low contrast, or last-minute cable jumps to reach an ignored corner. The space becomes quietly easy. Use feels smoother, glare recedes, and you spend less time “fixing” what your lighting should have covered from the start.

    Supporting the Setup With Clean Cable Management

    The benefit extends past light path: with a planned, well-supported linear fixture, cable management gets dramatically easier. Wires follow neat, hidden routes—clipped along brackets or tucked behind supports, not looping in the open or creeping toward work surfaces. Nobody notices a perfect cable run, but everyone relaxes when cords stop hijacking the first glance or getting in the way, session after session. Good support strategy—choosing correct brackets, planning conduit paths, setting up stable mounts—means less visible clutter and more dependable comfort, so the setup holds its own under real traffic, not just on photo day.

    What Makes A Lighting Setup That Lasts?

    The measure isn’t a perfect ceiling or day-one wow factor—it’s whether your lights make routine work easier after weeks, not just hours. Well-chosen, properly supported lighting keeps every surface usable, brackets and cords where they belong, and distractions out of the path. This isn’t an aesthetic upgrade: it’s daily stress prevention, the result of matching support hardware and fixture orientation to the way you actually use the space.

    If you’re living with dim desk edges, repeat glare, or constant cable drift, take a closer look: does your ceiling lighting actually solve the conditions you deal with at the surface? For most, orienting a linear fixture with real cable management is the detail that finally delivers the working comfort promised by overhead panels. It’s not about trends; it’s about fewer friction points—light where you need it, cables where you never see them, and a workspace that stays as clear to use as it looks.

    LightSupport

  • Creating a Reliable Workspace by Organizing Desk Undersides Effectively

    The desk that only looks organized is the desk that quietly drains you. Line up your organizers, stash the loose pens, file the spare notebooks, and the surface plays the part—until you actually work. Shift from keyboard to notebook, adjust your screen for a late-afternoon check-in, or roll your chair back to stand: suddenly, what you can’t see—cables stretched just enough to catch your shoe, power strips nudged sideways, adapters clinging to the edge—starts to sabotage flow. What shows as neat at 8 a.m. slowly turns into another under-desk tangle by midweek. With every device swap, drawer slide, or simple posture shift, the gap widens between the appearance of order and the way your desk actually behaves. The routine becomes wasteful: a daily scramble to reset what looked perfect not long before.

    Why a neat desk underside matters far more than appearances

    The real trouble with a desk isn’t on the surface. Problems appear where you don’t watch—chargers drooping past the edge, adapters swinging every time you shift your chair, and legroom swallowed by sprawling storage boxes. You notice too late: a loop of cord snagging your shoe, a charger jolted loose as you stretch, power blocks collected where your feet want to land. These aren’t one-time annoyances but repeating interruptions—minor, cumulative, and slightly embarrassing when you have to crawl around during a call. Out of sight means out of control, especially in cramped spaces or days packed with device switching. The desk looks calm, but the underside chaos interrupts your work so frequently it becomes the real “mess.”

    Surface order vs. real repeated-use behavior

    Most desk setups pass the first glance: cables tucked along the back, organizers lined up, a few clever clips doing all the visual work. But repeated use exposes the structural weaknesses that a stylized desktop can’t hide. Trays sag after a week under too much cable weight. Adhesive clips surrender, dropping lines onto your footpath or behind the drawers. That cable route that worked perfectly for your laptop stops making sense as soon as a monitor, power bank, or extra phone enters the mix—new lengths, new tensions, new drift toward your feet.

    The moment you reach below for a charger, only to pull up a snarl or catch a loose adapter, drives home the point: efficiency that looks fixed from above unravels underneath with every session. Surface order hides slow-motion failure—cables drifting down, adapters creeping into leg space, and constant small corrections that never really fix the flow.

    Desk routines: the real test for cable flow and storage

    Desk reliability isn’t about a “good” first setup. It’s about what happens after dozens of resets, nightly device swaps, or sudden pace changes. In a normal workday, you drop into the chair for a call, nudge aside a notebook, twist to find a charger, adjust a monitor, or shuffle drawers. Each action meets resistance or delay if the underlying setup can’t keep pace. If a storage box blocks your knees, if the cable route breaks across the drawer slide, or if clips force you to grope under the surface for the right cord, the irritation multiplies. Sooner or later, the need for “just another quick adjustment” starts feeling like a built-in tax on your attention.

    Example: everything’s moving smoothly until you roll your chair and feel the telltale snag of a cable you thought was routed clear, or you reach down for a charger but bump into a tangle of speaker wire and phone line. These aren’t dramatic problems—they’re friction loops that waste seconds every time and defeat the whole principle of an organized workspace. You end the day not with a cleaner setup, but with a low-level suspicion that you can’t return to work without crawling back under the desk.

    What actually improved the return-to-use feeling

    The shift happens not with another round of decluttering, but when under-desk structure finally controls where everything ends up. Mounting a solid cable tray, anchored firmly to the back edge, prevented adapters from creeping into legroom. Charger lines routed through a tray—not draped, but held a few centimeters under the desktop—stopped hanging where feet or drawers move. Now even frequent unplug/replug cycles don’t end in cables falling to the floor or tangling with storage units. Leg space stays open. Power doesn’t migrate to the worst possible spot. No more tracing cords by hand just to re-activate a device. Real improvements are quiet: accidental disconnects drop, drawers glide without a snag, and power blocks stay away from rolling casters, even as routines change through the day.

    The desk doesn’t suddenly look “more” organized—it finally works. Each reset between calls, work sessions, and charger swaps is simple: nothing shuffles out of place, nothing distracts you with small failures in the background. The friction that trailed the old “clean” setup is gone—not because it’s hidden, but because it finally doesn’t happen.

    When improvements create new problems (and how to spot them first)

    No under-desk solution is immune to unintended consequences. Fix one problem and another pops up: a cable box eliminates the visible tangle but blocks the bottom drawer, or heavy cable bundles rip adhesive clips free after a few weeks, dumping the mess back into leg space. Sometimes a storage fix interrupts the path you use most, or a cable tray is mounted just close enough to hamper chair movement. The patterns repeat: minor obstructions that only become obvious after days of extra effort or distraction.

    The best signal you’ve missed something? If under your desk needs fixing every few days—re-routing a wire, smacking a block out of the way—the system isn’t working. A durable desk solution is one you forget about. Cables remain grouped, adapters don’t wander, and swap-outs are deliberate, not desperate. The only time you need to reach down is when you actually mean to.

    Real questions from messy desk moments

    How do I keep cables from tangling under my desk after the second or third week?

    Secure the heaviest gear—power strips, adapters—directly in a sturdy under-desk tray or closed box, fixed at the rear. Don’t overload adhesive clips or cram every cord into a single channel; sag and detachment come fast. Use cable sleeves for related lines, but keep them loose enough for regular device swaps. Over-concentration in any single clamp turns that spot into a new tangle point by week three.

    Should I stick with open clips or go all-in on hidden trays?

    Hidden trays and cable boxes keep your leg space clear and greatly reduce accidental yanks, but make spontaneous device swaps slower. Open clips offer speed and flexibility, but also need more frequent adjustment as cables shift. Choose based on whether uninterrupted footroom or rapid access matters most for your day. Both beat letting everything slide into general chaos, but neither is flawless in real rotation.

    What’s one mistake most people make with cable management under the desk?

    Packing too much into too little room—overfilled clips, cords stretched across moving drawers, or power blocks plopped where your knees need to swing. These setups look managed until you’re pressed: then plugs slip, wires get yanked, and every disruption means hands-and-knees troubleshooting between tasks when you least expect it.

    What actually makes the desk feel reliable over time

    The real mark of a strong desk isn’t the show of surface order—it’s the near-absence of problems after days of intense use. Reliable workstations protect foot space, keep cable flow off the floor, and make storage stay put in the rush of actual tasks, not just in photos. The less attention your setup demands between work cycles, the more you can give to the work itself—not another under-desk rescue mission for wayward power bricks.

    Explore the full WorkBasic collection

  • Why Storage Systems Fail Over Time and How to Keep Them Functional

    The first day with a new storage setup—whether it’s in the garage, garden, or workshop—always feels like a minor victory. Tools have homes. The floor is finally clear. You can see the workbench and imagine move-anywhere productivity. But the real verdict doesn’t come on setup day. It arrives in the churn of real use: when you’re pushing through errands, bouncing between tasks, and suddenly that “perfect system” starts putting bumps in your path. What started as neat and promising can quickly turn into an obstacle course, crowding your routine where it should step aside.

    How Storage Systems Start Working Against You

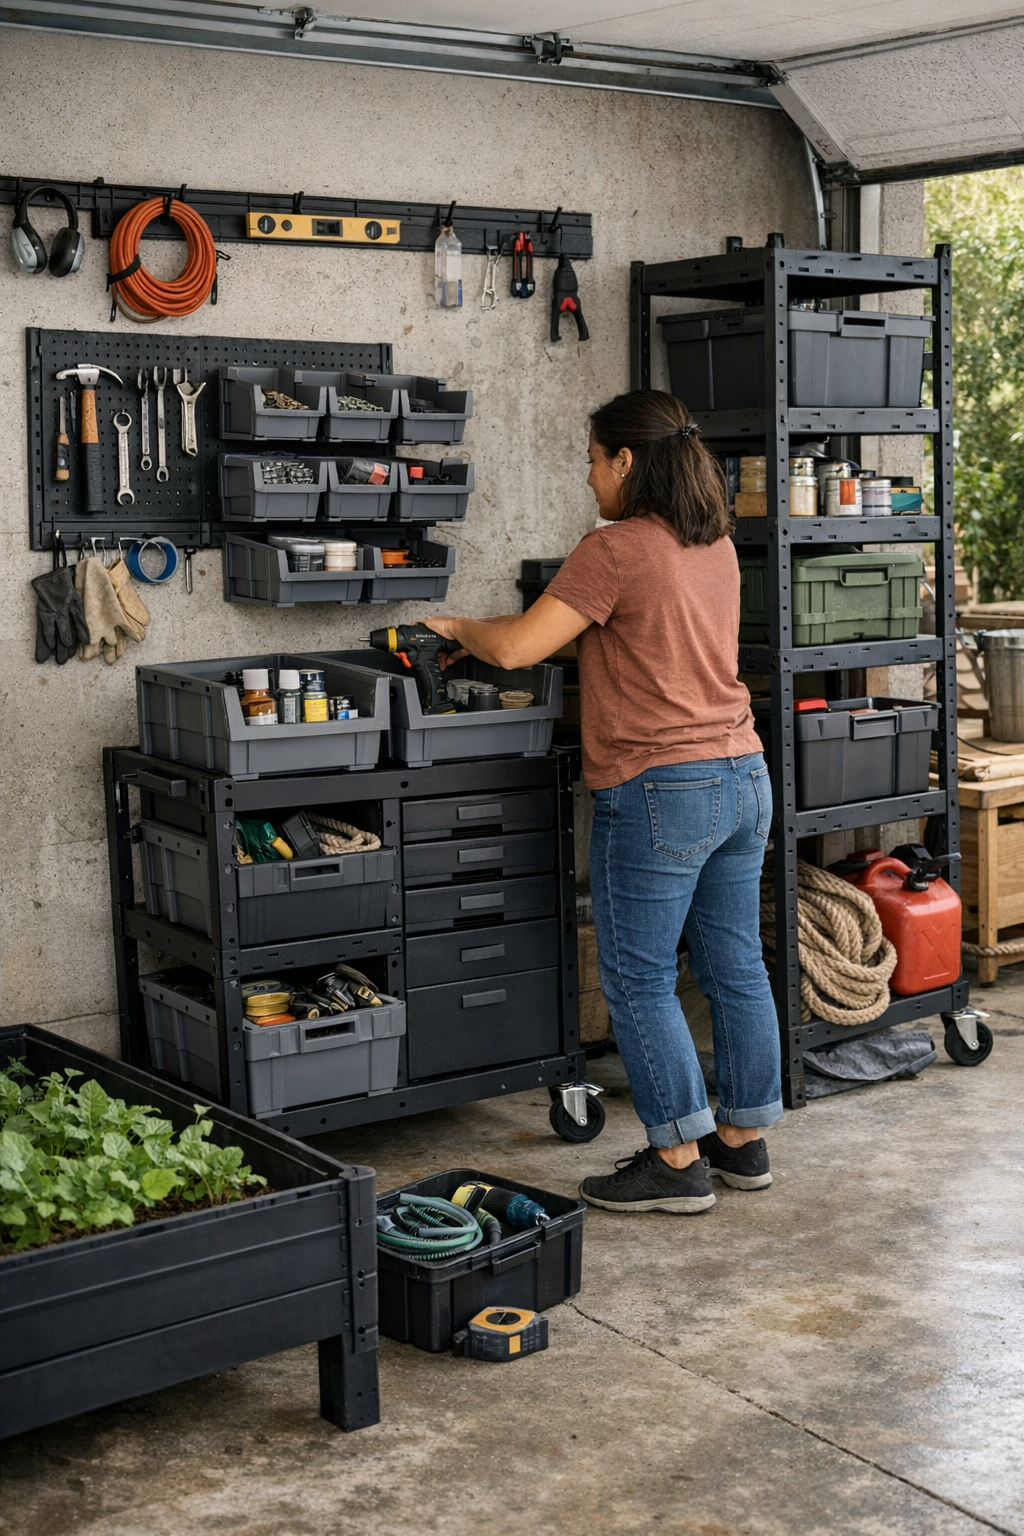
    Those wall racks, rolling carts, and modular bins promise to bring order. And at first, the improvement is obvious—you walk in, no piles underfoot, everything slotted in place. But as the calendar fills with half-finished projects and new supplies, reality sets in. That rolling cart you loved on day one? Now it’s blocking the aisle every time you need to drag the mower out or bring in a sack of soil. Wall racks show off your collection, but your most-used tools end up just out of reach or buried behind a row of things you use once a season.

    Friction starts small, then builds: a pair of bins blocking the drill for the third day in a row, a cart wedged in the exact spot you want to turn, a corner that never quite empties out. At first, it’s a few extra seconds. But stack these up—five nudges, three detours, the daily search for snips or a box of fasteners—and your routine slows. The “organized” area gradually fills with tools left out, overflow zones, and a creeping sense that the storage solution is just reshuffling the mess at a different angle.

    Where Storage Systems Fail the Day-to-Day

    The flaws don’t show during a careful Sunday setup—they emerge after weeks of improvising. Imagine grabbing a handful of screws in the middle of a busy Saturday, only to swerve around the same rolling cart that keeps popping back into the path. Or dropping a wrench onto a countertop, then realizing you need to unstack two bins just to put it away again. The little hassles multiply until you find yourself leaving tools out—because returning them feels like another chore.

    • Pulling three stacked bins apart just to fish out the one thing you always need.
    • Pushing the cart aside for the fifth time that morning, just to squeeze by.
    • Parking tools on a half-cleared bench, promising yourself you’ll sort them “later.”

    Most setups don’t collapse in a single dramatic event. Instead, the routine grinds down. The area built to help you work ends up breaking your stride—and all the neatness counts for little if you can’t move, grab, and put back tools in real time.

    Why “Tidy” Isn’t Always “Efficient”

    Looking organized is not the same as working efficiently. The clean rows of bins might impress at a glance, but if every trip means unstacking and tucking away awkwardly, you’re paying with time. Wall racks can clear the floor but make you stretch, reach, or shuffle sideways each time you need the gear you reach for daily.

    Consider the deep bin stack: it looks space-savvy—until you’re lifting three containers to dig out a socket set from the back. By the end of the project, an overflow pile appears “just for now”—right in the walking lane. A week later, the corner that should funnel supplies becomes a dead spot, holding whatever didn’t get put away because the process was just a bit too much hassle. Slowly, resets get ignored and the surface meant for working is reclaimed by clutter.

    Shifting from Storage to Movement

    The fix isn’t always more storage. Sometimes it’s subtraction—removing what gets in your way. After months of repeating the same detour, clearing out the overstacked bins and relocating the bulky cart changed the entire flow. Suddenly, the shortest route wasn’t blocked. Rather than three sidesteps to get across the space, it was a direct walk. The friction points—those subtle pauses and hesitations—vanished, and tools returned to their spots because it only took a second, not a reshuffle.

    Watch for repeating roadblocks: If you’re always shifting the same container or inching past the cart that almost fits, those are signals. The right move might be clearing that one high-traffic zone or reassigning where “overflow” lands. Sometimes moving a single choke point is enough to reset the area—without bringing in another organizer or gadget.

    Pinpointing Where Things Really Go Wrong

    Wall-Mounted Racks: Convenience or Compromise?

    Nothing beats cleared floor space on paper, but reality bites when racks get overloaded or hung above a comfortable reach. Instead of a grab-and-go, you’re balancing on tiptoes, reaching behind objects—or just leaving the tool on the bench for next time. Efficiency gives way to workaround: the “temporary” pile, the forgotten pair of shears, the bags that start nesting on the nearest chest instead of going up on the rack.

    Bin Systems and the Dead Corner Effect

    Storing bins side by side or front to back can look efficient, until every use means shuffling containers. Over time, the extra steps (and resistance) add up, and those “organized” bins become magnets for small piles—items stacked on top or just dropped nearby because returning them means disrupting the configuration. Dead corners aren’t truly empty; they’re the places that absorb whatever doesn’t have an easy return path. The result: slow but steady creep of clutter into what used to be clear space.

    Making Storage Work for Your Routine

    The best storage setup doesn’t just look tidy—it makes every movement smoother. When you can grab, use, and return something without sidestepping, restacking, or hesitating, the system works for you, not against you. True improvement is about reducing decisions and effort in the reset, not maximizing how much you can jam onto a rack.

    Every gadget promises a cleaner workspace, but only the system that fits your daily routine actually keeps order in play. Look where your flow is getting interrupted—those nudge points, chokepoints, and clutter-friendly corners. Don’t hesitate to tear up what isn’t working: shift containers, clear out the cart, and reclaim direct paths. The goal isn’t perfection; it’s practical motion. The best storage is the setup you hardly notice—because resetting the area is so easy, you do it without thinking, not just on clean-up day.

    Find modular systems, rolling carts, wall setups, and practical tools for working spaces at StackNest.