Blog

  • How Small Entryway Habits Disrupt Your Dog’s Homecoming Routine

    Most dog owners know the after-walk entry isn’t the easy reset it looks like from outside. The routine stutters at the same friction points: you juggle keys and groceries while your dog circles, pausing and peeking for cues. Under the usual excitement, there’s an invisible logjam—a shoe blocking the path to their mat, a bag left in the landing zone, the leash dropped in a pile instead of hung within reach. It only takes one misplaced item to turn homecoming into stop-and-go chaos, adding up to a routine that feels more tangled than welcoming. What appears tidy at first glance often breaks down exactly where dog and owner need a clear handoff.

    Entryway Friction: Where the Routine Really Gets Stuck

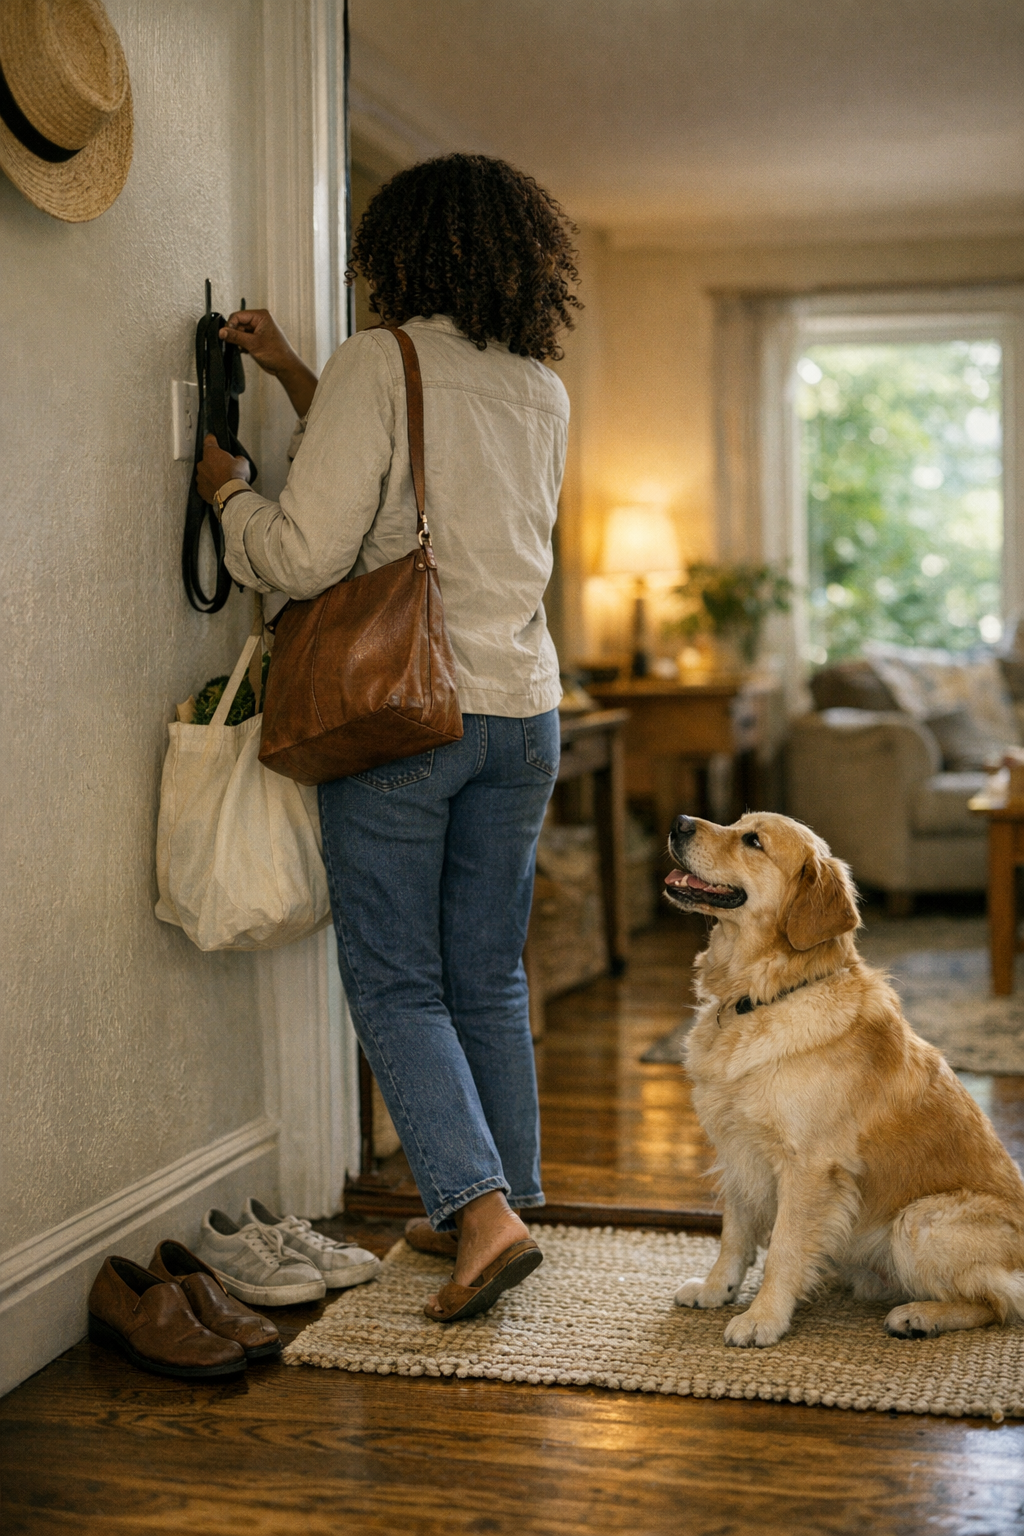
    Everyday home entries set the tempo for the evening—yet most doorways quietly sabotage the flow. You enter, balancing a bag, maybe dripping rain, and automatically step around a shoe you keep meaning to move. Your dog tracks your motions, nose low, looping awkwardly because the spot they expect to claim is squeezed off by something you dropped “just for now.” Your leash, supposed to hang by the door, is instead tangled with a jacket or under a week’s mail. The setup might seem under control, but the actual sequence — bags shuffled, leash scrambled for, paws dodging human clutter — gums up even the best-planned routine.

    This isn’t just excitement. It’s repeated misfires, triggered by a path that’s blocked or a handoff that’s never clean. One loose boot shifts a calm greeting into confusion. A leash stashed on a chair becomes a choke point: now you’re elbow-deep in clutter while your dog circles for direction.

    The Unseen Costs of a Blocked Path

    Clutter doesn’t just slow things down—it drags the reset across the whole routine. The longer a dog’s re-entry gets snagged, the more everything else stalls: dinner is later, you’re still cleaning mud off mail while also reshuffling bags, and that “settle-in” feeling slips further away. The friction stacks quietly until nobody lands in the evening calm—just a pile-up of small annoyances both sides come to expect but never accept.

    What Actually Happens During Settling: Real Scenes from Daily Life

    After a rainy walk, you’re tracking mud, arms full, thinking about dinner. The towel is never where it should be—blocked by a recycling bin or lost behind bags. Your dog aims for their spot but tiptoes, diverted by whatever’s crowding the mat. A soaked paw slaps a dropped envelope. Before you can even hang a leash, you’ve got damp mail, a restless dog, and off-track momentum. These aren’t rare emergencies—this is standard entry protocol for most homes.

    At night, coming back from that last outing, you reach for the leash, but boots have migrated in front of the wall hook again. You fumble, get the leash free, but the dog has already circled twice, not sure if this means “wait,” “go,” or “just lie anywhere.” Each minor block forces a micro-decision, scattering the homecoming into separate, slower steps. What should be a handoff becomes a repeated stall.

    When Organization Isn’t Enough

    Visual order doesn’t fix practical breakdowns. The corner that looks decluttered at noon turns into a barricade by evening, the thing you “set aside” turns into yet another block, and the leash “put handy” gets buried in the run of daily life. Most setups look better than they work. If routine stalling sneaks up despite what appears under control, the structure—not the dog, not your energy—is slowing the flow.

    Recognizing Disguised Routine Trouble

    There’s a sharp distinction between an entry that works and one that wears you both down with micro-friction. If you’re forced to reshuffle bags nightly, or your dog whines and stops at that same cluttered edge, it’s not a personality issue—it’s a structural problem. Stay alert for signs: are you always stepping over one bag too many to drop the leash? Does your dog detour or delay—even when you want them to settle quickly? Every micro-stall is feedback that the system favors appearance over function. Under repeated use, comfort is lost not to affection but to setup neglect.

    How After-Work Frustration Creeps In

    Small blocks pile up quickest when you’re tired. After a long workday, you want to unwind, but the first five minutes collapse into leash-finding, shoe-moving, and swapping places with a restless dog who can’t find what they’re supposed to do. That’s not a “rough day”—it’s a routine built on friction. Evening calm evaporates, replaced by quiet irritation that’s tough to spot but real in cumulative effect.

    Fixing the Flow: Small Shifts with Big Impact

    The unlock isn’t full remodeling. It’s identifying where momentum dies, then making just enough change that your routine becomes repeatable—and survivable. One fix: keep bags and shoes a full step past your dog’s “entry line,” not just out of your own path. Get a leash hook high enough to stay visible, low enough to grab without bending past clutter. If you hang the leash up every time, even in a hurry, it becomes a visible reset for you and the dog: outside is over, now we settle. A towel within reach—never behind boxes—means paws get wiped when it matters, not after the damage is done.

    Putting It Into Practice

    • Create a “clear zone.” The first step inside is reserved—no random drops, no shoes, no parcels. This strip is a guaranteed runway: you and your dog both get space to pause and reset, not trip and scatter.
    • Hang the leash, every single time. Pick a wall hook at entry level and use it, not the nearest chair or shelf. Over time, both you and your dog link “leash there” with “walk done.”
    • Tidy as you arrive, not as a chore later. Shift bags and shoes out of the zone before you relax—even if it nags in the moment. That quick reset relieves the worst routine pressure points.

    You’re not erasing all clutter—you’re targeting the spots where mess turns functional flow into a tripwire. Dog life is messy. But the most stubborn friction is where dropped items keep blocking the same threshold, trapping you both where you least want to stall.

    The Real-World Payoff: Smoother Transitions, Less Waiting

    When the entry is actually clear, the leash is easy to hang, and paws are wiped right at the door, routines compress fast. The dog goes straight from door to mat—no detours. You walk in and head for dinner or rest without circling back, and those early-evening interruptions shrink by half. The impact shows in fewer missed cues, less repeated circling, and a routine that finally feels as smooth as it looks in your head.

    It feels minor—until you stop having to fix the same hang-ups night after night.

    When Good Looks Aren’t Good Enough

    Photo-ready setups often hide the same weak links: a box that organizes supplies, but edges into the dog’s landing zone; a tidy mat crowded by last-minute shoes. A routine only works if your dog’s hesitation vanishes and you stop stumbling—even when things get messy. If the same corner keeps absorbing stray items and breaking your rhythm, it’s time to fix what blocks easy movement, not just what “looks right.” Consistency in path and placement beats appearance every single day. If a single friction point stays stubborn despite your efforts, direct correction beats another round of tidying.

    Let Your Daily Return Actually Reset

    Homecoming shouldn’t be flawless—just workable, every single time. Setups that clarify what goes where, that remove repeat friction and give your dog an unblocked line to their own reset, make every return cleaner, calmer, and easier to keep up. Fix the bottleneck, and the rest of your dog-life routine starts to fall in line.

    For practical entryway tools, leash hooks, and everyday gear that actually fits the lived-in routine, visit DogPile.

  • Mastering Carry-On Organization for Stress-Free Airport Exits

    Every traveler knows the moment: the landing announcement hits, and suddenly you’re fishing for your passport or tugging at a buried charger—fumbling inside a carry-on that looked perfectly ordered two hours ago. But under the real pressure points—security trays, boarding queues, cramped seats, and gate switches—what passed for organization at home gets put to the test. Visual neatness fades fast; blocked zippers, layered pouches, and outer pockets turned junk drawers force you to stop, dig, and retrace your steps when you should be moving forward. That’s when a carry-on’s structure becomes either a friction point or your one advantage for quick reset—there’s barely room for “good enough” when space and time shrink, again and again.

    The Disappearing Order: When Good Packing Fails in Real Use

    It’s easy to admire your bag on the hotel bed: all zippers shut, pouches lined up, nothing loose. But order that’s all appearance collapses under travel repetition. Reach for a cord and you’re met with pouch roulette, opening two—even three—sections before the right one. That passport you confidently returned to a “catch-all” slot is suddenly beneath five receipts and boarding slips at the next checkpoint. You catch yourself apologizing to the agent while your row waits; frustration builds, not from mess, but from pointless retrieval lag. This isn’t a discipline problem—most carry-ons simply aren’t built to absorb repeated movement without becoming their own obstacle course.

    Real Friction, Not Just Visual Mess

    The slowdown isn’t visual—it’s structural friction that multiplies under repeated use. Walking narrow aisles, squeezing into row seats, or rushing through security, small design flaws turn every movement into a potential snag. Outer pockets balloon with stuff you promised yourself to “sort later.” Zipper heads hide behind a shuffling mess of organizers, and documents slide behind snack wrappers instead of surfacing where you need them. At home, it feels distant; in action, these details block flow in all the places where quick access matters most.

    The Compounding Cost of Small Packing Slips

    Each micro-miss—misplaced charger, passport beneath the pile, lost pen—rarely feels critical on its own. But across a single flight (or worse, two in a row), every fumble slows the routine. A tangled cable adds seconds at security when you should be clearing the tray. A document buried in the wrong slot triggers sideways digging that halts a boarding line’s rhythm. Outer pockets meant for speed become slow-motion mazes. Most painful? These moments cluster in “reset windows:” the scramble before descent, the repack after a forced seat swap, or the crush of arrival. Surfaces stay neat, but function breaks down where seconds and efficiency slip.

    Comparing Two Carry-Ons After Real Use

    Imagine two travelers re-entering the aisle after a long haul. One is juggling snacks, leaflets, loose cords, and hunting deep in an overstuffed front pocket for ID. Every small access turns into a messy reveal and a repacking pause. The other simply opens one familiar zip: passport, charger, pen—each to hand in one movement. Their bag didn’t just survive turbulence; it absorbed disorder and kept their must-grab items in logical, reliable spots. The true difference isn’t obsessive neatness or a single magic bag; it’s a setup that transforms every repeat-use interruption into something quietly automatic.

    Why Most “Organized” Setups Fail by the Last Half Hour

    The real tripwire: right before descent, when time compresses and movement options vanish. Aisle-seated travelers especially know the squeeze—one handed on the bag, the other steering clear of elbows, it only takes a mis-layered pouch or a misplaced zip path to halt the reset. Pouches fold in on themselves or stack up, hiding the one thing you need. That clever multi-use pocket now swallows flight essentials; perimeter zips disappear under sliding organizers. Retrieval slows, documents miss their beat, and spillage into the aisle isn’t rare. The “organized” setup falls apart precisely when pressure peaks. The real measure of structure is its speed and certainty during these time-starved crunch moments—not its appearance during a calm pre-board check.

    The One-Handed Reset Test

    Reliable carry-on structure boils down to one question: Can you perform a half-blind reset with one hand, zero guessing, and minimal movement? The best routines look like this: slip your passport into its true anchor—never a loose catch-all; snap the charger into its purpose-built spot, not into a random pocket; click that pen home, not jammed behind a tangled cord. The goal isn’t sterile order, but muscle-memory storage that survives jostling, seat-hops, and gate-runs. Items shift, but the retrieval pattern never collapses—every essential “returns home” on the fly, not by unpacking the entire bag.

    Building a Carry-On System That Survives Real Travel Movement

    The easiest way to lose flow is the broad-stroke pocket: all high-use items mashed together in a single compartment for “quick access.” In reality, pens tangle with headphones, chargers snake through snack wrappers, and primary documents vanish when you can least afford them to. The contrast: dedicated, indexed pockets and pouches—each with a feelable logic. When you can find the cable, card, or ID by touch alone, the reset turns into an instinct, not a project.

    Scenes from Carry-On Reality

    • Boarding line: You hesitate with three zippers—passport behind tickets, outer pocket overstuffed—a single grab becomes a two-step retrieval as the line shifts impatiently.
    • Mid-flight: Headphones go back “wherever,” later burying your charger just when the battery hits red; seat neighbor sighs as you dig.
    • At security: Tray transfer drags out, a missing boarding pass slid under tissues—order by layers, chaos in practice.
    • Seat exit: One-handed repacking stalls; pouches collapse, items tightrope the tray, and the slow shuffle back up the aisle starts piling behind you.

    Turning Reset Into a Habit—Not Another Chore

    The upgrade isn’t “being more careful”—it’s building a structure that resets itself almost by accident. About 30 minutes before landing, slide documents, chargers, flight pens, and tissues into their true homes—dedicated slots, sleeves, and pouches made for quick, one-handed closing. The test isn’t during the calm, but during boarding surges, unplanned gate checks, or those clumsy rushes into a terminal. When your setup lets you repack and recover by sense, not sight, the reset doesn’t drain time or focus. It happens at speed, guarding against those last-minute lapses that multiply across legs and routines.

    What to Watch for in Your Setup

    Even small, tidy systems can trip over actual use. Ask yourself:

    • Do the same items keep getting buried, even in a “minimal” setup?
    • Is accessing an essential ever blocked by multiple zips, stacked pouches, or cluttered slots?
    • Does a routine reach still take too long—forcing you to glance or feel twice?
    • Is your “organization” hiding top-use essentials instead of surfacing them fast?

    No structure survives perfectly. But logical, purpose-built pocketing reduces the repeated reach, accidental reshuffle, and those slow-motion seconds that trip up every normal travel day.

    Why Structure Matters More with Each Trip

    A carry-on that survives real movement—boarding, waiting, repeated repacking, sudden seat switches—does more than look neat. It keeps you moving with the travel flow instead of backwards, never that person blocking the aisle or holding up the line. Every cleaner reset saves seconds, but more than that, it saves concentration and travel margin. With consecutive flights or tight connections, the advantages multiply: faster tray transfer, smoother document checks, recovery mid-stride instead of at a standstill. Make the support structure stronger, and the hidden cost of travel friction drops visible with it.

    Find pocket layouts, pouches, and travel tools built for real movement and quick reset at CarryOnSupply.

  • Why Flicker-Free Bathroom Lighting Matters Beyond Moisture Ratings

    “Damp rated” on a bathroom light sounds like protection. It ticks the moisture resistance box, satisfies code, and lets you install above a shower without worry. But if you spend a week actually using the space—shaving, cleaning, scanning the mirror—you notice something compliance doesn’t fix: the light pulses, flickers, or keeps your eyes working harder than necessary, even with a fresh install. That reassuring label does nothing for the slow headache or the jitter you spot at the tile edge after three early mornings under those LEDs.

    Moisture-Resistant Lighting Isn’t the End of the Story

    Most buyers assume a humidity-proof fixture checks every bathroom lighting box. In practice, moisture defense solves only half the problem. What hardly rates a mention until you notice it yourself is the subtle, repeated flicker that many LED setups introduce.

    This is rarely glaring at first. A soft pulsing hovers at the edge of a mirror or runs along the grout—barely there until you catch yourself squinting by Thursday, or realize you’ve started tilting your head trying to spot details that should be obvious. The headache is never sharp, just steady, and it drags into each routine.

    The Everyday Effects of Subtle Flicker

    Imagine a shared bathroom on a tight morning: one person leans close for beard trim detail, while another slides bottles or wipes toothpaste and surveys quick results. The overhead is technically bright—lumens look fine on paper—but something is off. Each glance into the mirror scatters with a shimmer at the reflection’s edge or a twitch down the backsplash.

    That first week, you catch yourself missing spots, struggling to see flecks on counters, or feeling your eyes scramble as you move past the sink. The pace slows for no clear reason—small tasks now take attention, and a supposedly minimal setup leaves the space quietly irritating.

    Why “Rated” Lighting Leaves Gaps in Daily Comfort

    The disconnect is structural. Damp ratings mean the hardware won’t fail from steam, but they do nothing for the driver inside—a silent player. If the driver is poor or the dimmer is mismatched, you get microscopic current fluctuations. The result: double reflections and micro-shadows that build, day after day, into visible strain.

    Glossy tile and mirrors make it worse. What seemed minimal and crisp on install day—flush mounts, hidden screws, cords tucked above the plane—now leaves vision scattered and details slippery. Every clean line is undermined by visual instability during the routines that fill a bathroom’s real schedule.

    Symptoms During Real-World Use

    • Flicker in mirror edges: Trouble focusing while shaving or doing fine grooming, with moving reflections that seem off but are hard to catch in stillness.
    • Pulsing, unstable shadows across counters: Surfaces look clean one way, then shift with each pass of the sponge or scan for small dropped items.
    • Visual fatigue: Low-level discomfort builds quietly; routine minutes near the sink accumulate into tired eyes or a tense brow by midday.

    This isn’t catastrophic failure—just steady, quiet resistance that saps comfort and makes daily activities slightly more taxing.

    Replacing Flicker: Small Change, Big Relief

    Switching to flicker-free, integrated LED drivers delivers something lost in most “rated” installs: visual calm that doesn’t break with every movement. Suddenly, edges are stable in the mirror, the countertop reads clearly under any angle, and you aren’t forced to keep readjusting your gaze to make things out.

    The space doesn’t look fancier, but staying tidy gets easier—spots and streaks stand out at once, tasks compress into fewer motions, and you don’t think about the light after two days of use. A neat install goes from decorative to functional, improving life with less daily drag.

    Common Pitfalls: Rating Without Stability

    Buying by label alone means trading one friction for another. Maybe you’re safe from moisture—but stuck with a flicker you can’t solve by moving toothbrushes, swapping bulbs, or nudging the vanity. Some try dimmer swaps, layering in diffusers, chasing “compatible” bulbs—most land right back at the same lingering problem: agitation that builds under regular routines.

    Don’t Stop at Damp Rated—Look for Flicker-Free

    If you want to avoid a repeat problem, filtering only for “bathroom rated” is a trap. Look for fixtures or hardware that claim “flicker-free” operation—and check for real mentions of LED driver quality, not just an all-clear for steam. Best-in-class options confirm stability at all dimness levels and after months, not just on day one. Reviews matter most when they come from users a few weeks in, not just right after installation.

    If you install yourself, avoid mixing random dimmers with flicker-free LEDs—those combos almost always degrade over time, even when they first look correct.

    It’s Not Just the Bathroom—Why This Applies Everywhere

    Flicker is not limited to bathrooms. The same issue repeats under kitchen cabinets, along shelf runs in a workroom, or above a home office desk. A rated fixture might seem sleek and bright at setup, but after a few late nights at a cluttered desk or elbow-deep baking at the kitchen counter, you’ll find the same jitter—especially wherever surfaces reflect or tasks demand clear, edge-to-edge visibility for small or fiddly work.

    Practical Moves for a Calmer Setup

    • Target flicker-free fixtures for any place you’ll use repeatedly—not just main bathrooms, but kitchen prep surfaces, workbenches, or reading nooks.
    • Aim for light that covers mirror and counter edges evenly—not just centered brightness. Clarity at task edges saves time.
    • Test your setup after real routines, not just five minutes after install. Spend a week, and watch for subtle shimmer or eye fatigue.
    • If something still nags, revisit connections, dimmer pairings, and cable runs to spot points where instability creeps in despite good hardware.

    Everyday Lighting: The Hidden Impact of Calmer Fixtures

    The best lighting setups rarely shout—and yet, their absence is felt in everyday friction: missed spots, jittery reflections, edge discomfort. No “damp rating” sticker fixes a fixture that wears you down by Thursday. Make structure and stability work for you, not just for compliance. The difference is a bathroom (or kitchen, or desk) that doesn’t just appear finished but actually feels easy to live with, no matter how many times you flip the switch.

    Find real, flicker-free lighting and practical support solutions at LightSupport.

  • How a Drying Fan Transforms Entryway Routines After Rainy Days

    Wet weather exposes entryway setups fast. After just one rainy day, shoes cluster in uneven rows, umbrellas sprawl over every open edge, and the narrow space by the door blends into one damp, crowded zone that never quite recovers. Mats collect puddles, but that “quick reset” slips away: what begins as organized turns into a cycle of slow-drying gear, blocked movement, and a constant feeling that each return home leaves the entry less usable than before. The true breakdown doesn’t start with lack of bins or racks—it starts when drying speed falls behind real use, and every drop zone becomes a backlog instead of a buffer.

    When Storage Falls Behind: Showing the Limits in Repeated Use

    On paper, most setups look under control—a bench for sitting, a tray for mud, hooks for coats. But the routine under pressure tells a different story. Each return drops new gear in the mix: a wet bag lands on the last clear spot, shoes from yesterday are still clammy, and the bench ends up covered instead of cleared. By the third or fourth round of comings and goings, the original “neat” footprint shrinks: mud slides past the tray, corners pile up with abandoned gloves, and the only dry path narrows to a tight squeeze. Instead of a transition zone, the entry clogs up—a visible sign that even the most solid racks lose ground when recovery lags behind the real pace of life.

    Stationary storage doesn’t solve for repeat dampness. As humidity and weather compound, resets drag out. Shoes that looked dry hours ago feel cold underfoot. Water sneaks under mats. Temporary bags and coats turn into ongoing obstacles because nothing ever fully dries before it’s needed again. The entry isn’t messy, exactly—it’s stuck, outpaced by daily flow, and each pass through tightens the zone further.

    What Fails First: Not the Storage, But the Reset Cycle

    Hooks, trays, and racks control the outline, but when weather repeats, the real test is whether the zone is usable before the next arrival. If boots or coats are still wet when it’s time to leave again, the “fix” becomes improvisation: extra shoes drift into hallways, damp jackets migrate to bedroom doors for better airflow, and the bench—designed for sitting—ends up as a drying rack. Everyone starts sidestepping new piles, moving carefully to avoid slipping, or staging gear where it doesn’t belong, just to buy enough time for things to dry. The visible flaw isn’t clutter, it’s a return flow that gets slower and less predictable with every cycle.

    Repeated Friction You Can See and Feel

    • Bags dropped at the pathway’s edge, pinching the route from outdoors in
    • Shoe rows doubling back, spreading past the mat and pushing the “clean zone” deeper inside
    • Bench surfaces lost to overflow—wet coats, helmets, or sports gear where people should sit
    • Temporary “later” spots that become semi-permanent hangouts for towels, gloves, or gym bags
    • The repeated routine of shuffling soggy items toward bedrooms or laundry just to finish the drying that the entry can’t handle

    All signal the same core problem: storage keeps the structure, but slow reset leaves the space stuck—what looks orderly is actually stuck in a slow drift to less usable.

    Active Airflow: The Shift That Unlocks Real Reset Speed

    Adding targeted airflow—a compact drying fan above the drop point or hidden in a slim storage column—does more than dry shoes. It breaks up logjams, turns hours-long resets into quick turnarounds, and stops the routine from slipping further behind with each wet arrival. Instead of waiting for damp shoes to air out, a well-placed fan pushes humidity out of the gear and the space, clearing puddles and prepping surfaces before the flow returns.

    With real airflow, the ritual resets: damp gear leaves sooner, so there’s no need to spread shoes or bags deeper into the house. The “walkable path” returns overnight instead of mid-morning. Benches return to seating instead of storage. Odors don’t settle in. The difference isn’t superficial—it’s in the pace: people return to an entry that’s ready, not lagging behind the routine.

    After the Switch: Entry Behavior Unclogged

    Picture it after a full week of rain. Three homecomings in half an hour: one person sheds running shoes dripping water, another drops a mud-streaked bag, and the last squeezes through with an umbrella and groceries. Before airflow, puddles claimed half the mat all night and the bench was just another place for damp heaps. With active drying always running, shoes actually dry and gear cycles back into use in a couple of hours—no more morning “where’s the driest pair?” maneuver, no overflow in the hallway, and, for once, somewhere to sit that isn’t half-covered in wet jackets. Every reset happens without having to think about workaround solutions in other rooms.

    Where It Works: Fitting Active Airflow into Tight or Busy Entryways

    Most entries are not built for endless gear or sprawling benches—they’re narrow, used from multiple sides, and often crowded on a regular morning. That’s why real-world airflow solutions stay compact and out of the way, focused on the bottleneck, not just the open wall. The effective placements are:

    • Mounted just above the drop area, blowing across the main “gear zone” without shooting air at doorways or faces.
    • Tucked inside a side storage element, angled to reach across two or three rows of shoes and bags without eating up floor space.
    • Kept clear below: no boxes, cables, or spillover shoes cluttering airflow where it counts most.

    Pair this with easily washable trays, mats, or racks: active drying can’t keep mud from landing, but it makes washing up less frequent, keeps surfaces ready, and stops grit from turning into permanent mess.

    Long-Term Use: Real Changes, Real Limits

    With repeated use, the split is clear. Shoes that once took all night can be ready in two or three hours. The bench stays available, so sitting down to tie laces isn’t a hassle. The “just for now” drop spots lose their hold, because gear genuinely resets in place. Yes, heavy mud and deep dirt still need occasional attention—no fan will erase the mess entirely. But the drag of dampness and slow build-up of odor no longer hangs around as a daily anchor. The threshold returns to function instead of friction, even through consecutive storms.

    No entryway solution erases every problem: airflow quickens recovery, but it can’t scrub scuff marks or replace floor mopping. Still, changing the pace of drying turns the entry from a weak link into a working threshold—a space on pace with daily movement, not always one reset behind.

    Day-in, Day-out: A Transition Zone That Keeps Up

    The result isn’t a showroom—no transition space ever is. It’s a front zone that keeps up: clutter detours shrink, the reset burden drops, and the cycle of overflow and drying backlog finally breaks. Active airflow isn’t decorative; it’s the quiet difference between a path you can use and one that always slows you down, between a bench as occasional seating and bench as permanent overflow.

    The improvement is in the details: a dry patch where you can finally step, shoes you can slip on without the squelch test, a bench that’s ready instead of buried. Active reset keeps the entry functional—real gear, real weather, and real repeated use, not just a tidy moment after the first setup.

    See more practical transition-space storage options at Betweenry.

  • How Under-Desk Organization Transforms Your Workspace Flow Instantly

    Under-desk clutter doesn’t just look messy—it drags on your entire work cycle. One cable bites your ankle while you adjust your chair; an outlet brick wedges itself exactly where your knees should be; a bin meant for “organization” turns into a shifting obstacle you scoot around fifteen times a day. Every repetition—sitting down, pushing back, reaching for a notebook, rolling your chair to the printer—tests whether your desk’s underside helps you move smoothly or jams you into fresh workarounds. It’s not about hidden mess; it’s about every shift that gets slower or more awkward when the wrong object sits in the footwell or along the cable trail.

    When “tidy” desktops create chaos below

    A quick straighten above—slide the cup, nudge the keyboard, clear one notepad—and the surface looks clean. But that “clean” is often a cheat. Gear slides down out of sight: adapters, bricks, phantom cables all pushed under the desk, right into leg pathways. That relief lasts until the next routine movement—chair wheels stutter over a charger, your feet nudge a cable again, a quick shift becomes a clumsy shuffle. Instead of running out of desktop space, you’re running out of space to move naturally.

    The result: a desk that passes any glance test but keeps interrupting your work at floor level. These aren’t just visual details; each minor snag or pause chips away at posture, drains attention, and erases the promise of a no-hassle reset with every return to your seat.

    The real cost of under-desk friction

    It’s not the first tangle—it’s the pattern that shows up by the third or fourth day. Repeated workflow exposes small failures: a chair catching on the same lonely cable every morning, a power brick that always rolls into your way, or a surge protector that drags cables whenever you stand up. Soon you’re anticipating obstacles, not jumping into work. “Do I need to clear the path again?” becomes part of your mental checklist before you’ve even hit the keyboard.

    Posture begins to shift around these obstacles, sometimes without you noticing—the chair doesn’t tuck, your feet land in odd angles, and the cycle of micro-adjustments dulls both energy and focus. It’s not a dramatic jam, but a string of tiny interruptions that turn organization from a one-time task into a running battle under the desk.

    Why quick fixes make some setups worse

    Clearing the top by dumping chargers and cables underneath is a trap. Compression above trades for obstruction below. Your workflow—scooting between keyboard and notebook, pushing the chair back to think or switch devices—runs into resistance: tangled cords to dodge, bins to angle around, drawers that eat the last inch of knee space. The new “order” reroutes your movements and dulls speed and comfort, especially as the days stack up.

    Contrast that with a desk equipped with a cable tray running along the back or a cable box that anchors power bricks out of your leg zone. Suddenly, your feet glide into place, the chair rolls without catching, and you stop calculating risks before each move. The invisible friction disappears, and it’s clear in the instant reset between tasks.

    Reworking the underside: What actually helped

    No need for elaborate builds: mounting a basic cable tray across the desk’s rear shifted the daily experience. Cables stayed pinned up, no longer lacing the floor. That freed up the footwell, so each device swap didn’t kick off another game of cable dodge. The “reset” after stepping away required zero rearrangement under the desk—and chair-to-keyboard became a direct glide, not a hopscotch over old freakouts.

    Over weeks, the improvement stuck. Instinctive resets returned, with no double-take under the desk. The muscle memory for stooping to reroute cords faded out. What mattered wasn’t the tidy look, but the absence of constant, low-level drag on movement—each cycle simply worked, instead of working against you.

    It wasn’t perfection—cables occasionally crept loose, devices were still added—but the sticky, repeat interference was gone, and the whole routine gained back an edge of flow and trustworthiness.

    Getting the fit right: Storage vs. actual workflow

    Dropping in organizers—whether trays, cable boxes, or clips—solves much of the obvious mess. But not every storage tweak matches the pressure points of how you work. Box in too much, and suddenly you’re crouched under the desk to reboot a router or unspooling cords you can’t reach. The difference between a usable fix and a fussy one rests on whether it clears friction for movement and device swap, not just on how empty the floor looks for a photo.

    For example: outlets you use every day shouldn’t end up behind drawers or boxed under bins. Those daily plug-ins need direct access. A cable tray should keep chair space open, not jut into your path or create new shifting obstacles whenever you adjust your seat. And beware drawers or bins that slowly migrate forward, crowding your workspace and forcing legs sideways just to fit.

    Which fixes last—and which only seem to work

    The true test lands by the end of your first real work week. Does the under-desk fix remain invisible in motion, or do you find yourself building new small workarounds? Useful setups let you scoot, stretch, plug, and roll in and out fluidly—if you’re still pausing, ducking, or shuffling gear to reset, the “solution” is still part of the problem.

    Quick FAQ: Under-desk setups in practical use

    Does cable management really matter if I tidy once a week?
    Absolutely—even if you reset every Friday, the everyday pattern of foot placement, chair guiding, or hunting for cables creates its own buildup. True cable control means you don’t notice small snags daily, so resets become background, not a task you brace for.

    Should I store all extra gear under the desk?
    Not if it kills movement. Filling every inch below shrinks legroom and pulls everyday devices out of reach. The best setups support access, not negotiation with hidden chargers or trays that drift and crowd your knees.

    Can organizers actually make things worse?
    Definitely—if organizers demand you crawl under to swap cables or force you to detach every cord to change devices, they add complexity. Aim for containment that simplifies movement and keeps frequently used ports within easy reach, not solutions that turn into rigid blockades.

    When a small shift unlocks better reset cycles

    Solving the underside of your desk isn’t about showing off empty floor space. It’s about breaking the pattern of constant, tiny interruptions—the cable snag, the blocked exit, the awkward return after stepping away. A cable tray, cable box, or more thoughtful placement of organizers doesn’t need to be dramatic to make resets fast and comfortable, posture settle without a fight, and distractions stop cropping up out of nowhere.

    Watch for real signs: If you find yourself moving smoothly from keyboard to notebook, rolling in and out without stutter, and never scanning for hazards before sitting, you’ve created a setup built for use—not just looks.

    Small, structural tweaks—especially those that protect the footwell and keep movement paths clear—pile up fast. That’s what makes a desk trustworthy: resets become automatic, not strained, and the surface stays ready through long sessions, with no mental or physical tax for just sitting down and getting started.

    Explore the full WorkBasic collection

  • Creating Functional Bag Storage That Keeps Entryways Clear and Organized

    Bag storage setups decide whether your space moves freely—or bottlenecks with every busy day. Walk into a garage, mudroom, or workshop and you know it instantly: in one, bags are stored with intention, and grabbing what you need is mindless. In another, bags explode across every surface, paths choke up, and you find yourself sidestepping, shifting, or flat-out detouring through a gauntlet of pile-ups. These trouble spots take over surprisingly fast—often as soon as storage gets chosen for looks, not for living.

    When “Tidy” Storage Trips Up Your Routine

    The neatness of wall hooks, slim shelves, or a new rail has instant appeal. On setup day, everything feels under control. Then routine sets in: by Thursday, those five hooks hold seven bags, straps corkscrewing together, canvas flopping to the floor. A stacked bin that looked minimal ends up blocking your access to the cabinet, forcing an awkward reach every time you need a tool.

    This isn’t a rare problem—it’s what happens when storage solves the look but ignores what life actually throws at it. Slim bins and hooks clear the wall, sure, but once the family is late for practice or a bulky backpack doesn’t hang up neatly, the system falls apart. Bins become black holes for overflow, rolling carts wander and sprawl into walkways, and suddenly your “organized zone” is just new clutter in disguise. Instead of friction fading, it quietly multiplies.

    Where Setup Fails: Overflow, Obstruction, and the Slowed-Down Reset

    The flaws show up quickly—just watch after a handful of real-life returns. That “catch-all” shelf with good intentions? It’s now a leaning mountain of tangled bags and loose straps that slide right off the edge. Wall hooks fill up fast, and overflow bags drop straight onto the floor, or, worse, sprawl over a bench or worktop, seizing even more space. The once-open corner turns into a hesitation point—do you shove, reroute, or risk stepping on someone’s gym bag?

    The classic dead-end hallway makes this painfully clear: peg rails go in to keep bags off the floor, but after one missed return, a single gym bag sits right where you need to walk. By the week’s end, a casual drape becomes a layered pile-up, forcing everyone to take an awkward sideways slide or, more likely, just avoid the area until the next big clean. The promise of “enough storage” unravels alarmingly fast—just a couple imperfect days and the whole flow bottlenecks, making the space feel smaller than ever.

    The Real Scene: Why “Organized” So Often Slows You Down

    Picture the daily scramble: you’re late, one hand on your bag, reaching for a jacket with the other. The only way to hang up your bag is to shift that rolling cart—again—back into its spot, which it never seems to stay in. Rows of bags bristle off hooks at shoulder level, a stray tote pokes your elbow, and a bin wedged under the shelf means you can’t step back without catching your heel. Weekend plans for a quick reset collide with reality: untangling, restacking, uncovering blocked doors, buying back your route through the space. “Organized” doesn’t mean friction-free. As soon as routines get rushed, everything piles up.

    What Actually Works: Storage That Bends Without Breaking

    The setups that last handle the chaos of real returns—gear slung down, extra equipment appearing unplanned, resets that take seconds, not minutes. If you have to shift one bag to put up another, the system’s already too rigid. If a missed return means a slip hazard, the whole routine gets upended. Function beats form every single time: setups must absorb imperfect days and overflow, not demand perfection to keep the path clear.

    The acid test: Does your storage flex when you toss in “just one more bag”? If two people come home at once, do you still have a walkable route? Can you drop, hang, or shove things away without needing a full reorganize by Friday?

    Making Room for Error: The Smart Drop Zone

    Here’s where a simple low cubby—open at the front, under those overloaded pegs—completely shifts the routine. Suddenly, instead of bags spilling across the floor or bristling from every hook, stray returns have an instant landing pad. You no longer choreograph a delicate dance just to reach the cabinet or bench. People can drop a bag and keep moving. The system absorbs overflow and quietly resets itself with almost no extra thought. The room holds more, but feels less cluttered, and you buy back the one thing every busy route needs: clear, predictable movement.

    And it’s more than a visual fix. Gone are the habitual sidesteps and panicked sweeps just to open a door. The space stays open even as it fills up, and the cycle of frustrated rearranging breaks.

    Five Telltale Signs Your Bag Storage Doesn’t Actually Work

    • The floor’s always covered—even after you tidy, stray bags creep back by the end of the week.
    • You find yourself untangling straps, wrangling rolling carts, or restacking bins more than once a week.
    • “Passing through” means dodging, shuffling, or shifting some other object just to make room.
    • The wall section you installed for storage is technically used—but half the time, you’re still blocked during the morning rush.
    • The area only looks clear after a deep reset and never holds up in real, repeated use.

    Sharper Tactics: How to Make Bag Storage Actually Flow

    • Layer vertical and floor solutions. Pair durable hooks for the “hang-and-go” crowd with an open cubby beneath for rushed returns and bulkier items. Missed the hook? No problem—the bag still lands out of the way.
    • Leave room for real-life overspill. If you install modular rails or shelves, set up a floor “catch” area for overflow so nothing spirals out into the path or blocks a door.
    • Pave a home for mobile units. Rolling carts and chests are only helpful if they stay put. Demarcate a parking spot—tape, mat, or floor decal—so mobile units don’t slowly invade walkways.
    • Prioritize resets that happen naturally. Setups should self-correct: after a week of heavy use, a quick sweep or toss-in restores order. Avoid organizing systems that only pay off after a marathon tidy on Sunday night.

    What Matters: Movement Over Mere Appearance

    The ultimate test isn’t how “organized” a space looks when empty, but how it holds up on a week of missed hooks, armful returns, and lopsided overflow. A well-placed cubby, modular bin, or rugged wall hook buys you margin—so you can move, drop, stash, and reset quickly, even when things go sideways.

    When storage is tuned to the way life really hits it, you don’t waste time shuffling, dodging, or constantly re-staging every square foot. What’s left is simple: less friction, more room to move, and a setup that holds up through the mess, not just in photos.

    Find setups and modular organizers for real spaces and routines at StackNest.

  • Why Leaving One Empty Slot Transforms Your Car Organization

    Step into your car after a long errand run, and the flaw in “perfect organization” appears instantly: your hands full, your phone buzzing, and every tray, slot, and cupholder already crammed with last trip’s leftovers. Re-entry becomes a quick calculation: where does this new coffee go? Where do you drop your keys when the usual pocket is stuffed with receipts and sanitizer? The system that’s supposed to keep things controlled now blocks you at the exact moment you need flexibility. On the surface, everything looks tidy. But in real, day-to-day car use, a packed setup turns small tasks into small struggles, every single time.

    When “Fully Organized” Turns Into Everyday Friction

    Stocking every compartment, filling every pocket, and maximizing storage seems logical—until it’s time to use your car in motion. Mid-commute, you slide into the seat, reach for the charging cable, and notice it’s tangled beneath sunglasses, spare change, and an envelope wedged tight. That slip of a gap you counted on is already gone, and there’s no room left for an unplanned item. Instead of feeling streamlined, the routine triggers a scramble: shuffling coins, clearing cords, and risking a quick drop somewhere awkward just to claim a spot.

    This is not an occasional hiccup. Real car use turns even the best-organized setups into friction zones. Trays overloaded as default, floor mats collecting what rolls off the seats, receipts and sanitizers escaping their “assigned” spots after a single sharp turn. The effect: an illusion of control with a hidden side of constant micro-annoyance, especially during rapid errands, shared driving, or quick re-entries where speed matters more than looks.

    No Empty Slot = More Work Later

    Every time there’s no open slot left, each new or odd-sized item becomes a problem. With every compartment filled, the simple act of adding a phone, a snack, or a parking ticket demands rearrangement—on the fly. You find yourself stacking items by the shifter, dropping essentials in the passenger seat, or leaving loose objects to rattle until you have time (and patience) to clear the pile.

    Shortcuts don’t really save time. You end up cramming, misplacing, or letting small clutter slide under seats—knowing it’ll resurface the next time you slam on the brakes or hunt for something mid-drive. A setup that promised “less mess” suddenly creates a cycle of forced clearing, more frequent cleanup, and slower access to whatever you actually need most.

    Overlapping Routines: Why a Buffer Slot Changes Everything

    No driving routine stays on script. You’ve got your phone charging—but now a passenger needs a port. You plan for coffee, but your only cupholder still holds yesterday’s bottle. Fully packed organizers don’t flex: every overlap creates new interference. Each time two needs collide, either your flow jams or you rig a quick fix—dangling cables across the console, stacking keys and cards beside shifting snacks, or just risking a slide into the footwell. That’s wasted time, hidden distraction, and more wear at the seams.

    The “after” photo of a maxed-out organizer hides the real test—how it survives round two and three. By the third errand, gum packets and wipes are fighting for space. A backup phone gets forced into a sun-blasted dash or pinched between seat rails, cable stretched and ready for another snag. “Temporary” drop points become permanent clutter, and the result is always more awkward workaround than flexible system.

    Real Scene: After-Work Fumble

    Picture the late evening after two stops: my normal phone tray swallowed under spare coins and store receipts, needing a quick recharge before the next leg. No open spot left—so my phone landed crooked beside the seat, precarious and half-charging, cable yanked tight. Another floor hunt, another ounce of frustration, and one more example of the same tiny setup flaw repeating. Most drivers invent similar short-term “fixes”—and pay for them later in extra cleanup, slower stops, or sudden mid-drive distractions.

    Building a Buffer: The Power of Leaving One Spot Open

    The real fix is not more “organization.” It’s leaving one compartment purposely empty—especially near your main action zone, like the driver’s console or charging tray. Think of this as a structural buffer, not wasted space: the margin for last-second handoffs, unexpected guests’ devices, drive-thru change, or receipts that can’t be crammed elsewhere. A deliberate landing pad cuts the scramble to zero, letting you shift, charge, swap, or stash without a bottleneck forming every time routines overlap.

    Test it out: clear the main tray near your seat and keep it reserved for overflow. That one open zone absorbs unpredictable needs—morning wipes, a friend’s forgotten phone, random snack wrappers—without forcing a mess elsewhere. Over the course of a week, you’ll notice: less last-minute stacking, fewer items drifting to the floor, and a measurable drop in frantic, end-of-day tidying. Even quick exits and rushed re-entries become smoother, because your setup can flex as real life demands.

    Choosing Your Buffer Zone: Location Matters

    The buffer only works if it’s where your hands naturally move most. For most compact and midsize vehicles, that means the forward center tray or deepest console, close to chargers and regular drop points. In larger cars, it could be the key side pocket or organizer zone nearest the main seat edge. The goal: make the buffer visible, within easy reach, and at the heart of your live-use routine—not buried in a back-seat cubby where overflow just becomes forgotten junk.

    Leave just one spot open. Any more and you risk building a new clutter nest. The standout benefit is speed: drop, swap, or grab without blocking yourself or slowing everyone down. In any real stretch of errands, that small gap becomes the critical “give” your setup never had when every inch was filled on day one.

    Does Leaving a Slot “Empty” Actually Create More Mess?

    The common worry—“won’t an empty tray just attract extra junk?”—doesn’t pan out if the buffer zone gets used as intended. Think of it as a temporary transfer hub: a high-turnover surface for items in motion, not a final graveyard for forgotten clutter. Quick use and end-of-day sweeps keep it clear. Meanwhile, cables, phones, sanitizer, receipts, and random extras stop piling up in less controlled zones (like the floor or side doors), making cleanup easier and consistent. The real win is preventing those migration routes to hidden pockets and under-seat gaps where real mess hides and grows unseen.

    Looking Neat vs. Working Smoothly: What Real-World Organization Means

    Maximizing every inch looks good in photos—but if using your car means more shifting, slower reach, and constant rearrangement, “organization” has become functionally messy. An open buffer slot sacrifices showroom polish in favor of live convenience: less stalling, fewer micro-dilemmas, and less repeated strain at every stop. For anyone facing commuter pressure, fast-lane errands, shared cars, or even just the recurring loop of loading, driving, returning, and reloading, this is not an optional trick. It’s the difference between a setup that just sits still and one that actually moves with you—errand after errand, week after week.

    For more practical setup tools and strategies to make your car work better—day after day—explore DriveWellSupply.

  • Why Inspecting Mount Holes Before Drilling Prevents Lighting Problems

    The wrong mounting hole doesn’t ruin a room in one dramatic moment—it quietly disrupts every routine. A flush-mount ceiling light just off-center in a low hallway forces you to squint past glare each time you cross at night. The vanity fixture you trusted to the template delivers shadows on half your face every morning, making you adjust your stance or tilt your head to get half-decent mirror light. Most people don’t realize how quickly a minor mounting misfire becomes a permanent source of irritation—one that colors how you move, clean, check your reflection, or work at a countertop. This is the part of indoor lighting that rarely gets fixed later, and yet it’s the reason a space keeps feeling “off” long after install.

    Why Mounting Hole Placement Matters—Beyond the Installation Guide

    Lighting fixtures may come with standard mounting holes and template guides, but real walls, ceilings, and routines rarely match the instructions. The placement you pick sets up the entire behavior of light and shadow in your space—whether the fixture is a flush-mount in a narrow hallway, a wall sconce by the stairs, or vanity lighting above a mirror that doesn’t quite line up.

    Trusting the default position or quickly marking holes by eye is where the real problems start. You might not notice with every switch-on, but a dozen little moments reveal the miss: stairways with edges lost in shadow, bathroom mirrors split between glare and gloom, hallway lights aimed too low or too high, sending harsh light right at eye level or leaving safe movement in doubt. The imbalance never improves with use; it only multiplies as routines repeat and minor inconvenience turns to daily friction.

    Everyday Use Reveals the Gaps

    Lighting failures aren’t theoretical—they show up in how you move and work, again and again. Picture a hallway that looks centered on install, but as you walk through at night, you find yourself dodging bright glare and pausing at darker patches near doorways. Lean in at the bathroom mirror: one half of your face is crisp, the other indistinct, so you start shifting your stance or stooping for better balance every morning.

    Task lighting signals the same problem: under-cabinet fixtures mounted an inch too far back throw part of the counter into shadow, forcing you to reach farther or move cutting boards to avoid the dark. In a laundry or utility zone, the “bright” ceiling fixture leaves the far side of the hamper or counter in gloom, requiring a portable lamp or a hand-shield against glare to get chores done. These annoyances do not go away, no matter how sleek the fixture or how high the wattage—they come straight from flawed mounting logic.

    How Skipping a Simple Check Becomes Ongoing Irritation

    Most persistent lighting problems are rooted in small, overlooked alignment mistakes. A flush or semi-flush mount not matched to the movement path turns movement into a series of micro-squints and shadowed pauses. A wall sconce installed to match wiring, not activity, pulls the main beam too low or high, blinding you on every late-night pass. Vanity fixtures that don’t center on the functional mirror turn shaving, makeup, or even handwashing into a daily frustration—never disastrous, but rarely comfortable.

    These aren’t dramatic errors—they’re the compromises that never settle. The room looks “done” but behaves unpredictably. You change your own habits to work around what should have been fixed: stepping wide on the stairs, craning at the sink, tilting mirrors, rearranging cutting boards, adding stick-on LEDs where a better mount would have prevented the problem. No flashy fixture can overcome poor mounting logic that ignores real use.

    Real-World Example: Mirror Lighting That Misses the Mark

    Consider a bathroom where the mirror’s edge falls just a few centimeters off from the wall box—but the installer uses the hole template anyway. The vanity light looks straight across the top, yet every morning you’re fighting shadow on one cheek, or bright flare along the mirror’s edge. You end up squinting, switching sides, or holding still in awkward positions just to see clearly. The annoyance is never huge—but it’s always there.

    Solid hardware won’t rescue that missed alignment. Lighting comfort, especially in spaces you use closely—like vanities or task counters—depends on where the light actually lands, not just where the box allows. This is a spatial, not just structural, detail—and it is visible in daily, not just one-off, use.

    Small Fixes Make a Lasting Difference

    Moving a mounting bracket by even a centimeter shifts the entire quality of a space—what’s visible, what’s shadowed, and what keeps frustrating you. Rushing to match the mount to wiring or wall boxes ignores the realities of real use. A better approach: measure and align mounting holes based on how people actually stand, walk, work, or look in the room, not just on paper diagrams.

    In one bathroom install, shifting the fixture 17mm to properly line up with the mirror—not just the wiring—removed daily shadow complaints and glare from the faucet, turning the mirror into a functional surface, not a guessing game. That tiny repositioning turned mornings from an adjustment routine into a normal, interruption-free task. It was a small step—but the effect lasted for years, proving that “close enough” ends up just missing the point.

    The same principle holds for hallways, stair landings, and work surfaces: light centered to your real path, not just the nearest stud or drill hole; fixtures at heights that match eye level, not just ceiling height; under-cabinet strips that meet the working edge, not just fit the cabinet run. Repeated use is where the improvement shows—a room that finally lets you stand, move, and see without workaround habits or unfinished gaps in comfort.

    Tips for Reliable, Frustration-Free Installs

    • Don’t assume the factory hole or template is final. Check wiring, but also compare against doors, mirrors, and the paths you use most.
    • Mock up the install before drilling. Painter’s tape and a cardboard cutout reveal where the light will hit (and miss), showing shadow lines and glare spots before you commit.
    • Use a level for every fixture—especially panels and linear lights. Even a small tilt throws the whole lighting pattern and makes the mistake painfully visible in long hallways or above counters.
    • Weigh the tradeoff: perfect wire coverage vs best light position. If the box and wiring force the fixture off-ideal, consider spacers or minor bracket adjustments—clarity and comfort count long after the wiring is hidden.

    Spending five extra minutes at install saves months of small, repeating annoyances. When holes are placed where the light actually helps—balanced on the mirror, centered on the stair run, crossing the hallway at the right height—the room supports your routine instead of forcing you to work around it.

    The Real Test: A Room That Doesn’t Interrupt the Routine

    A finished room with bright lighting can still feel wrong every day. What matters is not surface brightness, but whether the light makes daily movement, task, and mirror use easier—or leaves you fighting glare, dark corners, or imbalanced reflection. Fixing mounting alignment quiets the friction you notice only when the job is done “close enough.”

    If your fixtures look good but don’t quite work, start with the mount, not with upgrades or troubleshooting. A single corrected hole is often the fastest route to a room that finally works the way you thought it would at install.

    Shop practical indoor lighting for every space with LightHelper.

  • How Smart Cabinet Placement Transforms Outdoor Storage Efficiency

    Order in outdoor setups is easy to fake—but hard to keep. That first afternoon, a sleek storage cabinet or those fresh bins along the fence trick you into thinking you’ve finally conquered the clutter. By week two, reality resurfaces. That narrow side yard that once let you glide past is now a tripping hazard. The cabinet meant to hide tools quietly becomes a landing pad for overflow, while the footpath shrinks under the weight of one more “temporary” rake or bag. The promise of order fades fast when every reset demands more maneuvering—and the system that looked so organized on day one begins to undermine your actual routine.

    When Organization Breaks Down: The Realities of Outdoor Storage

    Outdoor friction doesn’t shout—it creeps until you can’t ignore it. It’s rarely about “too much stuff” all at once. It starts with the shovel sticking out at ankle level, or the watering can that never actually makes it back inside because the fit is just off. If a cabinet or wall system requires constant reshuffling, or pushes into your walking line, every “quick put away” becomes a hassle. Soon, the area that was supposed to tame the mess just creates new bottlenecks—and familiar shortcuts spawn clutter faster than you can reset it.

    The difference between functional and frustrating isn’t measured in cubic feet, but in daily movement. If a storage solution claims to “maximize space” but quietly traps a corner or forces you to double-handle gear, the overflow returns—and so does the friction. The real cost isn’t visible at first; it builds with every awkward reach or blocked door until you start leaving tools wherever you last used them.

    The Subtle Power of Cabinet Depth and Door Swing

    Tiny mismatches can sabotage an otherwise good setup. Door swing is a repeat offender. Picture a side-yard cabinet: shelves are deep, the doors jam after a partial swing, and what should be an easy stash becomes a hips-and-elbows shuffle. Pruning shears in hand, you need to wedge yourself sideways just to get the door halfway open—so you drop the tool on top and tell yourself you’ll fix it later. One missed return leads to another, and soon gear is scattered across tables, fence posts, and anywhere else the routine breaks down. But remounting the cabinet for a few more inches of clearance—true, full door swing—can snap the whole routine back into place. Now, returns happen in one motion; nothing lingers outside “for now.” The impact is instant and obvious: less sidestepping, less gear piling up, and the reset starts to feel nearly automatic.

    I’ve seen a single change—like moving my garage-edge cabinet forward by a hand’s width at the hinge—erase months of irritation. Suddenly there’s no need to angle my body, slide the cabinet, or hold the door while juggling muddy gloves. The hand-in, hand-out flow is possible, no detours, no mental drag. That’s real outdoor performance you notice every day.

    Exposed Racks and Open Shelving: Easy on the Eyes, Tricky in Practice

    Wire racks and open shelves sharpen a backyard’s look for about a week. After that, they reveal their real bias: vertical stacks that demand reaching over, shifting bins, and constant mid-task rearranging. In a tight corner or along a narrow patio edge, this setup means every retrieval is a balancing act. Gloves behind a watering can? Prepare to unstack two pots and slide a hose to the side before you can even start. Even empty, the racks eat up wall and step space—every inch of “openness” comes straight out of your path. What once felt organized now clutters the very line you need to move through.

    The real question: does anything come and go without hassle? If the answer’s no, order breaks down with every shortcut you take. Storage isn’t working when you hesitate to stow gear or leave tools out—no matter how neat the surface looks. Return flow matters more than any first impression.

    Cabinet Width, Height, and the Trap of the “Corner Fix”

    “Use every inch” is a common trap. Tall cabinets jammed in corners keep the floor clear, but put real strain on resetting: you need a ladder to reach the top or end up piling rakes and shovels up front. Wide units along the fence give you more surface, sure—but every foot they claim squeezes the path tighter, until you’re shifting one pail just to reach another. Awkward heights and squeezed walkways mean heavy stuff migrates to wherever it’s easiest to drop—which is never back in the cabinet.

    Picture this: pruning’s done, you walk over with the garden hoe, and the door won’t swing open. A bucket is blocking the floor. So you move the bucket, open the door, and now you can’t fit the hoe until you restack two other tools. It’s a slow-motion clog that builds every session. Days later, gear is scattered—less because of messiness, more because the setup fights your routine.

    Overflow and Dead Corners: When the Setup Loses to Habit

    Overflow zones don’t announce themselves, but you feel their drain. If a wall system is tucked just out of reach, or a cabinet demands bending, backing out, or stepping awkwardly, you’ll “temporarily” stash things at the closest open spot. Dead corners—those odd gaps between the cabinet and the fence, or next to the shed—quietly become magnets for random pots, abandoned hand trowels, or whatever’s left after the main space clogs. The path narrows a little more every week until a clear zone turns into a balancing act.

    One practical test: Stand where you normally walk. Open the cabinet with one hand. Does any part of you twist, step sideways, or reach blind to put something away? If yes, the setup will keep tripping up your routine. Orientation matters as much as capacity—the best location is one that fits your body’s flow, not just the area on paper.

    The Real Test: What Happens After a Normal Week?

    The truth shows up on a Saturday morning. After a few evenings of planting, watering, and hurried cleanups, take a look: gloves droop over a fence rail, half-filled soil bags sag in the walkway, pruners take up permanent residence on the side table. It’s rarely the amount of storage that’s wrong—it’s the fit with your real habits. When the layout works with you, putting things away doesn’t feel like a separate job. Return flow is smooth and automatic. The dogleg path around the cabinet disappears, and “I’ll just leave it here for now” stops being the most common routine.

    Minor Adjustments, Major Impact

    Most fixes don’t require rebuilding—just rethinking the match between footprint and movement. Move a cabinet forward for better hinge clearance. Replace a deep bin with a shallower shelf to open the walkway. Real value comes from setups that reduce daily resistance—tiny corrections that add up to less effort, easier resets, and less spillover in your space.

    Perfect order isn’t the goal—reliable, friction-free resets are. Tweaks that respect your routine will pay you back with clearer zones, quicker cleanups, and more usable outdoor space—no heroic tidying required.

    For more ways to make your setup actually work for your yard, visit TidyYard.

  • Avoiding Kickback in Deep Rip Cuts by Matching Riving Knife Width

    You’re pushing through a stubborn maple board, halfway into a long rip, when the saw suddenly lurches. The cut starts to drift, the motor strains, and what should have been a crisp, straight edge now threatens to burn or splinter. There’s no question: in the pressure of real-world cutting—garage projects, jobsite runs, tight workshops—the difference between smooth workflow and lost time is rarely about horsepower or blade size. It comes down to the details others miss—like the fit between riving knife and blade kerf.

    Why Saws That “Seem Equal” Leave You Stuck Mid-Cut

    On a display rack, two saws might look nearly identical—same blade diameter, familiar handles, matching weights. Judged by spec sheets alone, you’d expect them to perform side-by-side in the shop. The reality? Small engineering gaps, invisible until you’re deep into real stock, can make the workday unravel fast. The split-second between control and chaos often comes down to what’s happening behind the blade, out of sight but not out of mind once things bind or kick.

    Test cuts on cheap pine or ply rarely show the truth. The real issues surface only when you get serious—ripping through tough oak, framing fir, dense sheet goods. Suddenly, every pass feels heavier, the cut line wants to wander, and the saw starts grabbing or biting. Kickback risk jumps. You go from thinking about the project to wrestling the tool, burning minutes correcting what shouldn’t need fixing.

    How Subtle Setup Gaps Compound in Real Use

    It all adds up, usually in fractions. If your riving knife runs even a touch too wide compared to the blade’s kerf, it forces extra friction into every cut. Sawdust doesn’t clear; it compacts. The feed stalls. The saw might stall or stutter, then burst free, threatening your line and control.

    This isn’t a woodworking myth or some “perfect shop” detail. It shows up every time you try to run a series of rips for a glue-up, or dive into a heavy batch of shelving stock. Every board after your first feels tougher. Your shoulder starts to complain. Instead of steady progress, you’re slowing down to compensate for drifting lines and ragged, splintered edges—a tiny design mismatch compounding your effort with every pass.

    Kickback: When the Small Flaw Turns Dangerous

    You’re on your third or fourth rip through thick hardwood, the shop dust hanging heavy, and suddenly the saw yanks back. There’s a flash of heat at the cut, a burnt smell—what used to feel like an easy, controlled draw now turns hostile. Most pros will check their grip or stance, but the real problem often hides in the jam: the riving knife squeezing just enough to bind, thanks to a kerf mismatch or sawdust build-up. What looked fine at setup becomes the afternoon’s main headache—or worse, a real safety hazard.

    When a Fraction of a Millimeter Changes Everything

    Late in the day, with a stack of boards to go, the problem sharpens. First pass: not bad. By the fifth, you’re fighting for control, each push slower and shakier, the motor less willing. The blade’s still plenty sharp. But the riving knife—barely wider than ideal—turns every chip into a potential wedge. Heat builds up, the grain resists, and suddenly even smooth feeding stock wants to burn or tear out.

    Change out to a saw with a better-matched, slightly slimmer riving knife and it’s an immediate relief. Dust clears, the blade glides, and you get to focus on guiding the line instead of forcing it. You won’t find that on most feature lists, but in practice it’s the deciding variable between “almost right” and cuts that land clean every time, even when the wood itself is unpredictable.

    Shop Reality: The Fatigue and Friction Are Real

    Anyone running glue-up panels in a packed shop knows the cycle: you start off confident, then end up pausing between boards, weighing whether to keep muscling through, risk more tear-out, or accept another round of block sanding. The difference that half-millimeter slimmer riving knife makes? You’re staying on line, letting the motor do the work, and keeping your focus on the job instead of second-guessing the next cut. No showy features, just hours of fatigue you never got stuck with.

    Small Setup Details, Big Daily Impact

    It’s tempting to let yourself get distracted by battery ratings, brushless motors, or the latest claims on cut count. But after you crank out more than a few boards, the only numbers that matter are how riving knife and blade kerf fit together. Even a minor mismatch—barely noticeable during a quick test—becomes relentless when you’re grinding through hardwoods board after board. Get it wrong: every pass binds, scorches, or strays. Get it right: work stays fluid, cleanup drops, and you avoid that end-of-day shoulder ache that signals the tool’s been fighting you instead of helping.

    Watch for These Warning Signs

    If things get worse as you push on, look for:

    • The saw suddenly bogging or kicking midway through a cut
    • Heat burn marks or roughness appearing along the waste edge
    • Feed force noticeably increasing; each pass harder than the last
    • Sawdust refusing to clear, clogging at the riving knife’s heel
    • Excess time sanding out splinters and ragged tears

    Don’t just blame blade life or “tough wood.” Double-check whether the riving knife is crowding your cut. The real-world feedback is in how the saw feels and sounds under load, not in how the parts looked during setup.

    Smart Shop Habits That Prevent Headaches

    Let the saw’s feel—not just the cut quality—guide you to questions. Even a trusted tool will develop quirks: a base that’s just a little out of square, a kerf filled with chip buildup, or an ejection chute half-blocked by pitch. Ignore this, and you’ll be fighting the tool by lunch.

    Fast reality check: after a gnarly deep rip, take a beat and check the riving knife for heat darkening or sawdust buildup. It doesn’t take much—a hair’s thickness of pitch or dust—to gum up the gap, creating drag where there should be none. Every fresh blade, every switch for a specialty cut, double-check fit: riving knife and blade kerf, side by side. It’s five seconds that’ll spare an hour of aggravation if things start to bind. And if you’re powering through multiple rips, keep a narrow brush or quick air blast handy—cleaning out that space between passes helps you avoid the cascade of problems that build up when you skip it.

    Saws That Survive Real Repetition

    Most circular saw breakdowns don’t start with the motor—they start right behind the blade. Ignore flashy specs; the saws that hold up, board after board, are those that stay just clear enough at the riving knife to keep dust moving and the feed natural long after the battery buzz or corded whine is old news. The goal isn’t flawlessness—it’s building a work rhythm you can trust, with the kind of smooth, predictable cuts that reduce rework and wear, even on your longest days.

    Find circular saws and accessories tuned for real work at Gumboll.