Blog

  • How Establishing a Clear Waiting Spot Transforms Your Dog’s Mealtime Routine

    Your dog’s pre-meal shuffle isn’t random excitement—it’s everyday routine turning awkward when the setup keeps getting in the way. You watch your dog pace, linger halfway between rest and the bowl, or hover at the edge of the kitchen, waiting for a signal that never quite comes. At first it seems harmless, maybe even funny. But in repeated use, these “quirks” start to create actual friction: you’re stepping over a waiting dog as you grab feeding gear, timing gets thrown off, and the moment that should run on autopilot keeps falling short. Suddenly, the difference between a smooth routine and daily drag shows up in every meal reset, every cluttered walkway, and every missed chance to keep things moving cleanly. This is where the right structure—the kind you actually wish for midway through the week—starts to matter. If your setup keeps asking for improvisation, DogPile’s everyday dog gear world makes that invisible drag visible.

    The Invisible Strain in Pre-Meal Routines

    Small signals pile up fast in real dog-life. If your dog repeats the same hesitant circling, vocal side-comments, or waits in the wrong spot before every meal, they’re not just restless—they’re bumping into a missing piece in routine. It’s easy to ignore at first, but you’ll catch the same off-beat pause right as you reach for the leash, or the shuffle in the doorway as you organize bowls. Even in so-called “easy cycles,” you wind up rerouting your movements, keeping the feeding area clear by moving bowls, wiping paws with supplies that aren’t where you need them, or navigating gear that drifts just out of reach. The friction isn’t dramatic, but it repeats until you can’t miss it: the routine is “working,” but it’s not smooth for anyone.

    Over time, these tiny slowdowns spread. Your dog’s rest is lighter, settling takes longer after meals, and ordinary tasks—scooping food, prepping a walk, or answering the door—spark the same restless site-hopping. It’s not the dog bowl’s fault; it’s the missing structure that leaves every transition up for grabs, never quite letting downtime or cleanup land the way it should.

    One Weak Point, Many Ripples

    An unsettled routine seeps into the rest of your day. When you notice your dog drifting—not quite committing to the kitchen, not comfortable in the bed, hovering just out of the way—the tension multiplies. Maybe she’s camped halfway onto the hallway mat, or he spins away from the bowl as if waiting for better instructions. The space looks organized, but each time you need quick access—say, grabbing a towel after wet walks or shifting bowls while carrying something else—whatever’s out of line breaks your stride. An unresolved waiting zone isn’t just a dog problem; it means extra steps, shuffled gear, and an efficiency tax you pay at every meal, walk, or cleanup pass. Even when the area looks tidy after cleanup, the workflow clogs at old sticking points. That tidy look can fool you, but the clunky rhythm doesn’t lie.

    It Looks Calm, But Feels Restless

    “Looks fine” routines aren’t always fine in use. You can have the dog’s bed aligned and the bowl in place, but if every transition brings a fresh round of minor decisions—where should the dog be now, can you make it to the counter without interruption, will cleanup involve another detour—then settling never quite happens. Both you and your dog get caught in a low-stakes tug-of-war, making small choices in real time because the setup failed to give clear direction. That’s not background noise. It erodes the sense of rest in ways you only really notice after the twentieth cycle, when both of you still feel “almost done” even with nothing left out of place.

    How “Harmless” Pauses Erode Daily Calm

    One moment it’s just circling before dinner. Weeks later, meal transitions turn into a guessing game: your dog waits here one day, there the next, half on his bed or wandering to check if food is ready. The instability builds friction, not calm: every unclear pause is another little drain, breaking the routine’s flow before it can even start. Each time you have to correct a hover, drag a bowl back into position, or maneuver around spilled-over gear, the reality gets clearer—routine isn’t just about organization; it’s about repeated use, and ambiguous zones keep costing attention in every cycle.

    • Rest gets thinner: The dog stirs more, takes longer to relax, and bedtime resets drag out.
    • Feeding drags on: Bowls migrate, gear scatters, the dog’s attention jumps, and suddenly mealtime stretches longer than planned.
    • Spaces blur: Dog items drift into walkways—the crate is partly blocked or cleanup gear piles up where you least want it.
    • Apparent order, hidden friction: The area still “looks good” after cleaning, but the same awkward steps and reacharounds keep returning.

    Recognizing the Pattern: Where Does the Waiting Break Down?

    Here’s what shows up in actual use: your dog hears you at the counter, bounds up, but stops short—unsure where to wait, hesitating in the kitchen threshold. One dog whines softly, another just stares, body tense in a “maybe now?” stance. The bowls sit ready, the space is clear, but flow is fractured because there’s nowhere specific for the dog to settle and wait out the prep. The same breakdown plays out at other friction points: leash by the wrong door, towels missing at crate return, grooming gear buried two rooms away. Each time a transition is undefined, the next cycle repeats the stall—quieter than a meltdown, but visible in the slower pace and repeated owner corrections.

    A Small but Crucial Setup Shift

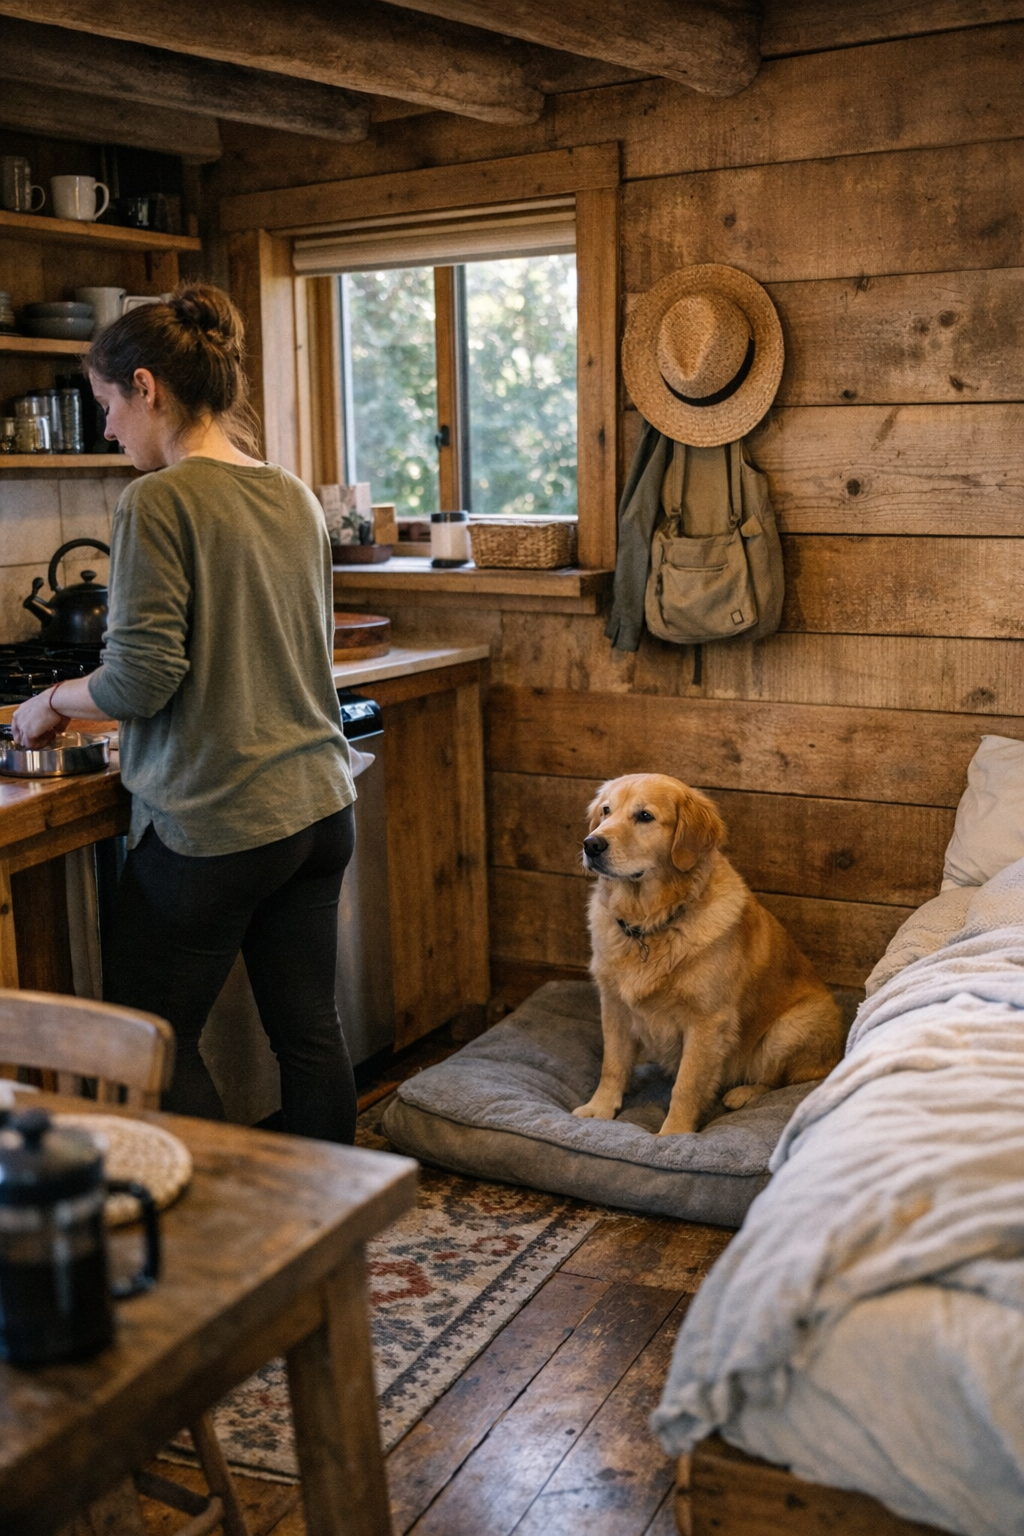
    The fix isn’t a total shakeup, just a real spot for waiting. Instead of letting your dog free-float between the kitchen and their bed during feeding prep, stake out a single location. In my house, the new anchor became a consistent spot on the bed—about five feet from the bowls, always just out of the walkway. The result is less negotiation: guide your dog there at the start of each meal, set a brief quiet wait, and only then prep the food. At first there’s hesitance; your dog might glance back at the bowl, test the boundary, look for permission. Two days in, the back-and-forth starts to fade. Suddenly, post-meal calm lingers longer. Mealtimes reset faster. And the old restless pattern doesn’t bleed into the rest of the daily routine.

    Making the Waiting Structure Work in Real Life

    Structure isn’t about making things strict—it lets routines settle sooner and recovery happen faster. With a fixed waiting spot, your dog knows what’s expected, and you skip the improvisation. You’re no longer nudging a dog out of your way as you move gear, and the routine picks up real momentum with every use instead of stalling for a mid-meal reset.

    • Bowl hover disappears: The dog’s at the wait zone, not underfoot. You reach for bowls and gear without sidestepping or pausing to direct your dog mid-action.
    • Less gear spillover: Feeding and waiting zones separate cleanly. Bowls, mats, and beds stop colliding or edging into each other’s space.
    • Reset gets cleaner: After eating, the dog returns to a clear spot—spilled food or crumbs are contained, and cleaning up doesn’t involve chasing the dog or moving items twice.
    • Calm routine endures: Patience during wait times doesn’t get burned up on anticipation, so bedtimes, wind-downs, and walk preparations all start to feel less frantic and more predictable.

    Making Changes Stick: Tips for Everyday Routines

    Select the right waiting spot. Keep it out of main walkways but close enough for the dog to see you working. If it’s too close, anticipation becomes pacing; too far and the dog may disconnect from the routine.

    Lead each time. Don’t wait to see where your dog settles today. Walk them to the spot before touching bowls or prepping food. That way, waiting becomes automatic, not a negotiation.

    Reward calm, not just presence. For dogs new to a fixed spot, start with brief sessions. Any quiet wait—no matter how short—gets a release and praise. Building consistency at the start is worth more than hitting a perfect wait time.

    Expect the friction to shift before it fades. Early days mean the new wait zone will inherit a little of the old uncertainty—extra shuffles, glances, even attempts to inch back toward the action. Hold steady. Let the routine, not just the boundary, provide the cue. The principle holds elsewhere too: a towel that’s easy to grab after muddy walks isn’t just convenience; it’s what breaks the pattern of messy delayed cleanup that keeps showing up once routines repeat.

    The Setup Test: Looks Neat, but

  • How Small Functional Zones Transform Carry-On Travel Efficiency

    Every frequent traveler has hit this wall: your carry-on seems perfectly organized when you leave home, but by the time you hit airport security or fumble for your ID in a boarding line, the “order” that looked efficient turns clumsy. You reach for a passport and brush past tangled charger cables, shuffle through so-called quick-access pouches, or pull open neatly zipped sections that fight you every step. The bag looks calm from the outside—but one badly placed pocket or a cable covering your travel documents can completely stall your flow at the worst possible moment.

    When “Visually Organized” Isn’t Actually Easier

    It’s easy to mistake a tidy carry-on for a practical one. The dividing line shows up in the micro-moments: stuck in a slow-moving security line, one hand balancing your bin, the other hesitating at a zipper that’s blocked by loose contents. You go for sanitizer but knock earbuds loose. A pouch meant for essentials turns into a snag point for every cable or receipt you collect mid-trip. What slows you down isn’t a chaotic mess, but a system that quietly resists you during the actual trip—forcing repeat stops, extra unzips, or awkward pauses while everyone behind you waits.

    It’s not spilled mess that signals the problem—it’s “order” that interrupts your access rhythm. A bag that photographs well can still force you to dig past unnecessary layers, unstack small items just to reach your boarding pass, or repack out in the open after each quick retrieval. By the third check, what looked organized at home becomes another slow-motion obstacle.

    Why Sequence Matters More Than Category

    The big mistake: organizing by gear type instead of by the order you actually use things. Lumping all your cables, chargers, and devices together works for storage, but in transit, you rarely need all tech at once. The cord you use once in-flight shouldn’t block you from grabbing headphones three times before you’re even airborne. Grab for a charger, out come tickets. Snag your passport, half your pouch contents spill into your lap. Each time, the “category” system unravels—and you pay the price in lost seconds, missed rhythm, and growing tension as you double back in lines or reach for a forgotten item from your seat.

    Travel sequences—security, boarding, seat entry, takeoff, mid-flight, landing—move fast. If your bag’s setup doesn’t follow this rhythm, you’ll keep pausing, repacking, or apologizing to strangers as travel order devolves into repeated micro-friction.

    Where Friction Builds, Even When the Bag Is “Neat”

    • In the boarding queue, balancing a bag on your shoulder, the gate agent asks for your ID. You dig into an outer pocket, but receipts and loose cables block your way. The pause feels longer—and so does the impatient line behind you.
    • On the plane, you placed headphones “on top” for easy reach—but turbulence and seat shuffling bury them under snacks and pouches. Now, just finding music means repacking your bag, tray table, and seat pocket in view of everyone nearby.
    • Security bins are sliding away. You unzip a pocket for liquids, only to find sanitizer jammed beside your e-reader. Sorting them exposes your private things to everyone, slows down the line, and leaves you scrambling to close zippers before your tray is gone.

    Small Zones: Packing by Use Timing, Not Just Item Type

    The fix isn’t more organizers or ultra-tidy mesh pouches—it’s drawing real boundaries inside your bag by function, not just by what fits together. One zipper for just travel documents (and nothing else), a fast outer pocket for inflight needs like earbuds and sanitizer, a padded zone for electronics you only touch once seated. Each zone is purpose-built for a specific travel action, so you’re never forced to rummage through unrelated gear, or repeat the same disruptive search for a single item.

    The result: sanitizer comes out on cue without disturbing your passport or device, and grabbing a boarding pass doesn’t send snacks tumbling. Over even a few cycles—boarding, inflight, arrival—the outcome is tangible: less thinking about your bag, fewer exposed contents, lower risk of errors when outside your comfort zone, and faster returns to “ready” status after every routine interruption.

    The Usability Drop-off After Repeated Access

    Big compartments and deep catch-all pockets look neat on the first pack, but they don’t recover well once you start moving. Drag out a document, and you’re stuck sifting past cables or balancing piles on your knees. Two or three retrievals later, perfectly stacked items are bent, lost under flyers, or need reordering before you can even zip the section closed. Even if nothing spills, you notice that every new access point makes the next one slower—especially during the public moments, like reclaiming your bag from an overhead bin or moving quickly out of your row after landing.

    The more you repeat these motion cycles, the heavier the system feels. By the time you reach your hotel or switch gates, the “order” that worked at packing time has faded—just as pressure to move fast is highest.

    Troubleshooting: Repeated Frictions Reveal What’s Not Working

    • Do you pause for the same item at every gate or checkpoint—never quite sure which pocket is right?
    • Are you opening, then closing, several sections just to do a single action?
    • Does your bag’s “organized” setup seem to degrade after a few security or boarding cycles, losing all reliability?
    • Does grabbing one small thing (like sanitizer) make it twice as hard to keep your boarding pass or headphones in place?

    Each of these is not just a quirk, but a real design signal: your carry-on is arranged for looks or categories, not actual travel sequence. A shift to smaller, clearly defined functional zones rewires the whole experience. You’re packing for the way you move, not just for a tidy Instagram swipe.

    Practical Adjustment: How Real Zoning Changes the Flow

    Instant improvement doesn’t demand a bag overhaul—just field-tested adjustments. A slim, outside zipper for ID and documents (and only those). Chargers and tech staged deeper, safely ignored until your seat. A low-profile pouch always loaded for fast-grab basics—lip balm, sanitizer, earbuds—handled with zero impact on the rest. This isn’t about making every move “perfect.” It’s about reducing those friction points that turn lines, trays, and aisle transitions into slow-motion stress tests. One less zipper per routine, seconds shaved every time, and a repeated sense that your setup is keeping pace with actual airport pressure rather than creating new burdens.

    When you stop repacking on the fly or scrambling for a missing cable in front of strangers, you notice the difference: your motion feels less exposed, your contents less at risk, your overall pace more consistent. Even as long-haul flights or tight gate changes stack up, the pattern holds—and the trip feels lighter at its most demanding moments.

    The Real Payoff: Structure That Stays Reliable Under Pressure

    The best carry-on setup isn’t about surface order; it’s about invisible flow. A bag engineered around how you actually move—boarding, passing checkpoints, shifting seats, lifting to overhead—means quick, silent retrievals instead of public disruptions. The difference becomes obvious when your setup survives not just one leg, but the entire journey, letting you reset headphones with one hand or extract a boarding pass in seconds, no matter how crowded your space or tired you get.

    The gap isn’t visible when you zip the bag shut at home. It announces itself in security lines, at congested boarding doors, and every time “order” falls apart in motion. If your system makes every retrieval a mini struggle, or lets one misplaced item block another, that friction is real—and worth fixing for good.

    For carry-on tools and smarter travel pouches that actually fit the way you move, see what’s working now at CarryOnSupply.

  • Why Proper Corner Lighting Transforms Your Under-Cabinet Spaces

    Dim edges turn any “finished” under-cabinet or shelf lighting setup into an everyday compromise—fast. Even with cables hidden and the surface newly bright, the reality sets in during week one: you start avoiding the ends, shifting meal prep or paperwork to the safe, central glow. Things migrate—chopping boards, chargers, the “good” utensils—always toward the brightest spot, leaving the corners in dim neglect. Suddenly, the newly installed light isn’t extending the usable area. It’s narrowing your habits, and every day, a so-called upgrade slowly becomes a limitation you plan around.

    When the Glow Stays Central—and Corners Fade Away

    After days with standard under-cabinet lighting, clutter collects in the lit zone, not by accident but out of necessity. Bowls, documents, and small tools pile up in the center because the edges slide into shadow. Even at midday, you might catch yourself squinting for a dropped cable or that farthest spice tin. As evening falls, the border between usable and unused becomes sharp: the full width of your counter, shelf, or desk reads as available, but the only area you actually reach for is the zone the light fully covers.

    This is more than personal preference—it’s strain built directly into the layout. Shared kitchens and office nooks become cramped as everyone clusters at the lone truly visible spot. Underused edges aren’t decorative; they’re a daily friction. Each sidestep or detour around a dull patch is time and comfort lost, even if you only notice when your routine pulls toward the middle yet again.

    The False Comfort of a Minimal Install

    Most setups start with the lure of visual order: a slim LED strip flush against the cabinet, hardware neatly hidden. But if the light beam falls short—too centered, too shallow—the “minimal” install turns cosmetic. Impeccable lines spell out the problem even faster: darkness crowds every edge. Every day, the setup looks resolved but works incomplete.

    Workarounds multiply: you inch cutting boards away from the wall, shift devices toward safer zones, constantly nudge everyday items from one patch of light to another. Sooner or later, you’re using just two-thirds of a full run. That’s not a subtle tradeoff—it’s wasted space built into your routine, not because of a technical gap, but because coverage got sacrificed for appearance.

    Glare vs. Shadow: Getting the Light Out Far Enough—But Not Too Far

    Slide the fixture forward to erase those dim edges, and you trade one annoyance for another: glare. Light spears out under the cabinet or shelf, bouncing directly into your eyes or splashing onto countertops at the wrong angle. That supposed sweet spot—broad coverage, glare-free lines—never lands by chance. It demands bracket tweaks and an honest look at shelf depth versus beam spread, not a guess from the spec sheet.

    If you’ve found yourself fidgeting with fixture position, or pivoting to escape hard glare during a late-night task, you’ve run into the real balancing act. It’s not technical specs that matter, but lived awkwardness: broad, low-glare light that actually fits your real working habits. There’s no universal answer—only patient adjustment, right until both the edge and the line of sight finally make sense for your own space.

    The Cable Conundrum: Neat, Calm, and Out of Sight

    Even the best lighting plan falls apart if one cable snakes down the wall or flickers into view at eye level. It’s not just visual mess—it’s a split-second distraction, pulling attention from the work surface before you even realize what’s different. Every “almost right” install seems to leave at least a few inches of white line climbing out from a shelf, or a black adapter hanging from an outlet with nowhere to hide.

    Small, decisive hardware wins here: adhesive channels or rear-edge guides route lines so tightly you forget they exist. When cable runs follow the fixture, hugging the underside contour or ducking sharply out of sight, both the room and your attention feel clearer. It’s a minor detail with outsized impact—especially during a rushed morning or group meal, when even small distractions add up fast.

    Everyday Use Reveals the Gaps: Real Scenes, Real Friction

    The first days after a lighting upgrade often sell the installation short. As routines settle in, new limitations surface, including:

    • Reaching for a canister at the shelf edge, but having to double-check the label where light failed to reach.
    • Pushing paperwork to the middle of a wide desk, though the ends “should” be usable—and telling yourself you’ll sort the rest later.
    • Watching everyone cluster in the same bright spot at a communal counter, while shaded ends gather untouched clutter.
    • Retrieving a dropped pencil or cable from a dim bin at the edge, hours later than you needed it.

    Each act builds a pattern: the visible area sets the real limit for use, and you quietly train yourself to ignore everything beyond the comfort zone of proper lighting.

    Small Shifts That Restore Real Utility

    Most fixes aren’t dramatic. Sometimes, moving the light fixture outward even an inch, or tucking the cable path above the cabinet lip, changes the entire feel of the space. Suddenly, the outer “catch-all” zones—once shadowy, awkward, or ignored—come back into use. Plates, keys, and chargers stop drifting toward the center. The whole surface earns its keep, not just the spotlighted sliver.

    Use a diffuser or custom cover if supplied. It’s not an accessory—it prevents raw glare while letting light reach out into those corners. Check the lateral spread; don’t settle until the entire usable width is comfortably, softly visible, but the beam itself doesn’t shine straight at your face. For dense or changing setups, don’t be shy about chunkier brackets or adhesive mounts: the last inch of cable or fixture length can be the dividing line between a half-measured fix and a truly usable solution that adapts over time.

    True Comfort Means Every Edge Works—Not Just the Center

    A lighting run that looks perfect but leaves half the shelf in shadow is a daily chore in disguise. Real comfort comes not from minimal aesthetics, but from making every inch function—edges lit, cables low-profile, traffic flow maintained, and bright spots distributed where activity actually happens. If you’re sidestepping the ends or if a group keeps crowding toward the one clear patch, your setup isn’t supporting you yet. There’s no reason to settle for surface-level neatness when small, hands-on changes can unlock the whole area’s potential.

    Purposeful under-cabinet and shelf lighting isn’t about aesthetics as much as about reliable routine. Once you strip away unused dim sections and stray cables, what remains isn’t just clarity—it’s daily usefulness that matches how you and others actually work. That difference is felt, not just seen. Small adjustments in position, angle, and support can turn your installation from “presentable” to a surface that finally does its job.

    http://www.lightsupport.myshopify.com

  • Why Sealed Bins Are Essential for Powder Storage in Busy Entryways

    Entryways and drop zones seem built for order, but in real life, they’re friction points waiting to happen. You start with good intent—bins for supplies, a designated shoe spot, a ledge for bags—but the system breaks within days. Shoes sprawl past their row. Bags eat up bench space or block the path. And the “organized” supplies? In daily use, open bins turn into leak zones: cleaning powders coat shelf edges, grit forms a band under the bench, and stray messes accumulate in seams you barely notice at first. It’s only after daily routines—bags dropped, shoes kicked off, hands reaching for powder in a rush—that the whole setup reveals itself: more hassle to reset, more messes to track, less actual order than you started with.

    When Open Bins Turn Convenience Into Mess

    Open bins tempt you with instant access. No lids, no pause—just grab the nearest supply and move on. But threshold spaces don’t stay still. People rush through, supplies shift, and the pressure multiplies:

    • Shoe cleaner gets grabbed mid-sprint, bin left skewed for the next person.
    • Bags tossed in a hurry clip shelves; a container teeters and tip spills over the edge.
    • Moisture from wet gear seeps into powder containers, and the contents clump or fuse into sticky corners.

    The first spill is small—a quick puff of white powder as someone misjudges the reach. By week’s end, residue tracks along baseboards, and powder is worked deep into seams. The ease of open access quietly costs you time. Each micro-spill or stickiness pushes the whole threshold toward a cycle: fix the mess or ignore it and let it multiply. Either way, fast access becomes endless aftercare.

    Shared Spaces Multiply the Problem

    Few entryways serve just one person. Most are collision points for shoes, bags, and shared supplies. Every extra user increases the chances of containers getting left ajar, bins shoved out of line, and powder escaping where it shouldn’t. Open bins in this setting don’t just save seconds—they fuel disorder: powders migrate under benches, wedge into corners, and soak up stray humidity. Cleanup escalates with every damp footprint and shaken bag. The price of that easy grab isn’t visible on day one; it’s the slow grind of reset routines doubling, as every pass-through wears the storage down a notch further.

    Real Life in a Crowded Entryway

    Picture a slim threshold on a rainy morning. You crouch to tie shoes; the bench is half-covered with bins. A powder tin tips and creates a faint dust trail across tiles. Next, wet bags arrive, mixing mud with whatever powder escaped yesterday. Within three days, the bench legs are gummy, shelf corners are rough, and the supposed “quick-clean” area is now stuck in cleanup mode. Wall shelves and vertical units help, but when bins are left open, powdery supplies jump zones—coating ledges, drifting to the floor, drifting through routines, and quietly raising the daily reset load.

    Sealed Bins: Containment Over Convenience

    The real fix is sealed bins—solid walls and latching lids that stop migration cold. It isn’t about making routines perfect. A latch means one more second per use, but delivers hours back in reduced cleanup and replacement. The practical difference stands out the first week if you match the bin size to your shelf or bench:

    • Powders stay dry, shielded from every damp bag and weather-soaked shoe.
    • Latching lids absorb stray bumps and seal against humidity, even in crowded entryways.
    • No crust of residue under the bench, no powder bands along the wall—just a reset that’s fast and actually finishable.

    You’ll still get minor setbacks—supplies get left behind, a bin goes unlatched now and then—but sealed containment keeps the mess from leaking into the rest of the zone. Instead of fighting slow-spreading grit, you refill supplies when they run out, not every time the weather shifts. The result: transition spaces buffer mess rather than spread it.

    Cleaner Resets, Faster Movement

    After switching to sealed storage, many notice their reset load drops. Wiping down corners becomes rare, sticky powder patches barely appear, and shoe dust stays inside bins instead of creeping out. Bags get tossed down without triggering a supply avalanche, and rows of shoes can be managed even in tight entryways without the overflow of last week’s mess. The setup stops slowing you down—its order actually matches its intent, hour after hour.

    Why Minimal-Look Setups Break Down

    A setup that wins on Instagram rarely survives the pressure of real re-entry: open baskets, exposed containers, “everything visible” systems. The weak point isn’t obvious at first. It shows in:

    • Trailing powder leaks no one notices until they’re embedded in seams.
    • Supplies clumping or fusing after a single rainy commute.
    • Surface order that crumbles by midweek as layers of small tasks resurface.
    • Pass-throughs slowed by a path jammed with overflow and drifted supplies.

    And it’s not just shoe powder. Any granular, spill-prone supply—de-icer, sand, shoe freshener—escapes containment in an open system. Every “quick trip” amplifies the breakdown, as small resets become routine interruptions.

    Practical Tips for Reliable Entryway Storage

    • Pick bins to fit your flow: Sealed, slim bins tall enough for powders but narrow enough to avoid crowding the bench or blocking the path.
    • Label clearly: In a shared space, clear category labels head off the “open every bin” search and keep the system sealed.
    • Catch tray below: A shallow, wipe-clean tray beneath bins catches the spills that do happen—reset is a five-second dump, not a deep clean.
    • Weekly check-in: Inspect for stickiness, clumping, or powder outside the bin. If the zone seems messier each day, audit for missed bin closures or misfits in your setup. Ongoing drift means it’s time to adjust.

    Turning Setup Into Stability

    Switching to sealed bins may not feel dramatic, but it draws a hard line between “looks organized” and “actually works.” Surfaces remain clear for days, not hours. Supplies feel ready instead of requiring a pre-clean. The real gain is routine reliability: entry energies can stay on movement, not recovery. Less powder creeps out, less dust settles in seams, and the area remains a passage—not a project.

    When entryway resets go from daily drama to a monthly habit—and your supplies stay dry through the worst storms—the space finally matches how it’s actually used. There’s a clear difference between a setup that performs for a photo and one that holds together every day, at every pass-through, for every person who moves through it.

    See more transition-space storage solutions at Betweenry.

  • Why Cable Management Systems Fail After Setup and How to Fix Them

    Clearing cables from the floor instantly changes how a desk functions—but it doesn’t erase friction; it just moves it. The moment cords are tucked into trays or cable boxes, superficial mess disappears, chair movement is smoother, and nothing gets trapped under wheels. But the real test kicks in later. By Wednesday, chargers vanish behind trays. Every new device means twisting to reach past the desk edge or unlatching a box mid-call. What started as a spotless workspace quickly spawns new interruptions: hidden, harder to spot, and far more likely to break focus when you’re under pressure. If your cable system only looks clean on setup day but slows down your second week, you’ll end up right back in frustration—just more quietly.

    The invisible upgrade—when cable trays change the problem, not the routine

    On the surface, cable trays and boxes promise a cure for cord chaos. No more loops snagging chair wheels. No more spirals of wire spreading across the footpath. But after a few device swaps and a handful of resets, the catch shows up: that perfect cable box under the desk now blocks you from quickly plugging in a guest’s charger or grabbing your headphones. Need to connect something fast? You wind up on your knees, prying lids, or groping blindly for a cable tip. The snags move out of sight but edge closer to your workflow.

    This shift gets sharper on stressful days: hardware gets replaced, you’re chasing a deadline, or juggling devices for a client call. Neat lines turn into barriers. Simple acts like plugging in a backup drive become mini-projects, not just quick, one-handed moves. The “hidden” mess is now an accessibility problem—less visible, but more capable of stalling you at the worst possible moment.

    Picture the real day: is the setup slowing you down or clearing the way?

    A desk that looks organized can still feel crowded once the work starts. Every session reveals the friction: you reach for your notebook, elbow bumping a tray lip; you shift your chair, foot meeting the solid edge of an under-desk box. Plug in a new device? Now you’re stretching or dragging at cords, just to get past a neat solution that doesn’t actually fit the routine. The trouble isn’t always obvious at first. Late in the day, you realize your charger is out of reach. During a meeting, standing up yanks a monitored cable taut. Organization isn’t a one-time reset—it lives or fails in repeated reach, movement, and device churn. If your system only maintains looks, it will lose against the grind of daily workflow.

    Small tradeoffs that come back to bite

    Floor-level cable boxes keep everything visible, but the mess and tangles stay in the peripheral vision—and underfoot. Trip or roll over a loose cable, and the whole arrangement resets itself the hard way. Under-desk trays give back floor space and hide the clutter, but the gain is fragile. Place the tray too far from the edge, and every device swap means standing up or fishing at arm’s length. Place it too close, and your knees or mobile drawer crash into it. The lesson is blunt: if reach or adaptability is sacrificed for surface neatness, real usability slips fast.

    Functional order: the setups that survive deadline weeks

    The gap between “looks organized” and “works organized” appears after your fourth device change or third week of deadline stress. Sit-stand desks, hot desks, even simple shared surfaces show this quickly: no cable system that needs both hands and a flashlight survives routine change. You can’t pause to uncap every time your laptop charger rotates through—or reroute a cable whenever a monitor arm shifts position. When a system locks you into a single pattern, it breaks under pressure. And the mess you fought to hide begins creeping right back over the desktop and floor.

    Every fixed arrangement becomes a trap when new devices, visiting coworkers, or a shift in task flow lands. Rigid cable boxes and locked trays work only as long as your routine stays frozen—and no modern desk does. The moment routine bends, you spend more time reaching, unplugging, and re-routing than actually working. Real solutions let the system adapt around your workflow—not the other way around.

    Quick scenario: the everyday cable shuffle

    Midweek, your main laptop goes down. You’re handed a loaner—keyboards and monitor stay put, but connections change. Inflexible cable setups mean downtime: you crawl under the desk, move the chair aside, unplug half your gear just to add one adapter. The interruption isn’t dramatic, but it chips away at the day. But with an open tray, or a cable channel with a movable slot, you just drop in a line and keep moving. No digging, no dismantling, no pause. The right organizer stays silent—the wrong one makes you work for every small change.

    What finally worked: a tweak that survived the rush

    After too many workday resets, I ditched the full-seal cable box. It kept the desk visually pure, but every adjustment meant shifting my seat, digging under the desk, and popping off a lid that was always grimy inside. Upgrading to a tray with one open slot made every shift immediate—extra charger? Slide it right in. Reposition for a sit-stand switch? No more wrestling cables back into shape. Swapping devices, lending a charger, or adding a barcode scanner takes seconds. The clutter doesn’t have a chance to pile up, because the setup never makes simple moves annoying.

    FAQ: Desk cable organization in real life

    How do I keep my cords both hidden and accessible?

    Choose organizers and trays with open slots, drop-out ends, or flexible rails. These create stable channels for cables but allow quick rerouting as work shifts—no need to take apart boxes or loosen every wire just because of a new charger or guest device. That’s the dividing line between a “picture-ready” desktop and a workflow that doesn’t stall when work moves faster than expected.

    Will cable trays interfere with my chair—or with standing desk positions?

    Most under-desk trays mount flush and stay clear—if you place them right. Keep enough space (5–8 cm is a good rule) between tray and back wall to let legs and chair pass freely. If your chair path, mobile pedestal, or knee room gets squeezed, you’ll feel it by lunchtime. Measure your chair’s swing before mounting—what seems organized on day one might get in the way during a reset, longer session, or when you shift postures in the afternoon.

    What’s the biggest mistake people make hiding cables?

    Lock-down thinking—over-tightening or over-sealing the setup because mess feels urgent. But the price for “maximum tidy” is slow, awkward changes. The best desk cable systems hold the mess in, but they don’t punish you for switching cables, trading chargers, or re-arranging after a busy week. If you wince every time you need to move something, the clutter will leak right back onto the work surface and floor.

    It’s not about perfection—just less interruption

    Pulling cables out of the way should clear mess and friction—not create new projects every time your routine moves. Any system that makes device swaps slow or charging awkward will fail during an actual workweek. Desks that work are built for real routines: messy, changeable, and pressure-tested. The best cable setups disappear into the background—no pauses, no new hurdles, just reach, plug, and get back to work. When cables become something you don’t have to think about, your setup is finally working as intended.

    Explore the full WorkBasic collection

  • How Modular Workshop Storage Can Improve Workflow and Reduce Clutter

    There’s a satisfying moment after reorganizing a workshop: new bins snapped into place, rails mounted, every tool sorted and labeled. Everything looks sharp, uncluttered—a grid of order ready for real projects. But beneath that first-glance neatness, true usability gets tested the moment routine work returns. Within days, the gap between a wall that looks organized and a setup that actually works starts getting wider, and the friction seeps back into every session.

    How “Organized” Falls Apart Once Work Begins

    On install day, hanging up rails and stacking modular bins feels like a meaningful upgrade. Each tool is visible, fasteners are easy to spot, and the worktable finally breathes. Yet after several evenings of real work—fixing a mower, starting a half-finished build, or just tackling small repairs—the weaknesses that weren’t obvious up front start to show themselves.

    Flat carts and open shelves tempt you to use any free spot as a drop zone. It becomes second nature to lay down a wrench on whatever surface is closest, especially when bins get crammed or hooks fill up. Overflow creeps in: a pile on the corner, stray screws in an empty cup, clamps parked in new, less-logical places. Soon, you’re moving last night’s pile before you even start, and those extra steps eat time and motivation. Organization lives on the surface, but workflow starts to lag underneath.

    One Evening, a Dozen Interruptions

    Imagine it’s 8:30 PM and you’re halfway through swapping hardware on a bench. The mobile cart, meant for convenience, now blocks the aisle because everything temporarily lands there during frantic moments. Hooks on the wall hold what’s in progress, but start to cluster, hiding must-have tools under layers of what’s “mid-project.” By cleanup, the once-clear bench is a patchwork: drill here, pliers there, tape measure across the bins, and a slow, backward puzzle to figure out where each piece belongs. Most “modular” layouts fail at this stage—not because of lack of storage, but because every open surface or oversized bin quietly attracts overflow and breaks the rhythm of return.

    Surface Order vs. Return Flow: Where Friction Lives

    Every storage system looks good in the after-photo. But setting something down and getting it back in the right spot without pausing the flow—that’s the real test. A setup that interrupts routine will show its cracks fast: you shuffle parts from bench to cart, then from cart to shelf, always one small step away from a reset that drags out longer than planned.

    You feel a weak return flow as extra steps and slow movement: digging behind taller bins to find a driver, shifting piles on a flat cart, bending around rolled cabinets that now serve as rerouted paths. Space gets used, but not in ways that speed up work. Instead, you’re reshuffling or sidestepping to recover pieces buried under yesterday’s overflow—and your “organized” wall fades into a static backdrop while the chaos shifts from surface to surface.

    Early Warning Signs of Bottleneck Zones

    Bottlenecks rarely announce themselves. A cleared workbench becomes an ad hoc tray for every misplaced screw. A run of bins along the wall looks busy, but if only three or four keep getting used, the rest turn into ignored storage or places where old hardware simply disappears. The isolated corner with an untouched basket—or worse, a catchall of scraps and half-empty tubes—absorbs more odds and ends than actual projects, gradually slowing you down every time you pass.

    That “just this week” overflow pile is really a recurring symptom. Any surface that isn’t defined with intent turns into the room’s memory hole. Slow invisible buildup leads to regular frustration and increasingly sluggish resets.

    What Real Tweaks Make Immediately Better

    One practical fix: mount shallow, open bins directly above the bench at eye level. This fundamentally changes cleanup and return movements. Instead of “just setting it down for now”—which becomes “finding it tomorrow”—putting away frequently used bits, pliers, or screws is a single, direct motion. The friction of circling the bench or detouring past a blocky cart disappears. Defined, purpose-built sections make destruction of flat, ambiguous surfaces possible—your bench doesn’t become a holding zone for every stray item anymore.

    Signs It’s Time to Tune Up Your Setup

    • You push or reroute the cart several times just to get across the space.
    • Piles overlap, and tools drift from assigned bins to stacked layers without clear lines.
    • Your bin wall still makes you dance around obstacles or hunt for essentials hidden in visual noise.
    • Open areas keep attracting a daily mess—resetting takes longer every night.
    • Corners and bottom shelves never get touched for actual projects but bristle with unused or forgotten gear you’re reluctant to move.

    None of these issues are dramatic on day one. They compound over time, as the system collides with real, repetitive use. What works isn’t pristine perfection, but practical design—one that channels your actual habits and lets returns feel like a step in your working rhythm, not a “clean for the weekend” ritual.

    Finding the Right Mix: Open, Closed, and Accessible

    Closed bins keep small hardware from wandering, but only work when you can open, reach, and stow in one fluid step. For tools grabbed constantly, open hooks and rails along the active wall win every time—they cut the cycle into seconds, not minutes. Strong setups blend both: closed for the loose stuff, open for the daily drivers, and everything sorted small and clear. Oversized bins or catchall baskets? They’re just future junk drawers in disguise. Dividing the wall into clear, labeled, bite-sized homes means no searching, less stacking, and nearly automatic cleanup with each pass.

    Tuning for Daily Use, Not Just a Clean Photo

    Decluttering is barely half of the work. Any open table or shelf that’s not broken up will pull in overflow and slow resets, every single session. Segmenting surfaces, tightening “return” paths, and reserving open zones for only what cycles in and out daily removes endless minor annoyances, whether it’s a one-car garage or a backyard work shed.

    Status-check after two weeks by watching the patterns: Which spots get dumped on, which bins go untouched, which corners block easy movement, and which surfaces force you to pick up the same batch of pieces more than once per project? Fix these with tighter modular zones, refined bin sizes, properly spaced hooks, and carts that don’t double as holding pens. The true win isn’t a wall that photographs as tidy, but one that resets itself, session after session, without dragging you back to zero each time.

    Shop modular storage and workspace solutions at StackNest

  • Streamline Your Car Cleanup Routine with Smart Trash Removal Setup

    You don’t notice the moment your car interior stops working for you—it catches you when clutter sneaks into every action. Your evening commute starts clean, but wrappers collect at your knee, receipts tangle with your phone cable, and bottle caps slide underfoot before you pull into your driveway. This isn’t the mess of a road trip or a backseat disaster; it’s the small, steady friction in everyday routines: trash that never leaves the car when you park, items that block reach the next time you drive, and a setup that looks tidy but slows you down at the worst times. Until cleanup happens by default, not as an afterthought, your car’s organization quietly fails. Here’s where the DriveWellSupply world comes in—focused on setups that actually match the way you move, reach, and load, not just how things look after a detail.

    Recognizing the Real Cleanup Problem: When ‘Later’ Never Comes

    Most drivers don’t hit the breaking point with a trashed floor or a pile of cups on the dash. The real cleanup problem is the invisible creep: you return from a five-minute errand, and that same stray receipt is now threatening to slip close to your feet. You reach to unplug your phone, but a crumpled napkin tags along for the ride. This isn’t just about appearances—this is clutter interfering with the basic flow of driving, parking, and re-entry. Every missed cleanup moment pushes tiny obstacles into each routine task, turning “I’ll throw it away later” into next week’s project. The full breakdown happens long before your car looks truly dirty; you feel it every time normal use starts getting interrupted by last trip’s leftovers.

    Why Car Organization Fails Under Routine Pressure

    What looks orderly at first can fall apart in repeated use. Stashing trash in the glovebox works for two empty wrappers—until you’re trying to jam in a cup and holding items in midair while rooting around for a registration. Using a door pocket “just for trash” sounds controlled until you need to grab a charger, and wrappers wedge under the handle. Too often, the system that promises order leaves you fishing around, shifting things aside, or giving up on quick access for the sake of a surface-level tidy look.

    • Glovebox bags fit a few messes, then force you to balance out trash while fishing for insurance cards.
    • Door storage for trash blocks chargers or folds up against bottle holders, costing legroom and speed.
    • Floors pick up drifting litter, so every stop means another layer—leaving the car visually better, but functionally worse by week’s end.

    Quick errands and tight parking lots magnify the problem—getting in and out becomes a shuffle, not a flow. Surfaces may look clear, but every trip comes with a reminder: your “organized” setup can still jam the works when even a small mess returns before you’ve finished your daily loop.

    The Overlap Trap: Trash, Charging, and Storage Collide

    Real trouble begins when trash containers and storage routines compete for the same zone. Charging cables looped over stray receipts. Door bins stuffed to the point you’re pushing bottles under window controls. Floor mats with coffee lids pooled at the edge. Even a clean-looking car develops flashpoints where convenience bottlenecks as the day stacks up. You only notice after a week:
    – Reaching for your charger turns into a shuffle—unplugging your phone drags out a sticky note or grocery coupon.
    – Dropping trash becomes a contortion act, twisting past the passenger seat or dislodging a sunshade, just to avoid tripping a charger cable.

    Instead of a clear routine, every cleanup stall adds friction. Eventually, returning to your own car means shifting or picking up the same items you meant to toss yesterday. The micro-delays become real frustration: floor clean, but reach disrupted; cables accessible, but wrappers now block the rest of your center area.

    What Actually Changes With the Right Trash Routine

    When your trash solution fits the way you actually move in your car—anchored near your usual reach, not just wherever there’s space—cleanup slides into muscle memory. Attaching a small, rigid bin to the front edge of your center console is less about looks, more about removing the stall between sitting down and clearing trash. On a normal rainy evening, you pop into the seat, drop the coffee sleeve in one motion, and plug in your phone—no sidestepping wrappers, no rearranging bottles, no pushing off clean-up. The friction drops. Every drive ends with less to do, and the cleanup never snowballs.

    This isn’t about perfection. Extra passengers, muddy weather, or a rough week can still outpace your setup. But a routine that puts trash removal at arm’s reach, not on your cleanup to-do list, keeps your seats and main areas usable—chargers clear, door access open, and small disruptions prevented before they derail your next drive. The car isn’t just tidy; it’s tuned to real, repeated use.

    Small Improvements That Last

    The payoff isn’t show-car gloss—it’s a drop in low-level annoyance from Monday to Friday. Instead of a pileup, you get seat zones that stay open and a charger that’s ready in one step, not a shuffle. Function stays ahead of mess, even when your schedule doesn’t. The best setup isn’t flawless; it’s reliable enough to keep clutter from controlling your day or making a short drive one more thing to dread.

    It won’t pass every torture test—random downpours and fast-food runs can still spill over—but the structure keeps rebound friction from taking over. Feeling organized isn’t about empty floors; it’s about getting in, moving, and heading out with nothing in your way. Less delay, less catch-up, more control no matter what your week throws at you.

    Everyday Examples: Noticing When Setup Works—And When It Doesn’t

    • Reaching for your charger and not dragging out last trip’s survival kit of napkins and receipts—because trash is already out of the way.
    • Sliding directly into your seat after multiple stops without moving bottles, wrappers, or a sliding container—cleanup happened when it was supposed to, not when you’re already late.
    • Ending even a tough Friday without facing down a pile of cups or a floor full of drift—because messes never have the time to build.

    The difference between “organized” and “usable” always shows in the repeat: a car might look under control, but if you’re still interrupted by cleanup, blockages, or shifting cargo just to get settled, the setup needs rethinking. The DriveWellSupply world orbits this line—focusing on products that don’t just hide mess, but actively remove routine obstacles so your car keeps up with your life, not the other way around.

    A Setup That Keeps Up With Real Life

    Effective trash management in your car doesn’t mean buying the biggest bin. It means putting disposal right where cleanup happens: within your reach every time you park or return. Make the bin stable and obvious; emptying it should be as natural as grabbing your phone. If trash leaves the car as you leave your seat, you break the cycle of clutter resetting after every trip.

    Look at your own habits. Where do small items pile up before you notice? Which stretch between parking and driving feels clogged—by wrappers, by bottle drift, by charger tangle? Adjust your setup so removing trash isn’t a special event at the end of the week, but a small, automatic step every time you head out. This deliberate structure doesn’t just make a car look cleaner; it keeps access, reach, and charging fast, even as the routine repeats and pressure builds.

    See more practical solutions at DriveWellSupply.

  • How Under-Cabinet Lighting Transforms Rental Kitchens for Daily Tasks

    The Real Kitchen Lighting Issue You Notice Too Late

    On first glance, the rental kitchen looks bright enough. Overhead, a flush wiry ceiling fixture throws light across the center, bouncing off tile and countertop, giving the space its “move-in ready” glow. But the weak spot isn’t obvious until you actually start working. Your first chop, your first onion peel, or the first time you reach behind the coffee maker—and the overhead light’s failure is immediate: shadows swallow the counter’s edge, especially at the wall. No matter how strong that ceiling fixture, a dark band stays put where you prep, wipe, and cook. This isn’t just a mild annoyance; it’s friction built into daily kitchen life. The lighting looks “done” but leaves you squinting and shifting bowls to chase usable visibility, every day.

    Why Overhead Fixtures Lose the Battle With Kitchen Shadows

    Flush mount or semi-flush fixtures do one reliable job: flooding the middle of the room. But kitchens are not meant to be lit like empty corridors. Every upper cabinet introduces a shadow line along the back of the counter. Anything—hand, chopping board, bread bag—instantly blocks the overhead beam. What should be a simple act—reading the label on a spice jar, wiping spilled coffee off a backsplash—becomes a two-step process. You either drag everything forward into the glare or lean awkwardly to see what you’re missing. Stand in this setup for a week, and it becomes routine frustration: slower prep, missed crumbs, hesitating when checking if marble is actually clean. Brightness from above does nothing for the dead zone under your cabinets. Your movement adapts, but the lighting never does.

    The Shadow Strip at the Counter’s Edge: Why It Stays a Problem

    Every kitchen with upper cabinets creates a shadow trap a few inches from the wall. You know it if you’ve ever nudged a mixing bowl forward for a better look, or tipped a bottle toward the center light to check for expiration. Rental kitchens age the problem—they almost always have just an overhead fixture spaced for general light, not actual workflow. The worst part? The discomfort fades into the background, misread as part of “working in the kitchen,” until you step into someone else’s well-lit setup and the difference hits: it wasn’t you, it was the lighting.

    Under-Cabinet Lighting: Precision Fix Where Daily Tasks Fail

    Direct Illumination for the Actual Work Zone

    Under-cabinet lighting doesn’t just “improve atmosphere”—it eliminates the core visibility flaw built into most kitchen designs. By mounting strip or bar lights along the underside of upper cabinets, aimed out toward the counter’s front edge, you kill the standing shadow strip that overhead fixtures always leave behind. The entire worktop—especially the zone behind the toaster and spice caddies—becomes clearly, evenly visible. No more moving bowls into the “safe” circle of light. Small routines change fast: you notice leftover crumbs on the first swipe, read faded packaging without squinting, and chop without fighting your own shadow.

    It’s not extra “brightness.” It’s an end to workaround habits—no more double-checking, no more guess-wiping, no more kitchen yoga to bring things into view. Each task happens in the direct light meant for real use.

    Rental Constraints: Plug-In & Adhesive Lights Avoid Damage

    If your lease forbids hardwired fixtures or new cabinet holes, you’re not locked into bad lighting. Plug-in and adhesive under-cabinet strip lights exist precisely for rental kitchens. With no drilling and simple routing along cabinet trims, they pull power from a standard outlet and can be removed without a trace. You gain targeted task light where the repeating frustration happens, not just a cosmetic accent for photos.

    Tip: Always confirm your landlord’s policy before plugging in new lighting, even if most leases allow removable solutions. Avoid last-minute move-out costs by checking first.

    Kitchen Life With—And Without—Under-Cabinet Lighting

    Think through your actual kitchen moves: reaching for a pan in the pre-dawn, searching for a misplaced scoop behind the blender, or trying to spot a spill before it dries hard. With only ceiling light, hesitation and mild error become routine—narrowed sight, slow hands, dim spots hiding the mess. You stop trusting what you see.

    Switch on under-cabinet strips and the counter’s entire depth is bright. Reaching behind appliances is straightforward—no more dragging the toaster forward to see if the surface is clean. Night or early morning routines become smoother: you prep and pour without squinting, no matter how dark it is outside. Cleanup is faster because shadows can’t hide what needs wiping. The change isn’t dramatic—just plainly better with every task, not just for “looks.”

    Why Countertop Clarity Is Workflow, Not Décor

    Direct, even light from under-cabinet fixtures does what a pretty fixture in the ceiling can’t: it turns “guess and check” workflows into efficient routines. With the whole prep zone clearly lit all the way to the wall, spill cleanup is thorough the first time. The days of squinting at a measuring spoon in semi-darkness are over. Even new users notice quickly—when the shadow problem is gone, you stop thinking about lighting and start moving through the kitchen like it was designed for people.

    Making the Right Under-Cabinet Choice

    Not all under-cabinet lights are equal. The common mistake is to grab cheap “puck” fixtures: they create pools of harsh light, leaving gaps and glare arcs over shiny countertops. If you want full counter clarity, choose diffused strip lights run nearly the full cabinet length and mount them toward the cabinet’s front—not buried deep near the wall. That’s where hands work, where the shadow falls, and where every unnoticed spill or crumb starts. Placement makes the difference between half-fixed and solved.

    The Limits of Under-Cabinet Lights (And Why They Matter)

    Even a perfect under-cabinet strip can’t light your whole kitchen. They’re designed for the work zone: prepping, wiping, reading labels. Overhead and wall fixtures still matter for cooking at the stove, seeing into corners, or navigating around the room. Ignore the sales promise of under-cabinet lights “transforming” the whole space—they fix the task shadow, not the entire kitchen’s lighting structure. But in the zone where you face the most repeated friction, targeted task lighting beats cosmetic fixes every time.

    If Shadow Frustration Persists, It’s Not “Just How Kitchens Are”

    If you’re tilting labels into hallway light, re-wiping the counter every morning, or fishing for dropped items you couldn’t spot the night before, those are design signals: your kitchen isn’t lit for actual use. Galley kitchens with heavy upper cabinets make this problem worse, no matter how “modern” the ceiling fixture looks. Under-cabinet task lights are not an afterthought—they’re the practical, answerable fix to a built-in, repeated-use flaw.

    Small Lighting Upgrades, Big Daily Change

    Switching to under-cabinet lighting is less about cosmetic glow and more about reversing constant, low-level inconvenience. Once installed, the difference shows up in every move: less searching, cleaner prep, no hidden mess. Lighting that finally works with—not against—your everyday kitchen behavior.

    For more practical indoor-lighting solutions, visit LightHelper.

  • Small Adjustments in Outdoor Storage That Transform Usability and Flow

    Every backyard storage setup looks polished for the first two weeks—until real routines start grinding it down. You place a bench under the window, squeeze a deck box along the fence, and swear you have it all covered. Then the rhythm of actual life hits. Suddenly, that smart setup slows you down: you wrestle a lid one-handed, muddy tools dangle off open bins, and every return trip becomes a test of how many things you can juggle or sidestep before quitting and stacking gear wherever there’s space left.

    When Small Storage Decisions Cause Big Hassles

    It always starts with innocent choices—a box pressed just a foot too close to the path, a toolkit wedged into a corner, a wall rack mounted slightly out of reach. Every slightly-off placement quietly adds steps to the routine. After mowing, you juggle a trimmer and have to clear a shovel just to latch the deck box. Or you wheel a bag of soil around bins that have drifted until every errand doubles back on itself. These setups don’t implode. They just keep nudging you off course, again and again.

    What Looks Good Isn’t Always What Works

    The easy answer is to bring in more containers, tighter bins, sleeker wall rails. The real world is less forgiving. On day one, those wall cubes line up neatly and every hook has a purpose. By week three, you’re inching around a bracket to reach a rake, or peeling a tarp back to grab clippers and finding the garden fork now blocks the path. The minute a layout gets in the way of returning something, the frustration shows up in every corner—walkways shrink, bins overflow, cleanup stretches from two minutes to ten.

    A Scene You Already Know: Order Collapses in a Weekend

    Say you’ve lined up four storage cubes along the garage and hung tools on the fence. Looks sharp. But rain hits, and now boots pile near the wall, bags lean across bins, and the only open path gets pinched by a box lid that refuses to close. Each step means nudging bins or stepping into mud. The next day, nobody bothers with the cubes—instead, tools land in the nearest dry spot. The system hasn’t failed loudly, but it’s already fallen apart.

    Invisible Costs: Fatigue in Every Blocked Route

    The real problem isn’t what you see—it’s the slowdowns you can’t ignore. That rack mounted barely out of reach makes every shovel return a pain. Floor cubes that crowd the main lane mean you’re always sidestepping or squeezing past, especially after a rainy project. Return one bulky item and you need to rearrange three others before you’re done; by the time you finish, a simple reset feels like a second job.

    This kind of friction turns the whole setup heavy. Gear starts to “temporarily” pile up outside its intended home. Suddenly, the area feels smaller, less usable, and every organized zone blurs around the edges.

    How Fast “It’s Good Enough” Stops Working

    Things unravel quickly—one busy weekend, an extra load of tools, or guests in the yard, and storage that “almost works” stops working altogether. When returning anything takes more than a few seconds, it sits out. The overflow creeps back and you find yourself negotiating with the setup rather than moving through it.

    Fixing Friction Means Lightening the Load

    Most outdoor storage problems aren’t about needing more containers—they’re about needing clear movement and less crowding. Try raising a wall rack five inches, or sliding bins a half-foot off the main walkway. Instantly, that end-of-day cleanup gets smoother. No more ducking under low rakes or banging shins on poorly placed lids. You can stow muddy gear without rerouting around boxes, and the return path stops feeling like a game of Tetris.

    If the daily return means guessing or shuffling gear, the root problem is lack of breathing room—not lack of storage. Even a hand’s width extra makes a difference when you’re carrying yard tools, trying not to trample new grass, or just eager to be done after a muddy job.

    Repeated Use Will Expose Your Setup’s Weak Spots

    Check your routine after a month: Does putting away one tool make it harder to return the next? Are you shifting bins or leaving items on the edge because reaching the main zone is now a hassle? Watch for overflow piling up where the system “almost” works—that’s your signal. The actual limitation isn’t square footage. It’s the hidden work of constant resets.

    Designing for Flow, Not Just a Finished Photo

    Start with the footpaths—every zone should have real elbow room, even if storage density drops. Racks belong at arm’s reach (account for gloves and boots), not as an afterthought above head height. Freestanding bins work best when offset from high-traffic paths. Split up zones so it’s obvious where the wet boots or muddy shovel should go, even after a draining day.

    Don’t let awkward corners become overflow traps. If the same dead spot always ends up cluttered, rethink its use—sometimes removing a box or swapping a freestanding chest for a wall bracket is all that stops the mess from coming back.

    What Makes the Difference

    The best outdoor storage doesn’t just hold more—it lets you move without tripping, shifting, or stalling. Most layouts fail in the everyday reset: too much bending, too many sidesteps, too many decisions before you’re even done. If every trip out back adds a reset chore, nothing stays put for long and the “system” becomes just another place to avoid.

    The setups that actually last are the ones that stay easy on the worst days as well as the best. It’s not the number of containers—it’s whether your yard can reset itself at the real pace of your life. Organize for motion, and watch the frustration finally lift.

    Ready for a setup that helps instead of hinders? See what real outdoor organization can look like at TidyYard.

  • Choosing the Right Air Cleaning Nozzle for Varied Surfaces

    Spend an hour with an air tool, and you’ll feel what most never see: the real difference between “good enough” and clean, efficient work isn’t raw power—it’s the nozzle on the end. Straight out of the box, fan heads and pinpoint tips look like minor variations. But the illusion lasts only as long as you stick to the easiest surface. Sweep a wide shop bench after sanding, and sure, any nozzle gives you results. Move on to rough concrete edges, coarse pavers, or brick seams—suddenly dust comes back, stubborn grit clings in lines, and what felt simple becomes a repetitive grind. Every missed patch is another squeeze of the trigger, and every pass is another minute lost.

    The Hidden Cost of Settling for “Close Enough”

    Here’s how it plays out on an ordinary cleanup: You start with a fan nozzle, clearing the bench after a sanding marathon. Sweep the floor, flick away wood shavings, everything looks on track. But as soon as you hit the textured brick base of a wall, the nozzle glides uselessly over ridges. Dust settles into grooves, dark streaks snake along low spots, and you end up chasing scraps from under tool racks. You push harder, but nothing budges. Frustration comes quietly—hands tiring, mental focus slipping, and the finish getting patchier with every extra pass.

    This isn’t just a workshop quirk—the same headache turns up in garages, onsite corners, and gritty walkways outside any job trailer. When the wrong nozzle faces the wrong surface, energy drains fast. The problem isn’t lack of effort. It’s a tool that’s just outmatched by the demands of the job—the flat sweeps are fine, but messy edges ruin the end result.

    Why Nozzle Type Matters, Every Single Time

    Put the accessories side-by-side and you’ll see three clear personalities:

    • Fan nozzles: Ideal for fast, even coverage across big, flat decks or shop floors. Perfect… until you run into inconsistencies—grooves, ridges, or anything below the surface. They float, but don’t dig.
    • Pinpoint nozzles: Precision jets for narrow seams, cracks, and rough texturing. They dig out old joint dust and packed grime, but covering a full slab with one is like trimming a lawn with scissors—tedious and fatiguing.
    • Turbo heads: Pure force for caked mud, stuck shavings, or post-construction grit. Too much on soft woods will scar the surface—the brute strength solution where subtlety fails.

    One pass with the “right” tool can save five with the wrong. But the catch is, most people grab whatever’s close and stick with it—so grit piles up in joints, pressure marks scar soft material, and what should be a five-minute blast drags into twenty. That’s not just lost time. It’s repetitive work, growing fatigue, and a finish that never quite looks professional.

    Where the Frustration Builds: The Mid-Job Reality

    Problems don’t show up in the first sweep—they sneak in after fatigue sets in. The classic example: you’re doing annual shop cleanup, moving quick with a fan nozzle over the bench. The visible dust clears, boards shine. But you roll over to the concrete base and find grimy lines stubbornly hanging on. Multiple passes, stubborn dirt, and suddenly your “almost done” turns into “what am I missing?”

    This is where you realize: the problem is the surface, not your skill. The fix isn’t more pressure or more passes. It’s knowing it’s time to swap nozzles for the surface—not just out of routine, but when the work throws up resistance.

    Quick-Swap: The Move That Saves You

    The single biggest workflow change? Keep both a fan and pinpoint nozzle handy—and switch the second you feel progress stall. As soon as you start seeing streaks, or as soon as corners stay dirty after a pass, pause and swap. Don’t gut it out or wait for frustration to peak. Clicking over at the first sign of drag means you don’t double your effort or spend the rest of the job fighting with the tool.

    Does the Right Nozzle Really Save Time and Energy?

    Reality check from long shop days: sticking with a fan nozzle on pitted or dirty surfaces can cost you roughly a third more backtracking compared to simply grabbing the pinpoint. For anyone moving between surfaces—a bench here, concrete there—that’s the difference between finishing today or dragging the job out. Quick nozzle swaps aren’t about speed—they’re about consistency and not running hands and wrists into the ground.

    How to Tell You Need to Change Nozzles

    It’s subtle at first, but these are the red flags:

    • Dust lines standing out after the first cleaning sweep
    • Grit tucked deep in seams or brick joints, resisting pass after pass
    • Swirl marks or minor scarring after heavy use of turbo heads
    • Your hand aching after “just a few more tries” in the same spot

    If cleanup doesn’t get easier with repetition, or if you hear the slap of air change pitch over rougher zones, that’s your cue. Swap early, not at the end.

    Real-World Use: Shop Routine to Dusty Brick

    Picture this: after re-sawing lumber and blasting joinery, your workspace floor is a patchwork of fine dust, odd corners, and brick baseboard. The fan nozzle makes quick work of the main drag in the open—but as you hit the edge bricks, dust stacks up. More pressure just numbs your hand and barely shifts the mess. Swap in a pinpoint tip, and suddenly the grooves clear, with less squeezing and less repetition.

    Miss this moment, and you waste energy chasing stubborn debris. That extra strain doesn’t just slow you down—over time, it breaks your rhythm, adds drag to every workflow, and leaves a jobsite that never quite looks finished.

    One Change: Keep Your Nozzles Ready

    Don’t bury your alternates at the back of the bench. Clip a fan and pinpoint nozzle to your tool belt, apron, or utility pouch every time you start a mixed-surface job. The extra prep pays off the second the surface changes. Think of swapping nozzles like using the right bit or blade for the material—yes, there’s a pause, but the work is smoother, cleaner, and a lot less punishing over hours or days.

    The Work Pays You Back

    Real productivity isn’t in piling up accessories—it’s in noticing when the work slows and adapting, fast. A nozzle swap can’t polish a floor or fix bad prep, but it can cut wasted effort and keep results consistent. Next time dust starts to streak, or you sense fatigue ratcheting up, switch that tip. Your body, your schedule, and every job after will run smoother for it.

    Shop tools and accessories at Gumboll