Blog

  • How a Simple Pause Transforms Your Dog Walks and Reduces Tension

    Every dog walk has a point where daily convenience quietly unravels. It doesn’t shout, but you feel it: that hesitation near the hedge, the fumble for a leash at the door, or the awkward pause at a narrow curb—the moment when what should be routine starts demanding double the focus. For most owners, it repeats in exactly the same spot. One overlooked pause or skipped cue—more muscle memory than decision—turns a predictable walk into a string of leash surges and mid-block interruptions. This isn’t chaos or disobedience; it’s the silent build-up of missed moments, and it keeps showing up no matter how organized your entryway or how fine-tuned your gear seems. Smooth on paper, but every evening you’re left fighting the same delay or tug, wondering why the routine never quite resets.

    The Everyday Walk: Where Setup and Rhythm Collide

    Walk routines get assembled from habit—leash on a hook, poop bags somewhere by the door, dog ready to go. It’s supposed to be seamless. For a few blocks, it is: you match steps, pockets are stocked, you know every corner by instinct. But then comes the spot you always skip—a subtle slow-down you forget, the leash tightening a second too soon, or a curb approached with one eye on your phone instead of your dog. Routines survive on these little signals, and when one slips, so does the flow. Now you’re adjusting grip, nudging for alignment, and the rhythm you relied on disappears. Each walk starts with a neat setup and still ends in frustration, signaling the real split between “organized” and “ready for repeated use.”

    It’s never about willpower or stricter correction. It’s the friction that sneaks in between expected comfort and what the real routine demands—an overlooked moment here, a silent shortcut there. The leash pulls taut, your dog surges or holds back, and suddenly you’re managing conflict where there should be calm. You react through the rest of the walk. Routine doesn’t save you—unless it’s lived through, it just covers for yesterday’s mistake until it shows up again.

    One Missed Turn—And Why It Refuses to Stay Small

    The pattern is frustrating because it hides in plain sight. Skip the pause at a wide turn, forget the deliberate slow-down at a driveway, or step ahead at the corner because someone else is walking by—now the leash tightens, the dog senses urgency, and the pace jumps. Even when you recover, the damage lingers. Every new block: more checking, more “wait,” more mid-walk restarts. The tiniest surge becomes the new template for the whole outing, until you’re back home with both of you a step more wired. The reset that should have happened mid-walk just gets carried inside, tension leaking into the hallway, kitchen, and any attempt to settle afterward.

    It never feels dramatic, but friction compounds. A leash that was loose now feels like a silent warning. Your dog’s ready to pivot from calm to restless in a blink—and you both know where and why it started, even if you don’t say it out loud. Consistency in the small moments, not just gear, is what keeps the routine from breaking down.

    The Quiet Cost of Skipping the Pause

    Owners get tricked by routine’s appearance: supplies by the door, leashes at the ready, everything visually in order. But routine only works if it survives repeated use. That two-second pause before a corner, the extra second letting your dog check in near the hedge, or the deliberate leash slack when you step onto the curb—these are the parts that reset the walk and strip away friction. Miss them, and the rest of the routine slowly loses its grip.

    It doesn’t take an outright mistake, just a shortcut: grabbing a leash from under a pile and delaying, watching your dog interpret your pause as “permission to lunge,” or rushing a turn and tangling the leash around your hand instead of letting it move naturally. Over time, these micro-missed connections build into a pattern that’s hard to diagnose but always annoying to live with. When the flow falters, both owner and dog start bracing for rough patches where smoothness should be automatic.

    • Digging for a waste bag while your dog slips into “go” mode—turning a loose leash into a two-handed scramble.
    • Approaching a corner, then realizing you’re blocked by another pedestrian and the leash was never reset—now you’re tangled, correcting after the fact.
    • Rushing to keep up through familiar shortcuts, only to find your dog is now using every pause as their own signal to speed ahead.

    As these glitches add up, what looked like a reliable setup becomes a repeating weak point. The tidy entryway or organized supplies don’t change the underlying loop—when missed cues keep happening, neatness just hides the friction, it never removes it.

    How Rhythm Breaks: The Aftereffect of the Skipped Slow-Down

    A two-second mistake can tangle your walks for days. Allow one corner to go un-paused, and the leash turns from support tool to obstacle. Mental autopilot kicks in—trusting the routine—while your dog recalibrates to the new rule: “more tension means I lead or react.” Suddenly, every approach to a turn is a test. You’re half a step behind, fixing grip at each block, losing the original calm that made the walk useful in the first place.

    This cycle never fixes itself through luck. The first lost pause sets up a domino effect: walk stops mid-block, corrections escalate, and once inside, your dog keeps pacing or hanging in the entry, expecting more motion instead of settling. The routine feels broken even when the gear or layout looks right. Until you spot the actual pause or shortcut you keep missing, the same struggle repeats—even after the rest of your routine seems stable.

    Real-World Friction Zones on Walks—And Back Inside

    • Entryway gridlock: Leash or harness is tucked behind bags or shoes, slowing you down and priming your dog to tug at the first chance.
    • Muddy cleanup choke point: Towel or wipes are “there” but not in reachable sight—leads to quick paw prints across the house before you can react.
    • After-walk energy overflow: Dog paces or circles inside because the missed leash reset outside never let them finish winding down.

    The Reset: Pausing on Purpose (Not Overhauling Everything)

    The smallest fix isn’t dramatic training or a busy new setup. It’s a two-second pause at each turn, just long enough to slacken the leash and let both of you regroup. You don’t freeze or make a show; you slow just enough that momentum returns only when the routine is aligned. Suddenly, you find leash slack cutting through more of the walk, and the loop—turn, regroup, walk—stays intact for whole blocks at a time. The benefit isn’t flashy, but it’s unmistakable: less awkward tugging, fewer micro-stops, and a smoother reentry when you get home.

    • Signals your dog not to surge, breaking the association between pause and excitement.
    • Avoids catch-up corrections, lowering frustration for both sides of the leash.
    • Extends post-walk calm, so settling back inside happens naturally—without a separate reset routine.

    This kind of pause won’t fix every outside distraction or sudden burst of energy, but it resets what routine is supposed to protect—usable calm, not just a collection of neatly placed supplies. It’s not about never slipping up, but about making the walk easier to recover without launching a new project every time something drifts off rhythm.

    Spotting the Change—In Walk, in Setup, in Home Flow

    After a few days of deliberate pauses, the difference shows where it counts. Now your dog checks in at every stop without circling or pulling. The leash stays loose even at your old trouble spot; you step back in without a hallway standoff, and the kitchen stays clearer instead of doubling as a pacing ring. The routines that once felt full of little snags stretch out and reset more easily, and you notice fewer after-effects trailing into the evening.

    The deeper lesson isn’t that your setup was wrong, but that “looks organized” rarely equals “works in real time.” Entryway gear, cleanup supplies, grooming tools—they can look perfect in a photo but miss the rhythm demanded by repeated use. The strategic pause is the same: invisible, not costly, but changing the whole chain of events for the better. It’s how a walk that started in friction ends with a household that doesn’t need separate rescue routines.

    Why Big Overhauls Don’t Fix the Real Pressure

    Most walk problems aren’t because you need more gear or a stricter routine—they show up because one small alignment keeps getting knocked loose and ignored. Beautiful hooks or perfectly arranged bowls won’t help if your leash, towel, or wipes are blocked at the moment you need them, or if the handling never matches your real rhythm. A setup might reduce visual mess, but still trip you up with repeated-use drag: slow leash reach, towel lost in
  • Why Eye-Level Storage Transforms Your Car’s Daily Organization

    Pop your car door open after a long day and the interior looks organized—until you’re actually moving. Suddenly, you’re back to stretching for a charger cable that’s vanished under the seat, nudging an “out-of-the-way” sunglasses case that’s slid into a gap, or digging in the console for an access card wedged too deep to reach. The dashboard might pass the clean test, but in everyday driving—the short errands, the fast returns—you keep hitting the same snags. “Organization” looks good on a static car, but friction shows up the moment you need something on the fly.

    When “Neat” Storage Creates Hidden Hassles

    Most car setups fail in the same, stubborn ways: you come back carrying coffee, groceries, and your phone, only to realize the charger cable—used minutes ago—has slipped to the floor again. One-handed, you’re forced into the knee-on-seat twist to recover it. That dipping, feeling around, re-routing the cable: each break in your flow chips away at your actual readiness. What seemed like a minor annoyance is now routine—especially on busy commutes, rainy mornings, or backseat drop-offs. “Tidy” rarely means “reachable”—and most days, you end up repeating recovery motions just to stay on schedule.

    The Problem with Below-Eye-Level Storage

    Those deep bins, wide glove boxes, and center console pockets promise a clutter-free look but multiply daily interruptions. Anything that can roll or slip finds its way out of reach on a sharp turn; phone cables snake under floor mats; cards wedge below armrests. Mid-drive, the illusion of control breaks: an item bumps loose because it never had a reliable drop zone. If you’re on errands with quick stops, every return means resetting fallen or shifted gear. The feeling isn’t chaos—it’s wasted seconds and constantly breaking stride, over and over, no matter how many times you “fix” it after cleaning.

    Eye-Level Storage: The True “Drop Zone”

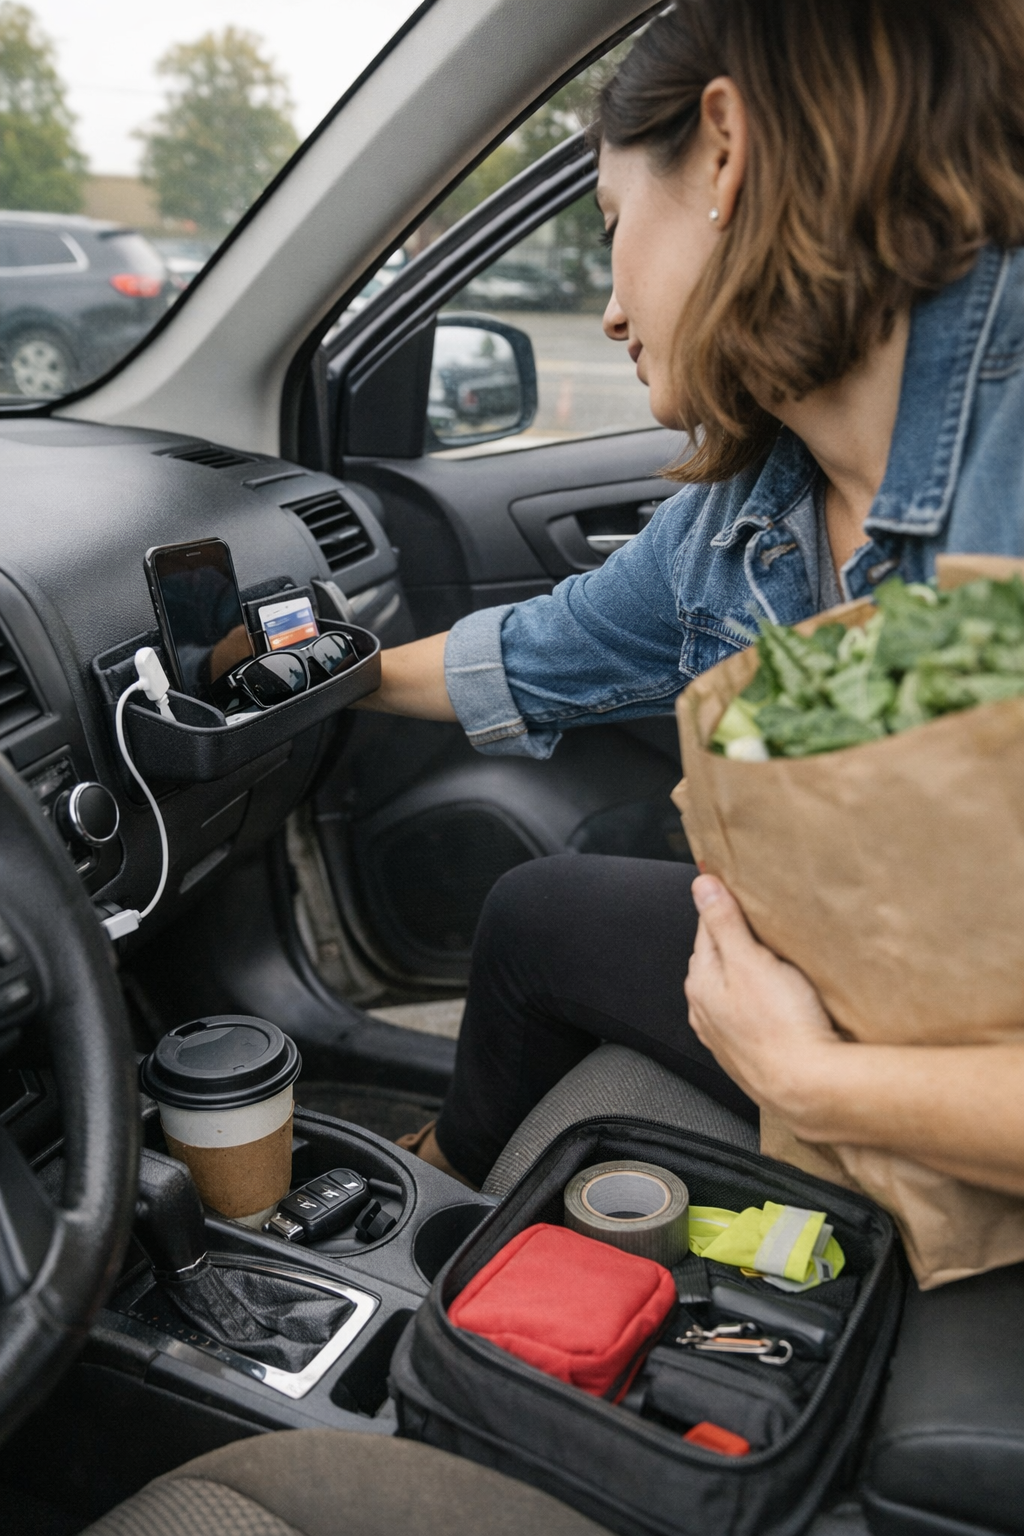
    The friction flips when your high-touch items—charger, phone, sunglasses, access cards—are set into trays or mounts at eye or hand level. Now, even in a rush, you park, grab, and return gear in a single motion, never hunting underneath seats or fumbling for cables. It stands out most on days with passengers or back-to-back errands: keys live in their spot, glasses stay visible, no one has to ask or search. The movement becomes smoother, less interrupted—especially once you’ve had enough of “organizing” just to have it unravel after two trips.

    How It Feels in Real Use

    Picture the common squeeze: the school run, raining, your arms full. You open the door only to realize the cable is now pressed so far under the cupholder your knuckles barely fit. Or, swinging in with takeout, the consoles “stuffed” look means you end up prodding aside a tangle before driving. These moments multiply whenever storage choices force you to pause, search, or dig at exactly the wrong time. Raised, visible trays and holders shorten every reach—and quietly remove those little, cumulative aggravations.

    Why Storage Needs to Support Your Actual Pace

    Real usability is measured not by how things look after a full clean, but by how every return-to-car, quick plug-in, or handoff goes throughout the week. The right structure does more than declutter—it adapts to the pace of errands, rushes, and shared use. Consider:

    • Cables resting in a shallow tray—grab-and-go—versus repeatedly snagging under the seat.
    • Cards tossed into a side-mount on entry instead of lost in the depths of a glove box.
    • Glasses consistently in a dash-level holder, not lost under shopping bags or seat covers.

    Setup differences aren’t just cosmetic—they either relieve or intensify daily friction. With open trays, you sacrifice a bit of invisible “tidiness” for genuine speed. For most people, seeing gear in predictable places is worth never crawling around for a stranded cord or misplaced card right before work.

    Handling Trade-Offs: Visibility vs. Visual Clutter

    Open, eye-level trays might disrupt the showroom line of your dashboard. That’s function winning against empty aesthetics. But this isn’t an all-or-nothing move: slim, low-profile trays and mounts fine-tune the balance. The best setups match what you grab most—not what you might store if you had all day. For some, that’s a slim tray by the steering wheel; for others, a discrete mount beside the cupholder. Overfill it, and you trade one kind of clutter for another, so stick to what actually rotates through your daily hand.

    Small Adjustments, Big Real-World Payback

    Experience in real cars shows that even an extra inch on a tray’s edge will keep cables from sneaking onto the floor and sunglasses from vanishing. Open designs always beat deep pockets for efficient, one-handed returns—especially during in-and-out routines or when sharing a vehicle. Once you raise your repeat-use essentials onto a tray or visibly mounted organizer, the bending, fishing, and “where did it go?” routine is cut to almost zero. The car doesn’t just look ready; it acts ready.

    Practical Tweaks That Make a Difference

    • Anchor cables above seat gaps for painless, tangle-free charging—even when you’re rushed.
    • Pick trays or mounts that work around dash vents and controls—sideline, never in the way.
    • Keep storage shallow and visual for instant checks on what’s missing or needs a recharge.

    With a better setup, re-entry is smooth: no more time lost to chasing after small gear or realigning the interior with every stop. Minor changes to storage position mean fewer interruptions, faster starts, and less wear on patience after repeated use.

    The Shift from “Stowed” to “Ready”

    Hiding every accessory creates tidy lines but slow reactions. A week of actual trips—the drop-offs, the quick errands, the shared drives—exposes the real cost of “out of sight”: wasted time, missed essentials, sudden delays. Order that survives real use depends on storage that serves your movement—not just the appearance of control. What matters is not wiping down the dashboard, but knowing your gear is always exactly where your routine demands it—visible, reachable, and ready in motion.

    Find car interior tools, organizers, and mounts that are made for daily routines at DriveWellSupply.

  • Why Proper Lighting Matters More Than Brightness on Slick Floors

    Slick floors expose lighting failures you don’t notice until you’re in motion—pausing at a stair turn because you can’t see the next step, squinting to spot a puddle on wet tile, or feeling one side of a glossy hallway vanish as shadows swallow the baseboards. Overhead lighting that looks bright on paper can fall apart the moment you cross polished tile or lean in at a fogged mirror. If you’re hesitating in spots that should feel direct—a bathroom exit, a laundry zone, a hallway corner—you’re living with the daily cost of light that misses real movement paths and leaves practical visibility to chance.

    Where Light Fails Slick Surfaces: More Than Just a Brightness Issue

    One ceiling fixture might seem to drench the bathroom or laundry in light, but actual routines keep finding the missed spots. Step from a steamy shower—every tile gleams with reflection, but you’re forced to track a safe place to land your feet. Glare pools under overhead bulbs, catching your eye when all you need is to check for wet patches. Hallway turns collect uncertainty: shadows thicken at trim lines, just where your stride demands clarity. Stairs, baseboards, and doorframes become pockets of unlit risk—encouraging shuffling, deliberate movement, and small course corrections that slow you down and force your attention away from your actual task.

    Repeated use makes the flaws impossible to ignore: slowing at slick thresholds, bracing at a darkened stair, drifting away from the brightest reflections just to keep your footing. These are more than small bothers—they’re repeated micro-decisions that drain confidence from each step and quietly raise the risk of a slip on the days you least expect it.

    Struggles in Hallways, Bathrooms, and Laundry Zones

    High-traffic, hard-surfaced areas create frictions that pure brightness can’t solve. In bathrooms, the supposed brightness turns against you—glare bounces off chrome and tile, bands of harsh reflection scatter right across your footpath. Hallways with ceiling-only light flatten at the center yet push the shadows out, so you feel one edge dissolve beneath your peripheral vision as you cross. On stairs, a single ceiling flush mount might blast the upper treads, but the landing lurks in partial gloom, marked only by a murky stripe where the surface shifts. Each missed spot isn’t theoretical—it’s where balance, visibility, or even the edge for a safe step disappears just before you need it.

    Regular routines amplify these failures. You carry piles of laundry but must slow at the wet doorway, half-seeing the tile seams. Shoes leave water by the entry and the far side of the hallway feels like it falls away into shadow, even if the fixture above looks powerful when the room is empty. Weak spread and glare become conditions you adapt to, but never solve, leaving the space visually incomplete in every real use.

    Common Friction Points That Interrupt Movement

    • Post-shower footing: A field of reflections breaks up the floor, forcing a visual hunt for solid ground.
    • Sharp hallway corner: The shine of the floor meets thick, shifting shadows—your step hesitates where clarity is most needed.
    • Stair descent: Well-lit upper treads surrender to shadowed landings, making the next surface an uncertain guess.
    • Laundry work zone: Overhead bulbs bounce from chrome and lids, making the workspace harsh while the floor blurs out beneath you.

    Why Traditional Ceiling Fixtures Leave You Second-Guessing

    Flush mounts and linear ceiling lights give a false sense of control—they promise coverage but deliver uneven spread, especially in rooms where slick surfaces multiply shadows and glare. The geometry of tile, the angle of baseboards, and the curve of a stair landing all work against uniformity. Turning up the bulb only intensifies these imbalances: glare clusters near your line of sight or blinds the shiniest patches, while corners and floor transitions retreat into darkness, waiting to catch your foot as you move on instinct instead of clear sight.

    The gaps show up in routine, not emptiness. An immaculate bathroom may gleam after cleaning, yet you can’t find the edge of standing water until it’s under your heel. Overhead lighting leaves blind triangles beneath vanities and unpredictable shadow falls under sink lines and stair turns. A space can look illuminated but still fail—if every step requires a check or a detour, the lighting is only delivering surface-level satisfaction, not real usability.

    Solving for Movement: The Power of Lower, Wall-Mounted Lighting

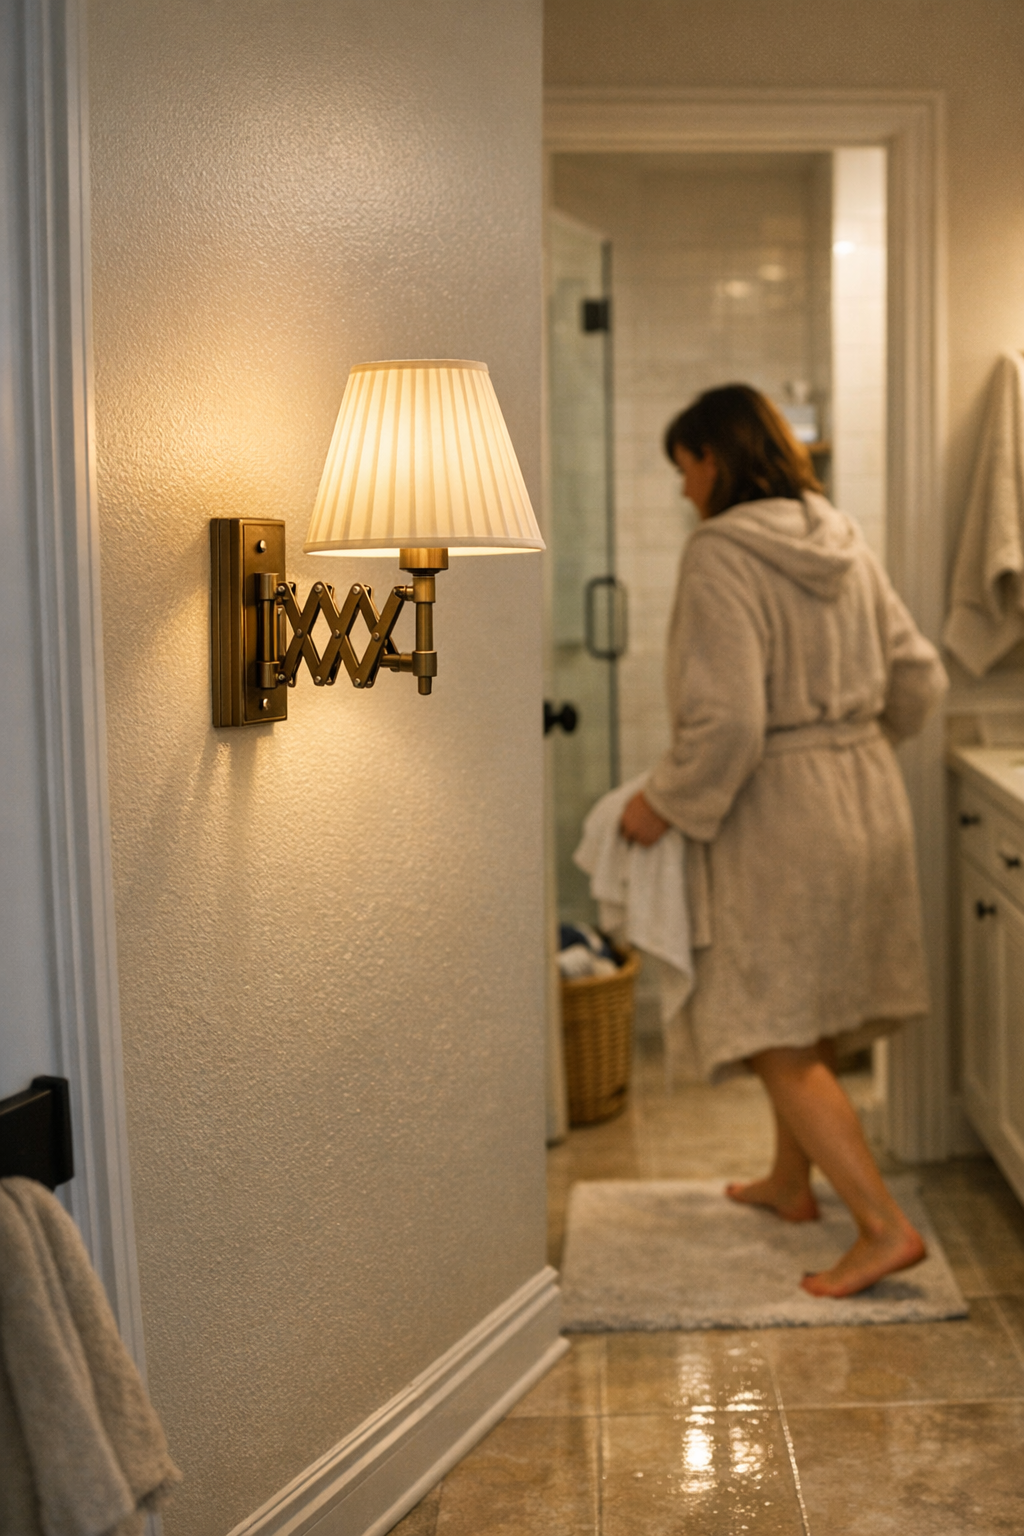
    The difference comes from moving light where it’s needed—not from brightness, but from placement. In slick-floor, high-use spaces, adding wall sconces or hardwired wall lights at elbow height changes how the room behaves. Suddenly, persistent shadow pockets dissolve and glare is tamed, because light skims across the target surface without reflecting straight into your eye. The last risky patch at a stair or hallway edge doesn’t vanish through sheer brightness, but through careful, targeted illumination of the path you actually use. The improvement isn’t theoretical: awkward pauses and cautious steps disappear, replaced by the ability to move naturally and see at a glance where to plant your feet—no more hunting for the safe spot or angling away from a blinding streak on the tile.

    Practical Tip: Where to Place Fixtures for Best Results

    • Mount wall sconces or hardwired wall lights at or just below eye level, focusing on main movement routes in bathrooms, hallways, stairways, and laundry entries.
    • Prioritize fixtures with a diffused, wide spread designed specifically to reach down and across the floor zone—not just above counters or doorframes.
    • Skip bare bulbs and narrow-beam spots; these create new glare, compounding the old problem instead of solving it.
    • Walk the space after dark: if any corner or passage forces you to hesitate or look twice, lighting adjustment is still needed.

    Frequently Asked Questions on Slick-Floor Lighting

    How can I reduce glare on slick bathroom floors?

    Choose diffused, wall-mounted fixtures with wide beams. Position them to send light directly across both walking surfaces and approach routes to tubs or sinks. This levels out shine and shadow, letting you see hazards without needing to squint or hunt for edges. Avoid direct, exposed bulbs—they often trade one hard reflection for another.

    Where should task lighting go in laundry or bath zones that get slippery?

    Target the zone at or just below eye level, especially near areas of repeated foot movement: entrances, laundry edges, tub approaches, and around any tight corridor. Good wall lighting fills gaps where tile meets wall and at turns, keeping steps clear and reducing surprise shadows before they interrupt your routine.

    Will brighter bulbs fix poor visibility in these areas?

    No—adding brightness usually magnifies problems by deepening contrast. The solution is not higher wattage but smarter spread: fixtures that bathe the movement zone in low-glare, even illumination and erase the shadow lines hiding at edges, corners, and under fixtures.

    Lighting That Supports Real Life, Not Just Good Looks

    A room that passes a brightness test can still trip up real routines—uncertain steps, hunched posture, split-second hesitation at the very spots you travel most. The best setups don’t just flood a room; they focus illumination wherever hesitation, shine, or shifting surfaces disrupt your habits. Balanced lighting removes those blind moments, turning each trip through a slick-floor zone from a string of micro-adjustments into a straightforward routine where you move naturally, without overthinking hazards or angles every time you cross the tile or circle the stair.

    For lighting that actually keeps up with how you live—without leaving dangerous or annoying gaps—see what’s possible at LightHelper.

  • Choosing Outdoor Storage That Adapts to Real Yard Challenges

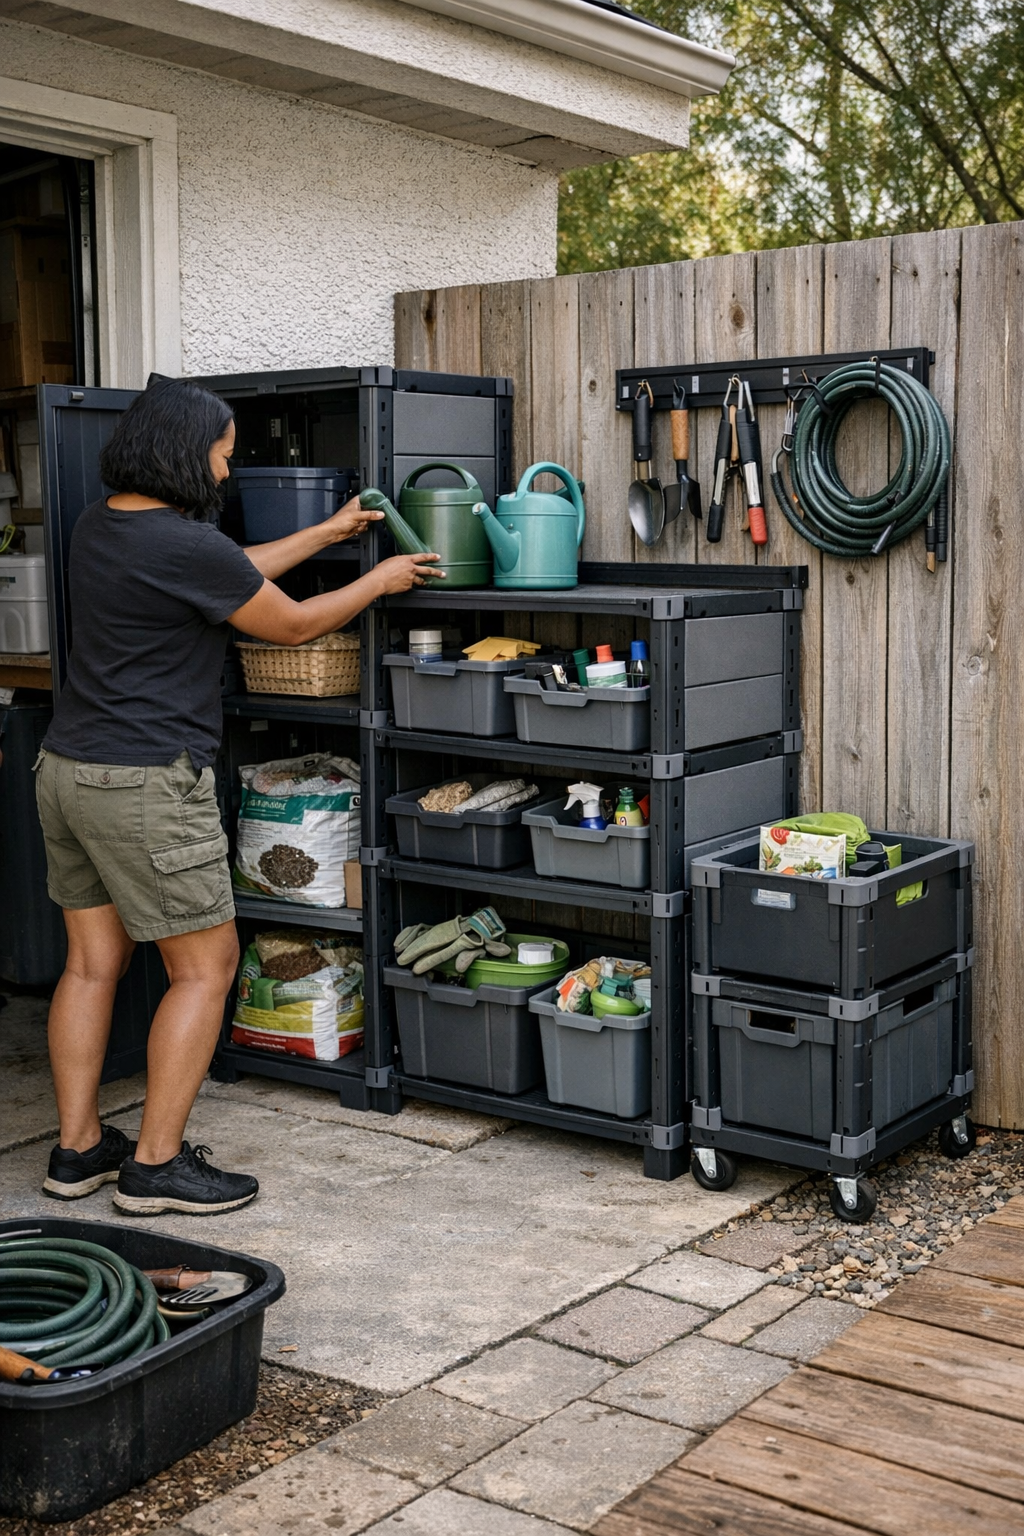
    The first week is always the lie: you reset your backyard, tuck everything into its spot, and for a moment, your storage setup almost looks like the catalog photo. But by Friday, that order is slipping—one piece at a time. It isn’t that your gear outnumbers your space; it’s that the setup can’t keep up with real backyard movement. What feels organized on day one is outflanked by day six: the mower stuck behind the soil bags, the soccer net dragged back to the fence, the hose left curving across the walk because shuffling everything back just isn’t worth it after a long day. This is the gritty divide between ‘looked right’ and ‘works right’—the difference between setup that survives a snapshot versus one that keeps up with real use, especially in small, side-yard strips or tight utility corners.

    The Subtle Breakdown of “Looks Organized”

    Walk through your yard at the end of any normal week and you’ll spot the routine cracks: a neat shed that becomes a bottleneck, a wall rack whose top shelf never actually gets used, a side-yard supposed to keep paths clear but that you start dodging by Wednesday. The promise of ‘a place for everything’ wears thin under repeat pressure—reset after mowing, toys cycling out after school, planters shifting for the weekend BBQ. None of the mess explodes overnight. Instead, it’s the steady build of friction: stacking the hose so you can park the wheelbarrow, wedging the rake behind a container because nothing else will fit. Every return gets slower, every zone feels tighter, and what began as organization ends in one more ‘temporary’ pile blocking the run to the gate.

    It’s easy to underestimate how quickly ‘convenience’ can disappear if storage is even a few steps off the natural path, or if “putting away” demands a shuffle of other stuff first. In real yards, that means anything stacked or far from where it gets used will be back underfoot by next weekend.

    The Realities of Fixed, Wall, and Mobile Storage

    Fixed Units: Stable—Until They Box You In

    Bolted-down sheds and outdoor cabinets promise protection, but their demands are hidden in daily use. Doors need full swings. Floor space has to stay empty. If you’re squeezing gear along a garage edge or fence line, all it takes is one bulky mower or bag in the way and the setup grinds to a halt. You end up leaving items just outside “for a second”—and by next downpour, tools and toys gather like driftwood at the shed door, waiting out the next full reset nobody has time for. Fixed units punish blended routines: if one person’s stuff gets in first, everyone else’s gear is stuck outside the system.

    Wall Systems: Vertical Space, Hidden Snares

    Hanging racks, hooks, and shelves sound like the answer for narrow alleys or utility zones where ground space is gold. But vertical solutions only work when the details match how—and where—stuff actually moves. Shelves just out of reach? Tools start returning to the ground. Awkward bins at shoulder height? You’ll balance spades sideways or leave them wherever it’s easy in the moment. A badly chosen hook can quietly trigger a slow failure: items stop ‘returning’ and migrate to a new pile on the patio. Even a few inches’ mismatch between shelf height and real use will break your quick reset, especially when speed matters more than ideal storage form.

    Mobile and Modular: Flexible—Until They Lose Their Anchor

    Carts and modular bins are lifesavers—when they know where to dock. But mobility turns to mess if you skip this anchor point. One rainstorm or a busy weekend, and suddenly bins are stranded in walkways, carts cluster by the hose reel, and a slope sends everything inching toward the garage threshold. What looked adaptable becomes a game of Tetris no one wants to finish. Without a true ‘home base,’ mobile pieces get left wherever is least in the way until the next big clean-up—by which time, the setup feels like part of the problem, not the solution.

    Backyard Reality: The Small Frictions

    Here’s how it actually goes: Saturday, you’re done mowing. The only spot left for the mower is inside the shed, but a garden fork is propped against the entryway—move it, and now it blocks the spreader. You leave the mower outside, just until later. By Wednesday, kids’ balls and discarded pool floats queue by the shed, all “waiting” for the next round of tidying nobody can do quickly. Instead of a reset, you get a queue—and by Thursday, the clear path is just another tight spot to sidestep.

    Or: you grab your favorite trowel from a just-out-of-reach wall rack during a planting rush. Later, you don’t bother with the extra reach and drop it by the fence, meaning to hang it later. By next week, that awkward corner is crowded with “temporarily” placed tools and bags, waiting for a bigger reset that never comes. Zone by zone, each inconvenient return becomes tomorrow’s visible pile.

    Space and Flow: When Products Show Their Limits

    It’s rarely about having too little space—it’s about how easily things move in and out, day after day. A storage bench might fit against the fence on the sketch, but in practice, its open lid cuts deep into the path. Line up containers in a side yard and suddenly it’s a tightrope act just to reach the compost bin. Shared yards expose weak return flow even faster: the quickest landing point becomes the new ‘home’ for everything, and assigned spots go empty. The setup’s original promise—clear zones, open walkways—breaks down as overflow collects in the most convenient-to-drop dead corners or gets stranded after the first downpour.

    Dead corners never lie: wherever it’s easiest to drop gear will fill up first. If your storage system interrupts more paths than it opens, or if a zone feels like a holding tank for overflow rather than a real home, resets will keep getting pushed off—and so will your use of the space itself.

    The ‘Return Flow’ Reality Check

    The best outdoor setups fade into the background; returning things becomes automatic, almost effortless. But every hidden step—unlocking a latch, moving three bins, lifting a heavy lid just to return one toy—adds friction, and friction gets paid back with clutter. These aren’t user flaws. They’re system reveals: a few extra seconds per reset is all it takes for gear, tools, and toys to migrate from their ‘intended’ spot to wherever feels less annoying in the moment.

    Wall systems work beautifully for what fits—until you need to park something heavy or awkward. Floor units keep bulkier items dry, but force a shuffle every time you need to grab something fast. Mobile bins offer real flexibility only if they have a clearly marked “landing zone” that’s actually convenient, not just out of the way. In practical terms, the real test isn’t how your setup looks once tidied, but how fast things flow back after a typical, slightly rushed day.

    Making Space Actually Work—Not Just Look Full

    Functional organization only proves itself when your path doesn’t slow down. In truly workable setups:

    • Footpaths stay open without endless rearranging.
    • Bulky things—ladders, carts—slide back into a spot you can actually reach, not wherever they first fit.
    • Frequent-use tools don’t require double-backs just to hang or stash them away.
    • Overflow piles aren’t inevitable every Wednesday; returning items makes more sense than leaving them out “just for now.”

    If you keep finding yourself stepping over the same pile, skipping resets, or reshuffling gear just to get by, the problem isn’t you. It’s a return flow mismatch: the system isn’t matching how your routines play out. Notice what gets stranded or parked awkwardly, and you’ll spot where the setup stops working and real frictions add up.

    Practical Adjustments That Actually Change the Routine

    • Set shelf and bin heights to match your natural reach. If a shelf is a stretch, move essentials down to hooks or baskets at elbow level, and use the hard-to-reach space for true seldom-use items.
    • Create a clearly visible “home base” for mobile gear. Don’t settle for vague corners—mark the reset point near the main path, where returning carts or bins doesn’t feel like extra work.
    • Leverage vertical space where it counts—but avoid forcing bending or over-stacking. Every extra lift or reach equals one more reason to skip the return.
    • Confine fixed storage in tight spots to single-purpose zones. Multi-user gear fighting for a single container guarantees someone will be left stashing gear in the overflow corner.

    The real test is always the midweek look: pay attention to where items actually cluster after every normal use—not the reset snapshot, not the “best-case” layout, but the lived-in, slightly messy day-to-day. That’s what separates a yard that works from one that

  • Ensuring Angle Grinder Disc Speed Matches for Safer, Cleaner Cuts

    There’s a moment every angle grinder user dreads—the telling jolt as your tool starts to buck and chatter halfway through a cut. You brace harder, but the wheel judders and the edge you meant to keep clean scorches and splinters instead. That instant, you know: something’s off, and it usually comes down to one thing—your disc’s speed rating versus your grinder’s power. This isn’t a small detail. Making the wrong match between disc and tool creates a drag on every part of your process. The fallout shows up everywhere: rough finishes that won’t sand smooth, discs reduced to shreds in half the lifespan, and that background frustration as your workflow breaks down while you double-check—or redo—your last pass. In actual shops and out on job sites, overlooking this spec isn’t a one-off mistake; it’s a recurring time-waster and quality killer.

    How Disc Speed Ratings Affect Every Cut

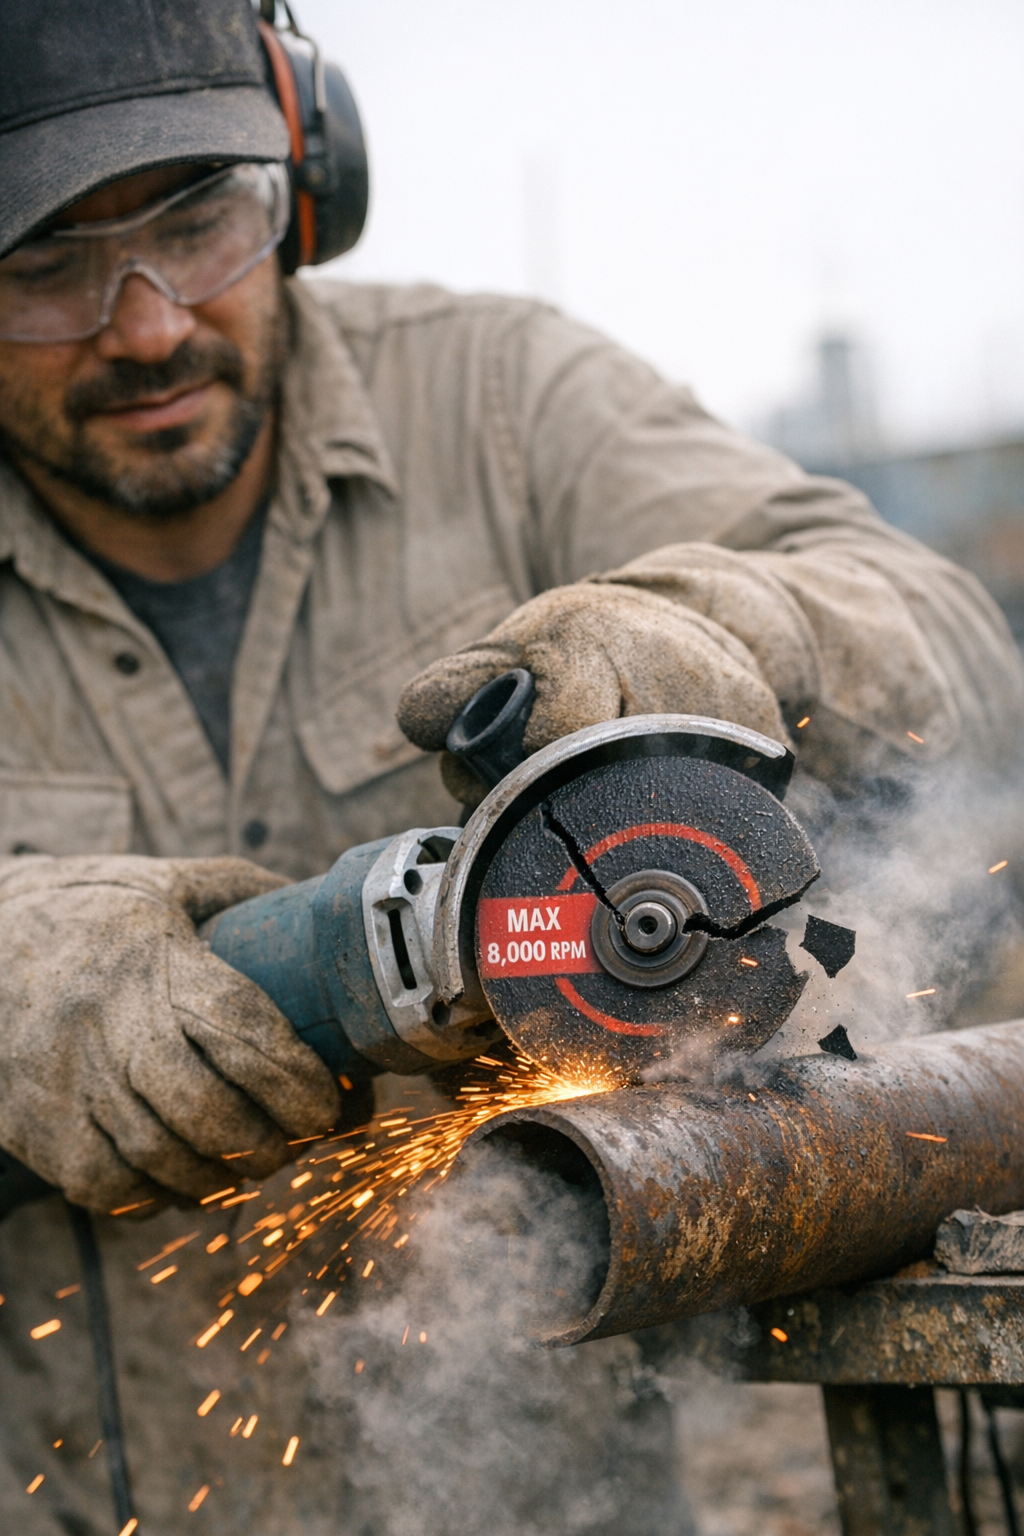
    Grab the wrong disc from your overcrowded tool bench—a disc rated for 8,000 RPM instead of the 12,000 your grinder’s built for—and you might not notice a difference at first. The disc mounts. The sparks fly. But the instant you start a real cut—grinding down thick welds or shearing through steel studs—a subtle shudder creeps in. That vibration is new, the tool’s control isn’t as tight, and you can feel your progress stalling.

    Heat comes next, radiating through your gloves. The grinder’s tone changes pitch, edging on a rattle. Instead of a sharp, clean edge, you end up with blue streaks, scalloped gouges, and a finish you’re going to have to rework—if the disc doesn’t crack or melt first. Ignore speed ratings, and suddenly every job feels like walking through mud, wasting both discs and patience in the process.

    Slices of Real-World Friction

    The Five-Minute Fix That Wrecks an Afternoon

    Picture a cramped fabrication shop: bench space is at a premium, sawdust and filings cake every surface, and your project list is backed up. You’re in a rush, need a new cutting disc, and grab the first one that fits. Midway through the cut, the grinder’s vibration ratchets up—you grit your teeth and finish, but what was supposed to save you time actually chews up the material and leaves a ragged, burnt edge. Now you’re stuck sanding out mistakes or cutting a replacement piece, all because a mismatched disc turned one quick task into a time sink.

    The Relief When Specs Align

    You swap to a disc rated well above your grinder’s RPM. Instantly, the difference is physical—the wheel flows through steel or aluminum, your hand stops cramping, and every line comes out straighter and cooler. Grinding welds takes less effort, the residue is minimal, and your shoulders aren’t aching from wrestling the tool. Stack up a dozen of these small saves on any job and you finish hours sooner, not stuck behind on punch-list fixes.

    The Fallout of a Wrong-Speed Disc

    Loss of control and extra effort. Push a disc past its max RPM and you feel it—a grinding resistance, sudden warmth, and odd debris hitting your wrist. The grinder wants to veer off track, you feel forced to compensate, and precision goes out the window. The sense of fighting your own tool multiplies wear on both the disc and your patience.

    Premature breakdowns and bigger messes. Discs that can’t handle your grinder’s speed wear into odd shapes fast. You’ll see chunks fly, edges burn, or even discs chip or delaminate mid-job. Every pass leaves more dust and an uneven surface that needs a second go-around. For big projects—long seams, thick angle iron, tough masonry—a mismatched disc can shatter outright, taking your workflow (and maybe your nerves) with it.

    How To Spot—and Prevent—A Speed Mismatch

    Same size, same thickness, similar packaging—two discs can look identical until you check the fine print. RPM ratings, tucked into a label’s edge, make all the difference. In a busy shop or during back-to-back jobs, it’s easy to let muscle memory guide you, reaching for the familiar package instead of double-checking the rating. But the result shows up fast: shaky cuts, rough finishes, and the feeling that you’re stuck redoing your best work for reasons that aren’t always obvious.

    If you move between different materials, swap discs often, or share equipment, these mismatches get more likely. The habit of grabbing “what’s closest” will cost you in headache and wasted effort, especially on days where you can’t afford surprises or second-guessing your tools.

    Make the Right Match—Every Time

    Always Start with an RPM Check

    It takes less than ten seconds: read the disc’s max RPM—usually stamped right on the label, sometimes edge-printed on the wheel. Cross-check it with your grinder’s top speed (found stamped near the handle or in the manual). If the disc’s max RPM is lower than your grinder’s output, don’t risk it—grab a different disc.

    Give Yourself an RPM Cushion

    Don’t just match specs—build in some margin. Ideally, use discs rated at least 2,000 RPM above your tool’s top speed. That buffer absorbs inevitable overpressure when you lean in hard, and protects both tool and finish when you’re pushing through tougher material or angle cuts.

    Handle Larger Discs with Real Caution

    Switching up to a bigger disc? Only safe if your grinder can slow down to well under the disc’s max RPM. Fixed-speed grinders with big, slow-rated discs are a recipe for cracks, shrapnel, and blown project timelines. Do the math and let specs—not just convenience—guide your setup.

    Your Disc-Speed Questions, Answered

    What if I toss a low-RPM disc on my high-speed grinder?
    You’ll feel it: sharp, chattery vibration, fast edge wear, and before long—hairline cracks, burning, and chips flying off. You risk damaging your tool, your workpiece, and your fingers. It’s not worth the gamble.

    Where can I check disc speed ratings?
    Look directly at the wheel’s label for printed or stamped max RPM. Your grinder’s specs should be easy to spot near the handle or in your manual—know them by heart if you want to work smarter.

    Can I run big discs at low speeds for delicate tasks?
    Only if your grinder is variable speed and set below the disc’s rating. There’s no safe shortcut to make a slow disc spin faster. Always match tool, disc, and task—the time saved in clean, fast progress is worth it.

    Small Habits, Major Payoff

    When you keep disc speeds matched to your grinder, everything improves—the tool feels lighter, your lines get cleaner, and hours lost swapping burnt discs or sanding out mistakes come back to you. It isn’t magic. It’s a simple, repeatable step that means less fatigue, fewer near-misses, and finished work you don’t dread showing or installing. Take the extra half-minute. Your future self—and anyone relying on the finished product—will thank you.

    Shop Gumboll tools & accessories

  • Creating a Functional Pet Care Corner to Simplify Daily Routines

    The Hidden Costs of a “Tidy” Pet Care Corner

    The polished look of a tidy pet care corner—bowls lined up, towel folded, brush within sight—rarely survives a full week of real use. On day one, everything seems within reach. By day three, you’re already sidestepping a refill bottle that’s wandered halfway across the kitchen, moving yesterday’s mail to grab the scoop, or opening three drawers before you spot the wipes. The sense of order evaporates not from big messes, but from micro-delays: pausing to hunt for a missing tool, doubling back for the cleaning towel, or dragging pet items in and out of shared spaces. This slow drift turns a setup that “looks ready” into one that quietly amplifies hassle and routine drag.

    Where Pet Care Corners Break Down in Real Use

    Most setups fail under daily pressure. The trouble isn’t obvious until everything speeds up—morning feedings squeezed between making coffee or evening routines when arms are already full. Suddenly, you reach for a water bowl and find sports bags or groceries blocking it because “pet stuff” pooled further than you planned. The grooming brush that seemed easy to grab is missing again—either buried under towels in the hallway or shuffled somewhere after the last meal. Every time something isn’t where it belongs, you lose the thread of the routine and start shuffling: towels in one room, wipes in another, food bins inching out of their lane. What looked intentional now forces you to play catch-up, one piece at a time.

    Ordinary Routines, Interrupted

    Imagine the cycle right after dinner: your cat’s waiting by the feeder, you refill the water bowl, check the floor—no brush in the bin. You reach behind the litter box, hands damp from refilling, and by the time you dig out the brush, a puddle has crept under the food mat. The cleanup wipes are further away than the chore is worth, so surfaces get left half-cleaned. What should have been a two-minute reset is now a pile-up of small, avoidable detours—clutter building up as delays compound.

    It’s rarely the outright mess that breaks routines; it’s every misplaced, overlooked, or “almost accessible” item. A wipe left just out of reach. A refill bottle that migrates and never comes back. Even with best intentions, the same weak point crops up during every routine rush, forcing a reset in the middle of a task. The impact isn’t just mess—it’s each fragmented step that slows things down and interrupts the rest of your day.

    The Difference Between Looking Ready and Being Ready

    Most pet care corners start with plans for visual order: feeding bowls lined up, leashes on a hook, supplies grouped “close by.” The cracks show as soon as several care rounds stack up. Bowls used for wet food are left to dry in the next room; towels hang too far away to avoid a drip trail; the brush is a step further than practical right after a meal. The system passes a quick glance, but actual routines expose new gaps—each mini-interruption revealing another part of the setup that works for display, not for use.

    Instead of efficiency, you face a low-level obstacle course: sliding bins or bags to get to what you need, moving clutter to finish another chore, and finding wipe containers missing after a snack-spill sprint. Shared spaces are slowly overtaken by pet care bits that never return to their zone, escalating the cycle of chore drag and unfinished resets.

    What Actually Works: One Purposeful, Central Care Corner

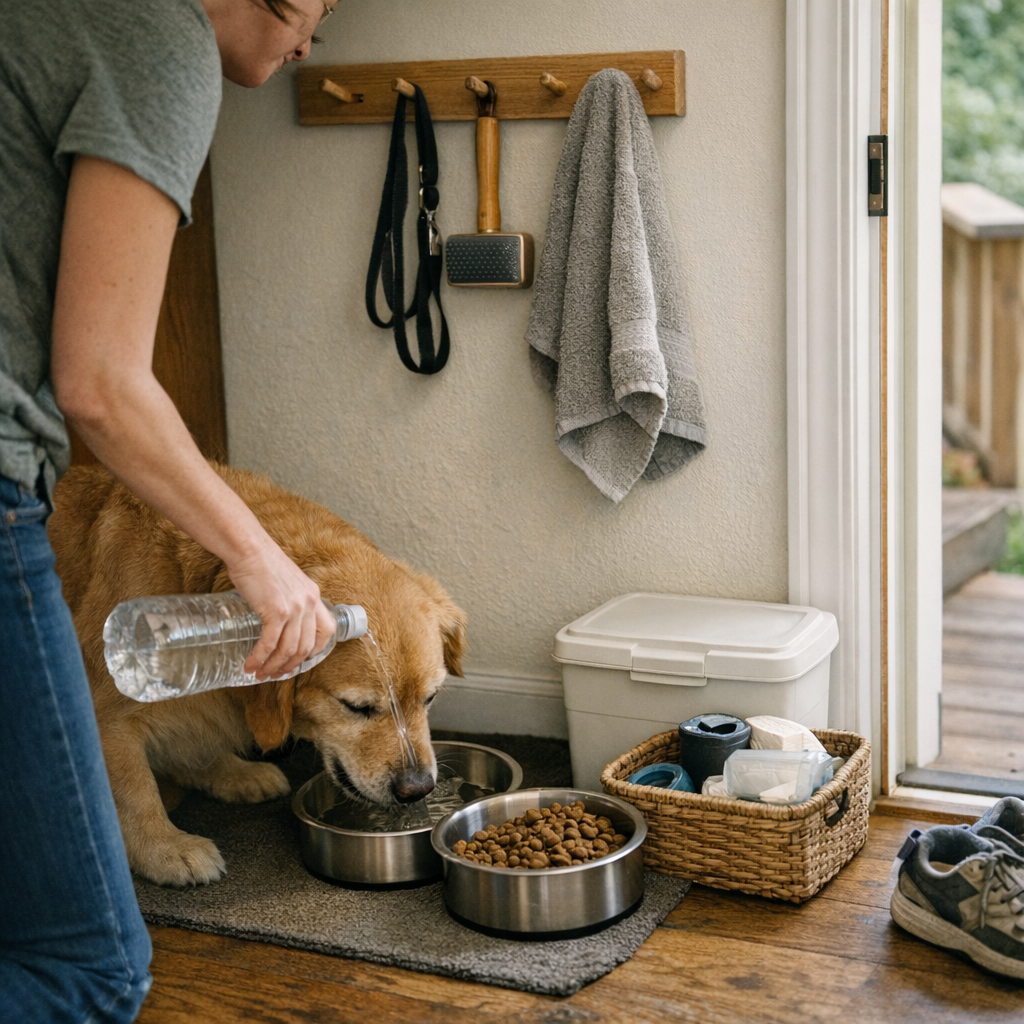
    The shift comes from choosing a single, practical spot—a corner near both the feeding zone and a water source, never in the way of main household traffic, and close enough that you’re not forced to wander mid-task. All essentials—bowls, a full refill bottle, brush, towel, and a lidded bin for wipes or bags—live there, always. Tools aren’t “almost” nearby; the brush hangs direct by the corner entrance, not in a drawer three steps away. Cleanups work because everything stays put.

    For example, place all supplies on the same shelf: wipes and bags in a bin with a lid that opens one-handed, the food container just below, brush hanging from a hook that’s visible as you enter. As soon as pet care ends—feeding, refill, after-walk wipe—spend ten seconds resetting: bowls wiped, refill bottle checked, bin contents returned. This reset keeps the next routine smooth before distraction can let items drift out of place.

    When every tool returns home every time, delays are squeezed out before they start. Instead of hunting, you pick up the next task—and the care corner works as intended, supporting routines rather than stalling them.

    The Real Payoff: Less Mess, Fewer Delays, More Calm

    A corner that keeps supplies in authentic arm’s reach—everyday, not just at reset—does more than look organized. It actively prevents the small slowdowns, pick-up clutter, and missed wipe-downs that keep routines from running cleanly. The goal isn’t spotless show-home looks; it’s eliminating those repeat sticking points that turn quick care into annoying obstacle courses.

    With a setup that holds up to repeated use, daily patterns change: feedings, water checks, after-walk cleanups, and quick grooming become almost automatic. Cleanup supplies aren’t a hallway away. Home spaces aren’t overrun, and routines get done with less friction. The difference is easy to feel—you spend less time resetting, track down fewer missing tools, and sidestep surprise messes before they spread.

    A care corner that fades into the background—where nothing’s ever missing, nothing blocks the flow, and routines end cleanly—doesn’t just seem calm. It keeps your entire setup genuinely low-pressure, leaving more room for what you want to do next.

    Explore more ways to smooth your daily routine at CalmPetSupply.

  • How a Drip Edge Transforms Entryway Storage by Controlling Water Damage

    Most entryway messes don’t announce themselves—they slip in quietly as foot-tracked puddles, damp bags, and the slow march of clutter the moment wet shoes cross the threshold without a working drip edge in place. What looks controlled on a dry afternoon can unravel in days: suddenly, that so-called organized entry zone demands endless wiping, squished shoes huddle away from soggy edges, and the whole space starts echoing with the steady friction of repeated cleanup. For anyone trying to defend real order at the door, the wrong setup quietly guarantees you’ll be battling the same avoidable mess again next week.

    The Hidden Drama of Water in Everyday Entryways

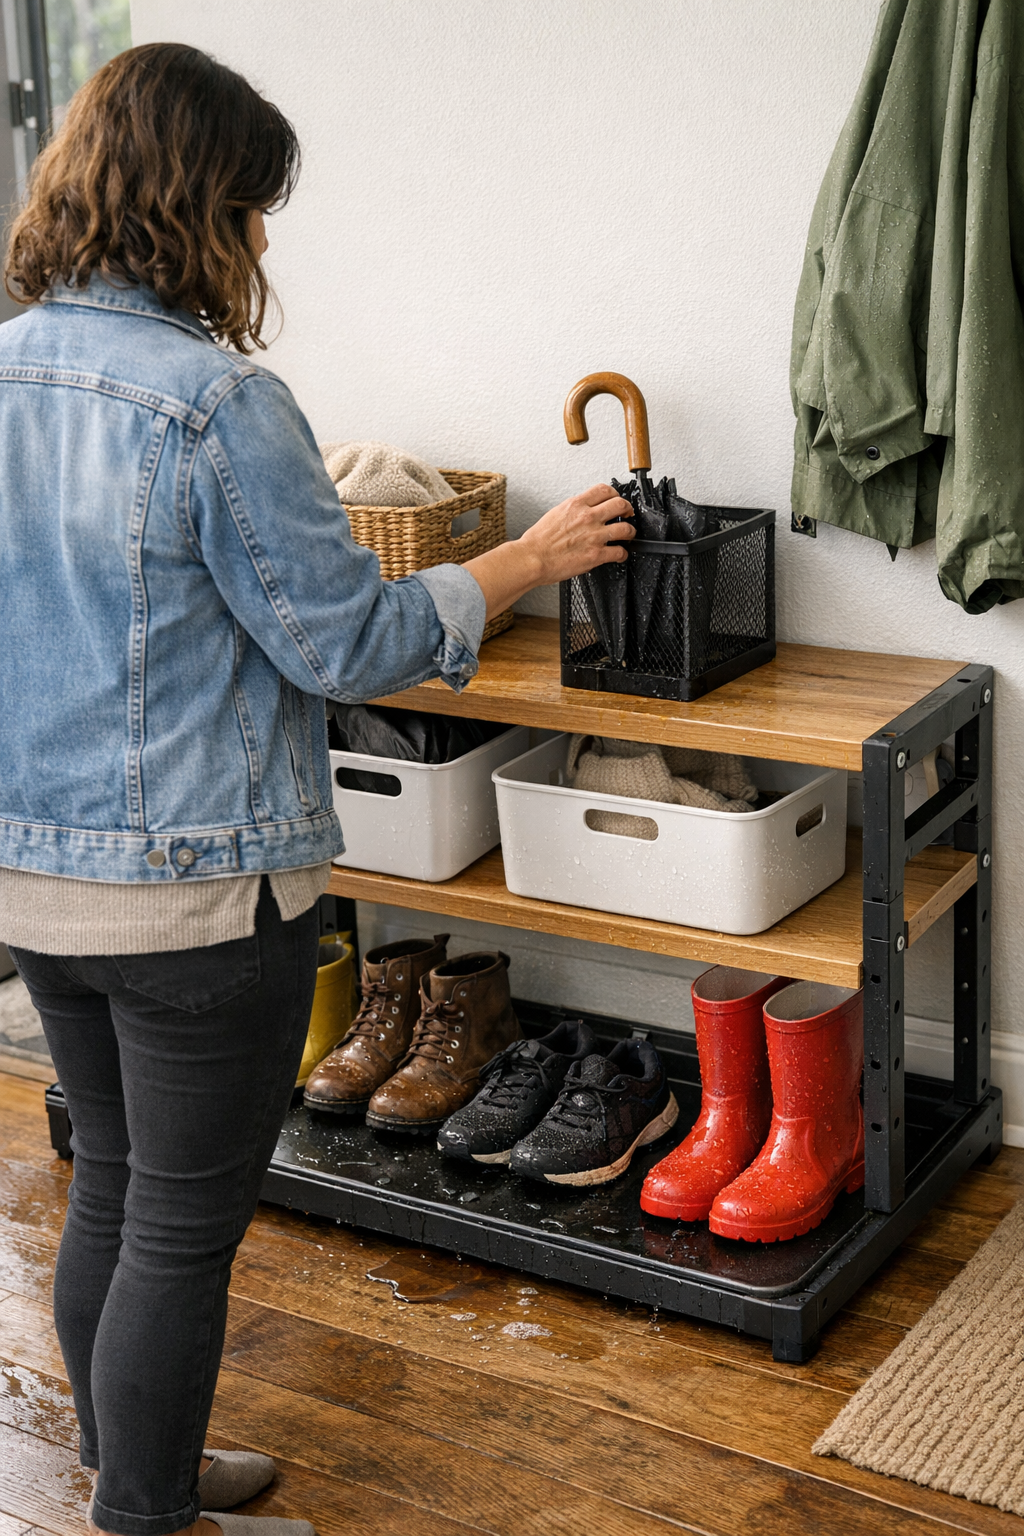
    Three rainy mornings in a row, and the pattern becomes obvious: shoes that started in a perfect row now edge away from wet patches. The area under the bench turns sticky and dark. You catch yourself nudging bags further out, trying to dodge the next creeping pool before it finds the wood grain. Suddenly, every return triggers a micro-reset—shifting things, absorbing runoff, and noticing the invisible lines where water slips past the supposed “storage boundary.” No matter how sharply designed, the absence of a true drip edge means constant low-level maintenance: mopping, re-spacing, rescuing floor seams from swelling as each day resets the mess.

    What a Drip Edge Actually Does (and Why It Matters)

    A drip edge blocks and channels water the second it tries to escape, stopping it at the boundary—before it has a chance to creep under trays, move along the wall, or seep beneath your containers. This detail feels minor on paper but is decisive in use: the moment water is routed away, entryways stop quietly degrading with every soggy return. In weather-prone drop zones—benches, shoe stations, bag catch-alls—closed bins and crisp shelves can’t compete if runoff finds an unprotected route. Telltale signs: warping along seams, dark patches at corners, shoe edges softening midweek. Install the right drip edge, and water collects where you expect. Floors survive weeklong storms with a single towel instead of repeat interventions.

    Looks Tidy, Stays Messy: Where Setup Gaps Sneak In

    Clean lines invite confidence, but function is defined by what happens after real use. A bench or bin without a drip edge seems controlled—until runoff slips underneath and stains start creeping in by Thursday. Temporary solutions pile up: shoes get shifted, bags are stacked further from the zone, but each workaround scatters the flow and strains the reset. The more you shuffle, the more the “organized” layout becomes a game of chasing the same wet footprints, rearranging items around a moving damp spot instead of truly containing it.

    This breakdown isn’t rare. Wet weeks expose every gap: shoes stack up near the door, umbrellas lean precariously, jackets drape to dry, and by Wednesday, water tracks appear beneath containers. Bags pressed too close soak through. Each fresh drop means slowing down the reset—each item needs hunting for a dry place, blocking the path or spreading water further. Even systems with decent capacity can fall apart when water isn’t checked at the border.

    Real-World Use: The Ongoing Entryway Reset

    Picture the actual routine: a family arrives, shoes off, jackets shed, backpacks dropped. Someone claims the bench—just as their seat hits a puddle where yesterday’s rain stopped spreading but didn’t dry. Bags, now half-blocking the pass-through, slip to avoid the latest damp patch. Kids dodge the swelling edge. The daily flow—supposed to be smooth—turns into a tight shuffle. What began as an “organized” entrance is now an obstacle course five minutes into re-entry.

    This isn’t about major spill disasters. It’s slow, compounding friction: puddles reappear, the reset gets slower, and access narrows as each new deposit blocks another path. A storage zone that looks fine on paper can turn into a routine disruptor if water travels unchecked—eroding the one clear division between clean and messy.

    Small Detail, Big Difference: Drip Edge in Action

    If you’re tired of rotating towels, finding mystery stains, and scrambling after each rain, a drip edge changes the daily reset. Swap a flat tray for one with a molded edge: water now stays pooled, shoes and flooring beyond don’t need urgent wiping, and the whole area resets in seconds instead of long minutes. The relief isn’t just visual—less mopping, less warping, less blocked access—but functional: movement stops being interrupted by another round of invisible seepage. For the first time, you can trust that wet gear will dry without invading every other surface.

    Matching Drip Edges to Your Setup (and Getting It Right)

    One-size-fits-all doesn’t work. The benefit lives or dies by placement and fit:

    • Edge location matters most: The drip edge must extend fully past where shoes, bags, or jackets actually land—not just as a decorative accent. Miss the true drop zone and water escapes into the zone you’re trying to protect.
    • Controlled channeling beats just blocking: Good drip edges have a lip or groove that collects and pools the runoff, away from seams and direct walkways. A flat blocker merely sends water elsewhere.
    • Materials shape the reset cycle: Stick with molded plastic or sealed rubber—they don’t swell or stain and can be cleaned fast, even after repeated wet weeks. Softer materials cling and turn sticky, dragging out the chore loop.

    Adaptation Tips for Existing Setups

    Most entry setups weren’t designed with a drip edge in mind—but if you’re living with the consequences, retrofitting is usually possible. Clip-on lips, adhesive edges, and modular tray extenders transform most benches, racks, or shoe trays into actual collectors. The trick is deliberate placement: create a stop where water naturally travels, making cleanup a planned routine instead of crisis management. DIY modifications won’t be perfect, but even basic barriers often outperform ignoring the issue and accepting creeping floor damage as the cost of using the space.

    Answering Common Setup Questions

    Is a drip edge essential for every threshold?
    Not everywhere—but in any entry zone where shoes, umbrellas, or outdoor gear land during rain or snow, a drip edge dramatically reduces cycle cleanup and surface decay. Occasional-use or decorative areas might manage without. If the space sees real traffic, skipping the edge all but guarantees more frustration with every wet return.

    Can I add a drip edge to open or flat storage?
    Usually, yes. Stick-on lips or extenders often fit most trays or benches. The key detail: add only where water is likely to leak or pool, not just where it’s easiest to install. Even minimal changes can give back much bigger control over week-to-week maintenance.

    What’s the best drip edge material for high-use or wet areas?
    Prioritize sealed, non-absorbent materials—molded plastic or substantial rubber. They don’t pull up water, stain, or slow resets, making them reliable for the unpredictable rhythm of daily use and shifting weather.

    Contain Water, Hold Order—Every Time

    A drip edge isn’t an aesthetic upgrade—it’s the one detail that separates functional order from an endless reset loop. Shoes stay dry, the cleanup shrinks, and your floor stops quietly absorbing every storm’s aftermath. The real takeaway: organized entryways only work if the setup directs water, not just items. Ignore that reality, and the chore cycle rarely ends. For high-use thresholds, a drip edge is what bridges the gap between tidy intentions and true, repeatable function—one small edge at a time.

    http://www.betweenry.myshopify.com

  • Streamlining Pet Travel: How Smart Organizer Design Eases Repeated Check-Ins

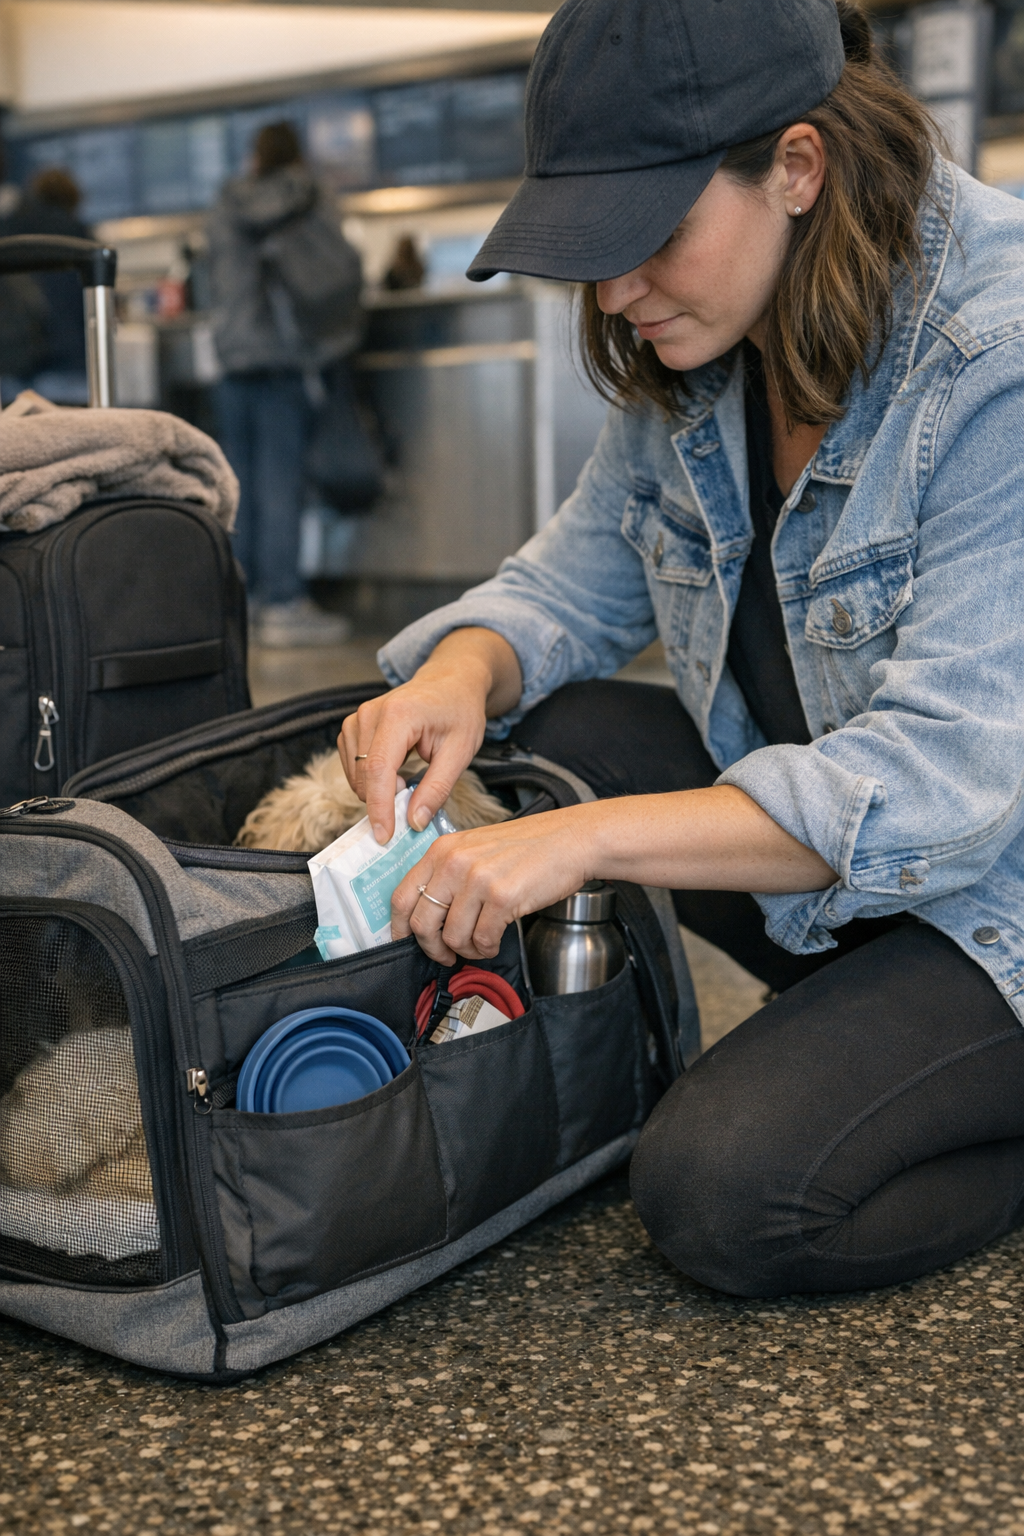
    Most pet travel bags fail during the second stop, not the first. The problem isn’t that you forgot supplies—it’s how every “organized” bag starts breaking down as soon as you’re forced to work out of it on the move. At home, that bag looks calm and squared away. But the moment you hit a hotel lobby, airport check-in, or rest stop, tidy pockets get blocked by a shifted bowl, wipes wedge under a leash, and suddenly, reaching for paperwork mid-line means an awkward shuffle while your pet tugs and the minutes drag. If you’ve ever fumbled for wipes with a nervous dog underfoot or tried to fish out health documents only to pull out snacks instead, you’ve already seen how surface order barely survives three real-world uses. This is the moment the PawGoTravel world begins—not with what to pack, but what actually works once you start moving, stopping, and reaching over and over.

    The Real Slowdown: When Bags Stop Working for You

    A “ready” carrier looks fine before you leave—zipped, stacked, nothing visibly out of place. The real trouble starts after you’ve had to grab something quickly, set the bag down, picked it back up, and started the next leg. That original setup is now scrambled in small ways by every move.

    Repeated stops expose every flaw in your structure. At the airport, by the car, or at a cramped waiting bench, the first access feels smooth enough. But after boarding, waiting, detouring for a pet break, then rushing to your gate, familiar friction points keep derailing your flow:

    • Cleanup wipes buried or sliding against the leash clip
    • Essential paperwork tangled with a bowl or spillover comfort toy
    • Treats sinking under bulkier items, impossible to grab when you need to calm your pet
    • Pouches blending together so you crack open the wrong section first—and have to reshuffle again on the fly

    These delays feel trivial in isolation. But each minor snag—an interrupted reach, a misplaced wipe—breaks your routine and lets handling get more scattered. The more “organized” your kit looks, the more aggravating it becomes when you still lose rhythm at every handoff.

    Packing for Movement, Not Just Order

    Most bags are built to look ready standing still. Movement exposes their limits. You can lay out every pouch at home, but real travel means lifting the carrier, threading through crowds, setting it down, reaching in with one hand while your pet shifts. That perfect setup becomes a collection of slowdowns: wipes blocked by a rolled blanket, bowls tipped sideways under health forms, treats now underneath the leash handle.

    Think crowded security lines: you’re balancing your pet, your bag, and a boarding pass. Snacks are supposed to keep things calm, wipes to catch a surprise spill. But reaching for either means fighting through papers and tilting compartments just to get to the right section. Seconds stretch while the line grows. From home, the design looked smart—after two stops, each reach gets slower. This is where “good on paper” becomes a real problem under pressure.

    Why Tidiness Fails When You Need Speed

    Zipped pockets and stackable pouches promise order, not true access. Travel isn’t about how things look when they’re slotted into place—it’s about how fast you recover, how easily you grab what matters with one hand while nudging your pet with the other. Bags that only chase tidiness fall apart in transit. Over repeated cycles—pick up, set down, reach in—the items you need most are the ones that wind up buried, blocked, or tangled. What worked in your living room can’t keep up with real stop-and-go travel.

    Speed Access and the Power of Separation

    The difference isn’t just more pockets—it’s how fast you can actually grab, reset, and move. Organizers that separate “grab-now” items (wipes, collapsible bowl, key treats) from deeper storage for spare leashes or backup gear instantly change how you handle every interruption. A single cavernous pouch means everything gets jumbled—one urgent search and your neat order collapses. Then the next mess takes even longer to fix.

    Adding a small, quick-access side pocket or seat-edge sleeve resets this dynamic. When you kneel mid-wait to calm your pet or scramble for a spill fix at a stranger’s feet, you reach straight for wipes or snack—no digging, no tilting. Suddenly, each transition blurs less. Your setup isn’t just packed—it’s actually ready to move again, fast.

    Real-Use Test: The Shallow Seat Pocket Shift

    An early morning dash—airport, pet in tow, fluids tight, nerves high. Moving just two essentials (wipes and a bowl) to a seat-edge pocket cut the friction out of every stop. Those items stopped slipping under other gear—they were always upright, always in reach. When a spill hit or a meltdown started, the fix was now one-hand, one-motion. No two-handed digging or spill risk. This kind of structural tweak—one clear division, not just another compartment—reduces handling time at every checkpoint and makes each restart less stressful to manage.

    Comfort Versus Agility: How One Fix Can Cause New Friction

    Better organization isn’t a magic bullet. Adding comfort matters: a soft blanket or calming toy can make a wait bearable for your pet. But too often, those extras migrate to wherever you’ve made fastest access—blocking wipes, swallowing paperwork, slowing your hand just when you need to act fast. The trick is not simply to add calming gear, but to question where it lives: if it helps your pet but creates a new block for you, it needs a new home in your structure.

    Access Over Aesthetics: What Survives Repeated Use

    The biggest upgrade isn’t in expense—it’s in structure that still works after the third or fourth transition. A pet travel setup that survives repeated, seat-side, one-hand access beats one that’s still “neat” after three checkpoints but constantly forces you to reorganize. The weak spot isn’t always obvious at first glance: sometimes it’s a too-deep pocket, sometimes a bottle wedged just where you need to grab treats. Finding and fixing those repeat offenders—however minor—does more for smooth travel than any gear “upgrade” alone.

    Routine Problems, Small Fixes, and the Real Decline of Friction

    The awkwardness of pet travel rarely explodes in big errors—most pain comes from microscopic, sharp-edged slowdowns: a wipe out of reach, a tangled leash, a second delay that breaks your flow. Move your fast-use items to clearly separated, stable spots. Keep comfort and cleanup zones split. The bag might never feel perfect, but each simple, repeated-use tweak brings the friction down and the confidence up—each restart less clumsy, each mess easier to handle without a reset.

    In real pet travel, what matters isn’t how “packed” you look—it’s how your setup behaves after three stops and five quick-access cycles. If your bag keeps forcing you to pause, shuffle, or restart, it’s time to rethink not your checklist, but your structure.

    Find more practical setups at PawGoTravel.

  • How Adjusting Under-Desk Space Transforms Your Workday Efficiency

    Most so-called “organized” desks hide their worst problems just out of sight—below the surface where clutter turns into daily friction. You see a tidy workspace at first glance. But under the desktop, cables drag against ankles, charging bricks get snagged by rolling chair wheels, and drawers that promised storage now block your knees every time you try to sit naturally. In the background, these irritations quietly repeat, shaping how often you lose focus, break your flow, or even avoid deep work at that workstation.

    The hidden drag of under-desk friction

    It doesn’t announce itself. The setup still looks clean mid-morning, but after a few hours, the friction adds up: feet catching an ethernet loop again, the power adapter bumping sideways every time you stretch your legs, that “space-saving” drawer repeatedly clipping your shin. These aren’t disasters—but every dodge, untangle, or forced posture shift chips away at your attention. By week’s end, your “minimalist” desk has become a series of near-invisible workarounds, sapping concentration and speed, even though nothing looks wrong above the surface.

    One adjustment that resets the workday

    Change just one under-desk detail and you change your entire workflow. Replace the mess of exposed cords with a clean cable tray, or reposition that oversized power strip to a less crowded spot. Suddenly, the path under your desk is clear. You sit down naturally—no more obstacle course for your legs or knees. Pulling a mobile drawer doesn’t mean contorting your ankles, and untangling a monitor wire mid-task no longer happens at all.

    Real use shows it instantly: instead of crawling under the desk to fix something, you’re reaching down or sideways, plugging in or unplugging with one hand—resetting your workspace without breaking momentum. Swapping between keyboard, trackpad, and notebook doesn’t knock anything loose. The right tweak aligns with your habits—not just your cable count—so the setup invites your return rather than daring you to try again.

    When “clean” isn’t enough: What actually changes workflow

    Hiding cables and clutter in boxes sounds like a fix, but it often just sidesteps the problem. Try stuffing every cord into a tight cable box and sliding it against the wall; now when you need to swap a charger or connect a device, your feet find the box first—and heat and dust collect underneath. Install a solid vertical panel to “clean up” the tangle, and those quick plug swaps turn into awkward reach-and-grab sessions. Visually, it’s neater. Functionally, it slows down every device change or leg stretch.

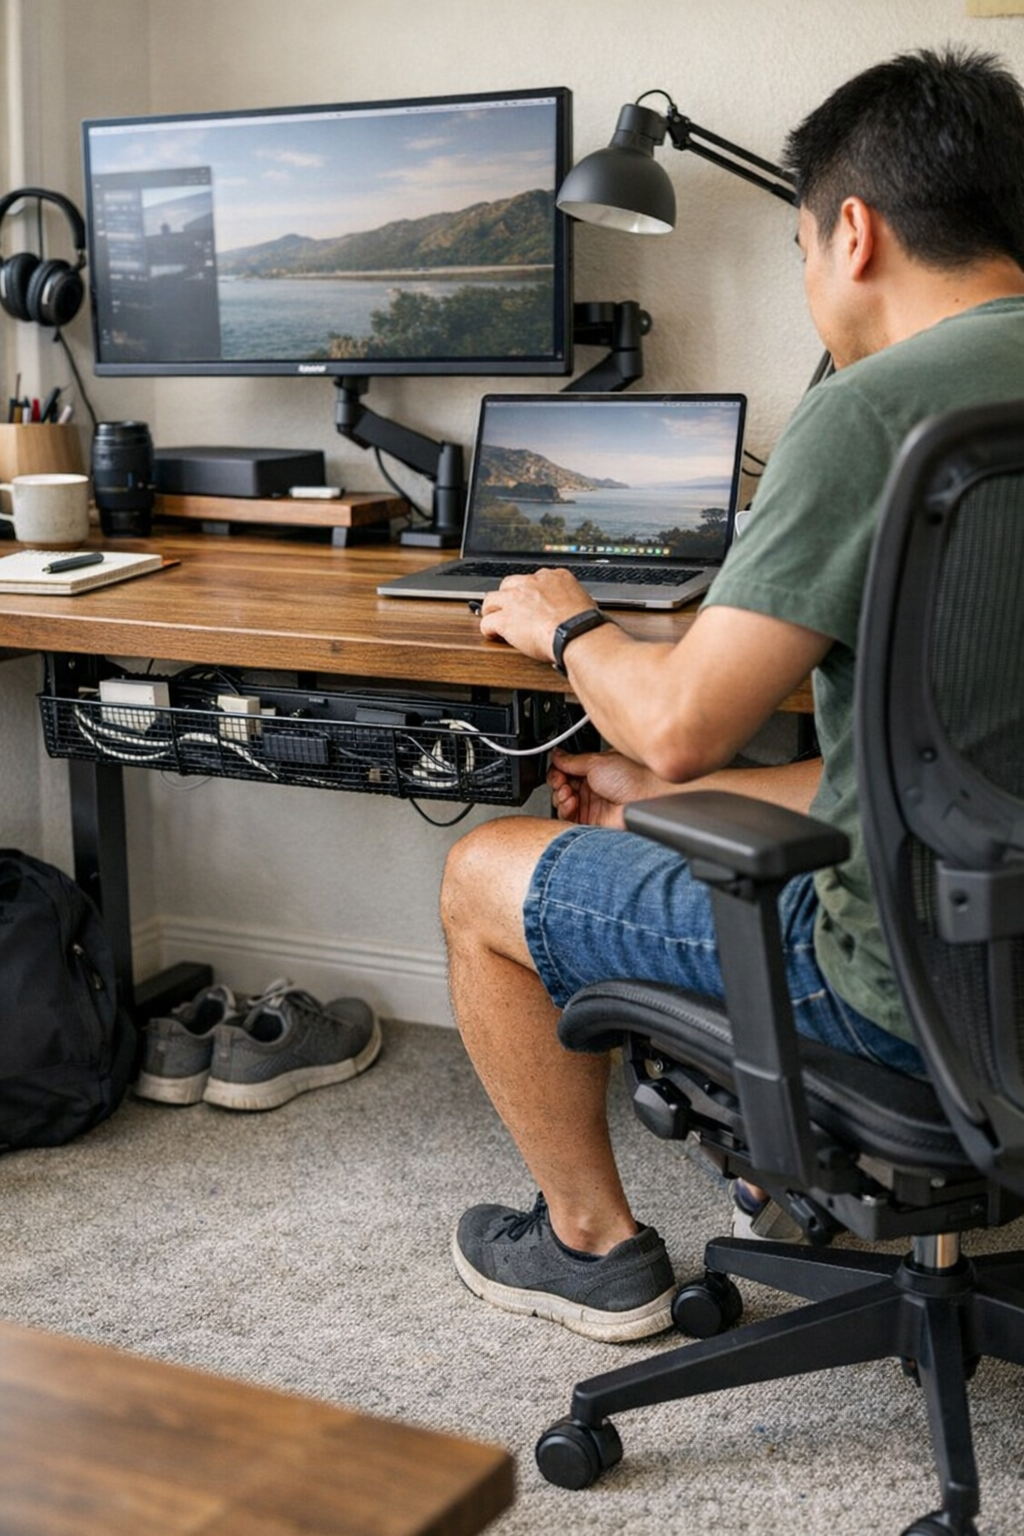
    Contrast that with an open cable tray mounted just under the desktop: cords are tidy yet accessible. If you need a charger or device, it’s within normal reach—no bending, crawling, or knee-banging. Movement stays smooth, and when workflow shifts—say, sliding a notebook into place, or adjusting for a second monitor—nothing snags, drags, or stalls.

    Workstation flaws that only appear during real use

    Most setups “fail” when actually used—not when photographed. Late afternoon: you shift your chair and clip a forgotten adapter. You need to grab a notebook from a shallow drawer and find the handle blocked by a loose cable. These moments don’t show up in product descriptions, but the repeated micro-friction makes a real difference: you pause before sitting, hesitate before stretching, or leave cords unplugged for “next time.”

    Accumulation is visible: a power plug working loose after days of gentle kicks; a drawer that never closes right because a phone charger migrated over just enough; a monitor’s angle slipping when forced by inflexible wire runs. Every misplaced piece beneath the desk turns into a tiny focus leak you correct in the background—sometimes without realizing it until the fifth or tenth irritation of the week.

    What changed: A simpler under-desk cable flow

    It took months of low-level annoyance before moving every cable into a simple open tray finally changed the baseline. Mounted about seven inches off the floor at the back, the tray formed a definite “channel”—not a tangle, not a guesswork pile. Now, cords aren’t targets for your feet, and you stop second-guessing every chair roll or charging routine.

    Resets became nearly frictionless: instead of ducking below the desk, pulling in or out was one motion. The desktop stayed almost empty by default, and the “where’s that charger?” routine disappeared. No more risky wheel-over-cable moments—just smooth switches and tidy returns, without vigilance or calendar reminders.

    Quick realities: Under-desk setup questions answered

    How do you choose the right under-desk organizer?

    Start with your movement, not your mess: Map where your feet and knees actually move—where obstacles force detours or shifts. Pick trays, drawers, or storage pieces that let your regular tasks—plugging in, sliding back, swapping gear—happen smoothly. Managing quantity isn’t enough; only form and fit that respond to your path stop new annoyances from showing up.

    Does cable management underneath actually change productivity?

    Every catch, drag, or accidental unplug slows you down—often by seconds, always by focus. Even small, repeated interruptions build up until the desk feels less welcoming. A clear cable path and unobstructed leg space mean you aren’t losing steam or troubleshooting after each work session—small but cumulative gains that make the difference between “organized” and actually usable.

    What do most people get wrong with under-desk storage?

    The fit to your movement matters more than the size or style. Overbuilt trays, deep drawers, or storage boxes wedged underfoot usually block your reach path, forcing adjustments elsewhere. The classic pitfall: creating new inconvenience in the name of hiding clutter—trays you can’t reach, drawers that turn cables into hinges, bins that steal your stretch space. Storage should help your workflow, not force a new routine.

    After a week: Does the new setup really hold up?

    One cycle is enough to feel the shift. With cables corralled above ankle height and nothing blocking daily movements, the desk stops being a test of patience. No more stealth interruptions, no more adjusting posture to dodge hardware. Instead, workflow resets, notebook switches, or chair pivots register as one smooth motion—the disruptions you didn’t know you were fighting simply don’t come back. Attention leaks close up, teaching you which fixes matter and which just rearrange the same issues. Most visitors never notice, but you recognize it every day you sit down.

    Explore the full WorkBasic collection

  • How Clear Return Spots Transform Workshop Organization and Efficiency

    The illusion of organization fades fast when real life kicks in. Day one of a new garage setup always looks promising—rows of crates, tool rails, and freshly mounted walls suggest order has finally arrived. But it’s never day one that tests you. It’s day seven, when you’ve juggled projects, grabbed supplies on the fly, and raced to put things back before dinner. That’s when the cracks form. Tools are out of place, supplies drift onto any open surface, and what’s supposed to work—just doesn’t. The setup that looked clean on install turns patchy the moment routines collide with reality.

    Visible Order vs. Daily Chaos

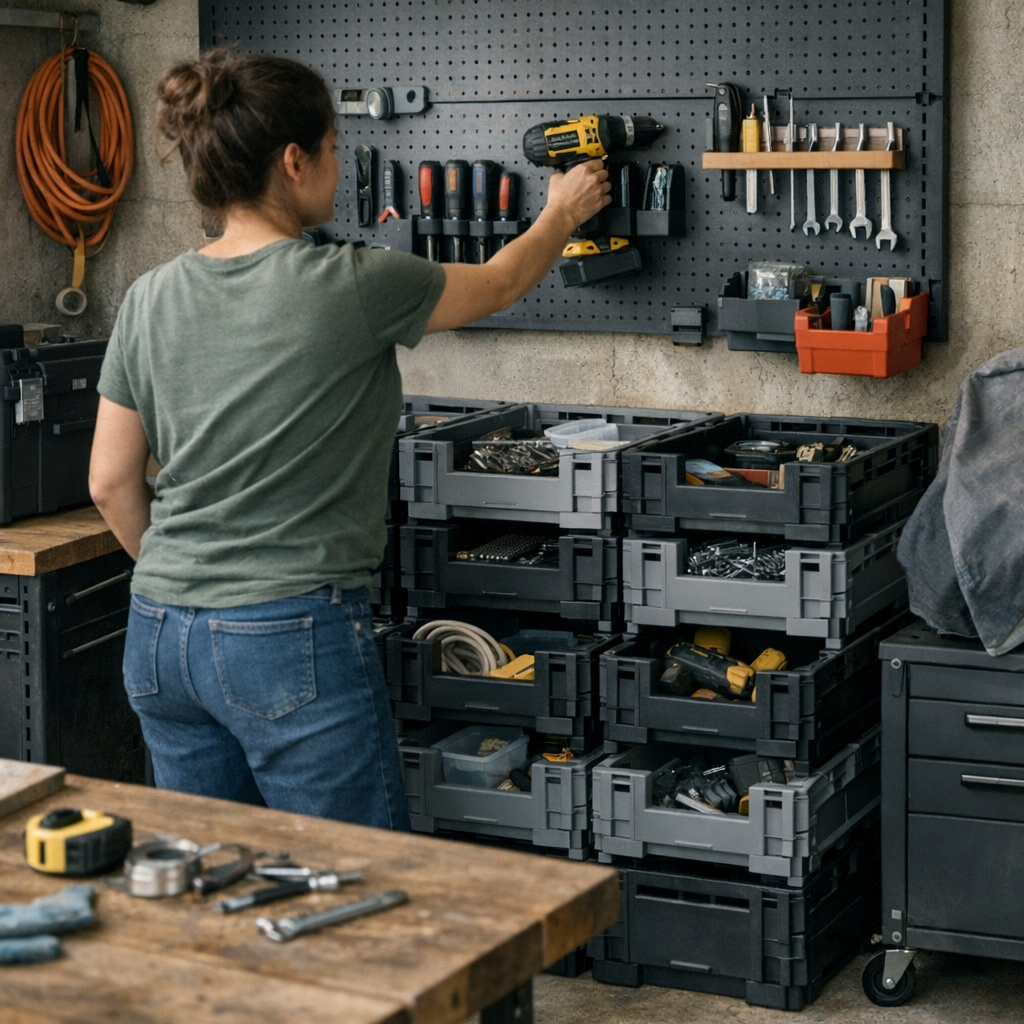
    You roll your cart along what should be a clear path, only to squeeze past a shelf that juts too far or sidestep a bin left in the “close enough” zone. Maybe you reach for a drill, but first you have to move yesterday’s project overflow off your workbench. Modular crates sit fully loaded beneath a neat pegboard, yet you catch yourself hesitating—do these pliers go here, or should you drop them anywhere that isn’t full? It isn’t about how tidy your wall looks right now. It’s about whether the space lets you move, grab, and reset without having to think.

    The Places Where Clutter Sneaks In

    Clutter rarely arrives all at once. It’s the gloves tossed on top of a random crate—the one that now mixes sandpaper, hose attachments, and a stray measuring tape. It’s the flat spot near the door collecting everything you intend to put back “properly” later. These are not storage shortages. They’re signals that return points are unclear—or too far out of the way. Every extra second spent making that decision becomes the beginning of a pile. Pretty soon, your cart is blocked in, the wall looks busy but yields nothing instantly, and a “dead” corner swallows a bucket you won’t need for weeks.

    Why “It’ll Do” Layouts Fall Apart

    Forget blaming lazy habits. In real setups, every small inefficiency gets multiplied by routine: re-parking your rolling chest just to get through the space; grouping paint supplies with cable ties because “they’ll sort later”; shoving bins aside to access what’s actually needed. Unlabeled crates become catch-alls. Wall hooks turn into drop zones for whatever fits. Corners and ledges attract overflow just because they’re empty. The friction builds—not with dramatic messes, but in a slow, steady creep of stuff that chokes your flow and leaves resets feeling endless.

    Movement Blocked, Momentum Lost

    The hidden cost isn’t the occasional mess, but the way your layout starts to fight you. Reaching around the same bulky edge, nudging a rolling cart past boxes that missed their mark, or bending awkwardly because a return spot is just out of the way—all those tiny blockages wear you down. They discourage tidying up on auto-pilot. Instead, you make do. The original plan, clean on paper, now quietly undermines the way you really use the space.

    The Practical Shift: Make Returns Instinctive

    Improvement starts not with buying more storage, but by erasing friction from return actions. When every tool or supply has a single, unmistakable slot, resets become nearly automatic. Swapping generic bins for wall-mounted holders shaped for each item transformed my bench overnight. Drivers slipped in by handle, the tape measure found its shape-fit cradle, and tools stopped lingering in piles. No “almost” homes—just obvious, instant returns with zero double takes.

    The Speed of No-Think Storage

    Within days, what used to stall—pausing to remember which crate was for pliers, or hunting bits—gave way to quick, seamless resets. When you use labels, distinct shapes, and visible cues—even for garden corners or deep utility shelves—there’s no incentive to cut corners, even in a rush. It’s the difference between tossing gloves in a random crate and sliding them into a bin made just for them. The right storage doesn’t add work; it removes decisions.

    Trouble Signs: Is Your Setup Getting in the Way?

    If you see tools spreading across any flat surface, or materials clustered on the top of carts and chests, your layout is slowing you down. If you reset by shuffling gear “just for now”—knowing you’ll need to sort it later—that’s your cue. Your space’s true test is how it handles the return moments, especially after a busy stretch when you’re most tempted to skip steps.

    Micro Tweaks, Lasting Results

    You don’t need a full rebuild to fix these pressure points. Sometimes it’s as simple as adding shape-matched holders, popping in clear labels, or carving out wall space that’s obvious even when your hands are full. Notice where overflow collects—those “almost” spots are prime upgrade targets. If something repeatedly lands where it doesn’t belong, it’s because its real home isn’t quick enough to reach.

    Let Routines Dictate Layout, Not Just Looks

    The most effective setups aren’t measured by how much they hold, but by how little they force you to stop and think. Week after week, it’s the layouts where every item has an obvious, repeatable home that keep everything moving. Access stays direct. Paths stay clear. Gear resets itself—not from magic tidying, but from design that matches the tug-and-pull of real use. That’s when your walls, crates, and benches finally work with you, not against you.

    http://stacknest.myshopify.com