Blog

  • Choosing Between Shelf Dividers and Storage Bins for Lasting Closet Order

    After a weekend closet overhaul, shelf dividers and storage bins can make any space look impressively in order. But as soon as the weekday rush kicks in, the real test begins. Shirts migrate, stacks sink, and small items multiply in the shadows—a familiar cycle for anyone juggling tight mornings and shared spaces. The question isn’t how organized your shelves look on day one, but whether that order survives the daily stampede for jackets, jeans, or a single missing glove. The way you separate stacks and contain loose things decides if calm stays or if clutter crowds back in by Wednesday.

    Shelf Dividers: Clear Boundaries, Quick Grab—Until Things Shift

    Step into your closet right after a fresh sort. Shelf dividers give folded sweaters and jeans their own lanes. Nothing topples, nothing blends. It’s immediately easier to pull a favorite shirt—instead of triggering an avalanche, you slide it out and move on. Vertical lines keep categories honest, especially in a closet touched by more than one set of hands. This system sings when items are stable, stacks stay short, and you’re not mixing big and small pieces together.

    But it only takes one rushed morning to spot the cracks: a stray beanie tossed on top, kids digging for hoodies, or a partner reaching back for a shirt and squashing two piles. Dividers stop sweaters from creeping sideways—they don’t prevent gloves from vanishing under stacks or loose socks perching wherever there’s room. By midweek, category lines blur; what started crisp now begs a reset, just to hold the chaos back.

    Storage Bins: Taming the Small Stuff, Hiding the Mess

    Where dividers corral big items, bins fence in the little things. Hats, scarves, belts—anything too risky to stack—disappear into bins and, at least for a day, everything looks managed. The clutter is hidden, the shelf looks cleaner, and you can sweep in spare socks or backup mittens without overthinking.

    The trouble comes when you’re late and need that one glove. Bins are deep, dark, and deceptively mixed. Search for a scarf, and you pull out hats, a mismatched set of mittens, and maybe last season’s sunscreen. Bins keep strays off the floor, but inside, categories tangle with every hasty grab. And if the shelves are deep, it’s a fishing expedition—everything falls to the bottom, and you’re left sifting blind to locate what you need.

    When Shelves Stop Making Sense

    Most closets start with ambitions: jeans here, gym shorts there, each shelf with a role. But a fast morning throws all that out. Stacks tip. A single oversized hoodie sits halfway across two zones. Categories blend, especially if you’re always dropping last-minute additions wherever there’s space. A shirt sliding to the floor or a hat wedged in the entryway means your system is starting to fray.

    Dividers that once separated adult and kids’ clothes now can’t stop socks from sneaking in. Unlabeled bins turn from “hats only” to “whatever fits,” assembling a patchwork of odds and ends. Soon, hallway benches and closet corners become general dumping grounds, no longer even pretending to streamline daily traffic. The roles you set begin to dissolve into general storage limbo.

    What Daily Use Really Looks Like

    Picture 7:10 am on a Thursday. Dividers at eye level still hold the line for sweaters and folded shirts, but down by your feet, bins hide a scramble of gloves and scarves. Reach up for a jacket buried in the middle of the pile—now two stacks lean, and a beanie drifts down a shelf. The next person in needs matching mittens and flips through the nearest bin, tangling socks in the process. By Friday, that initial order is a memory, and cleanup is already overdue.

    Move to the laundry area—dividers keep towels upright, until a single washcloth strays or an extra bath mat gets wedged wherever it fits. Utility shelves lined with bins start their week categorized, but by the time chores roll around, batteries share space with sponges and the original plan is lost. The problem isn’t effort—it’s how fragile most set-ups prove the moment you start using them for real.

    How Combining Dividers and Bins Finally Sticks

    Systems last when they match the mess—not just the mood after a big clean. The game changer: Dividers keep folded piles neat and upright (think: jeans, shirts, towels), while sturdy, clearly labeled bins catch everything loose and unstackable (gloves, scarves, belts). Give each bin one job, tape on a label (“winter scarves,” “kiddo hats”), and stick to it. That small clarity is what prevents the daily reshuffling and keeps your categories from turning into catch-alls.

    With bins locked into clear roles and stacks held in place by dividers, your closet can take a beating: after a busy week, everything resets in minutes. No more shelf space being hijacked by a flood of socks or wrestling a mountain of mixed-up accessories. The vertical space finally gets used without inviting a mess back in.

    Small Tweaks for Better-Lasting Order

    Don’t skip labels: even scrawling “sweaters” in marker on a divider or “mittens” on a bin prevents items from bouncing between zones. If your shelves are extra wide, try bins behind and open divided stacks in front—everyday jeans up close, off-season extras corralled behind.

    Don’t let bins and stacks overlap into one sprawling holding pen. The closer your setup matches your grab-and-go routine—the less you’re shuffling piles or emptying bins for single items—the longer your order holds up. If 90% of your closet is folded, stick with dividers; if drift and scatter haunt your shelves, give loose things their own homes. And embrace quick resets: five minutes at the end of the week is how order beats chaos, round after round.

    Real Results: Faster Resets, Less Daily Friction

    The best test for any closet isn’t the before-and-after photo—it’s how fast you get things back in place on an average night. A strong setup means minimum reshuffling and maximum clarity, even as things move. Dividers stabilize what’s steady, bins round up the wild cards, and the setup flexes with daily use. Watch as you go: Where do stacks always tip? What bin just becomes a black hole? Tweak, re-label, and watch your closet become a system you don’t dread resetting. That’s organization that finally keeps up with real life.

    See more practical storage solutions at ClosetWorks.

  • Creating a Dedicated Daily Section to Simplify Closet Organization

    Why Daily-Use Blending Breaks the Closet Routine

    The real closet problem isn’t a lack of storage—it’s losing your go-to clothes and gear among everything else. You set up neat shelves, add more bins, maybe even sort by color or season, but come Monday morning or late at night, the daily standards—your shirts, socks, work pants, or gym gear—hide in plain sight, trapped between last season’s jackets and forgotten scarves. The closet looks settled after a big clean, but as soon as life speeds up, you’re back to rummaging for the one item that always seems to slip from reach. The routine doesn’t collapse because there’s no space—it breaks when daily-use items blend with the rest, forcing you to waste time, shuffle hangers, and break your own flow. The inside-storage world makes this visible: a closet that holds everything but puts friction right where you don’t need it most.

    The “Daily Section”: A Boundary for Your Routine

    Imagine opening your closet and grabbing what you need in seconds, without peeling back layers of “someday” clothes or digging through a muddle of options. The difference? A clear daily-use zone: one shelf, a carved-out rail, even a single drawer, set aside for the handful of items you actually reach for most. This isn’t some night-and-day overhaul—just a distinct, visible line between high-rotation and background storage. In repeated use, this tiny boundary is what stops daily shirts from wandering, gym gear from getting buried, and the morning routine from turning into a mini excavation. Even in a small closet, one dedicated patch cuts down frantic shuffles and wasted time.

    A true daily section changes the return flow. Essentials go back to their zone, rarely-used items stay in the wings, and every week, you notice the shuffle cycle shrinking. The rest of your closet can get messy or stay sorted, but you lose less time searching and resetting, because your daily core isn’t fighting for position.

    The Slow Creep: When Order Disguises Chaos

    The breakdown doesn’t start with a mess—it starts with one item drifting out of place. A backup shirt lands in the daily zone, a scarf migrates off its hook, or a stray gym bag piles in. Suddenly, your “easy access” area is mixed up. The closet’s surface calm—bins, labeled shelves, identical hangers—means nothing when there’s no boundary holding the line. As soon as overflow items invade, every quick grab turns into a double-check, socks get buried under scarves, and you kneel to dig through floor bins that started as overflow but now trap everything you use most. You organize by look, but the function crumbles: order hides the hassle until resets take too long to ignore. Morning movement stalls, pathways get blocked, and “quick” routines slow down for the worst reasons.

    Scenes from Real Use: The Friction of the Undefined Zone

    The closet’s weak points show up in the rush. Real moments make the difference clear:

    • Reaching twice for the same shirt after it slips from your daily section into general storage—forcing a second scan every morning.
    • Opening a basket for socks only to find scarves crowding the top, pushing the basics out of easy reach.
    • Floor bins meant for excess become catch-alls; every retrieval turns into an awkward excavation, kneeling and shifting piles just to find tomorrow’s outfit.
    • Seasonal items, “set aside” on the edge, slide down or topple over, blocking fast access right when you need it most.
    • Organizing by appearance covers up how much reshuffling it takes every week just to keep daily-use pieces from drifting out of place.

    These are the friction points that break routines—why visible order can’t do the heavy lifting. The closet works when you segment for real movement, not when you pile up perfect storage cubes and hope for the best.

    Making the Daily Zone Stick: Trade-Offs and Small Adjustments

    This isn’t about flawless order. The target is a defendable line for real repeat use. Give one shelf corner or a drawer to daily-wear and commit: if backups, out-of-season, or rarely-touched pieces seep in, you’ll feel it next time you’re late. The trade-off is vigilance; without it, the line gets slippery, returns get lazy, and resets go from a thirty-second tidy to a multi-step event. But when the daily zone holds, every retrieve and return speeds up, and the burden of upkeep fades into the background.

    If closet space is tight, build vertically: keep top hangers for high-rotation shirts, peg a hook for essential scarves, or use a shallow divider for workday socks. Don’t worry about a big footprint. What matters is having a patch that never blends with overflow. The pain always starts when daily use merges with general storage—the next cycle of chaos born out of an “efficient” layout that can’t defend its own boundaries.

    Practical Tweaks for Lasting Separation

    • Install a low-profile organizer to divide one shelf—daily-use gear on one side, overflow on the other—to force a real split.
    • Dedicate a short section of your closet rail—five to ten hangers, nothing more—for high-rotation tops and mark it with a visible hook or tag so the line never blurs.
    • Use an open bin or tray at arm’s reach for daily accessories; skip the lids or deep cubes that guarantee buried essentials.
    • Set a weekly check: scan the daily zone and restore the boundary before drift turns minor friction into a disruptive reset.

    Tip: Anchor your daily zone as close to your first step in the morning as possible—inside the closet door or at arm’s natural reach. The closer the section is to your actual movement, the less chance anything else sneaks in and the more automatic the returns feel.

    Why the System Breaks Down—and How Keeping a Daily Zone Protects It

    Most closets don’t fall apart through neglect—they fail when boundaries can’t survive repeat use. When the flow isn’t tied to a daily zone, everything blends, and wasted minutes build up fast. Mark a clear, practical line for your essentials and you’ll feel the rhythm shift: mornings move, resets shrink, and the whole closet becomes predictable not because every corner is perfect, but because your real habits finally have their own space.

    The biggest difference isn’t spotless order—it’s never having to cross two zones just to start your day. You stop losing time to hunting, double-pulling, or fixing drift. The right setup isn’t flawless; it’s a defended, visible boundary that matches how you actually move and return things, even when life gets busy.

    Find more inside-storage ideas at Gridry.

  • Why Soft Edge Stairway Lighting Enhances Safety and Usability

    Stairway lighting isn’t truly judged in the packaging, on a display board, or in empty daylight. It’s tested at the friction points—when your hands are full and a stair edge blurs into shadow, or when a guest slows and squints at the last step while the hallway behind is dark. The surprise isn’t how lighting looks at a glance, but how a setup fails or irritates the real user: a half-visible step here, a shadowed tread there, a moment’s hesitation that repeats every evening. Stair lighting done wrong isn’t just a visual compromise—it becomes a pattern of small risks and repeated, invisible adjustments you never wanted to make.

    Why Stair Edge Clarity Matters More Than Brightness

    Not all “bright” stair lights deliver actual safety or comfort. The common mistake: assuming the most powerful or streamlined fixture solves everything. In reality, general brightness throws light where it’s least needed, bleaching out details on smooth treads, smudging the stair edges, and letting corners fall away into shadow. You notice it at night—someone hesitates at the landing, slows at the top, or makes unconscious micro-adjustments as their foot hovers, guessing at the next step. These hesitation points multiply with every pass, from quick commutes in a family entryway to careful night trips in a shared apartment stairwell. The real problem is not light levels—it’s the missed definition where you move.

    Signs the Setup Isn’t Holding Up

    Does anyone—resident or guest—move tentatively near the first or last step, especially after dark? That’s not just cautious habit. It signals a stair lighting setup failing where it matters most. If you catch visitors tilting their heads to “read” depth, or regularly see someone pause to test the landing with a toe, you’re watching the cost of bad edge clarity. In homes, the drag shows up whenever someone slows at dusk, clutches the rail tighter, or asks for help going down. Even pets will linger at a dark transition. Stairways that force you to double-check your own footing turn flow into effort every time the light shifts—or when a single bulb fails.

    The absence of crisp edge cues creates daily, automatic caution. Most people assume this is just how stairs feel after sunset. But the repeated burden—watchfulness where you should have trust—wears on everyone in the house.

    Where “Clean” Lighting Schemes Start to Fray

    “Minimalist” fixtures impress in photos: smooth wall plates, hidden wires, no surface clutter. But once real life takes over, weaknesses show. A ceiling downlight may leave corners murky and treads washed out, especially if the surface is shiny or the stairs curve away. Carry something broad—a laundry basket, messenger bag, or kid’s backpack—and you can block the only light, projecting a confusing shadow across two steps at once. Every “clean” lighting solution is only as reliable as the shadow it leaves behind. A perfect showroom look loses its worth the first evening someone misreads a tread because the angle hides a step or a bright spot makes depth harder to gauge. Clean lines that can’t keep pace with real movement end up as another visual tick box—one that doesn’t hold up in daily use or low light.

    Habitual Frustrations That Reveal Poor Lighting

    • Pausing mid-stair to re-find the next tread with your foot
    • Using your phone flashlight to check the bottom steps at night, even when lights are “on”
    • Kids asking for “the good light” instead of using the main switch
    • Reaching hard for the rail after sunset just to feel steady

    If these frictions are familiar, your setup looks finished but isn’t actually livable.

    Lighting That Makes Each Step Clear—From Any Angle

    The best fix isn’t more overhead light, but targeted edge illumination. Continuous step-edge or wall-side lights—such as low-profile LED strips installed just beneath the overhang or along the wall—cast subtle, readable shadows on each riser. It’s not about maximum output but about how the light maps the edge: every step’s profile pops, whether daylight is gone or someone’s shadow blocks the main fixture.

    In these setups, you’re never guessing if your foot has landed on the last tread, or whether there’s another drop. Edge definition holds up from both directions—going up with arms full, heading down with tired eyes. With real edge lighting, you avoid:

    • Dim or disappearing steps, even if hands or baggage block a ceiling lamp
    • Corners fading out, especially on stairs that twist or change width
    • Gaps in confidence: people flow, not pause, from top to bottom

    The result: stairs become background—no more stopping to interpret where each step begins or ends, even in the weakest ambient light.

    Cable Management: The Often-Overlooked Factor

    Lighting that fixes visibility but ignores cable logic creates its own mess. Exposed power runs, taped cords, or slapdash cable routes distract the eye and collect dust. Worse, they risk creating real tripping points in narrow, high-traffic runs. Even a short, out-of-place cable along the baseboard stands out more than you’d expect in a stairwell—especially when sightlines are already focused on the floor.

    Clean, concealed cable management isn’t decorative—it’s a safety and comfort upgrade. A tightly placed LED strip, with power lines guided behind trim or within purpose-built channel, respects the space as much as the user’s movement. Ignore this, and you’ll notice the problem fast: cables start to drift out, need re-tucking, or collect mess. Retrofits that “almost” solve the problem end up being redone after the first few months, often because cable chaos outlasts the lighting’s novelty itself.

    Small Tips for Real-World Stair Lighting

    • Test your setup at night, hands full—don’t trust the “installed” look until you try actual movement
    • Make sure every angle—including up and down—has consistent edge visibility, not just overall light
    • Invest in mounting or support pieces that make cable runs invisible, not merely less obvious

    “Finished” Is Only Real When the Use Is Seamless

    Installation can trick you: a new light may look flawless at noon, but if daily patterns reveal stray glints, dark zones, or constant distraction from a wandering cable, you’re stuck with setup friction that no “designer” look covers up. The stairway that actually works is one where nobody has to pause or recalculate—a result built not on looks alone but on the invisible work of lighting choices, edge visibility, and support logic that fades into daily use. “Finished” isn’t aesthetic; it’s the absence of friction—the simple, repeated comfort when each step feels obvious and safe. In the end, the most successful stair lighting is barely noticed by the people who count on it most.

    http://www.lightsupport.myshopify.com

  • Streamline Your Carry-On for Faster Airport Navigation and More Quiet Time

    Every carry-on traveler gets blindsided by the same hidden problem: your bag looks streamlined and organized before you leave, but friction piles up fast in real airport movement. On the hotel bed, it’s all zipped pouches and color schemes—until you hit security, boarding, or a cramped aisle and realize “organized” doesn’t mean “fast.” The downside isn’t visible mess. It’s the repeated delays, the blocked quick grabs, and the misplaced essentials that stall your flow from the first checkpoint to the plane seat—no matter how neat your system looked at home. The most common overlooked flaw? The gear you use over and over gets buried just when you need it most.

    When Visible Order Breaks Down: Overlapping Paths and Everyday Friction

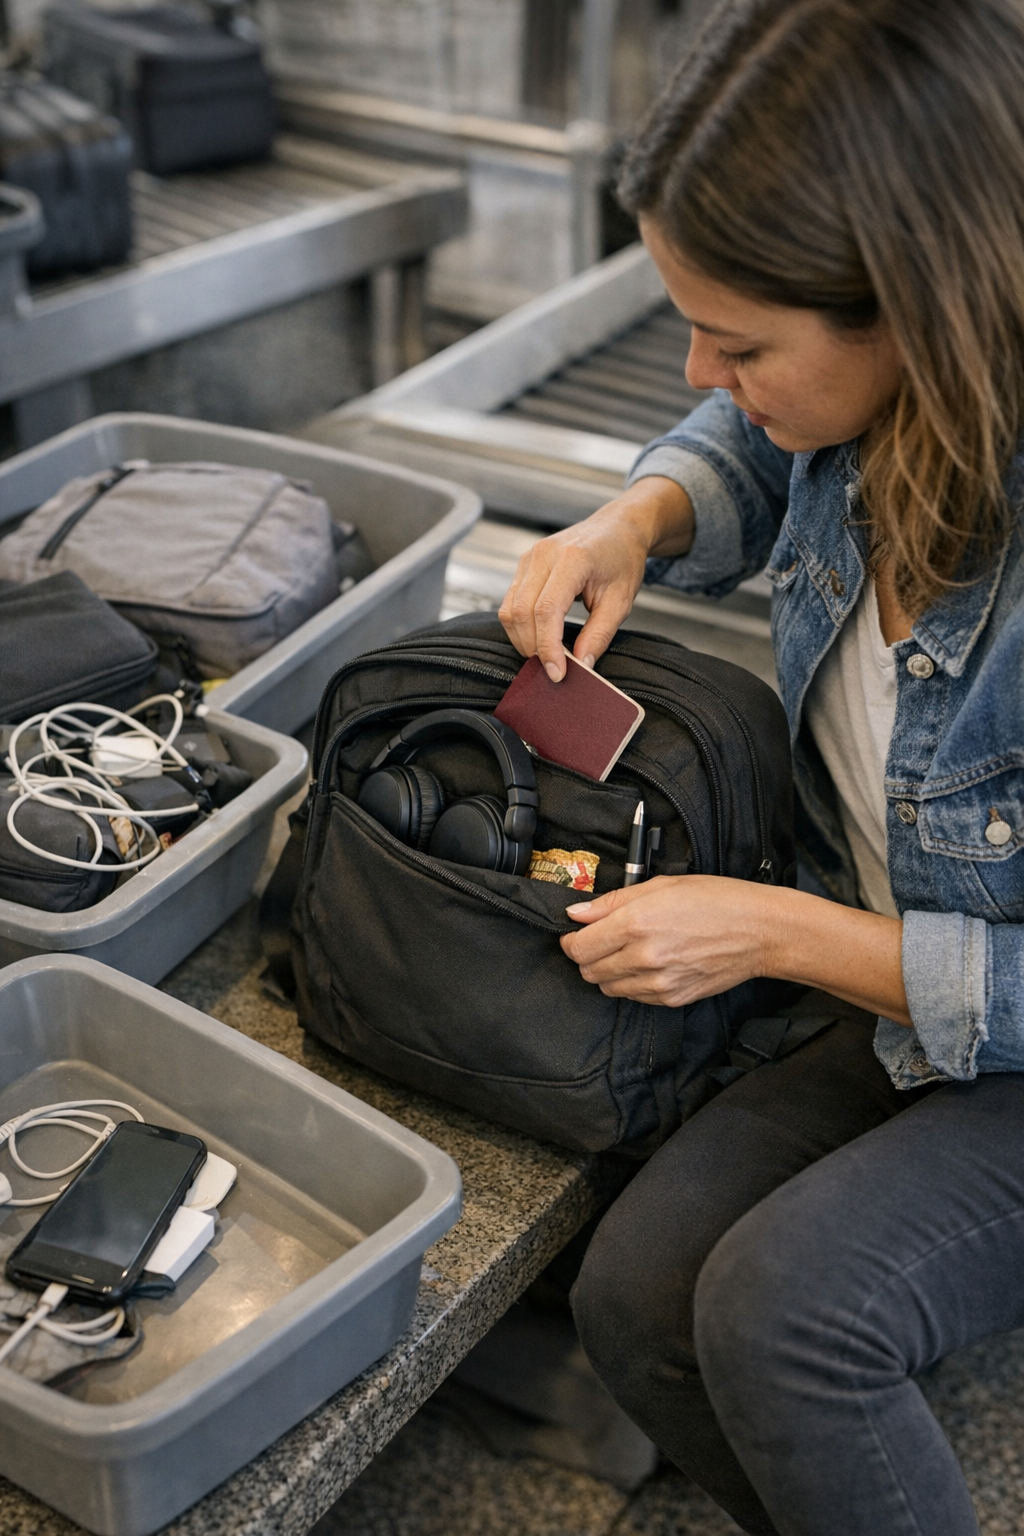
    A bag full of packing cubes, tech organizers, and light pouches feels like a win—until real travel starts. The trouble usually reveals itself at the first airport hand-off or security tray: a charger tangled with headphones, toiletries sharing space with your passport, and boarding documents buried under a snack pouch. That “quick access” pocket you packed so intentionally? It becomes a bottleneck the second you try to pull your ID. Banishing clutter visually doesn’t protect against the friction caused by overlapping paths—hands double-backing, shuffling, and digging for single items, while lines move and time compresses.

    Every traveler recognizes this: you reach into what should be an easy-access spot only to find three categories of item jammed together. What started as organized structure at rest collapses into repeated, distracted searches on the move. Quick access pockets get crowded with the wrong mix, and the penalty is paid every time you have to dig sideways to get what you need.

    The Cost of Repeated Interruptions: Micro-Delays Compound

    Each “one-second” search adds a ripple of interruption. Miss your passport on the first reach at security and you stuff it back into any convenient gap—meaning next time, it’s buried deeper. By the gate, your careful visual order is already a memory; now you’re forced to rummage, swap, and restore, introducing small but persistent slowdowns. Each unzipped layer or pouch moved isn’t just a single hassle—it’s cumulative friction, turning every checkpoint and repacking moment into a minor choreography problem that gnaws at your focus, energy, and time.

    The Retrieval Spiral: Where Systems Fail Under Movement

    Picture yourself shuffling up in a boarding line. You reach for your boarding pass and fumble through a cable pouch, loose hand cream, and headphones stacked right above your doc wallet. Instead of a one-motion grab, you’re running a step-by-step obstacle course: unzip, move, lift, shuffle, dig, restore, rezip—while the line surges forward and your “order” gets shakier. It doesn’t stop at documents, either. Whether you’re pulling snacks, pens, or earplugs, every extra layer adds drag. If you’ve ever found yourself repacking mid-aisle, or apologizing to a stranger for blocking the bin, you know the design failed the moment friction repeated itself under speed.

    Beyond Looks: Packing for Real Airport Movement

    There’s a real gap between a carry-on that looks sharp and one that stays usable with every flight segment. Pouches, cubes, and organizers create great order when laid out flat—but once you start reaching for high-frequency items (passport, headphones, pen) on the go, even a single extra layer becomes a time tax. A system that looks perfect sitting still often forces you into mini-searches and awkward repacking during live travel flow.

    The real cost isn’t just looking for things; it’s the travel fatigue from stacking tiny tasks. Every time you restore a “system” after a rushed search—putting cords back, re-zipping every pouch, flattening stray documents—the unnecessary work eats into what should be your smoothest moments. If you can’t reliably return to a single, predictable path for repeats like document checks or seat entry, you end up improvising every cycle, burning energy on things that should be frictionless.

    Where Setup Fails: Security, Boarding, Arrival, and the Overlap Trap

    The tension spikes at live pressure points. Security moves fast: trays stack up, people hurry, and your system has to work instinctively. If your passport and headphones fight for the same pocket, you risk dropping something or holding up the line—everyday overlap at its most visible. Even after security, the pattern repeats at the boarding gate and aisle: searching a crowded access pocket for snacks or paperwork means slower entry and more stress, not just for you but everyone behind. Seat entry gets awkward too if your single “catch-all” pouch blocks the way in a cramped row, or if a tight outer pocket needs a wrestling match to produce headphones.

    The overhead bin sums this up. Real travel exposes that a perfectly compressed bag—zipped tidy, color-matched—can still be a failure if grabbing one essential means lowering the whole bag, opening the main compartment again, and repacking half your stuff. Chasing visual neatness above practical access turns movement into a chore the moment reality kicks in.

    Better Setup: Isolation Beats Perfection

    The essential fix: don’t chase visual perfection—separate essentials for true access.

    Dedicate a single pocket or slim pouch for the short-list items: passport, headphones, pen, and snacks. Not mixed with chargers, toiletries, or anything you only use once per flight. This structure—one predictable path for routine retrieval—means you never have to guess or double-back, and your main compartment actually stays closed, reducing chaos with every use. You won’t eliminate all friction, but you strip out the unnecessary steps that do the most damage to your travel rhythm.

    It’s not about stacking more organizers. Selective separation kills the problem at its root. Any setup that demands repeated cross-searches for essentials is working against you. When frequent-reach items get their own zone, the time saved is immediate and the improvement doubles over longer, more demanding itineraries. Predictable motion—one zipper, one grab, one return—spreads calm through the whole trip.

    One Small Change, Real Flow Gains

    After just a couple flights, the pattern is inescapable: single-motion access for high-use items is the real test. Each layer you eliminate gives you back seconds, and the effect is tangible when fatigue builds at the end of a multi-leg day. Real carry-on effectiveness isn’t about the tightest packing at departure; it’s about whether you’re still moving smoothly after six or eight retrievals on a crowded travel day, with every step demanding new access.

    Smoother security flow, faster gates, stress-free seat entry—these aren’t soft wins. They’re the byproducts of a packing logic built for repeated, live use, not for a tidy Instagram shot. If you want a carry-on routine that actually holds up under pressure, trade appearance for access where it counts.

    Carrying Choices That Survive Repeated Use

    The recurring solution breaks down to two rules:

    • Essentials—documents, headphones, snacks—need their own dedicated pocket or pouch. Mixing them with once-per-trip items kills repeat access.
    • Don’t let single pockets become grab-bags for every category. Blending chargers, pens, and snacks forces overlap, multiplying slowdowns during every live retrieval—security, boarding, mid-flight, arrival.

    If you’re restoring order more than moving through it, your setup isn’t meeting the demands of real trip flow. You should be able to reach, retrieve, and return essentials in a single motion at every point—not just at the start, but through every cycle of the travel day. Once you’ve adjusted for true repeated use, the entire carry-on process moves quieter, smoother, and with fewer built-in delays—no visual trickery required.

    For practical carry-on travel tools designed for repeated access and low-friction movement, visit CarryOnSupply.

  • Ending Cat Play Early Prevents Toy Chaos and Keeps Homes Tidy

    If your cat’s toys keep slipping back underfoot—even after every “final” cleanup—it’s not a storage problem. The real wear comes in the gap between when cat playtime should end and when it actually drags on. Most indoor cat owners know the friction: you clear the living room, every toy boxed or binned, and still, right as you refill a water bowl or carry laundry through, a crinkle ball surfaces in your path. One stray sprint resets your tidy setup—and the loop begins again. In a StillWhisker world, surface order isn’t enough if the cleanup can’t keep up with where your cat’s nerve-ending energy actually escapes. The scattered aftermath isn’t random. It’s usually triggered by letting play fizzle past its real stopping point instead of wrapping up when your cat first starts to drift. And what feels like a minor annoyance—one missed reset—quickly compounds into repeat toy scatter, sidestep routines, and a cycle of invisible, persistent disruption that makes your “clean” space feel one step behind.

    How Play Sessions Leak into the Rest of the Day

    Letting play wind down on its own—waving the feather wand until your cat wanders off—sounds simple, but in the rhythm of an indoor routine, slow endings backfire. As your cat’s attention cools but doesn’t fully shut off, that leftover spark flares up again: a late sprint into the kitchen as you set the kettle, a rogue ball pinging off the wall, or a half-forgotten mouse showing up next to the main walkway. Without a decisive wrap and sweep, the toys migrate as soon as you turn away.

    Surface resets vs. hidden mess: You can design a stylish toy basket, space out the play area, or keep all accessories tight to a corner—but when play fizzles rather than finishes, toys still snake under couches or appear right where you’re carrying groceries. The living room looks maintained until a surprise burst sends a kicker under your heel mid-task. Trouble isn’t dramatic: it’s the quiet mismatch between how the setup looks and how it sidetracks your routines.

    Why Toy Scatter Keeps Returning—Even in a Tidy Home

    It’s logical to expect order from baskets, boxes, and labeled cat zones—until you notice clutter creeping back into walkways hours after cleaning. The true breakdown is timing. If you only tidy up when play is just “over,” that residual energy finds its own path, scattered across the room whenever you’re busy elsewhere. That’s why you pick up, breathe out, and still get interrupted later: toys marooned in high-traffic areas and another “quick” sweep before sitting down to eat.

    It becomes more than a minor mess. When late-stage play spillover keeps colliding with your normal flow, the sense of order wears thin. Every pass through a supposedly reset area risks new dodging, new pickup—a home that stays “almost” clean, never steady for long.

    Spotting the Real Stopping Point: Reading Cat Cues

    The missed moment: Your cat slows to a dawdling prowl, chases but doesn’t commit, or flicks an ear toward a ball but won’t pounce. Hit stop here—don’t push for that last lap around the rug. If you let play unravel past this dip, your evening likely means crawling under the couch for toys, nudging objects aside during a refill, or managing a small collision when a quick streak meets a water bowl edge.

    With practice, these cues stand out: the slow wander away, idle sitting with a toy, or half-hearted chase followed by a pause. Ending play right then—plus a swift visual sweep—interrupts the feedback loop. The aim isn’t abrupt cut-off, but a timely close so you contain the cascade, not just the clutter.

    Preemptive Gathering: Closing the Loop on Mess

    What actually makes a difference? Stopping while attention dips, then picking up every toy (yes, especially the sly ones behind chair legs or in the walkway) shifts your cleanup from reaction to prevention. Toy migration tapers off. The unplanned dash across shared zones fades. You’re suddenly resetting spaces that stay usable instead of just looking neat for a brief window.

    When the Cat Setup Looks Tidy But Feels Off

    Scan the room: basket in order, toys corralled, dish areas clean. But the “just finished” feeling doesn’t last if toys keep leaking back into daily movement paths. The gap is structural—your setup hides mess for a moment, but can’t contain the routine breakdown when toys resurface in the same traffic zone or under the same table, especially when you’re moving quickly or distracted.

    Day after day, the cat zone and human zone blur. A tidy basket by the armchair proves useless when it’s raided before bedtime, or a wand stick ignored after play triggers a whole new unscheduled chase. The breakdown isn’t explosive—it’s friction that accumulates. You spend more time re-clearing the same spots than actually using your space as intended.

    Everyday Interruptions: Where Routine Breaks Down

    The pain points persist because cat play migration doesn’t stay in the “cat area.” Reach for the water bowl; find a ball jammed near the base. Take laundry across the hall and bump a kicker in your path. Over a week, these micro-interruptions stack: unplanned pickups after work, sidesteps before bed, repeat touches on the same objects you counted as “handled.” When resetting gets delayed, comfort and shared access slip—and a setup that “should” work takes more effort than expected.

    This isn’t just about neatness: it’s the slow, real cost of handling the same intrusion multiple times, stealing time from meal prep, bedtime, or just sitting down undisturbed.

    Reset Habits that Actually Change the Friction

    It’s not about more bins or baskets. It’s about when you reset—catching the lapse before it grows. End play intentionally at the first slowdown and sweep up every loose piece, especially in key trouble spots: under the dining chairs, next to water and feeding areas, along shared walkways. Preemptive pickup stops tomorrow’s chaos from leaking into today’s setup.

    It pays to double-check usual trap zones: corners collecting balls, sofa undersides, paths from play to kitchen. Take care of the lone straggler now; waiting means it’ll become the trigger for the next round of mess during a rush or when your focus is lower, not higher.

    Example: The Ball by the Water Bowl

    Classic sign: later in the day, a plastic ball blocks your access to the water bowl. You think, “I’ll get it after,” but forget—until your cat sends water across the floor and you’re mopping up at midnight. The real slip wasn’t ignoring a ball, it was missing the moment for a tight reset after play. That’s the difference between calm and a spiral of late-night interruptions.

    More Predictable Routine, Less Unscheduled Cleanup

    Dialing in this stop-and-reset approach, your whole home shifts. Cat zoomies stay local to play sessions rather than bleeding into dinner or cleanup. The same periodic scan for outliers is quicker, less draining—you’re spending less time catching up and more simply living in a space that holds together between resets. There’s less backtracking; the room you set up tends to stay set.

    The goal isn’t perfection. It’s trimming the invisible labor—the repeat pickups, the lost minutes to small sprints, the home that looks more stable but finally feels easier to use again.

    When a Setup Starts Working for You—And Not the Other Way Around

    This isn’t about a showroom setup. A real StillWhisker setup holds its shape longer, demands less from you to reclaim space, and fits movements you repeat all week. You start noticing: meal prep flows without a plush fish at your feet, main paths stay open, and you don’t have to hover over every play session for the room to feel under control. By ending on the first loss of focus and carrying out the total reset—no toy left for later—your spaces back each other up: comfort for your cat, less chaos for you, and actual relief from endless reshuffling.

    The payoff is simple—a daily setup that’s easier to live with, not just cleaner on the surface, and a living space that finally works the way you wanted from the start.

    Shop practical indoor cat setups at StillWhisker

  • How a Simple Pause Transformed Our Dog Walk Routine for Good

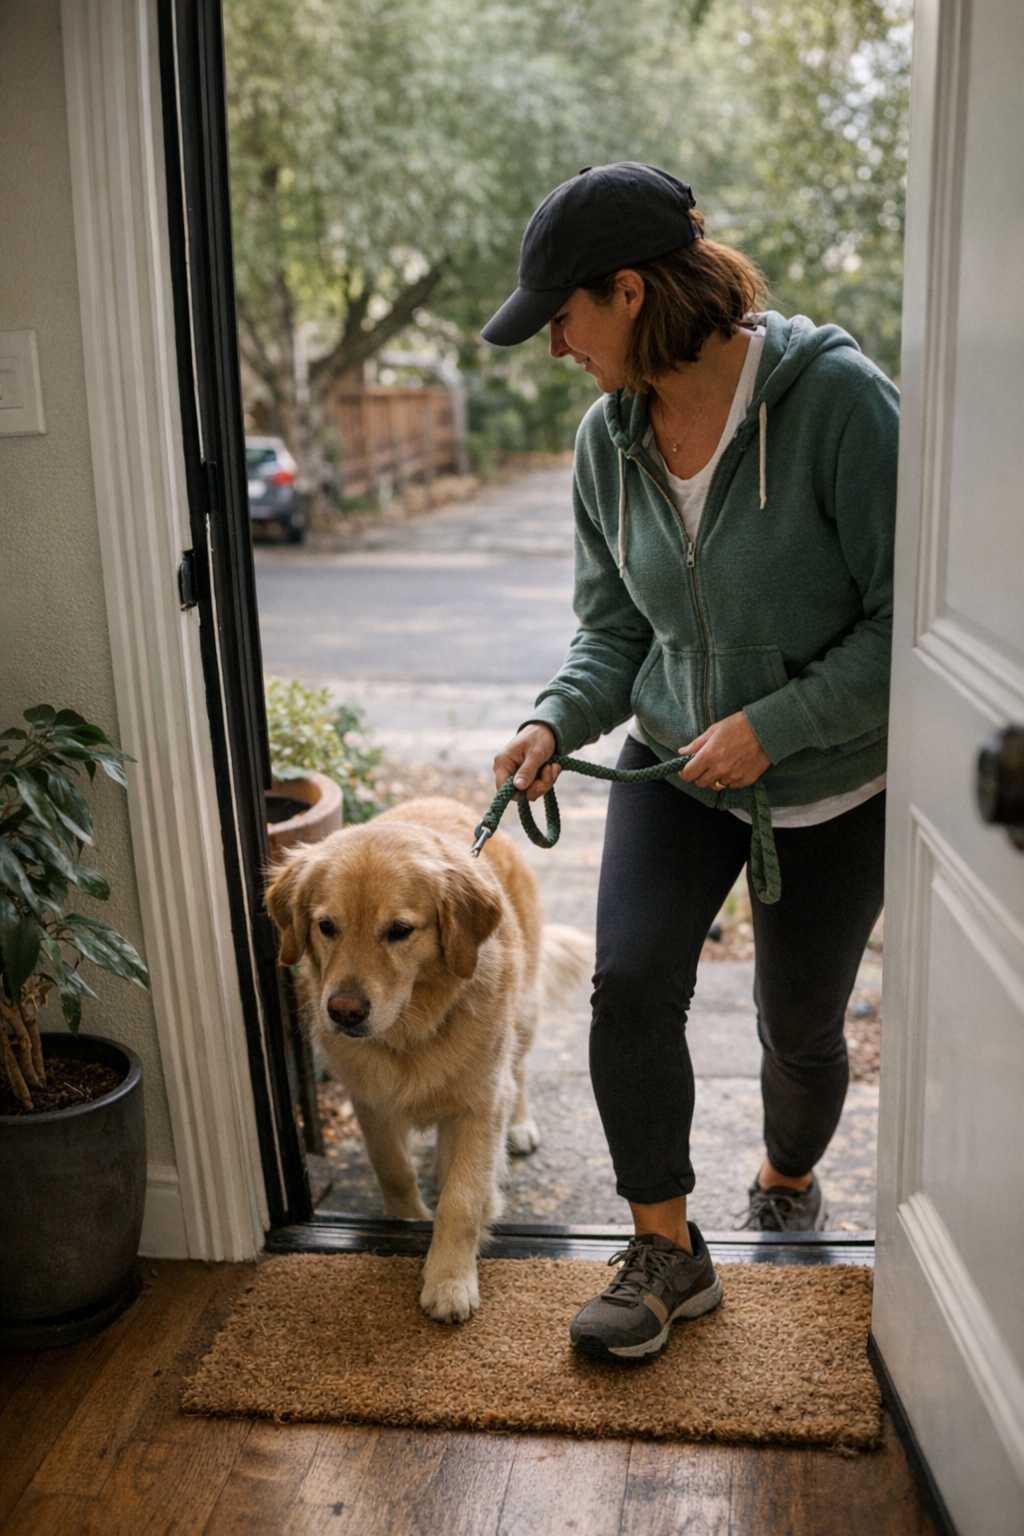
    Front doors are supposed to be quick—clip the leash, grab your keys, head out. But the real routine goes sideways: you reach for the leash, knock over the water bowl, dig past an overflowing hook, keys wedged under a chew toy, your dog doing circles or locking up between the mat and the open door. Instead of a smooth exit, every walk starts with a repeat bottleneck that drags down both you and your dog. If you’ve ever found yourself blocking the doorway, fumbling for wipes, or bracing while your dog stalls or bolts, you’ve seen how a setup that “looks ready” breaks down the moment real-life movement piles up. The first step outside is never just a step. It’s the daily test where small setup flaws turn into messy starts—over and over again—resetting the whole tone before you even clear the doorstep. In the DogPile world, that’s the front line where what’s tidy on paper rarely matches how things actually run.

    When the Start Keeps Catching: How the Front Door Becomes the Main Roadblock

    Missed leash hooks, corner-stacked baskets, water bowls wedged next to the path—these details only seem minor until they repeat. A dog side-stepping today but flat-out refusing tomorrow, pausing in the exact same spot before every outing. After weeks, you expect friction at this one threshold. Even reaching for the handle triggers the routine bracing—your hands already too full, the rhythm lost before you step into the world. “Just leaving the house” turns into a daily micro-battle, resetting even a well-organized entryway.

    As these hiccups stack up, they bleed into everything else: leash pulls earlier, paces are out of sync, even your dog’s first glance tells you both that something’s off. The porch was supposed to mean go. Instead, it signals scramble and repeat. The walk’s ease drains out of the first sixty seconds, long before route or weather even matter.

    Recognizing the Real Weak Point

    The catch is never just about willingness. Morning after morning, you fumble for the leash while the bowl blocks your path, or you find yourself dodging the same treat pouch dumped halfway into the walk zone. The setup might look shipshape, but every move—clip, scoop, grab—collides with one friction point that stubbornly stays. By the time your dog is finally harnessed, you both feel scattered. If the reset always means reshuffling towels or stretching past awkwardly placed bins, the “put together” entry is just another daily chore.

    That’s how setups start to betray you: visually neat, practically jammed up. The real threshold is never the door—it’s this spot where the same frictions restart, erasing the idea that routine means “simple.”

    Why This Handoff Really Matters—More Than the Route or the View

    Forget the new trail or varied scenery; none of it matters if the inside-to-outside transition keeps jamming the gears. When the handoff at the front door is a scramble—your dog is stalling, you’re sidestepping supplies, a mat slipping underfoot—no walk can fix that tense beginning. Patterns get carved in these seconds, teaching both sides that the pause and shuffle are just “how it goes.”

    The real control point isn’t the neighborhood, it’s the exit flow. Most advice skips over the handoff, but this stretch—how you catch the leash, move through clutter, give your dog a clear signal—decides if the outing feels doable or draining. Over time, a rough start burns in the message: expect tension. The walk becomes a routine disruption, not an escape—unless you fix the setup, not just the route.

    Repeated Friction, Lasting Consequence

    Hovering on a doormat while your dog hesitates—or zags sideways—builds frustration faster than any long route. The delivery truck idles, someone’s waiting their turn, and your hands are full, nudging gear, urging your dog, hoping not to yank or spill something. Even after you get moving, that sticky transition sets a tempo: unease on both ends of the leash, the rhythm stubbornly off for every block. It’s not just a nuisance; it’s the handoff that shapes how both of you approach “going out”—and whether it feels like progress or another repetition of the same snag.

    A Calm Door Routine: Simpler Than It Sounds

    Most “fixes” suggest training a super-calm stay, but the real shift happens earlier and simpler: insert a clear, predictable pause—every single time—before crossing the threshold. Not a new gadget, not a rigid routine. Just a practiced, shared moment—leash clipped, both of you still, gear in hand—before you move through the door. This small buffer steadies both of you much sooner than a complicated protocol or a picture-perfect sit.

    That pause isn’t dramatic, but you miss it every time things go wrong. A reliable clip-pause-move rhythm means less circling, less tension, fewer sudden bolts. When you and your dog know what happens next, nerves diffuse before they start. Over days, this tiny adjustment trims away the background stress left by a hundred messy exits.

    How the Three-Second Pause Changes the Routine

    Try this: after you’ve wrangled gear and clipped the leash, stand still with your dog just inside the door. Count a real three seconds—don’t rush—then give your signal to go. No circles, no scolding, just a shared pause and a clean step forward.

    That hold signals: the walk starts now, not in the scramble. It cuts through the rush, lets anticipation level out, and lines up both your focus and your dog’s. Most people find the freeze-and-zag moments start to fade, replaced by a straightforward, even exit. Dogs settle into the routine. Owners do too. The difference is felt not just in the first step, but in the recovery of the whole outing’s pace.

    Daily Frictions: The Small Stuff That Isn’t So Small

    Success isn’t just about where things sit—it’s about whether the motion actually works at real speed. Hooks hidden behind the door force awkward stretch-reaches. Baskets for leashes look neat until you need to wrestle one out with your hands full. A mat that bunches up under your dog’s first step sets the whole body off balance. Wipes or treats just out of arm’s reach trigger last-minute backtracks, guaranteeing that both calm and momentum start leaking away.

    None of these are emergencies. Under the daily repetition, though, they pile into genuine drag: mood dampened, dog uncertain, owner patience frayed. Visual organization isn’t enough—if routines mean sidestepping, reshuffling, or interrupted starts, you’ll end up strained no matter how good everything looks. The right setup supports real movement, not just a tidy snapshot.

    Comfort Versus Cleanup: The Balance Isn’t Always Obvious

    Go too far for comfort, and you end up tripping over solutions that slow you down. A plush mat for your dog can jam the door, making every exit a shuffle. Baskets with tight lids corral gear but add seconds to every rushed attempt at “quick walk.” It’s easy to miss how a cozy zone for your dog undermines your own flow. The trade-off hides in plain sight—looks great, but at the cost of smoother handling and cleaner restarts. When setup decisions pile on seconds and interruptions, comfort backfires into repeated hassle.

    Reset Moments: Where the Same Weak Point Comes Back

    Swap in a new mat, move the basket, angle the crate—still, the same glitch returns: you reach for the harness, but something’s always in the way. The walk is ten seconds late again, small frustration rebooted. Organization only works if the flow through the space actually matches what happens each day. The gap is always between “looks prepped” and “feels easy enough to move.” Storage that hides clutter but keeps essentials out of reach is still sabotaging your reset point.

    Reentry after a walk often shows where any system falls apart. Dirty paws and shoes meet towels that slipped behind a bench. Wipes are missing (or buried) just when you need them. Every slow, clumsy reset guarantees tomorrow’s start is thornier. Each beat missed here is another friction built into the next outing’s opening moves.

    Turning “Looks Fine” Into “Feels Better”

    The most useful routines don’t stop at looking organized; they make movement easier, reduce reshuffling, and shrink the exit hesitation to almost nothing. A practiced pause and a setup that lets you grab, clip, wipe, and move without a hitch rebuild the flow that clutter hides but friction reveals. Your dog lines up in sync. You don’t brace for the jam-up. The space holds up because it’s built for everything to get used, not just stored.

    Even one change—a reliable three-second pause before heading out—can replace weeks of stalling with smoother, more reliable walks. The front door shifts from a stress checkpoint to a predictable part of the day’s rhythm. The difference shows up in the quiet: you and your dog step out together, free of the routine drag, in a DogPile kind of entryway that keeps up

  • Why Vertical Storage Transforms Your Car’s Daily Organization Routine

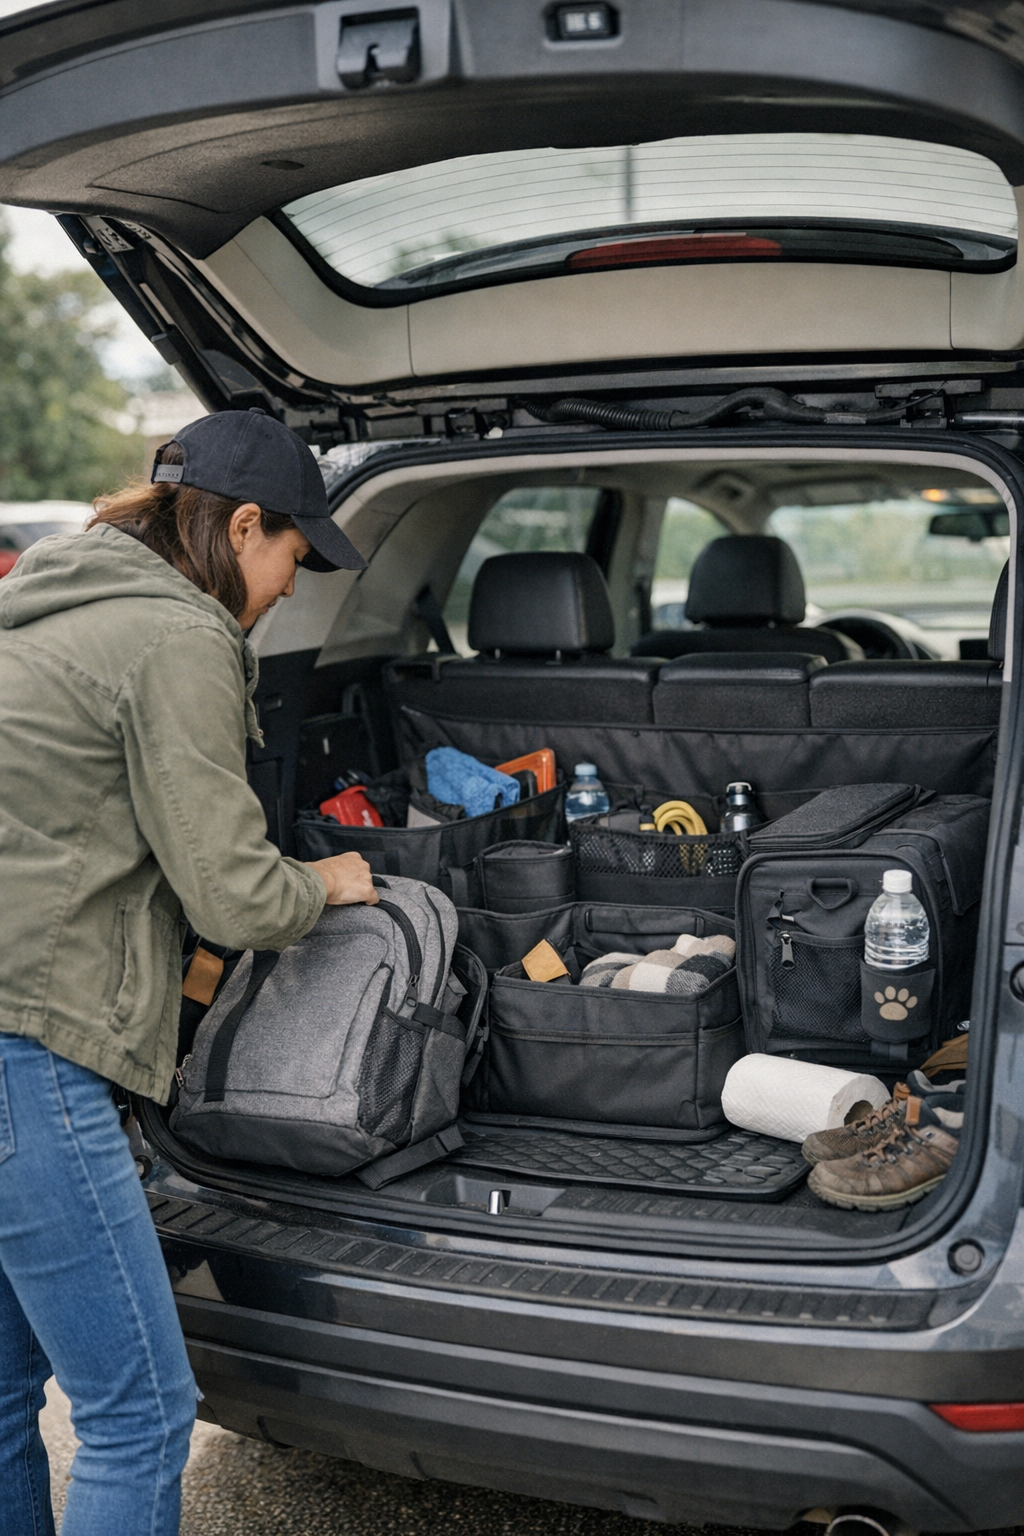
    Your car can look perfectly organized and still trip you up—every single day. You set everything in its place, stow the clutter, run cables under the console, close bins, slide keys out of sight. But one normal week and the illusion cracks: charger cable now tangled near the pedals, phone slips into a hard-to-reach gap, and every return to the driver’s seat means a fresh round of searching, shifting, or prying an item loose. It’s not a question of neatness—it’s friction in the routine: the same slow-downs, even after you’ve “tidied up.” This is where DriveWellSupply products start making sense—not for a showroom finish, but to disrupt the hidden hassles behind your next commute or errand loop.

    The Trouble With “Organized” That Slows You Down

    Visual order fools you—flat trays, tucked bins, and slim pockets work right after a reset, but they rarely hold up to the wear of weekday use. Mornings start fresh, but after the third stop your setup starts giving itself away: pens jammed beneath the seat adjuster, cleaning cloths wedged against loose receipts, charger cables snaking out from beneath a floor mat. Real organization that buries or stacks your essentials is the enemy of speed. This is the tension: a tidy appearance that breaks your rhythm every time you grab and go. Each extra motion—uncurling a cable, retrieving keys from a pile, lifting a jacket to reach your wallet—builds up, turning “clean” into cumbersome.

    Why Vertical Storage Changes Everyday Car Use

    Vertical storage flips the routine by keeping critical items upright and exposed, instead of buried or drifting loose. The change isn’t theoretical—it’s felt on the third parking-lot dash of the day. Your phone sits at hand, not lost in a tray. The charger stays slotted, not on the floor. The wallet is grabbable, not trapped under a reusable bag. With vertical slots, you see and snatch what you need in a beat—no pile-shuffling, no slow-down. It’s the jump from “organized for display” to “organized for speed”—what looks slightly odd at first, but immediately removes that hunted feeling from every quick return.

    Flat bins show their weakness fast: by Tuesday, a few errands and the careful placement is gone—chargers intertwined with loose change, headphones under a notepad, receipts blending with napkins. Vertical organizers, by contrast, give every item its lane—so the charger, the pen, the wipes, they don’t trip over each other. You move faster because nothing is concealed or trapped at the wrong moment.

    Real-World Scene: The Repeated Return

    Picture the double-back routine: you run into the pharmacy, arms full on the return. Drop into the seat, no spare hand to dig, but you sweep phone, wallet, and cable straight into their vertical slots along the console. Next stop, nothing has merged into a new pile; everything is upright, visible, ready to grab. The “before” is fresher than we admit—phone wedge in the seat gap, charger tangled near the pedals, delayed entry as you bend and reach, again. Small detail, but multiplied over a week, these seconds and interruptions make a tidy car feel anything but effortless.

    How the Wrong Structure Creates Quiet Friction

    Every regular drive uncovers the real flaws in your current setup. The right organizer seems to work—until bags, rain, or rushed mornings test it. Gloves and cables slip out of sight inside low bins, floor organizers trap what you actually need at the curb, and those hidden catch-alls make you cross and double-back for items that should just be there. A cable placed out of view on Monday is now a trip hazard below your shoe by Friday. The frustration repeats: you think “organized” should mean frictionless but, under real pressure, these solutions quietly fail.

    The truer test isn’t a clean start or a photo after detailing—it’s the Thursday morning chaos, groceries rolling, phone charging while you reach for wipes and all the “designed” solutions revealing their cracks. If every quick exit or entry means one more adjustment or search, it’s structural, not behavioral. The convenience you hoped for gets eaten by micro-delays and reacharounds that keep stacking up.

    Access Patterns: The Underestimated Design Flaw

    “Organized” is easy to sell, but day-to-day car use isn’t about stacked storage—it’s about reach, speed, and not fighting your own setup. If your routines involve kids, regular stops, or quick pickups, organizers that require multiple steps (unzipping, shifting, sliding trays) lose their appeal fast. The biggest flag: if you need both hands, a twist, and a rummage just to grab your charger or mask, your setup is working against you—and the slowdown will keep returning with every busy stretch.

    Vertical Organizers in Practice: The Subtle Upgrade

    It isn’t a remodel; it’s a targeted shift. Swap a floor bin for a lean vertical pouch at the seat edge and the “missing phone” pause disappears. No more retangling a cable fallen under the mat, no more circling for the right cupholder. When every item stands upright and separated, you cut the overlap and stop redoing the same motion. This becomes obvious on high-pressure days—groceries shifting, umbrellas damp by the door, or a burst of receipts after back-to-back errands. Vertical channels means every object returns to its zone, so the next drive doesn’t begin with reclaiming order from scratch.

    The difference is structural: tidy does not always mean accessible, but upright storage makes access the default. Instead of finding systems vulnerable to entropy, you’re working with compartments that resist the usual slide, bunch, and cover-up. The little wins add up—less seat-edge scrabble, fewer cables underfoot, less cleanup borne by the end of a routine week.

    What to Watch for: Fit and Placement

    Not all “solutions” help; some organizers frustrate with bulk or awkward sizing. A well-designed vertical slot should hug the seat edge and still allow seat movement or legroom. Oversized bins or stiff pouches create their own intrusions—jammed adjustment controls, knees bumping edges—just exchanging one problem for another. You want near-invisible setups: solid enough for stability, close enough for blind retrieval, never hiding what you actually need mid-commute. The wrong fit gets noticed fast and, if you’re honest, might make you abandon the system altogether.

    From Appearances to Usability: Real Gains Over Time

    After cycling through real commutes, errand runs, and parking-lot rushes, the differences sharpen. The back-seat clutter pile stops forming; the same three items never go missing after a week. Charger cables no longer trip your shoes, and the end-of-week cleanup shrinks to a couple of steps—just the unavoidable, not the built-up chaos. Each drive recovers seconds, and re-entry flows without stutter. A neat look is secondary; what counts is usable calm: structure that handles daily pressure instead of folding after a day or two.

    No organizer erases friction entirely—different cars and routines always find new pressure points. But vertical storage, when chosen to fit your space (and not block it), pays for itself quietly every time you return in a rush or reload before a drive. The gains are real: not for impressing passengers, but for reclaiming effortless movement in the moments that usually slow you down.

    For practical storage solutions designed to improve real repeated car use, visit DriveWellSupply.

  • How Proper Ladder Angles Improve Indoor Lighting Maintenance Safety

    Walk into any laundry room, stairwell, or hallway that “looks” bright, and you’ll still find yourself fighting for clear sight during the simplest maintenance tasks. Because it’s not just the fixture—flush mount, semi-flush, sconce, or panel—that makes the difference. It’s how your setup actively blocks, distorts, or wastes the reliable spread of light you assumed you had, especially the moment a ladder enters the picture. A badly placed ladder instantly fractures visibility, turning a routine bulb swap or cover tightening into a mess of shadow, glare, and guesswork—regardless of how modern or rated your lighting is.

    The Not-So-Hidden Trouble with Ladder Angles

    Anyone who’s changed a flush mount in a narrow hallway or reached for a sconce above a stair knows the pattern: the second you position the ladder without checking the light’s throw, your body blocks the best part of the beam. Instead of helping, the fixture turns every maintenance move into a struggle against your own shadow. Small jobs, like cleaning the edge of a glass dome or tightening a ceiling screw, suddenly demand one-handed balancing and blind fiddling. The core problem isn’t discomfort—it’s repeated lost visibility, which raises the risk of missed screws, slipped covers, and low-level tension in every “easy” fix.

    Maintenance That Gets Harder Every Time

    The first time you wiggle a fixture loose while stretching around a badly set ladder, you might shrug it off. Do this a few times—especially in tight spaces like laundry nooks or narrow bath corridors—and a pattern forms: dropped hardware behind machines, scratched sockets, and awkward work-arounds just to compensate for blocked or lopsided lighting. Bad positioning becomes muscle memory, and before you realize it, you’re solving the same visual problem every time you service your own indoor light.

    Where Ladder Angle Shows Up Most: Real Home Scenarios

    1. The Hallway That Looks Bright… Until You’re Reaching Up

    Hallways seem solved with a flush mount or strong linear ceiling fixture. But try to change a bulb or dust a panel by placing a ladder straight underneath, and you make yourself the shadow, losing the precise focus that’s needed. Fine tasks go sightless; glare ricochets off polished covers, washing out panel detail or turning glass domes into glare spots. Even with technically “good” fixtures, a careless ladder angle can turn an overbright setup into a visibility trap.

    2. Tight Laundry Rooms: Shadows Where You Need Clarity

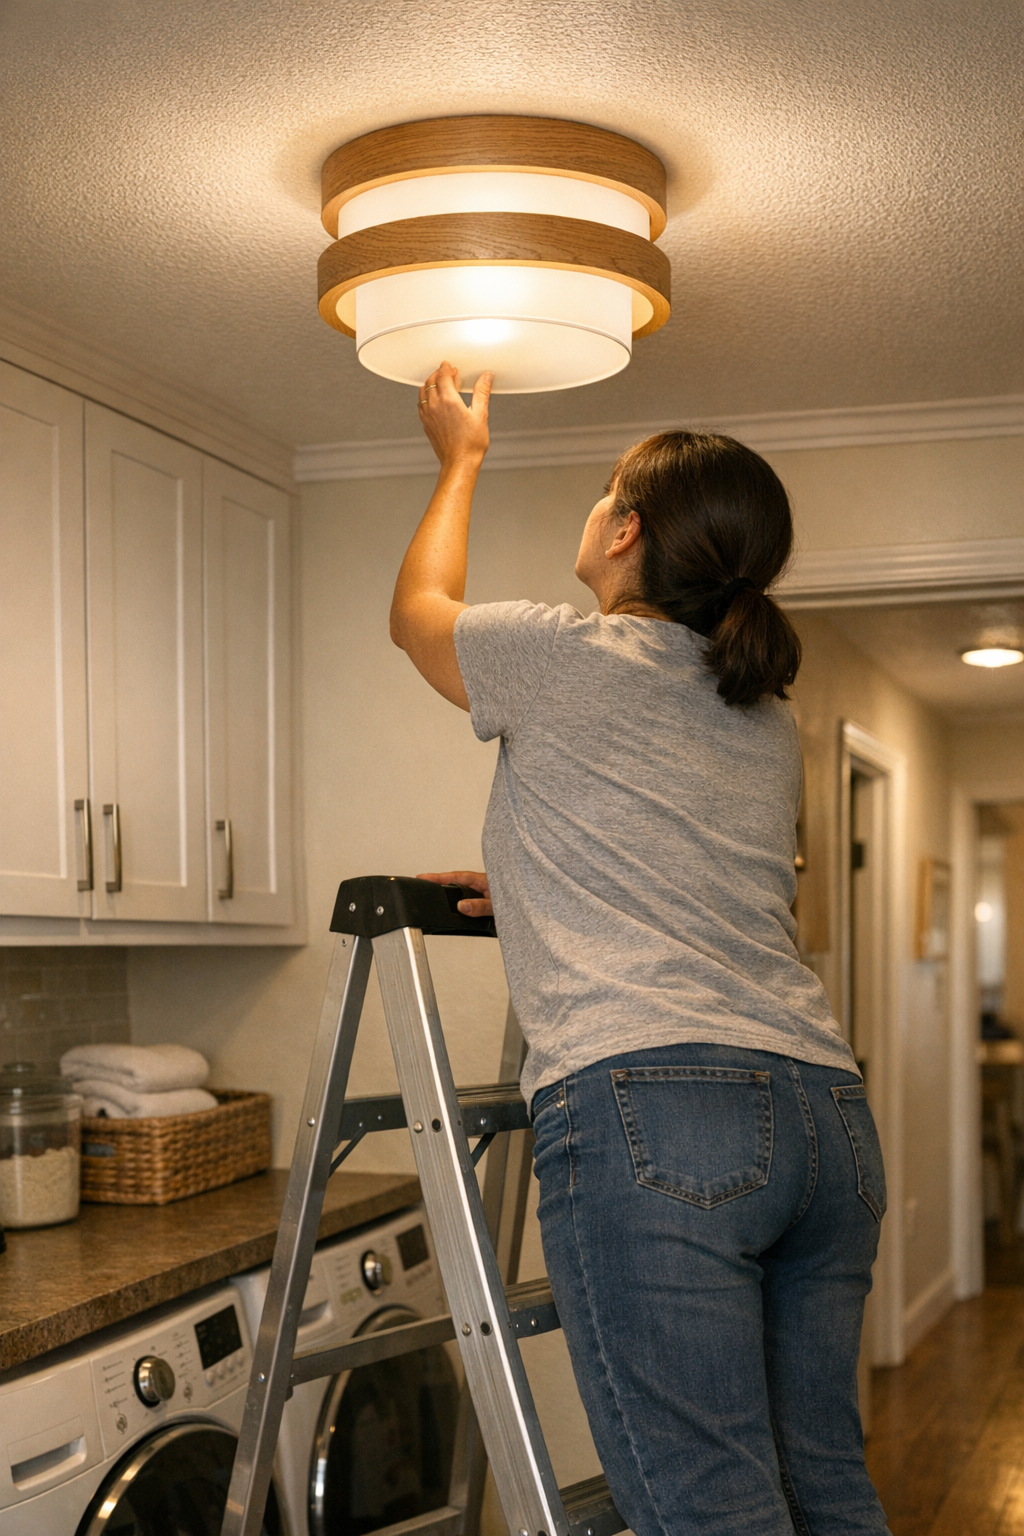
    Maintenance in a compact laundry room feels routine until you press the ladder up against a cabinet for support. Now, to reach a flush mount, you’re forced to lean, blocking half the fixture and putting your hands right in the path of the worst glare. Drop a screw, and it’s lost behind the washer. Smudges along the fixture’s edge go unseen. After three or four rounds, you know exactly which movements will cost you: sideways straining, blind reattachment, and habitual shadow problems that never seem to clear up.

    3. Stairways and Low Ceilings: More than Just a Reach Problem

    Stairwells demand more than safe footing—they force tough choices about ladder placement. With a sconce or semi-flush at a landing, the safest setup for balance leaves your body ghosting over the work area. Your own shadow hides loose wires or missing screws. Miss a footing and drop a fastener, and it disappears into the gap between steps. Stairway lighting should help with those risks, but a poor ladder setup means the lighting actually intensifies mistakes by pulling shadows right where you can’t afford them.

    Why Small Adjustments Make Lasting Differences

    Shift the ladder’s base just the width of a cabinet door or one stair riser away from the default and the entire work area transforms. In a utility alcove or beside a wall run, sliding over twelve inches might clear enough angle for the light to fall directly on your work—no more casting your own shoulders and face into deep shadow. Suddenly, the entire fixture edge becomes visible; glare backs off; small tasks flow instead of frustrating. That shift makes routine maintenance predictable and eliminates the worst “work blind” risks.

    This applies everywhere: entryways, stair turrets, or narrow corridors. If you place the ladder slightly outside the beam’s natural center, hands and head clear the main spread. You see the fastener holes, not your own silhouette. There’s less twisting, steadier footing, and a direct view for everything from bulb replacement to precise fixture cleaning. Repeated jobs, which once felt vague or awkward, snap into crisp, reliable routine.

    Tip: Think About the Space, Not Just the Support

    The instinct is to anchor the ladder against whatever solid edge is nearest—wall, cabinet, or shelf. But that “safer” spot often steals visibility. Instead, judge where your arms and body will land and give priority to unobstructed light, even if it means shifting away from the most obvious brace. Yes, it can feel less secure, but clear sight and fewer accidents outlast the illusion of stability that comes with crowding up to a wall. Run a test: before climbing, check where your working hand falls in the light. If it’s cast in shadow, adjust the ladder until the beam is uninterrupted—your routine, and the room’s real safety, will both improve.

    Repeated Use Reveals the True Setup

    No matter how modern the lighting, the wrong ladder angle punishes you on every round of maintenance. Layered bathroom lighting with strong vanity or mirror fixtures? An awkward climb blocks the best output, forcing neck bends, missed details, and a rush through spots where glare and shadow compete. Ceiling flush mounts or wall sconces above stacked bins in a storage corridor? One misstep and you’re operating blind, even in a “bright” room. Durable lighting setups only matter if the space supports repeated, unblocked access—not just visibility during idle hours.

    Over time, every repeated workaround—forced stretches, lost or bent hardware, uneven cleaning, incomplete replacement—chips away at the whole point of strong indoor lighting. The proof doesn’t show during a walkthrough; it shows in the clarity (or absence) you feel the third, fourth, or fifth time you’re up a ladder.

    Seeing the Room Differently after a Small Change

    Even a single shift—offsetting the ladder a foot from where you’ve always put it—turns the entire maintenance math around. Suddenly, your head and arms stop breaking the spread. Your grip steadies. The job goes from workaround to standard task: covers seat evenly, screws align on the first try, and you stop guessing what you can’t see. You’re not just checking a fixture off your list; you’re restoring trust in the room’s lighting to actually work in practice, not just look bright online.

    Let each small, deliberate adjustment add up. Over months, this reduces frustration and fatigue, and you recognize which design choices actively support both routine and surprise tasks. It becomes obvious which rooms need a change in fixture—switching flush for semi-flush, wall for ceiling, or adding a task light—because the “well-lit” feeling finally matches with real, unimpaired use.

    Field-Tested Quick Tips for Next Time

    • Never place your ladder directly in line with the fixture’s brightest output if you can avoid it. Offset by a foot or two and check that the main light falls cleanly onto your hands, not just your face or shoulders, before starting any work.
    • Pause before bracing a ladder against cabinets or machines. Step back, run a fast hand check where you’ll need to work. If you see shadow, adjust your angle until the beam reaches your point of action. This single check prevents most repeat maintenance frustration.

    The most “invisible” mistakes in indoor lighting come from careless setups: ladders that block, shadows that multiply, bright rooms that still make you work in half-dark. When setup quietly supports your sightline and movement—whether by fixture choice, placement, or just offsetting the ladder—you’ll feel the difference every time you reach up. http://www.lighthelper.myshopify.com

  • How Smart Storage Solutions Transform Yard Care Efficiency

    Yard clutter doesn’t crash in—it creeps up the moment putting one thing away feels like a bigger chore than it should. You finish a project on a tight afternoon, ready to be done, but glancing at your storage setup—a cramped deck box blocking your way or a deep bin wedged into a corner—you catch yourself dropping the hose or clippers “just for now.” That’s how a useful space quietly becomes a mess: not because you lack storage, but because the act of use and return never truly fit the way you move through the yard.

    The Subtle Ways Outdoor Storage Makes or Breaks Yard Flow

    Most people shop storage by size or by looks. But after one week of real use, what matters is whether putting things away is seamless or an obstacle course. The classic scenario: a big deck box sits at the patio’s end, ready for action. For a few days, everything lines up. Then it rains, the lid swells a bit, or a wheelbarrow gets parked in front, and returning just one tool means moving two other things first. Suddenly, you’re threading between half-finished stacks, with a hose zigzagging across the walkway and gloves abandoned on the bench because opening the bin feels like double work.

    Blocked Lids, Deep Bins, and the Rise of Hidden Clutter

    Oversized bins and deck boxes sell the promise of “one-stop” cleanup. But in real yards, they often become graveyards for gear. The rakes and hoes might go in vertical—once. After a couple of busy days, extra gloves and tangled hoses are buried under heavier tools, and the bin’s footprint—once so promising—starts to swallow more than it gives back. If it’s blocked by a spare bag of soil or half-shifted patio furniture, you cut corners: toss small tools onto steps, balance pots on top, anything to avoid the awkward unpacking. “Later” piles up quickly. Gear once organized now sits right in your way, or worse, goes missing inside a bin you now avoid opening at all.

    How Small Barriers Multiply Yard Frustration

    Every tiny delay—lifting a heavy lid, reaching past clutter, moving one thing to put away another—adds friction you feel in the routine. Sports balls wedge behind garden forks. Pruning shears drift away and show up next to the grill three days later. Soon, you spend more time dodging stray gear than actually moving through your space. These aren’t dramatic problems, but each one chips away at the urge to reset your yard—bumping shovels, re-sorting gloves, or squeezing around a container that used to fit but now blocks your path.

    Wall Racks and Open Storage: Clarity Over “Tidiness”

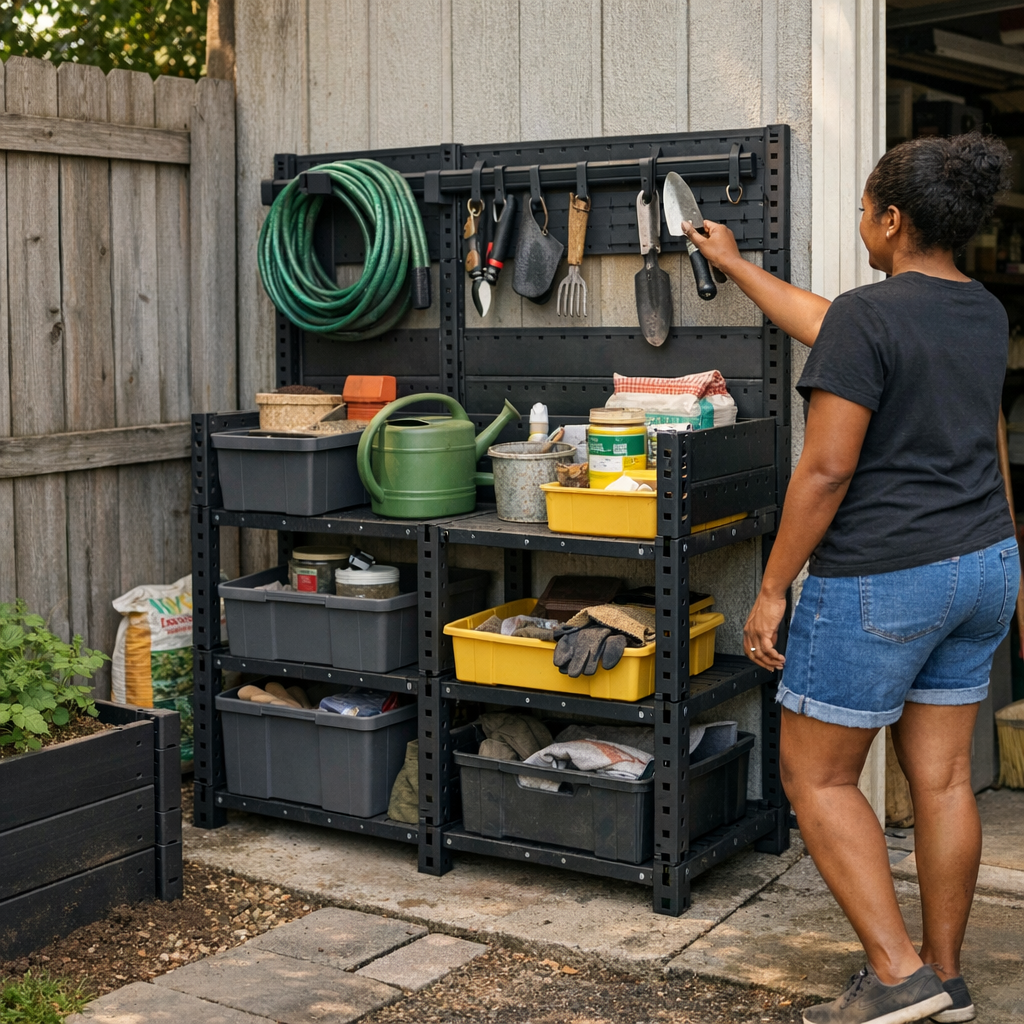
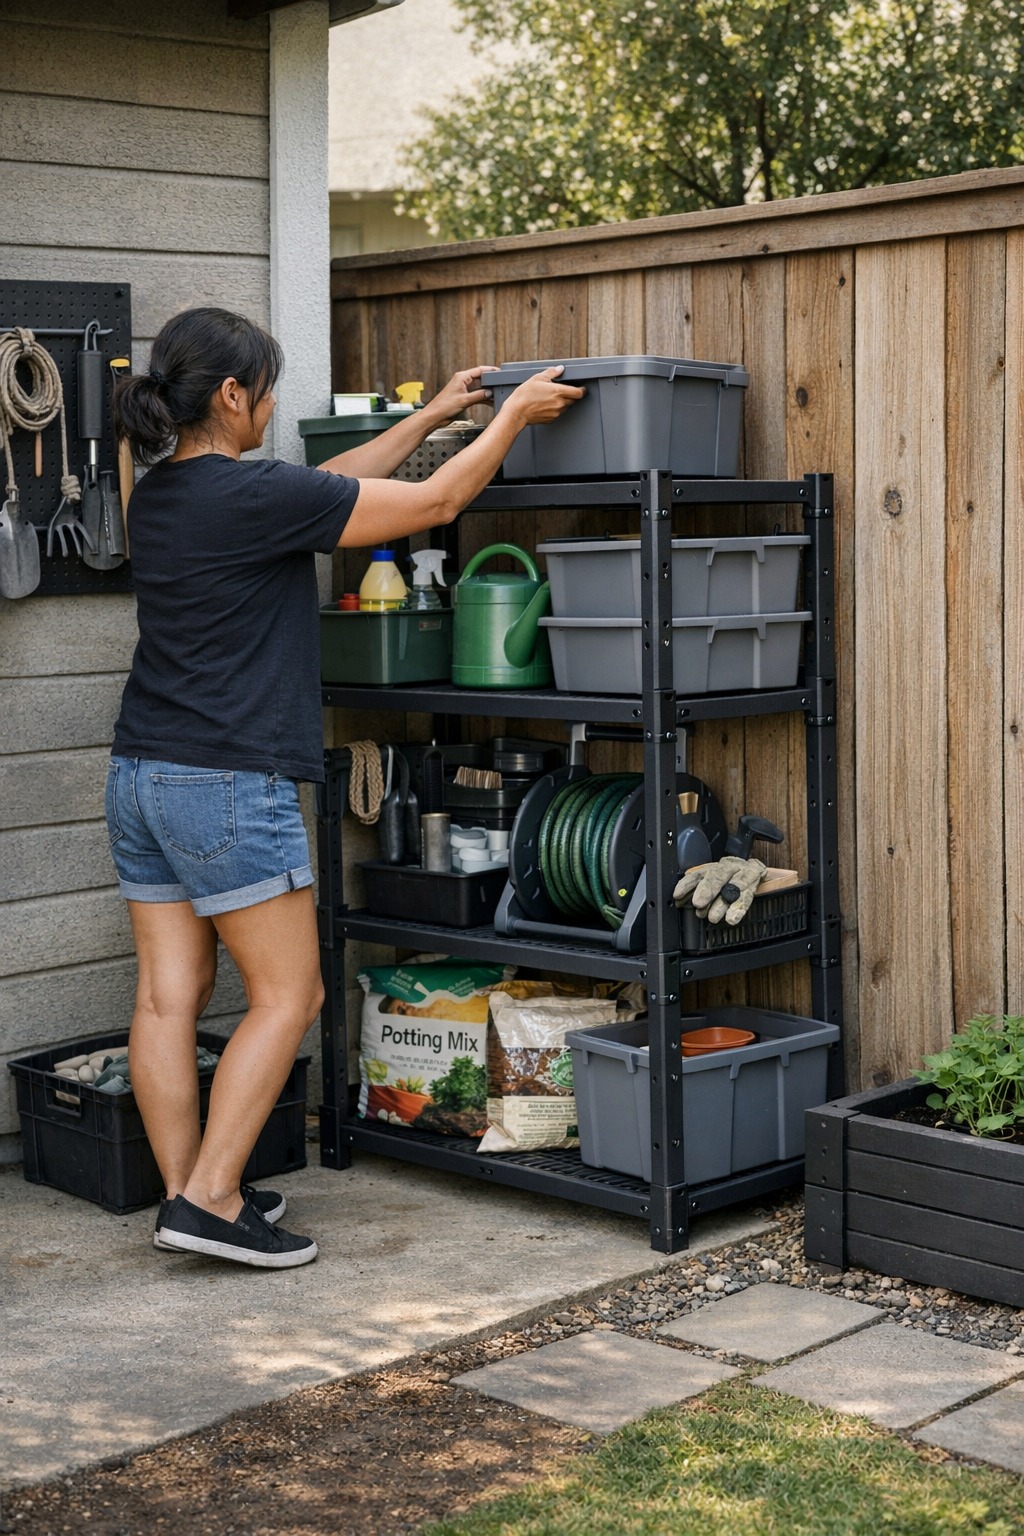
    The antidote to buried bins is out-in-the-open: wall racks, hook panels, or modular shelves along your real paths. These force a feedback loop you can’t ignore. Each tool, glove, or hose lives where you see it—miss one, and the gap is visible. There’s nowhere to hide a mounting pile. This feels risky at first (no more lidded camouflage), but it’s a nudge toward real upkeep. One glance, and you know what’s done and what still needs to return. The path stays open, and movement isn’t dictated by how full a box has grown.

    Making Wall Space Actually Useful

    But not every wall becomes useful by default. Slapping up hooks in a dead zone, or lining one fence with racks, is easy to do badly. Hooks clustered in a corner away from your cleanup path? Unused. Tight racks jammed behind bikes or bins? Forget it. True daily usefulness = tools right at the point you decide to stop. It’s mundane but powerful: think about where your routine actually ends (garage threshold, side gate, patio edge) and put high-movement storage right in reach, not just anywhere a wall is bare. Otherwise, “organization” turns back into another avoidance problem.

    Real Use: How Setups Fall Apart Under Normal Pressure

    Watch any yard for two weeks and you’ll see the difference between looking organized and actually working:

    • Return one, block the rest: That deep deck box seems roomy until the first time you set a garden fork on top—and now the hose is impossible to pull out without shifting everything. Gloves drop in, disappear under a shovel, and every “quick return” becomes its own grumbling search.
    • Shifting pieces, never open space: A freestanding rack near the back step clogs the flow. One more tool added, and soon you’re kicking a tangle of handles aside just to reach the compost bin. The footprint looked right, but the walk path gets narrower every week.
    • Overflow zones gathering mess: Every yard has at least one—behind the shed, the strip next to the AC, or that spot just beyond the patio. Missed returns end up here, multiplying quietly until “clean up” becomes a Saturday-long reset instead of a ten-minute finish.

    Small Wins: Tweaks That Actually Make Resets Easier

    Sometimes all it takes is one lived-in change. One TidyYard customer swapped a buried bin for wall hooks right by the garage exit—their tools became a “grab it, hang it back” habit, not a search-and-stack ordeal. Nothing fancy, but now the bench next to the system is always clear for sitting. You trade the comfort of hidden clutter for quick resets and paths that stay open. You’ll always notice what’s out of place, but that’s the point—it’s fixable in a glance, not buried for weeks.

    The Role of Return Flow in Real Outdoor Organization

    Real outdoor organization isn’t about tidy appearances—it’s about constant usability. When your setup matches the way you end tasks, putting an item back doesn’t feel like an interruption. Wall panels and open racks suit the tools you touch every few days: trowels, shears, rakes, coiled hoses within reach, not trapped beneath bins. Save the closed containers for long-term hibernation. If you notice one area always gets overflow, it’s a placement issue—not a storage volume issue. Add a hook or shelf along your actual route, instead of relying on one mega-bin two corners away.

    Tip: Map Your Actual Cleanup Path

    Next time you finish a project, notice the path from garage to side yard to patio. Where do tools naturally pause “just for now”? That’s your real storage need talking. Design your setup around the rhythm of return, and the yard stays workable without slow, repeated resets. Catalogs don’t show this, but the difference shows up every week.

    When Setup Fits the Space, the Yard Keeps Up With You

    No system is magic. There will always be odd corners that attract winter pots or overflow bins that still fill. But when your storage lines up with movement—not just dimensions—everything from a five-minute clean to a four-hour overhaul gets easier. The side yard remains walkable, wall racks stay in play instead of blocking the route, and resets rarely balloon into all-day jobs. You’ll see less mess, not because you cleaned harder, but because the system itself interrupts the old cycle of clutter gathering in all the wrong places.

    Find outdoor storage that fits your real routines at TidyYard.

  • Controlling Heat and Abrasives to Prevent Metal Discoloration in Grinding

    If you’ve ever clocked a real shift on the grinder, you know how quickly the best-laid plan can unravel. What’s supposed to be a fast touch-up—a weld smoothed here, a sharp edge dressed there—suddenly turns into a marathon of chasing ugly, splotchy streaks. Out of nowhere, that familiar blue or gold haze creeps across the metal. It barely looks like damage at first, but you know exactly what comes next: stubborn temper marks that won’t buff out, more abrasive changes, more sore wrists, and a whole lot more wasted time at cleanup.

    When Discoloration Becomes a Shop-Slowing Hassle

    Most have ignored an early patch of blue or brown and figured it would vanish with a couple quick passes. But optimism fades fast. Each time the wheel dwells too long—or you push a little harder out of impatience—the colors cut deeper, and you’re left with ugly spots that just won’t budge. Now you’re juggling disc changes, breaking out finer grits, or even backtracking to rework a finish that should already be done. In a real shop, workflow matters. When you’re grinding a bunch of pieces for a rush job or trying to get welds uniform across a rail, those “small” stains turn into real production bottlenecks.

    Hidden Heat: The Real Source of Your Color Troubles

    Discoloration on steel and stainless isn’t just a cosmetic nuisance—it’s the calling card of heat gone wild. Every grinder operator has felt how fast heat builds up under a coarse disc or when you try to muscle through with a tired, overloaded wheel. You might not see anything on the first pass, but keep circling those seams or long edges and suddenly the rainbow arrives. With thin material—sheet metal, boxed sections, pre-cut rail—it’s even more dramatic: temperatures climb with each pass, and just a moment’s lapse sends you deep into cleanup territory.

    It’s not just about looks, either. Once heat-discolored patches take hold, they anchor oxide layers and sometimes even shift the metal’s structure, making every bit of follow-up work that much slower.

    The Stainless Steel Test: Why Errors Cost More

    Grind on stainless and the stakes climb. There’s no hiding from your mistakes—rainbows develop fast and set in deep. Anyone who’s worked a continuous weld on a stainless bracket or countertop knows the panic of watching subtle blues turn into stubborn brown shadows. In a busy kitchen build, you’ll see welders pausing, swapping out for higher-grade ceramic discs, and dropping RPMs, all just to keep those telltale colors from haunting the surface and multiplying touch-ups at the tail end.

    When Disc Choice Translates to Real Work (and Less Frustration)

    Mid-grind, the difference between a run-of-the-mill aluminum oxide disc and a purpose-built ceramic blend changes everything. Side by side, a standard wheel throws lots of long, hot sparks—great for speed, brutal for heat. The ceramic disc’s sparks are tighter, the touch is cooler, and your grip doesn’t buzz with the same warmth after a few passes. That means your hands, wrists, and nerves last longer, and so does the uniformity of the metal itself.

    It’s tempting to reach for whatever’s in the drawer, but every shortcut here shows up later. Cheap, coarse discs carve fast but lay waste to the finish. The slightly stiffer resistance of a ceramic disc, especially in the 60-80 grit range, rewards you up front: fewer blue burns, less lost time switching abrasives, and a lot less surprise at the sander before paint or TIG.

    Reality Snap: Running a Rail in the Field

    Picture it—the sound of grinders, one hand bracing a rail section fresh off a structural weld, earplugs buzzing against steel hum. The plan: blend quickly, keep things moving, stay cool. But as you press in and that rail heats under your glove, you catch the first glint of blue, gold, and purple curling out by the weld. If you plow forward, the stains get more assertive—even a new abrasive can’t rescue it all. Instead, stopping for a disc check, easing off on pressure, and letting the metal cool off—even for a minute—can keep your workflow tight and your finish uniform without the endless spiral of “just one more pass.”

    Backing Off: Why Moderate Speeds and Better Discs Are Game-Changers

    This is where a smart setup pays off, every single time. Drop your variable-speed grinder’s RPM from max (10,000) to a controlled 5,500, lock in a quality 60-grit ceramic disc, and the chemistry changes instantly. In daily shop use, a quick test with an infrared thermometer showed a dramatic shift—110°C at moderate speed, compared to the punishing 160°C you’d hit at full throttle with a basic disc. It’s the difference between a shop that tucks up at the end of the day and a shop that spends overtime sanding out mistakes.

    That slower, smoother approach feels strange at first. Maybe it challenges your “get it done” instincts. But suddenly, blue heat signatures barely appear, edge uniformity stays tight, and your grinding time drops—you’re not fighting to erase the aftermath of impatience.

    Micro-Adjustments: Small Tweaks, Big Results

    Three habits make a powerful difference in daily grind work:

    • Work in short stints—don’t try to push one surface or weld nonstop. Let the metal breathe, and so will you.
    • If heat builds under your hand, don’t push harder—swap in a finer or ceramic disc to cool things off mid-session.
    • Stay alert during batch work; if you see rainbow patterning start to creep in, pause and reset before it escalates.

    Even just swapping to a better abrasive mid-job or taking a one-minute break can stop an ugly finish from spiraling. It’s habit, not heroics, that makes cleanup easier later.

    FAQ: Beating the Blue, Job After Job

    How can I actually prevent blue staining?

    Back the RPM down, use ceramic or high-quality abrasives, and chunk big work up into manageable, quick sessions. Catch color early and pivot before it cascades—think of the stains as an early warning, not a final verdict.

    Why does stainless steel punish mistakes so quickly?

    Stainless not only heats faster but holds onto that heat longer, spotlighting every slip in dwell time or pressure. Don’t rush—pace your work and stay vigilant about what your hands and eyes are telling you.

    Is grinding slower always worth it?

    Not if all you’re doing is rough prepping mild steel for framing. But for visible, precision work—or anything touching final finishes—lower speed and better discs always save time on the back end. It’s never wasted when the end goal is clean metal ready for the next step.

    Grind Smarter, Save Your Workflow

    Heat shimmer, blue streaks, ugly brown halos—they’re more than enough to ruin a long day at the bench or on-site. Every choice, from your RPM to the disc in your hand, can cut or compound cleanup. The best shops know: small, conscious adjustments now mean less arm strain, better finishes, and fewer late-night do-overs. Don’t aim for perfect—just aim for fewer unwelcome surprises when the grinder powers down for the day.

    Shop Gumboll for workshop-ready grinders, discs, and tool gear