Category: Lighting & Work Setup

  • How Thoughtful Lighting Choices Solve Everyday Home Visibility Challenges

    The right indoor lighting is less about what draws compliments—and more about what stops you from stumbling, squinting, or second-guessing every time you pass through a room. Look at the hallway you rush down ten times a day, the bathroom mirror where your face always looks off on one side, or the spot in the laundry where no matter how much you clean, a shadow masks missed dust. For most people, the gaps don’t show up until a light fixture turns routine movement into a minor obstacle—hesitation on the stair turn, double-checking the counter edge, or nudging closer to a too-dim mirror. It isn’t the wattage, or the style. It’s whether lighting actually covers what you need— and stops hiding weak spots that slow you down or make you adjust how you move.

    Recognizing Small Lighting Setbacks in Real Life

    Poor lighting doesn’t always scream for attention; it just quietly interrupts. Maybe you pause at a stair turn because the bottom step blends into darkness. Maybe you lean at an awkward angle to see your chin in the mirror. Maybe you wipe a countertop twice because the side nearest the fridge sits in shadow. These aren’t dramatic breakdowns—they’re the friction points that keep cropping up because the fixture isn’t built for this room, this routine.

    Even a new fixture can backfire. That “bright” flush mount at the center of your hallway may look balanced at first, but cross the threshold at night and the walls near the door still blur out. Carry a bulky basket down the stairs, and suddenly the lower steps dip into gloom, making the trip feel like a risk—especially when your hands are full. Style and brightness can’t compensate for spread that misses key zones or for shadows that get sharper over time.

    Why Brightness Alone Doesn’t Solve the Problem

    Rooms can look bright on paper and still leave you struggling in daily use. Step into a hallway: the middle glows, but each end fades after dark. Overhead lighting in a bathroom turns your reflection into an uneven study—face washed on one side, shadowed on the other, and skin detail guessing in the gloom. In laundry or mudrooms, a strong ceiling light gets fogged up by humidity or steam, leaving you hunting for corners and refolding clothes you thought were sorted.

    Then there’s glare— the quietly aggressive mistake. A fixture at the wrong height tosses harsh light straight into your eyes at every pass, especially on stairs or in narrow corridors. Movement slows; you find yourself looking away from the steps, not at them. Instead of making you feel confident, the space throws tiny jabs of uncertainty every hour.

    Repeated Routines Reveal Lighting Weaknesses

    The wrong lighting doesn’t just fail once—it makes its presence known every day. Each routine exposes the unresolved edge:

    • Crossing the hallway: The center’s bright, but open the door and your eyes strain to catch the shadowed edge.
    • Stair use: A single fixture centers the glow, but the last step blurs at dusk—making you slow down or pat with your foot.
    • Mirror use: Light drops off on either cheek, so you tilt and shift, searching for evenness in reflection.
    • Laundry: Steamy air dulls the bulb and you end up missing lint piles or struggling to see if a sock matches the rest.

    Each friction is small—none are deal-breakers. But that’s what makes them costly: they don’t demand a fix, so you just work around them, and the irritation compounds until you find yourself dreading a part of the house that should be automatic.

    Smart Upgrades: What Actually Helps in Daily Use

    Lighting upgrades that stick aren’t about chasing trends or cranking up the wattage—they’re about matching light spread, placement, and fixture build to the room’s demand. Practical clarity beats out aesthetics in every real test: how it feels after weeks of traffic, not just for the first “wow” after installation.

    Hallways and Stairs: Filling Gaps, Not Just the Middle

    The most visible fix in long or turning hallways is distributing light so movement feels automatic, not careful. Shifting from a single central flush mount to a staggered pair of damp-rated ceiling fixtures fills the dead zones—eliminating dim corners, making each rise and run obvious (even when your arms are full or rain clouds darken the space). That hesitation at the stair turn vanishes; people walk without slowing, and it’s easier to land shoes where they belong instead of tripping over what you can’t see.

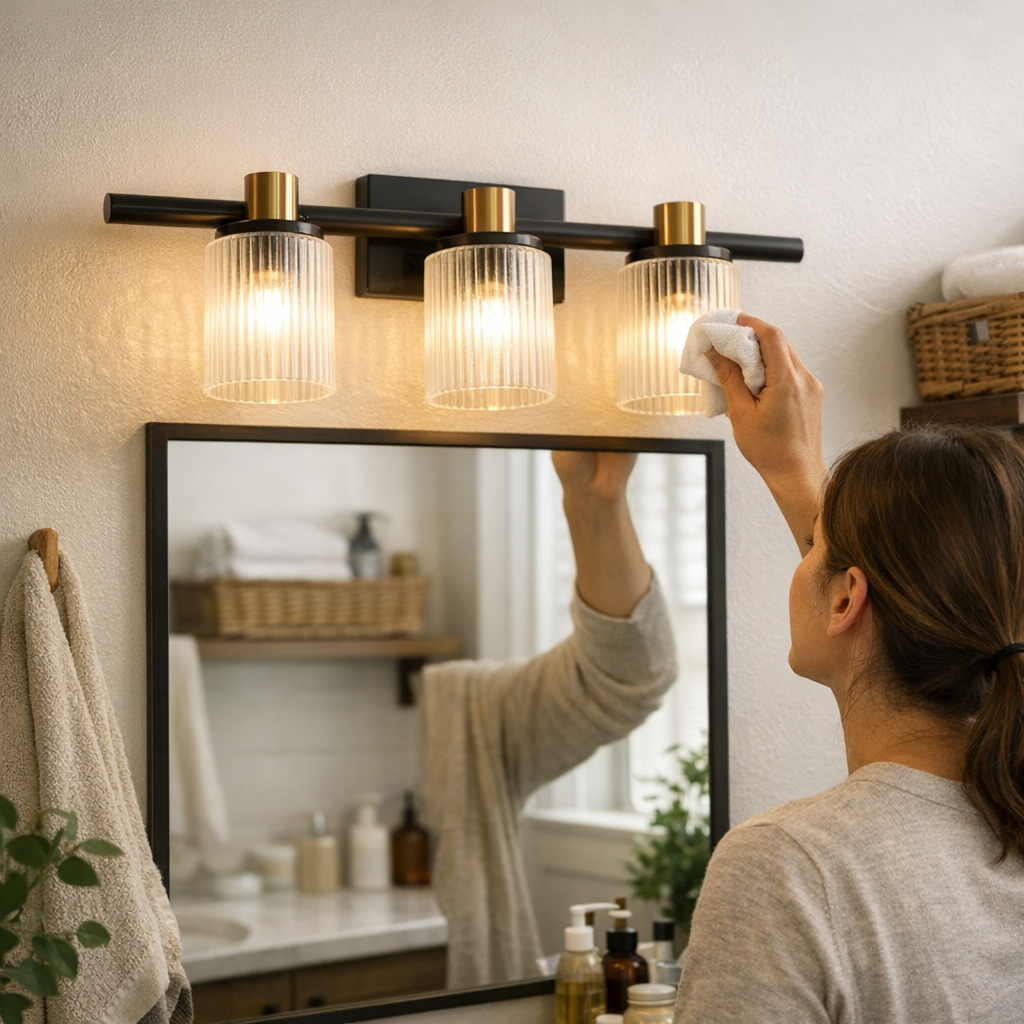
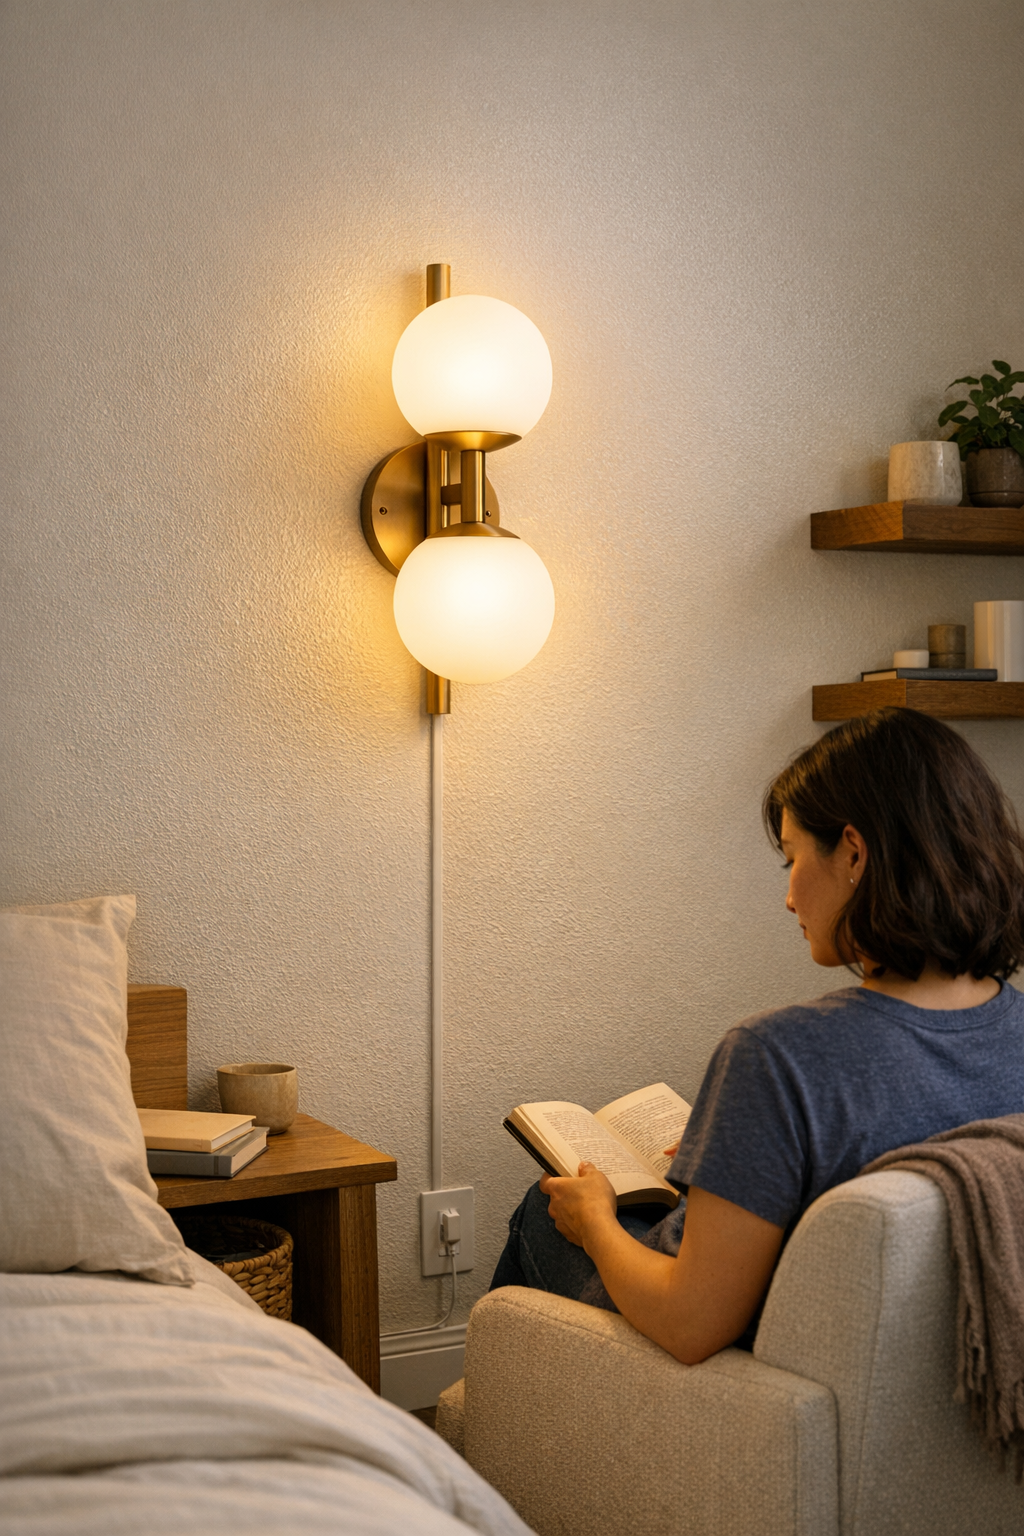
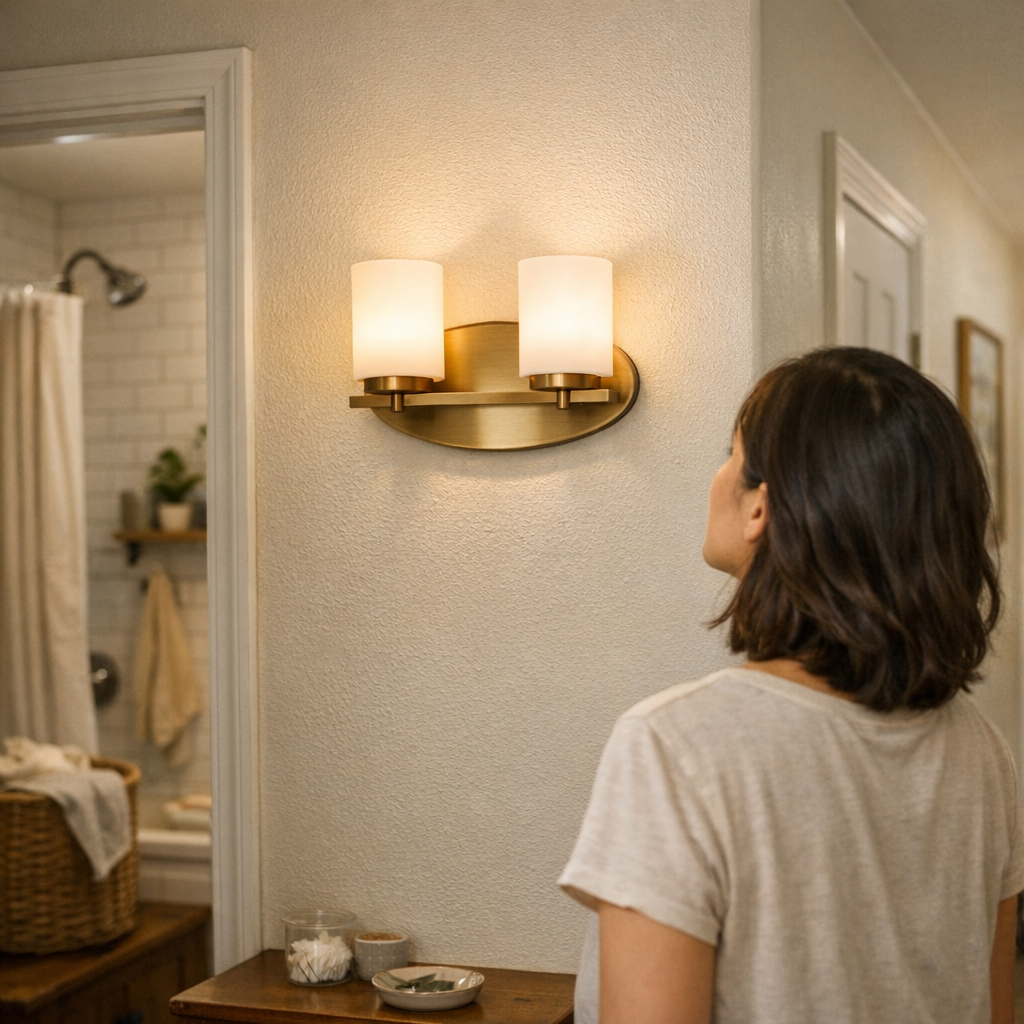
    Bathroom Mirrors: Even Reflection Wins Over Watts

    A single overhead bar turns grooming into a guessing game, with clean light in the middle and darkness at the cheeks. Adding sconces or side-mounted mirror lights brings both halves of your face into the same clarity—suddenly, you’re not craning your neck or shuffling side to side to get a true reflection. The payoff isn’t luxury; it’s reliability—shaving or makeup is straightforward, and the bathroom mirror stops being a source of doubt.

    Laundry and Utility Spaces: Battling Humidity and Glare

    Standard ceiling bulbs in laundry rooms lose the war against heat and humidity by midweek. A damp-rated panel fixture, built for steamy air, throws steady, diffused light across the counter—no glare on the appliance lids, no faded corners, and no more squinting to tell if a shirt is actually clean. Things look even and sorted, even under the worst conditions.

    Tips for Making Lighting Work for You

    • Check visibility in all conditions: Don’t rely on that first impression. Walk through at dusk, after a shower, and on grey days—weakness appears at different times.
    • Map fixtures to habits, not just to the plan: Watch how you cross, reach, or turn in the space. Place lighting to support those exact moves (especially for stair ends, mirror sides, and far counter edges).
    • Don’t risk cheap fixtures anywhere humidity lingers: Even non-bathroom spaces need damp-rated options if fog, steam, or laundry heat ever build up; ordinary bulbs degrade and shadow new spots.
    • Lead light away from eyes, not against them: Adjust direction and placement to avoid glare, especially where you walk straight toward a light (end of hallways, stair turns, utility sinks).

    When a Lighting Fix Sticks—What That Actually Feels Like

    The best lighting is the setup you notice only when it’s gone—the steps that are clearly visible even with your arms loaded, the mirror that’s never a guessing game, the counter that stays obvious edge to edge after a full round of chores. Frustration fades, movement becomes automatic, and small compensations you didn’t realize you were making simply disappear.

    Well-chosen fixtures don’t call attention to themselves, but their benefit shows up every time you cross the space or stand under them—not at installation, but after the routines that real lighting is built for.

    Explore more practical lighting solutions for everyday spaces at LightHelper.

  • Flexible Plug-In Lighting Solutions for Dynamic Indoor Spaces

    That “clean” ceiling or wall light you wired in for a perfect look? Once you start actually using the room—moving a desk, adjusting a monitor, or sharing the space—its limits show up fast. Fixed fixtures and smooth surfaces may look resolved, but each small change exposes an awkward reality: your lighting is locked in place, while your routines keep moving. You can sweep away cable clutter, but not the hassle of chasing usable light once the setup no longer fits the way you work or live.

    The Invisible Hassle Behind the “Clean” Lighting Setup

    Hardwired ceiling lights and sconces promise a cable-free, uncluttered surface. They look decided—no adapters hanging, no cords trailing anywhere. But the real test isn’t the photo; it’s what happens after the first month. Angle your desk to dodge late-afternoon screen glare, try reaching the far edge under a shallow shelf, or let a new stack of books block the beam: suddenly, you’re left with dim corners, glare lines you can’t escape, or work areas that stay in shadow. Shared desk spaces turn the problem up—every routine shift means someone’s forced to make do in subpar light, or just stop moving things altogether. The “fixed” calm begins to feel like hidden friction every time your habits change, even if only slightly.

    Plug-In Lighting: Flexibility Gains and the Trade-Offs That Follow

    Plug-in desk lamps and LED strips cut installation to the basics—plug, position, adjust. You skip drilling holes, you sidestep rewiring, you dodge wall damage every time you need a fresh angle. The catch is immediately visible: cords snake along the table, adapters surface near outlets, mounting brackets sometimes sit in plain sight even when you want them to disappear. It’s a trade—visual clutter for functional relief.

    But if you’re actually shifting seats, sharing a table, or flipping between tasks, this kind of adaptability quickly pushes ahead of any downside. The light moves with you, not against you. You slide a lamp toward a meeting spot, drag an under-shelf strip to brighten last-minute paperwork, or tip a shade for a new camera angle—in seconds, not with tools or disruption. With fixed lighting, those small pivots would mean living with always-off-point beams, or endless hesitation before actually using the space for something new. Flexibility trumps tidiness when routines aren’t static and every small job needs its own light geometry.

    Real Scenes: When Setup Friction Overrides Visual Calm

    Picture three people orbiting one long desk with shelf lighting above. One is note-taking and needs just enough brightness, another scrambles for a video call, needing soft, even face light, while the third stacks gear that blocks the beam. If the only source is a wall-mounted LED—no adjustability, no extra support—every user gets a different compromise: one bends to dodge glare, another leans into a persistent shadow, a third just accepts dim edges as normal. No cable in sight, but the routine keeps breaking against the limits of a setup that won’t adapt.

    Add a plug-in strip with a slide bracket or a clamp lamp, and suddenly, light follows need: the strip slides further along the shelf, the lamp pivots to clear a box, or the bracket unclips and moves to a new anchor point in seconds. Yes, the cable is visible, and the mounting bracket isn’t showroom-invisible—but each adjustment restores usability to another work zone. The space becomes flexible, not visually staged at the cost of everyday comfort.

    The Cable Factor: Managing Visual Distraction Without Losing Adaptability

    Plug-in setups put cables and brackets on display, and the visual mess is real—at first. But most of the clutter can be outsmarted once it’s a daily irritant: slim cords pressed flat along desk or shelf lines, adhesive clips keeping the run tight, or careful routing behind furniture edges. Each cable you manage is one less distraction—until something loosens or gets snagged mid-week. The fix then is a low-stakes routine: a quick reclip or mount, not a day of rewiring. Visible cords become background noise as long as supports actually stay put and don’t demand repeated repair. The moment a mounting fails, you spot it, snap it back, and keep working—no system shutdown or call for help.

    Day-to-Day Shifts: Little Annoyances That Add Up

    Even polished setups grind your patience if you keep reaching for the edge only to find the light always misses, or if glare returns every afternoon like clockwork. A lamp that moves means reclaiming five minutes each shift, a task strip that slides lets you share desk zones without shadow battles. With fixed lights, all those inconveniences compound—small, constant reminders that looking right doesn’t mean working right. Plug-in accessories accept routine change: you angle or move a lamp, scoot a strip across a shelf, or pull an adapter into reach when needed. Over months, the stress dropped by each tweak adds up. Go back to “perfect” hardwired stillness after living with adaptivity, and the underlying rigidity stands out all over again.

    Improving Plug-In Setups: Small Tactics, Noticeable Results

    Decent cable management is non-negotiable. Always start with the shortest cable that covers your reach. Choose cords that can disappear against the room’s main lines—hugging back edges, desk lips, or shelf runs. Use low-profile clips or compact runners to keep everything tight and avoid routine snags across work surfaces. If a power outlet is just too awkward for smooth positioning, add a slim plug-in extender as close to the main work spot as possible—20–30 cm is usually enough to shrink visible cable and restore flexibility.

    For lighting that really needs to move, lightweight slide brackets or clamp mounts let you shift position quickly without scraping up furniture. You’ll still see the support points, but the irritation fades: the setup proves, day after day, that adaptivity beats a minor mark on the desk or shelf.

    When Appearance and Function Collide: Making the Right Lighting Choice

    Every setup walks the line between how finished a space looks and what it’s like to actually use it. If your task is fixed—one chair, one activity, one lighting angle—hardwired might work. But for most shared, multipurpose, or rearranged zones, plug-in flexibility is the difference between daily friction and a space that serves the work, not the look. A line or bracket left visible may never vanish, but the drag of a rigid, one-shape-fits-all fixture interrupts routines far more. The perfect “clean” look is hollow if your lighting forces compromise at every turn.

    Prioritize lighting setups that can keep up with your habits, not just your design plan. If your routines adjust, overlap, or expand, well-managed plug-in lighting delivers a workspace or shelf that adapts in real time—making each day’s layout headache disappear before it builds. Over time, the difference between looking resolved and feeling genuinely comfortable is what keeps people coming back to a flexible, support-aware setup.

    LightSupport

  • How Under-Desk Outlets Transform Workspace Clarity and Efficiency

    The vanishing act of visible outlets: why it matters more than you expect

    An “organized” desk can come undone in less than a week—especially when power strips and charger cables slide back into view. The setup looks intentional at first, but by day three, twisted charging wires slice through sightlines, block access to notepads, and edge into every attempt to reset your work zone. Instead of focusing on a task, your eyes catch on looping cords and plastic extensions, each one a small distraction—each one creeping closer to where you type, sketch, or shift your chair. The real friction isn’t just visual: outlets start dominating prime space, and changing a device stops being routine and starts requiring an awkward shuffle just to find a free socket.

    The reality of desktop power: instant access versus constant interruption

    Desks often begin with everything in its place—chargers and power bars along the back, cables routed to the side. But one laptop swap or short-notice phone charge and the logic falls apart. The cable that was routed so neatly yesterday is now stretched across your mouse pad, the power brick blocks your notebook, and the back edge is a tangle after every reset. What looked organized soon becomes a work zone built for planned stillness, not real motion.

    When your setup means sliding between laptop, monitor, and handwritten notes—especially on a shallow desk—every new device adds cable drag. By the second work cycle, you’re untangling cords just to shift a reference book or stretching across a scattered mess to reach an outlet. Convenient placement slides toward convenience for today only: outlet strips that stay tidy for photos but migrate closer with each new charge, until friction wins and desktop order evaporates.

    Why putting outlets under the desk feels like a breakthrough (until it doesn’t)

    Beneath-the-desk cable trays, boxes, and under-mounted power strips give instant visual relief. The work surface looks spacious; no more charger blocks stabbing your wrist or cables circling in front of your notepad. Everything appears reset, with monitor centered and keyboard clear—until you need to plug something in fast.

    The catch shows up immediately. Halfway through a call, your phone pings low and you reach for power—except now you’re fumbling blind under the desk, twisting for a cord, or shifting your monitor just to get under the tray. Each mid-session charge breaks concentration. The “clean” setup starts to create a cycle of small interruptions: a workflow that looks fixed from above, but always makes you reach further or pause to plug in, especially if your routine demands frequent device changes.

    Desk clarity versus actual usability: where small placement changes add up

    The real test isn’t whether you can hide cables, but whether you can reach power without breaking stride. On compact or team-shared desks, those seconds add up fast—swapping from screen to handwritten notes, making room for a reference book, or sliding your chair sideways so someone else can join in. With under-desk outlets just out of reach, the setup grinds: a cable too short means stretching your phone awkwardly; a tray too far back means moving your monitor just to find a socket. The supposed fix demands extra steps every single time.

    What begins as a small hassle compounds quickly. Cumulatively, each awkward stretch, each reset-induced cable hunt, turns efficient desks into slow-moving puzzles. Multi-device stations especially reveal the cracks: every plug-and-unplug takes a few seconds longer and quietly chips at the pace and comfort you’re actually after.

    The daily routine: when an under-desk setup actually works

    Getting it right boils down to exact placement. Mounting a cable tray along the rear edge—close enough for an arm’s reach while seated—makes all the difference. Outlets stay hidden, but access isn’t a stretch or a blind reach below knee level. Real utility is measured not by looks, but by how quickly you can dock your charger behind a monitor or tuck a cable next to your day’s notes—and forget it’s even there.

    Small detail, huge impact: cable slack rides above your knees and chair wheels, instead of drooping into leg space or causing an unplug each time you slide your seat back. Snagged cords, unplugged laptops in mid-call, or unexpected tangles underfoot vanish from the daily routine—not because of surface tidiness, but because nothing interrupts the flow of real work.

    What the photos never show: when the right setup prevents new headaches

    Most “perfect” desk photos capture only the after—clean surfaces, no clutter. What they miss is how the setup responds when the workday shifts. Hide every outlet and you may trade visible order for the daily hassle of finding power out of sight. Go the other direction—everything accessible at arm’s length—and you face a permanent web of cables drifting across your workflow.

    It’s almost never about total concealment. The quiet win is in calibrating tray and outlet placement to match repeat reach: enough cable slack for comfort, not so much it drops to the floor. Too-short cords bring clutter back on top, while cable overflow becomes a hazard to legs and chair movement beneath.

    The sweet spot: a work surface where deliberate order isn’t skin-deep, and the details fade into the background because resets and mid-session changes just work. The surface adapts and recovers—without drawing attention back to a problem you thought you solved.

    Quick questions for real-life setups

    Can under-desk cable management work with any desk? Not always. You need at least a 10–15 centimeter clear back edge with no support rails or hardware blocking access—or blocking chair movement—if you want trays or power boxes to fit comfortably.

    Does hiding power always make sense if I’m charging all day? No. If you’re constantly plugging and unplugging, completely hidden outlets often cost you time. The best route is a hybrid: a tray or box mounted just within daily reach, or a desktop pop-up to handle the most-frequently swapped devices without pulling everything apart.

    Why does clutter return even after I hide outlets? Because the real world ignores best-laid plans. If cables are too short, or sockets are difficult to reach, you’ll start abandoning the setup—devices will migrate back to the desktop and the cycle restarts. It only holds if placement lines up with your genuine use pattern, not just the hope for less mess.

    Desk order that survives actual work

    The best desk setups are the ones you stop noticing. In practical terms, that means trays or cable boxes are hidden just far enough to clear the line of sight, but always within your routine’s natural reach. No arrangement stays perfect—devices multiply, tasks change, reset motions add up. Desk organization survives only if it moves with you—always a step ahead of cable creep, surface crowding, and the silent friction that comes from hunting for the right socket, again and again. The difference you feel isn’t in how the space looks but in how smoothly you can switch tools, reset, and move into a new task without even thinking about power. When access and order match your real workflow, the desk finally stops working against you.

    Explore the full WorkBasic collection

  • Creating a Dedicated Power Corner to Boost Shared Workspace Efficiency

    Most desks can look clear, but still force awkward pauses and clumsy reaches—especially in shared setups. Whether you’re working from a compact team bench, a hot-desk, or a family study area, the discomfort isn’t always obvious at a glance. It shows up the moment you need a charger: adapter bricks slide just out of reach, cables cross your notebook, and finding power means fishing beneath the desk while someone is trying to type. What looks organized quickly breaks down as each person moves, swaps devices, and makes improvised changes. The friction keeps returning, no matter how clean the surface appears.

    Where Tidy Meets Trouble: The Subtle Ways Clutter Creeps In

    Start the week with a clean slate—laptops charged, cables tucked into a desktop tray, adapters in the corner. But watch how fast real use unravels that neatness. By noon, someone snakes a charger across the desk, another person nudges a cable under the monitor, and by the afternoon, the old patterns creep back:

    • Cables sag over the keyboard just as you open your notebook mid-call
    • Adapters drift towards the mouse, catching sleeves or shifting piles of paper
    • Outlets vanish behind monitor stands, so plugging in means blind hand acrobatics

    This is the “desk reset” nobody wants: order disappears with every user. Without a fixed, anchored power corner, friction accumulates unannounced—broken focus, tangled wires, and that all-too-familiar crawl under the desk for a socket. The cycle repeats: accidental unplugs, slow restarts, and more interruptions than you notice in the moment.

    Defining the Power Corner: What Changes, and Why It Matters

    A true “power corner” becomes the one spot where cables and chargers don’t invade your workspace. Set at the back edge—near wall power but away from arms, legs, and your workflow—it acts as a stable control point. Every laptop brick, phone charger, and adapter stays routed to this base, held inside a cable box or tray, not spilled across the surface. That one detail transforms the routine: no more dragging a chair around stray cords or realigning the mouse each time after charging a device.

    The shift is instantly clear in daily use:

    • Cables hold their line—they don’t wander into another person’s elbow zone
    • Nothing is coiled up around chair legs or pooling beneath your briefcase
    • Devices can be unplugged and replugged without a tactical shuffle of notebooks or reaching under the desk

    This isn’t about cosmetic tidiness—it’s about cutting out the hidden resets and keeping essential cables right where you can find and use them. After several handovers, you notice: fewer device mishaps, no missing adapters, and you gain back all those seconds normally lost to fiddling with wires.

    How Desk Setups Fail: Recognizing the Real-World Friction

    A clean-looking desk doesn’t guarantee smooth work. Under repeated use, flaws surface:

    • Chairs repositioned just slightly, pulling a cord across your writing arm
    • Bricks teetering at the desk edge, falling and breaking your train of thought
    • The outlet “hunt”—one person packs up, takes a charger, and throws off the next user’s routine

    Here’s where the real difference emerges: an anchored power corner trades a bit of clear space for reliability. Power and data lines follow the same route, time after time. No more pausing mid-task to untangle or reorient before plugging in. It’s a structure that survives the actual pace of work, not just the appearance of order.

    Testing the Difference: Clutter Drift vs. Anchored Calm

    Day one: the desk’s clean, but each new user has to trace cables, untangle a charger, or slide a device aside to find power. The trip-ups build: work slows, energy leaks away, even if nobody notices in the moment. People become cautious, trying not to trigger another unplugged laptop or snagged headset cable.

    Day two: after adding a weighted cable box and charger tray to one rear corner, the rhythm changes. Wires stay out of sight, adapters are where you expect, and legs aren’t navigating a mess of cords under the desk. Swaps between users don’t require a micro-reset; the desk is ready in seconds. These returns matter most where team turnover is high or devices change rapidly—co-working tables, rotating project benches, creative stations used by several people a day.

    Simpler Returns: How One Change Alters the Whole Routine

    Add a single cable tray and weighted box at the rear-left desk edge, and the routine shifts. No more cords looping through the mouse area, or charging lines threading under notebooks. Coming back from a meeting isn’t a rescue mission for cables or adapters—it’s direct: sit, open, resume. The behind-the-scenes structure absorbs the mess, so you don’t have to fix it each time.

    This is most obvious after a few full cycles: Instead of daily order breaking down, an anchored power spot keeps basics in place. The desk resets cleanly no matter how many hands or devices swap in. Projects can shift, people can come and go, but the essential cable zone stays predictable—supporting fast returns and steady attention on the real work instead of the logistics.

    Quick Desk Power & Cable FAQs

    How do you practically set up a “power corner” on a shared desk?

    Choose one rear desk corner, typically nearest a wall outlet. Fix a cable box, tray, or weighted organizer in that corner. Route every power brick, charger, and data line through this entry point—don’t let cables migrate across to other zones or dangle into leg space. If cables tend to shift, use clips or sleeves to anchor excess, and label only the primary long-stay lines so every reset sends devices back to the same point—no searching required.

    Why is cable control more urgent in shared workstations?

    Without clear boundaries, power cords and data lines intrude everywhere, forcing resets all day. As more people swap in, the mess multiplies—slowing every user, raising the odds of accidental unplugging, and guaranteeing that every new task starts with someone fixing the layout instead of actually working.

    What’s the most common cable mistake on busy desks?

    Allowing chargers and wires to sprawl unchecked, both on the surface and underneath. This leads to tangles that grab on notebooks, falling adapters, and endless seconds lost to sorting out what goes where. On a busy desk, clean cable management isn’t just aesthetic—it’s critical to keeping work smooth, reliable, and fast to reset.

    Seeing the Payoff: How Anchored Power Brings Calm to Shared Spaces

    Improved desk calm isn’t about surface looks—it’s about how you move from morning to mid-day without being tripped by the same cable twice. Less hesitation, less device drama, less time wasted on micro-resets. That small, lasting change—anchoring power at a single point—quietly prevents momentum loss that scattered setups make routine.

    If your work involves shared desks, frequent device switching, or simple co-working, make the “power corner” your new standard. You’ll feel the reset friction drop with every return—and find out how much smoother work runs when the invisible details finally start working with you.

    Explore the full WorkBasic collection

  • Why Cleaning Electrical Contacts Prevents Flickering and Dim Lights Indoors

    Why does lighting that looked flawless on day one start failing you right when visibility matters most? You switch on the bathroom light and your reflection sits half in shadow. You reach the stair landing—suddenly, a step blurs into darkness. In rooms where movement and clarity matter—hallways, laundry corners, over-mirror setups, tight corridors—lights often flicker, lose focus at the edges, or force you into awkward pauses, even if the bulbs and fixtures are new. The trouble usually isn’t hardware—it’s the quiet breakdown at the electrical contacts: dust, oxidation, or grime building up, steadily eroding performance with every skipped cleaning. Miss this step, and you end up with lights that only look bright at a glance but leave you squinting or guessing where to move next.

    The Overlooked Culprit Behind Flickers and Dim Corners

    In the high-turnover zones—bathroom vanities, hallway sconces, stairway flush mounts—lighting performance slips long before contacts visually show dirt. At first, it’s low-key: a flicker you ignore, a stair landing that feels less certain, a mirror reflection that seems slightly grayer on one side. Over weeks and dozens of on-off cycles, cracks in reliability widen. That once-trustworthy laundry ceiling light starts hesitating to turn on, demanding a wiggle. The stair fixture dims one side of the tread, making you slow at the turn. In these moments, the frustration isn’t just the technical failure but the way it interrupts routines—blocking smooth movement and adding invisible friction to spaces designed for daily use.

    How Routine Neglect Leads to Daily Lighting Friction

    Neglecting to wipe contacts—either during a bulb swap or while reinstalling a fixture—lets dust, skin oils, and room moisture block electrical flow. The effect is cumulative, and in high-use zones, even one skipped cleaning can ripple out:

    • Stairways: Edges blur, shadow bands appear at turns. You find yourself scanning the floor instead of walking through on autopilot.
    • Bathrooms: One side of your face looks dim beneath the mirror. Shaving or makeup becomes a guessing game under a light that used to feel clean and direct.
    • Laundry Areas: A flush mount overhead starts flickering out mid-task, breaking your focus or leaving shirts half-shadowed.
    • Hallways and Corridors: Bright where you don’t need it, fading into dull strips where you want to walk confidently. A section near the entry seems to swallow your pace at night.

    These are not one-off annoyances. They’re the sort of irritations you ignore at first but keep bumping into—until you find yourself adjusting for bad lighting as part of your routine.

    The Slow Fade: Recognizing When Contact Neglect Is the Real Issue

    On install day, every flush or semi-flush ceiling light holds steady—clean, even, quick to respond. Fast forward eight weeks of real use: a semi-flush in the bathroom hums, the mirror zone feels yellowed at the edges, or a hallway ceiling light throws unpredictable shadow lines. The bulbs are fine, yet the room’s usefulness sinks. This shift isn’t about luminance specs or fixture style; it’s about the state of the contacts, ignored through quick bulb swaps and hurried remounting. The point when you tense up before stepping on a stair or lean in to double-check your reflection is when contact neglect stops being invisible. Shadowed sinks, delayed illumination, and distracted movement become part of your daily pattern before you even add “fix lighting” to the mental to-do list.

    Small Habits, Major Difference: Cleaning Contacts as Reliable Maintenance

    One minute with a dry cloth or a dab of alcohol on a cotton swab—especially in steam-heavy bathrooms, dusty laundry rooms, or high-cycle corridors—shifts the baseline. Suddenly, that stair fixture that once needed a bang just works. The laundry room light stays steady through the cycle. Over-mirror sconces shed shadow lines, making the face clear from both sides, not just the one closest to the bulb. The room doesn’t just look illuminated; it works better in motion, at routines’ pace. The real benefit shows up during the hundredth use, when you forget to think about the light completely—because it’s just on, every time you need it.

    The Price of Skipping a Step: When Small Friction Becomes Repeat Aggravation

    Simply swapping bulbs or upgrading fixtures without cleaning contacts is a cycle of disappointment. Electrical instability snaps back—lights hesitate, glare builds on mirrors, stair turns lose clarity, hallway paths dull at the edges. Each new attempt at a “quick fix” leaves friction in its wake: you move slower at stair landings, press the wall switch twice, or find yourself repeatedly squinting where you should see clearly. Trust in even a high-end fixture erodes quickly when the lighting never works the same way two days in a row. The thin but real line between a room that glows and a room you can actually use comes down to these tiny connections.

    Real-World Tips for Keeping Fixtures Dependable

    • When changing any bulb or adjusting a fixture, pause to clean the contacts using a dry cloth or a quick swipe of isopropyl alcohol. It’s seconds of prevention that keep reliability in place.
    • Zero in on bathrooms, laundry rooms, stairways, and hallways—these are the “friction zones” where moisture, dust, or daily cycling push contacts to the edge fastest.
    • If persistent flicker or dimness survives new hardware, focus on contact quality before jumping to bigger upgrades. Many failures are about physical connection, not high-tech fixes.

    Lighting You Can Count On Starts at the Smallest Connection

    The distance between reliable, trustworthy lighting and a room that interrupts your routine is often measured in a fingertip swipe at the contact. Most indoor-lighting headaches start—not with faulty fixtures—but with tiny layers of neglect. Each missed cleaning stacks up as shadowed stair turns, faded mirrors, and hallways that look bright yet still make you hesitate. It’s not about collecting the newest model or keeping the room spotless—just about making each reconnection count, stopping small failures before they become part of your routine. Dependable indoor lighting comes not from spectacle, but from the minor, nearly invisible maintenance that gives every switch real, repeatable certainty.

    LightHelper – Practical indoor lighting for dependable everyday use

  • How Cable Management Transforms Lighting Beyond Outlet Limits

    In most rooms, your lighting setup works until your routine changes—or until one too many cables cross your line of sight. What looks balanced at first unravels quickly when outlets force lamps, LEDs, or task lights into awkward, cable-driven positions. Instead of clean edges and reliable light, you end up with cords dictating movement, desk setups that interrupt your flow, and work zones that stay half-lit because the nearest outlet is too far or too exposed.

    When Outlets Dictate Your Lighting: The Everyday Friction

    The first sign something isn’t working? You have to layout your desk or table around where the cord can reach—not where the light works best. A single shift of a laptop, or even turning a chair, is enough to snap a hidden cord into view, drag a lamp sideways, or tangle your feet. Under-cabinet strips fall short at the edge where you actually prep food, and any attempt to clear clutter becomes a dance: catch the lamp, dodge the cable, push the extension strip back yet again. Glance around and the room might look refined, but try using any new surface or adjusting a task light and the setup’s weak spots show up in full.

    Most ‘tidy’ cable fixes collapse under daily routines. The illusion lasts until someone rearranges, cleans, or needs to share a work surface. Suddenly, there’s a choice: settle for glare, weak light, and cable snags—or give up reliable lighting just to keep things out of the way. There’s no real solution when fixture placement is decided by where it can plug in, not where you actually need light.

    Where Good-Looking Lighting Setups Go Wrong

    Running cables behind shelves or disguising them in raceways helps for a day, but doesn’t solve weak spots in coverage. A strip light along the cabinet’s edge looks clever—until the outlet distance creates a bright patch on one end, a dim corner on the other, and a bundle of excess cord trapped under kitchen utensils. Move anything, and the compromise slides right back into view: lamps no longer centered, task lights just missing the usable edge, and practical work zones marred by cable drag or visible adaptors.

    Even rigid cable clips lose the battle as devices shift. Tablet chargers replace lamps, someone brings in a fan, or storage baskets migrate along the shelf—and every change exposes the patchwork. The real problem wasn’t clutter; it was a setup never designed to hold up as you live or work around it.

    Real Scenes: Lighting That Doesn’t Keep Up With Life

    The Shared Table Struggle

    Shared tables never seem to land where outlets do. You set up for a meeting or collaborative work, only to realize the center is always in partial shadow, the edges over-lit, and battery lamps ending up drained halfway through the afternoon. Extension cords and long cables snake along the table, snagging on folders or bags. By the week’s end, the “solution” is an unstable chain of chargers, wobbling lamps, and a guarantee someone’s elbow will send a cable hitched over the edge, again.

    Under-Shelf Lighting That Misses the Mark

    Mounting a slim LED bar on a kitchen shelf should solve shadows, but if the socket is in the wrong spot, the cord cuts diagonally across space or bundles at the weakest point. The result is predictable: the far corner fades, leaving the spot you use most half-lit. Cables gathered to avoid the sink or block drawers become a daily annoyance, not a hidden fix.

    Patching but Not Resolving: Why Neat Cables Alone Don’t Fix It

    Clipping and hiding wires delivers short-lived order, but as soon as a laptop charger is swapped for a lamp, or routines demand a new plug-in, the “clean” look breaks. Cables tear free, task lights shift out of reach, and the original system returns—visible, awkward, and ever ready to trip someone up. Especially on desks and counters that are used by more than one person, cable management that only covers appearance can’t support actual work or living patterns.

    The Payoff of True Cable Management

    Reshaping where cables go—not just hiding them—forces light to match how you use a space, not how a wall was wired decades ago. For example, running a channel along a window ledge, tucking lamp cords precisely into slots, and facing all plugs into a single power strip hidden out of sight—this kills the daily game of avoiding trailing wires. The edge stays free for shifting lamps, cleaning, and sharing. Cables don’t fight for space or slide into high-traffic zones. The room passes its real test not right after the install, but every time things are moved or shared: cables stay out of the way, surfaces don’t become cord parking, and light coverage doesn’t collapse whenever one fixture gets unplugged.

    The shift is immediate in routine: lights actually stay aimed where you need them. Chairs, laptops, and kitchen tools travel in and out with nothing to re-route, no tangled extension strips to lift, and no “cable-pile” shadow running down the edge of your vision. Weeks later, it’s the absence of cable drama—no cords underfoot, no lamps dragged off balance, no one pausing to step around a power strip—that signals the setup is finally working.

    Position Lighting for Use, Not Outlets

    With real cable structure, you can mount wall lights, bracket lamps, or low-profile LEDs based on how you work, read, or relax—not just how close you are to a socket. A managed cable system lets you install at the ideal height, line up coverage, and keep every run off dust-prone surfaces. When your layout changes—swap chairs, tilt a fixture, move from solo work to a group call—lighting follows need, not wiring constraints or old outlet positions.

    Tip: Conceal cords behind cabinet lips or run them through back seams instead of along open edges. This not only blocks visible clutter and dust but ensures task areas (like kitchen counters or desk edges) are actually lit where you use them, not where the cord will reach with the least resistance.

    What About a Room Where Outlets Are Limited?

    Even in rooms with only one or two sockets, intentional cable routing can shift which surfaces function and which don’t. Use a discreet, short-cord power strip tucked under a cabinet or behind a desk edge, not left loose in main sight lines. Managed correctly, you spot a real power shortfall (and decide on an upgrade or extension) before cables pile up in chaotic, unusable tangles. In most setups, a single managed run is enough to keep cables off prime surfaces and let each lamp or task fixture do its real job—lighting the spots you actually touch and use.

    Lived-In Lighting: How Cable Choices Hold Up Over Time

    The failure point for most setups isn’t day one—it’s after a week of moving, cleaning, and adjusting. Cables drift, surfaces start collecting blocky extension strips, and lighting gets nudged out of actual use. The difference with strong cable support isn’t invisible polish; it’s the fact that prime surfaces stay open, lighting covers what matters, and cords stop rerouting your routine. The best result? No one mentions cables at all, because finally, your lighting works for the way you actually move and live, not just the way it looked the first time you staged the room.

    Find practical lighting, support, and cable management for real, repeatable indoor use at LightSupport.

  • Transform Your Workspace by Concealing Power Bricks for Seamless Use

    Provisional workspaces always betray themselves: tangled cables underfoot, power bricks scattered along the desk’s edge, and reach zones that punish every shift in position. If you’re swapping devices, dragging chargers in and out, or flipping between projects all day, it’s the power bricks—heavy, awkward, never quite in place—that turn a clean-looking desk into a trap. Hiding them isn’t about surface polish; it’s about clearing the recurring obstacles that steal your time and slow down every single return to work.

    Spotting the Difference Between “Tidy” and “Truly Ready”

    What looks clean at first pass—a line of cables tucked with clips, adapters nudged to the side—unravels once you actually use the setup. By late morning, you’ve knocked a charger crooked with your knee, nudged a power brick along the floor with your foot, and hesitated before pulling a notebook closer, knowing a cable might snag. Even after a careful reset, the desk surface starts surrendering to adapters and cord slack before you finish your first cycle of work.

    Desk organization fades fast under real use. Plug in a tablet here, disconnect a headset there, adjust the monitor during a video call—and the friction spills back into view. Each snag interrupts focus, each crooked brick erodes order. It doesn’t matter how neat the cables looked; the moment you need to shift or reach, you’re reminded the system isn’t actually working beneath the surface.

    Why Power Bricks Become the Unseen Culprit

    High-use desks aren’t static: laptops, dual monitors, phones, tablets, extra drives, and chargers accumulate. Each new plug means another brick taking up space, another path to tiptoe around. Instead of a smooth sweep from chair to monitor to keyboard, you find yourself steering limbs around obstacles just to avoid another tangle—or pausing before every movement, calculating whether it’s worth fighting with the cables.

    Even if the desk looks under control, one posture shift exposes the weakness. Push your chair in, lean for a printout, or try repositioning after a call—then realize a dangling brick has caught on your foot, or a looped cable trails awkwardly across your lap. Over several days, these friction points start controlling your habits: chairs left half-pushed in, monitor placement set to avoid knocking cords, and a shrinking working surface as adapters retake the territory you thought you’d cleared.

    How Hidden Power Bricks Change Everyday Workflow

    Moving power bricks out of sight—with an under-desk cable tray, a rear-mounted box, or sleeved anchor points—does more than clear legroom. It eliminates the silent interruptions that undermine focus: no more shifting papers to dodge a snaking cord, no more sidestepping swinging bricks, and no need to check below the desk before each push-in. The core test is this: aside from the main charger you grab every day, old cable choke points should basically disappear from your working awareness.

    Reset time drops, focus returns: at session’s end, you’re not untangling a mess or shuffling chargers back to hidden corners; instead, you just leave the desk, and it’s still ready for the next cycle. Whether you’re jumping between keyboard and notebook, or pausing for a call, motions are direct—no detours for neglected cords or sliding bricks breaking up your flow.

    Scene Shifts After Hiding the Bricks

    • You push your chair in—nothing blocks the route, no pause or glance underneath
    • You reach for notes beside the keyboard and find real open desk space, not cord clutter
    • You switch a device mid-project and never have to lift a cable out of the way
    • You leave for the day and don’t return to a reset chore tomorrow

    This isn’t about perfection. It’s about the small obstacles that stop eating at you all week—until their absence becomes striking. No more stepping around invisible tripwires. No more ritual untangling before you can move. The desk doesn’t just look better; its routines run smoother and stay smoother, even as the workload shifts and stacks up.

    What Happens If You Only Reorganize (Not Reroute)

    Tidy-up hacks—cable clips, surface organizers—tame the view from above, but rarely solve the lived problem. Bricks still slip into working space, cord loops gather wherever hands move frequently, and stray adapters work their way back to the very path you need clear. Friction reasserts itself and desk “cleanliness” remains a short-lived illusion.

    Rerouting cables completely—using anchored trays, rear-edge boxes, or sleeves placed out of movement lanes—makes a practical difference you notice in ongoing use. Now, device swaps and midday charging don’t leave cords and bricks creeping onto the desk. The difference is simple: you stop improvising; you start working. The desk stops feeling temporary, and instead, it becomes a station designed for return cycles, not just a moment of calm between cleanups.

    Choosing the Right Solution for Your Setup

    Your desk type, device mix, and—critically—your movement patterns all shape which cable structure will actually help. If you reposition between seated and drafting stances, or you’re constantly swapping devices, look for an easy-open cable tray: it’s flexible enough for access and keeps cables locked away from main traffic zones. If you mostly keep hardware static and aren’t changing setups often, a closed cable box at the far rear keeps clutter out of reach with no compromises.

    Key mistake to dodge: mounting storage where it blocks natural leg and chair clearance. A tray that looks elegant but bumps every knee quickly becomes just another obstacle. Leave all major sweep and reach zones open—what feels organized on day one should still support spontaneous movement and quick resets after weeks of use.

    Quick Answers for Common Cable Headaches

    Why does hiding power bricks matter if my desk is already “clean”?

    Because visual order isn’t enough—a hidden brick still adds drag every time you adjust position, swap devices, or try to use full desk depth. True clarity is when you work without pausing to rescue cables or step around adapters, even after back-to-back task switches.

    Will a cable tray or box get in the way or block movement?

    No—when trays are mounted at the rear underside, the main chair and leg paths stay open. Only mount storage away from repeat travel lanes for legs and feet; otherwise, you’re exchanging one friction for another.

    How do I know it’s time to overhaul, not just tidy?

    If the same cable tangles reappear after every reset, if plugging or swapping devices always means moving adapters back into place, or if you hesitate to slide in your chair, it’s clear: you need full rerouting and anchored storage, not just one more tidy-up session.

    What Changes—and What Doesn’t—After Upgrading the Setup

    When the bricks vanish, the desk stops feeling like a provisional fix. There’s more legroom, clearer sightlines to the monitor, cleaner reach zones—routine tasks feel direct rather than complicated by obstacles. Typing, switching devices, or jotting a note no longer means negotiating cords or weighing the cost of moving something out of the way. Of course, every setup has quirks: the job isn’t perfection, but friction that actually stays gone after repeat cycles.

    The surest sign of success? You stop noticing your cable management altogether. There are fewer interruptions, fewer micro-decisions before every move, and less daily time burned on system maintenance. Suddenly, the desk isn’t just ready for a photograph; it’s ready for the next session—and the next, without a pause.

    Explore the full WorkBasic collection

  • How Proper Cable Management Transforms Wall Sconce Installations

    Exposed sconce cables don’t just disrupt aesthetics—they sabotage the function of nearly every space they cross. What looks clean on install—glow above a reading chair, neat symmetry beside a bed—is undercut by a cable that drops down the wall, undermining both the mood and the routine. Suddenly, every day brings new friction: dust grabs every centimeter, cords snag on chair legs or sleeves, and your eye is pulled back to the jumble long before you enjoy the light. This isn’t a rare annoyance; it’s a routine problem wherever wall-mounted lights meet real-life use, especially in rooms that demand more from their lighting than just staying put.

    Where Exposed Cables Slip into Daily Life

    The slide from minimal to messy quietly accelerates with each small move. Desk corners, bed edges, and high-traffic walkways turn loose sconce cords into obstacles. Shift a desk or reach for a charger, and the cord slips off its anchor. Vacuum too close or bump the headboard, and the line that was flush collapses into awkward bends or sags, instantly visible from across the room. You find yourself not just re-tucking—a task that never lasts—but placing furniture less freely, hesitating to clean properly, and distracted by the cable long after the novelty of your “clean” lighting install fades.

    Consider the first week after mounting a wall sconce above a desk: the cable initially hugs the wall. Midweek, papers are shuffled and the chair gets pulled out—now the cord is tugged off its track, curling against the wall or making an awkward loop at the baseboard. In a bedroom, the same cycle resumes each night as you shift a pillow, drag the lamp cord, or budge the bedside table; the cable subtly untethers itself, becoming a new catch point for dust and distraction. Over and over, tight corners, shelves, and multipurpose walls expose the limits of any “placed, not managed” light, each routine tug compounding the disorder.

    “Installed” vs. “Placed”: What the Cable Tells You After a Week

    That fresh “finished” look fails quickly when the cable isn’t anchored for real life. An installed light should mean the cable stays almost invisible, the plug remains solid, and no amount of cleaning or rearranging causes a shift. Placed lights, with floating lines or barely-stuck clips, betray themselves: cables dip, accumulate dust, or get yanked sideways as people or furniture inevitably test the system. Especially in compact rooms—where outlets are in high demand and surfaces serve multiple roles—slack and sagging force you to repeat the same cable rescue routine: pushing in plugs, brushing away dust, nudging cords back behind corners, never quite restoring the original clean look you tried to achieve.

    Each week, these minor snags multiply. Shared workspaces or walkways see more elbows, more shifting legs, more erratic furniture edging into cable territory. The result isn’t just visual: moving the couch or shelf isn’t about refreshing the space anymore—it’s about chasing and concealing a line that refuses to stay put.

    The Clean-Looking Setup That Doesn’t Hold Up

    Pinning a cable in a dead-straight line or painting it to blend with the wall might look resolved for a day or two. But ordinary movement undoes decorative fixes fast. A sliding chair, a stray mop, or a restless night will scroll that cable back into view. The spot behind a desk or under a floating shelf collects slack and dust stripes—never truly invisible, just transiently disguised. Over time, these points become visual interruptions you adjust for every week: pushing a cord flush, nudging furniture to hide it, or cleaning around an awkward bulge you never planned for.

    Instead of staying streamlined, the “finished” effect deteriorates into something obviously incomplete—a cable that interrupts both how the surface works and how the room feels to live in. What began as a hidden line grows into a repeat annoyance, and every tidy-up is quickly unspooled by normal habits.

    How Proper Cable Management Changes Daily Use

    Upgrading to rigid cable channels or positive-locking clips—ideally, low-profile types with paint-matched finishes—re-aligns the entire setup. The cable drops vertically from the sconce into a fixed route: no more creeping slack, no more semi-visible bulges detouring around table legs or along floors. No more plugging things back in by hand, no more vacuuming around an exposed cord, and no more habit of glancing back to check if the setup survived another routine day.

    Cleaning turns straightforward: vacuums pass without tugging, brooms don’t snag stray lines, and the surrounding floor and baseboard keep their clarity. Furniture can press up against the wall without shifting the cable out of alignment. You stop fixing and start forgetting—the managed cable just stays put, and your sconce or lamp does what it’s supposed to do: provide light, not extra work.

    Months in, that channel or snap-in guide is still holding the path cleanly; no new dust gathers in awkward lines, and the cable route looks nearly new. There’s a functional calm at the room’s edge, one you only notice after moving, cleaning, or rearranging without finding the lamp cable in your way.

    Choosing the Most Reliable Fix

    Rigid surface channels and click-in guides solve what tape and sticky pads can’t: they clamp the cord securely, stand up to gravity and busy hands, and don’t slip out of place. A channel just wide enough—around 12mm, properly matched to the surface—lets the cord vanish visually but keeps it locked in, week after week. Unlike drilling brackets or staples, surface channels can be removed and patched easily, protecting both rented walls and future rearrangement. No permanent holes, less hassle if you decide to swap or move a fixture.

    Mistakes That Keep the Mess Coming Back

    Looping a cable behind a table or letting it drape between obstacles might hide it for a day, but slack and debris appear almost instantly. Every unconstrained cable draws lint, creates cleaning headaches, and invites another cycle of straightening and frustration. A “placed, not guided” sconce is never finished—it slips, shifts, and bumps its way into becoming the part of the room you fix most often.

    The pattern is predictable: the vacuum sticks, the dust lines grow, plugs loosen, and each catch pulls your attention away from the space itself. Instead of enjoying the lighting, you inventory the ways it interrupts the room.

    Why the “Installed” Difference Matters Most Where You Live

    The real payoff of proper cable management isn’t a prettier fixture—it’s a room that works without compromise. In rooms that blend rest and work, in corners where surfaces overlap and furniture shifts often, an anchored light keeps its place and keeps your routine running. The difference shows up in months of not noticing the cable, in never needing to re-tuck or un-snag, in finding both the light and the wall ready for whatever you need next.

    Resolving stray cables means fewer daily interruptions and a routine that stays smooth no matter how often you rearrange, clean, or simply live in the space. Done right, cable management isn’t just appearance—it’s the shift from constantly adjusting to finally using the room as you meant to.

    Explore practical cable channels, mounting options, and support accessories at LightSupport.

  • Why Patience Matters When Installing Ceiling and Wall Lights

    Flush-mount ceiling lights look finished the second you tighten the screws—until daily routines start picking them apart. Walk the same hallway half a dozen times before breakfast, and you’ll notice: what felt sealed and solid on day one can slip, tilt, or shadow as floors vibrate, doors bang, or humidity swells the air. Suddenly, that “done” fixture throws a warped shadow on the bathroom wall, leaves a stair tread half lit, or makes the laundry counter’s far side vanish into dimness—all because a flush isn’t really fixed until it survives real use.

    Why Do Ceiling and Wall Fixtures Come Loose?

    The first warning isn’t always visible. Subtle rattles, unexpected shadows, or a fixture that tilts just enough to channel light at the wrong angle—these are quiet signals of an install that didn’t adapt to the room’s real pressure. The culprits are rarely catastrophic: vibrations from every upstairs step, doors catching drafts and slamming, or a bathroom’s moisture stretching metal and loosening gaskets. In the spaces you actually live in, even small changes—humidity swings, busy movement—chip away at the mounting plate or seal, leading to slow, persistent drift away from the ceiling or wall.

    Quick tightening usually backfires. Squeeze a fixture too hard in one session and it compresses unevenly. The next morning, pressure “settles out”: a skinny trim gap appears, a glass shade lists to one side, or a streak of glare cuts across the corridor. What starts as invisible becomes hard to ignore: shadow lines inch across the wall, reflections in your mirror turn patchy, and even minor tilts become daily aggravations. Not catastrophic, just a steady leak of visual comfort every time you cross the room.

    Real-World Friction: When “Flush” Fails Under Routine Use

    The gap between how a fixture looks on day one and how it works a week later shows up in small, relentless ways. On a stair landing, you step and feel a “cold patch” where one tread falls into shadow because the ceiling light has drifted. In the bathroom, you lean in for close shaving and catch your face glowing unevenly in the mirror—one side harsh, the other dull. In a laundry room, you lose track of socks on the edges because a half-tilted fixture beams past your main work surface. All day, these near-misses repeat in the background—mundane, but they signal the fixture is slowly failing its job.

    That failure isn’t just cosmetic. In tight hallways, a five-millimeter lean from the base means sidelight spills sideways, leaving the walking route uneven and dull at the edges. Movement feels less certain; corners seem to close in. A space can look lit but still perform poorly, disrupting habits with glare, patchy visibility, or new shadows that never should have appeared.

    This is how you spot the difference: lighting that felt right out of the box, but after a week of real-world movement, becomes a visible interruption instead of an invisible aid.

    The Low Hallway Test: Where Imperfection Shows Up Fast

    If you want to catch a weak installation, walk a low-ceilinged hallway after a few days of normal chaos. If the fixture’s base slips even slightly, curved shadows arc down the walls, and once-clear paths flicker as family traffic or steamy air jostle the mount loose. You feel the light “break up” as you move—never fully dark, but no longer smoothing your routine. Spacing feels tighter. The room shrinks around the leftover shadows. In families, this isn’t rare: children slamming doors, regular laundry cycles, a week of changing weather—all test whether the light stays anchored or starts shifting under the pressure.

    Taming the Shift: Why Two-Stage Tightening Works

    The solution is less brute force, more patience. The most reliable fix isn’t super-tightening—it’s a two-step process: mount the fixture just snug to start, then wait at least a day as gaskets, metal, and ceiling settle. This pause lets unseen shifts in material finish on their own, so when you return for a final hand-tighten, the light stays flush without being stressed into failure.

    You see the payoff in fewer headaches. Hallways stay evenly bright; laundry rooms keep all surfaces visible. Mirrors in bathrooms return to even light rather than patchy glare. After this two-step tighten, you don’t face the weekly ritual of hunting down new fixture tilts or shadow stripes. Instead, your lighting remains steady, working with your daily routines—not interrupting them with surprise gaps or wobbles.

    Every Space Has Its Tolerance

    High-humidity spots like entryways, bathrooms, or laundry nooks test any installation. Here, even solid “safe room” installs benefit from patience: that 24-hour wait creates more stability, especially where you can’t constantly retighten. The result is visible—a fixture that simply holds its place, spreads light evenly, and makes the daily routine feel unbroken.

    Practical Lighting Q&A: Getting It Right the First Time

    How tight is “tight enough” for ceiling or wall lighting?
    Tight enough to support the fixture flush, but always with a little room for material settling. Over-tightening on day one almost guarantees rebound gaps or a slow tilt as the parts adjust. “Snug, then settle, then final hand-tighten” outlasts any one-step clamp-down.

    Do I really have to wait before final tightening, or only for tricky rooms?
    You’ll see benefits everywhere, but in vibration-heavy or humid spaces—bathrooms, stairways, entry halls—it’s essential. The pause allows all mounting surfaces and seals to adjust naturally, so you aren’t chasing down annoyances later.

    How can I tell if the mount was rushed?
    Look for quick signs: new shadow lines after a day or two, the start of a trim gap, or a glass shade that “walks out” of alignment. In active rooms, these flare up quickly if skipped—and skipping means you’ll be back under the fixture sooner than you think.

    Beyond Looks: Lighting That Carries Its Weight

    The difference between a room that’s just “lit” and a room that actually helps you see is real: a fixture that holds steady makes stair runs safer, keeps mirror light balanced at all hours, and stops you from squinting for the edge of the counter. When lighting stays where it belongs, the room feels finished every day—not just the day after installation. The real win is simple: light that works invisibly, supporting your routine instead of adding new frustrations.

    http://www.lighthelper.myshopify.com

  • Why Focusing Desk Lamp Light on Your Hands Boosts Productivity and Comfort

    Most workstation lighting is chosen for the desk’s appearance, not for the work you actually do. But if you sit down to repeat tasks, shift between keyboard and notes, or work through a late afternoon stretch, the gap between tidy light and useful light becomes hard to ignore. A lamp that lights the full surface looks “finished,” but the moment you move beyond that single centered patch—reaching for a charger, flipping pages, dragging a notebook closer—you start battling shallow shadows and surface glare that drain focus and energy hour by hour.

    Lighting for work isn’t about flooding the whole desk—it’s targeting the places your hands move and your tools land, again and again. Broad, even light across your workstation might keep things Instagram-tidy. But it also turns every cable, adapter, or backup pen into constant visual noise, and forces you to chase “good” light for every task shift. Focused, hand-area lighting does more than mute clutter: suddenly, micro-adjustments and side shadows fade out, and switching from one tool to the next stops feeling like a reset. Over a single packed week, you notice it—the difference in how easy it is to clear the desk, avoid fatigue, and stay on track mid-project.

    Desk Light Decisions That Show Up in Daily Routine

    Look at an organized setup: monitor centered, under-desk drawer to the right, everything routed with trays or boxes, cable clips around the back edge. On paper, it’s “solved”—but real work still bogs down. You’re shuffling your chair, tilting a clamp lamp, or propping up sheets just to chase a usable pool of light. Even with smart storage or a neat cable path, supplies drift into the gloom at the desk’s edge. Mid-task, hands stray past the beam and you’re forced to angle your wrist or rotate the whole chair to see a detail clearly. The light you picked for neatness stops matching your actual work path within days.

    This gap becomes routine: pens and sticky notes gather where the lamp hits hardest, while the rest—chargers, reference books—slide into the dim edges you ignore until clean-up. Resetting your desk means dragging everything from shadow to center, not rethinking how you work. The desk looks streamlined—but your workflow keeps running into friction, especially if you’re repeating the same switching and stretching motions every day.

    How Shadows and Glare Fail Real-World Desk Use

    Take the classic late-day scenario: editing a document at a “finished” workstation, lamp posted over the monitor on a tidy riser. The surface glows, but your typing hands cut straight through the beam, making an alternating pattern of glare, dead shadows, and missed texture. Each interruption—squint, chair nudge, lamp adjustment—breaks your rhythm and focus. When you push supplies aside or stack a notebook, your own arm blocks the task light and you lose another minute fumbling for clarity. Over the course of a long session, productivity doesn’t just slow—it fragments, turning lighting into a maintenance problem instead of support.

    These small disruptions add up fast: a workstation that felt dialed in that morning becomes awkward by 3 p.m., after enough rounds of switching lamps or shuffling organizers to escape that shadow edge. Lighting becomes another thing to “fix,” not a tool that you can actually forget about while working.

    Making the Switch to Hand-Focused Lighting

    The real shift wasn’t a new lamp, but a new aim: putting light exactly where hands, tools, and notes actually land—every task cycle, not just for show. Instead of stepping into and out of shadows for every step (glancing at a reference, sketching a section, recharging a device), the work area stays in steady, clear light. Switches—from keyboard to notebook, or from digital to paper—go quicker and break rhythm less. This doesn’t just speed task flow, it lowers the reset burden between sessions.

    Here’s what changes during a week of real use: Placing a clamp lamp arm so its beam stretches directly over your work zone—keeping the base clear of drawers, not fighting against an under-desk tray—eliminates the cable snags and awkward supply bumps that haunted the “centered” setup. Now, tools and notes stay where you actually need them. End-of-day resets shrink: instead of multiple moves, a single sweep organizes the desk. Small clutter stops piling up, and you spend less time repositioning light, more time working.

    Breaking Down the Real Advantages—And the Missed Opportunities

    Hand-focused lighting delivers:

    • Sharper task focus—your “active zone” is always visible, with no shifting shadows or distracting glare
    • Less unnecessary movement—hands rarely pass out of light, so you stop sliding the chair, hunting for a clear spot, or juggling supplies just to see
    • Reduced visual clutter—letting edges of the desk fade soft means loose items aren’t always in the way
    • Quicker resets—once your main work area stays consistent, routine cleanup shrinks from daily chore to a few seconds’ work

    On the other hand, broad surface lighting comes with hidden costs:

    • Random clutter is always in view, whether you’re using it or not, pulling at your attention when you need to focus
    • Frequently-used tools gravitate to the brightest patch, leaving the rest of the space ignored and crowded
    • Simple tasks—like jotting a note or checking a secondary device—start dragging out, because you have to adjust the lamp or your posture every time

    FAQ: Tuning Your Lamp for Real Workstation Performance

    How do I position a desk lamp to avoid hand shadows all day?

    Set the lamp so the beam falls slightly forward and down, right over where your wrists, notebooks, or active devices actually work. The light should cover your typical reach and movement, not just the geometric center. Check by sliding your hand through routine motions; if you hit a shadow or glare, adjust the arm, not your workflow.

    Does hand-focused light work for setups with multiple monitors or shifting work zones?

    If you anchor your routine—keyboard, sketch pad, device dock—focused light helps reduce interruptions and strain. For setups where you move between different equipment or split tasks side-to-side, flexible arms or under-shelf bar lamps make it easier to keep the beam where work happens. The key is quick, one-step adjustability—not a lamp that adds another reset as you go.

    What happens if I skip hand-area lighting and stick to whole-desk light?

    You end up working around the lighting instead of with it: awkward reach, eye fatigue, moments spent dragging a lamp or moving tools back toward the center. The longer your session, or the more your tasks change, the more these interruptions eat into time and energy—especially as the quality of daylight shifts through the day.

    Not Just Tidy—A Desk That Works for You Every Time

    Lighting needs to match the real rhythm of desk work, not just give the surface a uniform glow. A tidy desk is only stage one—if the tools, light, and reach don’t sync with how you actually work, friction sneaks back in. After a week with lighting that follows your workflow—not just your layout—setups feel less crowded, reset time falls, and focus recovers faster. The appearance stays clean, but the real difference is what you notice after several tough sessions: a desk that works at hand level, not just a surface that photographs well.

    Explore the full WorkBasic collection