Author: jaesoon_admin

  • Why Flexible Zones Outperform Fixed Layouts in Small Outdoor Spaces

    The real test of an outdoor setup never happens on day one. A space that looks perfectly organized—patio edged with tidy shelves, a side strip freshly cleared—carries an invisible timer. Come back two weeks later, after rain, projects, and new gear, and the routine reveals what the setup can’t handle: a hose snaking across the walkway, tools wedged together, bins already overflowing into the best shortcut from gate to door.

    The Real-Life Test: When Storage Meets Real Use

    It’s simple to feel satisfied with a weekend’s work—wall units leveled, garden tools lined up, floor space opened at last. But as routines kick back in and the seasons change, the cracks widen. The trowel that barely fits now blocks the watering can. Bike helmets multiply on the rack meant for boots. Movement slows, and suddenly, what started as better flow is now a string of small obstacles: clattering handles, the stepladder lounging in front of the only outlet, plastic bins stacked high enough to tip when you pull the bottom one free. The daily act of returning or retrieving even a single item becomes a negotiation with the arrangement itself.

    Flexible Zones vs. Fixed Layouts: When “Looking Right” Isn’t Enough

    Anyone with a multipurpose outdoor strip—the patio edge doubling as tool storage, that narrow side-yard, or the classic garage threshold—knows the seduction of clean, fixed layouts: a wall grid, permanent shelves, a designated rack for everything. On setup day, it echoes a magazine spread. But new needs arrive relentlessly: a leftover paving stone, an umbrella that won’t stand, another bag of soil, last month’s forgotten plant stakes. Inevitably, one zone starts swelling with the overflow. Suddenly you’re pulling out three bins to reach what’s behind them, or doing a lopsided dance to drag the mower past something that never should’ve been in the way.

    Real scene: “The neat shed” in early spring is all intentions—a crisp path, tools on the wall, buckets nested. Fast forward six weekends: clutters start pooling. Garden hoses don’t fully rewind, soccer balls drift into the walkway, the wheelbarrow migration involves a brief tool-rescue operation every time. By summer, watering the border plants means weaving around a thicket of unsorted gear and side-stepping the permanent pile-up in that one awkward corner.

    Flexible Zones in Practice

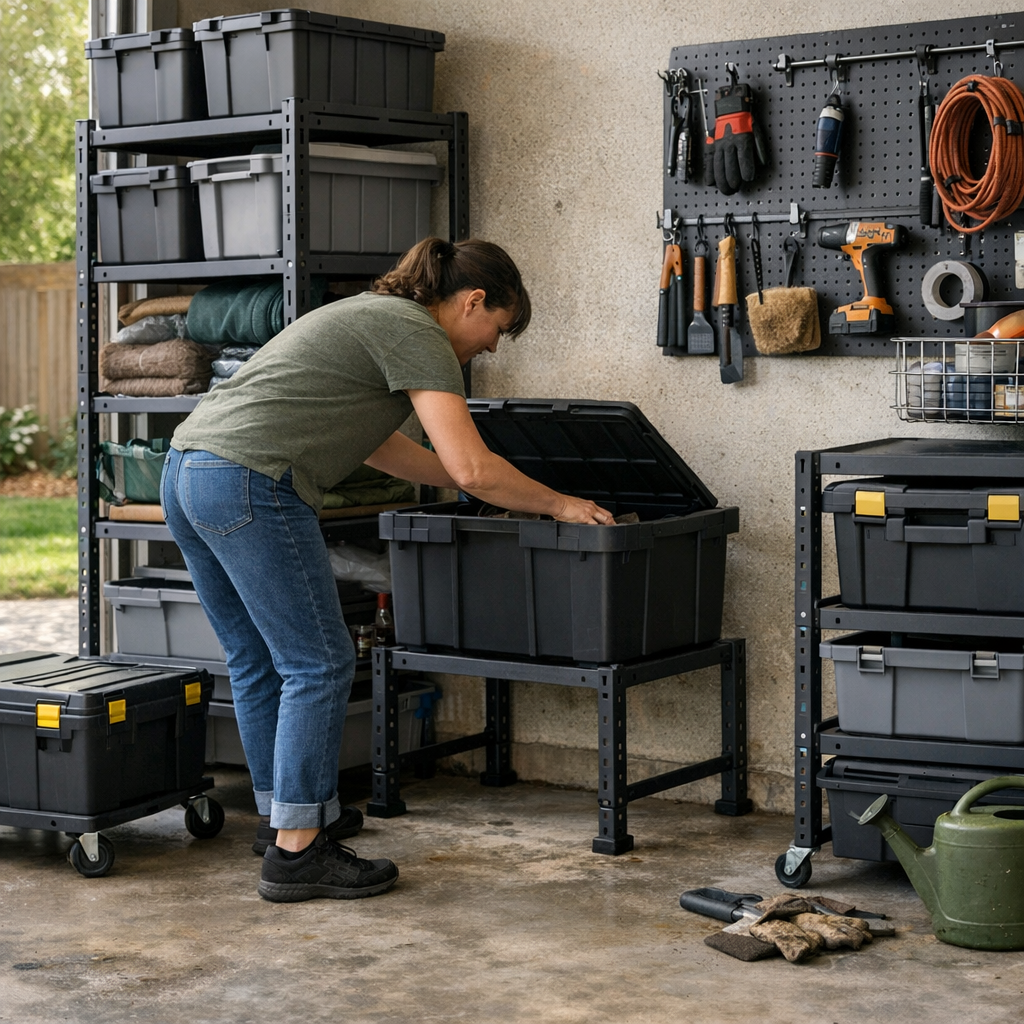
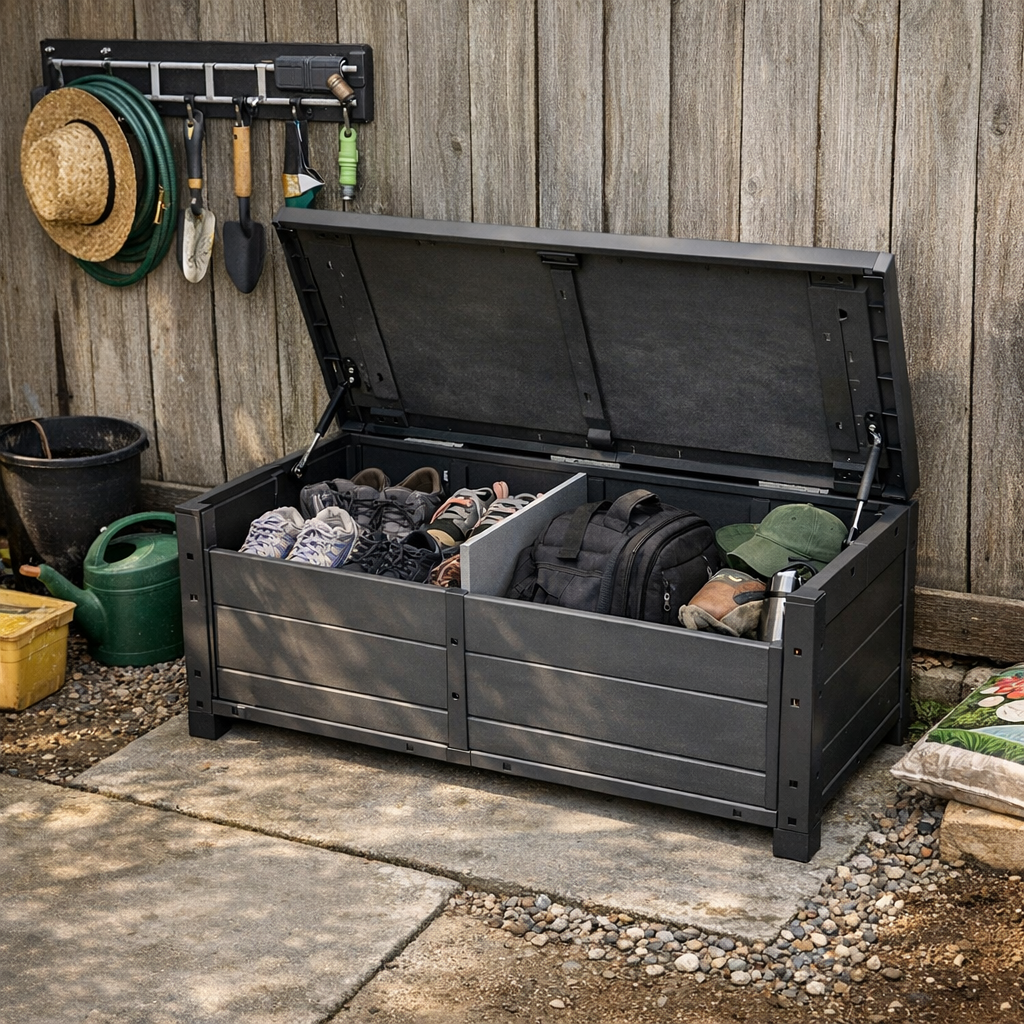
    Unlike rigid built-ins, modular racks, mobile carts, and stackable bins absorb real-life shifts. One extra tool? Add another bin, not another headache. Seasonal overflow? Slide out a rack, shuffle zones, keep paths open. Instead of being boxed in by the layout, you move the pieces—so minor changes don’t trigger a full re-organization and the return path to each item doesn’t keep getting longer.

    Why Clutter Creeps—And How Boundaries Snap Back

    The snag with flexibility: when nothing has a border, everything bleeds together. The gloves join the pool toys “just this once.” The overflow bin turns into a universal drop spot. One fuzzy weekend, you’ve gone from sorted to sprawled, with every clear surface up for grabs. Rather than a setup you can reset in seconds, you get scattered piles and an endless round of shifting things from zone to zone.

    Setting Boundaries That Actually Hold

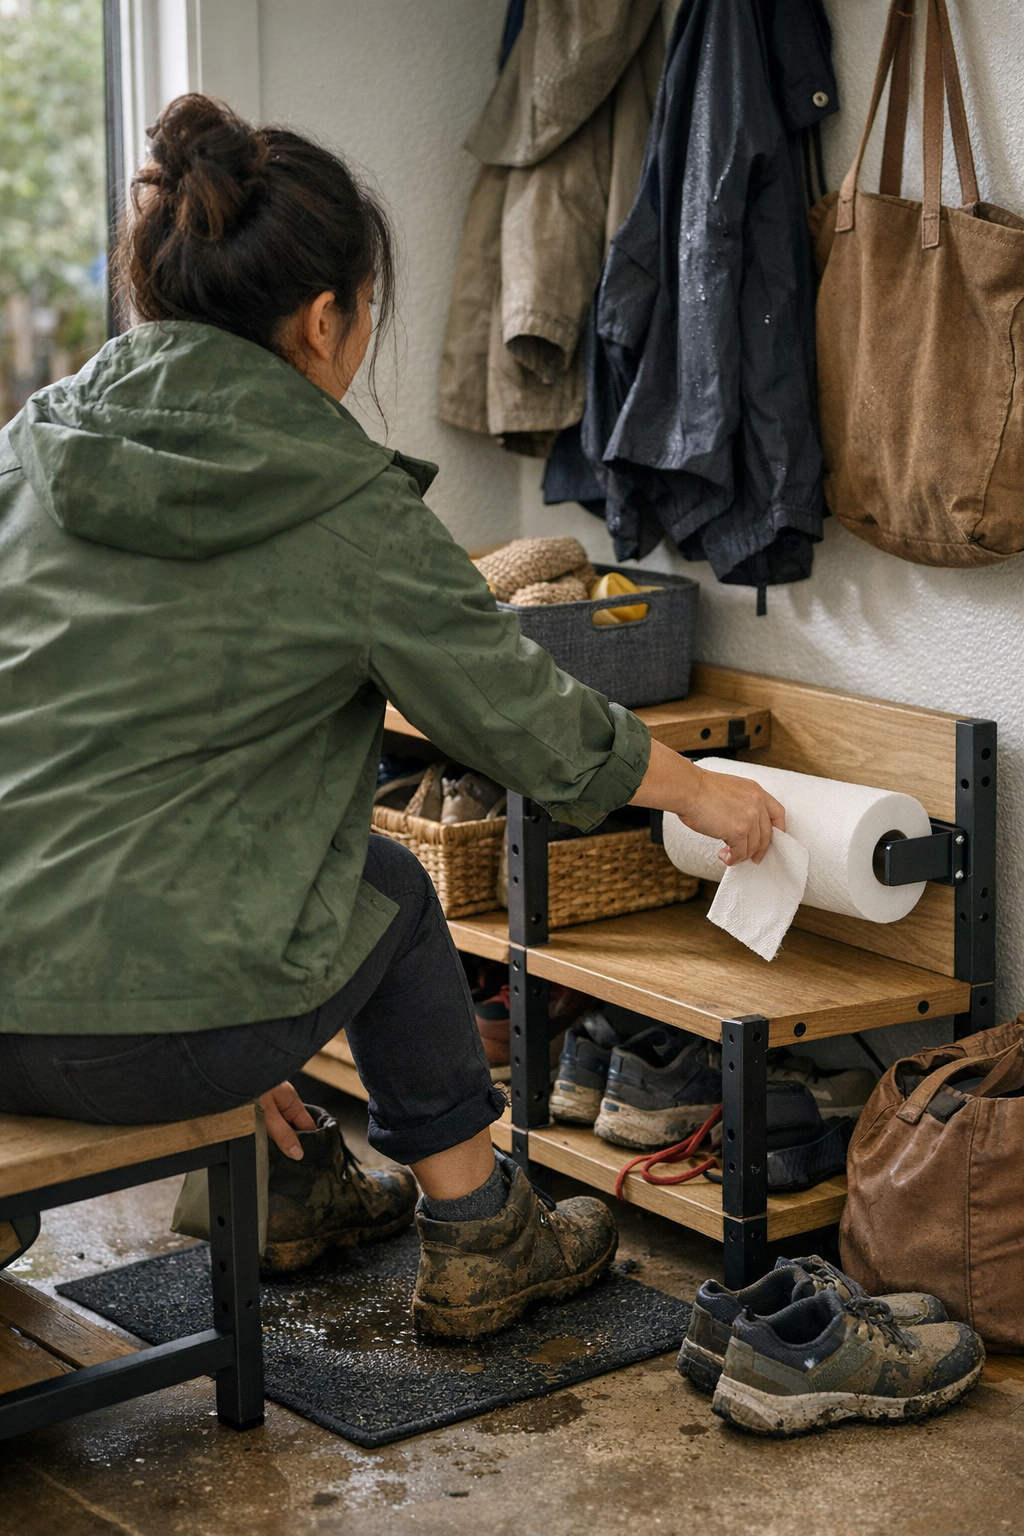
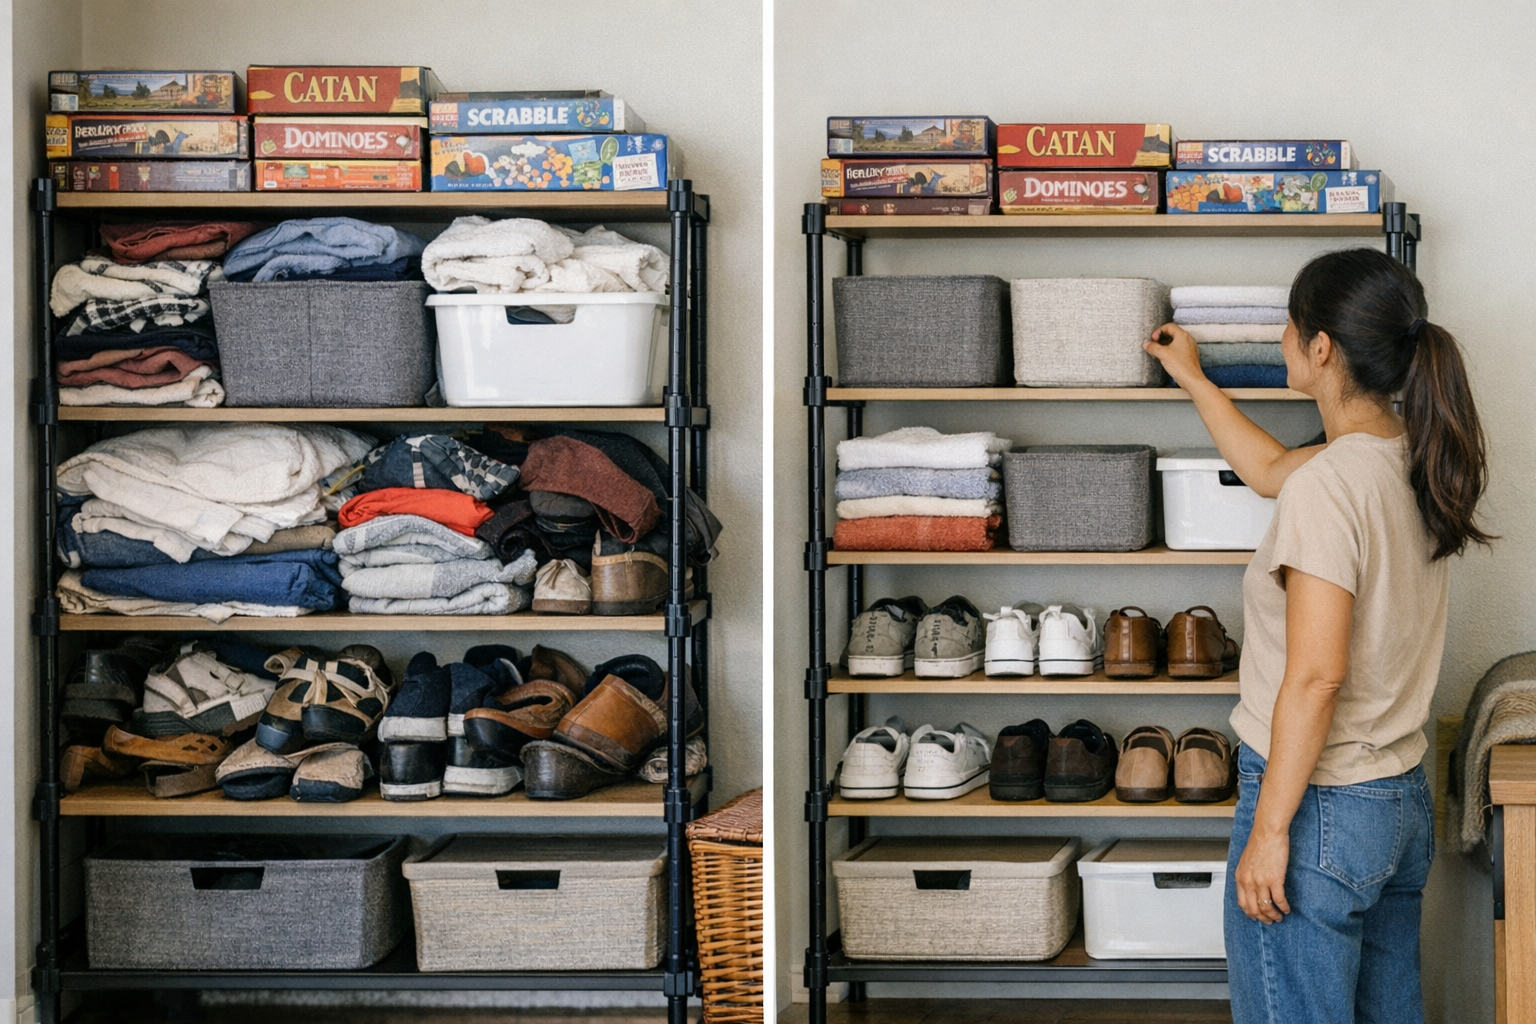
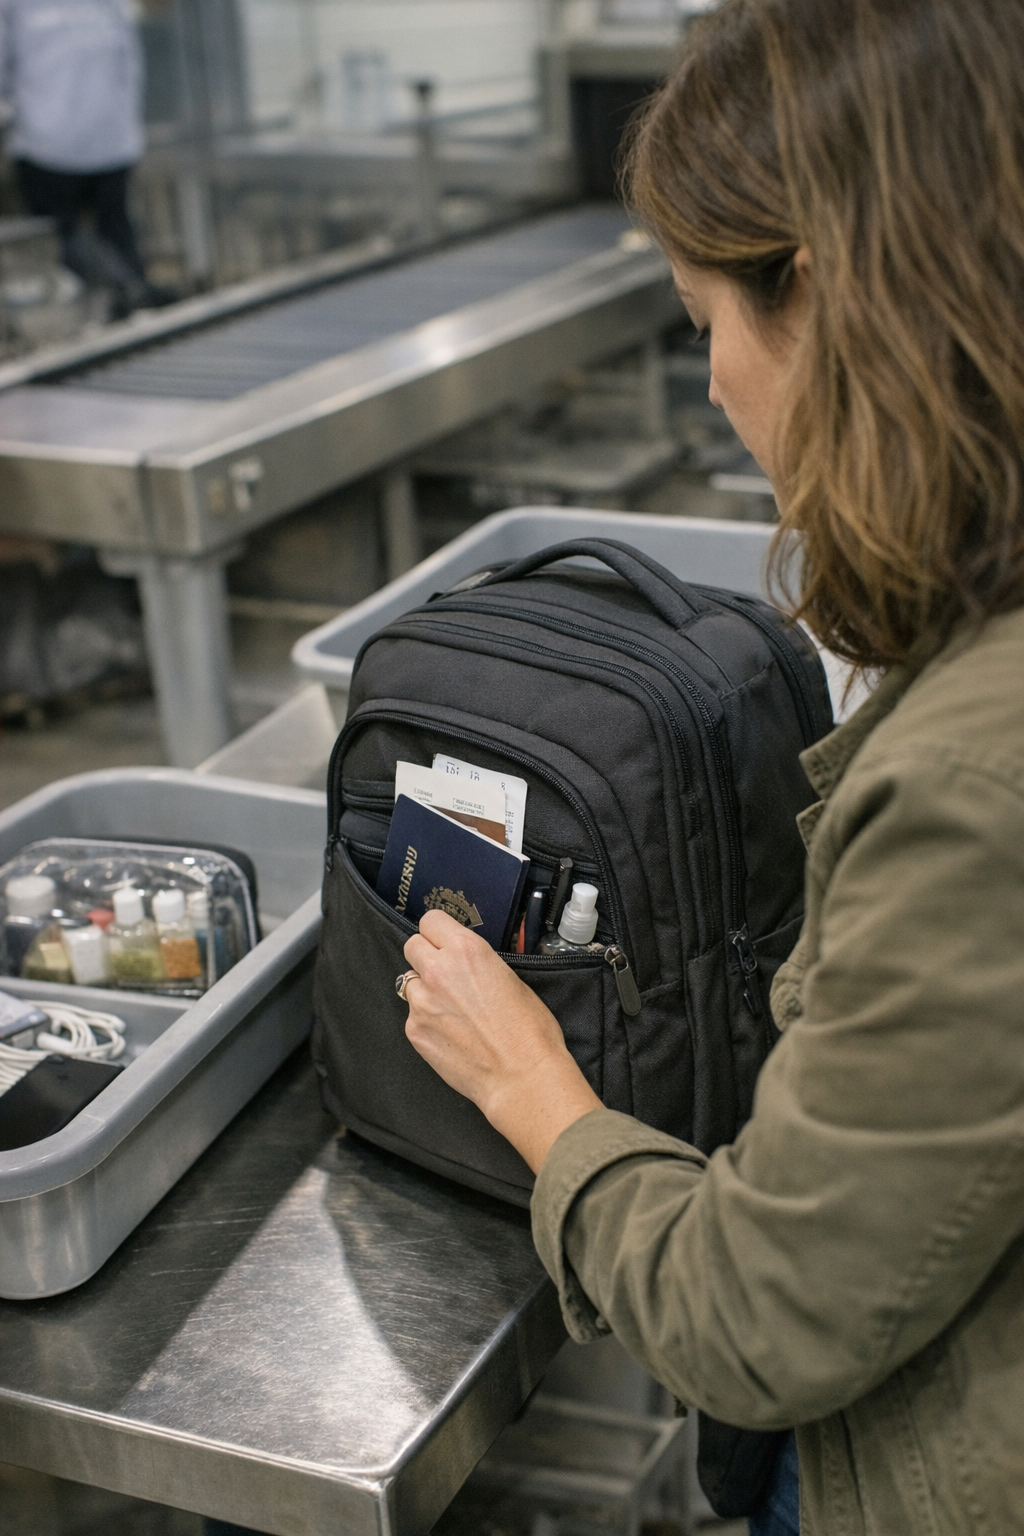
    The flexible setup only works if each zone stays recognizable—tools here, sports gear there, seasonal overflows apart. Visual dividers, color-coded bins, open labels, even bold tape to mark walking paths—all help keep truly movable systems from melting into a single catch-all. When bins have clear fronts, carts are labeled, and the wall is functionally split between “weekly use” and “someday overflow,” clean-up is snappy, not daunting. Walking through, you know what lives where and quickly spot what doesn’t belong.

    Everyday Reset: Small Corrections, Not Total Overhauls

    A month in, the magic is this: the urge for the dreaded “big reset” fades. No more sinking feeling when you see a pile up. Instead, it’s tiny adjustments—slide the overflow bin back where it belongs, reverse a stray shovel, re-stack instead of dump. These 60-second resets clear space for tomorrow instead of becoming a weekend project. Friction isn’t gone, but it doesn’t snowball. You don’t need to fight the setup to keep it functional—just nudge it back when needed.

    Still, flexible zones have their own traps. The cart becomes a drop-off point you stop seeing, or an open bin swallows stray garden stakes until the season’s over. But now, correcting these is easy—move one thing, fix the flow, and the system works with you, not against you.

    Where Conventional Setups Fail: Dead Corners and Blocked Movement

    Weak setups announce themselves in quiet frustrations:

    • You return the garden fork—then realize the hose reel is now blocked until something else moves.
    • Every time you want the mower, you shuffle two bins out of a too-narrow path yet again.
    • That one back corner? Still a magnet for mystery objects, because it’s never gotten a real job in the zone.
    • The impressive wall rack turns boots and buckets into tripping hazards, because there’s no flow after a normal weekend cleanup.

    Fixed layouts turn small resets into big detours. They promise order but force you into roundabout routes or constant reshuffling. A setup can look sharp while still interrupting every routine. Flexible systems, when clearly divided, keep movement open—quick fix, go on with your day. The difference is every micro-adjustment is built in, not a breakage of the setup.

    Real-World Routines: Keep It Useable, Not Just Organized

    • Take one minute after any busy afternoon to put the mobile bin back or re-mark walkways. Small resets fight creep the whole season.
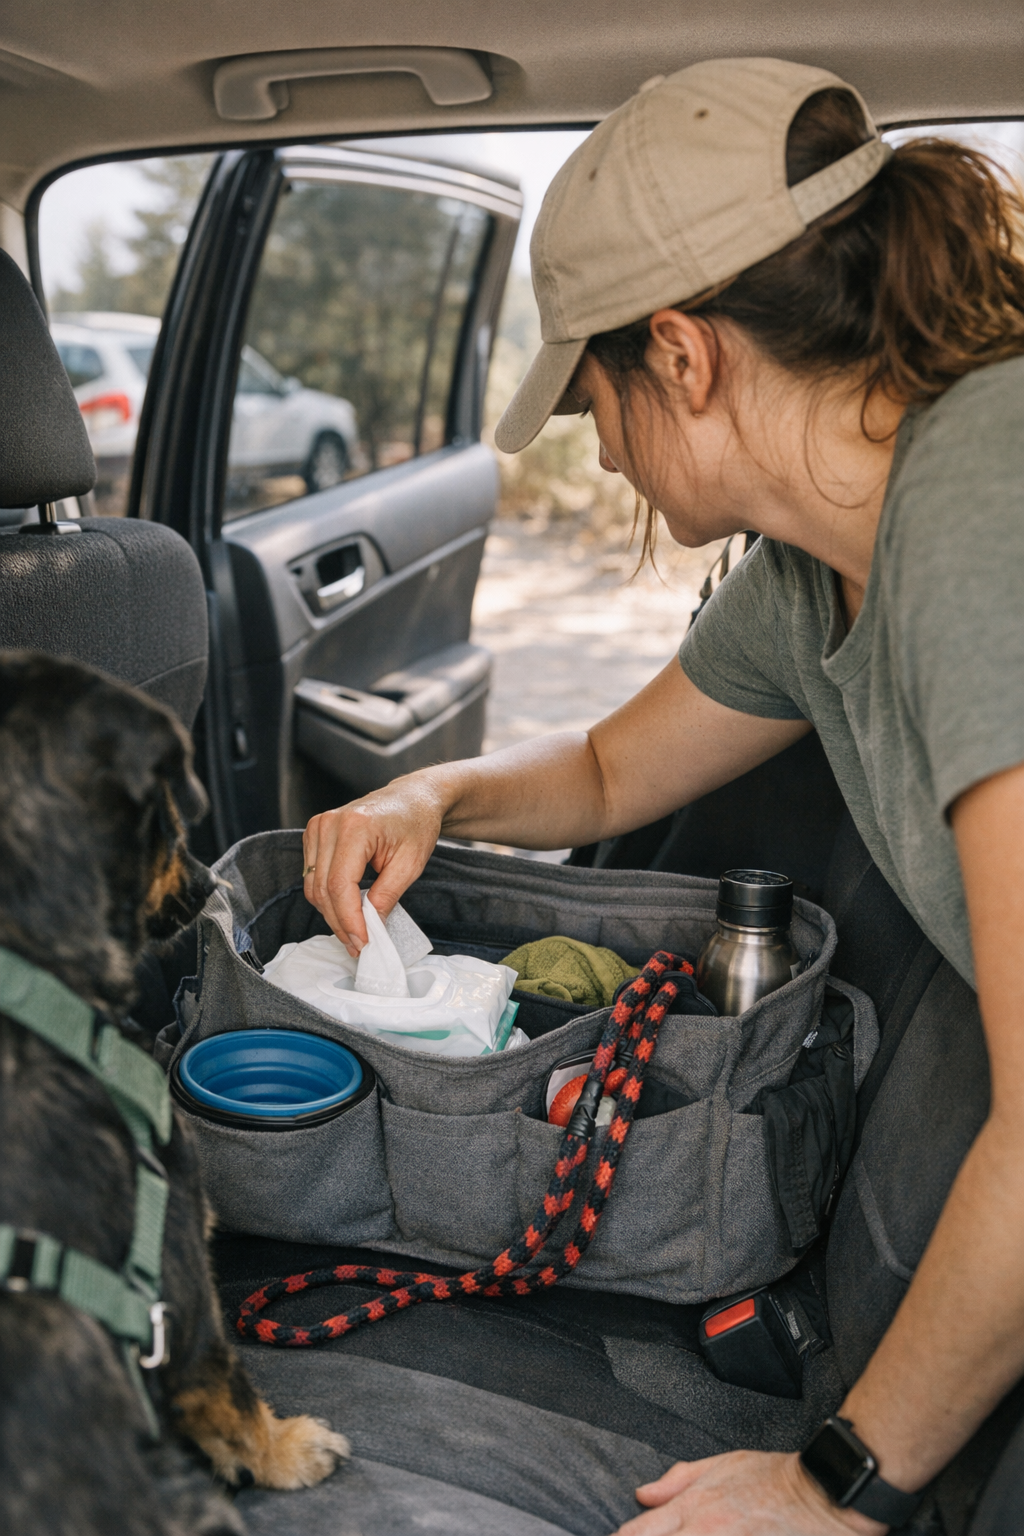
    • Give each flexible zone a visible identity—labels, color, or tape for “this is garden gear, this is toys, this is just overflow.” It matters more as the space gets tighter or more mixed-use.
    • Let overflow roll, not sprawl. The bin or cart on wheels takes the blow, then gets reset—instead of the whole path turning into a tripping maze.

    The Setup That Stays Useful—Not Just Tidy

    A practical outdoor system isn’t about perfect order. It’s about setups that bend with the routines, block out permanent pile-ups, and let you keep moving through—even after a rush, a project, or a storm. The difference between “organized” and “useable” isn’t how things look after setup; it’s how well the system handles all the imperfect, repetitive ways things actually get used—and returned—every week.

    The setups worth building don’t flatten every friction point, but make it easy to see what’s out of place, correct course with a quick move, and find a clear path after the next errand or chore. When the outdoor zone keeps working through the real-life mess, you spend less time shifting, less time searching, and more time just moving through. That’s how a backyard or utility strip stops being a silent frustration and starts making the rest of the home run smoother.

    Visit TidyYard for practical outdoor storage solutions

  • Mastering Heat Gun Temperature Layering for Flawless Surface Finishes

    The fourth time you pass a heat gun over a surface, the job reveals its true nature. What started as fast, flawless layering—on vinyl, pipes, or composite plastics—suddenly gets complicated. The gloss that popped after pass one turns unpredictable by pass four. Edges start to ripple. Gloss turns patchy. The surface, once perfect under fluorescent shop lights, gathers small betrayals: a rough spot here, a hairline bubble there. Every finish flaw adds time at the sanding bench, working overtime to erase mistakes that crept in while you tried to move fast and keep up with the rest of the workbench routine.

    Early Passes Hide the Real Battle

    It’s easy to trust the first layer. Both bargain and mid-range heat guns, straight out of the box, give you steady airflow and set-and-forget control. The job feels predictable—until the real workflow kicks in. Drilling, cutting, battery swapping, and then, by the third or fourth layer, you notice what the specs never tell you: a flawless start doesn’t guarantee a finish you can stand by. Rushing through the first passes encourages carelessness on the next, and that’s when seams turn soft, haze creeps in, and tiny flaws appear in places you already promised yourself you wouldn’t have to sand again.

    Layering Under Pressure: Where Precision Slips

    End of shift. You press a new vinyl seam. Yesterday’s panels looked sharp, but today, fine dust clings to sticky edges and that two-second hesitation with the gun leaves an entire corner too soft. Overlapping jobs mean you’re juggling overhead sanding, bit changes, and a queue of pieces all needing the same tool. The real threat? Sudden, careless temperature jumps—especially swings of 30°C or more between cycles—quietly set you up for streaks, micro-bubbles, and stress lines beneath the top layer. They don’t look like faults at first glance, but run your gloved hand along the seam, and you’ll feel roughness that wasn’t there yesterday. That’s the price of rushing in real-world shop conditions, whether it’s cramped job trailers, an unheated garage, or just pushing to clear a cluttered bench for the next stage.

    What Happens When You Rush the Heat

    Under pressure, it’s tempting to crank the heat to speed things along. You’re swapping dead drill batteries, scraping glue, and stretching the workday. The temptation is real—but the repercussions are, too:

    • Blistered edges—raised seams and random bubbles hiding out until your cleanup pass reveals them, ideally before the supervisor does.
    • Patchy gloss—a band of dullness or streaked surface where air lagged or the temperature crept up far too fast.
    • Sanding purgatory—flaws locked under layered plastic, demanding coarse grit or even a full strip and restart, which ruins flow and morale fast.

    Most of the time, these missteps don’t show up until several batches later, long after the chance for an easy fix has passed. By then, workflow slows and the project starts feeling like a lost cause.

    Small Adjustments That Actually Save Jobs

    The experienced crew learns fast: it’s not about fancy heat gun attachments or spec sheets—it’s about patience and repeatability. Move in tight temperature steps—no more than 20°C at a time—and let each layer settle. It’s a discipline as much as a technique. This rhythm cuts down on rework, keeps seams sharp, and makes end-of-day cleanup less of a chore. When you run a batch of a dozen parts, and your finish sticks, you notice real efficiency: less running back and forth for tool swaps, fewer surprises after cooling, and less fatigue chasing flaws down the line.

    Those small, habitual tweaks—steady increments, regular cool-down checks—quietly beat “maximum power” shortcuts every single time. Workflow stays smoother, and you spend more hours assembling or fastening new projects, not revisiting last week’s mistakes.

    Know the Signs Before It’s Too Late

    A heat gun that’s a little unpredictable is like a dull cutter: by the time you spot burnout, the damage is baked in. What should you actually watch for, before the job’s out of reach?

    • Puffed seams and softened lines—corners lose their edge, particularly where overlaps stack up or the temperature gets left unchecked.
    • Discolored patches—that off-tint or yellowing that tells you heat isn’t settling evenly, especially nasty on white plastics or light panels.
    • Scorched fragments—barely visible at first, but once layered over twice, nothing but a sanding wheel is going to get rid of them.

    Pause after each pass. Use the downtime from other tool changes—bit swaps, battery charges—to give each layer a quick inspection. It saves jobs, saves panels, and saves your nerves on deadline days.

    Getting Reliable Results, Not Miracles

    Great layering isn’t about chasing the latest multi-mode heat gun. It’s about using what you have in a way that fits the pressure and pace of real shop days: keeping temperature jumps in check, respecting cooldowns, and treating each pass as a chance to get it right—not just fast. Every new tool or blade upgrade helps only as much as your basic approach. In the real world, the small habits—tight control, methodical pace, constant checking—are what turn out consistent, professional surfaces batch after batch.

    The takeaway: Don’t let the quick wins of early passes fool you. Stay patient, keep temperature shifts measured, and let each layer prove itself before moving on. It’s a discipline, not a shortcut—and over the long haul, it’s what gets you off the sanding bench and back into real work.

    For tools and equipment built to handle the real grind, visit Gumboll.

  • Why Focusing Desk Lamp Light on Your Hands Boosts Productivity and Comfort

    Most workstation lighting is chosen for the desk’s appearance, not for the work you actually do. But if you sit down to repeat tasks, shift between keyboard and notes, or work through a late afternoon stretch, the gap between tidy light and useful light becomes hard to ignore. A lamp that lights the full surface looks “finished,” but the moment you move beyond that single centered patch—reaching for a charger, flipping pages, dragging a notebook closer—you start battling shallow shadows and surface glare that drain focus and energy hour by hour.

    Lighting for work isn’t about flooding the whole desk—it’s targeting the places your hands move and your tools land, again and again. Broad, even light across your workstation might keep things Instagram-tidy. But it also turns every cable, adapter, or backup pen into constant visual noise, and forces you to chase “good” light for every task shift. Focused, hand-area lighting does more than mute clutter: suddenly, micro-adjustments and side shadows fade out, and switching from one tool to the next stops feeling like a reset. Over a single packed week, you notice it—the difference in how easy it is to clear the desk, avoid fatigue, and stay on track mid-project.

    Desk Light Decisions That Show Up in Daily Routine

    Look at an organized setup: monitor centered, under-desk drawer to the right, everything routed with trays or boxes, cable clips around the back edge. On paper, it’s “solved”—but real work still bogs down. You’re shuffling your chair, tilting a clamp lamp, or propping up sheets just to chase a usable pool of light. Even with smart storage or a neat cable path, supplies drift into the gloom at the desk’s edge. Mid-task, hands stray past the beam and you’re forced to angle your wrist or rotate the whole chair to see a detail clearly. The light you picked for neatness stops matching your actual work path within days.

    This gap becomes routine: pens and sticky notes gather where the lamp hits hardest, while the rest—chargers, reference books—slide into the dim edges you ignore until clean-up. Resetting your desk means dragging everything from shadow to center, not rethinking how you work. The desk looks streamlined—but your workflow keeps running into friction, especially if you’re repeating the same switching and stretching motions every day.

    How Shadows and Glare Fail Real-World Desk Use

    Take the classic late-day scenario: editing a document at a “finished” workstation, lamp posted over the monitor on a tidy riser. The surface glows, but your typing hands cut straight through the beam, making an alternating pattern of glare, dead shadows, and missed texture. Each interruption—squint, chair nudge, lamp adjustment—breaks your rhythm and focus. When you push supplies aside or stack a notebook, your own arm blocks the task light and you lose another minute fumbling for clarity. Over the course of a long session, productivity doesn’t just slow—it fragments, turning lighting into a maintenance problem instead of support.

    These small disruptions add up fast: a workstation that felt dialed in that morning becomes awkward by 3 p.m., after enough rounds of switching lamps or shuffling organizers to escape that shadow edge. Lighting becomes another thing to “fix,” not a tool that you can actually forget about while working.

    Making the Switch to Hand-Focused Lighting

    The real shift wasn’t a new lamp, but a new aim: putting light exactly where hands, tools, and notes actually land—every task cycle, not just for show. Instead of stepping into and out of shadows for every step (glancing at a reference, sketching a section, recharging a device), the work area stays in steady, clear light. Switches—from keyboard to notebook, or from digital to paper—go quicker and break rhythm less. This doesn’t just speed task flow, it lowers the reset burden between sessions.

    Here’s what changes during a week of real use: Placing a clamp lamp arm so its beam stretches directly over your work zone—keeping the base clear of drawers, not fighting against an under-desk tray—eliminates the cable snags and awkward supply bumps that haunted the “centered” setup. Now, tools and notes stay where you actually need them. End-of-day resets shrink: instead of multiple moves, a single sweep organizes the desk. Small clutter stops piling up, and you spend less time repositioning light, more time working.

    Breaking Down the Real Advantages—And the Missed Opportunities

    Hand-focused lighting delivers:

    • Sharper task focus—your “active zone” is always visible, with no shifting shadows or distracting glare
    • Less unnecessary movement—hands rarely pass out of light, so you stop sliding the chair, hunting for a clear spot, or juggling supplies just to see
    • Reduced visual clutter—letting edges of the desk fade soft means loose items aren’t always in the way
    • Quicker resets—once your main work area stays consistent, routine cleanup shrinks from daily chore to a few seconds’ work

    On the other hand, broad surface lighting comes with hidden costs:

    • Random clutter is always in view, whether you’re using it or not, pulling at your attention when you need to focus
    • Frequently-used tools gravitate to the brightest patch, leaving the rest of the space ignored and crowded
    • Simple tasks—like jotting a note or checking a secondary device—start dragging out, because you have to adjust the lamp or your posture every time

    FAQ: Tuning Your Lamp for Real Workstation Performance

    How do I position a desk lamp to avoid hand shadows all day?

    Set the lamp so the beam falls slightly forward and down, right over where your wrists, notebooks, or active devices actually work. The light should cover your typical reach and movement, not just the geometric center. Check by sliding your hand through routine motions; if you hit a shadow or glare, adjust the arm, not your workflow.

    Does hand-focused light work for setups with multiple monitors or shifting work zones?

    If you anchor your routine—keyboard, sketch pad, device dock—focused light helps reduce interruptions and strain. For setups where you move between different equipment or split tasks side-to-side, flexible arms or under-shelf bar lamps make it easier to keep the beam where work happens. The key is quick, one-step adjustability—not a lamp that adds another reset as you go.

    What happens if I skip hand-area lighting and stick to whole-desk light?

    You end up working around the lighting instead of with it: awkward reach, eye fatigue, moments spent dragging a lamp or moving tools back toward the center. The longer your session, or the more your tasks change, the more these interruptions eat into time and energy—especially as the quality of daylight shifts through the day.

    Not Just Tidy—A Desk That Works for You Every Time

    Lighting needs to match the real rhythm of desk work, not just give the surface a uniform glow. A tidy desk is only stage one—if the tools, light, and reach don’t sync with how you actually work, friction sneaks back in. After a week with lighting that follows your workflow—not just your layout—setups feel less crowded, reset time falls, and focus recovers faster. The appearance stays clean, but the real difference is what you notice after several tough sessions: a desk that works at hand level, not just a surface that photographs well.

    Explore the full WorkBasic collection

  • How Weather-Driven Storage Design Prevents Hidden Damage Over Time

    Nothing tempts optimism like a freshly organized garage or shed. Crisp columns of bins, spotless wall panels, every cart and unit just off the floor—it all feels finished, even resilient. But every returning user recognizes the illusion. A busy week, a string of soggy days, and what worked on day one starts working against you. The real test isn’t how slick the setup looks, but how it holds up, day after damp, messy day, to the real push-and-pull of weather and use.

    Why “Off the Floor” Doesn’t Buy You Immunity

    There’s an undeniable appeal to getting storage up and out of the puddles. Bins perched on shelves, racks wheeled just an inch clear of the slab, all suggest that a tidy fix is in place. Until rain or snowmelt inevitably finds a way in. The smallest gap invites a cold pool under those carefully raised bins. Condensation rides up slab floors and clings to shelving legs. With each wet cycle, what looked organized morphs into a humid puzzle—bins tack to floors, wheels grind instead of roll, and suddenly the direct path to your tools is blocked by last week’s emergency reshuffle.

    The pattern is painfully familiar: That tight wall of bins starts dragging in corners. Mobile racks don’t budge when you need quick access. Overflow piles settle in just out of reach, building up with every chore until even the cleanest arrangement now slows your routine instead of streamlining it.

    Where Weather Sneaks In, Function Slips Out

    Every storage area carries its built-in weak spots. Maybe it’s the baskets stacked near the chilly outer wall. Maybe it’s the rolling trunk you regret every time you have to muscle it back into place. These friction points only multiply once water and humidity get involved:

    • Pooled water slips in unseen. Even a minor seam under shelving or a low cart can become a reservoir, quietly wicking moisture up into your gear.
    • Condensation lurks beneath and behind. Walls and bases that seem bone-dry turn out clammy on inspection, pushing rust along the frames and swelling the bottoms of particleboard.
    • Overflow turns into obstacle. Every time storage units clog the main route—from door to bench, or out to the garden—the irritation quietly escalates. Resetting doesn’t happen seasonally; it becomes a weekly battle.

    This isn’t just a yearly inconvenience. Left unchecked, each round of weather makes the system more sluggish. Access slows, paths choke up, and the difference between “looking organized” and being usefully organized grows wider. Bins that used to be easy grab-and-go zones become dead-end stacks. The once-promising setup becomes something you work around, not with.

    Frustration Arrives Before Damage

    The most telling signs a setup has gone sideways aren’t ruined tools or warped panels. It’s the little frictions that show up every time you try to use the space:

    • You end up shuffling two or three bins just to keep the way clear for the door.
    • A quick grab for shears means always squeezing around that same cabinet edge—again.
    • Resetting after a job drags on, as swollen bins wedge together and wheels resist the turn.
    • Overflow “catch-alls” swallow not just spares, but damp towels, dirt, and whatever you haven’t found time to sort—making layout and access worse with every pass.

    Surface order hides these growing inefficiencies. Your system might look crisp in a photo, but live-use tells a different story: flow gets clumsy, resets stretch out, and frustration builds every time a once-bright idea ends in an awkward cart dance. Storage that fits but never truly clears a path, ends up stealing time and momentum with every visit.

    Weather-Smart Setup: Real Tweaks That Hold Up

    So what stands up to the ongoing mess and moisture? It comes down to setups that don’t just avoid the floor—they beat the weather where it attacks most:

    • Lift everything—properly. Raise bins, racks, and mobile units a solid two inches or more. Sturdy blocks or feet, not just thin casters, break the path for sneaky seep and mean nothing welds itself to the slab after a wet weekend.
    • Give your storage room to breathe. An inch or two gap along every wall isn’t wasted space—it keeps condensation from creeping up and prevents mold from taking root.
    • Skip the dead corners and risky seams. That awkward spot behind the chest invites soggy buildup. Leave it open or limit use to gear that shrugs off damp.
    • Go non-absorbent when you can. Plastic bins, powder-coated metals, anything that sheds rather than soaks up moisture. One damp blast shouldn’t mean a season of stuck lids or warped bottoms.

    Spot-test your fixes: After heavy rain, wedge a wood strip or paver under the lowest bins and see which ones actually dry out. The ones that still sweat or cling need a better lift or a new home—no matter how “waterproof” the container says it is.

    Real Life: When “Safe” Storage Trips You Up

    Picture gearing up for spring yard work. A week of rain, and now those bins—raised just an inch, stacked along the far wall—are sticky, lids won’t budge, and the aisle to your spade twists around half-boxed supplies. Each small design compromise from day one now piles up, literally, in blocked corners and awkward footprints.

    The turning point comes with a rethink: Lifting every bin higher than before and refusing to let storage block the main lanes. Suddenly, carts and bins come free without a wrenching pull. Cleanup after every job takes minutes, not a half-hour shove. You spend less time rescuing supplies, more actually using the space—rain or shine.

    Routine Patrol: The Non-Negotiable Upgrade

    No system is ever fully set-and-forget. A weather-hardened setup still needs an occasional walk-through: move a bin, slide out a shelf, open up dead corners. These seasonal patrols keep airflow moving, outsmart slow leaks, and catch issues like early mold before they turn decks and bins into rescue projects. It’s a habit that pays off every time the next big reset never comes, because small adjustments keep the space on track.

    The Setup That Survives Return Trips

    The setups that truly work aren’t the ones that look perfect when freshly installed. They’re the ones where every return trip—rainy, rushed, or routine—feels easier than the last. Where raised bins and clear zones mean fewer reshuffles, and every main path stays open for actual movement, not just display. By treating weather as a regular opponent and leaving room for quick fixes, you’re building a storage system that quietly stands the test of time and the messes you throw at it season after season.

    StackNest

  • Optimize Entryway Cleanup with Strategic Paper Towel Placement

    How many times has a muddy shoe, dripping boot, or paw print made it straight past your entryway cleanup point before you even reach for a towel? Threshold zones are where the mess hits first—and too often, cleanup supplies get stranded just out of reach or buried behind overflow. Every extra step to fetch paper towels lets mud and water drift further, pressing the same pain point every week: the distance between real-world entry routines and where your cleanup tools actually land. If your entryway looks set up but falls apart by Wednesday, it’s not just clutter—it’s reset friction built in by placement that doesn’t match your real movement.

    Reset Friction: The Tug-of-War at Your Entry Door

    After a wet commute or a muddy walk, what actually happens by the door? Shoes get kicked off near the bench. Bags drop wherever there’s an inch to spare. Coats swing onto hooks or get draped across benches. Just one misplaced mop or hidden towel sets the stage for streaks that slide past the “drop zone.” You detour, dig behind bins, unearth a roll from inside a shoe pile—and by then, water has already crept under the rug. Every clumsy workaround—swapping hands between bags and boots, stretching over crowded benches—adds seconds and leaves the threshold losing the race against routine mess.

    More Than Visual Mess—It’s a Workflow Breakdown

    A towel holder mounted too high, squeezed behind bags, or left floating on a shelf doesn’t just look off—it interrupts cleanup where it counts. In practice, a towel drifted behind overflow or lost under a bench means you wipe up only after dirt spreads. Maybe the zone is sorted in the morning, but after a few rounds—school drop-off, dog walk, grocery haul—towels are out of the reset loop. Mess drags deeper into your space and resets slow to a crawl.

    What Actually Changes When Placement Matches Routine?

    Picture this: you walk in with soaked boots and heavy bags. Instead of zigzagging behind storage bins, a wall-mounted paper towel holder sits at bench height—right where you sit (or help a child) to unlace shoes. You pull a sheet mid-process, mop up the puddle before it chases your socks, and keep the flow moving. The difference is immediate: cleanup stops being a chore that lags behind and becomes part of the movement—no separate step, no “I’ll get to it later.”

    Why “Above the Bench Line” Solves for Repeated Use

    Bench-level mounting means towels are in reach as you sit or crouch for shoes, not perched where dirty hands have to stretch or double back. Go too low, and holders get blocked by boots and bags; too high, and you’re up and down, dripping water along the way. Every struggle—mud slipping by, paw prints racing across tile, water sneaking toward a living room rug—gets intercepted before it’s a reset crisis. Cleanup merges seamlessly with whatever task brings you through the door, not tacked on as an afterthought once the damage is done.

    “Good Enough” Entry Storage Rarely Survives the Week

    The temptation to use whatever shelf is free, toss in bins, or add a loose countertop roll is strong—until routine takes over. Most setups work for guests but collapse as soon as the traffic ramps up. If your towels and wipes aren’t anchored exactly where people land, daily use reveals the weak spots:

    • Back-and-forth laps around dropped shoes and bags, just to find cleanup supplies
    • Hands grabbing surfaces while searching, leaving extra smudges and streaks behind
    • Dirt sneaking past the line during a rain cycle, especially when resets fall behind

    By day three, shoes have overflowed, the paper towel roll is wedged behind the bench, and the threshold looks less like a managed drop zone and more like a spreading mess—again.

    Visible Difference When Entry Flow Is at Max Load

    The crunch shows up during high-traffic runs. Imagine three arrivals in 20 minutes: a rain-soaked kid, a dog that shakes off, groceries coming through while everyone fumbles for dry ground. When holders and towels are mounted right at the bench edge, every drip and splash gets handled on the spot—before a single footprint drags it deeper. Loose supplies, on the other hand, turn “just five minutes” of deferred cleaning into tracked-in grit and a shrinking window to reset before the next round. Quick laps turn into full cleanups—and everyone’s late.

    What’s Actually Different After a Placement Fix?

    Good entry setups aren’t just about less apparent clutter; they build in a rhythm. A well-placed wall holder at seated height trims out the most annoying steps: no searching with muddy hands, no trailing grime back over just-cleaned tile, no “reset round two” when someone else comes through. Instead, cleanup happens naturally during the process—more clarity, less mental drag, visible difference before you even think about it.

    How to Anchor Cleanup Where Action Actually Happens

    Stop letting towels, wipes, or rolls drift out of your real path. Mount at bench height, always within a simple seated arm’s reach—never up at shoulder level, never hidden behind bins, never as a loose accessory floating above the drop zone. Physically walk your door-to-bench route and see where your hand naturally lands as shoes come off or bags hit the ground. The difference between one smooth reset and a series of cleaning headaches usually comes down to these few feet—between what seems “away” and what’s actually in the line of movement.

    Practical Entryway Placement Tips That Actually Work

    • Keep the main walk lane wide and clear: mounting holders off to the side avoids blocking a fast path, even if centered storage looks neater.
    • Secure for actual use: wall-mounts that keep towels dry, off the floor, and reachable for both adults and kids outlast floating setups every time.
    • Pick slim profiles: wall- or side-mount holders that fit tight entrywalls and tuck within arm’s reach prevent spread, crowding, or new trip hazards in compact transitions.

    From “Looks Organized” to Works Every Time

    Entry setups that focus on visual order—stacked bins, matched baskets—often collapse when real life starts hitting the threshold at speed. The gap between a tidy zone and a functional transition point is usually where items are anchored. Move a towel holder to the right moment-of-action and you’re not just fighting clutter; you’re closing the slowest, most ignored leak in your whole reset routine.

    This isn’t about making mess disappear. Most of the gain isn’t even visible on a good day—it’s in the weeks when nothing else changes except fewer detours, fewer missed wipes, and faster resets when the weather turns or the schedule stacks up. Entry setups that keep up don’t just look under control—they feel lighter, less interrupted, and built for movement, not just for show.

    http://www.betweenry.myshopify.com

  • Why Exposed Litter Boxes Cause Hidden Mess and Stress for Cats

    Setting your cat’s litter box flush against an open wall might look tidy after a deep clean—clean lines, empty floor, nothing in the way. But give it two days, and the “easy” setup turns into an annoyance you keep tripping over: litter creeping across walkways no matter how much you sweep, a cat who hesitates before every use, and daily reset work that starts to bleed into your main routine. What looked simple becomes a nuisance you can’t ignore, and the cost is measured not in appearances but in every missed spot and wasted minute spent tracking what escaped.

    The Setup Trap: Open Placement Looks Fine—Until Real Use Begins

    Most cat owners have run this pattern: after scrubbing the box and lining up the mat, the area looks freshly organized. For the first day, you can almost believe the reset will last. But real life doesn’t care about symmetry. Each round of feeding, laundry, or a stop to refill the water bowl means you walk past the exposed box—sometimes pausing to kick aside grit, sometimes realizing the scoop isn’t where it needs to be when the mess hits. Within 48 hours, a thin trail of litter escapes the mat, working its way under furniture and into spots you swore were safe. Your cat’s pauses become longer and exits faster, and the illusion of control fades with every stray bit you find stuck to your sock.

    The earliest warning is rarely dramatic. It’s your cat standing at the edge, scanning the room with the box in open view—sometimes dashing in and out, sometimes circling for privacy. It’s you, reaching for supplies only to discover the dustpan was left two rooms away after yesterday’s sweep. The work keeps drifting. What started as a five-minute job becomes a fractured process: clean by the box, then by the door, then under the chair where you find the fourth lost toy of the week. It’s not a failure of willpower. The setup doesn’t recover fast enough to match real routines.

    Daily Friction: When “Tidy” Stops Feeling Easy

    • Tracked litter spreads into shared space: Grit finds its way past the mat, under couches, sticking to towels piled nearby, settling into places that have nothing to do with the box—but you still have to clean them. Wiping one zone turns into chasing stray crumbs that now belong to the whole room.
    • Quick access, slow resets: Supplies seem within reach until you need them mid-mess: the scoop’s behind a door, wipes are forgotten, and you’re stuck improvising. Dustpans creep closer, tools that should be out of sight become part of the visual clutter just to keep pace.
    • The cleanup cycle won’t stay short: A job meant to take moments now comes in waves—sweeping by the box, then the mat, then retracing steps as the cat races out, scattering fresh grit five feet away. The “reset” never really finishes.
    • Cats signal discomfort in the margins: Open setups favor human convenience at the cost of a cat’s sense of safety. Some freeze at the door, others dart through, and over time, you see antsier behavior—rushed use, sudden detours, or a mishap nearby because the comfort zone vanished under traffic.

    Room Order vs. Cat Security: The Hidden Tradeoff

    Choosing an exposed setup makes sweeping look easy, but it splits comfort and function: humans get clear walkways, cats get anxiety. When boxes sit in open or high-traffic areas, you trade out quiet box use for stress cues—longer pauses, less time in the area, and accidents that were never part of the plan. Meanwhile, litter begins turning the rest of the room into low-level maintenance zones: chairs dusted before you sit, hidden corners checked again while getting ready for work, and the feeling that no spot is safely clear of cat residue between deep cleans. The upshot: what looks uncluttered on day one requires extra work everywhere else, all week.

    One Change That Actually Stops the Mess: Shelter Without Sacrifice

    Most owners only retreat from open setups when daily cleanup expands beyond what anyone signed up for. The smallest adjustment—shifting the box behind a solid object like an end table, placing it beside a low bench, or setting a tote to block open sightline—usually pays back in hours, not weeks. Sheltering two sides, without sealing off the box, interrupts both tracked litter and anxiety. The result is fewer escapes beyond the mat and far less cat hesitation. Sweeps become targeted, not endless; crumbs stop piling up at random; and the nerves fade out of every box visit. The main area starts feeling like part of the home again, not an extension of maintenance you can’t get ahead of.

    The real test is the day you skip a touch-up and the rest of the room still doesn’t become a minefield. Your cat moves calmly in and out. You don’t keep catching edge-case messes after every meal, refill, or casual pass through. The friction lifts: you’re doing less, but the result is cleaner and calmer—for you and the cat.

    Shared-Space Headaches: When the Home Gets Pulled In

    The reach of a loose setup becomes obvious after a week: towels and socks pick up grit, laundry baskets get a crunch underfoot, and guests track bits through the house without realizing where it started. This isn’t about general mess, but about the invisible sprawl of a bad setup. An open lineup rarely keeps litter in its lane. Each pass through the area pulls more of the home into the orbit of box cleanup, making the mistake bigger than it looked when you first placed it.

    Reset Routines Matter More Than First Impressions

    That first-day sense of control fades fast; what actually makes a difference is how the area bounces back after real use. A structure that lets you reset in one sweep after a busy day is worth more than a display that looks perfect after a deep clean. When your routine shifts—quicker refills, cleaning focused only around the mat, less chasing down hidden grit—you know the environment is finally structured for real living, not just first impressions.

    Placement vs. Box Style: Picking the Balance That Works

    If you can’t move the box—tight apartments, shared food zones, or laundry rooms with no margin—you’re locked into solving with structure, not just location. The box style starts to matter more: open trays offer easy cleaning but force cats to perform in full view, while covered boxes add privacy but can hide odor unless cleaned often. Each compromise brings its own pattern of friction. If you can’t shift the placement, the repeated-use burden falls on your organization and daily reset discipline.

    Keep Eating and Litter Zones Apart—But Not Out of Sight

    A hidden but common issue: litter box and feeding setup crowd each other. Even a couple feet too close, and cats get fussy—drinking less, delaying eating, or missing the box altogether. The fix isn’t complicated: keep several feet clear between feeding and litter areas. Use a low divider, an offset storage bin, or even a hallway gap to create separation. This isn’t about building barriers for show, but about breaking up scent and sightlines just enough to avoid comfort tradeoffs—while keeping everything practical for your own refill and cleaning path.

    Practical Sheltering: Real-World Tweaks That Actually Help

    • Set a solid, low bench or shelf alongside the box—not boxed in, just enough to interrupt open views and give a sheltered retreat zone.
    • Move a tall storage bin or heavy-duty cardboard box to one side—perfect for renters wanting less mess without drilling or buying new furniture.
    • Position the mat so it covers a little more than the main exit—stopping the spread before it earns two extra cleaning spots. This can single-handedly shrink tracked litter for most homes.
    • Place cleanup tools—scoop, wipes, dustpan—just behind a nearby door or tucked inside a low basket. Not in open view, but easy to grab when the next little disaster calls for it. Accessibility here is half the real-world solution.

    These aren’t design upgrades; they’re ways to stop invisible effort from hijacking every room. The box doesn’t need a showcase—just a structure that limits headaches in repeat use.

    Recognizing When Visual Calm Doesn’t Help Function

    There’s a sharp break between a setup that looks neat at a glance and one that doesn’t interfere with your real life. The exposed, “organized” option rarely holds up when routines run long or cleaning lags a day. Tracked litter, shifting supplies, nervous cat responses—all are quiet but relentless signals the structure needs real adjustment. If you’re finding extra work drifting into new corners, or wishing the whole zone recovered faster, the setup’s appeal is only surface-deep.

    The best test: after one full cycle, is cleanup limited to just the mat area, with your cat using the box confidently and the room staying livable between resets? If not, it’s time to rebuild the structure for actual living—starting with visible, honest tweaks, not just appearances.

    April 6, 2026

  • Why Storage Benches Fail Without Clear Separation and Fast Retrieval

    No one expects the storage bench by the door to become a source of delay—but within days, it often does. What began as a shortcut to a cleaner entryway becomes an obstacle: shoes jammed together, bags swallowed into the pile, and the lid hiding an ever-growing tangle. The promise of “grab and go” vanishes the first time you’re pawing through a box of everything, blocking the walkway you meant to clear in the first place. This is the shortfall of a storage bench: not in the basic idea, but in what fails once repeated routines, multiple users, and real-life limits hit at the same time.

    When the Storage Bench Becomes a Stumbling Block

    Most storage benches are designed to look like tidy solutions—a place to sit, a spot for bags, and a lid that hides scattered mess. But the truth is, a bench with a single open compartment becomes a friction point as soon as it absorbs more than one category of need. Without internal dividers or clear boundaries, shoes end up wedged under coats; stray headphones drift into the murk with yesterday’s beanie; school books and shopping totes press against each other until finding anything requires a rescue operation. Once the lid is down, everything drifts.

    Try opening a crowded bench after two weeks of real use: instead of “grab-and-go,” it’s “dig and scatter.” You reach for a glove, end up sifting through sneakers, and finally give up with contents spread across the hallway. What was meant to streamline your exit now blocks your way, and the simplest retrieval winds up as a five-minute sidetrack that leaves the area messier than before. Resetting the bench—putting everything away again—feels like starting from scratch each time, which usually means it doesn’t happen at all. The bench keeps absorbing overflow until it quietly becomes the new clutter zone, hidden behind its own lid.

    Shared Use Exposes Weaknesses Fast

    Put a single bench in the path of everyone who lives with you—and any invisible flaw shows up fast. In shared apartments, family homes, or companion-heavy hallways, the bench becomes a battle zone. During the weekday rush, you watch as three pairs of shoes tumble on top of someone’s lunch sack, last night’s umbrella tangles with headphones and a missing set of keys, and the rebuilding starts before anyone even gets out the door. Access slows for everyone: one missing item triggers a mass excavation, and whatever doesn’t fit in the scramble just gets dropped by the entryway. The flow stalls, and mess leaks onto the floor around the bench, closing off the shortcut and making movement through the space a chore.

    This isn’t just a matter of too little square footage—it’s a design disconnect. With every retrieval demanding a re-stack (or a full reset), forced workarounds like leaving shoes on the mat or bags along the wall become permanent. You start to notice: a storage zone only “works” if it moves at the speed of your actual routine, not just stays hidden for a photo. If it looks sorted but breaks down when touched, you’re just trading out one kind of clutter for another.

    The Hidden Cost of Visual Calm

    At first glance, closed benches give the illusion of calm—no loose bags, no shoes in sight. But underneath, chaos can churn unchecked. With no partitions or internal structure, the bench becomes a dumping ground where boundaries blur after one busy day. That flawless, closed-lid look is often a surface fix: what’s tidy for the eyes is a trap for your time. It isn’t until you need something in a hurry—a missing glove, gym shoes for pickup—that you realize the “organized” look has bought you extra minutes of digging instead of less stress.

    If you’ve found yourself in this spot, you know how a neat entryway flips instantly to frustration the moment you start emptying the bench, hoping this time the item you need hasn’t dropped behind or under something heavier. The cost is hidden until your routine speeds up and the inside can’t keep up—forcing you to choose between a room that looks still and time lost every hectic morning.

    Practical Scene: The Morning Rush Meets a Flimsy Setup

    Rushed weekday: two people, both hitting the entry bench at once. Person one lifts the lid for gym shoes and gets a scatter-shot of outerwear and a stray lunch bag. Person two needs gloves; both start to unpack the cavity in parallel. Shoes spill out, hats roll underfoot, headphones slide toward the back. The floor clogs, movement halts, and the whole promise of quick storage vanishes. Even the intention of putting things away turns into delay—resetting the bench costs precious time neither person budgeted for, and by noon the entry zone has become just as unpredictable as an open pile on the floor.

    Dividers: A Small Addition with a Big Impact

    The real shift comes from inside, not outside. Adding even a simple divider—one board, a couple of bins, a snapped-in partition—changes everything. Shoes stay left, hats right, small grab-and-go bits in a narrow bin: suddenly, each item has an expected path. Instead of blending into a single, shifting pile, categories hold their ground. Grab a pair of shoes and your keys without collapsing a pile of scarves; return them later, and the zone stays sorted until the next use. You stop excavating, start repeating a simple pattern: open, spot, grab, return. Each person adapts faster, and resets edge toward zero effort.

    This interior structure means the bench supports your routine, not just hides your stuff. Even one clear divider prevents category drift—and brings muscle memory into play. It’s not about chasing perfect neatness, but removing the everyday friction that leaves things dumped outside the bench after one too many failed retrievals.

    Assigning Roles and Building Reset Habits

    Once zones exist inside, it becomes natural to assign each its own job: one for shoes, one for bags, another for those elusive small items. With shared use, labeling or color-coding sections (or just using separate bins) gives each person a familiar territory to return to. Shoes don’t wander under coats, headphones don’t vanish under heels, and bags aren’t trapped by stray winter accessories. Resetting happens on the fly—often as a side effect of use—because the boundaries reinforce themselves.

    For persistent small-item drift, a dedicated basket for keys, earbuds, or gloves inside the bench breaks the cycle. Instead of hunting for loose objects or watching them slip behind the main piles, you contain retrieval and return flow to a reachable spot each time. The result: a bench that doesn’t need major overhauls by Sunday—and a routine that doesn’t fold at the first sign of real use.

    Open Versus Closed: What Suits Your Routine?

    Open benches work for quick-drop, high-frequency items—athletic shoes, boots that need drying, items everyone needs to see. But that speed comes at a cost: without containment, every item adds to a visible sprawl, and neatness only lasts until the second user passes through. Closed benches cut down visual clutter—but this only holds if the internal setup tracks with your real pace. Shut lids over undefined piles deliver instant calm and instant chaos, depending on what you need and how fast you move. The difference is simple: structure inside, not just coverage outside.

    If several people share your entry zone, or return flow is quick and repetitive, the need for separated interiors grows. For solo users or rare-access areas, uniform bins might be enough. But for the majority—families, roommates, shared mudrooms—a divided interior isn’t just a nice touch, it keeps the zone functional and the passage clear. If you skip this step, weeks of use slowly lock you into full resets and repeated workarounds, and movement through the space slows until the bench itself becomes just another hurdle.

    Why Setup Details Matter After the First Week

    The difference between a bench that only looks organized and one that stays easy to use turns up fast, but isn’t always obvious until routines settle in. Most breakdowns stem from small—often invisible—setup flaws: a missing divider, a skipped basket, a rushed initial setup that never matched real demand. Benches, bins, floor systems, or modular sections: the best-performing setups aren’t just “bigger” or “cleaner,” but better aligned to the repeated cycle of retrieve, return, re-use—regardless of how many hands reach in each morning. The right internal tweak keeps friction low and order visible long after the newness fades.

    If you keep reaching for the same missing item at the door or notice new piles forming at the bench edge, the fix is rarely adding space, but sharpening structure. The setups that last are those that adjust for your routine instead of fighting it. A bench, a divider, even a zone-rethinking swap—sometimes a small inside change is all it takes to keep an entry moving, not blocking.

    For practical storage systems, components, and benches designed to make real spaces work better—not just look better—visit Gridry.

  • Why Simple Pet Travel Gear Outperforms Complex Organizers on the Road

    Pet travel setups rarely fail in theory—they fail at the first real stop. That “perfectly organized” bag or carrier doesn’t feel clever when you’re pulled over, one hand on a leash, the other frantically unzipping compartments just to get at a wipe or bowl. Water dish jammed beneath a folded blanket. Treats tucked away beside owner keys. Wipes missing in motion, “organized” out of reach by that third leg of the trip. The real friction isn’t what you forget—it’s what you can’t get to quickly when handling and cleanup are no longer theoretical. A setup that seems calm and dialed in on the driveway can slow you down at seat-side, right when movement needs to resume. This is the pressure point that shapes regular travel with pets, and PawGoTravel builds around these repeated, lived interruptions.

    When “Ready to Go” Gear Chokes in Real Movement

    Most pet travel friction doesn’t surface when packing, but when you try to grab a single item mid-trip—after real stops, with a restless pet, and no margin for slow access. On paper, every leash, wipe, treat, and bowl is allegedly “right where it belongs.” But pull over twice, handle a spill, and the pattern shows up: what looked arranged is now hidden by layers or blocked by comfort items. Fumbling for wipes, you sift through towels and your own keys. The bowl slides under gear you thought was for calm but now just delays you. The day’s routine pulls apart—not from missing supplies, but from setups that trap your essentials beneath their own structure.

    Repeated interruption, not one-time chaos, kills flow. Dense pockets and tight organizers slow you most during the critical seconds between stops, not at the start. Every unnecessary zip or shuffle at seat-side means another delayed restart—and a few seconds lost every time add up fast across a trip.

    When Organization Backfires: The Downside of Layered Kits

    Too many compartments, deep-zip bags, or “ultra-secure” carriers seem smart but hog seconds when your pet is squirming or you’re holding a leash and coffee. Seat-side, the structure that gave you confidence morphs into a barrier: you’re leaning in, balancing bags, reaching for items buried one layer too deep.

    Picture the loop: Quick stop for a five-minute water and cleanup break, only to spend two minutes rummaging for a bowl that migrated under the blanket, or for wipes sealed inside the “organized” compartment. One hand holds the leash, the other is left juggling zippers, shifting gear, losing patience. The same kit that looked optimal at home reveals a flaw—repeated stalls, each one bleeding out focus and keeping you parked longer than planned. Frustration isn’t a one-off; it’s a predictable cycle at every stop where organization becomes the drag.

    Repeat Friction: The Weak Spots Don’t Go Away

    The same snag reappears trip after trip. Seat-side “quick access” often gets blocked by the very comfort items you brought to calm your dog. A favorite toy soothes until it blocks the front pocket where wipes live. Bowls gravitate to the wrong end of the main bag. Every routine restart forces the same work: one awkward hand clears the way while the other tries not to drop something crucial. The setup isn’t chaotic, it’s just structured to work best only at rest—not in motion, not when speed counts.

    Comfort and calm are vital, but not when they make it harder to grab what you need. A setup meant for stability can turn into an obstacle course if quick access isn’t right at the top layer—or if every retrieval becomes a negotiation between calm and speed.

    Single-Reach Essentials Beat Over-Designed Organization

    What solves these daily-use stalls? Not color-matched pouches or the “most pockets”—but visible, easy-to-grab essentials that don’t require two hands, deep unzipping, or guesswork. Specifically:

    • Wipe pouch with a single-flap top, always outermost, never buried
    • Collapsible water bowl clipped to the carrier’s exterior—grab with three fingers, not a full unpack
    • Seat-facing open pockets for leash, keys, or waste bags—no need to reshuffle or pause

    Sometimes, the most practical setups won’t look showroom-ready. A slightly “untidy” outer pocket, an open tote edge, or a bowl clipped outside might not appear perfect—but under repeat stress, these quick-access zones let you fix, reset, and move in seconds. Ask yourself: When handling a spill or leash snag, do you stall reshuffling layers, or just reach, clean, and continue?

    Triggered by Reality: The Fourth Stop Test

    By the fourth stop, weaknesses stand out. Door open, dog half out, muddy paws on the seat, water at risk of spilling—this isn’t the moment for a double-zip pouch or reach-under-everything retrieval. A wipe at the very front means you can clean, reload, and buckle up before the energy drains from the trip. Bowl goes in the exterior mesh, no stacking or balancing act required. It’s not a miracle, just a structure that reduces unnecessary reaches—and cuts the cycle of small hang-ups.

    Small Shifts—Big Impact: Resetting the Routine

    The smallest adjustment—separating go-to travel must-haves by actual frequency of use, and making them instant-access—dwarfs all packing cleverness. After just one high-frustration trip juggling densely zipped pockets, the logic is inescapable: frontload wipes and water, stuff the rest second. Now, the leash stays in one hand, cleanup in the other, and you’re not paused, unzipping, or fumbling mid-move. The day stops feeling like an obstacle course and starts to flow again—one second per motion, not three.

    The endgame isn’t a sparse bag or a “minimalist” kit. It’s a routine that matches your actual travel rhythm—organized so you move with the trip, not against your own layers. Every second not wasted on repeat restarts or deep searches pays off—especially with energetic dogs and trips built on frequent, short stops.

    When Pet Gear and Owner Gear Collide

    One overlooked frustration: owner items tangled with pet gear. Searching for a treat but pulling out your phone; scooping up waste bags but snagging your charger. This overlap adds delay as you pick through the pile, and the pause isn’t solved with more dividers. Instead, give must-have pet items a protected, owner-proof “quick zone”—separate, unblocked, always within reach—so your own wallet never hides a leash or wipes. That single habit breaks the pattern of low-level gridlock, letting every transition feel smoother instead of heavier with each stop.

    Don’t Trust Looks—Test Real Access

    Organizers and carriers can sell you on visible order, but the true test is in the pressure of small, repeated travel tasks. Before your next trip, pick a must-have: wipes, bowl, leash. Time the reach, the return, the pocket reset—are you moving in one motion, or stuck shifting layers and re-zipping at every step? If each “grab” drags past a second or two, expect friction to set in by the end of the day. The access penalty adds up—not as chaos but as a routine delay you feel by the third or fourth stop.

    The setups that feel right in real travel are built for movement, not put-together looks or packing perfection. Long-lasting routines aren’t neat—they’re friction-proof enough to outlast the cycle of seat-side fumbles and repeated restarts. That’s the shift you feel—and it makes the next trip less about pausing for your setup and more about getting back on the road.

    http://www.pawgotravel.myshopify.com

  • Why Leaving Gaps Between Storage Bins Transforms Closet Organization

    It starts out looking perfect—or so you think. You line up bins across your closet, pantry, or laundry shelf, pressing each container tight against the next. The shelves look satisfyingly full, like you’re making every square inch count. For the first day or two, you feel organized. Then real life creeps in: you reach for a towel, push aside a cereal box to grab coffee filters, wiggle a laundry basket out from under a precarious stack. Each move ripples across the shelf. Soon, bins drift, stacks lean, and your careful setup loses its edge. Instead of finding what you need—or putting something away—in one smooth move, you find yourself hesitating, shuffling, and reconfiguring. The shelf fills up, but your daily rhythm stalls.

    Why “Packed Full” Makes Storage Harder

    Rows of bins sitting shoulder-to-shoulder look efficient in photos—but in a lived-in home, this tightly packed approach is where the problems begin. There’s no breathing room between categories. Containers blend together; a section for linens blurs into board games, dish towels start inching into the napkin bin, and loose socks migrate to wherever they land. Every quick grab tugs at neighboring stacks, making the next reach a little more awkward. Categories lose their shape, and the act of putting something back becomes a slow puzzle—where did this even come from?

    It’s not just a visual mess. It’s a practical slowdown. Wasted time adds up: searching for the right basket, moving three things to reach one, or returning items with a sigh instead of a snap. Little by little, efficiency leaks away—until “organized” no longer feels organized at all.

    Purposeful Gaps: Small Spaces, Big Difference

    The remedy isn’t to buy more bins, but to introduce small, visible gaps—about a finger’s width—between each container or category. This isn’t lost space. It’s a clean line between zones, a visual and physical reset point. Need to put away bath towels? The gap lets you target their spot without nudging a pile of board games out of the way. Categories stay sharp. Grabbing one thing doesn’t topple an entire row.

    After just a few days of normal use, the difference is impossible to miss. The boundaries hold, even as you and your family reach, return, and repeat. There’s no guesswork. Resets take seconds, not minutes—because you know where everything lives, and the system doesn’t break down with every hurried put-away.

    Real Storage Moments: What Changes With Gaps?

    Closet Shelves: No More Stack Collapses

    Think about a closet shelf holding out-of-season clothes, blankets, and shoe bins. When these touch, pulling out a single blanket means disturbing everything else—nothing is stable. Shoes wander into linen territory, hoodie sleeves snake their way into the sock bin, the “home” for each item feels temporary at best. Returning items means restacking or, worse, starting over.

    Leave an inch of space between each bin: suddenly, each category stands on its own. Need something from the back? No more domino effect. Linens slide back in beside games, not on top. Shoes don’t invade towel territory. A week later, categories are still clear. Tidying up takes seconds, not a full-blown re-org.

    Pantry: An End to the Scavenger Hunt

    The pantry is where well-meaning systems go to die, fast. When bins are squished together, snacks migrate into the pasta basket, lunch supplies nudge pantry staples into hiding, and soon every shelf becomes a general “miscellaneous” zone. You waste time rooting around for the last pack of rice cakes or knocking over three cans just to grab the oats in the back.

    Add narrow gaps, and the lines stay clear—less spillover, less shuffling. You see what’s missing before it gets buried. During the most rushed moments—packing lunches, prepping dinner—the right item is just a reach away, not a five-minute hunt.

    Staying Clear When Real Life Isn’t Neat

    Shelves always look their best right after a full reset. But as the week wears on, entropy wins—unless there’s a system that actually stands up to daily use. Visible gaps become a structural buffer, absorbing the chaos of life in motion: hurried hands, shifting needs, and family members who don’t see “organization” the way you do. Instead of everything devolving into one muddled heap, boundaries keep drifting items contained. When something’s out of place, it’s obvious—and fixing it is a quick adjustment, not a weekend project.

    Those “lost” inches of shelf space? You get them back through faster resets, steadier stacks, and less drift—meaning you spend less time fighting clutter and more time letting your system just work.

    Everyday Tips: How To Add Gaps Without Losing Space

    • Target your busiest shelves first: Where do things get messy fastest? Pantry snack zones, closet top shelves, entryway cubbies—start there for the biggest payoff.
    • Keep gaps just wide enough: All you need is space for a finger between containers—not a cavern. It’s about signaling a boundary, not giving up valuable real estate.
    • Test and tweak: After a week, take stock: Does everything still feel “zoned”? Are bins creeping together again? Adjust as needed—move things back, or tighten up if the gap feels too big.
    • Experiment small: Try this approach on a single problem shelf before committing. You’ll spot friction points fast, and see if the change holds up after a week of rushed mornings or after-school dump zones.

    The Spaces Where Gaps Matter More Than You Think

    Certain areas are naturally vulnerable to “category creep”: the utility room, the main entryway, any closet multiple people use. Gaps here are more than cosmetic—they keep peace and clarity. Kids see where shoes go, not just where the pile is biggest. Housemates don’t argue over where cleaning products start and party supplies end. Each reset—no matter how small—reinforces the order, making it durable instead of delicate.

    Even in less-frequented spots, these breaks work as an early warning system. When bins suddenly fill, the overflow is obvious, not hidden. Instead of spending Saturday undoing a week’s worth of gradual clutter, you catch it mid-week with a two-minute sweep.

    What You’ll Notice After Living With It

    The real payoff isn’t on day one. After a week, maybe a month, compare the shelves that looked “full” with the ones you gave breathing room. The gapped shelves don’t just look calmer—they are easier to use, faster to reset, and hold their organization even as household needs evolve. When you swap out winter gear for swim towels, or kids’ clothes for school supplies, boundaries stay clear instead of vanishing overnight.

    Just as a pause between songs makes a playlist better, intentional negative space is what turns shelves from stressful to sustainable. Those little gaps aren’t lost storage—they’re the invisible structure that helps order survive daily life, week after week.

    Shop ClosetWorks storage solutions here.

  • Streamline Your Carry-On for Effortless Travel Access and Speed

    The moment your carry-on leaves the hotel room, neat packing starts losing its advantage. You join the security line. Someone behind you sighs while you crouch at the tray, rifling past two stacked chargers for a travel-size lotion buried in a pouch. At the gate, you’re blocking the aisle, stuck unzipping and pawing through “organized” pockets just to free your ID. The design that looked perfect on the bed turns clumsy at the checkpoint—every retrieval becomes a full stop, every must-grab item comes with an interruption. A well-packed bag at rest often turns into an obstacle course as soon as you need to move.

    When “Organized” Isn’t Usable: The Hidden Trap of Neat Packing

    Most travelers over-focus on appearance: pouches stacked, cords wound, compartments zipped. But every extra layer, every nested wallet, each tightly arranged pouch—these details show their true cost when you try to retrieve something mid-trip. Common patterns emerge:

    • Your careful document stack forces you to handle every ticket, note, or bill just to get your passport out—for every single check.
    • Charging cables look sorted, but when you need one before takeoff, it’s trapped under three other things and a tangle waits.
    • The sanitizer and pen slide to the farthest corner of a deep organizer pocket, vanishing in the exact moment you’re up for customs.

    Travel isn’t static. Every time the airport flow speeds up, that “order” quickly becomes slow-moving friction. Looks neat on the surface, but each new transit reveals where the setup drags.

    Real-World Carry-On Moments: Repeated Interruptions That Add Up

    Security Check: The Quick-Access Bottleneck

    The X-ray line is where real carry-on design gets exposed. Nested pouches make for slow, awkward document digs. Now you’re fishing deeper, under pressure—then fumbling it all back as the trays stack up. Rush the repack, and it’s too easy to misplace something or leave behind a tucked-in device. The deeper your items, the more you reset in public.

    Boarding and Aisle Traffic: When Every Inch Matters

    Overhead-bin space is tight, the aisle is even tighter. You find your slim carry-on—then realize your passport is under two zipped layers, half-blocked by another pouch. Your top-down layout that looked so streamlined now traps small essentials behind everything else—forcing you to block the aisle and dig under pressure, just as the rest of the plane stacks up behind you.

    Tray and Pouch Trouble: Packing Choices That Loop Back

    “Deep organization” causes instant regret at the security tray. Suddenly you’re unzipping both a toiletry bag and a tech pouch, all for a toothpaste tube you thought was accessible. When travelers behind you rush forward, re-assembling your careful system mid-belt means something gets jammed or left out of place. The more nested your packing, the more fragile it becomes under pressure.

    Why Certain Packing Decisions Slow You Down

    The “Instagram-ready” bag hides a real problem: unzipping, detaching, digging, and reconstructing just to grab one high-use item. Boarding passes, tablets, snacks, and chargers pile up steps—each layered pouch or clever pocket multiplies reach and repack time. Tight spaces magnify every flaw. Crowded gates, shuttle jumps, busy transfer zones—here, every move you need to make in motion makes a packed-away item a liability, not an asset.

    In real travel, the only “order” that matters is the one you can use—quickly and without drama. Repeated access is the only useful measure.

    The Difference Between Tidy Packing and Instant Access

    Visual control fools most travelers. If your setup can’t deliver essentials directly—passport, charger, snack, sanitizer—you’ll end up breaking down your whole bag just for one thing. Key questions for real travel:

    • Can you pull your passport without shedding tickets or small bills all over the aisle?
    • Can you reach a charger or pen in seconds, or are you lifting pouches and squinting at zippers?
    • Is your repack at security a single, obvious motion—or a guessing game every time?
    • Do high-frequency items actually return to their “home,” or are you rebuilding your layout at every checkpoint?

    Most people only spot the cracks after their third flight or mid-transfer panic. A design that trims clutter at rest often underperforms where speed and access matter most—at the gate, in the seat, or when the line’s moving ahead.

    Reducing Carry-On Drag: Small Adjustments, Real Results

    More pockets don’t fix slow retrieval—less resistance between you and essentials does. The real improvement isn’t just another organizer, but finding the exact “lane” where the highest-frequency items always live. Example: group passport, travel docs, pen, sanitizer, and main cards in one shallow outer pocket with a smooth zipper path. Now, you bypass the main compartment for every high-pressure moment—ID check, ticket scan, customs—no more upending your bag or stacking items on the tray. Habits stabilize—the items always land in the same place, reset after use, and repacking shrinks from ten scattered moves to a single return.

    Instead of digging under-seat or blocking a busy boarding line, you move with the flow: open, retrieve, close, keep going. Repeatable, not fragile. The drag, mess, and delay fade—because your carry-on finally matches real travel speed.

    Recognizing (and Fixing) Carry-On Weak Points

    There’s always a stubborn trouble spot—passport lost in a black-hole pocket, tech charger buried under a secondary kit, or a pouch system that collapses with one wrong move. These are more than minor annoyances. They’re the signs your bag’s structure isn’t tuned for the pressure of repeated, in-motion use. The right setup becomes invisible under real conditions: key items stop needing a search party, reset paths become intuitive, and every needed object returns to its spot. If you keep repeating the same awkward zip or pouch shuffle, it’s time for a smarter reset, not just another “organizer” share.

    Travel-Ready Means Ready for Movement

    What looks “organized” in a lobby photo rarely survives real trip motion. A bag’s true value isn’t how untouched it sits for a quick snapshot—it’s how quickly you can grab what matters mid-line, mid-seat, or mid-transfer, often without even looking. If your setup cracks the third time you need the same document before takeoff, or stalls every aisle move, it’s not built for real flow.

    Getting there takes trial, judgment, and sometimes just one critical shift—a smarter pocket, a clearer outer slot, or a fixed path where high-use items never get buried. A functional carry-on turns trip chaos into flow you can trust—even through airport friction, cramped shuttle crowds, or trailing at the end of a long departure line.

    Find practical carry-on solutions at CarryOnSupply.