Author: jaesoon_admin

  • Wide Underbed Storage Boxes Solve Oversized Duvet Storage Challenges

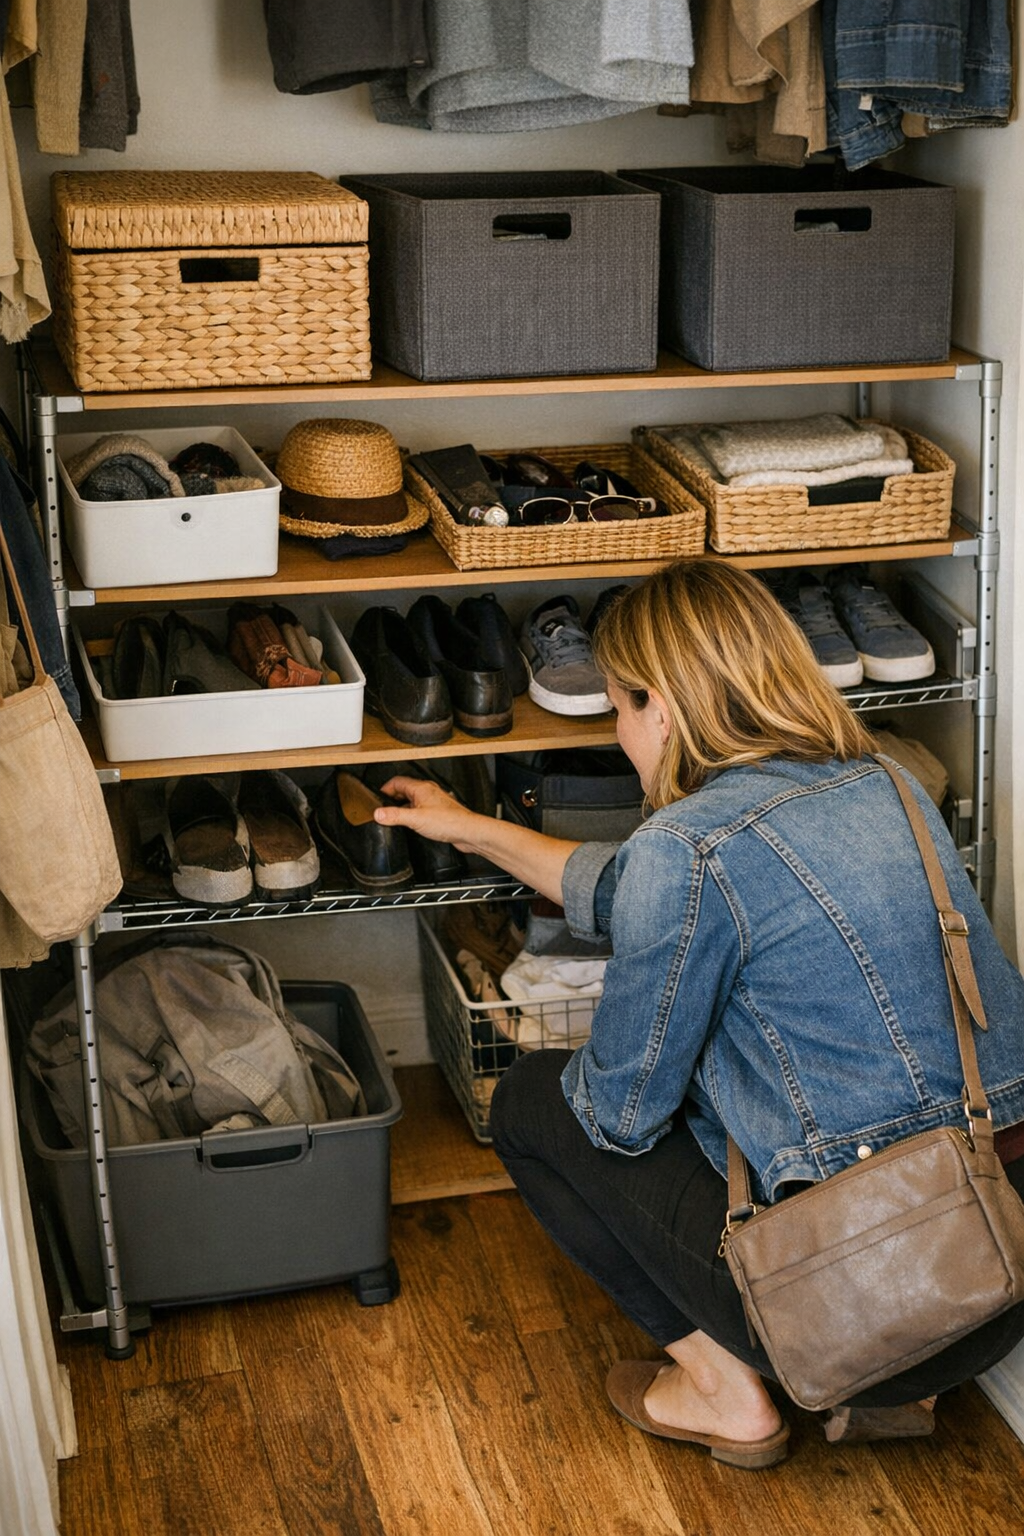
    Underbed storage can keep the bedroom passable, or it can quietly sabotage the space you thought you’d saved. In small bedrooms—where bedding doesn’t have a closet and walking space is already tight—the choice between a too-shallow bin and an oversized comforter isn’t abstract. You notice it the first time you stub your foot on a bin edge jutting out, yank at a jammed lid, or try to slide a box free only to feel it resisting, warped and bulging from the pressure of actual bedding. Most underbed storage looks organized in the beginning—but as soon as routines set in, what seemed smart quickly turns into a recurring obstacle, tripping you up every laundry cycle and slowing resets after every guest.

    When a “Tidy Row” Becomes a Reset Chore

    The illusion is strong on day one: a perfect row of bins flush under the bed. But normal use cracks that calm. Every time you fold and store bulky duvets and try to make them fit, you bend lids, bulge sides, and send boxes creeping out of line. Plastic distorts. Lids bend upward. The units start drifting. Soon, a single retrieval means shifting two other bins, bracing one hand on the frame, and wrestling against boxes wedged by overflow. An item you meant to “set and forget” now costs you minutes and frustration each round—especially painful if you’re stepping sideways between bed and wall just to get past.

    These aren’t minor inconveniences. In an already cramped room, every nudge, angle, and awkward scoot steals space, time, and patience. You’re buffering, realigning, or dragging bins with both hands instead of simply living in the space. The job of underbed storage was to make routines invisible. Instead, it’s taken center stage as a recurring background hassle.

    The Limits of Standard Storage Bins Under Real Bulk

    Standard underbed bins—designed for flat sheets or off-season clothes—collapse under the shifting volume and weight of thick duvets. For the first week, you get away with it. But each use adds pressure: bins bow, plastic corners get softer, and soon the lid won’t sit flat. One side sags farther; boxes stick out and create new snags along the floor, breaking whatever clean line you started with.

    A bigger problem? The spread of clutter at the edges. Bins meant to keep bedding corralled now force you into constant maintenance: pushing stray inserts back in, wrestling lids to fit, endlessly refolding or shifting items to make them settle, only for boxes to migrate out of reach or stick into the walkway after each round. The “setup” you trusted for order is now a series of piecemeal corrections—never quite reset and always one off-angle bin away from visible mess.

    Repeated Use Reveals Weaknesses Fast

    Look at a typical week: you launder and fold a duvet, try to compress it for a bin that’s not quite wide enough, and immediately the sides bend, the lid wobbles, the whole container jams against the bed’s underside—or pushes out just enough to block a path or leave bedding exposed. Every time you load or unload, things get a bit sloppier. Add guest bedding rotation and the cycle only accelerates: you run out of patience as much as you run out of space.

    If your use pattern isn’t static—swapping summer for winter comforters, pulling spare linens for guests—the storage friction compounds. What should be an out-of-sight, out-of-mind routine becomes a live issue, making the thin margin between a passable setup and an outright mess painfully clear.

    The Wide Underbed Box: Built for Repeated Bedding Routines

    The difference shows up fast with a truly wide, reinforced underbed box—one that actually matches the unfolded sprawl and settled weight of a real duvet. Instead of patching a system after every jam, you get storage that anticipates bulk and motion, not just shallow stashing.

    • Reinforced walls don’t buckle when you cram or retrieve.
    • Level, locking lids keep dust out and don’t deform, even after repeated use.
    • Single-handed, predictable access replaces wrestling and two-handed bracing—even in a narrow fit.

    It’s not about “more capacity”—it’s a design that keeps its shape and slides in and out with the same ease all week. You stop needing to straighten bins every Sunday, or brace the frame just to get something free. A real underbed box absorbs everyday use instead of magnifying every movement. Storage becomes background again—no longer claiming your time or blocking your path.

    Scenes from Everyday Use

    Blocked Pathways and Jammed Boxes

    See it on a rushed morning: you reach for bedding, but the bin jams sideways, bulging from last week’s hasty refold. Now you’re wrestling the box clear with an elbow, scraping it along the leg of the bed, bumping into a wall, or knocking it loose only to have it spill. Or you walk past, clip your ankle on a corner poking out—another “invisible” annoyance that’s become a regular hazard since the lid first lost its fit.

    Unplanned Category Drift

    The shape of clutter shifts as bins struggle to contain real use. Overflow forces some containers to become miscellaneous drop zones: stray throws, awkward pillows, a spare sheet that never finds a place. Instead of grabbing what you need, you pull three items and re-sort. Storage stops supporting your flow and starts demanding triage after every laundry load.

    Smoother Return Flow—and Fewer Small Annoyances

    Get the right wide box and the pattern flips. Bedding has a true slot—no bulging out, no hidden overflow, no debate over how much to squeeze. A quick return actually stays quick. The bin doesn’t drift or tip. Changing bedding is a one-movement task, not a mini-reset demanding clutch fixes. The background stays quiet; your path stays clear.

    Real-World Q&A for Underbed Storage Issues

    What’s the sure sign a bin is wrong for bedding?

    If you find yourself compressing one more time, wrangling lids, or constantly adjusting a box that edges further out after each use, you’re seeing the system fail in practice. Warped plastic, lids that won’t close, bins stealing floor space—these are clear flags that everyday use is overpowering the original plan.

    Are wide underbed boxes actually worth the trouble?

    The payoff is immediate in small routines. Wide, reinforced bins don’t fight you. They preserve both order and pace: bedding changes finish in less time, and resets stay in the background. The right box prevents all those small storage irritations from piling up—and keeps the rest of the room from paying that price.

    Can a better underbed box solve all my storage issues?

    No underbed storage is a magic bullet, but the right model eliminates one of the worst culprits: the recurring tripwire of ill-fitting bedding storage. You won’t solve clutter everywhere, but you will shrink the single most irritating storage reset into a quiet habit—no more wrestling, no more realignment, no more daily penalty for a cramped setup.

    Matching Storage to Actual Use (Not Just the Planned Layout)

    The real gap isn’t between “looks organized” and “works”—it’s between the system you imagined and how it stands up to repetition and bulk. The best underbed storage choices acknowledge tight walkways, moving piles, limited wall space, and the need for clean return flow. A well-matched solution makes storage invisible again: no daily corrections, no slow drift toward disarray, no buildup of micro-annoyances that eat away at living space. When every inch counts, the shift from “barely working” to actually supporting your routine is more than cosmetic—it’s a relief you can measure in time and movement, not just looks.

    See practical, setup-focused underbed storage options and more at Gridry.

  • Minimizing Friction in Pet Travel Gear for Smoother Journeys

    The real test of a pet travel setup isn’t how it looks at home—it’s what happens after three, four, or five stops in a row. That neat, organized bag you felt good about while packing quickly reveals weak points once the routine hits its first true snag. You reach for a cleanup bag and find it wedged beneath a rolled blanket. The water bottle that looked secure now blocks the leash’s clip. What seemed “calm” for your pet—an extra comfort mat, a favorite toy—becomes just another obstacle between you and whatever they need in the next minute. Even your pet starts to notice: every reach grows slower, every pause grows longer, and the energy between stops shifts. In pet travel, friction doesn’t announce itself. It creeps in when the flow is broken, and suddenly the only thing moving smoothly is your frustration.

    When Organized Looks Aren’t Enough

    A well-packed bag on your kitchen counter can fool anyone. Everything is zipped, snapped, lined up. Hygiene wipes have a dedicated slot; the comfort pad folds neatly; even spare toys have their place. But that order rarely survives the first handful of stops. The real-world moment: you reach for a leash and pull out treats by mistake, or you dig for a waste bag and find three half-used rolls buried beneath less-used supplies. The illusion of “ready” collapses at the moment you need just one thing, fast—and can’t grab it without moving three others first.

    It gets worse at seat-side. A cleanup kit in a rear pocket looks clever until the wipes wedge against a water bowl every time you try to get them out. Leashes slip under handles with the smallest shift. A few minutes after leaving, your precise system is already fighting itself: you brace your wrist, hesitate before reaching, and feel your pet’s patience drop as you scramble through an order that’s become all wrong for the kind of stop-and-go routine most trips demand.

    The Routine That Repeats—And Where It Breaks Down

    Most pet travel routines don’t fail at the start. They fail at repeated stops, once seat position, bag orientation, and reach patterns pile up real strain. Picture a rest stop: you check for water, a waste bag, the leash—each tucked away, but in the noisiest, slowest way possible. The lid on the wipes catches, the side pocket jams against your car door, and your pet’s posture stiffens as they realize every pause could mean a longer wait. With each delay, regular movement becomes tangled: your pet shifts half-out, then back, the moment for easy leashing already gone. Every inefficient reach stacks up—first annoyance, then tension for both sides of the leash.

    And it snowballs. Miss the right pocket once and the next stop makes it worse: items migrate to new corners, fast-grab essentials get buried, and each restart requires shuffling everything just to do something as basic as walk your pet or clean up after them. What started as a system now feels like a slow-motion obstacle course.

    Real Access vs. Theoretical Order

    There’s a gulf between a tidy bag and a setup you can actually use. A perfect row of supplies means little when it only looks neat at rest. In use, the bowl blocks the wipes, the comfort item covers the leash, and every stop means more shuffling—visible cracks, not surface flaws, emerge first. In those real moments, “having everything” isn’t just secondary—it slows you down. The only thing that matters is what you can reach without shifting, unzipping, or fishing items out of the way.

    Pets mirror this tension. Every time you pause to dig, their ears drop and attention tightens. Restarting with a fumble signals to them that movement is about to become a chore—and they may resist, adding another step you didn’t ask for.

    A Case in Point: The Ten-Minute Test

    Try this on your next outing: After ten minutes, stop and—without planning—reach for water and a cleanup bag as if you’re in a rush. Does your hand tangle with a zipper? Do you have to unstack or shift something first? If so, notice how your movement changes: micro-pauses, braced wrists, an awkward shuffle for your pet to wait out. One snag is enough to flip the mood from calm to hassle, and now both you and your pet anticipate the next hangup. The feel of an “almost right” setup becomes one you both dread to use repeatedly.

    The Overstuffed Side-Pocket Trap

    Most pet travel kits slip into the same trap: the side pocket, useful in theory, becomes a mini junk drawer in practice. High-use essentials mix with stashed-away extras, and you end up unpacking half your bag to get a single wipe. You’ll spot the problem before you admit it out loud: a slow hand reaching, your wrist braced, patience fading while your pet inches restlessly. These aren’t trivial—they’re repeated signals that your kit’s structure is working against you at the exact moments you need support.

    Building a Setup That Actually Moves With You

    Segment by use, not just by item. Assign the pocket nearest your seat or door to your top three essentials: leash, cleanup bag, water bowl. Don’t layer comfort items, treats, or backups there—let those live in the main compartment, away from your fast-access flow. Only what you must reach for every stop gets that privilege.

    And then—leave real breathing room. An open hand-width in your quick-access pocket means nothing blocks, nothing gets wedged, and there’s zero need to brace before grabbing. One open space can flip a stop from three steps to one: grab, use, return, move. It may sound simple, but this is where nearly every real setup falls short. The difference isn’t visible at home; you feel it the first time you move quickly, and your bag—finally—doesn’t slow you down.

    Small Changes for Noticeable Calm

    Efficiency in pet travel has nothing to do with perfection at rest. It’s about cutting the friction that returns every time the car stops and the real handling begins. The best setup doesn’t merely promise organization—it releases you from interruption. Over a day, seconds don’t compound into chaos, but into calm: your pet waits less, you fumble less, and every restart feels as smooth as the last.

    Compare the two outcomes: In one setup, every stop pulls you deeper into a maze of your own making, frustration growing with each touch. In another, structure “disappears”—you remember your pet more than your gear, because everything you truly need, in the order you need, is just ready.

    If pet travel still slows you down or keeps forcing awkward workarounds, you’re not alone. Usually, it’s a structural flaw—not operator error—that blocks truly smooth movement. One fix in that access logic can change the whole routine. See structures built for actual repeated use at PawGoTravel.

  • Why Stylish Storage Often Complicates Daily Access and Organization

    The perfectly arranged closet always looks great—right up until real life moves back in. All those matching bins and color-coordinated baskets promise easy order, but within days, the cracks appear. Shoes spill into the middle, gloves vanish into the wrong bin, and the morning rush leaves folded stacks crumpled and corners crowded. The show-home setup quickly gives way to the reality of daily routines: quick changes, tired evenings, unpredictable schedules. Suddenly the gap between “looks organized” and “actually works” is impossible to miss.

    When Style Adds Steps—and Friction

    At first, identical containers and perfect symmetry trick you into feeling in control. The neatness feels self-sustaining. But those matching lids and deep baskets rarely hold up to repeated use. Tall bins block your view, labels are forgotten, and opaque baskets mean mystery contents. Every time you reach for a charger or scarf, you’re shuffling containers—lifting, sliding, guessing. The system’s style becomes the source of its drag.

    The extra steps pile up quietly. By midweek, you’re reaching behind stacks to grab one thing, moving three baskets to find another, and reshuffling each time you put something back. Gloves land in the shoe bin. Chargers spill out over hats. Lids go missing—then never return. That “maintainable” closet now demands your attention every night, fighting your routines instead of supporting them.

    Where Appearance Beats Access: The Real Tradeoffs

    Picture a shared hallway closet lined up with matching lidded cubes. The initial effect is serene—everything straight, surfaces clear. But life in a busy home wears that system down fast. The moment you’re running late, bins get tugged out but not returned. Lids disappear. The most-used things migrate to the only open basket in front, while the rest become a jumble of tangled hats, tangled cords, and mystery items buried in the stacks.

    The daily rhythm exposes the system’s blind spot: categories blend, stacks topple, and shelf edges become drop zones “just for now.” Finding earbuds means upturning three bins. Grabbing gloves means reshuffling the row. Instead of curbing clutter, the closet hides it in plain sight—or worse, scatters it across the house as everyone leaves things where they land.

    The Real Weight of Over-Styled Storage

    Why does a closet that once looked effortless suddenly feel like work? Because you’re managing the setup, not using it. Each action—lifting a bin to see what’s behind, stacking baskets to reach something below, fishing through an unlabeled container—adds friction. Over time, what was supposed to simplify your life turns into a puzzle you solve on repeat.

    And as routines overlap—packages coming in, sports gear coming out, seasons changing—the categories lose shape. Winter gear slides into summer bins, everyday items get shuffled. The once-tidy arrangement becomes a daily game of stacking and re-sorting, just to get to the next morning without a pile-up.

    Spotting Storage Fatigue

    The warning signs are always the same: bins left out, piles forming at the edges, stuff “temporarily” stashed anywhere it fits. If opening the closet means shuffling three things just to grab one, or if you start leaving things out because putting them away is a hassle, your storage isn’t working for you—it’s working against you.

    What Happens When Storage Fits Your Routine

    Real solutions don’t come from adding more containers. The fix is aligning your setup with the way you actually use your space. In my own hallway closet, the breakthrough came from swapping a row of deep matching baskets for a mix of small open bins and a waist-high open shelf. Suddenly, there were no more hidden piles or balancing acts—shoes landed fast, grab-and-go items like hats and gloves had a simple drop zone, and all the high-use things were visible and within arm’s reach. The open shelf’s front edge, once a landing zone for clutter, finally stayed clear all week—because putting things away stopped feeling like extra effort.

    Smart storage setups reinforce routines instead of resisting them: when you can see what’s missing at a glance, you’re less likely to let clutter build. When putting something back takes one step, resets are faster by default. The system becomes self-sustaining because it’s built for how you live, not just how you want it to look.

    Designing Storage That Holds Up

    No closet or mudroom stays perfectly neat forever. But effective storage serves daily rhythms and fights back against clutter creep. Instead of fixating on matching bins and symmetry, use containers and shelves that mirror real-life categories—and keep your most-used items between knee and shoulder height. Break up deep shelves with open bins for things you reach for daily, and keep sealed baskets for out-of-season or rarely-used items. At least one open edge lets you spot missing or misplaced things before chaos takes over.

    Practical Tweaks That Make a Difference

    • Rethink shelf heights: Everyday grab-and-go items should land at “easy reach” level. If you’re crouching or reaching overhead for basics, swap the layout.
    • Watch for “bin overload”: If containers are multiplying—or migrating across shelves—ask if you really need a bin for everything. Sometimes an open shelf beats another box.
    • Audit your reset speed: If clearing clutter takes more than a minute, track down the storage step that slows you down. Strip out anything that creates extra work just to put things back.

    A Storage Setup Built for Real Life

    You don’t need a full overhaul—just honest tweaks where your routines meet resistance. The most effective changes rarely look drastic, but they pay off every day: less reshuffling, fewer mystery piles, and a closet that keeps its categories clear. Over time, your space feels lighter—not just because the surface looks right, but because it quietly supports the way you actually live. Everyone finds what they need, putting things away takes seconds, and sudden pileups become a distant memory.

    Find practical closet systems, shelves, and everyday storage options at ClosetWorks.

  • Reducing Friction Points Transforms Daily Car Comfort and Usability

    Every driver knows this pattern: you step back into a car that appears streamlined—phone tucked into its pocket, cables hidden, floor mats lined up, organizers squared away—yet minutes later the real friction shows. You reach for your phone and the mount’s just out of angle. The charging cable you thought you’d tamed is tangled around the gearshift or has vanished into the gap beside the seat. Floor mats, straight in the morning, now slide forward under your heel, tripping your step more than any actual clutter ever did. The surface looks ordered, but each repeated drive, park, grab, and reload reveals what isn’t actually working. Neatness doesn’t deliver smoother routines unless your setup makes every repeated action—entry, reach, charging, access—less of a hassle, not just better looking.

    The Hidden Burden of Tidy-Looking Discomfort

    It’s easy to obsess over a car that photographs well: wires coiled, pockets cleared, organizers promising everything-in-its-place. But daily comfort hinges on cutting down the micro-struggles that never show in pictures. That dash phone mount might be “minimalist” until you fumble for your phone, arm twisted, while parked at a red light or after a grocery run. If every access is a reach-around, the tidy setup quietly sabotages your flow.

    Cables are the same story. It’s satisfying to hide them, but two stops later, you’re hunting through the cupholder crevice or wrestling a cord wrapped around your bag. That “fixed” cable is now a loose end—literally—wedged somewhere you can’t see, just when you need a charge. Tidy does not mean usable.

    Repeated Use Reveals True Weak Points

    Quick errands and back-to-back stops expose these weaknesses fast. Car interiors set up for looks alone trigger new catch points right at your most repeated motions. Take waterproof seat covers: they protect from spills, but if every entry bunches them by the door or drags grit across the edge, you inherit a new cleanup step or slipping hazard. Center console organizers promise streamlined storage—until grabbing spare change turns into fishing through a deep, tightly-packed slot, making you choose between losing time and breaking your stride.

    The real cost isn’t the visible mess, but the steady loss of seconds as you reset mats, untangle wires, or reposition covers on the fly. Each micro-interruption isn’t dramatic but, multiplied across a week, it chips away at the convenience you thought you’d built in.

    When Every Routine Motion Adds Drag

    Focus on the zone where seat, belt latch, and center console collide: the epicenter of repeat friction. Here, cables drape into belt paths, slot organizers cramps access, and covers curl at the edge. Each re-entry means nudging a mat, freeing a cable from under your thigh, or lifting an organizer pocket just to grab a pen or sanitizer. This is where the gap between visual control and actual ease of use becomes obvious, drive after drive.

    Surface Order vs. Flow: The Everyday Tradeoff

    A common “fix” is pushing your phone into a deep seat pocket to get it out of sight. Visually, that works—until next entry, when the belt catches on the cable and you’re half-dangling the phone, or prying it loose from an awkward corner while cars pile up behind at school pickup. Floor mats that fit perfectly at first slip forward, stalling your first step in or out, and breaking rhythm as you need to pause and readjust. Trunk organizers that look flush and permanent can imprison groceries in unreachable corners, doubling the time it takes to unload—or making you upend the whole organizer just to reach a runaway bag.

    Small Adjustments That Transform Everyday Ease

    Often, the right single change beats more layers of “storage solutions”. Lowering your phone mount to vent height and switching to a straight, short charging cord—direct to the nearest USB—can erase the habitual untangle-and-reach routine. Slot the phone in, charge, and move: routine friction drops away. Compare that with complicated seat-side storage: if an organizer interrupts your hand’s natural path, it creates new struggles for the sake of “order.”

    Custom-fit floor liners—those cut to the true edges of your car’s interior—resolve both sliding and cleanup in a single move. They don’t just look neater; they stop the cycle where mats drift and dirt creeps in, meaning fewer quick-fixes with your foot and less cleanup every re-entry.

    The Cost of Overcomplication Around the Console

    Most repeat frustrations converge at the seat edge and center console. When phone mounts, chargers, belts, organizers, and cover flaps all crowd the same tight space, their intended order creates new clutter in daily use. Universal-fit accessories often promise a shortcut but can turn small everyday messes into larger, ongoing access problems. The more “functional” options you stack together, the more reset they demand.

    Designing for Real Repeats, Not Just First Impressions

    The difference between “looks clean, but works slow” and “actually easier every day” only appears after the first few cycles. You may finish your weekend setup satisfied, but by mid-week, traced-back friction returns: re-entry that requires a shove, pockets that hide your essentials, cables that migrate exactly where you need to move. Real comfort comes from setups that cut actions, reduce tweaks, and let movement happen without a reset ritual every trip.

    Watch for the spots that always snag your motion—those cables that sneak away from the console, the edge liner that needs straightening, the overstuffed pocket you actually avoid using. Fixing these friction points with stable, direct, custom-fit solutions pays off again and again: faster exits, cleaner loading, less “pause and adjust” after every routine stop.

    DriveWellSupply centers its car-use accessories on fixing these friction points at the source—solutions meant to last entire routines, not just look neater at parking time.

    Explore practical solutions at DriveWellSupply

  • Why Accessible Ground Wires Matter for Safer Indoor Lighting Maintenance

    The real difference between a lighting fixture that works and one that fails isn’t the way it looks on installation day—it’s what happens the first time you have to touch it again. In the actual rhythm of a house—busy mornings, rushed repairs, cleaning routines—a flush-mount ceiling light over the laundry, a hardwired wall sconce by the steps, or a vanity bar above the mirror can turn from “done” to demanding far faster than most people expect. One detail almost nobody notices at first—the ground wire, buried tight with no slack—can make every simple job risky or impossible: pulling at stuck screws in dark stairwells, straining to change a bulb by the mirror, struggling to reach across a damp laundry shelf. If the ground wire hides behind a powder-coated plate or jams stiff inside a wall box with zero give, what started as a “clean” install gets complicated overnight.

    The Hidden Friction Behind Everyday Fixtures

    This problem hides until it doesn’t. A ceiling light sits flush and even over a laundry counter. A pair of wall sconces bookend a mirror—lines sharp, everything anchored neatly out of sight. Only when you try to open the fixture do you discover the catch: ground wire clipped short, stiff, or stuffed behind heavy plates. It’s in the hurried moments—late morning, running to swap a bulb—that you find yourself half-blind, one hand losing grip as the fixture tugs down on its wiring. Cutting corners “just for now” or leaving the ground disconnected isn’t rare; it’s the desperate fix when access stalls. And this chronic strain creeps in fastest in places with regular interruptions: steamy mirrors, low hallway ceilings, vibrating stair turns, utility rooms where every screw seems to rust by month three.

    Real Use Reveals What Installers Don’t See

    Catalog-perfect lighting doesn’t show its limits until regular use exposes the weak points. The day-to-day tells the real story:

    • Mirror sconce, midnight: You lean close and half your face still falls in shadow. You go to adjust, only to find the wiring barely long enough to hold the fixture—your hand trapped, juggling the shade and searching for a connection you can’t even see. If the ground is free and visible, that fix takes one calm minute.
    • Stairway pause, weak light: A flicker draws your eye, and you reach up to check the mounting. When ground access is straightforward, you can detach, inspect, and re-secure without risking a short. Pinned wiring? Most just close it back up or risk a workaround that leaves things worse.
    • Hallway fade: Rows of semi-flush lights seem fine until months of door slams and vibration make coverage uneven. To open a fixture with buried wires, you either call for backup or risk stripping hardware—one misstep, and the next repair just got even harder.

    The cost: every time you jury-rig a solution or put off “fixing it right,” you leave behind a tougher problem for next time—sometimes a safety oversight, sometimes an invisible bottleneck that only gets worse with age and use.

    Moisture, Movement, and the Real Cost of Inaccessible Ground Wires

    High-traffic and damp rooms double the trouble. In a bathroom or utility corner, moisture seeps behind trim and fasteners, accelerating wear. The difference: when a quick moisture check means wrestling with a cramped, short ground, every cleaning, code update, or loose bracket becomes a low-stakes hazard. A shortcut—leaving the ground temporarily disconnected to fit things back—quietly builds a safety risk, especially in rooms with steam, vibration, or sudden fixture movement. As regulations or building codes evolve and hardware ages, what started as a “hidden” flaw increasingly blocks safe repairs and simple maintenance.

    Movement is its own pressure test. Step onto the landing, open a stairwell sconce, or try maintenance on an entry flush mount after a year: vibration and repeated access make all the difference between easy upkeep and another half-finished job. Fixtures with bad ground access turn even a bulb change into a stress point; every shortcut, every postponed tweak, and every forced maneuver adds silent friction to daily life.

    Why Visible, Accessible Grounds Make Every Fix Easier

    If you want your lighting to stay fixable, visible ground wire slack is the most important hidden upgrade. Four inches of reachable ground, positioned above the mounting or accessible near the wall box, means you can revisit, replace, or clean the fixture without turning your next morning upside down. The changes are immediate and cumulative:

    • Five-minute bulb swaps at a fogged bathroom mirror—no risky stretching, no wires yanked from inside the wall.
    • Shade adjustments or moisture checks in tight areas—handled solo, without fingers wedged behind metal or makeshift tools propping a fixture in midair.
    • Simple code updates or fixture replacements over time—done without rewiring short grounds or scheduling a return visit for what should be routine.

    Once you experience zero-fuss access, you notice every spot that’s missing it. It becomes the filter for what kind of lights and mounts you trust—not just for yourself, but for anyone who’ll face that ceiling or wall later.

    Tips and Lived-In Fixes from Repeated Use

    This fix isn’t exclusive to professionals. Whether upgrading a hallway sconce, stringing under-cabinet task lights, or swapping out a ceiling flush mount in a laundry, these habits spare you the usual headaches:

    • Coil ground, never cut flush: Leaving an accessible loop pays dividends with every fast bulb change, cleaning, or bracket inspection across the years.
    • Test final reach before tightening: Gently tug the wire at install—if removal still means disassembling the bracket or scraping hands on sharp edges, add slack before you call it finished.

    Neither step is visible after install, but both mean you avoid balancing fixtures midair or improvising unsafe repairs down the road.

    Lighting That Remains Useable, Not Just Bright

    A room can look fully lit and still let you down: glare on bathroom glass, a shadow line across the prep counter, lost edges along hallways, or a work surface that’s bright but half-obscured in use. So it is with maintenance—polished finishes and high output mean nothing if every fix is an ordeal, or if an unseen flaw guarantees stress next time. Ground wire access isn’t decoration—it’s the line between lighting you live with and lighting that actually supports living.

    Over time, what makes a ceiling light, wall sconce, or vanity fixture feel genuinely useable isn’t “how it looked when new”—it’s whether each return, adjustment, and regular check happens with confidence, not dread. Leave grounds accessible from the start; the small effort up front is what keeps every future change quick, safe, and clean instead of slow, risky, or left undone.

    Visit LightHelper for practical indoor-lighting solutions that stay reliable after installation.

  • Why Consistent Anchor Depth Measurement Matters for Hammer Drill Accuracy

    Depth control doesn’t get respect—until it derails your whole install. If you’ve actually spent hours on anchor holes—drilling for racks, brackets, or overhead hangers—you know how quickly a fast, tidy project slips into a haze of misfires and slowdowns. At first, every hole feels smooth. But after a dozen plunges, cement dust grinds into your gloves, sharp tape marks fade out, and you’re second-guessing every bit of progress. Suddenly the anchors sit proud, don’t seat flush, or bite too shallow. Now you’re reaching for a punch or chisel, halting that early momentum, and muttering about “good enough.” What should be a half-hour run turns into wasted energy, patch-ups, and frustration that nobody budgeted for.

    The Real-World Mess of Measuring Anchor Depth

    Whether you’re mounting heavy brackets in a damp basement or securing a pipe run in a grimy garage, every anchor has to land just right. That should be routine, but on real jobsites, the margin shrinks fast. Shop dust turns that crisp white tape into an unreadable smear before you’re even halfway. The drill’s built-in depth stop, if you bother setting it, can loosen from vibration or just get ignored in a rush. Even a collar, if set in a hurry, has a way of drifting after a few cycles. Every workaround has a weak spot, and small lapses quietly stack up until one “quick” job becomes an afternoon of fixing what the tape or stops missed.

    When Tape Fails—and Morning Shortcuts Bite Back

    Slapping a tape flag on your bit is fine for a handful of holes—but under real pressure, tape slides, gets obscured by cement, or peels off mid-run. By the fifth or sixth hole, you’re squinting at fingerprints and guessing depth by muscle memory. If your hands are slick or the lighting bad, good luck actually seeing any marker. There’s no consistency, and suddenly you’re shoving anchors and hoping they’ll seat. Of course, you hit one too shallow—so now you’re cleaning, prying, maybe running a new hole, and losing flow as your arms and patience give out.

    Collars and Stops: Feel Without the Guesswork

    Swap tape for a true depth collar and it’s a different job. The second you feel that collar touch concrete, you know you’ve hit target—no peering through dust, no second-guessing. It’s tactile, not visual. You can check depth by feel, even if visibility is shot. Proper stops or collars don’t win awards for perfection. They win by making every hole routine: line it up, drill till you hit resistance, move on without hesitation. The payoff is measured in smooth installs and projects that finish on pace with the first anchor every time.

    Scenes the Shop Floor Knows Too Well

    The difference shows up when you’re working at awkward angles or with your head pressed beneath a shelf, nose full of dust. Try keeping a tape mark visible when drilling overhead—concrete snow falls, your marker is gone in seconds, and now you’re guessing. Or drive anchors next to a web of old patched holes; you can’t afford a slip, but you also can’t clearly see your bit. The “quick fix” holes become repeat offenders—anchors end up proud, you reach for a hammer, and you know you’ll be explaining it later.

    This is where a fixed collar saves time and nerves. You don’t have to see the mark. The bit stops where it should, no drama, no extra cleanup. Less fuss with tools, less chance of scarring the wall forcing in shallow anchors, and fewer do-overs. It’s these imperfect moments—poor visibility, awkward spaces, and fatigue—where real stops or collars quietly pull their weight.

    Tool Setup: The Small Habit That Pays All Day

    Setup is seconds; mistakes burn hours. Set up with a depth collar—just a minute with a caliper or even a tape measure. Dial it in a few millimeters deeper than the anchor to clear dust. That’s all it takes. Set tight, that collar gives you repeatable, reliable hits, no matter how many anchors or how tired you get. The payoff isn’t theoretical: it’s bracket lines that stay level, fewer anchors that have to be hammered, and no more “almost” flush fastenings that catch a critical eye at the walkthrough.

    Stick with tape and, by hole number ten, accuracy fades. Each misstep demands a cleanup pause, sometimes fresh bits, sometimes redrilling. What felt streamlined at 9 am becomes a slow-motion loop of checking and fixing, slicing up both energy and jobsite morale. In the long run, control saves more than it costs.

    Background Habits for Depth Consistency

    • Set collars with actual measurements. Even a quick check with a caliper or tape beats a rough guess every time.
    • Drill a little deeper than anchor length (4-6 mm is usually safe). That extra depth catches stray dust and lets anchors truly sit flush.
    • Re-tighten collars every dozen holes. Hammer drills vibrate things loose—don’t assume nothing’s shifted.
    • Change out dull bits fast. Rounded tips throw off both speed and control, dragging your workflow to a crawl.

    The Win: Smoother Installs, Fewer “Do-Overs”

    The best installers aren’t just quick—they’re steady. Reliable depth means reliable anchoring, and it shows up in cleaner work and jobs that finish right the first time. You don’t have to chase perfection. Aim for habits that limit surprises: a simple collar, a minute’s setup, and fewer corrections down the line. Less wasted motion. Less backtracking. Less aggravation when conditions are rough and the work just won’t wait.

    Shop tools and accessories built for real job site reliability at Gumboll.

  • Choosing Between Backyard Storage Units and Wall Systems for Outdoor Clutter

    Outdoor storage doesn’t judge you on moving day—your real verdict comes weeks later, when the shed’s clean lines unravel into soccer balls wedged by the door, hoses creeping across every path, and tools claiming whatever edge you’ll tolerate after a long day. The showdown between a freestanding storage unit and a wall-mounted system isn’t really about aesthetics or capacity. It’s about whether your setup quietly clogs your routine—shuffling bins, nudging doors, retracing steps—or actually makes your yard less of an obstacle course after each storm, each Saturday, each ordinary weeknight. Good intentions meet mud, rush, and gravity. Setup choices make every difference—especially in corners where room disappears fast.

    Where Storage Becomes the Roadblock

    The first afternoon, your new storage looks tidy—a shed lining the fence, or a wall rail loaded just-so beside the garage. But normal use doesn’t wait. Each trip for the rake brushes against the packed lineup of patio chairs; bins you swore would stay sorted get stacked and re-stacked, blocking the walkway on every pass. In no time, movement gets pinched: sometimes a sideways slip, sometimes backing up and moving a wagon just to reach the pruners. Overflow stops being a surprise and becomes built-in friction.

    If you work with a side yard barely wide enough to wheel a mower, or a patio edge serving both storage and kids’ traffic, setup footprint matters more than shelf count. A floor unit filled once becomes dead weight. It’s supposed to solve chaos, but more often, it becomes the pivot point where everything bunches up: Park the scooter and now nobody’s getting to the rakes; want the gardening gloves, but you’re balancing bins just to pull the right door open.

    Wall-Mounted Systems vs. Standing Units: How Use Patterns Actually Shift

    Wall systems promise freedom underfoot and open lines of movement—until vertical clutter stacks up. Hooks go up neatly, items are easy to see. But in practice, “out of the way” means cramming old hoses above eye level, stashing out-of-season tools on the far ends, and letting this month’s gear pile right in front of last month’s. What started as a clean wall morphs into a shifting wall of stuff.

    It sneaks up: grabbing a shovel now requires shifting past coolers and moving the folding chairs—one hang-up triggers two more fixes, and suddenly you’re halfway to another weekend reset. Hooks meant to organize now collect overflow, blocking what you use most.

    Freestanding Units: Shelter That Can Box You In

    Freestanding and modular units offer the shelter your gear demands—but they claim their territory and don’t give it back. Dropped into a fence line or anchoring the patio’s end, their swing radius interrupts the routine: the shed door opens and now the footpath is gone, so tools dragged out for one job just get dumped outside for “later”—clutter in a new location.

    Soon, the inside becomes an “anything goes” zone for bulky, awkward gear—cushions, sports nets, bags of soil—often just piled to clear the patio, not truly put away. The evidence: every time you pencil in a “Saturday shed rescue,” frustrated by how quickly that reset is needed.

    The Return Problem: Can You Actually Put Things Back?

    The best outdoor storage proves itself on the return trip, not on day one. If putting a trowel away means working past children’s boots, buckets, and a half-lost hose, it’s easier to drop it “just for now”—a momentary decision that, repeated, piles up into chaos.

    Wall-mounted options work if returning gear is simple—grab, hang, step away. But few systems stay that simple under daily use. If the trimmer only fits behind a stack of bins, or a wall hook now supports three tangled extension cords, nobody’s putting things away the right way after a late-night chore.

    Big sheds repeat the cycle with bulk. You unload outdoor cushions after a cookout and leave them inside the threshold, telling yourself you’ll “fix it up properly next time.” That next time creeps further out, as each drop-off blocks the last one. The rhythm breaks down, and the storage eats its own path.

    Overflow Piles & Dead Corners: How Clutter Wins in the Edges

    Every system promises a place for everything—until overflow creates its own zone. Stray gear finds the same awkward corner by the gate, or a once-clear path shrinks as piles drift slowly outward. That wall grid that felt perfect after spring cleaning? By July, it’s a choke-point for everything too awkward to store somewhere else, and the overflow stays until the next full reset.

    Modular units don’t always flex. One cubby stays empty for months, the next is packed and spilling out. Meanwhile, rigid storage boxes can’t dodge wheelbarrows or redirect foot traffic. The result? You’re always working around storage when it should be working around you.

    The Real Measure: Does Your Setup Keep Up With Daily Life?

    The difference isn’t drawer count or shelf height. It’s whether your flow—grab, use, put back—survives a real week of change. Areas that do double-duty for play and projects have to adapt on the fly, not just look contained when nobody’s moving. Wall racks can flex for midsummer swaps or quick rearrangements. A mobile cart or bin might save the day when garden tasks explode or guests bring more gear. It’s the ability to tweak, not commit, that keeps things from bogging down.

    Beware any setup that traps your habits. A shed that severs play space is an obstacle, no matter how nice the doors swing. A wall system overloaded with sports gear and boots becomes a messy barricade by the end of a rainy week.

    Practical Tweaks That Cut Down Clutter Creep

    • Designate an overflow landing pad—and set it where clutter wants to gather, not where you wish it would. A crate near the wall racks can keep soccer balls and jump ropes from flooding walk space.
    • Rotate out dead corners by swapping seldom-used stuff for what needs to stay within reach. Don’t expect one layout to last a year—refresh with the seasons, or after a month of noticing what keeps getting blocked.
    • Prioritize the return trip. If any system demands reshuffling for the smallest item, it’s time for micro-changes—not just another “deep clean.” Small adjustments beat giant resets, every time.

    Why Real Fit Eats Features for Breakfast

    The right setup won’t win awards for looks but will quietly make your yard less irritating, reset after reset. Go for what matches your yard’s awkward paths and return habits, not what seems impressive by the numbers or the catalog photo.

    Wall systems keep floors in play—but rustle up chaos if overloaded. Storage units keep your gear dry, but can carve zones that block everything else. What feels “easy” on install day can quickly become the thing you avoid, if it’s not built for the reality of your space and your routine.

    When “organizing” becomes your new default activity, your storage is failing. Build for easy returns, fast tweaks, and the messes you know actually happen. That’s when outdoor storage genuinely helps, not hinders.

    For a full look at outdoor storage and real-world fit, shop TidyYard storage solutions.

  • Keep Pet Areas Tidy by Placing Cleaning Cloths Within Reach

    Simpler Daily Pet Cleanup Starts With Setup, Not More Effort

    Most daily pet mess isn’t dramatic. The real friction comes when you reach for a cloth after a water spill or a quick wipe-down post feeding—only to find the towel is across the room, blocked by recycling or missing entirely. Even the smallest missing detail—a cloth, a scoop, wipes left out of reach—can stall your whole cleanup, letting drips and crumbs collect until you’re stuck with a mess that’s harder to handle at the end of the day. What seems like an “organized-enough” setup in the morning can slowly drag your routine down by dinnertime, just because basic pet-care tools aren’t where they need to be, when you actually need them. This is where many setups quietly fail, even when everything looks tidy on the surface—revealing the everyday gap that CalmPetSupply routines are built to close.

    When a Care Area Looks Set But Still Slows You Down

    Start with a typical morning: bowls aligned, food and scoops stacked, wipes tucked somewhere “handy.” Once the day hits full speed, those details start breaking down. You reach to top off water and find toys and crumbs crowding the area, or discover the cleaning cloth is AWOL—lodged behind clutter or left in another room. The setup looks right, but the function’s never there in real time.

    You’re forced to leave drips and sticky bits “for later,” which means they solidify. When both cats and dogs share the same zones, that gap becomes an endless cycle: the dog bumps the bowl just as the cat swoops in for breakfast, messy pawprints multiply, and you skip the quickest cleanups because the tools require just one trip too many. Nothing is catastrophic, but your routine starts falling behind at every edge.

    Hidden Friction: When “Easy Enough” Isn’t Simple in Real Use

    Real-world friction doesn’t announce itself—it just accumulates. Maybe everything is technically tidy because you keep cleaning supplies tucked away, but even one extra drawer or sealed container is enough to justify letting a wet patch sit, telling yourself you’ll handle it later. Meanwhile, your pet’s paws track the mess into hallways, and the “easy enough” system proves slow when it matters.

    Every delay compounds. A once-quick swipe morphs into a baked-on patch by evening. A lint roller lives in the cabinet, but grabbing it means moving shoes or wrestling the door, so shedding sits longer and resets get skipped. Over the week, these small frictions repeat—until a simple cleaning habit feels like a chore that’s always waiting in the background.

    Real-World Scenes: Where Setup Makes or Breaks Your Flow

    Scene One: Hectic morning. You reach for a refill and step on a squeaky toy, which tips the water bowl over. The cloth you need slipped under stray mail, and instead of wiping up, you dodge the puddle—catching sticky pawprints later, after they’ve already spread.

    Scene Two: End of the day. Dried cat food hardens at the rim of the dish. The towel’s technically nearby, but grabbing it means dragging a cabinet door open behind a recycling bin. Rather than wrestling with the setup, you leave it—more gunk to scrub next time.

    Scene Three: Quick outdoor walk. The dog returns muddy. You know the brush helps, but it’s buried with leashes and harnesses. Pawprints trail into the room; cleanup gets postponed, and what could’ve been a one-minute reset becomes a late-night sweep.

    Why Setup Matters More Than a Prettier Space

    A clean look can mask repeated slowdowns. Whenever you have to shift food bags to grab wipes, detour for a towel, or dig behind toys for a cleaning cloth, the area “works” until it doesn’t—and those missed moments pile up. The best tool stashed just out of reach loses its purpose, turning what should be a one-step reset into extra work. Even the most streamlined setup can reveal cracks by week’s end, once daily pressure exposes whatever’s just far enough out of place.

    You notice the weak link most when routines overlap: the cat sneaks a second helping, the dog sloshes water across the mat, and you’re weaving around toys or bags—all while the cleaning wipe is missing in action. That’s when a setup’s convenience collapses, taking your sense of control with it.

    Practical Adjustments for Smoother Daily Flow

    The upgrade isn’t harder work—it’s in small, targeted tweaks that actually cut friction. Hanging an absorbent cloth on a nearby hook transforms delay into action: grab, wipe, hang back up—no more searching, no more excuses. Every cleanup resets before messes get a chance to harden or spread, tackling pet tracks and feeding spills with the least effort possible.

    Keeping a visible tote right next to your main care zone handles two jobs: key supplies are visible and at arm’s reach, and you spot instantly when something needs refreshing (like switching out a towel before it gets gross). This way, instant wipes after feeding and refilling become background routine—less mess, less stress, and no more dreaded “catch-up cleans” eating into your evening.

    Takeaway: Easy Access Wins Over Perfect Appearance

    Real pet care setups are measured by what you can reach, not by what you can hide. Keeping just the right tools within reach means you actually handle every small mess before it piles up. This approach shrinks routine interruptions, cuts out constant reshuffling, and lets feeding, cleanup, after-walk resets, and basic grooming all blend into the day—whether the schedule shifts or not. A neater look is only the side effect; the main advantage is less repeated cleanup strain, more reliability, and a setup that finally keeps pace with real daily needs.

    Find practical setups and everyday tools for real-life pet routines at CalmPetSupply.

  • Streamline Your Carry-On Setup for Faster Post-Arrival Movement

    Plenty of carry-ons look organized when you first pack them. But the real test hits after landing—when you’re moving fast, squeezed in the jet bridge, and every second matters. The zipped-layer order that seemed like an upgrade quickly morphs into fumbling and blocked reach the moment you need your passport or transit card on short notice. In those minutes between seat and city, structure overtakes style: the bag that looked efficient now shows its blind spots when you have to dig, pause, or grip three pouches just to produce an ID. If you travel more than occasionally, you know the discomfort—slowed lines, missed beats, and a setup that seemed “neat” but now holds you back. This is where most carry-ons reveal what really works—and what repeatedly fails.

    When Organized Isn’t Effortless: Where Carry-On Setups Fall Short

    Mesh dividers and sleek little pouches only go so far. While your bag might “present well” on the hotel bed or in the overhead, travel exposes any system that trades quick access for visual order. Land, walk, and try to grab just one thing—too often your passport is trapped under headphones you wore halfway, or your charger’s behind a snack pouch you never even needed. Every time you unzip an extra layer or reach through the wrong pocket, you’re not just losing seconds, you’re losing your place in the flow of arrivals. This kind of slowdown rarely happens once—it repeats itself, checkpoint after checkpoint.

    What really grates is how these small missteps multiply. Watch a business traveler forced to dump out overlapping pouches just to reach a laptop cable, or a family stuck shuffling bags while the crowd flows on. Your “order” never really moves with you—it waits for a flat surface, slows at every squeeze point, and demands a reset every few stops. The friction isn’t messiness; it’s the gap between design and actual use in motion.

    The Real Retrieval Test: Fast Access vs. Packed Neatness

    First reach after landing is where neat setups unravel. Airports amplify this. In Amsterdam or Chicago, you’ll see some travelers glide right through with a pass or card in hand. Others stall, stepping aside to fumble through inner pouches, double-unzipping, and blocking lines. The perfect roll of cables, or a nest of snacks in a side sleeve, all get in the way when your rhythm depends on quick, reliable grabs.

    • A passport slotted in a middle sleeve—just deep enough to miss your first reach.
    • Tech pouch buried behind toiletries, forcing an awkward juggle at the edge of a crowded corridor.
    • Loose SIM cards, receipts, or emergency cash wedged so tight with snacks or chargers you have to dump two pouches to get at anything small.

    Every extra motion—wrong zipper, dragged-out sleeve, repacking on foot—builds unnecessary tension. Miss it once and it’s a pain. Repeat it every trip and your “system” becomes the thing slowing you down, not supporting you.

    From Boarding to Baggage Claim: Where Flow Breaks Down

    Boarding and deplaning push neatness to its limits. While a perfectly packed bag inspires confidence, the real check comes in the aisle or at your seat. You’re in motion—people behind you, elbow room tight, and half your essentials still need to be re-sorted. Wrong pouch, misaligned Zip, or that single-compartment “solution” you once praised—each now slows your exit as you hunt for passes or repack headphones with one hand.

    Getting your carry-on down from overhead is just a small win. The problem sets in when, balancing bag and jacket, you only have a few moments to reach key documents or a transit card. Too many compartments or a single deep pouch means you’ll open the wrong section and scramble. Watch this pattern repeat trip after trip: that neat overhead-ready setup repeatedly trips you up at precisely the moments when pace matters most.

    The Arrival Reset: Repacking in Real Time

    Past customs, after the baggage carousel, or outside the terminal, most travelers wind up wedged somewhere, clumsily repacking or searching for a cable or card that’s nowhere near the outer layer. The clever “pouch within pouch” thinking that seemed so clean at home betrays you in the field. Reach in, tangle with small electronics or paperwork, and discover that to reset your setup requires opening half the bag—all while taxis line up and others shift past you.

    This isn’t just about time lost. Miss a document, drop a pass, or forget a charger after a reset, and suddenly “order” becomes a source of mistakes. What fixes one kind of mess introduces a new hassle under actual travel pressure. Real improvement is measured not by the fresh look of your bag each morning, but by fewer repacks, faster retrieval, and less standing still at critical handoff points.

    The Shift to Immediate-Access: Small Change, Big Relief

    Travel long enough and you stop tolerating these slowdowns. Essentials—passport, transit card, cable, keys—get a fixed spot, outboard and reachable with a single zip. No more nested sleeves or layered pouches for anything you’ll need more than once per arrival. That change alone, trimming one or two barriers to access, radically reduces the odds of getting blocked at the worst moment.

    • No more flipping through two inner bags just to show a pass.
    • No more unpacking half your main compartment just for a phone cable.
    • No more rushed stuffing, then reshuffling everything minutes later as you transit again.

    The win isn’t hypothetical: the setup works every time pressure rises. Open, grab, done. That’s real stress removed—no matter how rough the travel day, your system scales to the rush, not just to the tidy photo before leaving home.

    Routines that Survive the Travel Cycle

    Repeatable access is what holds up—trip after trip. Fixing your keys, ID cards, and key cables to a dedicated, never-moved pocket cuts out the shuffle. Constantly moving these essentials, or hiding them deep to “look neat,” only creates new search routines on every leg. Minimize shifting zones—what works on the kitchen counter gets torn apart the minute you’re moving with a crowd, forced to produce documents or cables quickly.

    Save dividers and pouches for items you truly only access once or twice: toiletries, backup batteries, extra snacks—fine for internal organization. But for any item showing up at multiple pressure points—documents, phones, or passes—outer, direct access wins every time. Small repeatable moves beat big organizational resets, easing not just comfort but overall command as airport pressure builds.

    Layered vs. Direct: The Practical Difference Across the Trip

    If your carry-on is easy to close but slow to reach into, it’s only half-useful. When retrieval means repacking everything else just to get a single item, all the aesthetic points vanish. Trip after trip, the most effective setups always feature:

    • One predictable grab for high-frequency essentials
    • Zero overlap—no hunting between three pockets for the same card
    • Pouches as separation, not as an obstacle course you run each time the rhythm shifts

    Neatness at packing is not the same as flow in transit. The difference shows immediately: does each movement—boarding, clearing security, exiting to curb—add friction or remove it? Setups that look sleek but require regular unpacking for basics become an anchor, not a tool, repeating the same minor failures every leg of the trip.

    Carry-On Structure that Moves with You

    Carry-ons get judged not when they’re fresh, but when used in real pressure loops: overhead to aisle, gate to curb, lounge to train. The carry-on that gives a direct, reliable reach for repeated-use items rarely lets you down even on the messiest trips. Minimizing the same handful of slowdowns—awkward pouch repack, blocked outer pocket, repeated digging—is what genuinely keeps the journey moving. The goal isn’t a bag with zero problems, but a structure that absorbs the annoyance for you, rather than handing it back every time speed matters.

    Find practical tools for better carry-on setups at CarryOnSupply.

  • Achieving Balanced Ceiling Lighting for Comfortable Everyday Spaces

    Your lighting setup looks finished—until your routine proves otherwise. Ceiling fixtures lined up, cords hidden, surfaces swept: it feels resolved for a day or two. But sit down at a shared desk or pace past the far edge, and the cracks appear fast—a shadow always hugging one seat, cables that start escaping their “tidy” routes, or a persistent dim zone where you actually work. These aren’t rare misses; they’re the points where “looking done” fails under daily use, forcing repeated, annoying adjustments.

    Where “Looking Done” Falls Short: The Hidden Gaps in Ceiling Lighting

    Symmetry from above doesn’t guarantee usable, shadow-free surfaces below. The reality: one seat stays in the dark regardless of where the fixtures land. The furthest spot on a dining table or worktop—prime territory for spreading out—remains weirdly underlit, while the rest falls into patches of uneven light. Even with careful downlight planning, the corners or edge-seats become the weak links, introducing friction every time you reach for papers or shift your chair.

    Most flaws stay masked during a quick tour, but the moment you use the space—leaning in to work, reading into the night—your attention snaps to these shadow traps. Cords meant to be hidden brush against shoes, mounting points that seemed subtle before now get snagged on a jacket or catch your eye every pass through the room. Visual “neatness” dissolves with every inconvenience.

    Micro-Adjustments: A Routine Interrupted

    That “resolved” look gets tested and undone with every routine. You’re always reaching—pulling a lamp closer so you can see, shifting your laptop to dodge the glare from a fixture placed just off-center. One cable detaches from its clips after a desk shuffle for a call; a discreet bracket turns into a knuckle-bumper or a visual sore point with every lap around the room. What started as a lean setup spirals into a series of micro-fixes—lamps repositioned, chairs inched away from bright spots, tabletop clutter by necessity instead of choice.

    Task Corners: Where Frustration Builds Fastest

    Desks and work surfaces—especially in multi-use rooms—reveal these design gaps right away. Take a compact office with a dual-purpose craft table: overheads flood the main section, but the perimeter—where most tasks creep—stays persistently dark. By evening, someone’s fetched a spare lamp, its wire looping unpredictably across busy paths, creating trip risks or crowded outlets. Each workaround stacks more stress, and reaching for a plug or shifting tools mid-task becomes part of the expected struggle.

    Every new device, rearrangement, or shift in the day’s use exposes fresh limits. The sense of a “clean plan” turns brittle—now it’s just a shell over constant patching and cord wrangling, with small physical irritations compounding into real drag on comfort and flow.

    Lighting the Edges: Subtle Fixes with Lasting Impact

    Flooding a room with more overhead light rarely solves these edge failures. The improvement comes from pushing light—not just out—but right to the places your routine breaks down. A slim LED bar along the desk edge flips the script: previously murky corners become plainly usable, with no more angling a lamp or blocking your own shadow. Instead of chasing visibility, the brightness lands where your hands, papers, or tools actually sit. You no longer need to reshuffle light sources after every meeting, craft session, or late-night read.

    Cable discipline shifts from “temporary tidy” to a quietly stable baseline: integrated routes and brackets mean wires retreat from your daily field of vision and physical path. No dangling reminders; no subtle daily re-cluttering. Tiny hardware choices here directly reduce distraction and pre-empt rework as the ways you use the room flex.

    Not Just Overhead: Bringing Light Down to Usable Level

    Most failed setups rely too heavily on centralized, ceiling-mounted lights. These setups produce a glare zone directly under each fixture and under-serve shelves, desk perimeters, or display edges. Move your laptop three inches, and you’re back in shadow. Place a notebook along the outer quarter of the table—a real-life behavior—and it falls into the half-lit gray. Even a well-placed fixture, if not paired with low-profile, targeted light (under-shelf strips, panel LEDs, plug-in runs), can leave users trading off between too-bright central spots and dim, frustrating gaps at the margins.

    It isn’t only about prettier light—it’s about breaking the rhythm of interruption: surprise glare when standing up, stumbling over a pop-up extension cord that wasn’t meant for daily visibility, or juggling too many support brackets just to keep things in reach but out of the way. Each missed cue is a minor drain on flow.

    Practical Setup Observations

    • Frequent Lamp Relocation: If a lamp gets pulled and pushed constantly, your ceiling coverage skips the zones you actually use—especially surface edges and work corners.
    • Cable Sightlines: When the first thing you notice is wire—not workspace—your support plan has failed quietness. Bracket and route decisions up front erase daily visual and physical obstacles.
    • Shadowed Corners: Rooms that seem evenly bright under direct daylight reveal surprise shadow pockets at night or under bad weather. Test each area against your real schedule, not a perfect daylight walkthrough.

    Reducing Routine Hassle: Small Adjustments, Big Difference

    Lighting setups that truly support daily life earn their keep with a handful of low-drama, high-payoff tweaks. A targeted under-cabinet LED eliminates the nightly search for a flashlight or stray desk lamp. Cables fixed along support lines—not swinging loose—mean less visual noise and fewer stumbles. A secondary plug-in light at the far edge of a surface lets you stop moving your chair just to get clear, shadow-free visibility. The fixes aren’t flashy; they’re friction-stoppers.

    The acid test: when lighting stops dominating your awareness, and your attention sticks to work, crafts, or conversation, you’ve landed closer to the right setup. It’s not about being impressed by your own lighting, but about using a space that just gets out of your way.

    What “Evenness” Really Delivers: Quiet Comfort Over Time

    Perfect grids on the ceiling mean little if your routine still catches on surprises. Lighting evenness isn’t symmetry—it’s whether every used surface matches your actual habits: clear, consistent, no rerouting, no visual static. The test comes weeks later: are the cables still discreet, are brackets only visible if you look for them, do shadows creep in when schedules or seasons change? The best setups quietly track what you do, adjusting once, then holding steady—so you spend zero time second-guessing the light or moving things out of the way.

    Tips to Keep Everyday Use Smooth

    • Supplement close to routine points. Mount a narrow LED along the edge you use most, not just around the room, for practical, lived-in coverage.
    • Choose bracket and cable solutions that reinforce your lines of movement. Route wires off worktop edges and out of footpaths; integrated support hardware is often quieter than decorative.
    • Audit for reality, not ideal images. Meet your space in the evening, test your real patterns, and watch for any surface that sends you hunting for more light or hiding from cables and glare.

    A room that stops forcing you to tweak, shuffle, or tolerate small annoyances is what holds up in real use. Setups that still demand intervention after move-in weren’t actually finished; setups that need nothing more than being used are the ones that last.

    Shop LightSupport for smarter indoor lighting and cable support solutions