Blog

  • How Adjusting Your Safety Gear Can Quietly Fight Fatigue

    Understanding the Hidden Impact of Fatigue on Job Sites

    Anyone who has spent long hours on a job site or in a busy workshop knows the creeping exhaustion that can set in well before lunch. You may feel dull headaches, persistent aches in your back and shoulders, and a slow but relentless drain on your energy. This fatigue isn’t simply a discomfort; it’s a risk factor that can compromise your safety and performance.

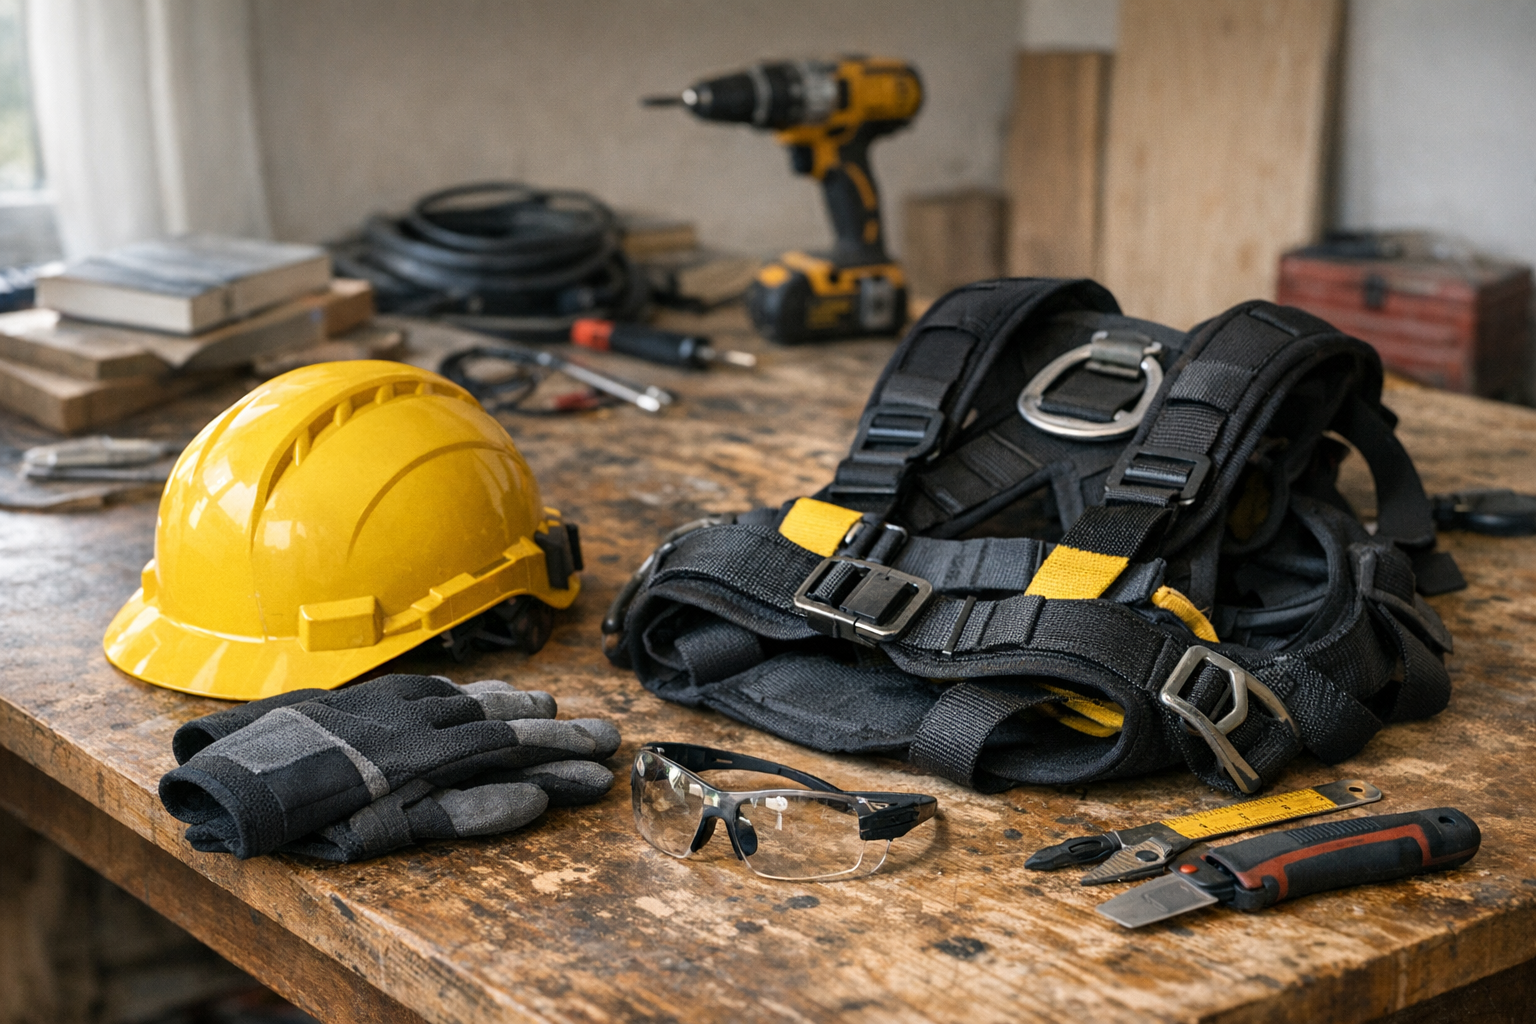
    While personal protective equipment (PPE) is often viewed strictly as compliance gear—something to wear so you don’t break safety protocols—the reality is that PPE plays a vital role in how your body copes with the physical demands of your workday. Properly chosen and correctly fitted gear supports your body and helps prevent the gradual energy drain that leads to fatigue and accident risk.

    Why Fatigue Matters: More Than Just Feeling Tired

    Fatigue affects more than just your mood—it has serious implications for your safety and efficiency. A tired worker has slower reaction times, impaired coordination, and reduced concentration. These factors contribute to a higher likelihood of mistakes and accidents. Over time, fatigue can lead to chronic issues such as repetitive strain injuries, muscle disorders, and slower recovery after shifts.

    Even if your workload or shift hours aren’t flexible, you can influence the way your body interacts with your work environment through your protective equipment.

    Choosing and Adjusting PPE to Combat Fatigue

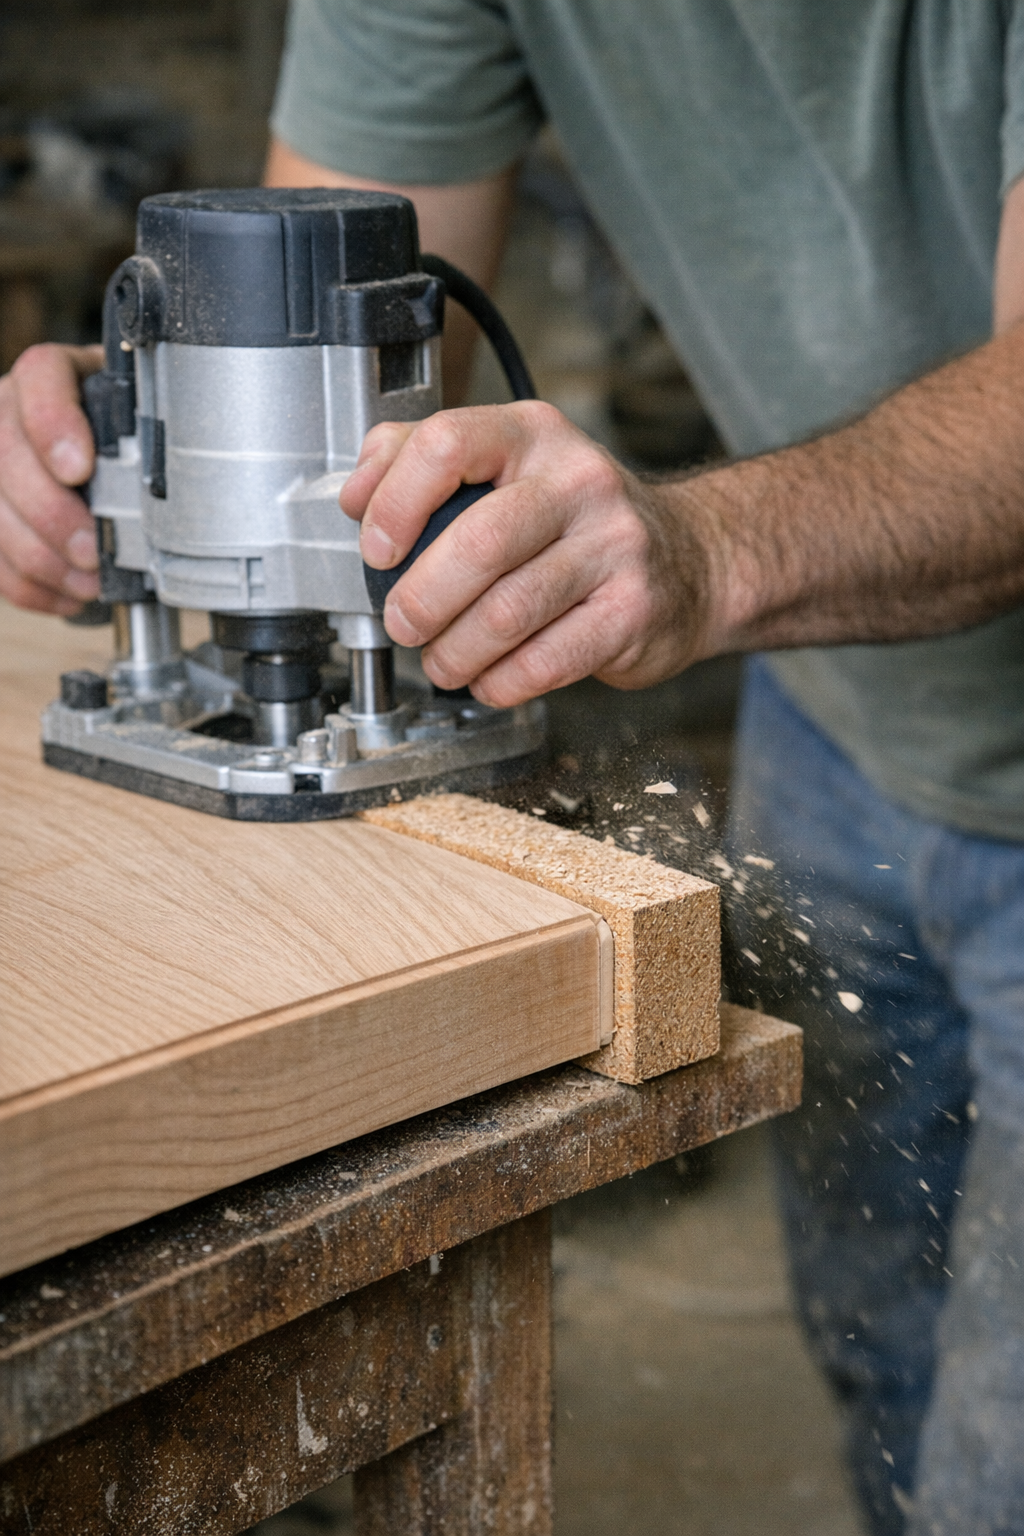
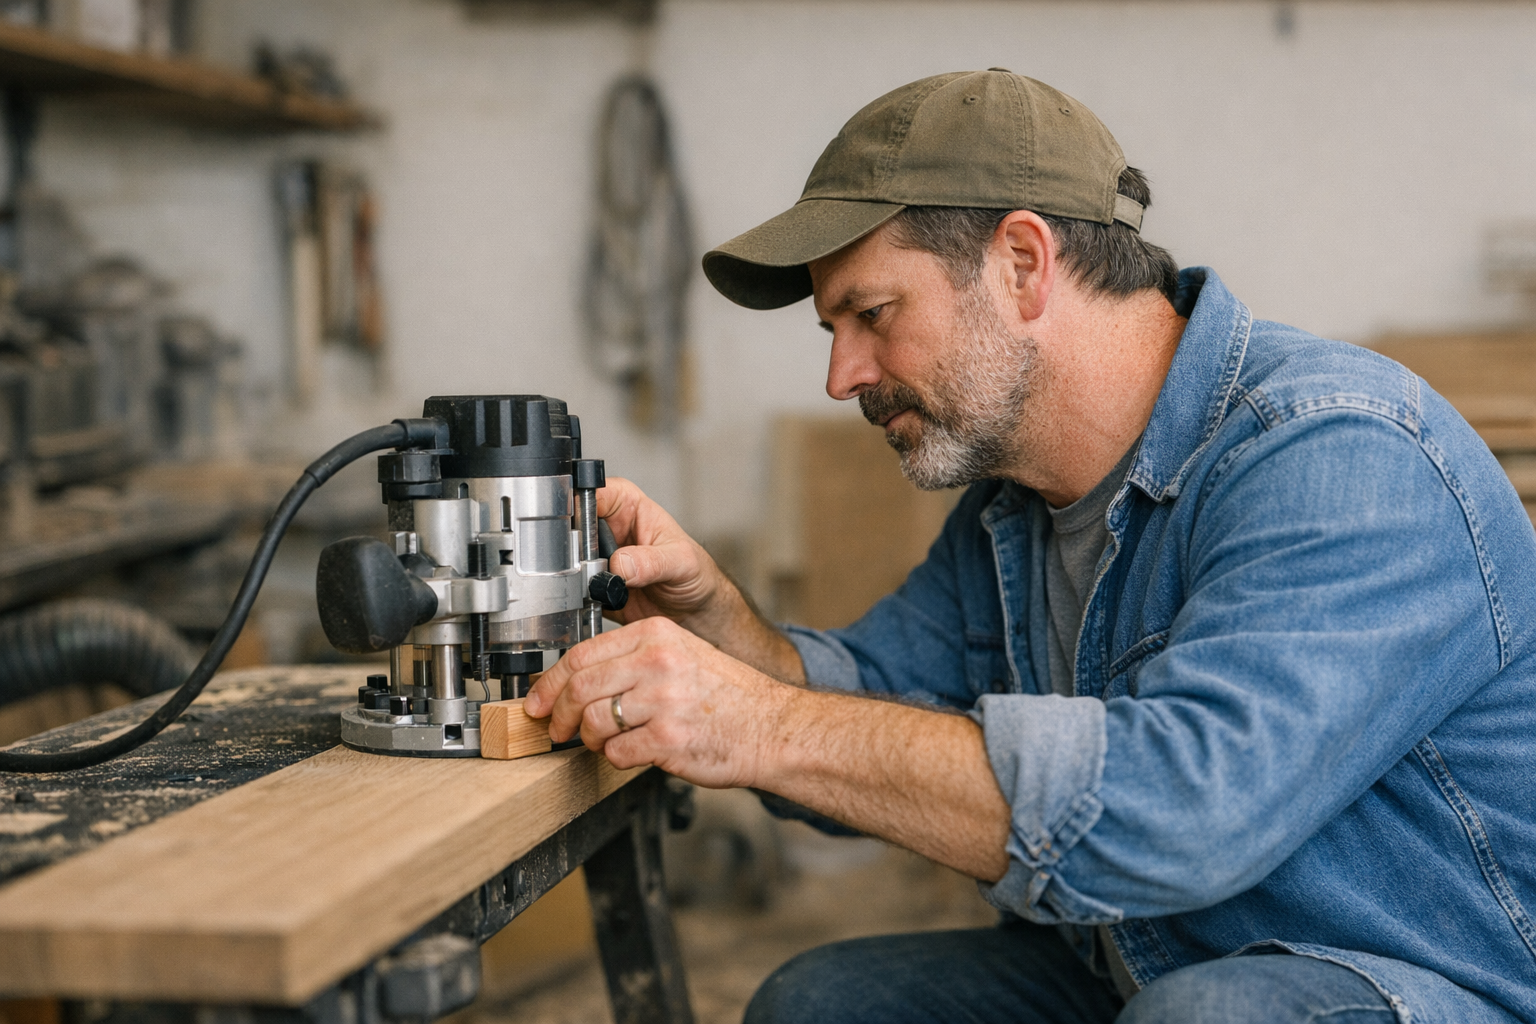
    It’s common to underestimate how much poorly fitted or low-quality PPE adds to physical strain. For example, gloves that are too stiff or bulky reduce hand dexterity, making routine tasks feel harder and increasing muscle fatigue. Safety glasses that slip down force constant adjustments, leading to neck stiffness and distraction. Harnesses that don’t fit properly shift weight unevenly, causing muscle tension and cutting circulation—ultimately exhausting you faster.

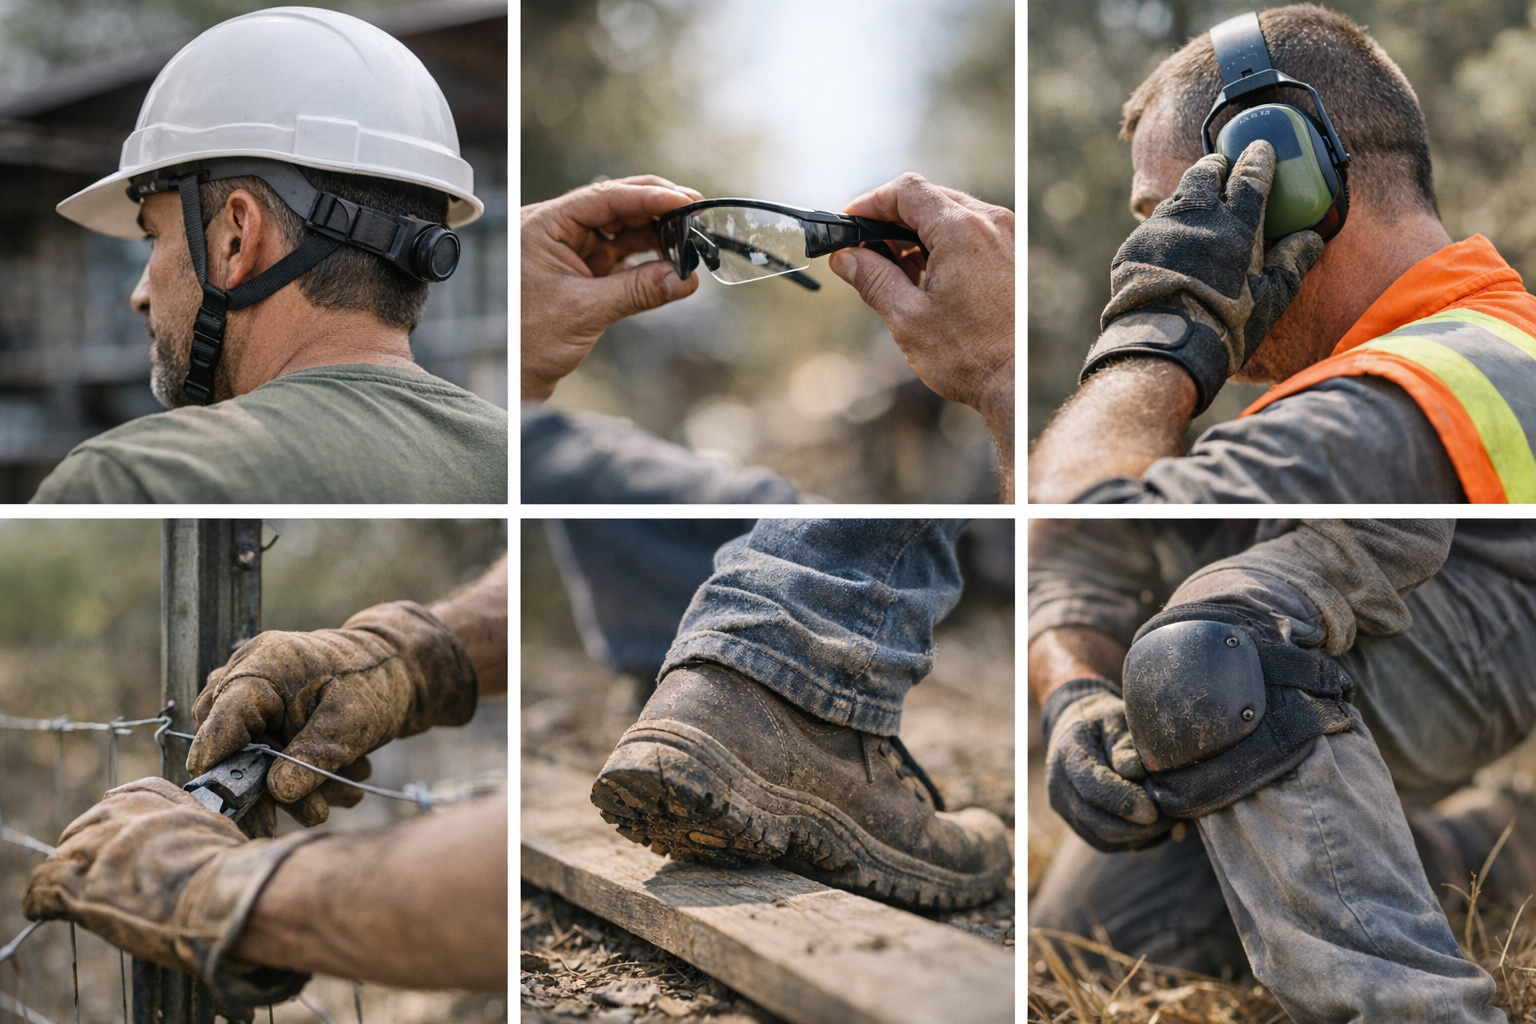
    Gloves: Protect Without Sacrificing Dexterity

    Selecting gloves for specific tasks like flooring installation should balance protection and flexibility. Opt for gloves that offer mechanical protection at abrasion level 3 or higher, such as those compliant with EN388 standards. Lightweight nitrile-coated gloves that meet ISO 13997 cut levels A2–A3 provide excellent grip and cut resistance while allowing natural hand movements.

    Safety Glasses: A Clear View Without the Fuss

    Choosing safety glasses that meet ANSI Z87.1 standards ensures they provide durable impact resistance without sacrificing comfort. Quality glasses stay put without frequent repositioning, keeping your focus on the task—not on adjusting slipping frames.

    Harnesses: Fit Is More Than Comfort

    When it comes to harnesses, proper adjustment is critical not only for your safety but for reducing fatigue. Leg and shoulder straps that are too loose or positioned incorrectly can cause the harness to ride up during movement or a fall, transferring load unevenly. This can result in over 60% of the weight pressing on your shoulders instead of distributing evenly across your pelvis and thighs.

    Properly fitted harnesses designed to meet EN 361 or ANSI Z359.11 standards distribute arrest forces safely through the dorsal D-ring between the shoulder blades and support straps. This minimizes muscle strain and reduces risks such as circulation problems or nerve compression.

    Practical Tips for Daily Gear Adjustments

    To get the most out of your protective equipment, incorporate regular gear checks into your routine. Stand tall and gently adjust your harness straps so they rest on strong points like the top of your shoulders and the upper thighs—not too tight to restrict blood flow, but snug enough to prevent shifting.

    Check that the harness D-ring sits centered between your shoulder blades. This optimal position ensures fall forces are directed down your spine, reducing the chance of injury and unnecessary fatigue.

    For gloves and glasses, test mobility and comfort by performing typical work movements—bend, reach, grip—and note any resistance or slipping. If your gear causes you to compensate your movements, consider switching to better-fitting or more ergonomic options.

    Recharge Your Energy Through Smart PPE Choices

    Modern safety equipment offers innovations designed to reduce fatigue, such as lightweight helmets with improved ventilation and moisture-wicking liners. For example, switching from a 400-gram helmet to a 280-gram ventilated model can significantly reduce neck strain and headaches over a long shift.

    Breathable fabrics in gloves and harness straps help regulate temperature and reduce sweat build-up that can quickly sap your energy. Keeping cool and dry enhances endurance on demanding days.

    Mid-Shift Refresh Tip: Brief Movement Breaks and Gear Checks

    During breaks, take a moment to reassess your equipment fit. Stand, stretch, and check if straps have loosened or shifted. Small micro-adjustments can restore comfort and help maintain circulation, reducing the accumulation of fatigue. Pair this with simple stretching exercises for your neck, shoulders, and legs to refresh circulation and ease muscle tension.

    The Long-Term Benefits of Proper PPE

    Fatigue doesn’t just impact immediate safety; it also influences long-term health and job satisfaction. Equipment that supports your body effectively decreases the wear-and-tear on muscles and joints. Over time, this reduces chronic pain, improves recovery, and helps you stay consistent in your performance.

    Small changes like switching to ergonomic work boots with proper arch support or choosing gloves that fit your hand shape can prevent everyday aches from becoming debilitating conditions.

    Final Thoughts: PPE as a Vital Element of Work Wellness

    Accidents and fatigue often result from overlooked factors—hidden strain, ineffective equipment, or bad habits—not from a lack of effort or skill. Viewing your protective gear as an extension of your health investment is a powerful shift in mindset.

    Spend time each season evaluating and adjusting your PPE. Prioritize fit, material quality, and task-specific features with measurable standards in mind. This helps you work smarter, stay safer, and feel better day after day.

    Remember: the right protective equipment isn’t just a job site requirement—it’s a key part of preserving your energy, focus, and wellbeing throughout every workday.

  • How the Right Safety Gear Quietly Protects You All Day

    Understanding the True Importance of Safety Gear for Outdoor Work

    Spending long hours working outdoors under the sun or sky can silently drain your energy and focus. Whether you’re repairing a fence on a lazy afternoon or enduring a scorching day replacing a roof, safety gear becomes more than just compliance—it acts as your essential line of defense when fatigue creeps in and concentration fades.

    What qualifies as “essential” safety equipment can vary widely among experienced workers. Some swear by their boots, others by their gloves. But a handful of pieces consistently prove their worth across many jobsites, helping professionals complete their work safely and intact.

    1. Reliable Head Protection: Comfort Meets Critical Safety

    Wearing a hard hat might feel excessive, especially on slow or less chaotic days, but it is a crucial safeguard. A hard hat’s protective benefit is only as good as the comfort level allows you to wear it consistently throughout the day. An uncomfortable hat is often discarded after a break, increasing risk.

    Choosing one with a built-in sweatband and ratchet-adjustable suspension makes a big difference. These features promote comfort by providing a snug fit without pressure points, making you less inclined to remove it.

    Look for helmets certified to standards such as EN397 or ANSI Z89.1. These certifications guarantee impact and penetration resistance, with the shell and suspension tested to withstand drops of weights about 5 kg from 1 meter. Proper adjustment is key: maintain a 1-2 finger gap above the eyebrows and use a secure chinstrap to prevent rocking or pinching, especially on windy or active job sites.

    In my experience removing old ridge caps on metal roofs, a glancing blow to the head was absorbed effectively by a well-fitted hard hat with an appropriate chinstrap. Such incidents highlight how crucial the fit and retention system is—not just the shell itself.

    2. Eye Protection Designed for All-Day Wear

    Safety glasses must not only meet standards but be comfortable enough to remain on through fogging, sweat, and glare. Anti-fog coatings, UV protection, and adjustable nose pads can greatly improve wearability.

    Certifications like EN166 or ANSI Z87.1 ensure lenses will endure impacts such as gravel thrown up by brush cutters or flying debris from grinding tasks. Side shields add valuable peripheral coverage, protecting the side vision from stray particles.

    Always keep a spare pair handy. Nothing derails productivity faster than a cracked lens when the workload is high and the deadline urgent. Avoid the common pitfall of propping glasses on your cap—this routine almost always ends in scratched or broken lenses.

    For regular cutting or grinding work outdoors, opt for lenses that block at least 99% of UV rays to protect your eyes from cumulative sun damage.

    3. Gloves That Work As Hard As You Do

    Cheap or ill-fitting gloves rarely last beyond an hour of heavy outdoor work. The right gloves enable grip and dexterity while managing breathability and protection throughout long shifts.

    Leather-palmed work gloves often strike a balance, providing abrasion resistance and comfort. If you find your fingers turning numb when gloves are too tight, sizing up or breaking in a new pair before a big job prevents discomfort and loss of feeling.

    For tougher jobs involving heavy lifting or fence repairs, look for gloves rated EN 388: 2122X. This standard signifies reliable protection against abrasion, blade cuts, tears, and punctures, significantly reducing injury risk without sacrificing flexibility.

    However, avoid insulated gloves on hot days. Excess insulation causes sweat accumulation, reducing grip and increasing the chance of blisters during repetitive hammering or wire tensioning tasks.

    4. High-Visibility Clothing Is Essential Beyond Roadwork

    Hi-vis gear may feel unnecessary on a quiet lot, but diminished visibility due to weather changes, dust, or fading daylight puts you at risk. Lightweight reflective vests are a simple addition that enhances your presence not just to passing vehicles but also to machinery operators, colleagues, and even pets roaming the property.

    ANSI/ISEA 107 Type R, Class 2 vests meet practical requirements for outdoor visibility, with a minimum of about 775 square inches of background material and 201 square inches of reflective striping. These specifications ensure you remain visible in variable environments. Worn or faded vests can become nearly invisible under low light, negating their safety benefits.

    5. Hearing Protection: An Often Overlooked Must-Have

    Prolonged exposure to chainsaws, mowers, and circular saws can lead to ear ringing or long-term hearing damage. Earmuffs with pivoting cups allow easy on/off during breaks, promoting consistent use. Breathable cushions minimize sweat build-up, which encourages wearing them for extended periods.

    Keep your hearing protectors within easy reach—resting them around your neck rather than tossing them in a tool bag helps you remember to put them back on quickly. Look for ear defenders rated with a Noise Reduction Rating (NRR) of at least 25-30 dB to effectively reduce harmful noise levels.

    Check regularly that ear cushions remain intact and well-shaped. Pads that are split or compressed drastically reduce sound attenuation, so replace them seasonally or when damaged.

    6. Durable Boots That Support You Through Long Days

    Protecting feet requires more than a steel toe—it demands comfort and support across hours of terrain and activity. Wide toe boxes, moisture-wicking liners, and rugged treads all contribute to sustained comfort and safety.

    Look for ASTM F2413-rated boots, which provide minimum impact and compression resistance—typically around 75 foot-pounds—ensuring protection from sharp objects like nails or heavy materials.

    Slip-resistant soles certified to SRC or ASTM F3445 standards help prevent falls on inclined or uneven surfaces, an important factor when fatigue sets in and footing becomes less certain.

    Consider rotating two pairs of boots each season—alternating wet and dry use extends midsole life and delays leather cracking, which commonly signals the end of boot durability.

    Small But Impactful Gear You Shouldn’t Overlook

    Beyond the main protective gear, smaller items dramatically improve comfort and safety. Sweatbands and sun-blocking neck gaiters protect your skin and help regulate temperature. Slip-on arm sleeves shield against cuts and sunburn, while ventilated knee pads with no less than 15 mm of closed-cell foam cushion repetitive kneeling tasks and reduce discomfort.

    A Fresh Perspective: The “Set-and-Review” Safety Routine

    One practical habit that transforms long outdoor workdays is performing a quick self-inspection at regular breaks—like when you pause for water. Scan yourself from head to toe:

    • Is your helmet properly seated and adjusted?
    • Have your glasses slipped or fogged?
    • Are your gloves sweaty or torn?
    • Is your vest still visible and intact?
    • Are your boots or ear defenders fitting correctly?

    Addressing a single equipment issue each break prevents small problems from escalating into injuries or lost time. This routine resets your awareness through the day, making safety an integral part of your workflow rather than an interruption.

    For example, keeping gloves snug and sweat-free can prevent painful blisters, one of the most common complaints on manual jobs. By taking two minutes to adjust gear regularly, you maintain better control and comfort.

    How Fatigue Influences Safety and How Gear Counters It

    Fatigue rarely hits suddenly; it creeps up, causing distraction and risk-taking tendencies. Well-selected safety gear doesn’t just provide physical protection—it supports your ability to notice and respond as your focus wanes.

    When your helmet is comfortable enough to stay on, your boots reliably support tired feet, and gloves protect without squeezing, you’re more likely to spot uneven footing or a tool slipping from your grip. The right equipment acts as both armor and an extension of your senses.

    Choosing Gear That Fits Your Unique Work Style

    Every jobsite has unique demands and every worker has preferences. No checklist can cover every nuance. The one universal truth is that safety equipment works best when it fits well and gets worn consistently.

    Before your next long outdoor shift, take stock not only of what’s available but what you actually wear. If something feels uncomfortable or you catch yourself removing it frequently, invest time in finding alternatives that suit you better. Comfort and usability trump brand or price every time.

    This practical approach transforms personal protective equipment from a neglected burden into your trusted companion—your silent advantage from first light through the last punch-out.

    Practical Resources

    For an overview of protective gear that meets safety standards and real-world needs, explore comprehensive collections tailored for long outdoor hours and various job environments.

  • How Simple Habits Keep Your Air Tools Dry and Reliable

    There’s a familiar sharp hiss as you squeeze the trigger on a pneumatic tool, and a perfectly driven nail slides into the wood. But if you’ve ever relied on air-powered tools for even a few projects, you know there’s a hidden challenge lurking beneath that burst of compressed air: moisture.

    Unchecked water vapor in compressed air not only leads to visible puddles under the drain valve, but more dangerously, it causes corrosion inside hoses, damages your tools, and ruins delicate finishes. It took me one ruined paint job and a corroded impact wrench to finally understand just how important managing moisture really is.

    Why Moisture Is a Hidden Threat in Air Compressor Lines

    Compressing air naturally condenses water vapor. Humidity in the air—no matter how dry it might seem—gets squeezed into your system. When the compressed air cools while passing through hoses, water droplets form and travel downstream, reaching every tool you connect.

    What’s the real damage caused by this moisture?

    • Rust and corrosion inside tools and tanks: Prolonged exposure to moisture creates corrosion on steel parts inside your tools and compressor tank, leading to pitted ratchets, stuck triggers, and rusted fittings that need frustrating repairs.
    • Damage to painted surfaces: When moisture spits from the line during tasks like spray painting, it causes imperfections such as fish-eyes and gritty finishes. These flaws usually require sanding and costly rework.
    • Reduced tool performance: Water acts as a barrier or inappropriate lubricant inside pneumatic motors, resulting in weaker impact power or slower cycling in nail guns.
    • Premature wear on seals and valves: Moisture deteriorates rubber O-rings and gaskets, leading to leaks and loss of pressure efficiency.

    A Personal Wake-Up Call: When My Air Ratchet Clogged With Muddy Water

    My realization came unexpectedly. While assembling a steel frame, my trusty air ratchet started sputtering and nearly slipped from my hand. Unscrewing the quick connect, a few drops of brown, muddy water dribbled out. Within days, the inside of the tool was corroded and sluggish.

    It was tempting to blame the tool’s age, but a seasoned mechanic told me bluntly: “You let water ride shotgun too long.” That moment led me to adopt better moisture control habits—here’s what truly worked.

    Effective Strategies to Prevent Moisture Buildup in Air Lines

    1. Drain Your Compressor Tank After Every Use

    While this seems obvious, it’s often overlooked. I used to drain my tank once a week, assuming that was enough. One humid week changed that—just two days in, water sloshed inside my tank. Now I drain it after every session, no exceptions.

    Practical tip: Attach a clear plastic bottle under your drain valve to collect condensation. Seeing real water accumulate is a constant reminder to keep that valve open. It’s easy to ignore a closed valve; it’s impossible to ignore a filling bottle.

    If your drain valve sticks or clogs, upgrade to a ball valve or a quick-release drain for smoother maintenance.

    2. Install a Water Separator Filter Right at the Compressor Outlet

    A simple inline water separator is an inexpensive, effective upgrade. Screwed in directly after your pressure regulator, it traps liquid water before it enters your hoses.

    Choose a separator rated for at least 150 PSI, matching your compressor’s output and fittings—usually 1/4″ NPT for workshop compressors producing 4 to 12 CFM. Remember, these separators do collect water and must be emptied regularly; my own needs draining even after short, 20-minute jobs.

    3. Keep Your Hose Layout Optimized to Minimize Water Traps

    Condensation is encouraged by cool spots; hoses that sag hold water like a reservoir. I stopped letting my air hoses lie flat on the floor. Instead, I loop them with a gentle, consistent slope so any moisture naturally flows back toward the compressor or toward a drain point.

    Elevating hoses on wall hooks or racks also helps. Even raising a hose a few feet makes gravity your ally, reducing internal water pooling. Consider adding quick-disconnect couplers every 30–50 feet if you use very long hoses—this lets you clear out water without taking apart the whole system.

    4. Add a Secondary Moisture Filter Near Your Tools for Sensitive Jobs

    For tasks like spray painting or electronics cleaning, add a mini moisture filter just before your tool. These small inline filters capture residual moisture that bypasses upstream separation. Having one in place saved me from countless ruined finishes.

    Note that these fine inline filters often have lower pressure ratings (about 80–125 PSI) and need periodic replacement, usually after 20–40 hours of use in damp environments.

    5. Adopt Good Hose Storage Habits to Let Moisture Drain

    When you finish your work, disconnect your hose and hang it vertically with both ends open. This allows trapped water to drain naturally. Coiling hoses on the floor with closed ends traps water inside, encouraging corrosion and compromising hose life.

    Installing a wall-mounted rack about 4 feet off the ground is a small investment in longevity. Flexible polyurethane hoses are especially forgiving to this practice, but even traditional rubber hoses benefit significantly.

    Refreshing Your Approach: Small Habits, Big Impact

    Sometimes, a subtle shift in mindset can make all the difference in the workshop. Instead of thinking of moisture control as an occasional or tedious chore, treat it as part of your tool care ritual—just like sharpening blades or oiling moving parts.

    Consistent check-ins and maintenance after every job keep problems small or eliminated. Even small visible signs of moisture are indicators to act immediately rather than a reason to delay. This mindset shift transforms maintenance from a burden into a natural part of your workflow, extending the life of your tools and improving every project.

    The Results: Reliable Tools and Flawless Finishes

    Since making these moisture management habits routine, my air tools run cleaner and last longer. No more sputtering ratchets, no more blotchy paint surfaces. The peace of mind that my pneumatic system delivers dry, dependable air is worth every extra second spent on maintenance.

    In Summary

    Moisture in compressed air lines is a silent saboteur, causing everything from rust and premature tool failures to poor finish quality and lost productivity. Preventing it doesn’t require complicated gear—just consistent habits:

    • Drain your tank after every use.
    • Use water separators at the compressor outlet.
    • Keep hoses arranged to avoid water traps.
    • Add inline filters near sensitive tools.
    • Store hoses vertically with open ends to drain liquids.

    These simple steps shield your investment and quality outcomes. Start with something easy, like putting a bottle under the drain valve and observing your water output. This awareness is often the turning point in tackling moisture problems before they cost you downtime or expensive repairs.

    Adopting these practical moisture prevention tactics will help keep your workshop efficient, your tools reliable, and your projects flawless.

  • How to Find the Perfect Air Compressor PSI for Flawless Nailing

    If you’ve spent even a day using a nail gun powered by an air compressor, you’ve likely noticed there’s a “sweet spot” for pressure—where every nail sinks just right, smoothly and cleanly. Dialing in the correct air compressor PSI (pounds per square inch) for your nailer isn’t simply about matching numbers; it’s a subtle art that determines whether your work looks professional or ends up frustrating you with jams, proud nails, or damaged wood.

    Understanding Why PSI Is Critical for Nailing Tools

    The interaction between a nailer and its air compressor boils down to pressure, not horsepower. Each pneumatic nailer is designed to function optimally within a specified PSI range. If the pressure is too low, nails won’t drive fully—leaving them protruding or causing the nailer to jam. Too high, and you risk driving nails deep enough to damage your workpiece or even blow through thin materials.

    Typically, finish and brad nailers perform well between 70 and 110 PSI, while framing nailers require a bit more, usually in the 100 to 130 PSI range. However, these ranges are starting points, not fixed rules. The type of wood or material you’re fastening plays a big role. For example, driving nails into hard maple baseboards often requires pushing pressure toward the higher end of the finish nailer range—around 110 PSI—while softer woods like pine might only need 80 PSI.

    Professional carpenters typically pair an 18-gauge brad nailer with about 85 PSI for precise trim work, using fine-finish blades with 16–18 teeth per inch for clean cuts. On the other hand, framing tasks with heavier nailers and thicker nails—such as a 0.131-inch shank—commonly require 120 to 125 PSI for full penetration without material damage.

    It’s also important to respect the manufacturer’s pressure specifications. Operating a tool well outside its recommended PSI risks jams, misfires, and damage to both tool and material. Understanding this balance enables more consistent, quality results.

    Real-World Examples Highlighting PSI Challenges

    Consider a straightforward baseboard installation I helped a friend with recently. The job should have been quick, but the nails wouldn’t set flush. It took some troubleshooting to spot the issue: the compressor was set at 65 PSI, below the 70–80 PSI sweet spot a finish nailer typically needs. After increasing the pressure to about 80 PSI, the tool drove nails beautifully, eliminating the need to hand-tap partially sunk nails and preventing damage to the trim.

    A common pitfall is relying on compressor settings that worked “last time” without adjusting for the specifics of each job—such as material hardness or nail length. For instance, driving 2-inch nails into MDF at pressures under 75 PSI frequently results in nails that sit proud or cause jams, which in turn slows the work and can accelerate wear on the trigger mechanism.

    Typical Nailers and Their PSI Requirements

    • Brad Nailers (18 Gauge): Generally operate around 70–100 PSI. Limiting shots per minute (SPM) to under 60 helps maintain consistent pressure and precision. Use carbide tipped or high carbon steel blades to handle return cuts without dulling quickly.
    • Finish Nailers (15–16 Gauge): Ideal range is 80–110 PSI. For hardwoods like maple or oak, start near 100 PSI and adjust downward if nail heads show deformation or crushing.
    • Framing Nailers: Need 100–130 PSI. Engineered lumber often requires full-depth nail penetration at around 125 PSI, but watch for blow-through risks, which can be mitigated by reducing firing speed or using thicker, clipped-head nails.
    • Pin Nailers: Typically operate between 60–100 PSI. In hardwoods, high pressures or SPM can shear thin pins, so test carefully before starting hard jobs.

    Always use your tool’s manual as a baseline, but finalize settings by testing on scrap pieces that closely match your work material. For example, a 16-gauge finish nailer at 85 PSI suits softwood trim, but harsher materials may push the requirement toward 105 PSI for clean seating without damage.

    Testing Pressure Under Realistic Conditions

    An adjustment many professionals overlook is measuring the compressor’s output pressure at the moment the tool fires—not just when it’s idling. Under load, pressure can drop 5 to 10 PSI, especially with smaller compressors or during rapid firing. If you only adjust the regulator while the compressor is resting, you might unknowingly set the tool to underperform during actual use.

    To precisely dial in pressure, watch the gauge on the compressor’s regulator while firing 3 to 5 nails consecutively. Significant pressure dips may necessitate increasing the baseline setting to maintain consistent nail depth. This issue is amplified by longer hoses or when multiple users share the compressor.

    Here’s a practical tip: shoot test nails into scrap and check depth after every 2 or 3 small pressure adjustments—never more than 5 PSI at a time. This gradual approach helps you zero in on the perfect balance, compensating for hose loss, compressor lag, and minor air leaks.

    Helpful Signs Your PSI Needs Tweaking

    • Nails sticking out: Usually caused by too-low pressure or dull nail tips.
    • Blow-through: Nails exit the piece unexpectedly or sink too deeply; often a sign of excessive PSI or nails too thin for the material.
    • Jamming at startup: Especially in framing nailers, can indicate insufficient pressure compounded by long or narrow air hoses.

    These problems rarely require drastic changes. Often, adjusting pressure by 5 to 10 PSI and retesting resolves the issues quickly.

    Managing Compressor Limits and Recovery

    If you’re using a small compressor, it’s important to factor in its recovery time. During continuous nailing, a compact unit often struggles to maintain pressure, causing the PSI to drop between shots and resulting in inconsistent driving depth.

    For example, a pancake-style compressor with a 1–2 gallon tank can handle light trim work with 18-gauge brads, but may stall on longer runs such as installing baseboards or door jambs. To maintain consistent performance, take brief pauses allowing the compressor to recover to 90–100 PSI. Attempting to shoot when pressure falls below 70 PSI risks semi-driven nails and potential heat buildup inside the nail gun’s mechanism.

    Don’t Underestimate the Impact of Hose Length and Fittings

    Many users focus only on the compressor’s reading, neglecting the effects of hose length and couplers. Long or narrow air lines cause pressure loss before the air reaches your tool. When using hoses 50 feet or longer, or low-bore quick-connect fittings, you may need to increase compressor output by an extra 5–10 PSI to compensate.

    This is especially critical in fine carpentry or cabinetry, where even a 5 PSI drop can make the difference between a perfectly flush nail and one that sticks out. Upgrading to larger-bore hoses (3/8 inch or greater) and high-flow connectors reduces pressure loss and improves tool response, especially on runs over 25 feet.

    A Refresh Tip: Approach Each Project With Fresh Tests

    Even if you’re experienced with your tools, approach each project as a new puzzle requiring its own setup calibration. Changes in wood species, humidity, nail type, or even compressor wear can subtly shift pressure needs. Starting with fresh, incremental tests on project-specific scrap material—rather than relying on past settings—helps uncover hidden variables and ensures your pressure setup suits every circumstance.

    This mindset shift from “set it and forget it” to “test and adjust” transforms how you approach pneumatic nailing, boosting both quality and confidence before you commit your nailer to the workpiece.

    Conclusion: Fine-Tuning PSI for Smooth, Professional Results

    Proper air compressor PSI tuning for your nailer goes beyond strict adherence to specifications. It requires attention to material type, nail size, tool characteristics, hose length, and compressor capabilities under load. Paying attention to subtle signals—like nails not seating properly, blow-through, or tool jams—and methodically adjusting pressure in small increments leads to consistent, clean results.

    Testing on scrap material, monitoring pressure during actual use, and factoring in equipment limitations will save time, reduce frustration, and help you avoid common pitfalls. With the right approach, the difference between an average job and a professional finish lies within just a few pounds per square inch.

  • How Choosing the Right Rivet Gun Eases Repetitive Work Pain

    Understanding the Core Differences Between Manual and Electric Rivet Guns

    When it comes to riveting, the choice between a manual and an electric rivet gun shapes not just the task’s pace but also your physical comfort and accuracy over a long day. Manual rivet guns rely entirely on your grip strength and arm power, requiring approximately 40 to 60 pounds of handle force with every squeeze. This force adds up quickly if you’re setting rivets repeatedly across a full work shift. Quality manual guns typically have hardened steel jaws and work best paired with a fine-threaded mechanism—often between 16 to 20 threads per inch—to allow a smoother, more controlled pull.

    By contrast, electric rivet guns automate the setting process using motor-driven mechanisms. Most operate around 1,500 to 2,000 cycles per minute (SPM) and set rivets with just a quick press, significantly easing the operator’s effort. Battery-powered models equipped with at least 2.0Ah battery packs are common, and they absorb the repetitive strain that wears hands down during large jobs.

    At face value, it might seem like a mere convenience, but the difference unfolds across comfort, consistency, and workflow efficiency, especially when dozens or hundreds of rivets are involved.

    When Manual Rivet Guns Are Still the Right Tool

    Manual rivet guns have undeniable benefits. Their simplicity makes them extremely durable—no concerns about power failures or electronic malfunctions. They’re self-contained, reliable, and can offer greater precision and control in tight or awkward spaces where an electric gun’s bulk may be a disadvantage.

    They’re well suited for occasional, light-duty use, especially when working with softer rivet materials like aluminum or mild steel. For example, when dealing with oddly angled joints or tight crawl spaces, a low-profile manual gun can fit where electric counterparts cannot.

    However, it’s essential to select a manual gun matched to your task. Insufficient leverage on a model for harder materials leads to fatigue, incomplete sets, and even damage to the tool or mandrels. Generally, handle length matters a lot; a 10-inch handle provides better mechanical advantage for tougher materials such as stainless rivets. An example from a recent project involved reattaching support brackets in a confined attic space where only a slim, single-hand manual gun fit—but even then, fatigue started setting in after around a dozen rivets due to repeated squeezing.

    Why Electric Rivet Guns Are a Game-Changer for High-Volume Work

    Electric rivet tools don’t just speed up rivet installation; they dramatically reduce user fatigue. A typical electric rivet gun can fully set a standard rivet in 1 to 2 seconds and deliver a consistent pulling force, around 10 kN (2,250 lbf), ensuring clean, reliable fastenings on a variety of materials, including harder metals.

    Consistency is key when executing repetitive tasks. Fatigue often causes errors such as misaligned rivets or dropped mandrels; electric tools help reduce these mistakes by standardizing each cycle. However, one operational caution is necessary: avoid running the gun nonstop at maximum pace. Continuous rapid-fire use can overheat the motor and strain lithium-ion batteries. To prolong tool life and preserve battery health, take a 1 to 2 minute break after approximately 50 rivets, especially when working on thicker or heavier materials.

    Additionally, plan your battery swaps smartly. Carry a fully charged spare and consider swapping when your battery charge hits 30% to avoid unexpected downtime. It’s a simple practice that many overlook but prevents frustrating delays that can disrupt project flow.

    A Real-World Tip for Streamlining Your Riveting Workflow

    One surprisingly effective workflow adjustment that benefits users of both manual and electric rivet guns is pre-staging your rivets and prepping holes in batches before continuity of installation. Gather 10 to 20 rivets at once and keep them within easy reach. Also, inspect and clear holes of burrs or debris with a countersink or reamer beforehand. This setup keeps you focused during the installation run without multiple disruptive motions to fetch rivets or troubleshoot fittings.

    This setup improves pace and reduces hand strain with manual guns since you avoid frequent pauses. For electric tools, it aids consistent pacing and makes better use of each battery charge, ultimately reducing fatigue and mistakes.

    How Switching to Electric Tools Changes the Installer’s Experience

    Aside from speed and reduced effort, what strikes many is the noticeable drop in dread by the time they reach the end of a job. The cumulative hand fatigue from a manual gun tends to build gradually, often leaving operators with soreness and exhaustion at the finish. Moving to an electric rivet gun can almost vanish this weariness.

    In one recent duct installation, technicians began manually setting rivets but switched to electric halfway through. The differences were clear: more consistent, error-free results and significantly less hand soreness reported by the end of the shift. Even those skeptical of powered tools ultimately adopted electric guns for routine jobs, reserving manual guns strictly for difficult, tight access areas.

    Still, budget-conscious workers or those with infrequent riveting needs may find manual tools perfectly adequate. The key is recognizing job volume and matching the tool accordingly.

    Listening to Your Hands: Practical Advice for Choosing the Right Rivet Gun

    Rather than deciding solely based on speed or initial cost, pay attention to how your hands and body feel as the job progresses. Test both manual and electric rivet guns on typical tasks and check in with yourself toward the end of the run. Are your hands cramping? Is fatigue affecting your accuracy or enthusiasm? These clues often matter more than specs or brand hype.

    For occasional or small-scale projects, a manual rivet gun can feel almost meditative and give you total control. But once your work shifts to repetitive assembly, electric rivet guns offer a meaningful boost in comfort, consistency, and ultimately, productivity.

    Refresh Tip: Change Your Environment Between Runs to Maintain Focus

    To combat mental and physical fatigue during long riveting stretches, try briefly changing your working position or environment between batches. Stepping outside for fresh air, stretching your hands and forearms, or doing simple wrist rotations can reset muscle tension and improve circulation. This subtle shift not only rejuvenates your body but also sharpens mental focus, reducing the risk of errors when you return to the task.

    By integrating thoughtful breaks and workspace prep into your routine, each rivet set feels less like a grind and more like steady progress.

    Wrapping Up: Matching Your Rivet Gun to Your Workload

    Ultimately, the best rivet gun choice depends on the quantity and frequency of your riveting needs. Manual rivet guns excel in simplicity, reliability, and control for small or challenging jobs. They’re favorites when working in cramped spaces or with softer materials.

    Electric rivet guns shine when volume, speed, and consistency matter most—offering a tangible reduction in physical strain that preserves your hands and keeps quality high throughout long shifts. Smart battery management and intentional workflow planning heighten these benefits.

    Stay tuned to your body’s response through the day rather than just the initial ease of use. This approach ensures your tool choices support your health and productivity long-term.

    Explore the full Gumboll collection to find compatible tools and accessories tailored to diverse riveting needs.

  • Why Your Oscillating Blades Dull Fast—and How to Fix It

    There’s something uniquely satisfying about slicing through stubborn trim or making a precise plunge cut with an oscillating multi-tool. Its versatility and precision make it a favorite in any renovation or repair arsenal. Yet, a common frustration many users face is the rapid dulling of their blades—often after just a few cuts. This not only interrupts workflow but also adds unexpected costs and aggravation.

    Understanding why your oscillating blades wear out quickly is the first step toward smarter usage and longer-lasting performance. Let’s dive into the causes and explore practical ways to extend blade life without sacrificing efficiency.

    Why Do Oscillating Blades Wear Out So Fast?

    It’s rarely a single cause. More often, several factors combine to shorten a blade’s lifespan.

    1. Using the Wrong Blade for the Material

    Each oscillating blade is designed with a specific material in mind. Wood blades typically have 6–8 teeth per inch (TPI) and are made from high-carbon steel (HCS), optimized for clean cuts in wood and soft materials. However, using these on metal trim or embedded nails accelerates dulling.

    For metal—especially nails, screws, or non-ferrous metals—bi-metal blades with finer teeth (10–14 TPI) are ideal. Tile and grout require blades with carbide or diamond grit edges. Mismatching blades and materials causes rapid wear and poor cutting performance.

    2. Heat Build-Up from Excessive Friction

    Oscillating tools operate at high oscillations per minute (OPM), often between 18,000 and 22,000. Pushing too hard, pausing too long, or plowing through a cut without adequate movement generates heat due to friction. This heat softens the blade’s cutting edge (especially HCS blades) and quickly reduces sharpness.

    3. Improper Technique and Excessive Force

    It’s common to want to muscle through cuts as if using a reciprocating saw. However, pushing hard doesn’t speed things up; it bends or chips the blade’s teeth and generates damaging heat. The key is to let the oscillation and blade design do the work rather than forcing progress.

    4. Blade Quality and Thickness

    Not all blades are manufactured to the same standard. Inexpensive blades often use inferior materials, imperfect welds for tooth sections, or are too thick (a large kerf), resulting in rough cuts and faster dulling. Investing in better-quality blades pays off, but even premium blades dull without proper care.

    Adapting Your Approach: Technique Matters

    One of the most overlooked factors in blade longevity is how the tool is handled during cuts. I once thought blade wear was just inevitable until I observed a tradesperson working more deliberately. Instead of aggressive force, they applied gentle, consistent pressure and allowed the tool to oscillate freely. As a result, their blades lasted well beyond expectations.

    Practical Tip: Reduce pressure and focus on controlled, steady movements. Let your arm act as a flexible guide instead of a rigid lever. Resist gripping the handle too tightly or forcing the blade through the material.

    For plunge cuts, starting at a 10–20° angle rather than plunging straight in helps the cutting teeth engage progressively. This reduces friction spikes and heat buildup, ultimately preserving the blade edge.

    Refresh Tip: Shift Your Mindset to Precision over Power

    It’s natural to associate power tools with brute force. But oscillating tools thrive when you give them a measured, purposeful touch. Instead of thinking, “How fast can I push through?” try asking, “How can I maintain control and consistency?” This subtle change in mindset often leads to better results and longer blade life.

    Key Practices to Extend Blade Life

    Building on technique, here are practical adjustments that consistently yield longer-lasting blades:

    • Match Blade and Material: Always choose the appropriate blade type and TPI. Bi-metal blades for metal, carbide for tile and grout, and HCS for wood.
    • Control Speed: Use lower oscillation speeds for tough materials (10,000–15,000 OPM). High speeds can overheat and dull blades faster.
    • Cut in Short Bursts: Instead of continuous cuts over 30–60 seconds, alternate cutting and resting. This cools the blade and prevents heat damage.
    • Angle Your Cuts: Start cuts at an angle to engage teeth progressively, reducing surface contact and friction.
    • Keep Blades Clean: Adhesives, paint, and dust build up on blades, increasing friction and heat. Periodically wipe blades clean with a rag or tap off debris between cuts.
    • Rotate Blades for Different Tasks: Mark blades for specific uses like demolition or fine finish work to preserve them longer.

    Understanding Blade Quality and Specifications

    Quality matters, but it’s not just about price. Look for blades with consistent manufacturing standards: good welds, proper thickness, and materials suited for your key projects.

    For detailed work, thinner blades (less than 1mm kerf) provide better control and clean cuts. For demolition or aggressive cutting, thicker blades tolerate rough use but may heat up faster.

    Reading reviews and user experiences can save money and frustration. Many users report blades losing teeth rapidly after hitting nails on cheap blades despite manufacturer claims.

    A Case Study in Efficiency

    During a recent window renovation, I faced trimming out old window moldings filled with nails. My first blade became dull within minutes. Instead of swapping repeatedly, I switched to a bi-metal blade, dialed down the tool speed to roughly 12,000 OPM, and cut in short bursts under 20 seconds each, cleaning debris regularly. That approach allowed me to finish three windows with a single blade, a clear win in time and money saved.

    Final Thoughts: Small Changes, Big Impact

    Prolonging oscillating blade life boils down to combining smart blade selection, appropriate speed, and gentle, controlled handling. Instead of forcing cuts, be deliberate—allow the blade to work at its own pace. Regular cleaning and rotation between blades based on task further stretch their usefulness.

    Blade-Life Extension Tip: When possible, let blades cool between cutting sessions. On site, a quick dip in water or a blast of compressed air removes debris and dissipates heat, helping blades last longer during intense workflow.

    Next time you prepare for a project, consider these tweaks. Not only will your blades stay sharper longer, but you’ll likely find your work smoother and more satisfying.

  • Why Does Tear-Out Happen—and How Can You Prevent It?

    Understanding Tear-Out in Router Work: What Causes It and How to Prevent It

    Anyone who has worked with a router on wood knows the sinking feeling: you’re routing a crisp, clean edge, fully focused, when suddenly that harsh noise rings out—the bit catches unexpectedly, sending a jagged splinter ripping out of your otherwise smooth surface. This flaw, known as tear-out, can quickly derail the appearance and quality of your project.

    Why does tear-out happen? And, far more importantly, what practical steps can you take to minimize or avoid it? Getting to the root of tear-out means understanding the interaction between the spinning router bit and the wood fibers, as well as how your technique influences the outcome. Let’s explore the causes of tear-out, how to recognize vulnerable fragile spots in your workpiece, and effective strategies to improve your results.

    What Actually Causes Tear-Out?

    Tear-out occurs when wood fibers are lifted or torn rather than sliced smoothly by the router bit. The spinning blade cuts fibers ahead of it, but if fibers aren’t properly supported or if cutting parameters aren’t optimized, those fibers can break away unevenly.

    Key Factors Leading to Tear-Out

    • Grain Direction: Routing against the grain can lift delicate fibers instead of cleanly cutting them. Understanding grain flow and routing with it whenever possible reduces tear-out.
    • Bit Sharpness: A dull or damaged bit doesn’t slice cleanly, instead tearing fibers and causing rough edges. Regularly inspect bits for dullness and use high-quality carbide-tipped or spiral up-cut bits for cleaner cuts.
    • Feed Rate: Moving the router too quickly increases force on the fibers and can cause splintering, while moving too slowly risks burning or chatter marks. Aim for a steady, balanced feed aligned with bit speed—commonly between 14,000 and 18,000 RPM—and adjust based on wood hardness and bit size.
    • Workpiece Support: Unsupported edges, especially at end grain or corners, are prone to splintering. Fibers without backing support easily pull away during cutting.
    • Bit Type and Tooth Count: Choosing the right bit profile and the number of teeth is critical. For example, high-tooth-count spiral bits (two or more flutes, 1/4″ shank) are excellent for hardwoods and plywood and reduce tear-out significantly compared to basic straight bits.

    Spotting Trouble Zones Before Routing

    Tear-out isn’t equally likely across every section of your wood project. Recognizing areas at risk allows you to adopt specialized strategies to protect those spots.

    Common Vulnerable Areas

    • End Grain: Edges that expose end grain fibers tend to tear more readily since the fibers run perpendicular and are weakly supported.
    • Corners and Curved Profiles: Sharp transitions and curves often lack backing support or place uneven stress on fibers.
    • Veneered and Highly Figured Woods: The thin veneer layer, or irregular fibers in figured woods, may delaminate or peel in long strips under a router bit.

    When routing unsupported grain at an outside corner, for example, using an aggressive bit profile or one that removes too much material in a single pass can instantly result in break-out.

    Simple Yet Effective: Using a Backer Board

    One of the most straightforward adjustments that dramatically cuts tear-out is to clamp a backer board flush behind or beneath the workpiece edge you’re routing. Though it might seem like a small extra step, the results speak for themselves.

    When the router bit reaches the end of the cut, instead of gouging into unsupported fibers, it cleanly slices into the solid backer board. This transfers any splintering or tear-out to the sacrificial scrap rather than your finished piece.

    This technique excels when working on tabletops, door edges, shelves, and other projects where exposed end grain or edges must remain flawless. It costs a little time to set up but can save hours of repairing or replacing damaged material.

    Additional Tips for Cleaner Routing

    • Route End Grain First: Beginning with the vulnerable end grain edges allows any minor tear-out to be cleaned up later when routing adjoining sides.
    • Take Multiple Shallow Passes: Instead of attempting to remove all the material in one deep cut, adjust your bit for shallower depths—around 2 to 3 mm (about 1/8 inch) per pass. This reduces strain on fibers and yields smoother edges.
    • Test Grain Direction and Bit Rotation: Make test cuts on scrap to determine if climbing or conventional routing produces a cleaner result. Climb cutting (moving with the rotation rather than against) can reduce tear-out in some scenarios but requires steady control to avoid the router “jumping.”
    • Adjust RPM for Larger Bits: For larger router bits (over 1 inch diameter), reduce the router’s speed to prevent chatter, heat buildup, and chip-out.

    Refresh Tip: Listen Closely While You Rout

    One subtle but powerful skill is training yourself to listen to the router’s sound during operation. Smooth, consistent humming generally means the bit is slicing cleanly. Conversely, a rough, rattling noise often signals an impending tear-out or aggressive fiber lift.

    By paying close attention and stopping immediately if you notice a change in tone, you can adjust feed rate, routing depth, or technique before damage occurs. This moment of mindful listening becomes a simple preventive checkpoint that can save your project.

    Making Tear-Out Manageable

    While tear-out can never be entirely eliminated—after all, wood is a natural and unpredictable material—understanding its cause and applying thoughtful strategies make it far less frequent and always manageable.

    Using sharp, well-maintained bits, routing with awareness of grain direction, employing backer boards, and taking shallow passes go a long way toward producing consistently clean edges and profiles. Coupled with experiential feedback such as sound cues and strategic routing order, you’ll find tear-out transforms from a dreaded problem to a minor annoyance.

    Reflect regularly on your workflow and setup, and you’ll develop the discipline to identify potential tear-out risks before they happen, ensuring your craftsmanship remains precise and professional.

    Summary

    Tear-out during routing is primarily caused by routing against grain, dull bits, improper feed rates, and unsupported wood fibers—especially at end grain and corners. Mitigating tear-out involves using sharp, appropriate bits with sufficient tooth count, routing in multiple shallow passes, employing simple backer boards to support cuts, and tuning feed speed and bit RPM to the material.

    Listening attentively to your router’s sound and testing routing direction in scrap can further minimize risks. These small adjustments add up to cleaner finishes, less wasted material, and a more satisfying woodworking experience.

  • How Precise Bit Depth Control Transforms Your Woodworking Edges

    Working with a router along the edge of a board often brings a surge of anxiety, and for good reason. Achieving that crisp, clean cut instead of ending up with rough edges or damaged wood largely depends on how precisely you control the router bit depth. Many a good piece of wood has been ruined because this critical step was rushed—or overlooked altogether. The following guide dives deep into mastering bit depth control so you can confidently achieve smooth, professional-looking edges every time you route.

    Understanding Why Bit Depth Control Is Crucial

    On the surface, setting the bit depth on a router might seem like a simple adjustment, but the reality is far more nuanced. Cut too shallow and your edge profiles can look weak or uneven, tempting you to pass over the same cut multiple times and waste valuable time. On the other hand, cutting too deep in a single pass invites a range of problems — tear-out, scorching, chip marks, or even the router jumping unexpectedly. These issues are especially pronounced when working with hardwoods, veneers, or delicate laminates.

    The ideal approach balances depth and precision. For example, a standard roughing pass with a sharp carbide or high-speed steel bit typically involves removing around 3 mm (roughly 1/8 inch) on hardwoods, or slightly more—around 4 to 5 mm (3/16 inch)—on softer woods per pass. Sticking to consistent bit depths helps minimize vibration and keeps feed rates smooth, reducing stress on both the tool and the workpiece.

    Bit specifics also matter. The number of flutes or teeth per inch (TPI) on your router bit influences edge finish quality. More flutes generally produce cleaner cuts but require you to slow your feed rate or reduce router speed (RPM) to avoid burning or tearing the wood fibers.

    Step-by-Step: How to Find Your Perfect Bit Depth Each Time

    A simple but game-changing tip is to always set your bit depth with the router unplugged and resting on its side. This improves safety and gives you a clear view of the bit relative to your workpiece. Start by loosening the locking ring and lowering the bit gently until it just touches the wood surface. From there, raise the bit by the exact amount of your intended cut depth—sometimes as minimal as 1/8 inch for delicate profiles.

    If you’re using a handheld router, make sure the base plate sits flat against a hard, level surface while adjusting depth. Avoid guessing by eye. For plunge routers, use the depth adjustment stops and lock them firmly once set. Many trim routers feature fine micro-adjustment dials, letting you achieve accuracy down to half a millimeter—ideal when processing multiple matching pieces or working with prefinished materials.

    A Simple “Scrap Test” That Saves Projects

    Before making a cut on your real workpiece, always verify your settings with a test pass on a scrap piece of matching wood. This step can’t be overstated. Testing confirms that your bit depth is correct, that cuts are clean and crisp, and that there’s no burning or tear-out before committing to the actual project.

    If you see any scorch marks on the scrap, review your router’s RPM. For many hardwoods, an optimal speed range is between 16,000 and 22,000 RPM, depending on the bit diameter. Larger diameter bits require slower speeds to rest the wood and prevent burning. Conversely, running the router too fast or pushing the bit too slowly can cause scorching or rough edges.

    Real-World Strategy: Using a Depth Stop Block

    After trial and error, one of the most effective tricks I’ve adopted is using a small wooden block cut to the precise depth I want to route. When setting up, place the router base on a flat surface and position the block next to the bit. Lower the bit until it just contacts the block, then lock the depth adjustment.

    This simple physical reference takes guesswork out of adjustments and allows quick, repeatable setups. When routing batches of identical parts, I keep this block handy and reset the bit depth before every run. It’s a tiny tool that dramatically reduces sanding and correcting time later on. If you step away and return to the project later, that block reliably “remembers” the setting for you.

    Why Taking Two (or More) Shallow Passes Produces Exceptional Edges

    Regardless of your final target depth, never try to cut it all at once. Breaking it into multiple shallow passes helps you achieve clean, burn-free edges, prevents chipping, and puts less strain on your bit and router.

    The temptation to rush and push deeply in one pass often leads to issues. Deep cuts can cause the router to chatter, the bit to wander, or worse, grab and gouge the wood—especially when using HSS bits instead of carbide. A solid rule of thumb is to keep each pass no deeper than half the diameter of your bit.

    For example, when working with maple, hickory, or other dense woods, especially on floor panels or beading profiles, this approach preserves bit sharpness and results in those flawless, chip-free edges professional woodworkers aim for.

    Slow, incremental routing also lets you monitor changes in the router’s sound or feel. If the pitch shifts or resistance grows, it’s time to slow down or revisit your settings before irreversible damage happens.

    Ergonomics and Environment: Small Adjustments That Impact Depth Control

    Another often-overlooked factor is your setup height and body position. Routing at an awkward level leads to inconsistent pressure and poor depth control. Setting your workpiece or routing table at waist height creates better visibility and more even downward feed pressure.

    Using adjustable workhorses or benches that position stock just below elbow height helps maintain control and alignment throughout longer runs or detailed edge profiles, reducing the chance of mistakes due to fatigue or reach.

    Refresh Tip: Shift Your Perspective to Embrace Patience

    When routing, it’s easy to fall into the mindset of speed and efficiency. But excellent edge work rewards patience. Instead of rushing through setup, pause and think of bit depth adjustment as an essential preparation phase—like sharpening your pencils before sketching. Investing these few extra minutes can save hours of sanding, patching, and redoing cuts down the line. Approaching routing as a deliberate, measured process rather than a task to rush transforms your woodworking experience and boosts overall quality.

    Final Thoughts

    Achieving clean, professional edges with a router isn’t just about owning premium tools or expensive bits. It comes down to good habits: consistently checking and setting bit depth carefully, running test cuts on scrap wood, and embracing incremental passes. These practices not only produce better results but extend bit life and reduce frustration.

    Make bit depth control a routine part of your workflow—just like clamping your workpiece or checking blade sharpness. That little bit of patience upfront pays dividends in smoother cuts and less finishing work. The next time you run your hand along a perfectly routed edge, you’ll know it’s the payoff of thoughtful preparation and respect for the tool’s capabilities.

    Explore the full Gumboll collection to find compatible router bits and accessories that can help optimize your routing setup.

  • How Patience and a Heat Gun Rescue Old Paint Jobs

    There’s a familiar tension that creeps in before you start removing old paint from any cherished woodwork, whether it’s a banister handed down through generations, a window frame that anchors a room, or a vintage side table with memories embedded in its grain. The fear isn’t just that paint will come off; it’s that the surface beneath—your wood, metal, or masonry—might suffer permanent harm. Scratches, gouges, burns, or warping often seem like inevitable side effects of a paint removal project, especially if you rush or wield your tools too aggressively.

    However, there’s a method that transforms this daunting chore into a manageable, even satisfying experience: using a heat gun with patience and precision. Over many projects spread across woodwork, metal trims, and even some masonry details, I’ve learned that heat guns can safely soften and release paint without striking the surface beneath. But only if you respect the tool’s power and nuances. This article distills those lessons into actionable advice, informed by real workshop moments and hard-earned insight.

    Why Choose a Heat Gun for Removing Paint?

    Traditional paint removal often conjures images of chemical strippers or vigorous sanding—methods that either fill your air with noxious fumes or leave clouds of dust. A heat gun offers a cleaner alternative: it gently warms paint until it softens and peels off. Unlike chemicals, it avoids harsh solvents and potential surface stains; unlike sanding, it doesn’t abrade the substrate itself.

    Heat guns work effectively on diverse materials—from solid wood to metal surly enough to take heat, and even on masonry if you proceed carefully. Understanding how to control temperature and proximity is the key. Most heat guns offer temperature settings from roughly 400°C up to 600°C (750°F–1100°F maximum), but for paint removal, you rarely need to exceed 300°C–400°C (570°F–750°F). Staying below the maximum temperature preserves the surface’s integrity and keeps the paint’s behavior predictable.

    Additionally, if your heat gun has variable airflow, resist the temptation to blast at full force. A softer, moderate airflow prevents softened paint from splattering or spreading messily, helping you maintain clean control.

    Assess the Surface and Paint Before You Begin

    Before firing up your heat gun, take a moment to identify the materials you’re working with and the type of paint involved. Wood species with thin veneers or intricate, delicate molding can distort under excessive heat if treated carelessly. Metals generally tolerate heat well, but always double-check compatibility, especially with finishes or primers that might contain sensitive components.

    One critical caution concerns paint containing lead, which was common in pre-1970s homes. Overheating lead-based paint can release hazardous fumes. If you suspect lead paint, exercise extreme caution: follow safety guidelines, wear respiratory protection, and consider professional removal.

    The paint’s composition affects how it reacts to heat. For example, acrylic or latex paints might melt into a sticky, stubborn residue rather than crisply lifting. In these cases, lower heat settings and slower scraping help avoid making a mess.

    Real-World Experience: Learning to Work Slowly Pays Off

    A personal story illustrates why rushing with a heat gun can backfire. Last fall, while repainting window frames in a chilly sunroom, I was pressed for time and anxious to finish quickly. Cranking the heat gun to its highest setting, I held it too close to the wood surface. The paint blistered and bubbled rapidly, but so did the wood beneath—small dark scorch marks appeared that no amount of sanding fully erased.

    After that frustrating experience, I adjusted my approach. Instead of maximum heat, I dialed back to a medium-low setting (~350°C/660°F), keeping the gun 1.5 to 2 inches away from the surface. Instead of hurrying, I worked in gentle, overlapping movements over small sections no wider than my palm. Waiting only long enough for softening paint to react, rather than pushing longer, prevented damage and made scraping easier.

    Step-by-Step Guide to Gentle Heat Gun Paint Removal

    1. Test a Concealed Spot First. Before tackling a prominent area, try a hidden corner. This trial helps you gauge the heat setting and the surface’s reaction without risking visible damage.
    2. Set Your Heat Gun to Medium-Low (300–400°C). High temperatures can cause burns and distortions. Starting lower and adjusting upward as necessary is safer.
    3. Keep the Heat Gun Moving. Constant motion prevents overheating any one spot. Use smooth side-to-side sweeps or small circular motions without lingering.
    4. Watch Closely for Paint Bubbling. Once you observe bubbles or slight peeling, stop heating and pick up your scraper.
    5. Scrape with Care Using the Right Blade. Use a flexible, rounded scraper blade about 1 to 2 inches wide, held at a shallow angle (10–15°). This minimizes gouging risks.
    6. Allow Stubborn Areas to Rest. Don’t force the scraper on resistant paint; instead, cool the area briefly and reapply gentle heat.
    7. Clean Residues Lightly. After scrapping, wipe down with a slightly damp cloth to remove loose paint fragments and dust.

    Choosing and Using the Right Scraper Makes a Big Difference

    A simple but impactful shift that transformed my approach was swapping sharp-edged scrapers for flexible blades with rounded corners. These kinds of scrapers conform gently to curves and contours, peeling paint instead of digging into the substrate. Maintaining the scraper at a flat, low angle helps slide it beneath softened paint with minimal impact.

    If you ever feel the scraper snagging or sticking, resist the urge to force it. Reheat the spot and loosen the paint safely. Over time, sharpening or replacing your scraper blade keeps it effective without increasing injury risk to the surface.

    After Paint Removal: Handling the Surface with Care

    Once you have removed the paint, the temptation might be to sand aggressively or use harsh chemical cleaners to prep the surface. Resist. Especially with wood, over-sanding removes original character and weakens thin veneers or delicate details. Instead, choose a light buffing method using fine-grade steel wool (0000 grade) or a fine finishing pad.

    For metal surfaces, a soft brass brush helps clear remaining paint bits without scratching. Maintaining the surface’s natural texture at this stage ensures better adhesion for new paint or finishes.

    Refresh Tip: Slow Down to Save Future Work

    When tackling paint removal, it’s tempting to hurry through and “get it over with.” But slowing your pace isn’t just about avoiding mistakes in the moment—it’s a way to safeguard your project’s longevity.

    Each time you rush and damage the surface, you add more labor, cost, and frustration downstream. Conversely, patient, gentle work preserves the integrity of your materials and creates a better foundation for refinishing. Think of this as an investment: a little more time now can save hours of corrective work later.

    Taking breaks to step back, reassess your heat and technique, or simply breathe can shift your mindset and reduce fatigue-driven errors. This deliberate tempo turns paint removal from a chore into a thoughtful craft.

    Final Thoughts: Mastering the Art of Heat Gun Paint Removal

    Removing paint without harming the underlying surface demands respect—for your tools, the material, and the process. The secret lies in balancing enough heat to soften paint against too much heat that damages. Pair that with the right scraper choice and controlled, patient motions, and you gain command over a task often dreaded.

    Every project teaches you to refine your approach: the settings, the distance, the speed, and the scraping technique all blend into a rhythm tuned over time. Mistakes aren’t failures; they’re lessons that help you protect what matters.

    If you’re planning future DIY refinishing or restoration projects, consider how this adaptable, low-mess approach can save your surfaces and your sanity.

  • How Small Heat Gun Habits Transform Your Indoor DIY Safety

    Completing a DIY project indoors with the help of a heat gun can bring a sense of quiet satisfaction—whether it’s stripping old paint, softening adhesive, or accelerating drying times on paint and finishes. The steady hum of the tool, the subtle scent of warmed materials, and the small victories of things going smoothly all contribute to that rewarding feeling. Yet, beneath this straightforward utility lies a layer of risk that many users don’t fully consider. Using a heat gun indoors demands respect for its power and thoughtful precautions, because a simple slip can quickly turn from productive to problematic.

    Why Heat Guns Are Essential for Indoor DIY Work

    Heat guns have become staples in many toolkits because they combine precision, versatility, and controlled heat delivery. Unlike open flames or chemical strippers, heat guns provide a safer alternative for tasks like paint removal, vinyl repair, or tubing shrinkage. Their ability to offer variable temperature settings—from gentle warmth to intense heat—makes them adaptable across many surfaces and materials.

    However, when working indoors, those very benefits can introduce new challenges. Confined rooms mean less airflow to dissipate heat or fumes and increase the chance of encountering flammable materials like old insulation, wooden trims, or loose debris. In such environments, a moment’s carelessness can lead to scorched surfaces, smoke alarms, or worse. Recognizing these risks is the first step toward mastering safe and effective heat gun use.

    The Risks Hidden Indoors

    • Limited Ventilation: Fumes from heated paint or adhesives linger indoors longer, posing health risks and potentially igniting if mixed with sparks.
    • Flammable Materials Nearby: Dust, curtains, cardboard, and insulation can easily ignite or melt unexpectedly if exposed to stray heat.
    • Hidden Hazards: Wiring behind walls or old wooden surfaces might get damaged or catch fire if heat isn’t carefully controlled.

    All these factors mean that even routine projects need an extra layer of mindfulness indoors.

    Common Mistakes and How to Prevent Them

    Nearly every DIYer who has worked indoors with a heat gun can recall a small misstep or near miss. These incidents often boil down to a few key oversights that are completely avoidable with proper preparation and technique.

    1. Failing to Clear the Workspace

    One of the simplest but most overlooked steps is prepping the immediate area. Soft plastics, paper, loose dust or sawdust, and fabric near your work zone can all turn into unexpected hazards under high heat. Take the time to sweep or vacuum dust, move magazines and papers away, and secure curtains or drapes before switching on your heat gun.

    2. Ignoring Temperature and Fan Speed Controls

    Not every heat gun is created equal, and many offer adjustable temperature dials and fan speeds for a reason. Choosing the right setting—typically between 200°C and 600°C depending on your task—prevents overheating. For example, delicate vinyl flooring repairs usually require lower temperatures with controlled airflow to avoid burning or warping. Using the highest setting when it’s not needed can lead to rapid material damage and even ignite underlying surfaces.

    3. Letting the Power Cord Get Too Close to the Heat Source

    The heat gun’s nozzle can surpass 600°C (over 1,000°F), which instantly melts or damages anything in direct contact. A common rookie error is letting the power cord droop near the nozzle. This can cause plastic insulation to melt, short out the tool, or spark electrical hazards. Always secure and route the cord well away from your working area.

    A Game-Changing Setup Tip: The Metal Heat Shield

    Years ago, while stripping paint near some wooden kitchen shelves, I discovered a simple modification saved me from scorched walls and nerves. Placing a large lightweight metal sheet—like a clean baking tray or an old aluminum clipboard—upright behind the section I was working on acted as a heat shield. This reflects excess heat and catches softened debris that might otherwise damage surfaces or cause drips.

    This technique is easy to implement yet highly effective. The shield should be slightly larger than the target surface and positioned just a few inches behind it. It doesn’t add fuss or time but provides a physical barrier that helps keep surrounding areas safe. For narrow trim paint stripping, pairing this setup with holding the gun at a 30–45 degree angle and using short, overlapping passes keeps heat concentrated and controlled, avoiding warping or deep burns.

    Keeping Safe and Comfortable When Things Heat Up

    Knowing that heat guns can easily reach temperatures of 600°C (around 1000°F) or more underscores why caution is paramount indoors. Several simple habits can maintain workspace safety and lower stress during your DIY sessions.

    • Use a Stand or Non-Flammable Surface: When not actively heating surfaces, rest your heat gun on a dedicated stand or a metal surface. Never set it nozzle-down on wood, fabric, or piles of paper.
    • Ventilate Generously: Always crack a window, switch on a fan, or open a door to circulate air. Fumes from paint and melted plastics accumulate quickly and degrade indoor air quality.
    • Limit Heat Application Time: Apply heat in short bursts or quick sweeps rather than a prolonged blast. This controlled approach lessens the chance of overexposure and potential damage.
    • Unplug When Not in Use: For safety and peace of mind, disconnect the heat gun when you take breaks or finish work to prevent accidental activation or curious pets touching the tool.

    Another tip related to distance: hold the gun approximately 25mm (about 1 inch) away from the surface. Being too close risks burning the material and reduces your ability to distribute heat evenly, which can damage paints, plastics, and conceivably wiring behind panels. I personally find setting a kitchen timer for 30–45 second intervals helps remind me to move the gun or pause and reassess the surface temperature to prevent damage.

    Refreshing Your Perspective: Take Short Breaks to Reassess

    Amid focused work, it’s easy to get tunnel vision and unintentionally apply heat too long or miss subtle signs of scorching. A practical technique to refresh your perspective is to deliberately step back every few minutes—literally take a short break from the task to inspect your work and surroundings with fresh eyes. This pause not only helps catch problems early but keeps you mentally alert and reduces stress during tedious jobs.

    During these short breaks, grab a quick breath of fresh air by stepping near an open window or door. This simple habit enhances ventilation and renews your concentration, making the overall process safer and more enjoyable.

    The Small Details that Make the Biggest Difference

    In many ways, the secret to safe and effective indoor heat gun use lies in the minor adjustments and habits you develop. Double-checking your workspace, protecting nearby surfaces, carefully controlling temperature and distance, and pacing your work with intentional breaks can transform what might feel like a risky operation into a smooth, confident process.

    Even seasoned professionals approach heat gun work indoors with a blend of respect and caution. That slight increase in heart rate before flipping the switch isn’t paranoia—it’s recognition of the tool’s power and the responsibility to keep both the home and yourself safe.

    Final Thoughts

    Using a heat gun indoors need not be nerve-wracking. With thoughtful preparation, controlled temperature settings typically between 350–450°C for paint stripping, and simple protective measures like heat shields and good ventilation, you can tackle your projects with greater precision and far less risk. Remember: it’s the small things—the extra couple of minutes prepping your space, the right angle, the shield strategically placed behind your work area—that help keep your tools, your home, and your nerves intact.

    Before you start your next indoor DIY heat gun project, ask yourself: Have I cleared the area, set the optimal temperature, planned for quick passes, and positioned a heat shield? These steps will make all the difference between an efficient, satisfying job and an unexpected mishap.