Blog

  • How the Right Saw Blade Silently Saves Your Woodwork Finish

    Understanding Tear-Out and Why It Happens

    Tear-out is a common frustration when cutting wood, plywood, and veneered materials with a circular saw. It occurs when the saw blade tears fibers out of the wood on the exit side of the cut, leaving jagged or fuzzy edges that detract from a clean finish. This is especially problematic on fine or delicate surfaces such as cabinetry-grade plywood or laminated panels where a smooth, factory-finished edge is crucial.

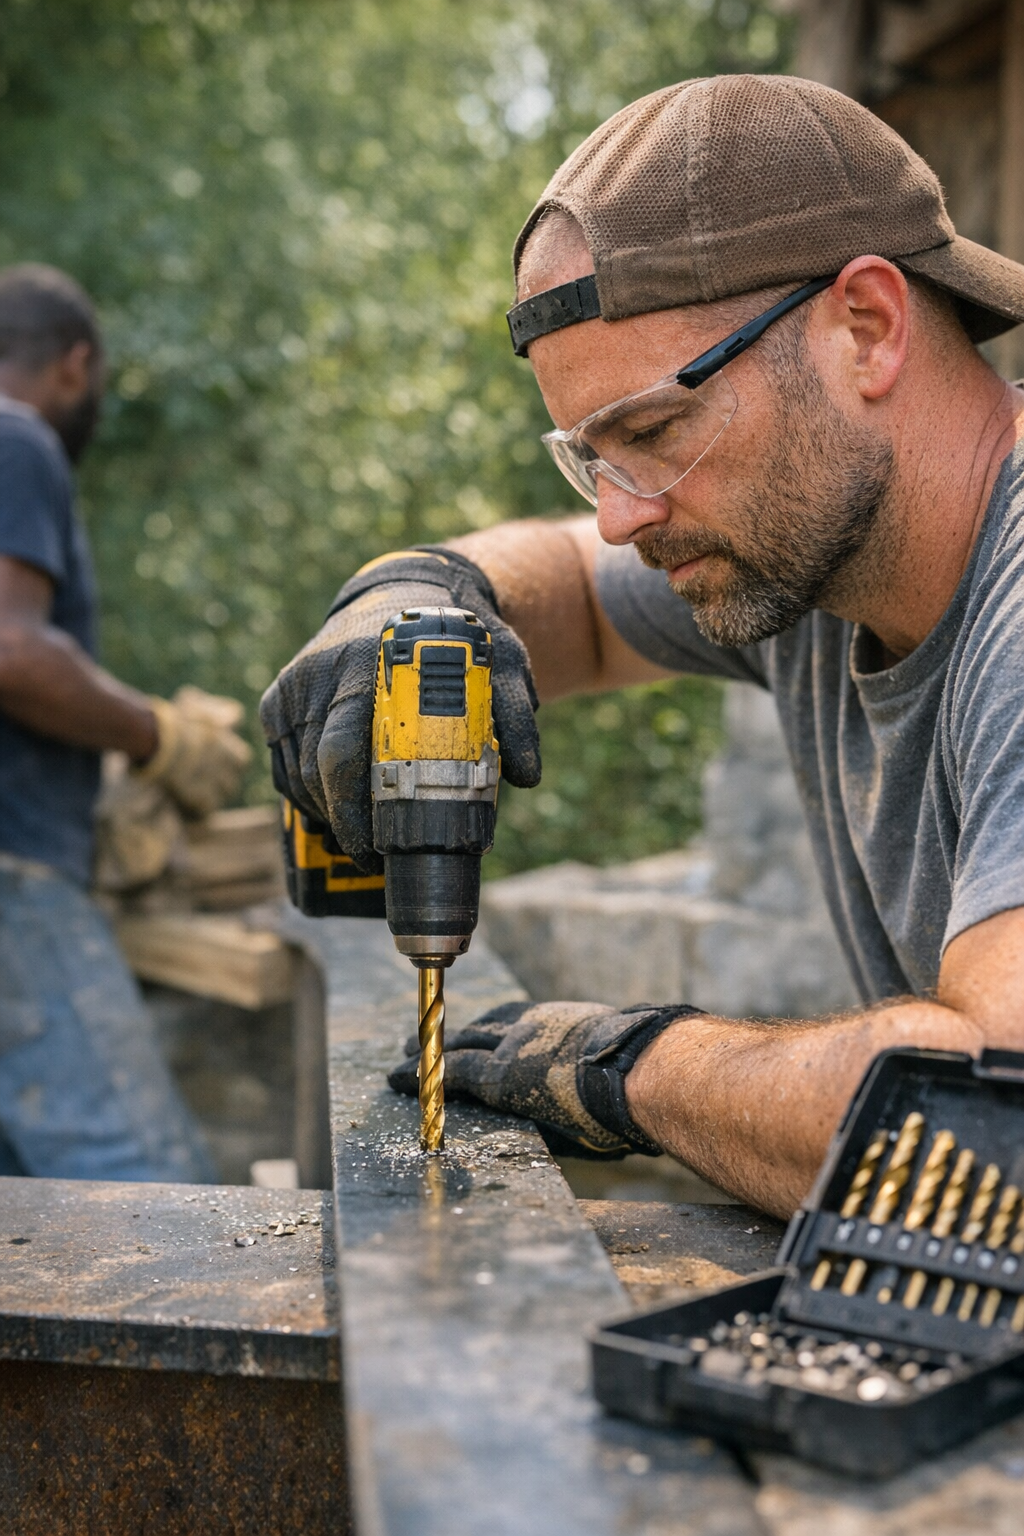
    While many users focus on their feed speed or technique to reduce tear-out, the most critical factor is often the blade itself. Standard construction blades tend to have fewer teeth with an aggressive profile designed for fast, rough cuts rather than finish quality. These blades accelerate fiber splintering and cause tear-out, especially at high rotational speeds.

    Why Tooth Count and Tooth Geometry Matter

    Circular saw blades typically range from 24 to 80 teeth for common woodworking purposes. A lower tooth count blade (24–40 teeth) is better suited for framing and rough cuts because it removes material quickly with deep gullets but leaves a rougher edge with greater tear-out. Conversely, blades with 60 to 80 teeth produce much cleaner cuts because they slice fibers more delicately.

    The tooth geometry also plays an essential role. Alternate Top Bevel (ATB) teeth are angled, allowing each tooth to slice fibers cleanly, minimizing splintering and tear-out. This is in contrast to the flat-top grind of construction blades, which tend to lift and break wood fibers rather than slice them.

    Optimizing Blade Choice for Veneer and Plywood

    For cutting prefinished plywood, veneered panels, or other delicate sheet goods, swapping out a standard framing blade for a 60-to-80-tooth ATB blade is transformative. An ATB blade with carbide tips and a kerf width between 1.6 mm and 2.4 mm balances stability with minimal material waste.

    For example, a 7-1/4″ diameter, 60-tooth ATB blade with a 2.0 mm kerf thickness provides smooth, chip-free cuts on cabinet-grade plywood. When paired with proper saw depth settings, such a blade can eliminate post-cut sanding and refinishing—saving significant time and preserving material integrity.

    Practical On-Site Tips to Reduce Tear-Out

    • Adjust Cut Depth: Set your saw blade so it extends about 1/8″ to 1/4″ beyond the thickness of the material. This ensures the teeth enter and exit smoothly without lifting the panel edge.
    • Secure Your Workpiece: Firmly clamp or support panels to prevent vibration or flexing during the cut, as movement increases the risk of chip-out.
    • Score Before Cutting: For delicate veneers or laminates, light scoring along the cut line with a utility knife can help fibers stay intact.

    Refresh Your Perspective: The Importance of Regular Blade Maintenance

    Even the best blades can cause tear-out when they become dirty or dull. Resin, pitch, and gum build-up on blade teeth increase friction and can burn or splinter wood fibers. Experienced woodworkers recommend cleaning fine-tooth blades every 10–15 cuts using a soft wire brush or commercial blade cleaner to maintain crisp, clean cuts.

    In addition to cleaning, inspecting the blade for dull or chipped teeth is crucial. Replacing or sharpening blades before projects ensures you maintain optimal cutting performance and reduces unnecessary material damage.

    Common Mistakes and How to Avoid Them

    One frequent error on site is relying on a single, universal blade for all cutting tasks. While this might save the effort of swapping blades, it often results in tear-out on finish cuts, increased sanding time, and wasted material. Switching to a high-tooth-count finish blade for visible edges should be standard practice.

    Another pitfall is poor technique, such as pushing the saw too fast or cutting with an unsupported edge. These factors can overwhelm even the best blades. Taking steady, consistent passes and ensuring proper material support will maximize cut quality.

    Real-World Experience: The Difference a Fine-Finish Blade Makes

    On a recent custom bookcase project, improperly using a worn 24-tooth construction blade caused heavy edge splintering on prefinished plywood panels. The contractor had to re-cut multiple boards, losing valuable material and time. After switching to a 60-tooth ATB blade and maintaining a clean blade plate, subsequent cuts were flawless, requiring no sanding and saving hours of labor.

    Summary

    For anyone serious about achieving professional-quality cuts with a circular saw, investing in a dedicated finish or plywood blade is essential. Choose blades with 60–80 carbide-tipped ATB teeth and an appropriate kerf that matches your saw and material thickness. Combine this with proper set-up, secured panels, and maintenance to virtually eliminate tear-out on your projects.

    Remember, the right blade choice can save you from hours of sanding and frustrating material waste—making your woodworking smoother, faster, and more precise.

  • Why Does Your Reciprocating Saw Blade Shake So Much?

    Every experienced builder, renovator, or DIY enthusiast has faced this frustrating moment: you insert a fresh blade into your reciprocating saw, prepare for a precise cut, then pull the trigger—only to feel intense shaking and vibration that threatens to throw off your control. Excessive blade vibration isn’t merely annoying; it undermines the accuracy of your work, increases fatigue, and can even cause tool damage over time. So what causes that jarring chatter and how can you get a smooth, reliable cut every time?

    Why Does My Reciprocating Saw Blade Vibrate So Much?

    It’s tempting to blame the saw itself, but most vibration issues stem from factors around the blade and material interaction rather than the tool’s motor or mechanical condition. Understanding these factors can turn shaky frustration into steady success.

    Blade Type and Tooth Configuration

    Reciprocating saw blades come in a wide array of designs, tailored for wood, metal, demolition, or multipurpose use. Using the wrong type of blade on your material almost guarantees chatter. For example, a fine-toothed blade meant for metal struggles against dense or knotty wood, while a coarse-toothed demolition blade delivers a rough finish but better stability in soft materials.

    Teeth per inch (TPI) critically affects vibration. A lower TPI blade (around 6–10 TPI) quickly cuts wood but may vibrate more on thin or hard materials. Conversely, high TPI blades (14–24 TPI) produce smoother cuts in metal or plastics but require slower feed rates.

    Blade Thickness and Length

    The blade thickness (kerf) also impacts stability. Thicker blades are stiffer and resist flexing, ideal for demolition or tougher cuts, whereas thinner blades flex more and can vibrate excessively when extended.

    Longer blades tend to behave like diving boards – more flex, more vibration, especially in deep or plunge cuts. For controlled framing work or precise cuts, shorter blades (around 6 inches) provide better rigidity. Reserve longer blades (9–12 inches) for demolition or deep cuts where reach is essential.

    Blade Condition: Sharpness and Straightness

    Dull, bent, or damaged blades cause vibration as the inconsistent teeth force the saw out of line. Warped blades can throw your cut off balance, accelerating fatigue and tool strain. Regularly inspect your blades for chipped teeth, bends, or dullness and replace them proactively before your cut quality suffers.

    Material Stability and Holding

    Unsecured workpieces amplify vibration. If your wood board or pipe shifts with the blade’s motion, the entire setup becomes a vibrating mess. Clamping down your material or wedging it against a solid surface is one of the easiest and most effective ways to reduce blade chatter and improve cut quality. Never underestimate how much a simple clamp can transform your experience.

    Cutting Technique and Saw Settings

    Applying excessive force isn’t the answer. Forcing the blade to cut too quickly increases vibration and blade wandering. Most reciprocating saws have variable speed triggers; slower speeds (1,800 to 2,300 strokes per minute) usually produce cleaner cuts with less vibration in wood. Also, orbital action settings work well for soft materials but cause more vibration when cutting hard woods or metals, where a straight reciprocating motion is preferable.

    Practical Tips to Reduce Blade Vibration

    Choose the Correct Blade for Your Material

    Select blades specifically designed for your project material. For instance, a 10–14 TPI bi-metal blade is ideal for EMT conduit, while robust 6 TPI demolition blades excel at cutting through old wooden joists. Keep separate blades on hand to swap quickly as your project demands.

    Inspect and Maintain Blade Condition

    Before every cut, take a moment to examine your blade. Look for any signs of warping, dull teeth, or damage. Replacing blades as soon as performance dips prevents increased vibration and wear on your saw.

    Use Shorter Blades When Possible

    Limiting blade length to what you need reduces unwanted flex. For everyday cutting, a 6-inch blade strikes the right balance of reach and stiffness, leading to steadier, more controlled cuts.

    Secure Your Workpiece Firmly

    This simple step often yields the biggest improvement. A stable workpiece won’t shift under the blade’s motion, eliminating one of the primary causes of vibration. If clamps aren’t immediately available, wedge materials firmly against a solid structure.

    Adjust Saw Speed and Control

    Don’t push too hard or fast. Let the blade do its job with steady, controlled movement. Experiment with speed settings and orbital action to find the smoothest cut for each material.

    A Useful Perspective Shift: Glance at Your Setup as a Whole

    When blade vibration frustrates you, take a step back and consider the entire cutting process—from blade selection and condition to workpiece stability and technique. Instead of rushing to blame the tool or apply more pressure, pause to check whether your setup addresses each factor. Often, the fix is straightforward: swapping to the correct blade, securing the material better, or simply reducing your cutting speed. This holistic approach not only reduces vibration but improves safety and precision.

    Real-World Experience: Stabilizing Your Work Makes All the Difference

    Once, I was tearing out old decking. Each blade I tried bounced erratically and veered off course. After several frustrating attempts, I realized the planks weren’t clamped down, letting them move with every stroke. Adding a quick clamp transformed the process—the blade cut smoothly, vibration vanished, and I nailed the precise lines needed for cleanup. This simple fix can save hours of frustration and wasted material on any project.

    Taking those extra few seconds to organize your work setup, ensure your blade choice fits the material, and maintain a steady hand truly elevates your cutting quality. Vibration isn’t just an annoyance; it’s a signal telling you exactly where your process needs adjustment.

    Summary: Key Steps to Eliminate Excessive Blade Vibration

    • Choose blades appropriate to your cut material and TPI.
    • Inspect blades frequently and replace dull or bent ones promptly.
    • Prefer shorter blades for most tasks to reduce flex and wobble.
    • Secure workpieces tightly using clamps or wedges.
    • Maintain controlled feed rates and appropriate saw speed settings.
    • Maintain a balanced grip and stance—avoid forcing the tool.

    By applying these tips and mindfully approaching each cut, you transform your reciprocating saw from a jittery annoyance into a precision tool you can rely on. Remember, many blade vibration problems stem from setup and blade choice, not the saw itself. Invest time in preparation and blade care to make every cut steady, clean, and fatigue-free.

    For more on blade selection and maintenance, check out our guides on choosing the right reciprocating saw blade and safely using your tool in different materials.

  • How the Right Saw Blade Teeth Cut Demolition Time in Half

    Why Tooth Count Matters in Demolition Work

    If you’ve ever found yourself grinding away at a stud wall filled with stubborn nails or slicing through metal piping with a reciprocating saw, you might have noticed one thing: not all blades are created equal. What often gets overlooked is a deceptively small detail on the blade—the tooth count, or teeth per inch (TPI). This seemingly minor feature can completely change the pace and ease of your demolition projects.

    Whether you’re a professional contractor or a dedicated DIYer, recognizing and matching the right tooth count for your demolition material can drastically reduce fatigue, cut down project time, and improve overall control of your saw. It’s not about achieving a pristine cut; demolition is about momentum, efficiency, and managing stubborn materials.

    Understanding Tooth Count and Its Impact

    Tooth count refers to the number of teeth packed into one inch of a saw blade. This number influences how aggressively the blade cuts, how much material it removes per stroke, and the type of surface finish you can expect.

    Categories of Tooth Count

    • Low TPI (6–10 teeth): These blades feature large, deep teeth and gullets that swiftly remove material. They are ideal for heavy wood demolition, especially where nails are present, allowing the blade to ‘shed’ nails instead of snagging on them.
    • Mid TPI (10–14 teeth): These provide a balanced cut suited for nail-embedded wood, plastics, and certain metals. Mid-range blades offer versatility but can overheat or struggle with the most demanding materials if used exclusively.
    • High TPI (14+ teeth): Featuring finely spaced teeth, these blades cut slower but produce smoother finishes, best reserved for delicate metals or precision cuts.

    Selecting the Right Blade for Your Demolition Material

    For demolition, the choice is almost always toward lower tooth counts because speed and durability trump cosmetic finish. Let’s consider common materials:

    Nail-Embedded Wood

    A blade in the 6–8 TPI range will slice through wood embedded with nails far more efficiently. Larger teeth clear nails from the cutting path rather than getting stuck, reducing kickback and blade breakage.

    Metal Pipes and Conduit

    Bumping up to a 10–14 TPI blade helps avoid blade chatter and keeps your cuts smoother when tackling metal. Lower tooth blades tend to jump or jerk excessively on metal, hampering clean cutting.

    Plaster and Lath Walls

    For plaster with gritty sand inclusions, coarser teeth (around 5–6 TPI) resist clogging and keep momentum steady.

    Optimizing Saw Settings Alongside Tooth Count

    Blade efficiency isn’t just about teeth. You’ll also want to adjust your reciprocating saw’s speed (measured in strokes per minute, SPM) to match the material.

    • Wood demolition: Use high SPM settings around 2500–3000 to maximize cutting pace.
    • Metal cutting: Lower speeds (1500–2000 SPM) reduce excessive heat and vibration, preserving the blade’s life.

    Pairing the correct speed with the appropriate TPI helps avoid overheating and excessive wear. Remember—pushing the saw aggressively to speed up cuts will often backfire, as overheating blades slow your progress.

    A Real-World Example: The Difference of Switching Tooth Counts

    A few years ago, while tearing down an old stud wall packed with nails, screws, and vintage trim, I started with a 14 TPI “all-purpose” blade. Within minutes, the blade was bogging down, heating up rapidly, and cutting felt uneven and frustrating. Swapping mid-way to a 6 TPI demolition blade completely changed the game. The blade ripped through wood and nails smoothly, chips flew continuously, and I cut the project time nearly in half.

    The difference comes down to the tooth geometry—the large gullets on low TPI blades clear debris faster, keeping the blade engaged rather than stalled. Plus, the reinforced spine on demolition blades ensures they withstand twisting and nail hits without snapping.

    Practical Tips for Working Smarter

    • Always carry spare blades: Use magnetic strips on your toolbox or cart to keep a few essential blade types close at hand for quick swaps.
    • Listen and watch for signs: If your blade starts burning material or the saw kicks back, pause and switch blades rather than forcing the cut.
    • Let the blade do the work: Don’t push your saw hard; steady pressure and the correct speed let the blade cut efficiently and prolong its life.
    • Choose blade length wisely: Longer blades help reach through thick walls and protect your hands from accidental contact.

    A Refresh Tip: Shift Your Perspective on Demo Work

    Demolition isn’t just brute force work; it’s a rhythm. Approaching demolition with mindset shifts can significantly improve your endurance and results. Instead of fighting through resistance, pay close attention to blade behavior and saw feedback. A small pause to swap blades or adjust speed can save you hours of fatigue and blade wear over the course of a project.

    This approach transforms demolition from a grueling chore to a series of manageable, efficient steps—each cut flowing into the next, with less frustration and more control.

    Summary: Make Tooth Count Your Demolition Ally

    Matching reciprocating saw blade tooth count to your demolition materials is a simple yet impactful way to speed up your work and reduce effort. Low TPI blades shine on nail-studded wood and tough framing, mid TPI options handle mixed materials, and high TPI blades bring precision to metal cutting.

    By pairing the right blade with proper saw speed and keeping spares on hand for quick changes, you’ll save time, extend blade life, and reduce strain on your tools and body. The next time you gear up for demolition, think tooth count first—you may just halve your project time and triple your satisfaction.

  • How a Simple Bit Coating Transforms Your Tool’s Lifespan

    Understanding the Importance of Drill and Driver Bit Coatings

    If you’ve ever experienced rapid wear on your drill bits or driver bits, you know how frustrating it can be to repeatedly replace them mid-project. Whether you’re a seasoned professional or a weekend DIYer, the lifespan and performance of your bits are often heavily influenced by one overlooked factor: the protective coating applied to the bit.

    At first glance, these coatings might seem like simple surface colors—black, gold, or bronze—but these ultra-thin layers play a vital role in reducing friction, resisting heat, and prolonging cutting edge life. Instead of simply being cosmetic, they provide engineering benefits that translate into smoother drilling and less downtime.

    The Most Common Bit Coatings and Their Benefits

    There is a range of coatings available, each engineered for specific materials and applications. Understanding what each coating offers can help you choose the right bit for your job and achieve better results.

    Black Oxide Coating

    This coating imparts a deep black finish to the bit, enhancing corrosion resistance and reducing surface friction. It is the most affordable upgrade from uncoated steel bits and works well for general-purpose drilling in softer metals and wood.

    Advantages:

    • Improved corrosion resistance compared to bare steel
    • Lower friction helps the bit cut more smoothly
    • Cost-effective for everyday use on wood and mild steel

    Titanium Nitride (TiN) Coating

    Known for its signature golden color, TiN coating significantly enhances wear resistance. It is particularly favored in construction and metalwork because it can offer 2 to 4 times longer bit life than black oxide coated bits.

    Advantages:

    • Greatly extends edge retention in wood and metal
    • Reduces friction and heat buildup during drilling
    • Suitable for high-speed drilling with corded or cordless drills

    Cobalt Bits

    Often alloyed rather than purely coated, cobalt bits feature a silver-blue tint and are designed for tackling tough metals, including stainless steel. These bits are a staple for professionals who frequently drill into high-strength materials.

    Carbide and Diamond-Tipped Bits

    These premium bits are not coatings per se, but rather involve brazing hard inserts onto the bit tip. They are ideal for drilling into masonry, tile, and glass due to their extreme hardness and durability.

    How Coatings Improve Performance and Longevity

    Drilling generates significant heat from friction, which can quickly dull an uncoated steel bit and reduce its lifespan. Quality coatings act as a barrier that reduces friction, lowers operating temperature, and helps maintain a sharp cutting edge for longer periods.

    For example, a titanium nitride coating not only extends the bit’s usable life but also helps maintain stable drilling speeds and decreases the chance of the bit “walking” or slipping across the work surface.

    Optimizing Drill Settings for Coated Bits

    Even with premium coatings, improper drilling techniques can shorten bit life. To get the best performance:

    • Use appropriate speeds—for hardwood and steel, around 1200–1500 strokes per minute (SPM) is ideal with TiN bits.
    • Avoid forcing the bit; let it cut at its own pace to prevent overheating.
    • Periodically withdraw the bit to clear debris and allow cooling between holes—about 5 to 10 seconds can make a significant difference in heat reduction.

    Real-World Example: Jobsite Benefits of Using TiN Bits

    Consider a typical construction scenario involving drilling into steel plates for handrail bracket anchoring. A TiN-coated 5/16″ bit was able to perform ten pilot holes in 1/4″ steel plate before any noticeable dullness. In contrast, a standard black oxide bit began to vibrate and lose grip by the fourth or fifth hole, highlighting the clear advantage of premium coatings for metal work.

    Refresh Tip: Pay Attention to Visual and Tactile Cues

    One practical benefit of high-quality coatings like TiN is that their wear is visually apparent. The golden coating dulls or wears away at the tip over time, signaling that the bit is nearing the end of its effective life. Being mindful of these subtle changes in appearance and sound—such as a change in cutting smoothness or an unusual whirring—allows you to proactively replace bits before poor performance or breakage occurs.

    Considerations for Driver Bits

    Driver bits also benefit from coatings when working with metal studs or dense lumber. Black oxide or titanium coatings extend life and reduce wear when driving numerous screws, especially drywall screws that often challenge bit durability.

    However, even coated driver bits are not immune to wear and should be monitored closely during heavy use to avoid stripping screws or damaging fasteners.

    Maintenance and Bit Care Best Practices

    Here are actionable tips to maximize the lifespan of your coated bits:

    • Avoid grinding or sharpening coated bits: Doing so removes their protective layer and essentially turns them into bare steel bits, which quickly wear out.
    • Use the right bit for the material: Match coatings to the intended application—for example, use cobalt for stainless steel and carbide for masonry.
    • Store bits properly: Prevent corrosion and nicks by keeping them in dedicated cases or holders.

    Final Thoughts

    Choosing the right coating for your drill and driver bits is a smart investment in both time and money. The small upfront cost difference for coatings like titanium nitride translates into significantly longer bit life, smoother drilling, and fewer mid-project interruptions. Paying attention to drill speed, bit condition, and making use of the natural wear cues coatings provide will keep your projects moving efficiently.

    Consider how your current bit care routine stacks up. Are you pushing through dull bits hoping they’ll last just one more hole? Or are you using the right coatings and practices to keep your jobsite downtime minimal? Adopting better bit care and investing in premium coated bits can elevate the quality of your work and lessen tool-related headaches.

  • Solo Airport Mornings: Embrace Freedom, Rhythm, and Your Perfect Bag

    There’s a certain rhythm to airport mornings when you’re on your own. It isn’t exactly excitement, but it’s not anxiety either—just that in-between feeling you get from watching things unfold and not knowing what’s next. I glanced at my boarding pass and let the sounds of the terminal blend together—the steady buzz of lights overhead, bursts of perfume from hurried travelers weaving past. My carry-on sat by my leg, its wheels twitching as my fingers tapped on the handle.

    Traveling solo comes with a kind of freedom, mixed with the quiet of your own company. No group to meet up with or anyone to match steps with this time. The terminal echoed with muffled announcements and distant phone conversations. I could take it all at my own pace. That’s one of the nice parts, especially when everything you need fits in a single bag. No awkward teamwork, just a suitcase sliding over glossy tiles, ready to go whenever I am. I’d picked it up from Carry Supply, and it had already proven to be a solid travel companion.

    Security went by without much fuss. Moving through alone, all you need to think about is your own stuff—passport, bag, maybe a snack. Once you’re through, it all opens up again: magazine stands, the scent of bitter coffee drifting from cafés, airport windows glowing in the morning light. I took my time with my coffee, just watching people filter past. Some strode confidently like they’d done this a hundred times; others looked half-awake; a few clung to their tickets like a lifeline.

    Airports always put you in this odd waiting zone. Sitting alone, you start noticing little things—the pattern on the carpet, the gentle tone in the gate agent’s voice when she’s helping a kid, your own reflection in the glass. I caught myself wondering if I’d packed everything. That quick mental checklist is a habit now. Before the next thing happens, there’s always that small pause.

    Soon enough, a boarding call crackled over the PA. I watched people gather their things, give last instructions, lean in for a quick goodbye. When my turn came, I stood up, guided along by the pull of my bag and the comfort of routine—handle in hand, small steps forward. On solo trips, these habits matter more than you’d think. It’s nice knowing where all your essentials are. Travel is unpredictable, but your bag can be the one steady thing.

    Walking down the jet bridge, I felt the low hum of the plane through the floor. There was no one to share the quiet, but there was no pressure to fill it either. I found my seat, got my bag overhead, buckled in. The little rituals kicked in—seatbelt click, jacket tucked, headphones ready. For a few hours, the world shrank to just this space: background conversation, that silent energy before takeoff.

    Mid-flight, I found myself looking down at the patchwork below, not really thinking about much except how simple things feel up here. Solo travel gives you that space to just be—watching your thoughts go by, the way cities and clouds blur together. Now and then I’d remember a past trip, but this was different. Traveling alone lets you move at your own speed, without expectations.

    Landing always seems to come quicker than expected. The wheels touch down, everyone stands too soon, the search for your bag—still safe above—brings a little relief. The small victories count here: breezing through customs, catching glimpses of the new city outside the window. Sometimes, these little moments end up meaning the most.

    Arriving somewhere new, you always bring along a bit of who you were before you left. The streets, the evening lights, all remind you why you set out. In its own quiet way, solo travel helps you become a little more confident, a bit softer with yourself. On the night I flew home, I noticed how much easier it felt to move through busy terminals alone, just me and my bag.

    Waiting to board by yourself isn’t really about being lonely. It’s more about seeing what you notice—to new places and a bit more of yourself. That’s probably the one constant: with each trip, you learn to trust that you’re carrying what really matters, in your bag and in your own way.

    For me, traveling light and traveling well makes all the difference. I found my way with Carry Supply, and I’ll keep moving, always ready for the next landing.

  • Why Your Drill Bit Walks—and How to Fix It Easily

    Understanding Why Drill Bits Wander Off Center

    Ever had a drill bit that refuses to start where you mark it? You position the bit carefully, press the trigger, and then it suddenly slides sideways—just a few millimeters off your mark. While that might seem minor, this movement, known as “walking” or “skating,” can ruin accuracy and cause misaligned or oversized holes. It’s frustrating whether you’re a novice or a craftsman with years on the clock.

    At the root of this problem are a few common causes:

    • The drill bit’s tip glides across the surface before biting.
    • The surface is too smooth, hard, or slick for the bit to grip initially.
    • The drill isn’t perpendicular, or it starts at too high a speed.
    • The bit is dull, worn, or unsuitable for the material.

    Walking is especially common on hard woods, laminated plywood, metals, and other smooth surfaces where the bit finds no “purchase” to start drilling promptly.

    Choosing the Right Bit to Minimize Walking

    One of the best defenses against bit walking is selecting the proper drill bit tip design for your material. Not all bits should be treated equally or used interchangeably.

    Brad Point Bits are an excellent choice for woodworking projects. They have a sharp central spike that helps the bit stay centered by physically anchoring it before the cutting edges start their work. This design dramatically reduces skidding on flat wood surfaces, plywood, or laminates. For hardwoods, seek brad point bits with 8–10 teeth per inch for a clean and steady cut.

    Twist Bits are versatile and common but can be prone to wandering because of their blunt tip geometry. They’re best reserved for softer materials or when precision isn’t the ultimate priority.

    Metal Drilling Bits need to be sharper and usually come with a split-point tip angled at 135°, which helps the bit self-center when starting in steel or aluminum. Using a 118° bit on metal often leads to more walking because the tip geometry isn’t optimized for the harder surface.

    Masonry Bits feature a tungsten carbide tip designed for brick, concrete, and stone. They’re highly durable but ineffective for steel or wood, where their geometry prevents proper biting.

    A big mistake is using a “one-bit-for-all” approach. General-purpose bits often fall short on wood hardness or paint finishes and wander more easily.

    Practical Techniques to Stop a Bit From Walking

    Create a Starter Dimple

    One of the simplest and most effective ways to prevent bit walking is to create a small pilot indentation where you want the hole.

    This dimple gives the bit a physical seat to sit in before drilling starts, dramatically improving accuracy.

    How to make a starter pit:

    1. Mark your drilling spot clearly with a pencil or scribe.
    2. Use a center punch if you have one. Gently tap it with a hammer to create a shallow dimple.
    3. If you don’t have a center punch, a sturdy nail, scratch awl, or even the corner of another drill bit can work as a substitute for wood or softer metals.
    4. Begin drilling with the bit seated in this dimple—start spinning slowly and carefully.

    This simple physical guide often cuts walking down by 90% or more, especially on hard or smooth metals and wood finishes.

    Apply Masking Tape for Extra Grip

    When drilling into extremely smooth or glossy surfaces like ceramic tiles or finished plywood, applying a piece of masking tape over the drilling mark adds grip. It gives the bit a little more bite in those first rotations, preventing slippage and scratches.

    This method is popular with tile installers because the tape reduces walking and cosmetic damage.

    Start Slow and Straight

    Resist the urge to blast your drill at high RPM from the start. Instead,:

    • Keep the drill speed low when starting (around 300–500 RPM for wood, 150–250 RPM for metal).
    • Apply gentle, steady pressure to allow the bit to bite steadily without forcing it.
    • Ensure your drill is held perpendicular (90°) to the surface. Even a slight tilt of 10° can cause the bit to wander.

    Use a small carpenter’s square or visually check the angle from different points if you’re unsure.

    Maintain Sharp, Well-Matched Bits

    A dull or damaged bit tip worsens walking. Even the best tip design cannot compensate for a worn edge.

    Regularly inspect your bits and sharpen them when necessary using a bit sharpener or bench stone. The investment of a few minutes to sharpen your bits will save frustration and improve your hole accuracy dramatically.

    Remember, a well-maintained bit engages the material immediately, cuts clean holes, and holds center without wandering.

    A Refresh Tip: Slow Down and Trust the Process

    It’s tempting to rush through drilling tasks, especially when projects pile up. But trips to patch holes and re-drill waste more time and materials than a deliberate, methodical approach.

    When you slow down to take these few preparatory steps—proper bit, a starter dimple, correct drill angle, and sharp bit—you build precision into your work and avoid frustration.

    This mindset refresh helps transform your drilling from a source of headaches into a satisfying part of the craft.

    Real-World Example: Precision on the Job

    Once, while installing a French cleat wall, I found that many mounting screws had badly misaligned holes. Switching to the dimple technique—simply tapping in a small pilot mark before every hole—revolutionized my installation speed and accuracy. The crooked, frustrating starts disappeared overnight.

    My experience echoes the wisdom of seasoned metalworkers and woodworkers who know that a controlled start is half the job.

    Summary: Stop Bit Walking with Simple Actions

    • Use the right bit style and tip for your material—brad point bits for wood, split point bits for metal.
    • Create a starter dimple with a center punch or improvised tool.
    • Apply masking tape over smooth surfaces to add grip.
    • Start drilling slowly and hold the drill perfectly perpendicular.
    • Keep bits sharp and well-maintained.
    • Adopt a patient, methodical approach to drilling to save time long-term.

    Following these practices will improve your hole accuracy every time and transform drilling from a frustrating chore into a precise craft.

  • “Master Pre-Flight Jitters: Travel Light with Your Trusted Carry-On”

    The cycle repeats every time, right before heading to the airport. I wander through the apartment, checking the stove again, unplugging a lamp I probably didn’t need to, and glancing at my carry-on, already packed and waiting. I used to think this pre-departure anxiety meant something was wrong with me—something that would disappear after enough trips. But it hasn’t. That little jolt of nerves settles in quietly, especially during check-in, even with all the anticipation that comes with travel.

    The airport ride rolls by in its usual mix of excitement and unease. Traffic lurches, a podcast plays, but I’m only half there—wondering if my bag is too heavy or if my passport made it from the coffee table to my backpack. I check the charger again, just in case. My carry-on sits in the passenger seat, a low-stress companion whose handles feel familiar. Packing it last night was actually relaxing—folding shirts, tucking in a few books, finding comfort in small routines before jumping into the busy unknown. For anyone still looking for something sturdy to bring along, I found my go-to here: carrysupply.myshopify.com.

    Check-in always has a strange, stage-like feel. The line crawls forward, everyone a little distracted, quietly worrying about their own stuff. You can spot the moment when people tense up—a boarding pass scan, a bag questioned for being too big. My turn comes. I hand over my passport, stand a little straighter than normal, try not to over-explain. The agent barely glances at my scuffed carry-on, the one that’s made it through trip after trip. I think about how much I’ve squeezed into overhead compartments lately, how I’ve learned to pack lighter but still can’t shake the nerves underneath it all.

    Once check-in is done, I get a short wave of relief, but security brings its own set of tiny steps. Shoes off, pockets emptied, laptop out—somehow I’m sure I’ve forgotten something. The routine never feels totally normal. Stress hangs on until I’m through, bag rolling behind me. At that point, everything shrinks down: the hum of wheels, bits of airport conversation, a little less tension. Having something familiar to hold onto, like a steady bag, makes things easier.

    Boarding feels quieter and more relaxed. I find my window seat, slide my bag overhead, and watch as people come down the aisle, each scanning tickets and searching for space. The engines start up, and for a second, I realize I always hold my breath then. The plane climbs, the city drops away, and those jitters that stuck around all morning finally start to fade.

    There’s a pause mid-flight. I glance at my carry-on, tucked away, and think about the small things it’s carried: spare socks, notebooks, random souvenirs. There’s something reassuring in knowing your essentials are all right there, as long as they fit in something you trust. When the seatbelt light goes off, the tension drops. It’s just the sky outside and the thought that somehow, destinations just keep showing up.

    Arrival comes with its own blend of nerves and novelty. Airports each have their own smell, customs lines their own rhythm. But my bag’s humming wheels give a sense of home, no matter the country. I step into the arrivals hall, blinking at whatever new light or weather, and manage to feel a bit braver with every trip. Maybe you never get rid of the anxious part entirely—you just let it ride alongside a quiet hope for what’s next.

    The anxiety doesn’t vanish, but it shifts. Walking through a busy city with my bag at my side, I notice how everyone’s moving at their own pace, carrying thoughts I’ll never know. Late at night, unpacking, I remember that what feels urgent rarely is. Most worries fade once life picks up again. I keep the small routines: folding shirts, zipping up pockets, taking it as enough.

    Sitting in a local café, I send a quick message home, suitcase by my feet—a small reminder of all the miles together. There’s no single fix for the nerves at check-in, but having a reliable bag, one that sticks with you, helps ease things along.

    Coming home is always a bit quieter. I wait at familiar arrival gates, bag in hand, and think about all the places it’s tagged along. It’s funny how easy some comforts are: the sound of a zipper or the grip of a handle, knowing you’re never really lost, just moving forward, slightly uncertain and a little more capable each time.

    The anxiety never fully disappears—and maybe that just means I still care about what’s ahead. I acknowledge it, keep moving, and look for small ways to steady myself between places. My carry-on rolls alongside me out of the terminal, as steady as always. If you’re searching for something similarly reliable, it’s worth starting here: carrysupply.myshopify.com. And who knows—maybe next time, check-in won’t feel quite so tense.

  • Why Permanent Anti-Fog Coatings Are Worth Your Attention

    Why Foggy Safety Glasses Are More Than Just an Annoyance

    Anyone who has worn safety glasses knows the frustration—one moment your vision is clear and sharp, and the next, a foggy haze blurs everything in front of you. Whether you’re working outdoors on a chilly day, moving between a cold zone and a heated workshop, or simply wearing a mask that directs your breath upward, fogging is a persistent and hazardous disruption.

    Safety glasses are meant to protect your eyes and help you maintain focus. But when your lenses fog up constantly, they become a safety risk themselves. You might stop working every few minutes to wipe them, or worse yet, continue squinting and guessing your surroundings, increasing the chance of accidents.

    Understanding Why Safety Glasses Fog Up

    Fog forms when warm, moist air meets a cold surface and condenses into tiny water droplets. On safety glasses, this happens when:

    • You walk inside after being outdoors in the cold.
    • Your breath, especially if you’re breathing heavily, creates moisture behind the lenses.
    • You’re wearing a mask or respirator that channels warm breath upward.
    • You work in humid or sweaty conditions.

    The basic physics behind fogging means you can’t always control the environment or how your body behaves. But you can seek gear that minimizes the problem so you don’t have to stop constantly.

    Permanent vs. Temporary Anti-Fog Solutions: What Really Works

    Many safety glasses are marketed as “anti-fog” or “fog-resistant,” but the devil is in the details. Most temporary solutions involve coatings or sprays that require frequent reapplication and quickly wear off during a workday. These include water-activated coatings or sprays that promise fog-free vision for minutes to an hour.

    On the other hand, permanent baked-in anti-fog coatings bond directly to the lens surface during manufacturing. These coatings are much more durable:

    • They don’t wash away when the glasses get wet or dirty.
    • They last for weeks or months in real, rugged work conditions.
    • They reduce the need for constant cleaning or reapplication.

    The difference is significant. If you find yourself relying on spray bottles multiple times per day, it’s not the gear—it’s the coating.

    Real-World Experience: Why Durable Coatings Make a Difference

    Consider a day working in a hot attic retrofit. The air is moist and your mask directs your breath under your safety glasses every time you breathe deeply. With temporary anti-fog glasses, you might reach for a spray or cloth 10+ times in a few hours—losing focus and momentum each time.

    Permanent anti-fog coatings don’t just delay fogging—they often prevent it entirely under typical conditions. This means:

    • You spend more time focused on your work.
    • You maintain safer awareness of your surroundings.
    • You reduce frustration from constant pauses and lens cleanings.

    Practical Tip: How to Reduce Fogging By Adjusting Your Mask Fit

    Even the best coatings can struggle if warm breath is funneled directly upward. If you wear a mask or respirator, try putting your safety glasses on after fitting your mask firmly over your nose. A tight seal reduces the amount of moist air hitting the lenses.

    Quick adjustments such as:

    • Using masks with a nose wire and molding it to your face.
    • Placing a strip of medical or sports tape across the top inside edge of the mask to seal gaps.
    • Ensuring your glasses fit tightly but comfortably over your mask edges.

    These small changes often provide noticeable improvements without any new gear purchases.

    Refreshing Your Perspective: Beyond the Lens Treatment

    It’s easy to focus solely on the glasses themselves, but sometimes managing fog requires a small shift in how you approach the entire system of protection. Consider the following:

    • Layer your safety gear thoughtfully: Position masks, respirators, and glasses strategically so breath is directed away from lenses.
    • Pay attention to ventilation: When possible, working near a fan or air circulation can disperse moist air.
    • Regularly clean your lenses: Dirt and oils reduce coating effectiveness; gentle cleaning with manufacturer-recommended solutions keeps coatings performing well.

    This holistic view reduces fogging problems even further and helps your gear last longer.

    What to Watch For When Choosing Anti-Fog Safety Glasses

    When shopping or evaluating your current safety glasses, look out for these key details:

    • Permanent or baked-in anti-fog treatments: Phrases like “permanent coating” or “baked-on” suggest durability.
    • Avoid water-activated or replenishable coatings: These often need frequent reapplication.
    • Be skeptical of vague terms: Words like “fog-resistant” or “anti-mist” without specifics may mean minimal protection.
    • Consider lens material and design: Some polycarbonate lenses have better inherent anti-fog capabilities.

    Final Thoughts

    Fogged safety glasses are more than an inconvenience—they compromise your safety and productivity. The most effective solution lies in choosing lenses with truly permanent anti-fog coatings combined with mindful mask fitting and lens care.

    Making these choices allows your safety glasses to fade into the background—letting you focus on the job at hand instead of the constant battle against fog. Try implementing these strategies in your work routine and see how much smoother your day can go.

  • “Discover Airport Magic: Stories of Journeys and Timeless Travel Companions”

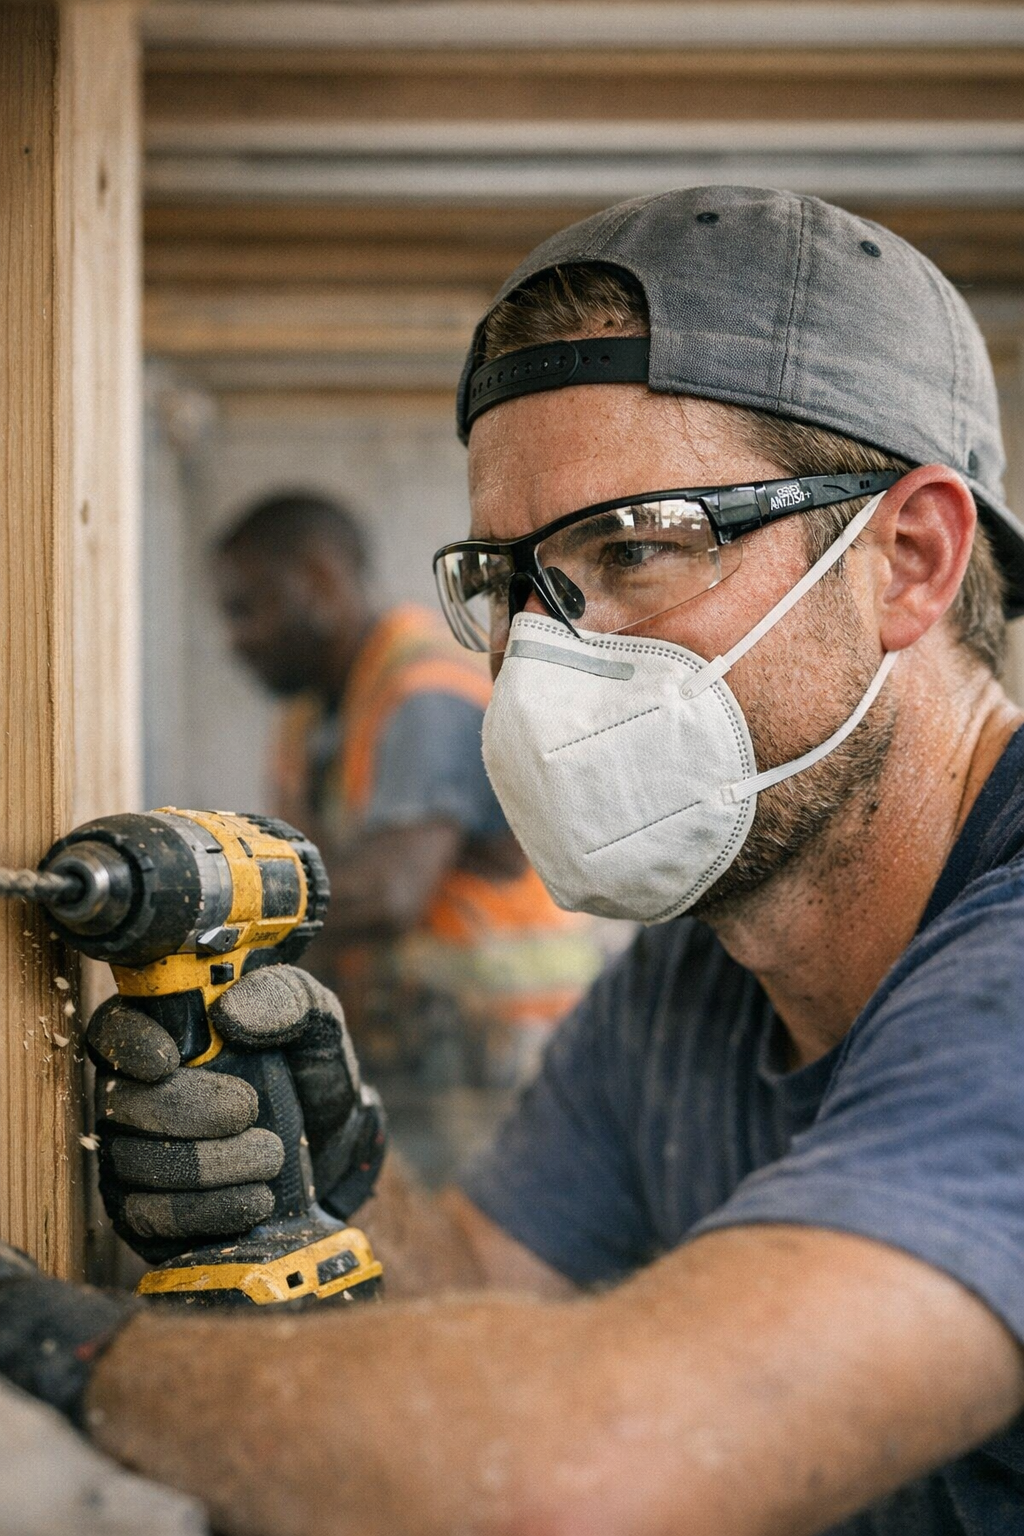
    Every time I walk into an airport before a flight, there’s this familiar hum in the background—a mix of nerves and a bit of excitement. Maybe it’s the odd light slanting through the windows or the voices blending together, but the place always feels a little different right before it’s time to board.

    I sometimes think airports just highlight whatever you’re already feeling. I usually arrive early, still a bit groggy from too little sleep and that low-key rush about going somewhere new. My carry-on rolls along beside me, patched and well-traveled, stocked with the things I like to have nearby in the air—a book, headphones, travel journal, and a coffee token from a past trip. I’m always browsing for new gear, too; if you’re the same, there’s Carrysupply, with bags you start to imagine collecting their own history.

    There’s something kind of personal about the security line. Everyone’s going through the same steps: shoes off, laptops out, belts undone. Even if you’re used to it, it makes you feel a little more exposed, and you can almost sense the day shifting. Sometimes I look at the people around me and can’t help but wonder where they’re headed and what they’ve packed inside those bags.

    Once I’m through to the terminal, things feel sharper. The smell of pastries at a bakery stand, the echo of an announcement overhead, the flickering flights board stacked with unfamiliar destinations—all the details stand out. A lot of times I’ll grab a spot in a quiet corner, feet propped up on my carry-on, letting the wait settle in.

    The area by the departure gates always turns into a temporary community of strangers all sharing the same moment. There are people talking with family on the phone, flipping through passports, or catching up on something on their screens. Some just watch planes outside, or listen to the chatter from a group in matching sweatshirts, or notice a kid looking up in awe at the engines. There’s a rhythm to it—little clicks, hushed laughs, the sounds of people about to head off.

    When boarding is called, I grab my bag and get in line, running through the usual checks without really thinking. There’s always that feeling as I join the queue: leaving something behind but already focused on what’s next. I keep an ear out for my row, making sure the zipper on my carry-on is shut.

    On the plane, it quiets down. I stash my carry-on under the seat, glance around, and notice how everyone’s faces shift as they settle in. Hoodies, business jackets—it all blends together. There’s this sense of being between places, somewhere just out of reach of where you’ve been and where you’re going. I catch myself holding onto my backpack strap, feeling that little push as the plane starts to move.

    Once we’re cruising above the clouds, the world below fades out, and time feels softer than it did back at the gate. Up here, everything slows down. I might pull out my book for a while, or just drift off thinking about the place I’m about to land. New streets, different languages, and a different kind of sunlight waiting on the other side of the airport ride—it hits you every time. There’s something almost freeing about being in this in-between.

    If I’ve learned anything, it’s to pick your travel companions carefully. Sometimes it’s another person, sometimes it’s just your favorite carry-on that’s seen its share of rough luggage racks and long layovers. It’s funny how an old bag you’ve brought everywhere can become a little piece of home, wherever you find yourself in the world.

    Arrivals have their own atmosphere. When you finally walk out of the terminal, whether into sun or rain, it all feels new for a moment. My bag seems a bit more scuffed, maybe with a new sticker or two picked up along the way. That familiar weight is almost reassuring.

    Coming back through the airport heading home is always easier. The routine sets in, and everything feels more familiar. The airport coffee even tastes a little different, and the goodbyes at the gate aren’t quite as sharp. At the end, there’s always a quick look back—what changed, what stayed the same, and maybe something small you picked up to keep.

    Maybe that’s just why airports have that certain feeling before a flight—a thousand stories stacked up, everyone waiting for what comes next. Even after years of travel, I still notice it, and honestly, I hope I always do. In those in-between moments, anything feels possible.

    I’ll wrap up here, between arrivals and departures. My old carry-on is next to me, ready for wherever I’m off to. If you ever find yourself hunting for a travel companion you can count on, there’s always Carrysupply, quietly waiting in its own corner of the internet—kind of like the airport itself, full of stories yet to start.

  • Are Your Safety Glasses Quietly Sabotaging Your Precision Work?

    Understanding How Lens Quality Impacts Your Precision Work

    Have you ever struggled to mark a precise line or thread a tiny screw, only to find your vision blurred or distorted despite wearing safety glasses? Many assume that wearing any safety glasses is enough to protect their eyes and maintain accuracy. However, when you rely on inexpensive safety lenses, you might unintentionally introduce subtle distortions that cost you precision and increase fatigue during detailed tasks.

    In this article, we’ll explore why cheap safety glasses can compromise your accuracy and offer practical insights on choosing the right eyewear to ensure clarity and comfort throughout your workday.

    The Hidden Cost of Low-Quality Safety Lenses

    At first glance, safety glasses appear simple and uniform: clear plastic shields with arms to secure them in place. The real differences lie beneath the surface, especially in the lens material and manufacturing precision. Lower-cost safety glasses typically use polycarbonate lenses that may have inconsistent optical clarity due to lower standards in grinding, curvature, and coating application.

    For example, the thickness of lenses in cheap glasses can be as thin as 1.4mm, whereas more reliable, jobsite-grade eyewear usually features lenses closer to 2mm or thicker. Even slight deviations—such as a half-degree error in lens curvature—can cause light to bend unevenly, leading to distortions that are critical during fine work.

    Types of Distortion Caused by Inferior Lenses

    • Edge distortions: Subtle warping at the periphery of the lens creates pincushion or barrel distortions, where straight lines appear curved.
    • Magnification shifts: Slight variations in magnification near the lens edges can mislead your perception of measurement and alignment.
    • Ghost imaging: Faint double images or reflections can cause confusion during close-up tasks requiring focus.

    These effects aren’t always obvious at first, but they force your eyes to constantly refocus and strain, subtly undermining your accuracy and causing fatigue.

    A Real-World Example: When Safety Glasses Betray Your Markings

    A few years back, I spent an afternoon installing cabinet handles for a friend. Initially, I wore a cheap pair of safety glasses, confident they would protect my eyes without issue. After making a few holes, I noticed the spacing felt off—marks that should have been perfectly straight seemed slightly curved. I shifted my angle repeatedly, wondering if my technique was the problem.

    When I finally removed my glasses and inspected the marked points, the lines were noticeably warped. Not my hands—the lenses were distorting my vision, shifting my perception enough to cause misalignment. This experience drove home how optical imperfections in eyewear can directly impact the quality of your work.

    Why Consistent Vision Matters in Precision Tasks

    Whether you’re a carpenter, electrician, automotive technician, or hobbyist, precision is often non-negotiable. The smallest misjudgments in alignment, measurement, or cutting can lead to a domino effect of errors:

    • Refocusing fatigue: Inconsistent light refraction forces your eyes to constantly adjust, leading to tiredness and decreased accuracy over several hours.
    • Misaligned marks: Even a 0.5 to 1.0mm deviation on a 300mm gauge can cause gaps in joints or ill-fitting trim.
    • Tool misalignment: Eye strain can cause you to set saw blades, chisels, or punches off-center, compromising the finish.

    These small errors compound, resulting in wasted effort, additional rework, or lower-quality outcomes.

    How to Test Your Safety Glasses for Distortion

    Before committing to a pair of safety glasses, it’s worth performing a simple at-home test:

    1. Hold your safety glasses at arm’s length.
    2. Look through them at a fine, straight line—such as the edge of a steel ruler or a tile edge.
    3. Slowly move and tilt the glasses in various directions.
    4. Observe whether the line stays perfectly straight or twists, waves, or shifts as the image moves across the lens.

    If you notice more than 0.5mm of distortion at arm’s length, those lenses might introduce enough error to affect your precise work.

    Performing this quick check before starting a detailed task can save time and frustration later. If your lenses fail this test, reserve those glasses for rough or demolition work.

    Choosing the Right Safety Glasses for Accurate Work

    Investing in higher-quality safety glasses means selecting lenses designed with strict optical standards and durability in mind. Here are features to look for:

    • Standards compliance: Look for EN 166 F or ANSI Z87.1+ certifications, which require minimal refractive distortion—typically less than 0.06 diopters.
    • Optical quality lenses: Plano (non-prescription), distortion-free lenses with consistent thickness, usually 2mm or greater.
    • Coatings: Anti-fog and scratch-resistant layers help maintain clarity throughout a long workday.

    These choices ensure your vision remains clear, minimizing refocus and eye strain, so your hands and tools can perform at their best.

    Refresh Tip: Swap Glasses Mindfully During Your Workday

    A simple strategy to maintain comfort and precision is to keep two pairs of safety glasses on hand: one budget-friendly set for rough, messy, or demolition tasks, and a higher-end optically clear pair reserved for measuring, marking, and detailed assembly.

    This small habit keeps you visually sharp when you need it most—without sacrificing eye safety during less critical phases. Switching glasses might take a few seconds but yields a substantial boost in accuracy and reduces unnecessary eye strain.

    Integrating Accurate Eyewear into Your Workflow

    Before starting your next project that involves tight measurements or finishes:

    • Evaluate your current safety glasses using the distortion test above.
    • Consider upgrading to certified, optically precise lenses if you frequently work on intricate tasks.
    • Use your robust glasses consistently for layout, marking, and fine adjustments.
    • Keep a secondary pair for demolition, rough cutting, or painting.

    Maintaining clear vision safeguards not just your eyes but the integrity of your work results.

    Conclusion

    Cheap safety glasses still protect your eyes from physical hazards but often introduce optical distortions that can subtly sabotage your precision work. Lens-induced image warping and magnification shifts cause eye strain, misaligned marks, and errors in tool setup—problems that worsen over prolonged use.

    Taking time to test your eyewear, investing in certified distortion-free lenses, and adopting smart habits—like swapping glasses based on the task—can significantly improve your finishing accuracy and reduce fatigue. Remember, the foundation of precise craftsmanship begins with clear, undistorted vision.