Blog

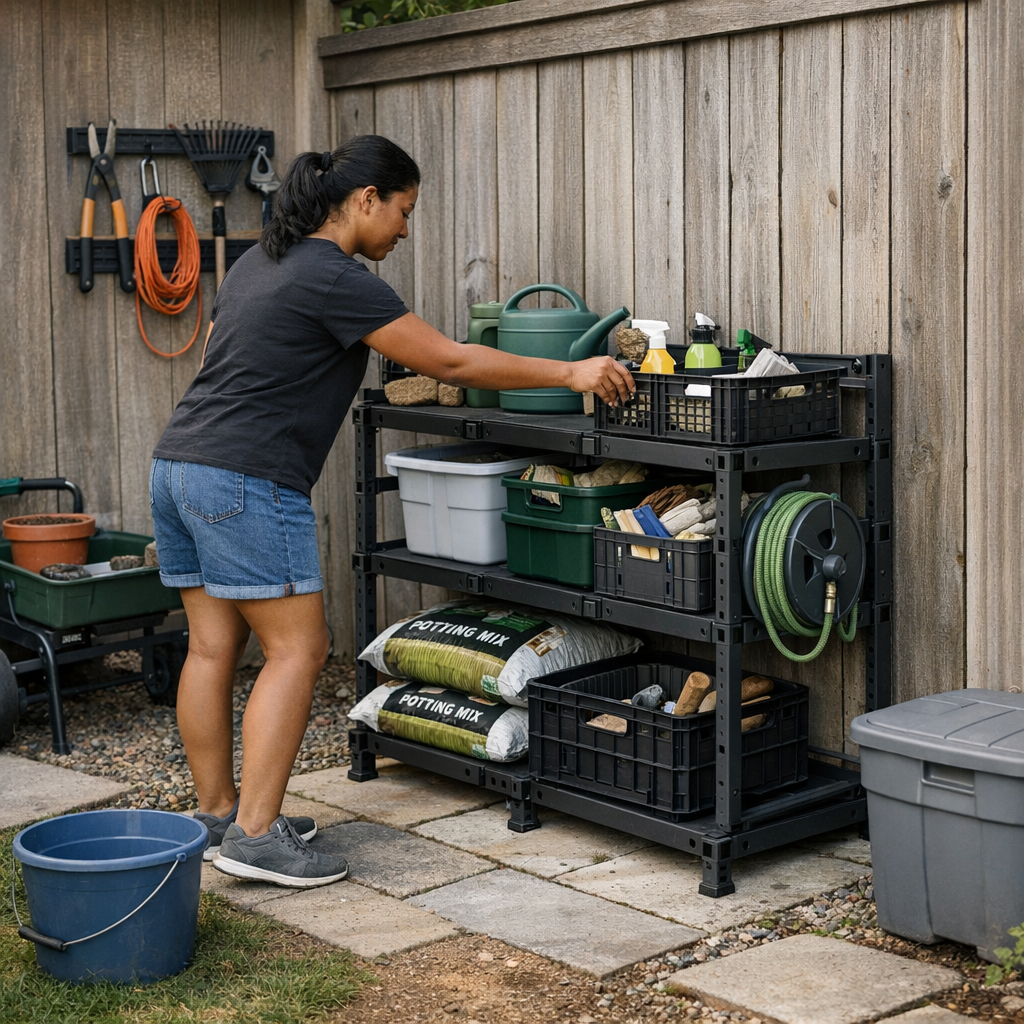
  • Choosing Backyard Storage That Stands Up to Daily Use Challenges

    Most backyard storage setups look organized right after installation. The truth comes later, when the daily shuffle begins—wrestling a shovel back after a long day, wedging the mower past stacked tubs, or tracking down gloves with muddy hands only to find them buried again. What seemed like a perfect layout on paper quickly collides with the stubborn friction of everyday return flow, pinched walking space, and gear that drifts right back into your path.

    The Real Friction: Why Setups That Look Tidy Still Trip You Up

    Order hardly lasts in a backyard or side yard that gets real use. That spark of control—floors swept, bins lined up, tools perched on rails—vanishes the moment your routine collides with the setup. Swap out sports gear for garden tools? You pull two bins out and wedge them somewhere wet. Stash pruners before the rain? Now you’re shifting heavy bags just to clear an inch of shelf. If “putting things away” means playing storage Tetris or moving the same tub twice to walk the path, the obstacles multiply. Each quick fix becomes another slight reroute—until even small jobs drag out or get skipped.

    Most setups break down in the squeeze-points: side-yard strips that double as storage and walkway, patio corners hijacked by overflow, or fence zones you never intended to block. A container that looked reasonable for hoses and planters suddenly eats too much space when one late project means everything gets stacked, half open, right in front of what you need next. What passes for organized after a Saturday reset is often just the starting line for next week’s shuffling routine.

    Floor Units: A Catch-All That Eats Its Own Space

    Floor boxes have the same flaw: there’s always something in front of what you actually reach for. That big deck bin swallows loose gear easily—until you’re knee-deep pulling out garden shears and tangled hoses to get at the one trowel you want. Every season, new layers form: last year’s boots, sports cones, the garden sprayer you needed yesterday. The more you pile inside, the less likely anything returns to its original spot—so overflow clusters in front, then at the corners, until you’re circling the bin instead of moving through the yard.

    Awkward Footprints and Clogged Corners

    Storage units promise order but routinely create dead ends. The fence-side box turns into a magnet for quick drop-offs: a soccer ball, garden stakes, a bucket with tools that never quite dry out. Left for convenience, these extras block the main route from garage to garden. Soon your well-planned footprint becomes a slow detour, with growing piles forcing you to pick a new path every week.

    Wall Systems: Clear Floors That Quickly Fill and Blur

    Wall-mounted racks and hooks seem ideal for narrow yards—room to walk, tools on display. But practical reality is messier. Hooks fill in a week, rails get loaded with more than they’re meant to handle, and shelves become catch-alls for whatever needs to be hidden fast. The first month, you find the right shovel with a quick glance. By the third, you’re peering behind a row of tangled rakes and odds and ends, unhooking two things to get at one, or knocking a pail to the patio each time you reach for snips.

    When two people share a zone, the blur gets sharper. New items land wherever there’s empty space. What looked streamlined Saturday is a wall puzzle by Wednesday, with gloves wedged behind a bag of potting soil and clippers left hanging sideways, never making it to their “spot.” The wall stays “organized”—but every return gets harder, and the pile encroaches on your walk every time the weather turns fast and cleanup is rushed.

    Invisible Choke Points

    Wall systems usually fail at the interaction points: the most-used hooks get overloaded, the far corners collect the long-term clutter, while the spots you need in a hurry get buried first. Roll a wheelbarrow through a tight passage—another rake snags the handle. Try for a quick cleanup with muddy hands—stuff falls from the shelf or blocks the next shelf up. The appearance is neat from a distance, but the value drops with every layered return.

    Modular Systems: Flexible, Until Everything Moves at Once

    Modular bins and rolling carts feel like a solution for changing demands—until the flexibility backfires. Bins migrate from the patio to the fence; shelves overlap, half-full, purpose lost; carts slide into the main route because the side zones are blocked. In the confusion, basketballs end up in the yard bin, sharp tools drift into the kids’ cart, and you’re left with a system that needs a reset almost every weekend just to keep basic function available.

    When Adaptable Systems Become Slippery

    Sudden weather, guests, or a busy week shove mobile units out of sync faster than you imagine. That cart prepped for fertilizers finds a new home in the only open corner, now directly in the path from gate to garage. A single added item—boots, balls, garden ties—means the path is blocked until you find time for a full reshuffle. Modularity works in theory, but without strong zones and anchors, the setup drifts fast, and your daily routine is the first casualty.

    Spotting the Red Flags: Where Setups Break First

    If you’re regularly stepping over gloves at the patio edge or losing hand tools to a random bin, your storage is pushing back on your routine. The smallest neglected items—pruners, hose nozzles, even bags of bulbs—show where the system interrupts, not supports, your flow. Frequent pileups aren’t just mess—they’re evidence that return routes are blocked and your setup is missing critical access points.

    • Standard units: Overflow piles at the far edge; rarely used things block daily essentials; belongings creep outside the original footprint.
    • Wall rails: Hooks crowded out by frequent-use tools; fiddly gear stuck behind what won’t move; mental fatigue just locating what’s needed.
    • Modular zones: Bins re-sorting themselves by accident, with play gear and sharp implements sharing space for lack of a boundary.

    Resets take longer, pathways clog, and your “organized” setup is only a few days away from chaos—visible in every forced detour and gear pile you didn’t plan for. If you’re spending your weekend restoring order instead of working or relaxing outside, capacity is meaningless without functional return flow.

    Habits That Quietly Strengthen the Setup You Have

    • Designate an easy landing zone: An open bucket or tray at the most-used transition (patio-to-yard, garage-to-garden) for tossing gloves and hand tools. Shift these to their homes in one go, not every trip.
    • Re-label, color-code, or visually mark bins and shelves at each season change: Resetting small signals slows gear migration and keeps boundaries “live” before the system gets blurry.
    • Give mobile carts a marked home base: Chalk a patio corner, stake a side patch—the goal is to turn “wandering” storage into purposeful pivots, not obstacles mid-path.

    Monitor for repeat overflow. If every week the patio edge, side gate, or specific fence spot attracts stray piles, that’s your clue: the return flow isn’t working. Reroute, carve a shortcut, or adjust access. Don’t just tidy—rework the pinch point so you’re moving forward, not circling the same mess.

    The Real Test: Does the Setup Disappear Into Use?

    A functional outdoor setup earns its keep not by staying neat after one big reset, but by almost disappearing—everything flows naturally back to its spot, piles stay small, and walkways remain open week after week. Whenever you find yourself hesitating over a return, shifting three things to put away one, or dreading yet another mini-reset, that’s not inevitable—it’s feedback. Adapt the zones, not just the gear, until your storage matches the way you actually use your outdoor space.

    Setups that pass the real test don’t fight your routine. They shrink friction, dampen clutter, and leave room to move—so you reclaim the space for what you actually want to do, not just for managing the system. Let your own rhythms guide what and how you store, and expect the setup to evolve with your habits—not just with the seasons.

    http://tidyyard.myshopify.com

  • How Strategic Adapter Storage Transforms Your Workspace Efficiency

    The typical desk problem isn’t always chaos or cable mountains. It’s the sudden stop of your hand—blocked by a lurking adapter, power brick, or charger that refuses to stay put. Even after the big tidy-up, adapters and charging blocks migrate to the hotspots: right under the monitor arm, wedged beside your notebook, or dangling at the back edge where your elbow knocks them mid-reach. Day one looks clean. By day ten, each device swap and every awkward nudge becomes a steady drag: cable ends slip into your writing space, adapters crowd out your mouse, and charging blocks set up subtle obstacles the minute your workflow speeds up. You feel it most when you try to move—a desk that looks organized, but keeps interrupting your shift.

    Why exposed adapters disrupt more than just the view

    If you’ve ever worked on a compact or multi-device desk, the pattern is familiar. External drives and chargers pile up, shifting with the day: left for better coffee access, right to clear notebook space, or right in your mouse path after a quick plug. Each new adapter adds surface tug and more reaching around—untangling, moving plugs to reclaim an inch of writing room, chasing after a cable block that slid from behind the monitor. These are micro-interruptions: barely noticeable alone, but after a week of repeats, they build up into real lost time and focus. What starts as visual clutter becomes a chain of tiny obstacles, reshaping how you use the desk.

    And adapters never commit to one zone. Your “clean” morning surface crowds out fast by noon, with plugs following your workflow in slow, interrupting drifts. Each move slows you down, breaking the flow that a setup is supposed to support.

    Surface tidy vs. real usability—what actually helps workflow

    A desk that looks spotless can still slow you down. Stashing every adapter and charger into a deep drawer or behind a monitor arm feels decisive—until you need to swap in a new device. Fully visible adapters win for pure speed, but force you to live with cable drag and constant cable repositioning. Concealed adapters tame the desk’s look, yet turn every mid-work search into a slow box-dig or cable hunt during a live call.

    Actual workflow speed comes from selective hiding with designed reach: the adapters you touch daily belong in shallow under-desk trays or tucked just behind the monitor—out of sight, always just within reach. This keeps working and note-taking space clear, lets you swap or re-plug a charger in seconds, and stops adapters from becoming endless surface debris.

    Where adapter setup starts to test itself during use

    A flawed adapter setup always reveals itself at the worst times. The “scramble minute” happens when you need an immediate plug change and the right adapter is missing, buried, or blocked by drawers. Or you try to recharge a device mid-meeting, only to have the cable vanish behind the desk. If your solution is too deep or awkward—like a tray out of arm’s reach, or a drawer unit that nudges into leg space—every retrieval feels longer, especially under pressure. In those moments, adapters crawl back onto the surface, breaking your order and stacking extra resets into your routine.

    The more you connect and disconnect—writing, switching, or jumping between calls—the more drag too much hiding or the wrong storage adds. Every “just for now” adapter left on the worktop is a signal: your setup isn’t quite holding up to real use.

    The change that finally stuck: making the hidden reachable

    Interruptions only faded after a real setup tweak: a low-profile tray just beneath the desk’s rear edge—shallow enough to keep in reach, tucked enough to hide at a glance. Every high-use charger and cable got its own spot within a half-arm’s stretch of the main work area. Less-used adapters shifted out, into cable boxes or a drawer that stayed closed all shift. Now the most frequent plug swaps happen without standing up, interrupting your reach, or losing track of what’s connected—even if a stray cable slips loose now and then.

    The impact wasn’t just visual. Cables stopped encroaching on elbow and notebook space; charging blocks quit tumbling to the floor. Daily reset—the last-minute tidy before logging off—actually got quicker. Not showroom perfection (real life breaks the pattern sometimes) but finally paced for real work, not just looks.

    Adapter storage methods in real workspaces

    Where should adapters live—cable box, under-desk tray, or drawer? There’s no universal setup. Cable boxes suppress visual clutter for rarely-swapped power bricks and legacy chargers, but trade away fast access. Under-desk trays handle high-frequency adapters: keeping the main desk open, cutting down cable drag, and letting you swap on the fly. Deep drawers can corral the rest, but quickly fill up and complicate retrieval if you need them too often. The best mix depends on what you really use, how often you switch, and where friction creeps in—at the writing edge, under the desk, or beside the keyboard.

    How hiding adapters transforms (and challenges) real use

    Getting adapters out of sight but still within reach changes how your desk works—not just how it looks. When high-use plugs are always accessible but never in the way, your energy goes towards tasks, not dodging or digging for cables. Accidental unplugs, cable snags, and end-of-shift resets fade into the background. After a few cycles, putting adapters back in the same hidden, reachable spot becomes automatic—leaving the surface clear and the pace of work smoother.

    The main trap is over-hiding—burying every adapter in a drawer or box, then scrambling to retrieve them under deadline or distraction. The point isn’t perfection, it’s knowing what you use most, keeping it near, and letting the rest fade out of daily reach. Notice which movements break your flow and adjust the hiding depth to fit.

    Takeaway: Form supports flow when accessibility leads

    Desks that match the pace of repeated adapter use—not just visual order—save more energy and time than you expect. The real benchmark isn’t an empty surface at 9 a.m., but how easily cables, chargers, and adapters move with you as pressure mounts. When quick-swap plugs always reappear in the same hidden but reachable place, interruptions shrink, and the whole setup finally supports, not slows, your day. That’s the shift: better cable structure means less correction, faster swaps, and a desk that resets itself for the next round—without trading off workflow for looks.

    Explore the full WorkBasic collection

  • Why Modular Outdoor Storage Outperforms Traditional Weatherproof Chests

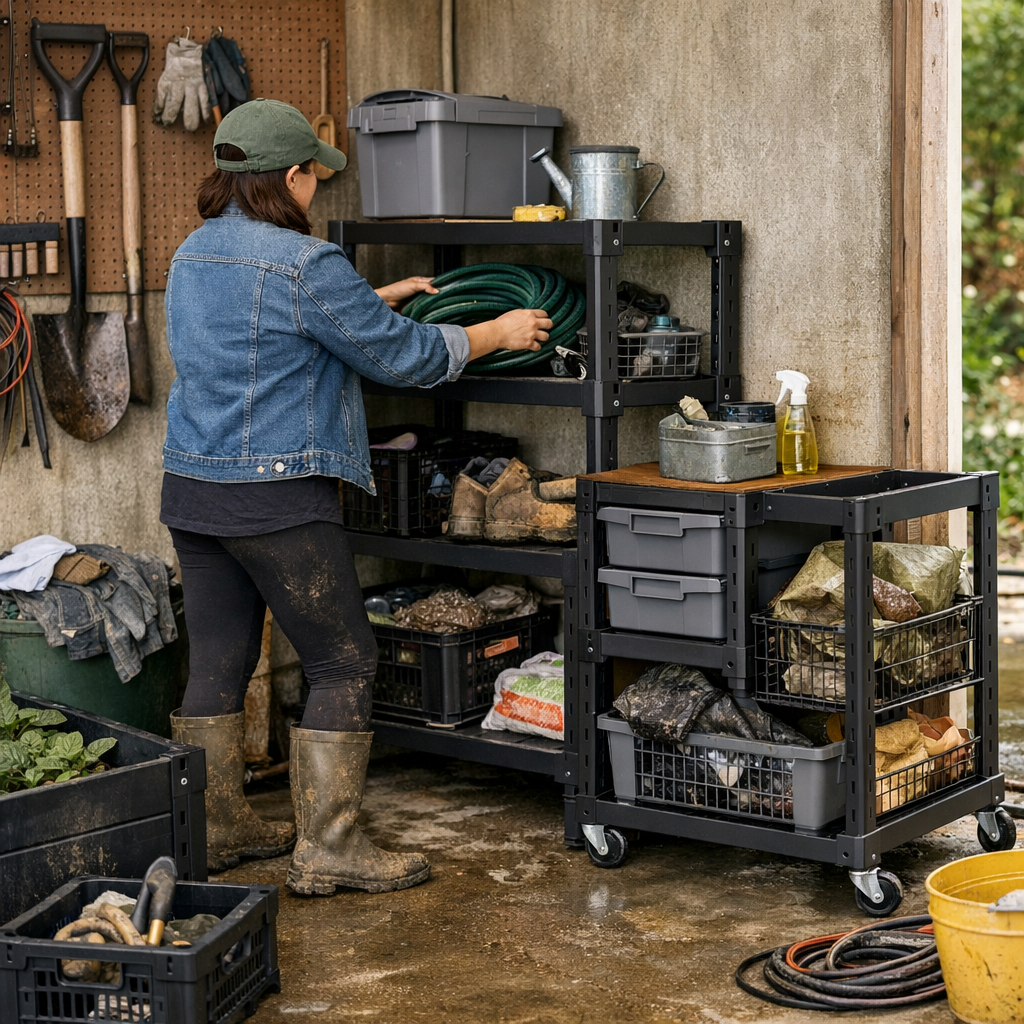
    The first day you finish an outdoor storage zone, it looks like you finally solved the chaos. The bins line up in crisp rows, the chest is wedged tightly to the wall, and every tool stands at attention on a shelf. You step back and feel ready for anything—until reality takes over. The next rain rolls through. You slog in, boots dripping and arms loaded, only to trip over the chest blocking your path. The “waterproof” lid jams on the wall, impossible to open without shifting the whole box. Gloves and towels pile up at awkward angles. The walkway that looked so clear yesterday now feels like a crowded alley, and each return becomes a clumsy detour through muddy bottles, tight corners, and bins too packed to budge.

    Why Order Doesn’t Survive the Elements (or Real Life)

    It’s not the setup—it’s what happens after. Outdoor storage always looks finished on day one, but repeated weather and daily use expose every shortcut. Lid clearance you never considered is suddenly tight. That chest whose footprint once felt smart now traps your movement, forcing you to sidestep and nudge it for every pass. Tools creep into unused corners, creating new overflow spots you never meant to have.

    This isn’t a flaw in your plan—it’s what happens when real routines crash into static arrangements. You bend around bins to grab one rake, only to notice you’re always moving something out of the way. The clever wall rack now breaks up the space so much you flow from task to task slower than before. “Organized” melts into aggravation as dead corners swallow gear and tight gaps choke the route you walk every day.

    “Organized” At a Glance, Friction Every Time You Return

    The visual calm of opening day has a hidden cost: movement stalls, access tightens, and you spend more time fixing the setup than using it. The difference between “it fits” and “it works” gets obvious fast. The matching bins that lined up so satisfyingly now block you when a single awkward rake or lopper won’t slide in. The neat shelf you planned for gloves crowds the entry the moment a basket overflows. Every trip out means stepping over one thing, shifting two others, and telling yourself—again—you’ll reorganize later.

    The symptoms build up in daily returns: the rush to get gear inside before the next downpour, the tangle of basket handles against the door, and the frustration of pulling out boxes just to stow a hose. Each cycle adds a new layer of friction. It’s not storage—it’s a daily shuffle, and by midseason the tidy layout is already unraveling, one soggy pile at a time.

    Scenes From an Outdoor Setup That Doesn’t Flow

    Picture a real return: The rain’s just stopped; you’re juggling potting soil, muddy gloves, and the shovel you used yesterday. As you squeeze past the chest wedged by the walkway, your elbow grazes a shelf that seemed perfectly placed—until now. The “sealed” bin that dominated your setup becomes a recurring obstacle for your boots and buckets. Overflow baskets by the door fill up, so you stop to untangle gloves from a garden fork—is anything actually easier?

    Here’s what keeps breaking down, no matter how organized things look at first:

    • Shoving the heavy chest aside just to access what’s behind it.
    • Boxed-in corners that turn into dumping grounds for stray hoses and tools.
    • Wall racks that slice up the space, making every movement a zigzag.
    • Bins crammed tight, so getting anything out means a game of reverse Jenga—every time.

    With each use, your carefully planned order becomes a shuffled-in shortcut. The more the weather shifts, the more often you’re forced to reshuffle just to keep the space usable.

    From Cluttered Reset to Real Flow: Modular Storage in Action

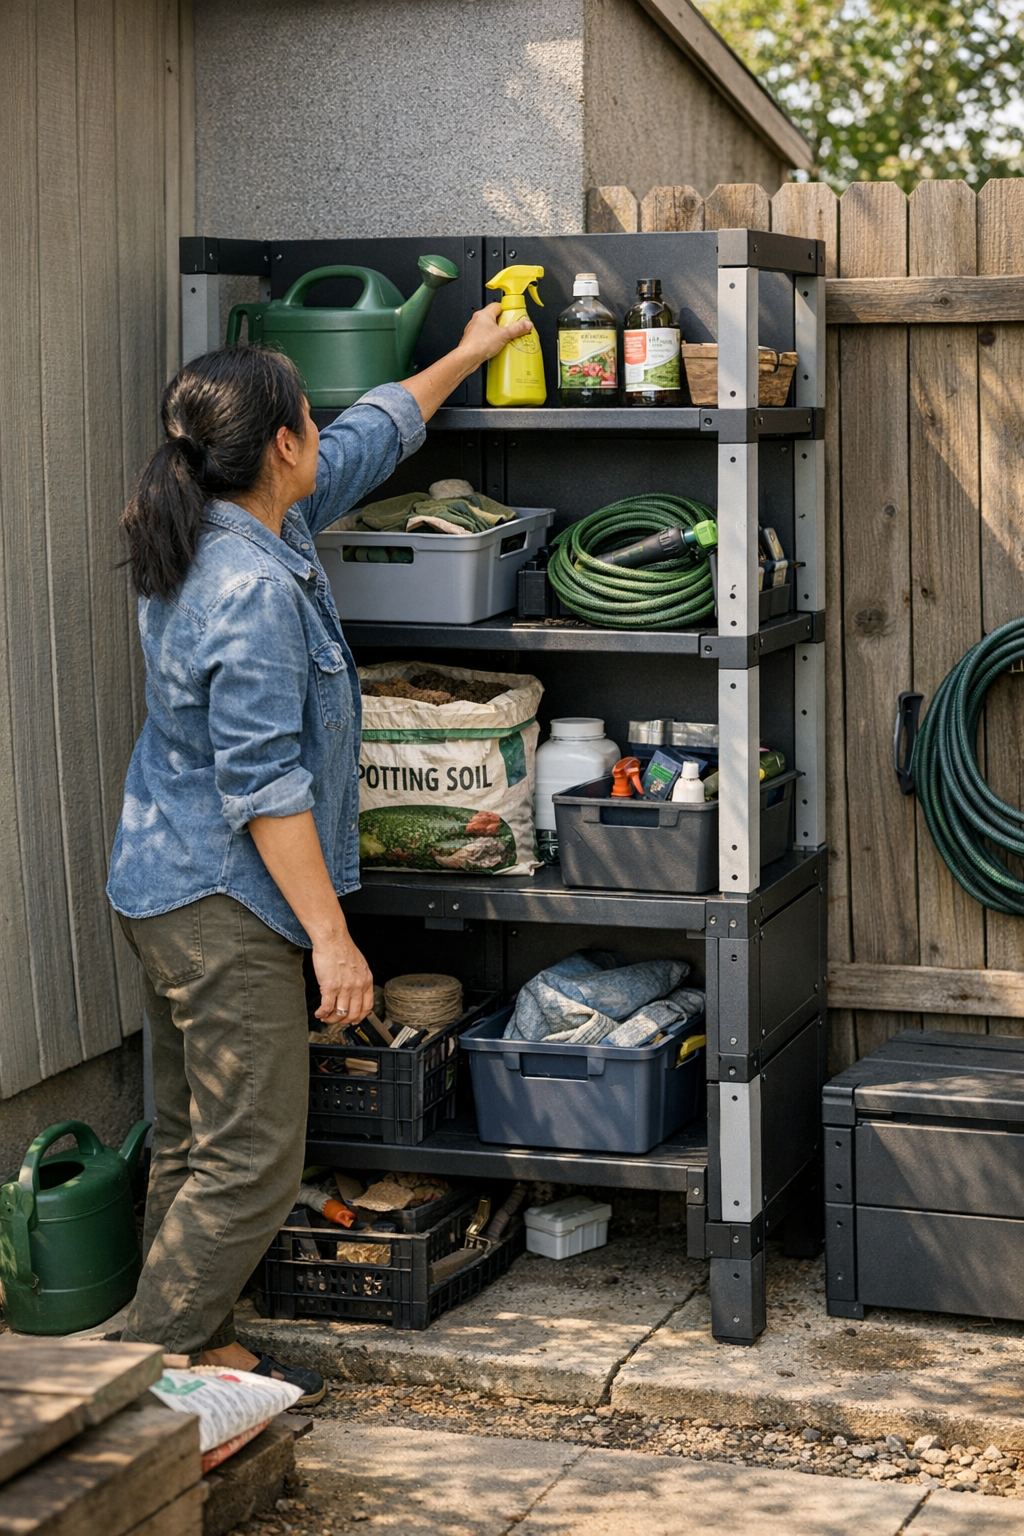
    The big shift came after one too many muddy struggles. Swapping the chest for a modular rack seemed minor—until it wasn’t. Open shelves, lifted just enough to let runoff escape, and no tight corners to crowd your movement. The game-changer? What the setup didn’t do: no blocked path, no lids jamming against the siding, no dead zones attracting the overflow.

    Returning with soaking-wet gear, you could drop items straight onto an open shelf, let the airflow dry them down, and be done—no twisting, dragging, or stacking on top of old bins. The path stayed clear, every return felt less like a shuffle, and resetting the area was almost automatic. Real flow meant not thinking about your storage during the messiest days, because nothing forced you to work around it.

    When a Chest or Bin Still Makes Sense

    Some storage zones don’t demand daily access. Sealed chests are fine for gear that stays put—winter covers, pool floats, or spare hose. But if your setup has tools, boots, or supplies that rotate seasonally or get wet and muddy, closed bins quickly become an anchor. The difference stacks up: open racks adapt, while closed containers keep asking for workarounds, stacking, or extra trips to unbury a single thing. Overflow is rare, resetting is faster, and the gear you use most lands exactly where it needs to, every time you come back.

    Practical Moves: Small Changes, Smoother Routines

    • Go for open racks with raised feet: This lets water drain and air move, speeding up drying and making it easy to clean up after storms.
    • Don’t stack bins just to save space: Stacked bins always look neater in a catalog than in real life. Every extra layer means triple the work later.
    • Test door and lid clearance now, not later: Even a couple inches add up with muddy boots and wet arms. If the lid or door blocks your movement, your routine pays the price.
    • Find and fix “overflow magnets”: The same corners and shelf edges collect the cast-offs every week. Small tweaks here—like shifting a rack or adding a landing space—save hours across a season, and keep clutter from making a comeback.

    The Lasting Difference: Function Over First Impressions

    Most outdoor storage setups crack after a few weeks of real, dirty use—not because they weren’t neat enough, but because they weren’t built for movement. You don’t feel great storage when you’re looking at it; you feel it when nothing blocks your path or slows your return. The proof is in the afternoon when you toss a muddy shovel onto a clear shelf and step away, ready for next time.

    If the setup looks organized but blocks your route, those lost minutes pile up—reshuffling, unstacking, sloshing past half-closed lids. That’s where modular storage shines: built for seeing, grabbing, and returning gear without thinking. It’s not about “perfect” order. It’s about less friction, more flow, and a space that keeps working no matter how rough the season gets.

    Explore modular storage that actually works with you at StackNest.

  • Why a Trash Bin Near Your Entryway Keeps Clutter Off Counters

    An entryway that looks controlled on Sunday can feel gridlocked by Wednesday—if clutter has nowhere to go the moment you walk in. Shoes may line up, bags might find a hook, and surfaces look inviting—for hours, not days. Then the first round of real-world debris—junk mail, crumpled wrappers, receipts, empty packaging—starts collecting wherever hands pause, especially if the nearest trash bin isn’t within grabbing distance. Without an instant hand-off spot, each pass-through presses temporary junk into permanent fixtures, tightening pathways, crowding benches, and making the next reset slower and less likely. Entryway order isn’t lost in a crash; it decays by increments—one overlooked wrapper, one stashed flyer, one coffee cup left “for later.” The threshold zone only works if daily friction has a landing pad. Without it, every organized setup is quietly undermined by the daily drop-off pattern.

    When Throwaways Turn Into Permanent Fixtures

    The visible difference between a functioning entryway and one slipstreaming into disarray doesn’t show up overnight. Monday starts fresh: bench clear, shoe tray aligned, mail sorted. But by midweek, friction builds—one grocery receipt perches on the bench, yesterday’s snack wrapper surfaces underfoot, a takeout cup edges into shoe storage territory. Every pass-through adds a fragment. Patterns form: the same person leaves keys and wrappers; the same edge hosts the “deal with later” pile. No single item demands a reset, so small debris go unchallenged. If a trash bin isn’t right by the incoming path, the delay is enough for clutter drift to establish itself—slowly swapping clean lines for catch-all corners.

    The Snowball of Reset Friction

    What starts as simple storage—shoes, mail, bags—begins doubling as a landfill for every item not instantly dealt with. Without disposal right at the threshold, surfaces abandon their real job as staging areas for ready use and instead become reluctant holding zones. Now, after the morning rush, the shoe rack gathers not just shoes but a halo of packaging. Reset doesn’t mean just lining things up; it means collecting scattered trash, shuffling piles, ferrying throwaways to another room, and often leaving “just one more thing” behind. Multiply by kids, roommates, or shared households, and each layer makes the space slower to reclaim. What felt organized last week now means dodging half-trash, losing seconds at every return, and facing a growing reset burden for a space meant to simplify—not delay—daily flow.

    Scenes of Cluttered Thresholds: Real-Life Habits

    The Bag-and-Bench Trap

    Grocery bags in one hand, junk mail and receipts in the other. No trash bin in sight so the “just for a minute” pile forms on the bench. Shoes arrive next to the heap. By day two, the bench is no longer a seat—it’s a backup bin, and clearing it starts to feel like a full project.

    Shoe Rows Breaking Down

    The row is tight in the morning, but by evening: stray wrappers, receipts at the tray’s edge, grit where shoes are meant to rest. Picking up a pair now means dodging debris or just giving up and stepping over the mess. Overflow isn’t dramatic, but it creeps until the tray becomes a dumping ground as much as a shoe organizer.

    The “I’ll Toss This Later” Experiment

    Multiple passes, different people, same story. Everyone has one small item they don’t want to carry—flyer, napkin, broken shoelace—which lands near the entry. No single offense seems worth a trip to another bin. They stack up, squeezing the clear path tighter every day. Actual resetting gets postponed, while the threshold feels more like a hurdle than a welcome mat.

    How Adding a Trash Bin Changes the Transition Flow

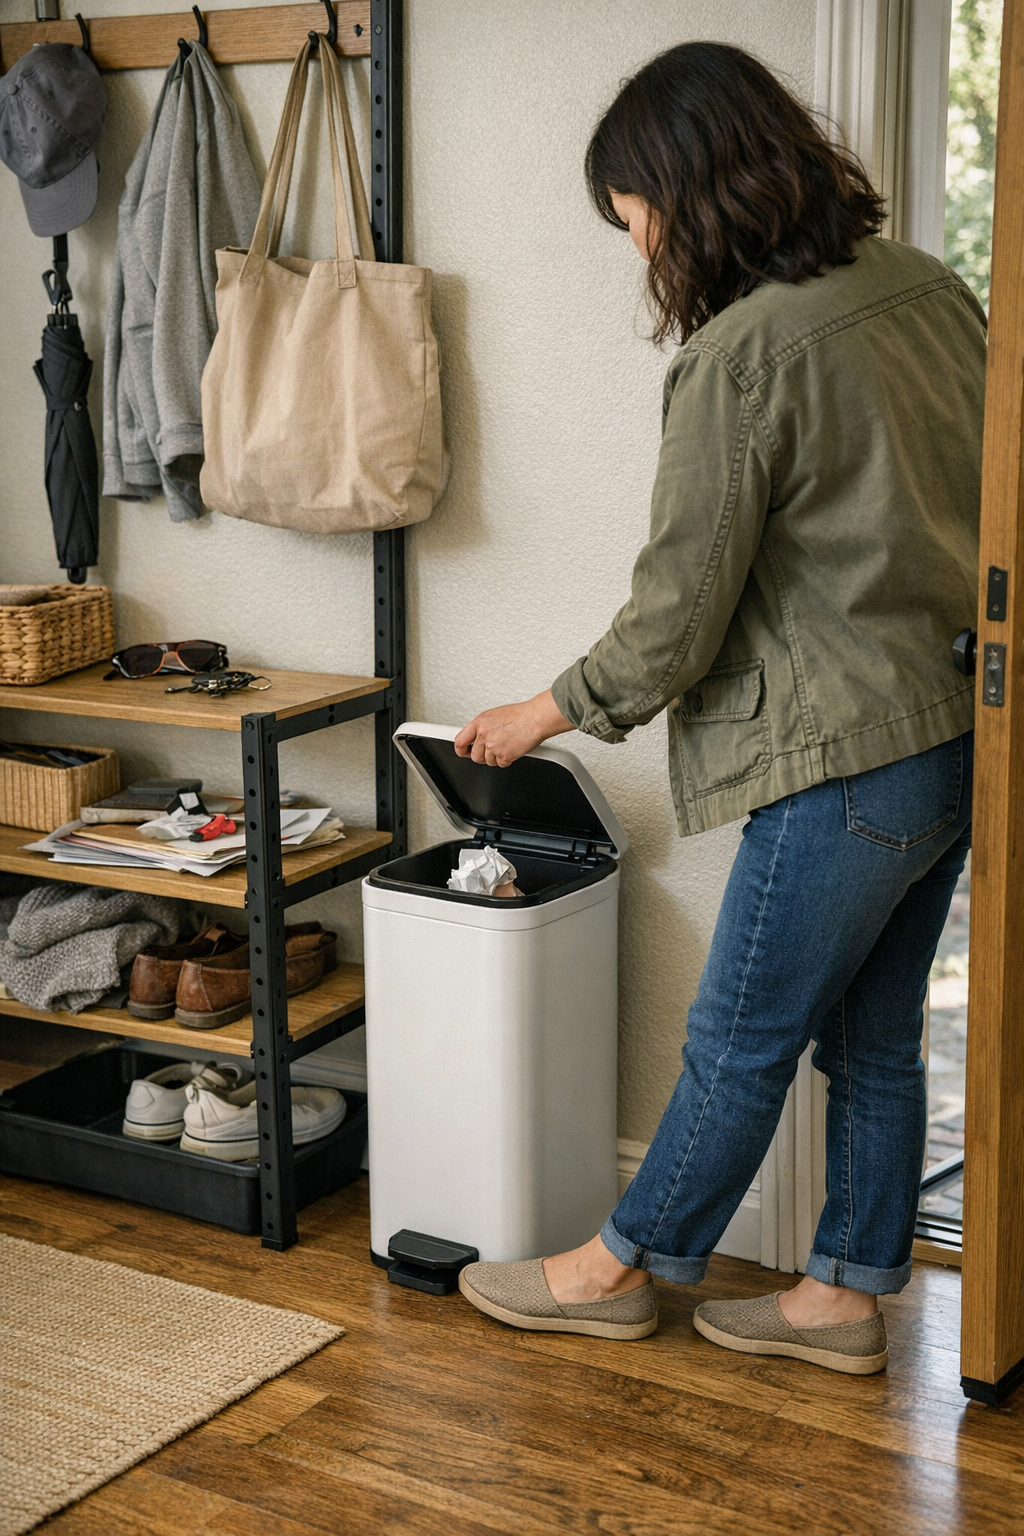
    Drop a slim, lidded trash bin with a foot pedal just off the natural entry path—right alongside, not in front of, the shoe zone. Suddenly the pattern breaks: wrappers disappear the moment you step inside; unwanted mail vanishes straight from hand to bin; and that sticky “I’ll get this later” habit fades because disposal happens automatically. Surfaces stay functional because debris gets intercepted—before it can scatter, stack, or sprawl.

    The difference is visible almost immediately. Within a few cycles of leaving and returning, the bin fills up—but benches stop serving as overflow, shoe racks remain for shoes, and mail organizers don’t double as trash organizers in disguise. The act of passing through the threshold now maintains order instead of undermining it, letting organization survive real-life use, not just the rare reset.

    Setup Details That Matter

    Entryways that resist clutter aren’t the biggest—they’re the best at intercepting junk in real time. A vertical, slim-profile bin consumes inches, not feet, preserving movement space while staying obvious enough for automatic use. Lidded designs shield against visible overflow. A foot pedal means you aren’t forced to set anything down before tossing it—vital for the “arms full, rushing in” scenario. None of that matters if the bin is tucked out of reach; the right placement means intercepting debris directly in the flow—never blocking routes, always inviting immediate use. The less extra motion reset takes, the less likely clutter advances past the drop zone in the first place.

    Placing the bin elsewhere—laundry, kitchen, or any “next stop”—just guarantees more buildup in the transition space. Make waste disposal part of the entry ritual itself. The right setup doesn’t require cleanup as a separate task; it makes the reset near-automatic every time you step inside. Small design choices actively determine whether the entry stays usable through a busy week—or quietly collapses by Thursday afternoon.

    The Real Difference: Entryways That Actually Keep Up

    Most entryways look “organized” immediately after cleaning, or for that first round of guests. But repeated use exposes shortcuts and breakdowns fast. Without a trash bin that’s truly integrated, clever shoe racks and wall organizers lose ground to daily drift: stray edge piles, mail backup, wrapper spread, reset steps multiplied. Order grows harder to maintain with each pass. The result is never disaster, just buildup—hidden in plain sight until movement stalls and the threshold turns into a bottleneck.

    Adding a trash bin is less about perfection, more about protection: protecting the function of each surface so bench, rack, and shelf remain what they’re meant to be—even in rush hour, bad weather, tight space, or full-family throughput. Clean lines don’t last by accident. A reset built into the walk-in routine is what keeps your entryway holding its ground, instead of constantly caving under daily debris.

    For storage solutions and real entryway setups that actually match the pressure and pace of transitional spaces, visit Betweenry.

  • Small Adjustments That Transform Your Cat’s Space Into a Calm Home

    Tidy setups aren’t always easier. In most indoor cat homes, the trouble starts after the first day—right when everything still looks organized but routines begin to snag. The bowls line up on the matching mat, the litter tray sits neat with a pad, toys vanish into bins, and the room looks “finished.” Then: the first refill stops short because a mat edge folds. Crumbs skip past the border. Water streaks dodge under a bowl, and the “organized” feeding corner quickly demands extra steps. Tiny setbacks multiply, and that’s how a supposed quick upkeep slips into a daily grind. StillWhisker isn’t just about clean lines—it’s about fixing the spots that cause you to double back, bend over, and deal with the same mess, day after day.

    When a Clean Setup Keeps Getting in Your Way

    A feeding area looks controlled until you’re nudging a bowl to pour water or sifting crumbs that slip just beyond the mat—at exactly the same spot, every meal. Food bits fall outside the coverage zone. The mat itself drifts as your cat’s real path claims more ground. Reset time stretches because you’re constantly scooting things aside, or stretching to reach, losing seconds to small, repeat annoyances. That “tidy” setup starts acting more like a set of hurdles than a help.

    The friction repeats in every zone: a litter mat that looks wide enough—but every sweep uncovers pieces migrating into the hallway. A water bowl wedged next to a chair so it’s hard to reach. The toy bin always half-filled, while favorites resurface under the couch only on cleaning day. These patterns aren’t new—they’re just the places most setups break down when real routines kick in.

    Recognizing Friction Points Hiding in Plain Sight

    The problem isn’t just stray mess. The true signal your routine isn’t working is repeated inconvenience—if you’re cleaning the exact same spot, moving the same object twice, or finding the same type of mess in the same place, the setup needs rethinking, not just tidying.

    Common checkpoints in daily cat-home rhythm:

    • Reaching for a food bowl and bumping into another dish or tool that shouldn’t be there
    • Kneeling to spot-clean only to realize the wipes or brush aren’t close at hand—again
    • Navigating around a “blockage” where cat gear cuts across your main walkway

    Each of these moments steals time and movement—one at a time, it’s minor; repeated at every reset, it adds up to real friction.

    How Invisible Mess Slips into Your Shared Space

    The real test is in shared zones. Mornings start clear; by noon, toy mice trace a crooked line behind chair legs, and that window perch blanket is already holding fur. Even after you tidy, some corners require one more pass—a sign the original placement isn’t matching your cat’s habits. Hot spots develop: a sofa side becomes a toy magnet, a mat edge always slows your stride, and the “invisible” mess is suddenly impossible to ignore. The difference between a room that just looks settled and one that’s genuinely less work lies in these details.

    Small Shifts That Change Your Maintenance Routine

    The most effective fixes aren’t about aesthetics—they’re about dropping routine strain. Small, targeted changes shift the real daily pressure points:

    • Enlarging a litter mat to fully cover the path your cat actually uses, not just the front of the box
    • Relocating feeding bowls so pour angle and access aren’t blocked by traffic—ending meal delays
    • Moving toy storage directly to the spot toys keep landing, not where they’re supposed to go in theory

    A well-placed mat cuts cleanup to one room—not up and down the hallway each night. The difference isn’t a “prettier” room; it’s a routine with fewer interruptions, no extra stretching to reach, and less mess leaking into new corners.

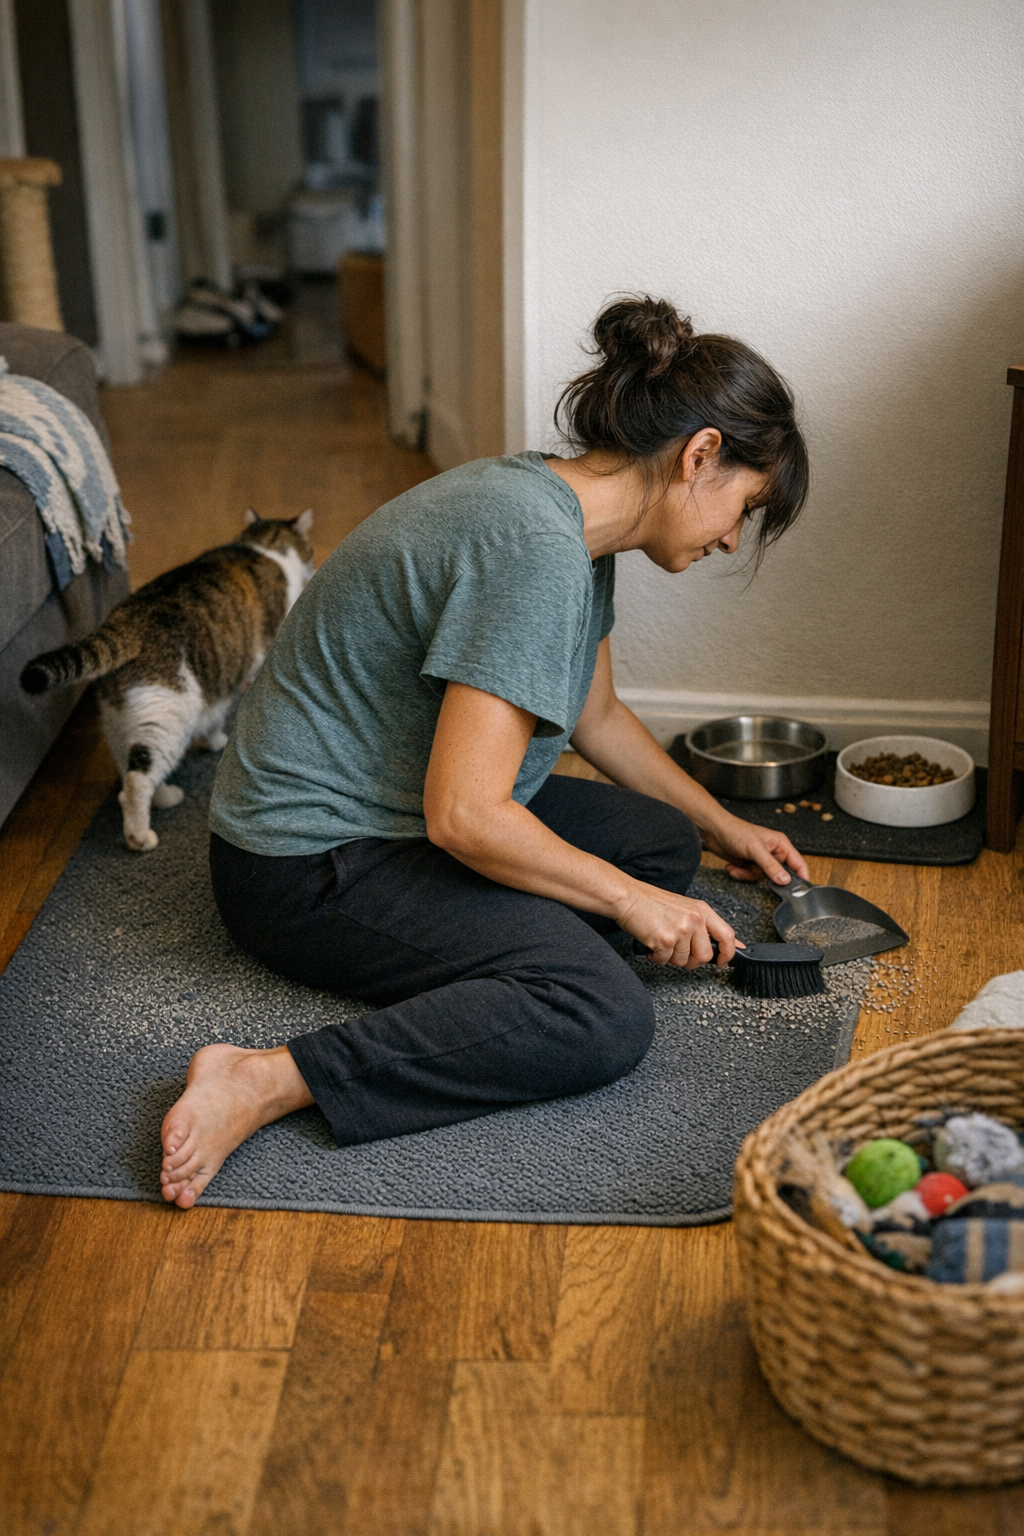
    Case in Point: The Litter Mat That Actually Contained the Scatter

    Too many owners fight a losing streak: scoop, sweep, repeat, but tracked litter always sneaks out somehow. A single practical change—a wider, better-placed mat, matched to the actual post-box sprints—finally kept the grit inside the zone. Separating the litter area with more coverage meant fewer midweek sweeps and less mental fatigue from unfinished cleanup. Over a few resets, the litter trail didn’t reappear, cleanup switched from a multi-step drag to a quick pass, and the feeling of constant redo faded. This wasn’t luck; it came from watching exactly where the problem happened, not guessing on setup day one.

    When a Setup Looks Tidy but Feels Off

    Even a neat-looking setup can slow routines to a crawl. The space looks ready, but use tells another story:

    • A window perch feels “finished,” but fur always piles at the same tight corner that resists fast shake-out
    • The scratcher blends into the décor but drops loose bits where you walk—demanding daily sweep-ups
    • Feeding mats catch most mess, but crumbs sneak past shallow edges, meaning a total sweep after every meal
    • Emergency wipes live in a “reasonable” drawer, but you’re always darting out to grab them exactly when the mess hits

    This is the gap between upkeep blending into your rhythm and it turning upkeep into a nagging project.

    How to Spot a Setup That Needs Tweaking

    The warning signs show in the pause: if you’re always slowing at one spot, battling the same debris, or spending more time in “quick resets” than you expected, your setup isn’t doing its job. Look for:

    • Crumbs, drips, or fur reappearing at the same mat border or behind the same bowl
    • Toys always lost under the same furniture edge and never quite returning to their bin
    • Cleanup supplies that remain tucked away but not where the mess keeps showing up
    • Routine resets taking longer each week even though the surface looks organized

    The goal isn’t mess-free living—it’s to shift obstacles and time-sinks so resets feel automatic, not drawn out.

    Targeted Adjustments That Actually Shift the Burden

    Update where patterns reveal weak points, not just what looks right on day one. Don’t overhaul everything—go where the routine actually stumbles: extend a mat where mess escapes, nudge feeding stations away from walkways, choose bins that match where toys wind up. After a few days, see which tweaks reduce “double-backs” and cut out the choreography of moving the same item, searching for a cloth, or shuffling bowls for reach. What feels easier isn’t the look—it’s the new normal of zero stalled movement, no unplanned trips for gear, and no more daily interruptions where mess wins.

    You’ll know it worked because the house gets quieter: blocked paths vanish, missed messes shrink, and resets become background—not a constant to-do list in your head.

    Room by Room: Real Improvements That Last

    Feeding and Water Areas: A mat barely “long enough” never holds up; extend it to where actual spills and crumbs fall—not just where bowls line up visually.

    Litter-Adjacent Zones: Watch the natural exit path—cats fling debris further on busy exits. Expand coverage and cut down on repeat cleanups.

    Toy Spread and Storage: If favorites always end up under the same sofa, adjust your system. Changing bin location or rearranging the trouble spot can eliminate the “lost toy” hunt during cleanup.

    Rest Corners & Comfort Setups: Window seats and plush blankets collect fur in predictable places. Have a mat or cover close by—choose one that shakes out in seconds and doesn’t become a backup project.

    Cleanup Access: Keep wipes and lint rollers where you pause for resets—not stashed out of sight. Each moved supply that’s within reach takes seconds off every interruption.

    It’s Not About a Perfect Room, But a Workable Routine

    Indoor-cat homes aren’t for magazines—they’re for living. The best setups prove their value not in looks, but in how fast you recover control after a feeding, refill, scatter, or return. If you and your cat both get on with your day—and the messes stop dictating your moves—the system works, no matter how settled it appears. The difference is clear when friction fades, not when the room looks staged. The proof?

    Explore what works better over time at StillWhisker

  • Maximizing Bathroom Storage with Practical Over Toilet Shelving Solutions

    Over toilet shelving looks like an easy fix for crowded bathrooms: use the dead wall above the tank, unclutter the floor, and suddenly it’s “organized.” But in real, shared bathrooms, this promise slips fast. Shelves that fit cleanly on Sunday are cluttered by Wednesday, with daily routines snagged by the exact solutions meant to smooth them. Adding storage above the toilet isn’t just about stacking shelves—it’s about whether that setup survives real use: the morning rush, overlapping routines, and the silent drift from order to backup overflow that always collects in high-traffic corners.

    The Hidden Friction of Over Toilet Shelving

    At first, a new unit stands sharp: shelves empty, every item placed with intent, and floor space briefly clear. But actual use exposes a more difficult reality. The space fills with awkward mixes—everyday toothbrushes beside rarely used backup lotions, towels jammed behind cleaning sprays—and the “storage” you gained just means more to move, sort, and rescue when something tumbles out of reach. By midweek, the gap between having more storage and having usable storage is obvious: now, grabbing deodorant means lifting three bottles and reaching past a jumble of bins you didn’t plan for.

    The difference hits hardest during real routines. A too-shallow upper shelf sends dropper bottles skidding off the edge. A deep shelf buries everyday items behind low-priority backups—every trip for toilet paper or toothpaste becomes a search-and-retrieve mission, with at least one product falling between the tank and the wall. What looked streamlined starts to collect frustration, not just clutter.

    Morning Routines, Clutter Drift, and the Shared Bathroom Test

    Bathrooms with shared routines bring setup flaws into sharp relief. One person grabs face wash while another hunts for backup razors. Space gets pinched: towels slide, bottles topple forward, and no system survives the weekday overlap unscathed. When shelves wobble or spacing is off by even an inch, stress multiplies. Categories that started distinct blend together—extra toilet rolls disappear behind obscure bins and don’t resurface until someone finally clears the shelf end to end.

    If a shelf doesn’t fit live routines, it becomes a daily blockade. Instead of a one-handed grab, you’re holding a basket up with your chin while shuffling bottles around. Time saved evaporates in small resets: re-stacking washcloths, shifting shampoo so it doesn’t block the tank, searching for items that migrated out of reach, all before you’ve left the house.

    Wire vs. Solid Shelves: Real-World Pros and Cons

    Wire shelves offer a tradeoff: airflow keeps towels fresh, but small tubes slip through gaps or knock over and vanish behind the toilet. Retrieval isn’t just awkward—it’s gymnastic. Solid shelves prevent losing items entirely, but trap moisture underneath bottles and cluster dust around edges, turning quick wipe-downs into slow chores. By early afternoon, a bottle is already stuck at the back in a shallow puddle, and drying the surface becomes just another recurring chore.

    Nobody wins every trade. Wire works for bulkier, quick-grab items—towels, hairdryers—while solid shelves make sense for small, daily-use jars if you wipe them dry and don’t overload the surface. In high-use, shared baths, shelf material helps less than shelf positioning: seeing what you need at a glance predicts actual ease of use better than construction alone.

    Quick Adjustments That Sort (or Reveal) the Problem

    The smallest hardware tweaks often mark the line between upgrade and setback. Raising the bottom shelf just a couple of inches can prevent towels from jamming against the tank lid—a fix that stops the usual “snag and avalanche” every third retrieval. With a clearer retrieval path, movement changes: grab-and-go returns, and awkward shuffling drops to a minimum. When baskets can be pulled forward without dragging out backup sprays or snagging on shelf supports, the difference registers in seconds rather than after-the-fact regret.

    A change in shelf position is a shift in friction, not just airflow. If the zone below is open, it takes a quick straighten to reset—no more forced wrestling with baskets half buried behind containers, and no mystery puddles of leaked shampoo at the back. The importance of just a few more inches or repositioned supports is less about appearance and more about removing recurring obstacles from the reset cycle.

    Overloading: When Extra Storage Turns Against You

    The lure of maximizing space—another basket, a higher stack, more backup packs—turns on its owner fast. Overcrowd the shelving and every movement slows: the tank is blocked, the footprint widens, corners collect neglected bottles and dust, and daily essentials vanish under layers of “just in case” extras. Visual order breaks down by degrees, reset effort increases, and you’re suddenly working around the storage more than with it.

    Watch the edges: unused tubes gather near vertical supports, overflow baskets block the path to basics, and category control dissolves. Three backup tubes of toothpaste might wedge themselves out of sight, and rolls of toilet paper become stale after weeks at the back. Each additional bin that doesn’t fit the routine becomes a small retrieval delay tomorrow.

    Wall-Mounted vs. Freestanding: Matching Support to Real Loads

    Freestanding units might look sturdy, but when crowded with glass bottles or heavy cleaning supplies, most flex under the load or feel unstable when you reach high. Wall-mounted options, properly anchored, handle more weight and feel solid under strain, but demand a commitment—installing, checking alignment, and living with your initial spacing choice. An immovable bracket two inches too high or too low locks the whole setup into a routine mismatch until you break out the tools again.

    Basing your decision on lived needs—not just looks or ease of assembly—saves time and frustration down the line. Don’t gamble the top shelf on weight, and don’t trust “storage capacity” over the pattern of items you actually reach for most. Shelf spacing and support matter more than shelf count alone.

    Scene: A Real Reset After a Long Day

    End of the day: the bathroom’s absorbed a full round—multiple showers, kids’ toothbrush searches, the nightly toilet paper dash. You face the over toilet shelf: a towel sways off one end, a bottle’s half fallen, and a spare roll is wedged behind a too-large bin near the back. If shelf heights are right and main-use items are visible, reset is minimal—shuffle a few towels forward, slide a stray jar, and reclaim open space without sifting through overflow. If not, another round of digging, untangling, and re-sorting awaits before the area is ready for tomorrow’s rush.

    The only real test: Does your storage let you reset quickly when routines collide, or is it another slow fight every night? Function always outlasts first impressions.

    Making Over Toilet Shelving Fit Your Routine

    The best results don’t come from crowded shelves or catalog-perfect symmetry—they come from setups built for repeated use: raising key shelves, using wire only where it actually helps, dividing categories so return flow is predictable, and trimming overflow so the high-traffic path stays open. Watch for the edge cases: piles that encroach on access, containers that migrate, categories that drift instead of staying grouped.

    Above the toilet is a tricky zone—a real test of friction and flow, not just storage. When the setup reacts to real routines, retrieval takes seconds and resetting becomes a once-a-day pleasure, not a chore. This is the practical difference between “stored” and “usable”—an edge that matters whenever anyone in the house needs fast access, even after the system’s been lived with for weeks.

    See more practical inside-storage options at Gridry.

  • Streamlining Pet Travel: How Smart Organizer Design Eases Repeated Stops

    Halfway through your day, the pet carrier that looked “ready” at home starts to feel like a bad fit. The wipes you need are wedged behind a half-spilled treat pouch. Your dog’s leash is tangled under a hydration bottle. Grabbing one thing means juggling three others—right when a clean, quick reset is most urgent. With every stop-and-go, what looked neatly organized becomes an obstacle, draining patience and slowing you down. This isn’t rare inconvenience—it’s the point where most pet-travel setups quietly break under real repeated use. PawGoTravel lives in this gap: the space between gear that photographs tidy and gear that actually works at seat-side pace, with a restless animal in tow.

    When “Prepared” Doesn’t Mean Practical

    Looking organized is easy; actually moving through a travel day is something else entirely. Zip everything shut, label pouches, line up snacks and wipes—and five minutes after your first pit stop, real-life travel takes over. The pet wants out. The leash is under the bowl. The wipes are somewhere, but not in hand. What worked on the counter now stumbles at the curb. Equipment you placed with care at departure quickly starts to scramble itself with every short stop, every re-entry, every messy pause for a roadside break.

    “Pocket for everything” seems efficient until it’s mid-trip, and now finding one item means digging, shifting, or emptying half your kit. In reality, the friction shows which setups hold up—and which just look organized until movement starts.

    The Hidden Slowdown: Compartment Overload

    Extra sections don’t guarantee speed—they usually delay it. A carrier packed with layered dividers and clever sleeves ends up hiding your essentials under each other. After two or three stops, the “tidy” look is gone—now you’re stuffing a damp bowl above a knotted leash, then hunting for wipes that have slipped deep into a side pocket. What felt smart in your kitchen now feels like a puzzle you get forced to resolve, again, each outing.

    These recurring stumbling blocks stack up fast:

    • Leash buried under a water bottle—can’t reclip your dog without unpacking half your kit
    • Cleanup wipes visible, but stuck at the bottom and impossible to extract one-handed
    • Comfy bedding eats up the best access pocket, so nothing is reached quickly
    • Pet food gets muddled with human snacks, mixing crumbs and slowing every grab

    Each “organized” layer adds another pause. Pets squirm, tempers shorten, and your trip’s rhythm breaks: now, travel is dictated by your gear’s slowest point, not the pace you need.

    Scenes That Reveal the Weak Point

    Returning to the Car When the Routine Breaks Down

    Imagine finishing a muddy detour at the park. Dog leashed to your wrist, wipes clutched in one hand, damp bowl under your arm—you get to the car, only to find the front pocket is blocked by the treat bag you used last stop. There’s a pause, your pet gets impatient. You’re unpacking gear to extract what you need, repacking it in a slightly worse arrangement for next time. Multiply this by every pit stop, and your “organized” setup turns into perpetual reshuffling—swapping speed for slowdowns that never appeared at home.

    Juggling at Quick Stops

    Fast errands get complicated in seconds. Buckling your cat’s seat harness demands squeezing past a half-open package of wipes jammed on top. You close the travel bag after a water break, but reaching for the leash means digging past snack pouches while your dog pulls off-balance. What felt fine on your hallway floor collapses under real-time use—revealing the gap between a calm setup and true travel flow.

    What Actually Makes the Difference?

    The real fix isn’t more storage—it’s targeted, repeated-access placement. The most effective pet travel setup is the one that puts your highest-use items—wipes, leash, bowl—where they’re instantly reachable, one-handed, at the edge nearest your pet’s space, every single time.

    Instead of scattering essentials in far-flung pockets, group them where your movement begins: close to the carrier opening, side pocket by the car seat, or top-flap on the travel bag. Suddenly, you go from awkward, multi-step digs to barely pausing. Each restart is swifter, routine items come out in order, and travel flow returns—no matter how many unscheduled pulls over or seat-side cleanups you run.

    It’s not about extra features or more “solutions.” The real advantage is structural: the right pocket or opening ends interruption before it starts.

    Why “Compartmentalized” Isn’t Always Efficient

    At first, kits loaded with slots and dividers feel clever—until you’re forced to operate by their logic, not yours. A bowl jammed into a deep sleeve, a leash tangled in a mini-pocket, wipes you can’t reach without unzipping half the bag: every stop magnifies how these systems slow you down. The more you strive for order, the more your gear pushes back with micro-delays.

    The contrast is clear during heavy-use days: a wide-access section beside your pet’s seat lets you dump a wet bowl, grab wipes, unclip and pocket a leash—all one motion, one hand reserved for your animal. Structure that supports repetition means fewer interruptions, and nearly immediate reinforcement that this arrangement cuts friction instead of stacking it.

    Resetting the Routine — and Keeping It Moving

    The best pet-travel setups are built for return-to-movement, not just for a first impression. If every stop demands re-sorting, hunting, or untangling, your gear isn’t just cluttered—it’s pushing you off schedule, and making fast cleanup feel harder every single trip.

    Prioritize kits that let you:

    • Snag wipes or treats without unzipping multiple sections
    • Keep your own keys, snack, or coffee from colliding with leashes and bowls
    • Hold onto your squirming pet while extracting cleanup supplies
    • Leave each stop at the same pace you arrived—instead of losing time as the day wears on

    If a bag or carrier consistently trims minutes from restarts, it isn’t just a better organizer—it’s an easier travel companion, stop after stop.

    Finding Your Real “Ready” Setup

    After enough returns to the car, every owner sees it: the gap isn’t between “organized” and “messy,” but between setups that let you reset in seconds, and those that keep adding micro-battles, tangles, and spillover. Carriers and bags that adapt to repeated movement—and cluster your critical items together—eliminate the hidden drag of fighting your storage over and over. Every time you restart with ease, the payoff is clear: less time fixing, more time moving, no matter how many seat-side cleanups or field-side pauses your real trip demands.

    Want pet travel gear that survives more than a photo op? Focus on return-to-movement flow—not just surface-order. Fewer forced compartments, smarter front-side access, and a structure that reduces interruption instead of multiplying it. For solutions built for the real, repeated push-and-pull of road travel with pets, explore PawGoTravel’s practical solutions here.

  • Solid vs Wire Shelf Dividers: Which Keeps Your Closet Neater Longer

    Most closet shelf dividers sell the same day-one promise: stack your shirts, bags, or towels neatly behind each barrier and—at first glance—everything looks fixed. But real life isn’t still. By the end of the week, you start to notice the gap between “organized” and actually workable. Sweaters lean, t-shirts droop sideways, and boundaries blur almost imperceptibly. Suddenly you find yourself shuffling through mixed piles, reaching around slumping stacks, or even digging for a lost scarf that slid between dividers. The question of wire versus solid shelf dividers stops being theoretical—and starts shaping how much effort you spend just keeping your closet in check.

    Day-One Order, Day-Four Friction: Where Shelf Dividers Fall Short

    At first, every divider promises separated sections and stable stacks. In reality, their true test comes not in the setup, but in the scramble: quick grabs for pants on a weekday morning, pulling out one towel while other piles crowd in, stretching for that one bag wedged behind others. This is when you see the difference between a shelf that holds its shape—and one where divisions melt away as the week goes on.

    Wire Dividers: Boundaries with Blind Spots

    Wire dividers advertise structure but often leak stability at the edges. Sure, they keep boots and folded jeans roughly contained. But when you pile up softer clothes—think stacks of tees, rolled gym tanks, loosely folded pajamas—small items slip through the gaps. One shirt corner droops between wires. By Friday, the stacks lean, merge, and you’re left untangling a subtle pile-up. Worse, when you’re in a hurry, reaching for one thing often unbalances everything nearby, making each reset slower and messier.

    Solid Dividers: Stacks Stay Put

    Solid shelf dividers create a different rhythm. The wall they provide means a hoodie can be tugged free without causing the neighbor pile to collapse. Soft scarves, thin tees, even slippery athletic gear—these don’t cascade sideways or fudge the boundaries as easily. When you push stacks higher to maximize space, solid dividers keep them upright, letting you actually use the full vertical height without risking a midweek slide. The difference isn’t just neater lines; it’s the way categories maintain their shape through your daily rushes, resets, and lazy toss-ins.

    Midweek Reality: The Grab-and-Go Test

    The cracks show up right in the middle of an average week. Imagine stretching on tiptoe for a favorite shirt and dislodging half a pile of tees, which then slouch into another section. Instead of a clean pull, you’re left restacking what you disrupted—sometimes during the morning rush, sometimes late at night. Those extra few seconds add up, making the closet feel more high-maintenance than helpful. Every repeat reset chips away at the illusion of order, until you realize you’re spending more time fixing the system than enjoying it.

    With solid dividers, resetting is a two-second gesture: a quick hand swipe lines things back up, no fiddling with lost socks poking behind wires or scarves slipping out of sight. Order survives the weekday rush—and comes back instantly after laundry.

    When Dividers Decide: Does Your System Hold Up?

    Without meaningful boundaries, categories crumble fast. What started as separate stacks merges into one sprawling blend: gloves with hats, towels with sheets, handbags tangling together. Entryway bins absorb every lost mitten; closet shelves devolve into a guessing game. This spiral is especially quick if your shelves are crowded or if vertical space isn’t fully used. Wire dividers let boundaries sag, so shelves “fill up” well before they should. Solid ones, by actually supporting higher stacks, let you claim back vertical inches and keep piles standing tall. Suddenly, those shelves that always felt cramped can hold more—without sacrificing clarity.

    Bags, Shoes, and Why Solidity Matters

    Handbags and purses are the biggest giveaway. On wire dividers, stray straps droop, small bags fall sideways, and corners wedge awkwardly between bars—a slow slide towards clutter. With solid dividers, each piece stays upright, ready to grab and instantly visible. Pull out your work tote and you find it facing forward, not buried sideways or pressed out of sight. The same goes for shoes on higher shelves or hats in a mudroom—solid lines mean you don’t sift through a mixed-up crowd every time you need something.

    Reset Frequency: Divide Less, Adjust Less

    It’s not just how dividers look, but how often they force you to intervene. Wire-divided shelves demand micro-adjustments after every use—rescuing slumped socks, straightening piles, untangling hats. Solid dividers, meanwhile, buy you quiet time between resets. When it is time to tidy, a single pass is usually enough: slide a stack straight, dust off an easy-to-reach surface, grab what you need without chaos rippling across the shelf. Every daily routine—from grabbing gym clothes to restocking towels—becomes faster, calmer, and a little more satisfying.

    Micro-Tweaks That Actually Help

    • Lock dividers tight: Wobbly dividers, no matter the style, undo the point. Make sure every divider is firmly in place after each shelf reset.
    • Don’t overcrowd: Overstuffed shelves defeat even the best dividers. Leave a sliver of space beside each wall for a smoother grab and easier maintenance.

    These details keep your dividing system visible and useful, instead of one more thing you stop appreciating after setup.

    The Right Divider: For the Way You Really Use Space

    A freshly divided shelf is only the beginning. The real question is: does it stay organized through a regular week—mornings, evenings, five-minutes-til-out-the-door? Choosing between wire and solid isn’t about looks; it’s about what you want at the end of your day. If you find yourself constantly reshuffling stacks, watching categories blur, or losing time on slow resets, solid dividers deliver a working upgrade: steadier stacks, faster access, and less daily annoyance.

    Solid dividers are rarely glamour purchases, but for crowded shelves, soft fabrics, or high-turnover closets, they pay for themselves in time saved and friction avoided. If a divider lets you spot what you need—and the system holds after a week of grabs and resets—you’ve found a better way to run your space.

    Find storage dividers that hold up to real daily life at ClosetWorks.

  • How Slim Ceiling Lights Transform Low Spaces with Smart Installation

    Low ceilings don’t just limit where you hang a light—they force every lighting decision to prove itself during daily use. Fitting a central fixture that looks slim in photos can still box in movement, leave you ducking exposed cable lines, or scatter glare exactly where you work. Even in clean, modern rooms, the wrong overhead setup quietly clamps down on workflow and comfort, leaving support hardware and stray shadows as daily irritants that never quite disappear.

    Where Lighting Setup Turns Into Invisible Friction

    In a low-ceilinged room, overhead fixtures do more than take up space—they shape every routine. A bulky or poorly placed ceiling light is not background decoration. It’s the reason you stop short when organizing a top shelf, brush fingertips against a fixture while stretching, or find yourself shifting your desk inches to avoid a glare streak left by a misaligned bracket. The supposed visual upgrade turns into a tangible source of interruption, segmenting the room and making a shared space feel even smaller with every pass-through.

    It doesn’t matter how tidy the rest of the room is—if two support brackets pull the eye off-center, or a cable run stays obvious against the ceiling, those details demand attention. When those lines cut across overhead space or spill awkward shadows onto desks and tables, the cost isn’t just aesthetic. Suddenly, reaching for a book means tipping your body away from a glare patch; two people using the same work surface end up jockeying for the “good light” spot. The sum of these small frictions is real: they slow routines, wear patience thin, and make shared zones feel tight even when square footage is unchanged.

    How Slim Lighting Changes the Room—And Where It Falls Short

    Slim, low-profile fixtures promise relief: remove a clunky light, and your ceiling line looks higher, the room feels airier, and there’s less to dodge. The first impression delivers—until routine use cracks the illusion. When the physical fixture nearly vanishes into the ceiling, you might expect the problem is solved—but cables that won’t tuck away, brackets that don’t align, and mounting that solves the look but not the use show up almost immediately, especially where the same surface serves different needs day to day.

    Real impact comes not from fixture thinness but from how support and cable logic meet repeated use. Mount a slim LED panel and clear the center, but miss cable management and the clutter relocates, snagging the eye at the room’s edge or shadowing the wrong corner. Each time you slide a desk or shift a chair, stray cables and busy mounting areas reintroduce distraction. That “clean” setup quickly grows rough at the edges, undermining comfort as real routines rub against superficial solutions.

    One Room, Multiple Problems: Where the Clean Look Fades

    Consider a compact shared office: one central LED panel, two desks, both in constant use. Swap the bulky fixture for something razor thin—it helps at first. But within days, both users find themselves sidestepping the same shortcomings: the bright center that throws dimness onto the farther desk edge, a sudden glare spike on one monitor, the cable snaking out and down despite best intentions. The ceiling looks less crowded, but every misaligned detail competes for attention when routines speed up.

    By midweek, repeated frustration sets in. You lean out of glare more than once a day. Your co-worker tugs at the monitor to catch a clear line of sight. The once-flat cable sags, forming a lazy dip overhead. None of these faults flash red on installation day, but their persistence makes the room feel cramped, not finished. The cost isn’t theoretical: it’s the micro-irritation of posture shifts, lost desk edges, and seeing a “solution” only halfway hold up.

    It’s the Accessories—and Their Placement—That Make the Real Difference

    Slim lighting alone rarely fixes the lived-in discomfort of low ceilings. Durable comfort comes from precise mounting and strict cable control. The design matters, but so does each decision about bracket location and wire routing. Move from a generic bracket to a ceiling-hugging channel, bury cables inside a matching path, or nudge a fixture just enough to center light over an actual workspace, and you start preventing the return of clutter and shadow. A shift of 12 centimeters for one bracket kept the cable entirely out of sight in a real setup, transformed a patchy edge into useful workspace, and stayed stable even after furniture shuffled—which only happened because support details were chosen for actual use, not just for initial appearance.

    Don’t Let “Looks Finished” Mask Real Discomfort

    Many setups seem resolved once the fixture is up, but reveal flaws under constant use. A bracket that juts into the edge of a walkway, or a cable that slices an otherwise open ceiling, traps attention every time you cross the room. The illusion of “tallness” vanishes the moment someone has to duck or steer away from a repeated shadow line. People make unspoken adjustments—angling chairs, shifting routines into awkward corners—when the support structure solves appearance but not function. True success is not a day-one “after” shot, but a work week where you forget about the lighting because it never interrupts, glints, or tugs your field of view.

    The Details That Decide If “Slim” Stays Practical

    In the reality of low ceilings, it’s easy to upgrade only the visible fixture while letting the messy parts remain. Slim panels can outperform older ceiling lights, but if cabling winds out in plain sight or mounts pull light off target, the advantage disappears fast. Miss the far desk edge, and whoever lands there lives with eye strain. Push cables to a corner, and their new “out of the way” spot winds up as part of the everyday scenery.

    • Exposed cables = unending visual noise. What starts as an invisible line soon becomes a distraction you learn to resent with every upward glance.
    • Off-center brackets pull the ceiling off balance. Even a minor misalignment sets up asymmetrical shadows—most obvious over desks and group tables where illumination needs are highest.
    • Old mounting points undermine new setups. Relying on legacy fixes drags fresh fixtures out of sync with today’s real needs, misplacing light and leaving shadows unaddressed.

    The ceiling feels clear only when every element—panel, support, cable—works together to suit how people actually use the space, not just how it photographs on install day.

    Small Fixes That Help Over Time

    If rewiring isn’t practical, use adhesive cable channels color-matched to the ceiling to make runs inconspicuous. For off-center fixtures, angle brackets so that any shadow drifts away from the main desk or work area instead of across it. These are tweaks that matter: a few minutes to reposition a bracket or slide a cable out of a sightline can relieve months of low-key discomfort, letting you focus on work instead of wrestling the setup yet again.

    What Makes a “Clean” Ceiling Hold Up in Real Life?

    The real value of slim lighting in low-ceilinged spaces isn’t just the fixture—it’s the stability and quietness of the setup through everyday shifts. If you’re not spotting exposed cables, dodging protruding brackets, or squinting at half-lit surfaces, it means the installation matches actual routines, not just design ideals. A ceiling that stays clear is built out of discipline: cable management that lasts, support points that anticipate daily patterns, and placement that resists disruption from small movements and rearrangements.

    The payoff is subtle but real—setups that never nag, rooms that invite shared work, and ceilings that recede rather than restrict. Even a small change, done with attention to real use, makes every ordinary routine noticeably smoother. For lighting and support setups that solve not just how a room looks, but how it actually works over time, visit LightSupport.

  • How to Organize Your Carry-On for Stress-Free Airport Gate Changes

    Every traveler has faced it: your carry-on looks neatly organized at home, but within minutes in an airport, that same setup becomes a liability. You’re sliding between strangers in a moving boarding line when security suddenly asks for your passport—and right then, your “packed to perfection” pocket system slows you down. Instead of a quick grab, you’re fumbling with layered pouches and hidden compartments, exposing the gap between home order and real airport movement. Organization that feels sharp in your bedroom often collapses under actual travel pressure, especially when document checks or seat entry happen faster than you planned.

    When “Organized” Isn’t Enough in Real Airport Movement

    A bag that looks orderly in your hotel room doesn’t guarantee smooth movement in transit. The real verdict comes at the worst moments: shuffling forward in a boarding queue, stuck behind a bottleneck at security, sprinting down a crowded terminal with a gate change ticking down. Visual neatness offers zero help if you’re double-unzipping, moving pouches aside, or repacking mid-flow just to get at your ID or boarding pass. The true test isn’t whether your bag looks ready, but how much friction you feel—repeated tiny holdups—each time your hand goes searching for something you actually need, fast.

    That drag builds in silence. A neat setup at home turns irritating when you’re forced to dig, shift, or reset contents every time another travel checkpoint makes a new demand—while impatient travelers press behind you and the line keeps moving.

    The Subtle Ways Pocket Design Trips You Up

    Outer pockets seem helpful until they turn into traffic jams for essentials. It’s standard to stash fast-access items—documents, headphones, sunglasses—in the same “easy” pocket. But by the second or third attempt to retrieve something, you often end up rearranging the pocket to reach what’s at the bottom. Layering daily essentials together in the same exterior spot forces you to block and unblock your own path: a sunglasses case wedged in the way of your boarding pass, or charging cables half-covering your passport. Even well-intended segmented pockets can backfire as needs flip rapidly—security, then charger, then wallet, in a sequence that didn’t matter at home but becomes critical in the airport’s stop-and-go rhythm.

    A Familiar Friction: “That Pouch Was Supposed to Help”

    At first, nesting everything—tech, travel documents, chargers—into a single organizer or all-in-one pouch feels efficient. But that same pouch becomes a delay machine when, under travel pressure, you have to fish through cords for your ID, or move tickets aside for a charger. Each retrieval feels minor—until it’s repeated in every checkpoint, every boarding, every tray transfer. What started as a “clean system” becomes a repeated source of mild panic: headphones tangled with receipts, passport hiding under cables, the pouch itself now a speed bump instead of a solution. By the third or fourth interruption, small irritations accumulate into real drag, especially when time and space are tight.

    Packing Order vs. Movement Order

    There’s a cold truth: the bag that looks best lined up at home is often not the one that works best when you’re actually moving through airports and planes. Rigid lineup, stacked organizers, and tight compartments photograph well—but start to fail as soon as you enter the unpredictable pacing of a travel day. Stacked pouches stack your problems: one charging brick blocking a zipper, one “quick-access” slot stuffed behind other cases, an external pocket overflowing because the interior ones are too cramped. Packing order flatters your system in theory; movement order exposes whether you can actually reach, grab, and move on without pausing or reshuffling every time the sequence changes.

    The “One Grab Turns Into a Pause” Moment

    Picture rushing gate to gate. You reach into an outer pocket for your boarding pass, but it’s wedged behind headphones and yesterday’s sunglasses. What should be a one-motion retrieval becomes a public shuffle: pulling items out, setting them down, disrupting the line behind you. Suddenly, the arrangement that felt foolproof has turned on you, and you’re left remembering that travel exposes every layer of overplanning—and every shortcut that wasn’t built for reality.

    How Two Dedicated Pouches Break the Cycle

    The first real improvement comes from dividing, not stacking. After too many stops to repack mixed pouches, switching to two lean, purpose-built pouches—one for travel documents and essentials, one for tech—broke the old friction cycle immediately. The travel-doc pouch slid into a wide, no-fuss exterior pocket with a zipper that opened fully. Tech and cables stayed inside, no longer in the way. Every time a guard, gate agent, or attendant called for tickets or ID, you could target the right pocket once—no digging, no double-handling, no resetting. That single split cut down stress and forced pause time at every repeat use. Suddenly, interruptions didn’t equal total repacking—just a clean grab and on you go.

    The difference shows up over and over: the pouch you need is reachable without unpacking a layer of gear, you repack fewer things each time, and your sequence stays intact. The pace of travel recovers—not because you packed for looks, but because you packed for how often real access is demanded under pressure.

    What to Look for in a Truly Travel-Ready Carry-On

    • Wide, single-action external pockets: Should unzip fully and show key items at a glance, so you’re not reaching blind or disrupting internal order.
    • Dedicated, single-purpose pouches: Never force travel documents to share space with cords or chargers. Shared space means lost time at checkpoints.
    • Minimal overlap between high-access items: Each item that competes for the same spot is a future bottleneck—split them early to avoid repeat slowdowns.
    • Zipper paths and pocket depth matched to motion: A pocket that can’t be opened cleanly while standing, or a compartment that’s too deep for easy reach, becomes a mini-ordeal every time you’re called to move quickly.

    How Packing Choices Are Exposed by Airport Reality

    Packing order is just the starting line. Actual travel is built on access cadence—the rhythm of repeated reach, use, and return, often crammed into minutes while juggling bins, bags, and boarding slips. Each dig, unzip, and repack reveals whether your choices speed you up or quietly drag you down. What made sense the night before can slow you down at every checkpoint, aisle squeeze, or document request. These small snags pile up until that “perfectly organized” bag feels like a barrier, not an upgrade, and the visual order from home fails to translate into fluid movement in the real world.

    Signs Your Current Setup Is Slowing You Down

    • Repeatedly reaching for the same item, always finding it blocked, stashed beneath something, or off-sequence
    • Needing to open two or three pouches to retrieve a single passport, charger, or boarding pass
    • Feeling your progress stall in line or at your seat as you untangle or reset pocket contents
    • Realizing your home packing “system” leaves you stuck, not helped, when access speed actually matters

    Ultimately, there’s a difference between a carry-on that holds its shape and a carry-on that keeps you flexible—ready for every new checkpoint, line surge, or gate shift, no matter how many times the needs change along the way.

    For more field-tested carry-on tools, visit CarryOnSupply.