Blog

  • How Small Boundaries Keep Pet Care Areas Neat and Functional

    Why Pet Care Setups Feel Tidy at First—Then Start Slowing You Down

    A pet care setup that looks calm on day one can quickly turn into a daily annoyance when routines actually start piling up. What feels organized the first morning—bowls aligned on their mat, towels hanging within reach, grooming tools tucked nearby—rarely stays that way by the end of the week. Instead, you run into water tracked past the mat edge, towels sliding behind laundry baskets, or a refill bottle in just the wrong spot, turning a quick reset into a mini detour. The initial order is visible, but the real pressure comes when refilling, wiping, or grabbing basics interrupts the routine you hoped would run on autopilot. That’s the split: a pet area can look ready for care, but real friction only shows up through use.

    The hard truth: setups that seem neat after cleaning can turn against you if their physical boundaries collapse under repetitive use. Tidy lines count for nothing if daily care keeps pushing bowls, hooks, or bottles out of sync with how you actually move.

    The Hidden Friction of Small Boundary Shifts

    One inch—the wrong inch—changes everything. Take a feeding mat that slides too easily or a towel hook just beyond comfortable reach. Maybe your pet’s bowl has drifted close to the wall after two days of scooping. Now, grabbing it means bending at an awkward angle, usually knocking into a food bin or scattered bag. Or a water bottle, placed “neatly” near the entry, turns into a trip hazard or gets nudged into the feeding zone, requiring a shuffle with every meal.

    This unseen friction rarely matters during calm, deliberate moments. But during the morning rush—or those sleepy late-night check-ins—an out-of-place cloth or half-blocked access means wiping up with the wrong towel, bumping into things, and forgetting one step until the mess gets noticed later. Instead of smooth routines, you end up moving items as often as you move your pet.

    Real-World Routines: Where Small Setups Break Down

    After breakfast, a clean mat looks fine—until you spot dried water spots just past its edge, because it slid while your dog pawed at the bowl. The cleaning cloth you need isn’t missing, but it’s now buried behind leashes and bags on a crowded hook. At midday, the bowl sits too close to the radiator after your last refill, so you have to shuffle other bins just for a pour. Even a feeding area that started out clear now requires awkward reaches simply because tools and bowls migrate.

    After-walk routines stall for different reasons. Towel hooks blocked by last week’s shoe rack addition mean you have to dig for a usable towel as your pet shakes off inside. A brush left in the kitchen—since the grooming area isn’t working—means care tools float in and out of meal prep zones, never quite returning to where they belong.

    These aren’t disasters—just repeated disruptions that make a setup increasingly hard to live with. What looked organized is now a series of workarounds.

    Invisible Drag: When “Tidy” and “Effortless” Don’t Match

    A tidy feeding corner or tucked litter box can pass for functional, but repeated care quickly exposes every compromise. A mat that’s just a bit too small, a towel that’s always one step too far, or a storage bin lid that forces you to move your own shoes for every scoop—these add seconds, then minutes, and finally reluctant reshuffles to each day. Design choices that simplify one part of the routine often force last-second improv elsewhere.

    A towel hooked over the counter instead of in the entry blocks leashes or vanishes behind storage bins when you’re mid-reset. Storage bins with lids that swing into crucial walkways mean you’re nudging bags, sliding containers, or pausing more than refilling. Each “small” design gap becomes another drag on care speed when routines speed up, especially in high-traffic or shared spaces.

    Moments That Signal a Setup Needs Fixing

    Here’s where weak setup boundaries become obvious:

    • You spot spilled water or food outside the mat only after it’s dried, because the edges don’t line up with real splash zones.
    • Cleaning cloths are always “somewhere nearby” but never exactly where your hand goes after a spill—adding an extra step each time.
    • Grooming tools collect on counters meant for meal prep, breaking the care area’s flow and spreading clutter into cooking space.
    • You have to nudge trash, food bins, or bottles aside after every meal before resetting, repeating a fix that feels temporary but keeps returning.
    • Leashes and harnesses pile up near the door instead of their hook, simply because the hook is now hidden behind a coat or bag.

    If cleanups keep getting delayed, if tools migrate out of their zones, or if pet items repeatedly spill into shared space, your setup isn’t just untidy—it’s fighting the way routine care actually happens.

    Practical Changes That Streamline Everyday Care

    Small corrections have big effects:

    • Shift the mat so the water or food bowl sits fully inside—stopping daily drips from escaping, and often eliminating the need for extra wipes.
    • Move towel and leash hooks so they match your actual entry-and-exit path—midway between the door and the feeding spot—stopping items from piling up or migrating out of reach.
    • Place refill bottles on shelves above—not beside—the bowl zone, keeping the floor clear for feeding and protecting refills from accidental bumps that scatter other essentials.

    Tweaks that follow your real motions—not just design ideas—are what make resets fast, cleanup natural, and tools stay where you left them.

    Understanding the Difference: Looks Good vs. Works Well

    A setup can be spotless at a glance yet still trip you up. If bowl placement, hooks, mats, and supplies don’t mirror your refill, clean, and after-walk movements, hidden work piles up. Layouts that look intentional but ignore those repeated motions bring order at the cost of ease. Mats should meet splash radiuses, hooks should land where hands go after walks, and bins and supplies belong in line with your habits—even if that means slight visual imperfection in exchange for zero backtracking.

    That’s the split most people miss: visible order fools the eye, but lasting comfort comes from setups that hold their boundaries through dozens of uses, not just on day one. The “I don’t think about it anymore” feeling only happens when your arrangement survives actual wear and stays responsive to repeated moves.

    Less Repetition, More Comfort: Small Wins Add Up

    Notice where daily care routines keep snagging—mats creeping, hooks blocked, basics one step out of sync. Tidy looks are passive; resilient setups prevent the repeated detours. Whether your pet bolts to the bowl or lingers at the door, a care area tuned to your real habits makes cleanup, feeding, and resets less of a chore and more of an afterthought.

    Find more practical solutions for feeding resets, water refills, and everyday cleanups at CalmPetSupply.
  • Why Rounded Tray Corners Make Entryway Cleanup Faster and Easier

    In real entryways—the high-traffic, always-in-flux drop zones—organization isn’t about that first-day reveal. It’s about what happens after you’ve lined up shoes, tossed bags and watched the floor reclaim itself with mud, grit, or yesterday’s rain. The overlooked culprit? The interior corners of your entryway storage trays. When storage corners are sharp, grit and moisture settle deep into the angles, turning a quick wipe-down into a frustrating, almost daily reset struggle.

    When the Entryway Works—Until It Doesn’t

    It’s easy to believe you’ve solved the mess after adding trays and bins—at first. Shoes get dropped in, the bag lands (mostly) where it should, and the space looks temporarily under control. Fast forward: a few wet commutes, a toppled lunch container, a steady drift of dirt. You spot the shift right along the tray’s edges—damp streaks, debris trapped tight against the wall. What started as a managed threshold quickly becomes a boundary you’re fighting to maintain. The ‘set it and forget it’ promise of entryway storage gives way to the reality of scraping out grit from deep, hard-to-reach corners, while the zone you cleared starts to blur back into chaos.

    The tray’s internal corner design doesn’t just add up visually—it compounds friction with every reset. Those ninety-degree angles gather what your routine brings in and refuse to let go. You wipe and realize the clean line stops short, leaving behind a stubborn halo in the exact spot meant for order. The frustration isn’t just that dirt remains, but that it accumulates faster than you can keep up.

    How Rounded Corners Change Daily Cleanup

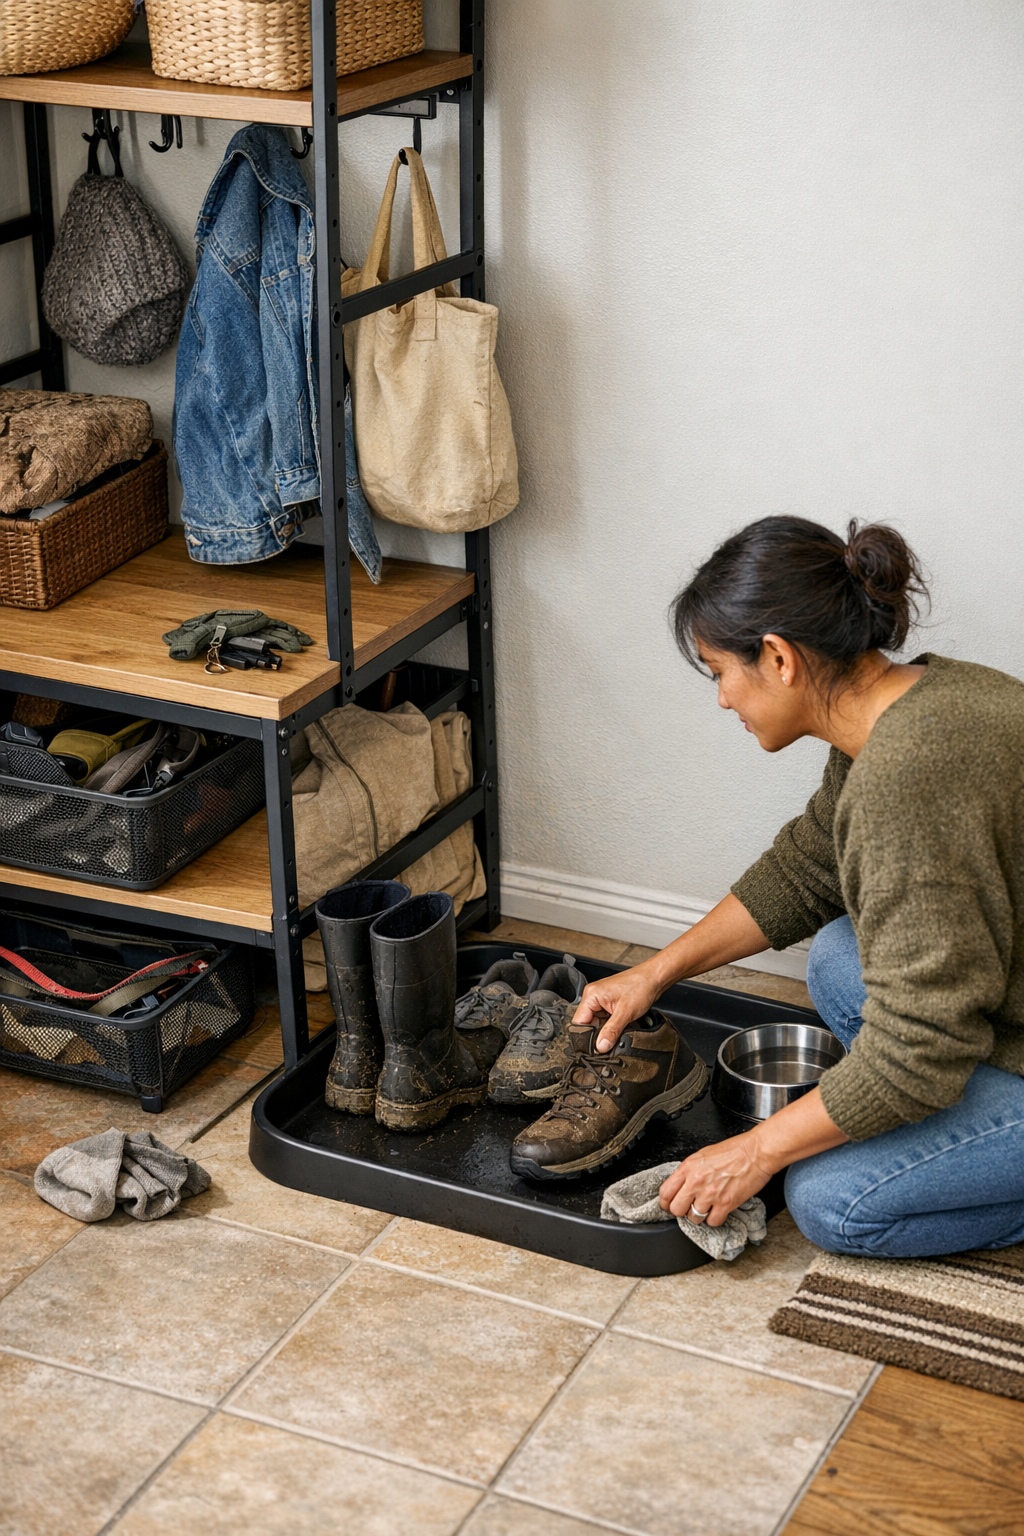
    Switch to trays with rounded inside corners and the main difference lands during real cleaning—when there’s mud, spilled water, or sandy shreds from a gym bag. Instead of hunting into corners with a detail brush, you swipe once and the debris is gone. Water drains in a pass, not pooled for hours. Silt and grit get carried away by a rinse. No second pass, no soaking, no pretending you’ll get to it later. That difference becomes unmistakable as you repeat resets during the week—not silently dreading cleaning up the threshold, but actually finishing in a single move, and moving on.

    Evening Resets Feel Lighter

    Most families can’t schedule a dedicated deep clean for the entry. Resets come between work and dinner, before bed, or just after the next round of drop-offs. With rounded-corner trays, these bursts of cleanup don’t turn into mini-projects. Hit it with a damp cloth or lift under the faucet, and you’re finished. No gritty surprise on your next pass-through. In setups where bags fly in and kids’ shoes land sideways, the speed and completeness of the clean is the thin line: the difference between a truly ready zone and a stubborn base layer of yesterday’s mess.

    Real Friction: What Accumulates When the Corners Aren’t Right

    Entry zones aren’t static shelves—they’re highly active, high-pressure spaces. Shoes start in rows but migrate wide with each return, bags bump against shoes, and larger items like hockey sticks or strollers quickly test the limits. In a sharp-corner tray, each wet day leaves behind harder lines of dirt. Grit builds where you barely notice until it’s suddenly obvious—and then annoyingly stuck. By evening, runoff collects not in the open, but precisely in that narrow, unreachable runway at the tray’s edge. Any attempt to reclaim the clean zone turns into sidestepping mess or wrestling tools into corners never intended for them. Your movement slows, routines stack up, and the illusion of order cracks on the daily threshold reset.

    Let this continue a week or two and you get real consequences: edge stains, baseboard dampness, smells creeping in, and eventually a subtle hesitation every time you cross the space. The overflow becomes self-reinforcing—one dirty bag or shoe can turn the whole drop zone from resettable to semi-permanently off-balance.

    Sharp Vs. Rounded: Which Holds Up Under Real Use?

    Stacking sharp- and rounded-corner trays in the same entry, their strengths emerge in opposite cycles. Sharp-corner trays give a crisp look against benches and cabinets—at first. But as each day brings new shoes and runoff, their corners quietly become sediment traps. Daily, you face a choice: spend extra time for a barely-complete clean, or put it off and accept more mess tomorrow. The reset delay isn’t hypothetical—it stacks onto the time, energy, and willingness you have to keep using the system at all. Over time, what started as ‘organized’ now quietly becomes a bottleneck you avoid, leaving your routine to work around, not with, your storage.

    Rounded-corner trays approach the transition zone with a different logic: anticipating not perfection, but mess, and offering a reset you can actually keep up with. The edge may not sit razor-flush against the wall, but that’s the point: nothing gets trapped. After rain, kids’ practice, or simply one busy return, you can lift, rinse, and see everything washed clean on the first try. Meaningful payoff: less dread around cleanup, more trust that your chosen entryway setup won’t quietly betray you two weeks later.

    Practical, Lived-In Examples

    Picture the weeknight checkpoint: Rain boots thud into the tray, backpacks drop off the side, the leash uncoils still damp. Minutes later, you survey the aftermath. With sharp-corner trays, the surface wipes up—corners do not. Even after two passes, the dirt line hugs the edge. With rounded corners, the same sequence empties with one efficient wipe, even after multiple rapid-fire entries. Mess leaves with you, not dug in for next round.

    Or the inevitable Saturday catchup: You want to clear out overflow before guests arrive, or just to restore passage for the week ahead. Sharp-corner tray: you’re bracing for ten minutes kneeling, toothbrush in hand, cursing those design decisions that seemed so minor. Rounded-corner tray: the entire zone is back to clean with a mop or hose in under a minute—no corners to battle, no mess left lurking. The time saved and the feeling of starting fresh is tangible.

    Small Differences, Big Impact in Setup Performance

    This isn’t theoretical—it’s the difference between setups that stay manageable week after week, versus ones that create new friction and slow your movement. A tray’s corner shape decides whether the space genuinely resets or quietly devolves into the same old clutter spread. In places where the path tightens, the bench edge overflows, and temporary drops keep multiplying, crisp corners look controlled at first; rounded corners maintain actual, practical control through real family use. Setup choices like this signal whether you’ll spend your time living in the entryway, or fighting with it.

    One Useful Tip

    Stuck with sharp-corner bins or trays right now? Line them with a flexible mat trimmed to round out the inside corners. It won’t erase the cleaning dead zones, but it does intercept much of the debris and lifts out for rinsing in seconds. Until you can swap to full rounded-corner solutions, this small retrofit buy you a real-time advantage without remaking the whole entry.

    Why Setup Details Like This Decide How the Threshold Actually Feels

    The reality at the door is a constant tension—you want order, but the pace of daily life keeps breaking it down. Whether you’re dealing with a tight entry zone or a wider drop area, cleanup friction shows itself in dozens of small ways: shoe rows spilling wide, bags blocking reset flows, walls looking clear but clutter drifting back in. Rounded-corner trays are the kind of unglamorous fix that carries real weight. They turn a threshold from a battle for temporary order into a space you can restore—quickly, every time, without dreading the next cycle of mess. That’s not about catalog looks; it’s about whether your setup truly keeps pace with repeated use.

    http://www.betweenry.myshopify.com

  • Creating Wall Storage That Matches Daily Use and Reduces Clutter

    That rush of satisfaction when you first set up wall storage in your garage or workshop is real—and a bit deceptive. Shelves are lined up. Tools and parts stand at attention in labeled bins. The floor feels open for the first time in months. But then, as you dig into actual work—one project, maybe two—the system you just installed begins to press back. Your wall looks organized, but your hands and habits say otherwise.

    When “Organized” Stops Fitting Your Routine

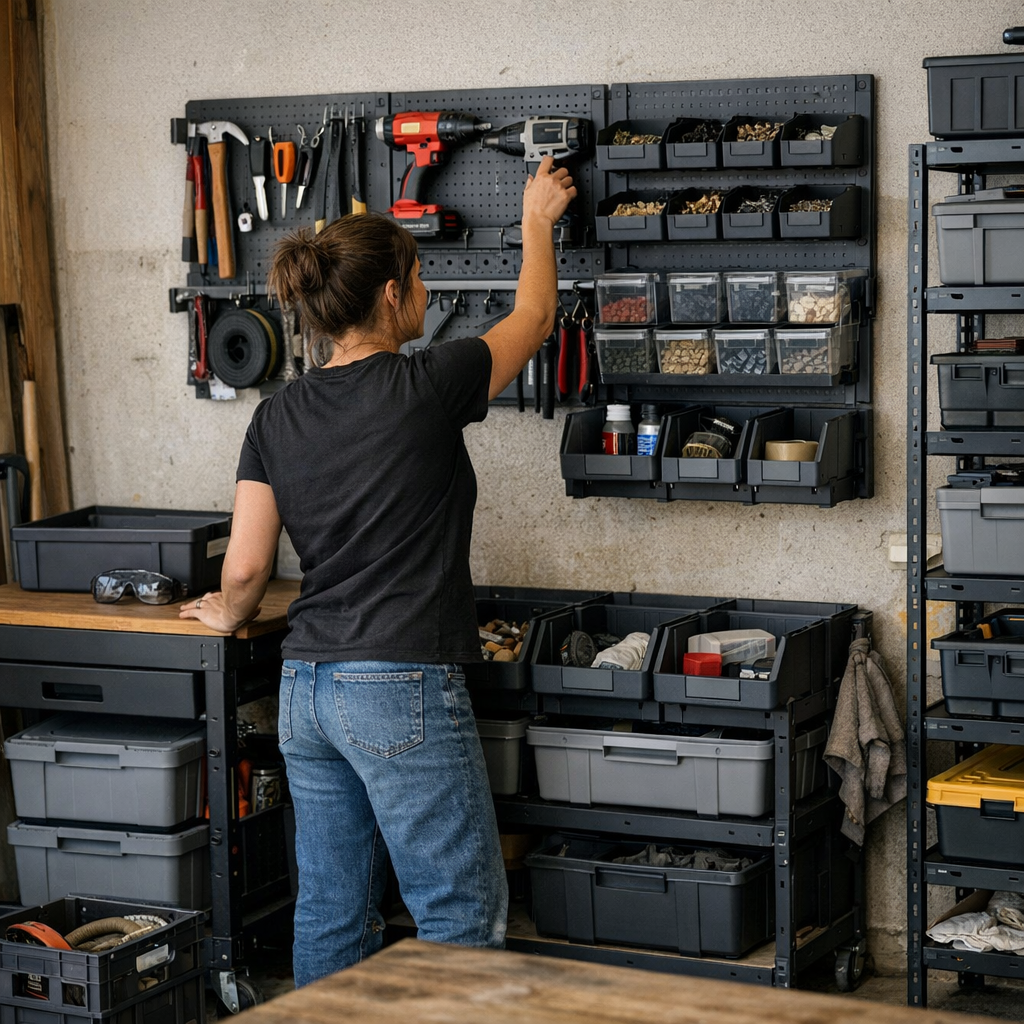
    The typical wall storage layout—stacked bins, crisp pegboards, modular tracks—gives the illusion of readiness. But walk through a few real jobs and the compromise becomes obvious. Each grab for a tool changes the flow: reaching past awkward edges, skirting around a rolling cart parked in the only open gap, shifting one bin just to get to another. The setup that’s supposed to streamline your area quietly slows you down, project by project.

    Maybe the fastener box you need is two rows up, just out of reach, and you stand on tiptoe—again. Or you’re always bumping the cabinet door because the handles crowd each other. For all the visible order, the routines beneath keep stutter-stepping, collecting little piles of “return later” on every available surface. The floor might stay clear, but your effort is getting rerouted by your own storage system.

    The Misleading Calm of a Clean Wall

    Don’t trust that tidy look at a glance. Sure, a flush row of bins looks neat, but if pulling out one means unstacking two, or if a pegboard jammed with tools means handles get hooked together, the surface calm is masking daily friction. The real cost is measured in small, repeated disruptions—each time you have to shuffle boxes to get a single drill bit, or circle around a rolling cart parked out of ‘temporary’ necessity.

    Ask anyone with a loaded garage wall: Over time, your top-use tools wander. Bins double-stack, or land on the floor “just for now.” You start tracking which bins gather dust because it’s too annoying to return things properly. A handsome wall becomes a maze of micro-adjustments, minor blockages, and the slow creep of overflow into your freshly reclaimed floor space.

    Everyday Clues That the Wall Isn’t Pulling Its Weight

    Real life exposes what the neat install hides. Picture a Monday—your drill lives in prime territory, but by Thursday, pliers and screwdrivers have migrated to the workbench after repeated stretching or acrobatics just to hang them back. Three bottlenecks crop up again and again:

    • Overlapping pegs: It takes a wrist twist to fit a screwdriver back without shifting a wrench or knocking off your measuring tape.
    • Bland, packed bins: Rows of small hardware bins blur into one, so you resort to rummaging every time you need a washer, and “returning” items is just as tedious.
    • The “default drop zone”: Bins lower on the wall gradually claim all the busy tools, because returning them up high is just awkward enough that you stop bothering. Suddenly, overflow hardware mixes with daily drivers—a habitat for clutter.

    Now the smooth return after a project is replaced by improvisation: a favorite tool perched on the edge of a shelf, an extension cord coiled in an empty cart, the whole area slowly drifting off-script. Containment beats chaos but never quite delivers a frictionless flow—you’re maintaining appearances, not momentum.

    Pushing Past Looks: The Impact of Real-World Tweaks

    Improvement isn’t about adding another label or ordering more bins. It’s about shaping the system to meet your actual moves, not just mimic the showroom. Try this:

    • Center your most-used tools at chest height, spaced apart so you can grab and replace each one with a single, blind reach—no dodging neighboring handles.
    • Dedicate lower shelves to bulk hardware or overflow, where you expect to dig, not reset quickly.
    • Divide the wall by function. Make one section for hand tools, another for fasteners, a third for safety gear—rather than mixing everything on one crowded board.
    • Look at how you actually approach the wall. If you’re always reaching above eye-level or leaning sideways, lower the busiest zone by a foot. That 12-inch tweak can kill off a daily annoyance for good, shrinking the awkward footprint and making resets automatic again.

    The effect? Those gaps where clutter collected disappear. You stop inventing workarounds and start trusting the wall to support, not interrupt, your projects. Suddenly, you’re not thinking about storage mid-job—it just keeps pace with you.

    Can You Feel the Friction? Here’s How to Notice

    The evidence is right in front of you: tools start living on carts, benchtops, or even the floor. If every cleanup uncovers a pile of “I’ll put that away later,” it’s not laziness—it’s the wall getting in your way. And the classic mistake? Trying to fix it by adding bins, which only spreads the mess unless the zones match real tasks.

    Watch for dead corners—sections of wall you never use because the angle’s wrong or reaching around a cabinet edge is always awkward. These spots pull in random leftovers and quickly become clutter magnets. True efficiency comes from resisting the urge to fill every inch and instead making every zone a natural “home” for something you use—no shuffling needed.

    Immediate Fixes That Actually Work

    • If returning a tool requires moving (or risking) another, rework that area so each tool’s path is direct and single-step.
    • If one wall is jammed while another stays empty, cut the guesswork: set obvious roles for each zone so you’re never “just putting it somewhere.”
    • If cleanup time lags behind the work itself, change zone height, rethink traffic paths, or let go of the urge to over-stack for looks. The time you reclaim is the proof it’s working.

    The Difference You Actually Feel: Movement, Not Just Order

    A wall setup that truly helps doesn’t just look sharp—it erases the small stalls that slow you down. Resetting after a rush job stops being a chore. You reach, use, and return tools on autopilot, without second-guessing where things live. The floor stays open because the wall absorbs routine clutter—no clogged corners, no accidental drop zones.

    The real mark of an effective setup isn’t the first-day reveal but how easy movement stays, week after week. When you’re not tracing the same awkward footprints or pausing to untangle a storage pileup, you know the system fits your flow. In the end, it’s about matching visible order to lived-in clarity—a shift from staging a space to actually owning it, day by day.

    Find modular wall setups, rolling carts, and storage systems designed to flow with your real routines at StackNest.

  • Transform Your Pet Travel Setup for Stress-Free Car Trips

    A pet travel setup can look perfect for the first five minutes—until real movement exposes how much it actually slows you down. Try driving a loop of city errands with your dog or cat: carrier buckled in, bag zipped, everything packed where it “belongs.” That illusion lasts until the first pit stop. Now a water bottle rolls out, wipes are wedged under a leash, and a comfort blanket you packed for the pet has pinned the bowl at the bottom—just when you need it. By the third stop, the calm start is gone. You’re digging for cleanup gear, unburying the leash for every break, and bracing for the next round of mess or fuss that your “organized” setup keeps making harder to handle.

    Bench Breaks: Where Organization Gets Exposed

    The difference between packed and usable starts as soon as the doors open away from home. The driveway feels neat: every section zipped, supplies in place. But once stops stack up—gas, walks, sudden cleanup—most setups unravel. Moving from one patch of grass to the next, the bag turns awkward. The leash crosses over wipes. That water bowl that was easy to find is now buried under “just in case” gear. Instead of smooth access, you’re stuck shuffling the same four things in circles, frustration climbing with every pause. Any sense of “ready” falls apart as the main pouch becomes a tangle and you second-guess what you packed where.

    That Hidden Friction You Start to Expect

    Even seasoned pet owners fall into the same setup traps: essentials stashed where they look organized, but turn unreachable when actual cleanup or fast handling is needed. It’s always the small failures: wipes forced behind the leash; the comfort blanket in a spot that now blocks quick water access; a phone you thought would stay clean, now under something muddy. You know friction’s baked in when grab-and-go moments keep leading to the wrong pocket or when your “quick” bowl is tangled in a harness that wasn’t in the way before.

    Why “Looks Organized” Doesn’t Mean It Works in Motion

    A photo-ready carrier might feel like progress, but order on paper collapses under real travel rhythms. Most all-in-one bags promise every essential in one place, but not in the right order. The first moment your hands are full—one on a leash, the other reaching for wipes during a scramble—the setup’s limits show up. Soothe a stressed cat while sifting for a bowl, or untangle a leash from the cleanup pouch while your dog presses for the exit. In practice, the clever compartment layout often gets in its own way.

    The Slippery Slope of Overlapping Items

    The downfall isn’t dramatic—it’s months of small annoyances stacking up. Mid-morning, the water bowl’s jammed below the harness. Wipes slip deep behind a leash, and the blanket—slightly damp from a water bottle that never fully closed—now covers what you actually need. Soon, the main zip strains to shut, and each “quick stop” ends as a scramble to pull one thing without dismantling the rest. What started orderly becomes a perpetual reshuffle, slower after each use.

    Repeated Stops: Where Little Problems Turn Big Fast

    No matter how perfect a pet travel kit feels at home, repeated stops expose every weak link. One key trigger: the seat-edge handoff point, where dog leash, bowl, water, and your own keys compete for space. That edge fills up fast. Leash over bowl, wipes jammed where you can’t grab them, and anything loose falls under the seat with a single motion. Now a two-minute water break becomes a mess: the dog fidgets across the bench, you search for wipes while trying not to spill, and lost supplies drag the whole reset into a slow-motion shuffling act.

    Blocked Quick Access Multiplies Frustration

    By stop number three, you know the routine is working against you. Supplies exist—they just won’t cooperate. Seconds lost hunting for a leash or wipes stretch each interruption, pushing your patience and your pet’s. What seemed “organized enough” on paper becomes a twitchy game of find-the-thing-you-already-packed, every time the car door opens. The trip turns more about wrestling your setup than about moving smoothly.

    Turning “Ready” Into “Reachable”: The Shift That Actually Matters

    A travel setup gets better not by adding more gear, but by changing where and how you store each thing based on the rhythm of stopping and going. The breakthrough isn’t a bigger bag—it’s moving the high-frequency essentials into instant reach:

    • Wipes clipped separately and visible at seat height—never buried under the leash.
    • Bowl snapped right beside the leash clip, always outside the pouch or carrier.
    • Comfort blanket rolled in a mesh pocket that doesn’t cover the hydration spot or force a reshuffle.

    With wipes in reach, a muddy paw cleanup becomes a three-second grab, not a bag-emptying search. Resets after stops are shorter. The carrier doesn’t balloon with “just in case” gear you have to work around at every break. Over a handful of trips, less shuffling means a cleaner seat, calmer transitions, and fewer lost supplies stuck between seats or in door pockets. Those small, repeatable improvements—faster grabs, less overlap, easier resets—accumulate into setups that feel less like a project, and more like silent help.

    A Setup That Stops Fighting Every Trip

    The biggest difference isn’t showy—it’s in energy saved over a dozen stops. Fewer frantic scrambles, fewer forgotten wipes, and a bench that stays cleaner with less effort. Pet settles sooner, the awkward shuffle at seat edge disappears, and missed supplies don’t lurk waiting to trip up a reset. These aren’t headline wins, but over weeks, they decide whether local runs with your pet become manageable or a source of dread every time you reach for the carrier. When the structure stops fighting your routine, every short trip—however messy or hurried—remains workable all the way home.

    From “Prepared” to Actually Easy: What Structural Change Really Feels Like

    The calm of a good-looking setup at home is no match for the reality of pet travel: stop, move, pause, repeat. Weak spots only reveal themselves late in the trip, when friction accumulates and energy drains. A system that lets you move without endless reshuffling and searching marks the true difference between “set out once” and “handled every break without stress.” If you keep getting slowed by jammed wipes, lost bowls, or comfort gear that just gets in the way, it’s the bag’s structure—not your planning—that needs to change. The sharpest upgrades come from honestly diagnosing which section slows you down, then reworking access so your next break helps, not hassles, your progress.

    Visit the PawGoTravel store here.

  • Creating a Functional Desk Setup That Supports Seamless Device Changes

    The clean desk illusion tricks nearly everyone: cables vanished, devices lined up, surfaces clear—on day one, the workspace looks ready. By midday, reality hits. You reach for a charger or try to slide your chair in, and suddenly that perfect order demands workarounds: a cable tug here, a bin blocking leg space there, a monitor that won’t shift because the wires are locked in. What seemed sleek at 9 a.m. now becomes a daily loop of micro-frustrations—proof that neatness isn’t the same as a desk that actually works when you need it.

    The Real Cost of Prioritizing Looks Over Function

    Chasing visual order is satisfying—a clean surface is easy on the eyes. But burying clutter without considering movement or reach turns the so-called upgrade into its own obstacle course. The decline is quiet at first: a charger cord flicks across your notes, a power block cramps your legs, a cable snags when you shift the keyboard. Ignore one, and another crops up: plugging, adjusting, and moving things becomes part of the routine, not for better flow but because the “order” creates its own set of steps to undo.

    When “Tidy” Gets in the Way of Real Work

    A workspace looks perfect just after reset—wires pinned to the rear edge, adapters stowed below, not a single cable on the desk. But this staged calm never survives actual work. Need a different laptop? Undo the clips, thread the cable—there goes the so-called efficiency. Phone low on battery? The outlet is boxed behind a bin; now you’re crouched on the floor. Adjust the monitor? The tightly routed cable either pulls loose or simply doesn’t move far enough. Instead of supporting the workflow, the setup starts fighting every new task.

    Classic Friction Points That Sneak Up Fast

    • Cable Cross-Talk: Neat routing puts cords where your forearms need to go, snagging your wrists every time you jot notes or type.
    • Blocked Movement Paths: Under-desk storage brings surface relief but can jam your legs or force awkward pivots—especially on desks that already feel tight.
    • Pinned Power Bricks: Out-of-sight cable boxes mean every switch or swap requires bending, digging, or partially unpacking the setup just to charge one device.

    Where Setup Decisions Actually Matter: Repeat Use, Not First Impressions

    The real desk test happens in motion: switching quickly from keyboard to notebook, prepping for a call, dragging in a second monitor at 4 p.m. A cable tray fixed too far back? Now every device change breaks flow—you’re ducking under the surface, knee bumping a drawer mid-meeting. Display cable routed tight for looks? Monitor height is now a multi-step detour, not a quick adjust. It’s not the cable count, but the way each one adds invisible steps—standing up to reach a charger, shifting everything just to regain elbow room, or realizing you’ve tucked away the one adapter you now need. A desk works in practice when friction drops every time you reset, not just when the surface is empty at the start.

    Routine Interruptions Add Up Quickly

    Interruption rarely looks like mess. It’s your pen blocked by a cable stretch, a headset that nearly reaches but pulls back at the last centimeter, a mouse path interrupted by a tray edge. If you handle multiple devices, shift between seated and perch postures, or adjust your monitor for different jobs, every layer of “tidy” that isn’t designed for change becomes another stop-and-rethink moment. The cost isn’t clutter—it’s the slow leak of focus every time you hit a snag.

    The Small Change That Made Returning to My Desk Seamless

    The biggest shift? Not another organizer, not endless ties. I mounted a simple open cable tray along the front edge of the desk—ten centimeters back, within reach but off the work surface. Instantly, cables cleared the desktop, chargers and adapters stayed ready, and the usual plug-and-swap routine no longer meant crawling or dismantling half the setup.

    This worked because:

    • Chargers and cables stayed accessible—every device swap was just a reach, never a search or a crawl.
    • No whip or drag over papers; cables flexed but didn’t spill into the workspace.
    • Routine resets—typing, sketching, hopping on a call—didn’t involve undoing yesterday’s order. Nothing jammed, nothing hidden only for “neatness.”

    Over time, this single change beat every attempt to hide or box away wires. The desk stayed ready between sessions—no more undoing “tidy” just to begin again.

    Questions That Come Up in Real Use

    How do you keep cables both tidy and accessible?

    Don’t hide usability for appearance: An open tray just under the front edge means cables are tidied away, yet instantly at hand. Closed boxes and clipped routes trade away practical speed every time you need to add, remove, or swap something—no matter how neat they look.

    What’s the most costly mistake in cable management for a working desk?

    Pushing minimalism at the cost of function: When everything is clamped or routed out of sight, device swaps require disruption. You lose real speed if the flow depends on undoing “organization.” Work slows, and the supposed improvement starts to wear thin within days for anyone who changes hardware or repositions frequently.

    How quickly do these issues start to matter?

    If the desk hosts shifting tasks, mixed gear, or regular resets, you’ll notice the drag the first week. Smooth on day one, stuck by day five. The minor workarounds outnumber the visual wins fast—and compound until it feels easier to work anywhere but the “organized” desk.

    What Separates an Organized Desk from a Reliable One

    Reliability isn’t a perfectly silent surface; it’s being able to return, plug in, shift position, and pick up where you left off—without first fixing or unblocking part of the setup. The best desktop setup is the one that removes double-checking, pauses, and forced resets, not just clutter.

    Tidy is only the beginning. Lasting gains come when your setup fades out of the way: nothing to fiddle with, no detour just to access your own equipment, no ritual reset. If each session makes you rethink cable paths, move drawers, or chase adapters, “good organization” is only hiding the problem. The difference is plain by the flow: does your desk help you start, or does it make you fight the same hidden frictions every time?

    Explore the full WorkBasic collection

  • Choosing Between Wire Shelf Baskets and Dividers for Lasting Closet Order

    Closet shelves never stay fixed for long—no matter how perfect they look on reset day, real life exposes every flaw fast. Maybe you fight through a tangle of bags every morning, or dig for a sweater buried beneath a toppled stack. You spend time reorganizing, but within a couple busy days, shelf order crumbles. Categories blur, grab-and-go is gone, and you’re back to reshuffling. That’s where the choice between wire shelf baskets and dividers really matters—not in how they look on day one, but in how they hold up against your actual, imperfect routines.

    The Recurring Messes That Break Most Closet Setups

    Closets fail right at the stress points: reaching behind a pile for your favorite shirt, pulling out towels from underneath a teetering heap, shoving a purse back into a crowded corner. Even after a full reset, stacks lose shape fast. Shirts slump, jeans squash lighter items, and anything not perfectly folded migrates. By midweek, the clean rows you created melt together, and the “sections” you defined are lost.

    The core problem is reliability: Can you keep categories separate—and reach what you want—without a nightly reset or constant frustration? Both wire shelf baskets and shelf dividers claim to solve this, but their limits surface the moment you need speed or make less-than-careful moves.

    Shelf Dividers: Order That Works—Until It Doesn’t

    With shelf dividers, there’s an immediate visual payoff. Folded shirts, stacks of jeans, even towels look tidy and split into clean, logical zones. You feel like you’ve carved out permanent space for every type of clothing. Lines are crisp, boundaries obvious—a snapshot of organization.

    How Dividers Let Clutter Creep Back

    But the first busy morning usually wipes out the photo-ready look. Pull a shirt from the middle? The stack slouches and spreads beyond its allotted lane. Grab jeans in a rush, and the pile next door shifts. Dividers can’t stop stacks from changing shape or clothes from losing definition. If your family shares the closet, a careless reach multiplies disruption. By the end of the week, “divided” shelves look like a bad Jenga game—lots of vague, overflowing piles to rescue yet again.

    The Everyday Scenarios

    Picture the top shelf in a busy entry closet: scarves, hats, towels, all positioned between clear dividers. It works until someone’s looking for their missing beanie, or digging for guest sheets at the back. In seconds, dividers are bypassed as items fall over, forcing new stacks into old spaces. Dividers are at their best only when everything stays stackable and nobody’s in a hurry—but real closets rarely run that way.

    Wire Shelf Baskets: Containment with a Side of Inconvenience

    Wire baskets transform messy shelves by drawing firm lines: odd-shaped bags, slippery knits, and all the loose accessories finally have a corral. Baskets stop items from drifting or spilling into each other, even after a week of use. The difference is visible—categories stay put, and you don’t spend your evenings herding sweaters back into their zone.

    The Catch: Retrieval Isn’t Always Instant

    But baskets come with their own quirks. Looking for the clutch at the bottom? You’ll need to lift or unpack what’s on top, or pull out the basket entirely. This works for items you use occasionally, but if you’re reaching in each day, it slows you down. Baskets reduce shelf chaos, but they trade the luxury of fast, at-a-glance access for the discipline of stronger containment.

    Everyday Basket Realities

    Envision a laundry shelf lined with baskets: socks, dryer sheets, stray cleaning cloths all packed together. Items never wander off, but “grab and go” becomes “root around and repack.” It’s neater—your shelves don’t dissolve during the week—but now you introduce a mini sort-out ritual whenever you use them. The mess is contained, but your routine includes new steps.

    Mixing Baskets and Dividers: Building Real Resilience

    Closets rarely stick to one category per shelf—most have oddball mixes: stacks of jeans beside loose workout gear, guest linens next to bags. No single system can cope with this shifting terrain. Dividers keep shirts and pants from sprawling—but can’t cage loose or hard-to-fold items. Baskets handle the wild cards, but slow down access to everyday pieces.

    The most durable setups blend both: Line up shirts or pants between dividers for quick scanning and pulling—reserve baskets for soft, lumpy, or slippery items that rebel against stacking. This not only keeps roles and categories clear but also absorbs the inevitable chaos of rushed mornings, sharing with family, or odd-shaped belongings. The result? Your shelves function, even when your routine doesn’t stay flawless.

    Simple Storage Tweaks That Actually Help

    • Put baskets where things creep: Place them in overflow zones—where extra purses, scarves, or workout gear tend to invade neighboring stacks.
    • Use dividers where stacking works: Reserve them for shallow shelves or rows meant for like-sized items—shirts, towels, jeans—where all you want to prevent is sideways spread, not total separation.
    • Leave breathing room on your shelves: Resist the temptation to pack every inch. Giving each storage zone just a bit of slack cuts down on knocking things over and means less frequent major resets.

    From “Organized” to Actually Easy

    Overstuffed shelves aren’t fixed with a single product or a single reset. Real organization lives in the day-to-day: reaching for what you need without reshuffling half a closet, sections holding their meaning, and clutter staying where it belongs. It’s not showroom perfection—it’s a system that gets knocked around all week and still works.

    Wire shelf baskets and dividers each target different storage headaches. Neither is a miracle on its own—but the right mix, grounded in the reality of your routines, gives you a closet that stays useful after the photos are taken. The best setups aren’t about impressing guests, but about making the morning rush less frantic and reset duty a quick task—not a chore that eats up your Sunday night.

    Shop ClosetWorks closet organization systems, baskets, and dividers

  • Why Divided Underbed Organizer Trays Transform Craft Supply Storage

    The first time you stash every marker, glue stick, and bead into a lidded underbed bin, it feels like real progress—until you have to pull something out on a busy afternoon. That bin looks orderly for about a week. But the real test shows up the second or third time you hunt for a missing pen, or try to grab colored paper before the rest of the pile slides forward. Category lines blur, layers collapse, small supplies vanish under bigger ones, and the neat system that promised speed turns into a slow, two-handed excavation just to begin another project. In real daily use, underbed storage can turn into a blocker—adding steps, forcing reshuffles, and turning a “quick project” into a drawn-out rummage on your knees.

    A Glance Into the Real Life of an Underbed Bin

    Picture pulling out a single, undivided bin to find scissors for a school assignment. You reach in and, instead of a clear lineup, you meet a confused stack—paper sheets half-crushed by acrylic paint bottles, stray bead bags jammed into corners, the only black pen missing somewhere under two unrelated kits. That “everything in one place” promise dissolves after a few sessions. Each small retrieval means just enough disturbance that categories slip, supplies settle wherever there’s a gap, and every lid closing locks in new disorder. The initial sense of control unravels. The bin’s outside hides a zone that gets tougher to use every week.

    Where Open Storage Bins Fall Short—And Why That Matters

    Large open bins advertise themselves as solutions, but in repeated use they behave more like a temporary hiding spot. Each hurried cleanup—especially on a timeline or shared with kids—ends with a fast sweep: handfuls of mixed items thrown in, heavy bottles landing on fragile sheets, half-opened packages at the edges. By the fourth or fifth project, what looked streamlined becomes slow and irritating. Items get buried, categories disappear, and next time you need a glue stick in a rush, you’re left picking through a layered mess. The hidden clutter slows every retrieval, shortens patience, and makes it likelier you’ll postpone new projects just to avoid the hassle.

    Compartmentalized Trays—A Small Shift With Real Impact

    Divided underbed trays work differently by turning the open void into a set of contained, visible zones. Instead of letting all supplies tumble together, these trays slice the bin’s interior into clear boundaries: markers lined up here, scissors in reach, small embellishments controlled instead of free-floating. The effect isn’t just neater appearance—it’s a daily behavior shift for anyone whose routine depends on easy retrieval and reliable returns.

    The payoff shows up in the repeat cycle. You slide out the tray for a quick task—beads haven’t wandered, scissors return automatically to their shaped slot, papers aren’t crushed. Because there’s no empty void to build random piles, the space doesn’t demand a mental reset before every use. Each category has a clear “address,” making misplaced items stand out fast and retrieval friction lower in real, regular use.

    Preventing Category Drift (Without Mid-Project Sorting)

    The best trays stay shallow—about two inches deep—forcing each item category to remain visible and contained. This depth control keeps you honest: too much of anything overflows, and you spot it immediately rather than after three projects. Category drift slows down because it’s harder to pile new finds on top. Cleanup isn’t a separate chore—when returning items, they either fit back in the compartment or stand out as overflow that needs handling. That means less double work, even during quick, distracted resets or team efforts in shared spaces.

    This edge is clearest in high-change routines. Instead of ending a late-night session with the resigned thought of “organizing later,” a shallow tray lets you drop items in the right place now. The system reinforces itself without mid-project sorting or weeknight reorganization sprees.

    When Dividers Make Things Worse

    Dividers don’t save every setup. Compartmented trays get difficult—and sometimes counterproductive—if you overload compartments or mismatch their size to your actual supplies. Oversized rolls, bulky glue guns, or irregular tools jam compartments, tumble between zones, or end up crowding every section with overflow. After a few forced fits, you start ignoring dividers, and the “system” becomes just as cluttered as a plain bin, except now retrieval means wrestling past extra plastic walls. Tools that change shape or size often (think expanding craft kits or oddball projects) can highlight wasted space, force awkward fits, or delay storage instead of smoothing it.

    If your supplies skew large, fast-changing, or downright awkward, too much grid can turn flexible storage into a cramped puzzle—one that slows cleanup, blocks access, and makes every retrieval a compromise.

    Small Shifts that Hold Up to Repeated Use

    Most people don’t have time for weekly resets or fresh rounds of triage. A divided tray worth keeping is one that lets you stay functional after normal, careless use—without the hidden penalty of a big re-sort. Here’s how you see the real value: Retrieval gets faster, not slower. You find what you need before you’re annoyed. Lost hours disappear. Return flow smooths out. Distraction or tiredness doesn’t break the system; putting things back becomes automatic, not a new burden.

    For anyone juggling projects or sharing supplies with family, the goal isn’t a showroom finish. It’s being able to pull one thing and return it without dragging out the entire bin or treating “cleanup” as tomorrow’s problem—because categories hold their line through real-world use, not just initial setup.

    Tips for a Reliable Underbed Craft Setup

    Plan before you buy. Lay out your regular supplies. If your materials are mostly small and categorized—think pens, beads, brushes—go for a tray with simple, right-sized divisions and keep each section lean. But match compartment sizes to what actually needs to fit, not what looks organized on day one.

    Concrete tweaks to reduce friction:

    • Label or color-code zones for essentials, especially for families or shared bins.
    • Keep high-use items up front or closest to the pullout edge for fast retrieval under pressure.
    • Pair divided trays with a separate box or folder for bulky, seldom-used, or awkward items—don’t force an imperfect fit.

    Pay attention to drift. If, after a week, you see new piles forming on top of compartments or random category spills at the edges, adjust now: swap divider positions, trim contents, or shift routines so the system matches reality, not a catalog photo.

    The Everyday Advantages (and Limits) of Defined Underbed Trays

    The real difference in craft and household storage is visible not after a rare deep clean, but on the sixth or tenth hurried reset. Open bins solve the appearance once but leak disorder with every use, forcing you to trade surface calm for hidden mess and slower retrievals. Divided trays anchor categories without demanding perfection. They withstand careless returns and shared-traffic chaos—as long as you build around your actual use, not just the first arrangement.

    In crowded rooms, with supplies piling up and routines shifting, the real edge is this: choosing a structure that fights back against silent category drift and endless reshuffling, making it easier to pull, use, and return what you need, even if the system is never truly perfect.

    Shop Gridry Storage Solutions

  • How Dedicated Toy Storage Transforms Indoor Cat Spaces and Daily Routines

    Scattered cat toys don’t just clutter the living room—they block the next thing you need to do. It starts small: a few toys make the space feel lived-in, maybe even cozy. But within a week, the shuffle builds. What looked like harmless comfort on day one—crinkle balls between couch and scratching post—quickly turns into tripping over a wand during breakfast, nudging a felt mouse aside just to reset the feeding mat, or bending down, again, to yank a toy from under the table before you can vacuum. The difference shows up not in how the room looks after a once-over, but in how much those scattered toys slow down everything: water refills, feeding, cleanup, or even just getting across the room. This is where “cat enrichment” crosses into daily obstacle, and where the right StillWhisker setup moves from nice-to-have to non-negotiable.

    When Toy Scatter Turns Into Real Friction

    It doesn’t hit all at once. Leaving toys out after play nearly always seems reasonable—until you realize how fast they start drifting into the spots you use most. Today it’s a single ball at the bowl’s edge; three days later, the feeding mat is half-buried and the water station is tangled in plush tails. These interruptions change simple chores into layered routines:

    • Every bowl refill becomes two steps—clear toys first, then handle the water.
    • Vacuuming requires hunting down loose toys before the floor can be cleaned.
    • Main walkways turn into a maze, for you and for your cat.
    • You think the reset is done, then spot another toy jammed under a cabinet—one more detour before “finished.”

    In small spaces or multipurpose rooms, every square foot matters. Feeding, cleaning, and play overlap—so even a few runaway balls can multiply the effort, turning what should be a quick sweep into an ongoing, never-quite-done routine.

    Why “Leave Them Out” Doesn’t Work for Most Homes

    Letting cat toys linger looks harmless on day one. By day five, they pile into every pathway. Feeding mats drift, water bowls slide, crumbs gather and hide under felt mice. What started as a little extra “enrichment” mutates into a real, repeat inconvenience by week’s end.

    The overlooked problem: Each time you handle a toy—step around it, pause to move it, fish it from behind a chair—the seconds stack up. You want a quick food top-off, but instead you’re tracking down kitties’ loot, kneeling again, wondering why keeping up still feels like a chore even when the room isn’t visibly messy.

    Small Apartments, Tall Order: How Tight Spaces Expose Weak Spots

    In a studio, the impact is instant. It doesn’t take much—just two days of casual play, and your route to the water bowl is a dotted obstacle course. Mealtime for the cat or yourself becomes a stop-and-clear routine instead of a one-motion scoop and pour. Every lost inch adds up, and toys seem to drift straight toward the worst pinch points—door frames, bowl edges, the one clear space you need for yourself.

    Layers of Reset: How Toy Collection Shapes Your Daily Rhythm

    Home routines show which habits lower the mess and which ones keep backfiring. Toy collection is an invisible fault line: let them sprawl and every refill or meal becomes a mini search party. Round them up after play, and suddenly the mat sits flat, the bowl is steady, the sweep is actually quick instead of punctuated by crouching and reach-arounds.

    • Letting toys scatter means more micro-interruptions, more time lost to searching and rescuing.
    • Collecting right after play means fewer delays, and other chores don’t get hijacked by stray distractions.

    This reset isn’t about an Instagram-clean shot—it’s about coming through your evening without redoing last night’s cleanup, and about being able to handle quick, real resets when the rest of your day piles up.

    The Difference Between “Looks Under Control” and “Feels Under Control”

    A space can look settled at a glance—baskets full, surfaces clear, toys tucked out of sight. But if you’re knee-bending for lost mice daily, or dodging plastic balls with a coffee mug in hand, it’s not actually working. Surface-level tidiness often collapses at the first sign of real use:

    • Toys stashed out of the way just creep back underfoot if the setup doesn’t make returning them fast and almost automatic.
    • The room resets itself—right up until the next burst of play, when toys rocket back to the main intersections of your routine.
    • When storage isn’t near your hands at the end of play, cleanup becomes an all-over chore. Instead of finishing in a minute, you’re circling the room again.

    Order that lasts isn’t about display. It’s about a workflow that holds up when you’re tired, rushed, or distracted—so your routines don’t get derailed by small, repeating interruptions.

    Scenes From Real Home Use: How Toy Drift Interferes With Everyday Routines

    Spot #1: Feeding and Water Trouble

    The cat chirps for breakfast just as you’re about to refill. You nudge a crinkle ball from the edge, scatter kibbles, and fish a toy fish from under the water bowl—plus mop up a fresh sprinkle, all before coffee. The real problem is speed: what should take seconds drags out, again, one toy at a time.

    Spot #2: Cleaning Sidetracked by Stray Toys

    You pull out the vacuum and immediately spot three fuzzy mice lurking under the sofa. Now it’s a round of crouch, stretch, and rescue—sometimes realizing a favorite toy’s been missing for days. If this overlaps with the litter area, everything picks up an extra layer of dust you didn’t ask for.

    Spot #3: Human Traffic and Cat Pathways

    Shared spaces get the worst of it. Balancing groceries or laundry, you hit a plastic ball, sending it skittering into the walkway—or trip into a miniature explosion of toys. It’s more than distraction: little by little, the space feels less yours and more like constant maintenance mode.

    Why a Simple Storage Basket Makes a Real Difference

    The answer isn’t complicated: put a low, open basket right beside the main cat zone. Now, play ends with a quick toss-in—no hunting across the room, no forgotten corners. Over time, the routine builds itself. Feeding and cleaning speed up, the kneel-and-grab cycle fades, and playtime doesn’t leave a residue that sneaks into the rest of your tasks.

    Skip the elaborate bins. The best basket is the one that sits close, feels obvious to use, and lets your hand—and your cat—drop things in without leaving the space. The simpler and closer, the smoother the reset. If you don’t have to cross the room to store toys, you actually will put them away.

    Shared Spaces, Stable Routines: What Actually Changes?

    • Resets get smaller and faster: The whole chore condenses into a quick sweep, not a room-wide search.
    • Feeding and cleaning stop stalling: No more shifting toys every time you reach the bowls.
    • Walkways stay clear: You and the cat both move freely, not around clutter.
    • Daily friction drops: What was an endless battle shifts to a routine that takes about as long as you wish it did in the first place.

    This isn’t about perfection. It’s about less second-guessing, fewer mini-resets, and regaining a little bit of control without adding to your mental load—even after a particularly wild play session or messy day.

    When Toy Scatter Signals a Setup Weakness

    If you find yourself always scooting toys away before every refill—or are spending your evenings on your knees fishing balls from random hiding spots—the setup is showing its real weak point. That pattern, if ignored, becomes an invisible tax on every feeding, every cleanup, every movement through the room. Noticing it early means you can break the cycle fast with one visible structural change, sparing yourself hours of repeat work over the next month.

    The takeaway: Don’t let a surface “clean look” cover up a slow, steady drain on your time. The best indoor-cat setups solve for the next use—not just the next photo or the first impression.

    See more practical indoor cat-life setups at StillWhisker.

  • Why Carry-On Organization Often Fails During Real Travel Transitions

    Every traveler knows this frustration: your carry-on looks perfectly organized on your hotel floor, but collapses into chaos the moment you hit the airport flow. What passes as “order” in your room falls apart the second TSA says “laptop out,” the boarding agent requests your ID, or a sudden gate change sends you sprinting. One neat packing cube on top, two zipped pouches lined up, everything in its place. Then—standing in a moving security line—your passport has vanished under toiletries, your charger is buried somewhere, and retrieving one document drags out into a full-bag exposure. The more you repeat each access—checkpoint, boarding, seat entry—the more you feel the drag of a setup built for looks, not movement. Each extra unzip, each awkward tray transfer, and every slow repacking cycle adds seconds and tension you can’t spare in real transit.

    The Real Test: When Organization Isn’t Enough

    There’s a sharp difference between a bag that looks organized and one built to move quickly through airports. The calm of a crisp layout disappears as soon as the routine breaks—passport control, security bins, or gate announcements. You find yourself kneeling by a bench because your headphones, charging cable, and ID have merged in a pouch, or your most-used items are layered under things you barely need. By the second checkpoint, the “tidy” setup starts working against you. You become the person holding up the line—not because you’re disorganized, but because your structure hides essentials behind the wrong sequence.

    The Cost of Layered Packing

    This is where real consequences show: packing for presentation—main zipper zipped, cubes aligned, cables tucked—creates a snapshot of order, but not usable order. The first real use exposes the trap. Need a charger? Suddenly, you’re digging under a grid of less-used cubes. Want your passport mid-boarding? It’s vanished beneath toiletries or stacked off-sequence in a deep organizer. Each time you reach for a “frequent” item, you have to unstack or re-sort—multiplying small delays into major slowdowns during boarding or security. The more you build for surface neatness, the more likely high-frequency gear ends up hidden under the least-used stuff, turning basic access into repeated, awkward stops.

    Real-World Friction Points (and Why They Repeat)

    Travel exposes design faults quickly—and some friction points become impossible to ignore after only a few routines:

    • Security tray handoff: You pause, hold up traffic, and have to unzip two sections because your laptop or passport sits under “tidy” pouches, not within single-motion reach.
    • Boarding pass check: The line moves forward, but your document is wedged with tangled headphones or sealed behind a cable organizer—making you double-check every pocket just to find one slip.
    • Seat entry: The aisle is crowded, and your charger for in-seat use is three layers deep. You’re blocking the row, apologizing, and repacking on the fly.
    • Gate changes: Your quick-access pocket has become a mixed jumble after one rushed search. Now, to retrieve a ticket, you set the whole bag down and reshuffle—breaking your own sequence again.
    • Repeat repacking: Important pouches move farther from reach with each use; repeated retrieval leaves your bag less ordered—and more stressful—every segment of the trip.

    How Setup Choices Shape Your Experience

    Choices about zipper paths, pouch stacking, and “grab zones” decide if your airport routine is smooth or slowed. When high-use items—passports, chargers, pens—end up layered beneath “nice-to-have” gear, the result is reach confusion: the same item gets lost, even after you repack. Overlapping “essentials” in one deep organizer turns urgent grabs into disassembly jobs. What looks streamlined at rest generates friction when the trip is in motion.

    One Bag, Many Cycles

    Most carry-on structures seem efficient until you run through them three or four times in a real trip. The initial order unravels as soon as you use the bag in sequence: first checkpoint, then gate, then seat access. Each new use means everything “perfectly” stacked gets jumbled in the search for essentials. By the second layover, your main compartment feels like a stopgap, forcing repeated unzips and mini-resets. A bag that looks controlled can still fragment your flow, as every retrieval adds more interruption.

    Building for Movement, Not Presentation

    The fix isn’t decorative—it’s functional. Sacrifice surface neatness for top-layer access. Prioritize outer, single-zip pockets or shallow pouches for highest-frequency items: passport, primary charger, headphones. Allow visible grab zones, even if it means the bag’s surface looks less “curated” when zipped. This adjustment puts what matters right on top—no stacking, no guessing where you need to reach next.

    Make reaching for your passport a single-motion move. Stop digging through nested layers just to charge a device. Seat entry, checkpoint bins, and quick repacking begin to feel natural—even with unexpected interruptions. Instead of returning to the old stress of holding up a luggage queue or kneeling to reset your cables, you move forward without apology or excess motion.

    Tested Tweaks Pay Off Over Time

    After several airport stretches, this shift makes itself clear: repeated use stops feeling like erosion, and starts feeling lighter. The difference isn’t dramatic in one cycle, but across check-ins, gate switches, and seat drops, the “relief” builds. Fewer stops. Less flustered rummaging. Your bag starts behaving as a fast-access tool, not a slow puzzle—especially as the routine pressures build up on a multi-leg day.

    Practical Packing: What to Change for Easier Access

    Don’t just organize for looks. Implement these structure shifts based on repeated-use value:

    • Dedicate outer or shallow pockets only to essentials used in-transit—boarding pass, primary charger, travel documents—nothing else.
    • Push seldom-needed items to deeper areas, avoiding overlap that leads to blocked quick access in line or at your seat.
    • Quit prioritizing “first glance” order. Function trumps appearance: smooth unzip, grab, and close beats a tidy grid every time.
    • Watch for repacking signal. If you’re reorganizing the bag mid-segment, your access flow is off—reset your pouch logic where the drag is worst.

    The goal is a setup that matches your actual travel movement: fast retrieval for repeated checks, no matter how many flights or gate changes stack up. Tune your carry-on’s layout not for an Instagram shot, but for fewer slowdowns in the real, repeat-heavy rhythm of transit.

    Appearance vs. Usability: Closing the Gap

    Repeated travel will show you: visual order hides nothing from an airport’s real pressures. The structure that works isn’t the one that stays zipped and pretty—it’s the layout that stops you from searching, re-sorting, or apologizing for yet another slow retrieval. A carry-on isn’t “right” if you’re still replaying the same hunting-and-repacking cycle each trip.

    Rethink your setup: trust it not for its appearance, but for its ability to move, flex, and keep you ready through the interruptions that define real travel. The solution isn’t theoretical—it’s tested in the patterns of actual transit, gate after gate, segment after segment.

    Find tools and organizers truly built for in-motion travel at CarryOnSupply.

  • Creating Calm Hallway Lighting That Eliminates Glare and Clutter

    Hallway lighting failures don’t stay hidden for long. The sharp glare of a bare LED panel, the uneven pools left by a flush ceiling fixture, the exposed under-shelf strip that looked invisible in the package—all of them show their real limits once daily routines start to test them. Turn the corner with an armful of laundry and squint at the hotspot flaring at eye level. Notice a thin cable threading down to the outlet, slightly out of reach but still distracting in your side vision. Pass through before sunrise, hesitating at the shadow lines pooling in front of doorways. Every pass, each soft stumble, adds up: what began as “clean” now means pinched sightlines, unpredictable brightness, a trip over an awkward support when you’re not fully awake. Weak hallway lighting isn’t a small inconvenience; it’s a repeated interruption, dragging attention exactly where you want none—into the gaps, the glare, the hardware that never quite fades from view.

    Where Minimal Lighting Setups Trip You Up

    Minimal fixtures rarely stay invisible once you need the space to work. That flush LED tray promises a crisp ceiling line, until the exposed diodes catch your eye and force you to change your path. Plug-in lights on the shelf edge look “discreet,” but their hotspots carve sharp transitions as soon as a doorway breaks the beam. Even if you only register a quick glance away or a slight body shift, those micro-adjustments signal a setup that isn’t truly blending into your life. Day-to-day use turns these small misalignments into friction: hands reaching for backpacks in the morning, tired eyes darting from glare on a midnight snack run, one person shifting their stride to avoid the same hard-lit patch near the linen closet.

    The real problems multiply with movement—especially with other people, bags, or just the collision of regular activities. A cable that looked hidden in photos snags on a shoe or hangs one inch too low. “Perfectly placed” once, a fixture now throws shadow bands down the wall or makes a narrow passage feel even tighter. Hardware that promises minimalism draws the eye every time you pass, refusing to disappear when routines demand the space just work. In real homes, the lived friction always outpaces the showroom promise.

    Lighting That Works With — Not Against — Your Movement

    Hallway lighting has to move with you, not stand in your way. It isn’t a question of pure brightness; it’s about consistency—light that fills without shouting, so every walk-through feels neutral, no hesitation. Controlled diffusion changes everything:

    • Flush ceiling panels “disappear” on install day, but the hard downward beam bounces off floors and makes glare nearly impossible to escape in motion.
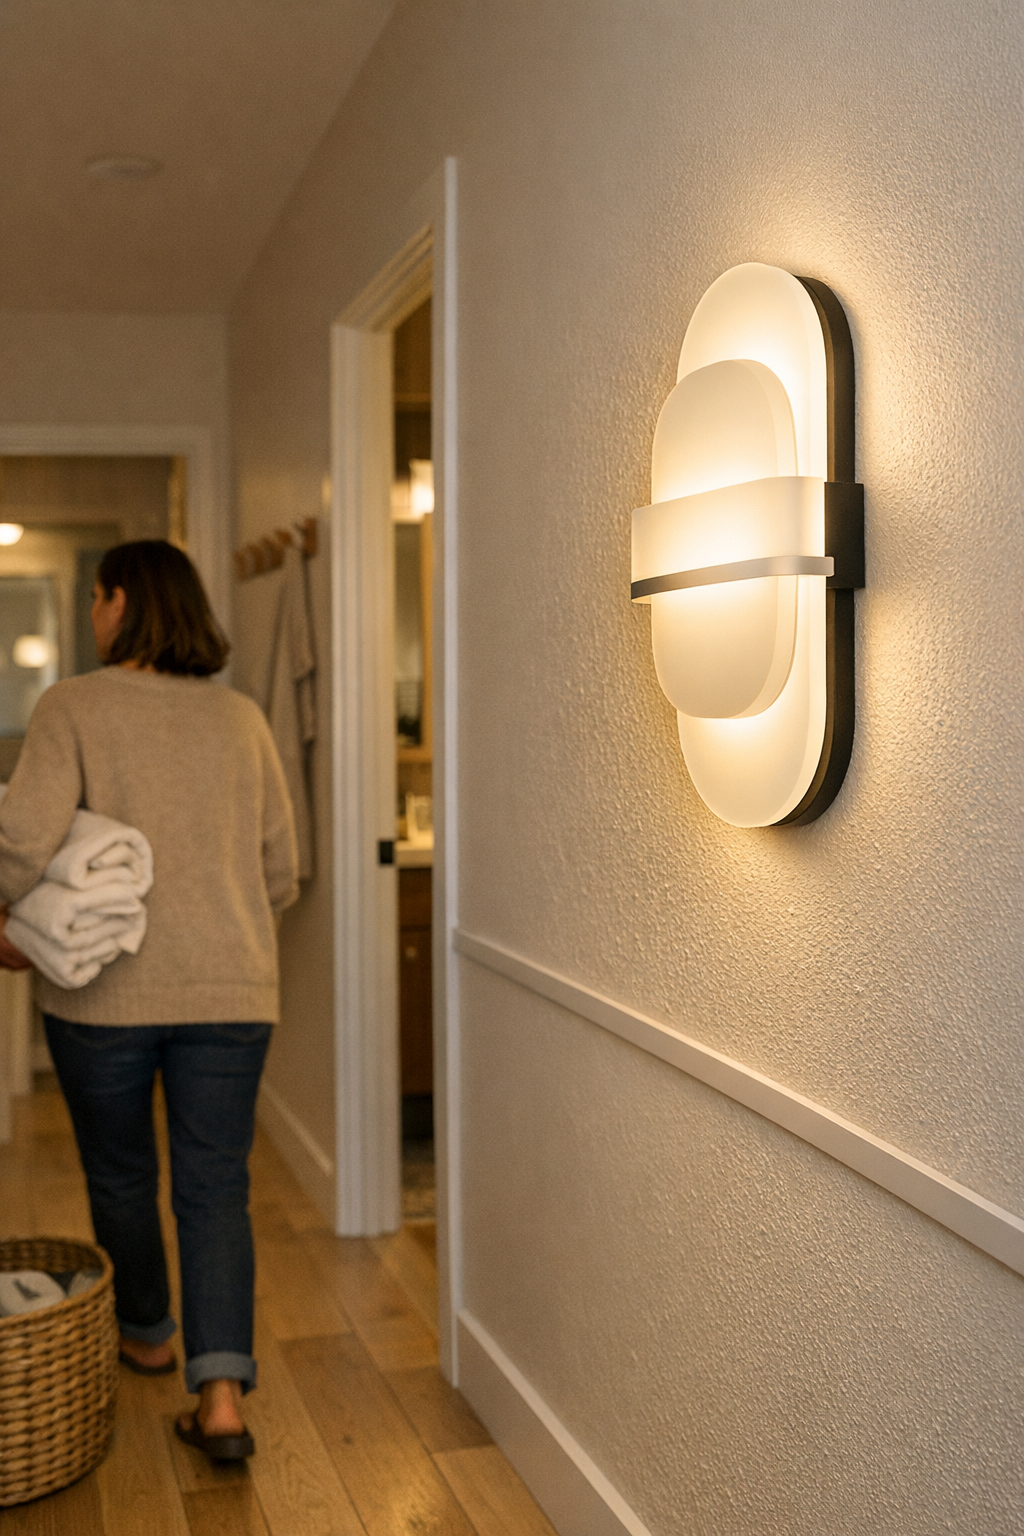
    • Wall-mounted diffusers or under-shelf bars, slightly more visible at first, actually cast an even wash across your walk—softening corners, dissolving abrupt edge shadows, letting you ignore the fixture entirely after a few passes.

    The shift isn’t just theoretical—it’s immediate and gets sharper the more the space is used. One week with a good setup: you stop bracing for eye shock by the bathroom door, no longer pause to dodge a bright spot, and baskets or bags stop catching in the same overlooked corner. When hallway lighting works, you “forget” it—not by hiding the fixture, but by removing the tension that makes you notice where it fails. Unremarkable is the goal: light that fits so well it becomes part of your muscle memory, not a navigation challenge every night.

    Real-World Hallway Setbacks: Where the Setup Fails

    Picture the hallway at its worst moments: arms overloaded, lights needed most, routine breaking down. That exposed ceiling bulb worked fine until you flinch and grope along the shadowed wall, eyes burning from a misplaced hotspot. A cable running along the ceiling skips the tidy look altogether—hooking coat hangers, snagging a child’s sleeve, or just interrupting calm every single time you see it out of the corner of your eye.

    Compact hallways with shelving or multiple doors multiply the problem. Strong beams frame the space exactly wrong—turning “organized” storage into blind corners or giving every reach for a coat a lingering moment of awkwardness. The missed seconds and flickers of discomfort aren’t in the marketing photo, but they become the real cost of an unresolved setup, day after day.

    What Changes Hallway Lighting From Distracting to Dependable?

    Reliable hallway lighting is built with placement, not power. More lumens or a trendier fixture won’t undo practical mistakes. What usually makes the big difference: a low-profile, wall-mounted light run parallel to the hallway’s length, cable-managed in a channel that matches your trim, installed at roughly one meter above the floor. It’s not flashy—it’s a structural shift.

    • Positioning below eye level wipes out direct-glare crossfire; you stop wincing on each pass.
    • Wall wash softens the sharp baseboard shadow and brings dim corners into usable view—night or day.
    • Neutral cable channels ride tight to the wall or baseboard; wires disappear, and nothing interrupts shoes, baskets, or shoulders cutting through.
    • Doorway “blast zones” vanish: the surface stays visible, even, and free of sudden visual drama.

    Give it one month: the nagging shuffle disappears, glances at the lighting drop off, and the old habit of squinting or bracing fades. The fixture no longer asks for attention—because it truly blends with how the space is used, outlasting showroom perfection by simply not getting in the way.

    Practical Observations for Smoother Hallway Lighting

    Don’t Try to Dim Your Way Out of Glare

    Most hallway glare comes from exposed bulbs or direct-view LEDs, not raw output. Lower wattage only softens the problem; it doesn’t fix the underlying angle or intensity. Diffusing shields and smarter positioning almost always deliver clearer comfort than fiddling with how bright the room feels on paper.

    Cable Management Should Quiet the Space

    Unmanaged wires don’t just look off—they drag your eye every time you pass, breaking concentration and adding visual clutter. Closely fitted cable channels, matched to existing baseboards or run behind shelf lines, make wiring silent in daily life. After a few days, covered edges vanish and your focus returns to simple movement, not sidestepping the setup.

    Mounting Height Matters—Aim for Steady, Even Light

    Mount hallway lighting at about one meter above the floor when possible: this avoids harsh sightlines, broadens the spread, and keeps fixtures out of the danger zone for door swings. Especially in narrow passages and with low ceilings, the payoff is less in appearance and more in how routine movement stays relaxed—no dodging brackets, no glancing at the light mid-step.

    The Real Test: How the Space Feels After a Hundred Passes

    The difference between a hallway light that looks good on install day and one that works month after month is always revealed in routine. If the fixture “disappears,” not by hiding, but by never breaking your flow, you know the setup is finally right. Lasting comfort isn’t about technology or perfect cable runs in week one—it’s about designing away those little repeated stings that nobody notices until they’re finally, quietly gone. Only then does the hallway become what it was meant to be—just a part of daily movement, no longer a reminder that something didn’t fit.

    Shop practical indoor lighting and support at LightSupport