
Walk into any laundry room, stairwell, or hallway that “looks” bright, and you’ll still find yourself fighting for clear sight during the simplest maintenance tasks. Because it’s not just the fixture—flush mount, semi-flush, sconce, or panel—that makes the difference. It’s how your setup actively blocks, distorts, or wastes the reliable spread of light you assumed you had, especially the moment a ladder enters the picture. A badly placed ladder instantly fractures visibility, turning a routine bulb swap or cover tightening into a mess of shadow, glare, and guesswork—regardless of how modern or rated your lighting is.
The Not-So-Hidden Trouble with Ladder Angles
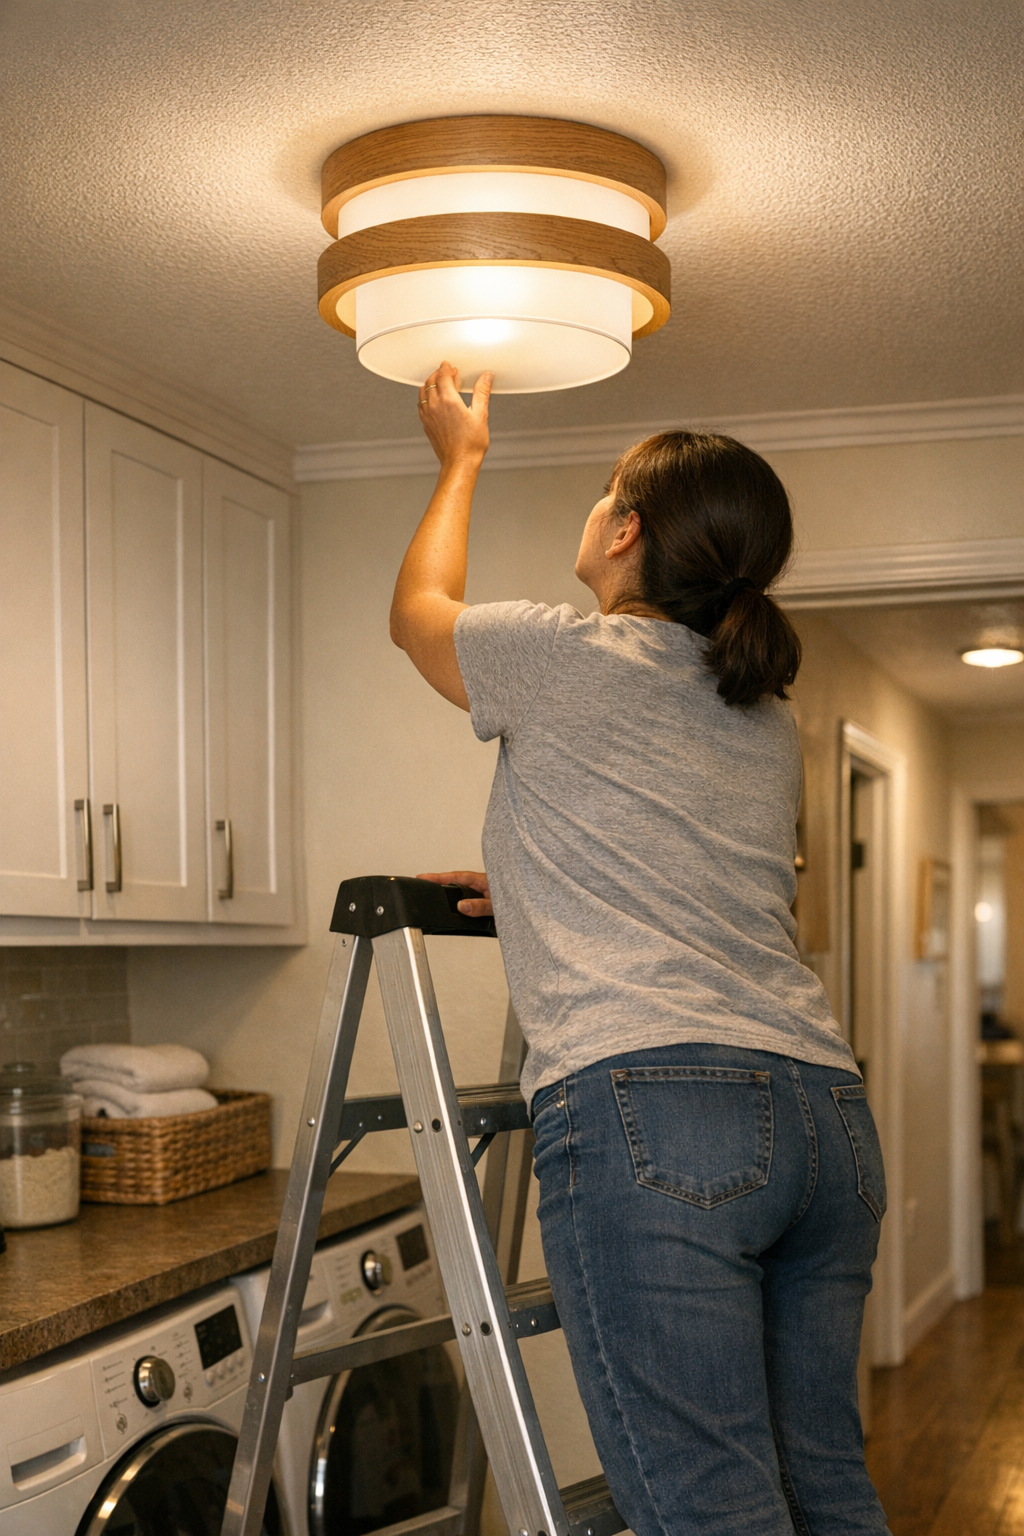
Anyone who’s changed a flush mount in a narrow hallway or reached for a sconce above a stair knows the pattern: the second you position the ladder without checking the light’s throw, your body blocks the best part of the beam. Instead of helping, the fixture turns every maintenance move into a struggle against your own shadow. Small jobs, like cleaning the edge of a glass dome or tightening a ceiling screw, suddenly demand one-handed balancing and blind fiddling. The core problem isn’t discomfort—it’s repeated lost visibility, which raises the risk of missed screws, slipped covers, and low-level tension in every “easy” fix.
Maintenance That Gets Harder Every Time
The first time you wiggle a fixture loose while stretching around a badly set ladder, you might shrug it off. Do this a few times—especially in tight spaces like laundry nooks or narrow bath corridors—and a pattern forms: dropped hardware behind machines, scratched sockets, and awkward work-arounds just to compensate for blocked or lopsided lighting. Bad positioning becomes muscle memory, and before you realize it, you’re solving the same visual problem every time you service your own indoor light.
Where Ladder Angle Shows Up Most: Real Home Scenarios
1. The Hallway That Looks Bright… Until You’re Reaching Up
Hallways seem solved with a flush mount or strong linear ceiling fixture. But try to change a bulb or dust a panel by placing a ladder straight underneath, and you make yourself the shadow, losing the precise focus that’s needed. Fine tasks go sightless; glare ricochets off polished covers, washing out panel detail or turning glass domes into glare spots. Even with technically “good” fixtures, a careless ladder angle can turn an overbright setup into a visibility trap.
2. Tight Laundry Rooms: Shadows Where You Need Clarity
Maintenance in a compact laundry room feels routine until you press the ladder up against a cabinet for support. Now, to reach a flush mount, you’re forced to lean, blocking half the fixture and putting your hands right in the path of the worst glare. Drop a screw, and it’s lost behind the washer. Smudges along the fixture’s edge go unseen. After three or four rounds, you know exactly which movements will cost you: sideways straining, blind reattachment, and habitual shadow problems that never seem to clear up.
3. Stairways and Low Ceilings: More than Just a Reach Problem
Stairwells demand more than safe footing—they force tough choices about ladder placement. With a sconce or semi-flush at a landing, the safest setup for balance leaves your body ghosting over the work area. Your own shadow hides loose wires or missing screws. Miss a footing and drop a fastener, and it disappears into the gap between steps. Stairway lighting should help with those risks, but a poor ladder setup means the lighting actually intensifies mistakes by pulling shadows right where you can’t afford them.
Why Small Adjustments Make Lasting Differences
Shift the ladder’s base just the width of a cabinet door or one stair riser away from the default and the entire work area transforms. In a utility alcove or beside a wall run, sliding over twelve inches might clear enough angle for the light to fall directly on your work—no more casting your own shoulders and face into deep shadow. Suddenly, the entire fixture edge becomes visible; glare backs off; small tasks flow instead of frustrating. That shift makes routine maintenance predictable and eliminates the worst “work blind” risks.
This applies everywhere: entryways, stair turrets, or narrow corridors. If you place the ladder slightly outside the beam’s natural center, hands and head clear the main spread. You see the fastener holes, not your own silhouette. There’s less twisting, steadier footing, and a direct view for everything from bulb replacement to precise fixture cleaning. Repeated jobs, which once felt vague or awkward, snap into crisp, reliable routine.
Tip: Think About the Space, Not Just the Support
The instinct is to anchor the ladder against whatever solid edge is nearest—wall, cabinet, or shelf. But that “safer” spot often steals visibility. Instead, judge where your arms and body will land and give priority to unobstructed light, even if it means shifting away from the most obvious brace. Yes, it can feel less secure, but clear sight and fewer accidents outlast the illusion of stability that comes with crowding up to a wall. Run a test: before climbing, check where your working hand falls in the light. If it’s cast in shadow, adjust the ladder until the beam is uninterrupted—your routine, and the room’s real safety, will both improve.
Repeated Use Reveals the True Setup
No matter how modern the lighting, the wrong ladder angle punishes you on every round of maintenance. Layered bathroom lighting with strong vanity or mirror fixtures? An awkward climb blocks the best output, forcing neck bends, missed details, and a rush through spots where glare and shadow compete. Ceiling flush mounts or wall sconces above stacked bins in a storage corridor? One misstep and you’re operating blind, even in a “bright” room. Durable lighting setups only matter if the space supports repeated, unblocked access—not just visibility during idle hours.
Over time, every repeated workaround—forced stretches, lost or bent hardware, uneven cleaning, incomplete replacement—chips away at the whole point of strong indoor lighting. The proof doesn’t show during a walkthrough; it shows in the clarity (or absence) you feel the third, fourth, or fifth time you’re up a ladder.
Seeing the Room Differently after a Small Change
Even a single shift—offsetting the ladder a foot from where you’ve always put it—turns the entire maintenance math around. Suddenly, your head and arms stop breaking the spread. Your grip steadies. The job goes from workaround to standard task: covers seat evenly, screws align on the first try, and you stop guessing what you can’t see. You’re not just checking a fixture off your list; you’re restoring trust in the room’s lighting to actually work in practice, not just look bright online.
Let each small, deliberate adjustment add up. Over months, this reduces frustration and fatigue, and you recognize which design choices actively support both routine and surprise tasks. It becomes obvious which rooms need a change in fixture—switching flush for semi-flush, wall for ceiling, or adding a task light—because the “well-lit” feeling finally matches with real, unimpaired use.
Field-Tested Quick Tips for Next Time
- Never place your ladder directly in line with the fixture’s brightest output if you can avoid it. Offset by a foot or two and check that the main light falls cleanly onto your hands, not just your face or shoulders, before starting any work.
- Pause before bracing a ladder against cabinets or machines. Step back, run a fast hand check where you’ll need to work. If you see shadow, adjust your angle until the beam reaches your point of action. This single check prevents most repeat maintenance frustration.
The most “invisible” mistakes in indoor lighting come from careless setups: ladders that block, shadows that multiply, bright rooms that still make you work in half-dark. When setup quietly supports your sightline and movement—whether by fixture choice, placement, or just offsetting the ladder—you’ll feel the difference every time you reach up. http://www.lighthelper.myshopify.com