
The hidden slowdown of an “organized” desk
Your desk looks clean—paper stashed out of sight, cables routed behind stands, a monitor riser tidying the surface. But that “organized” upgrade, chosen for its storage or style, might quietly drag down your workflow in ways you don’t see until later. Extra reach to the monitor. Slow, creeping tension in your shoulders by midday. That awkward gap under the riser where documents disappear but never quite fit—forcing a shuffle every time you switch tasks. For workstyles built on frequent paper checks, fast keyboard-to-notebook transitions, and a screen that stays properly centered, an ill-suited riser can turn visible order into a new layer of daily hassle—one that repeats every hour, not just at reset.
Small-clearance risers vs. tall risers: Where the difference lives
Height is not a small detail—it’s the difference between use and interruption. The typical logic is tempting: a tall riser opens up more space, so you can park a laptop or stash bigger trays underneath. But after a week or two, even a half-inch of extra elevation pushes your monitor just above a natural sightline. You start re-adjusting your chair to compensate, sliding lower in your seat, or craning your neck late in the day. The desk looks organized, but feels subtly harder to use—each new item placed under the riser is another reason to reach, stretch, or recalibrate your screen or posture.
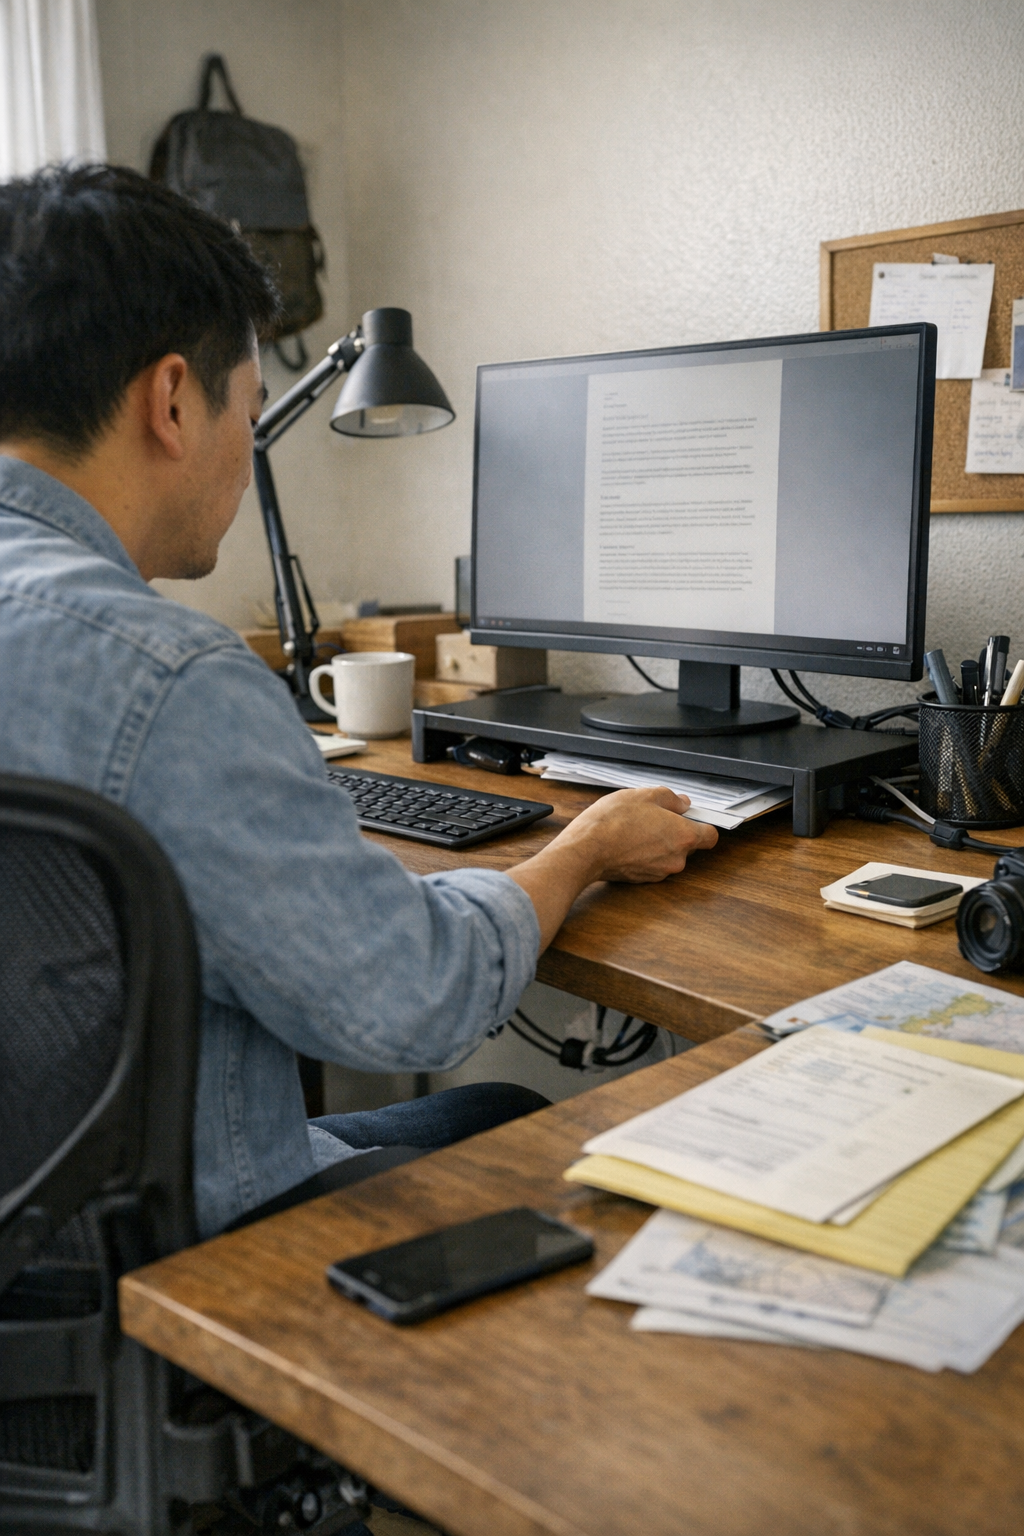
By contrast, slim risers enforce a desk discipline that pays off every day. With just enough clearance for a paper stack or slim notebook, you gain a home for active documents—no juggling, no arc over tall piles. The motion becomes automatic: slide a sheet in; grab a page out. No stack growing so high you have to tilt your monitor to see over it. It’s the difference between a setup that resets cleanly and one that quietly reintroduces clutter under another name.
How friction appears in daily routines
What gets missed in desk makeovers is how minor friction, multiplied, wrecks daily flow. Early days with a new riser, that extra bit of monitor lift is invisible. But by the fourth or fifth work session, symptoms emerge: reaching out farther for a notebook wedged under the screen, wrestling a cable that doesn’t fit cleanly under the riser lip, or hesitating every time you want to drop a note in your main work zone.
The daily signals are subtle but clear:
- Your eyes tilt up, not glide naturally to the monitor
- Charging cables catch when you move devices or shift your keyboard after lunch—one more tug, one more adjustment
- Papers meant to be “at hand” vanish into semi-hidden trays, breaking your focus just to bring them back
Individually, these are small slowdowns. But together, they add up: a desk that looks reset in the morning slowly turns into a series of micro-barriers by the afternoon. What starts as efficiency becomes an invisible tax—on posture, speed, and attention.
What improved when I changed setups
Dropping the tall riser for a thin, low one made effects show up right away. Any document I needed could slide beneath the screen without lifting it out of view. No more hiked-up monitor, no low-key neck ache during lengthy calls, no pause searching for a place to toss pages beside the keyboard. Crucially, workflow snapped back: active papers lived front and center, ready to move in one hand, not locked in trays off to the side.
The bigger reveal came midweek—the day when a new device and extra cable needed a spot. With a thinner riser, threading adapters took seconds; no scraping on the riser underside, no bending plug housings, no re-routing power cords just to avoid knocking over a mug. Clearing the desk to reset for a new round of work stopped being a project and became a three-step move. By the end of the week, I noticed I’d gone days without sliding monitor arms, restacking trays, or correcting a hunched posture mid-session.
Common setup questions, answered
Why not rely on classic desk trays?
Desk trays collect loose papers, but always off to the edge. Each time you grab from a tray, you rotate or stretch, breaking your workflow rhythm. Sliding two hands sideways, shifting your chair, searching for yesterday’s note—all while your shoulders drift forward. A riser with the right under-clearance keeps current pages squarely in your main zone—centered, within natural reach, protected from spills. The real point isn’t hiding documents, but ensuring active materials move in and out of your workflow without thought or delay.
What’s the optimal clearance under a riser?
Half an inch to one inch. That space fits a tight paper stack, a single notebook, or a thin planner—everything instantly accessible. Anything thicker belongs in a drawer, not inside your core reach area. Tall risers, meant for storing large piles, tend to create more clutter and block comfortable monitor height. Narrow it down: only what you reach for every session should be within the monitor zone.
How do I avoid a cable jumble under the riser?
Even compact risers can squeeze cable runs, especially with multiple devices. The trick is mapping cable paths before loading up the desk—plan where charging lines exit, and use adhesive cable clips or sleeves under the desk’s back edge to guide cords before they tangle beneath the monitor. Don’t overfill the space: a little open zone around cables means less drag, cleaner resets, and fewer knocks against loose plugs each time a device moves. Cramming every gap with storage only reintroduces cable mess in disguise.
Real scenes from an improved workstation
Three days with the low-rise stand, and reaching for pens, switching from laptop to notebook, and puling reference documents forward all happened in a single, straight motion—no pause to clear space, no sidestep around a stray tray, no paper jammed under a riser’s lip. My posture held up through longer stints at the desk; the need to adjust the screen or chair barely cropped up. The active workspace stopped feeling like a balancing act, and started working as muscle memory.
Even reset routines improved: end-of-day meant closing the laptop, sliding a small document stack under the monitor, and finding every cable still where it belonged. No combing through trays or managing cables that had snuck into the wrong gap. The desk itself signaled what to do next—a setup supporting repeated flow instead of demanding another cleanup.
When “looks organized” does not mean “works well”
It’s common to finish a deep clean, add new organizers, and still find that your process hasn’t changed—you still reach awkwardly, still lose momentum shuffling between tasks. The key distinction with the right monitor riser isn’t just that things look tidy, but that work switches from one mode to another without hesitation. Documents move in line with your typing. Cables remain untangled after multiple resets. Eyes land right on the screen, not slightly above or below after each session.
Small frictions add up fast. A desk upgrade isn’t proven by its morning appearance, but by whether you stop fighting it in the middle of your actual work. For most, a slim riser is just enough to keep necessary papers and accessories within reach—without raising your field of view too far or inviting another round of reset friction. Less attention to the setup, and more time where the workflow just happens.
The best desk setups aren’t the ones that disappear—they’re the ones that keep your process clear, natural, and predictable, even after a dozen switches and resets in one day. Make each improvement earn its place through repeated, real use—anything else just puts friction out of sight, not out of reach.