
The fourth time you pass a heat gun over a surface, the job reveals its true nature. What started as fast, flawless layering—on vinyl, pipes, or composite plastics—suddenly gets complicated. The gloss that popped after pass one turns unpredictable by pass four. Edges start to ripple. Gloss turns patchy. The surface, once perfect under fluorescent shop lights, gathers small betrayals: a rough spot here, a hairline bubble there. Every finish flaw adds time at the sanding bench, working overtime to erase mistakes that crept in while you tried to move fast and keep up with the rest of the workbench routine.
Early Passes Hide the Real Battle
It’s easy to trust the first layer. Both bargain and mid-range heat guns, straight out of the box, give you steady airflow and set-and-forget control. The job feels predictable—until the real workflow kicks in. Drilling, cutting, battery swapping, and then, by the third or fourth layer, you notice what the specs never tell you: a flawless start doesn’t guarantee a finish you can stand by. Rushing through the first passes encourages carelessness on the next, and that’s when seams turn soft, haze creeps in, and tiny flaws appear in places you already promised yourself you wouldn’t have to sand again.
Layering Under Pressure: Where Precision Slips
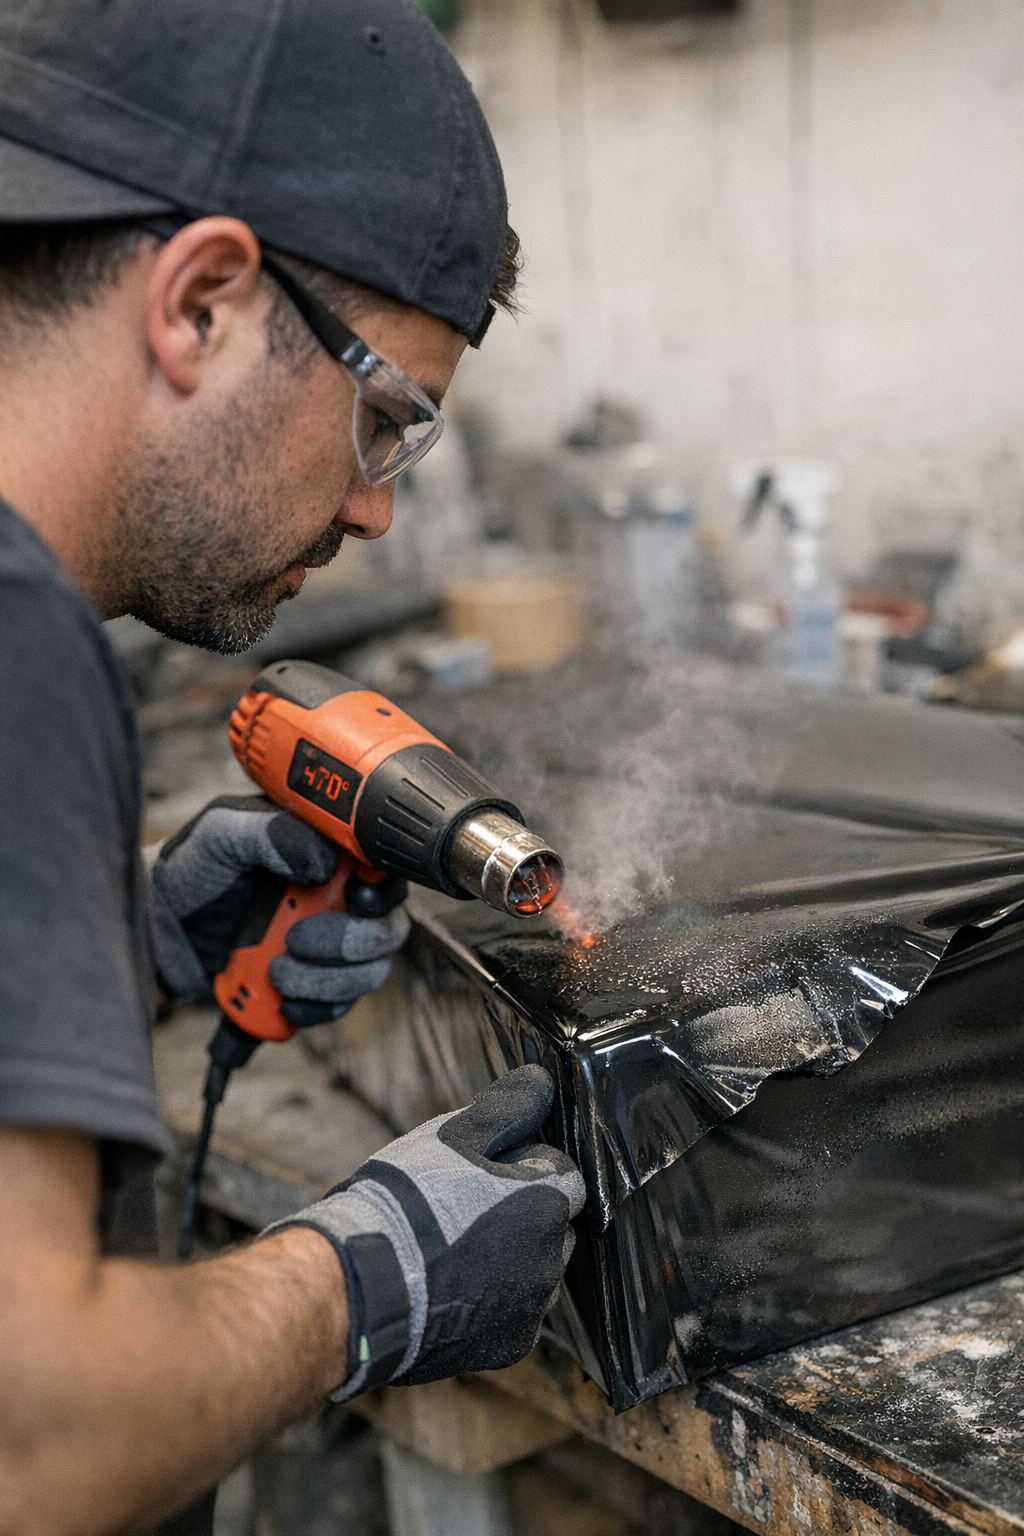
End of shift. You press a new vinyl seam. Yesterday’s panels looked sharp, but today, fine dust clings to sticky edges and that two-second hesitation with the gun leaves an entire corner too soft. Overlapping jobs mean you’re juggling overhead sanding, bit changes, and a queue of pieces all needing the same tool. The real threat? Sudden, careless temperature jumps—especially swings of 30°C or more between cycles—quietly set you up for streaks, micro-bubbles, and stress lines beneath the top layer. They don’t look like faults at first glance, but run your gloved hand along the seam, and you’ll feel roughness that wasn’t there yesterday. That’s the price of rushing in real-world shop conditions, whether it’s cramped job trailers, an unheated garage, or just pushing to clear a cluttered bench for the next stage.
What Happens When You Rush the Heat
Under pressure, it’s tempting to crank the heat to speed things along. You’re swapping dead drill batteries, scraping glue, and stretching the workday. The temptation is real—but the repercussions are, too:
- Blistered edges—raised seams and random bubbles hiding out until your cleanup pass reveals them, ideally before the supervisor does.
- Patchy gloss—a band of dullness or streaked surface where air lagged or the temperature crept up far too fast.
- Sanding purgatory—flaws locked under layered plastic, demanding coarse grit or even a full strip and restart, which ruins flow and morale fast.
Most of the time, these missteps don’t show up until several batches later, long after the chance for an easy fix has passed. By then, workflow slows and the project starts feeling like a lost cause.
Small Adjustments That Actually Save Jobs
The experienced crew learns fast: it’s not about fancy heat gun attachments or spec sheets—it’s about patience and repeatability. Move in tight temperature steps—no more than 20°C at a time—and let each layer settle. It’s a discipline as much as a technique. This rhythm cuts down on rework, keeps seams sharp, and makes end-of-day cleanup less of a chore. When you run a batch of a dozen parts, and your finish sticks, you notice real efficiency: less running back and forth for tool swaps, fewer surprises after cooling, and less fatigue chasing flaws down the line.
Those small, habitual tweaks—steady increments, regular cool-down checks—quietly beat “maximum power” shortcuts every single time. Workflow stays smoother, and you spend more hours assembling or fastening new projects, not revisiting last week’s mistakes.
Know the Signs Before It’s Too Late
A heat gun that’s a little unpredictable is like a dull cutter: by the time you spot burnout, the damage is baked in. What should you actually watch for, before the job’s out of reach?
- Puffed seams and softened lines—corners lose their edge, particularly where overlaps stack up or the temperature gets left unchecked.
- Discolored patches—that off-tint or yellowing that tells you heat isn’t settling evenly, especially nasty on white plastics or light panels.
- Scorched fragments—barely visible at first, but once layered over twice, nothing but a sanding wheel is going to get rid of them.
Pause after each pass. Use the downtime from other tool changes—bit swaps, battery charges—to give each layer a quick inspection. It saves jobs, saves panels, and saves your nerves on deadline days.
Getting Reliable Results, Not Miracles
Great layering isn’t about chasing the latest multi-mode heat gun. It’s about using what you have in a way that fits the pressure and pace of real shop days: keeping temperature jumps in check, respecting cooldowns, and treating each pass as a chance to get it right—not just fast. Every new tool or blade upgrade helps only as much as your basic approach. In the real world, the small habits—tight control, methodical pace, constant checking—are what turn out consistent, professional surfaces batch after batch.
The takeaway: Don’t let the quick wins of early passes fool you. Stay patient, keep temperature shifts measured, and let each layer prove itself before moving on. It’s a discipline, not a shortcut—and over the long haul, it’s what gets you off the sanding bench and back into real work.
For tools and equipment built to handle the real grind, visit Gumboll.