
Why Tight Curves Challenge Your Jigsaw
Have you ever started cutting a tight curve with your jigsaw, only to notice the blade swaying, the tool tilting awkwardly, and the cut line going off track? You’re far from alone. Tight curves are a common headache for anyone using a jigsaw, even skilled woodworkers. The familiar responses—checking the shoe alignment, fiddling with speed settings, or blaming the type of wood—often don’t solve the core problem.
To improve the precision of your curves and avoid frustrating jigsaw tilt, it helps to understand exactly why this happens and how you can adjust your approach for smoother results.
What Causes Jigsaw Tilt on Tight Curves?
A jigsaw differs significantly from stationary tools like bandsaws or scroll saws. It’s handheld, highly portable, and comes equipped with a thin blade that’s supported only at one end. When you attempt to cut a tight curve, the blade naturally flexes because it’s trying to follow the curve but lacks rigid support at the tip. This blade flex leads to a phenomenon where the baseplate (often called the shoe) begins to tilt or rock as the tool loses even, stable footing against the material.
One common impulse is to push harder through the curve, assuming that increased force will help keep the blade on track. Paradoxically, this only makes the problem worse. More pressure causes the blade to twist in its kerf (the narrow slot the blade cuts), increasing the likelihood of the jigsaw tilting or the cut veering from the intended line. At worst, this can cause heat build-up, burning the wood surface and dulling the blade faster.
The Role of Blade Selection
Using the right blade is crucial. Blades with around 10 to 12 teeth per inch (TPI) and a narrow profile—generally less than 1/4 inch wide—deliver better control on tight curves. Their slim width allows for smaller radius turns without excessive flex. Blades made of bi-metal tend to last longer, especially in hardwood or plywood, than standard high carbon steel blades.
Sticking with a generic all-purpose blade during tight curve cuts is a common mistake. Such blades are often wider and more prone to bending, causing the shoe to tilt and resulting in rough, uneven cuts. Investing in the right blade type for your project can dramatically reduce tilt and improve overall cut quality.
Maintaining Shoe Contact and Stability
Another subtle but critical factor in jigsaw tilt is how the shoe sits on the work surface during tight curves. The shoe must remain fully flush with the material. Even a slight lift on one side—sometimes just a millimeter—can cause the blade to wander and the tool to feel unstable.
Woodworkers often describe this as the “ski edge” effect—the shoe rides only on one corner, losing proper contact and causing the tool to tilt noticeably. Maintaining full and even shoe contact throughout the curve is essential for accuracy.
Keep Your Equipment Clean
Small details count. Sawdust buildup, dried glue, or debris on the shoe’s bottom can create uneven contact, increasing tilt risk. Regularly clean the shoe base, especially before tight, precision cuts, to ensure the jigsaw stays level and predictable.
Speed and Patience: Keys to Better Curves
Pushing the jigsaw quickly through a tight curve often backfires, producing blade flex and shoe tilt, along with uneven cuts and potential burn marks. The solution is to slow down before entering and throughout the curve. Allow the blade teeth time to cut cleanly and clear sawdust instead of forcing the tool forward.
If your jigsaw offers variable speed control, dialing it back from its maximum—say from 2,800 strokes per minute (SPM) down to 1,500 or 1,800 SPM—can make the cut smoother and reduce tool tilt. This slower speed gives you greater control, especially on dense or thick materials, and helps the blade track the curve neatly.
Experienced woodworkers often adopt a rhythm: accelerate through straight segments, then ease off speed before and during curves, somewhat like changing pace when driving a vehicle through winding roads.
Real-World Application: Flooring Installation
For example, during a herringbone flooring project involving intricate oak cuts, reducing the jigsaw’s speed by half while navigating tight patterns noticeably minimized blade burn and enhanced cut alignment. The time invested in slowing down saved hours of corrective sanding and refitting down the line.
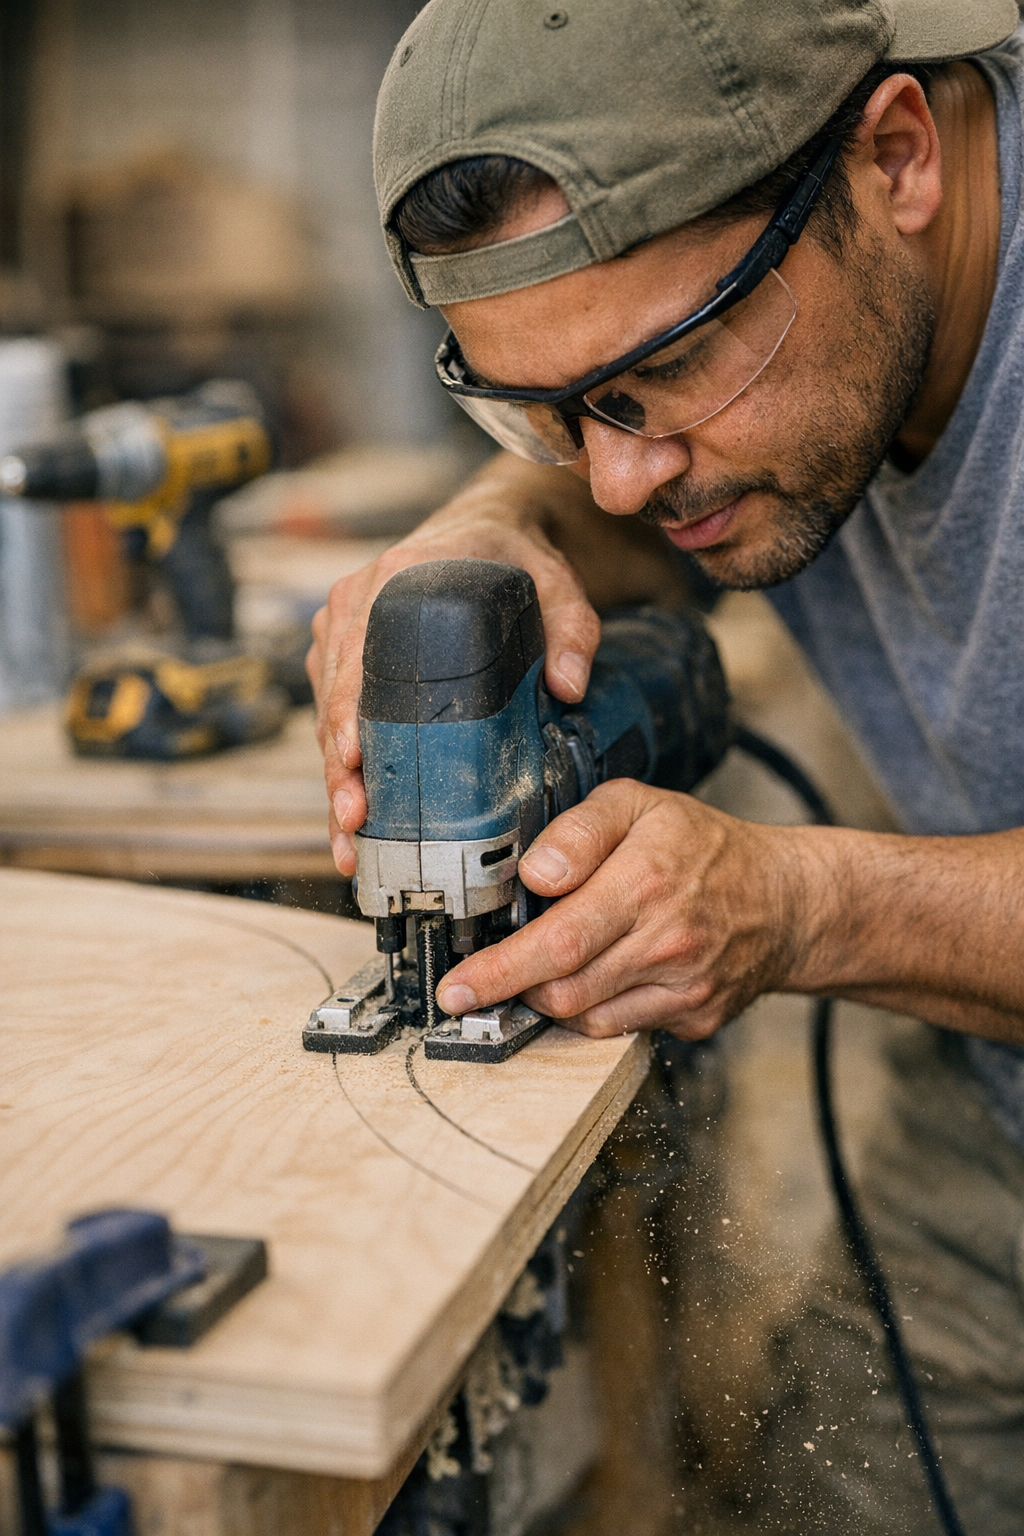
Grip and Handling Technique
After years of hands-on practice, one impactful adjustment is in how you hold the jigsaw during curves. Instead of gripping solely on the rear handle, position both hands closer to the baseplate. One hand can gently steer the front of the jigsaw while the other modulates speed and stability at the rear.
This approach is like controlling a pizza cutter rolling around dough: not raw force but a gentle coaxing motion. Guiding the tool’s nose helps keep the shoe steadily engaged with the work surface and provides tactile feedback when the blade starts to twist or the shoe begins to lift.
It takes a little practice if you’re accustomed to a single-handed grip, but the improvement in control and curve quality is substantial. With both hands engaged near the shoe, you can detect and counteract tilt before it disrupts the cut.
Common Culprits Behind Jigsaw Tilt on Curves
- Blade Too Wide: Wide general-purpose blades won’t hold tight curves well, increasing flex and tilt. Narrow blades under 1/4 inch work best.
- Dull Blades: Dull teeth require excess pushing, which leads to tilt. Inspect blade sharpness frequently, especially after cutting harder woods.
- Forcing the Cut: If you feel resistance and find yourself muscling the tool, pause and evaluate blade condition and technique.
- Loss of Shoe Contact: Heel or side lifting means the saw is tilting. Regularly feel and visually check for steady shoe placement.
Field Example: Stair Riser Fabrication
On a project cutting curved stair risers from MDF, a crew member consistently tilted the jigsaw, causing undercuts nearly 5 mm off the template. After switching to a narrow 12 TPI blade and coaching him to hold the saw with both hands near the baseplate, both his speed and accuracy improved noticeably. No more blade binding or burning, and the parts fit perfectly on assembly.
Refresh Tip: Focus on the Curve’s Moment, Not the Entire Cut
When you anticipate a challenging curve, mentally break down your cut into segments rather than trying to master the whole curve in a single pass. Approach each small section slowly, adjust your grip and speed as needed, then proceed. This segmented mindset helps you regulate pressure, maintain shoe contact, and keep the blade straight through the curve’s most demanding portions.
This approach helps prevent overwhelm and improves consistency, especially on complex shapes or unfamiliar materials.
Final Thoughts: Technique Over Force
Ultimately, jigsaw tilting during tight curves comes down to managing blade flex, grip position, shoe contact, and tool speed—not brute force. With a sharp, narrow blade, a moderate stroke rate, and hands anchored near the shoe, you’ll find your curves cleaner, your cuts straighter, and your overall woodworking experience more satisfying.
Each time a jigsaw cut tilts or wanders, it usually signals that the blade is being forced beyond its capabilities or that your grip is compromising stability. Instead, slow down, check your setup, and guide the tool gently through those tight curves. These subtle adjustments will save material, reduce waste, and deliver professional results.
How often do you evaluate your cutting technique before starting a complex jigsaw cut? Streamlining your approach today can pay off in fewer headaches tomorrow.