Blog

  • Transforming Indoor Lighting: How Placement Solves Everyday Shadow Problems

    You don’t really see a lighting problem the first hour a new fixture goes up—you feel it every morning when a stair edge vanishes in shadow, or when a bathroom mirror turns your shave into a guessing game. The disappointment isn’t in the bright look of a room, but in the daily friction: stumbling steps, squinting at glare, task corners that stay murky no matter how “upgraded” your fixture claims to be. Good indoor lighting isn’t about how much you see, but about how reliably you can move, work, and notice details right where the routine calls for them. The cracks only really show with use—when a room that looked brilliant at install keeps tripping you up in small, stubborn ways.

    Where “Bright” Isn’t Enough: Seeing Past First Impressions

    Flick the switch on a new ceiling light or wall sconce, and the room appears fully lit. But walk through it at night, bend to the bathroom sink, or try to find something on a shelf, and the limits appear. A flush mount may spotlight the center but leave aisles and edges vague. The reflection at your mirror looks vivid until half your face falls into gloom just by tilting your head. The letdown isn’t about total brightness—it’s the uneven sweep, the patchy glare, the corners that stay stubbornly dim even in “finished” rooms.

    This mismatch between how a space appears and how it actually works is hard to ignore, especially when you spot the same trouble spots every time you move or look closer. A hallway lined with what looks like powerful fixtures may still have alcoves and turns that trigger hesitation, proving visible light isn’t the same as usable light.

    Hallways, Stairs, and Edges: Trouble in the Transitions

    Movement reveals the weak spots fast. Stand at the top of a stairway or halfway down a hallway—often, the light feels strong overhead, but leave the landing and each step seems to fade into gray. On stairs, this means not just slowing down but adjusting your stride, hands reaching out “just in case,” especially in early mornings or late evenings. When arms are full, your margin for error shrinks. Even a small blind patch or dim corridor corner creates a pause. Over days and weeks, these moments stack up: more caution, less flow, small delays that grind against the rush of morning departures or quick turns at night.

    Mirror Zones and Grooming Spaces: More Than Just Glare

    Bathrooms are where lighting trouble feels personal. Overhead bulbs promise a “bright” zone, but real use tells another story—chin in shadow, browline washed out. Move closer to shave or apply makeup, and you catch yourself shifting left or right, trading one shadow for another. It’s not a question of style or overall power: it’s about whether the lighting setup lets both sides of your face appear clearly, or if a wall sconce throws light so narrowly that one half always needs a second try. If you’re constantly changing position at the mirror, the light is working against you, not with you.

    Laundry Corners and Work Surfaces: Useful Tasks Require Useful Light

    Laundry rooms and utility counters rarely get lighting that actually helps. Most get a ceiling fixture that blankets the room but doesn’t address the source of the problem—the disappearing front edge of the washing machine or the folding counter that loses detail when you need to spot a stain. Work surfaces live in the shadow zone. Instead of adding another ceiling bulb, targeted under-cabinet lighting or a focused hardwired wall light can turn a half-lit zone into a fully functional space. Otherwise, you end up working around the dim spots: dragging a lamp over, leaning closer, or just guessing if the job is really done.

    How Problems Add Up Over Time

    The real cost of poor indoor lighting comes with repetition. A dull shadow near the top step or one persistent dark slant at your mirror feels minor the first week. But after months, those little delays add up: double-checked steps, extra squinting, habits bent around invisible obstacles. You adapt without thinking—tilting your head, repeating movement, running your hand along a wall—tiny compensations that slowly erode the confidence and efficiency of the whole space.

    Simple Shifts That Open Up the Space

    You don’t have to gut your setup for big gains. Try replacing a glare-heavy overhead with a semi-flush mount that softens but expands the spread—making stair turns fully visible, not just the middle landing. Wall lights placed level with your face at the mirror (not above, but to the side) tamp down shadows, giving a true reflection instead of a guessing-game silhouette. In utility spaces, a run of under-cabinet fixtures does more for folding, sorting, and cleaning tasks than even the brightest ceiling mount ever could.

    Put new lighting to the test: observe shadow lines and glare at your real-use times—before dawn or after dusk reveals issues midday can hide. Adjusting light placement even slightly can make cluttered corners or tricky edges actually usable, not just bright-looking. Pay attention to surface clarity and coverage, not just if the whole room “reads” as lit.

    Testing for Real Coverage: Everyday Checks

    Day-to-day patterns reveal lighting strength or failure. Watch for dark bands under cabinets, faded stair treads, hallway spots you avoid, or work surfaces that flip between visible and veiled with every step. If you’re drawn toward bright patches and avoid certain angles, it’s not just a decor flaw—it’s a setup problem. The living test is: do you find yourself squinting, hesitating, or shifting behavior in the same places, again and again?

    The Problem with “Inherited” Fixture Placement

    Lighting trouble is often a legacy problem: ceiling boxes land where the builder found easiest, not where you need light most. Relying on existing fixture spots means you inherit their blind spots too—shadow trails, awkward glare, work zones that never get addressed. The better measure isn’t just “where does this fixture fit?” but “does this actually create visibility where the routine demands it?” Sometimes a hardwired wall light, under-cabinet panel, or switched-up sconce is what it takes to break the pattern of chronic, baked-in dimness or glare.

    Moisture and Durability: Don’t Skip Damp-Rated Fixtures

    In laundry rooms, shower areas, or anywhere steam creeps in, using an ordinary light is quietly risky. Damp-rated fixtures aren’t just legal checks—they’re peace-of-mind for the long haul, holding up against corrosion and short-lived bulbs where humidity wears everything down. Skipping this step doesn’t show until it fails: rusty hardware, flickering performance, or full breakdown long before you expected it. In high-usage, moisture-prone rooms, durability isn’t a bonus feature—it’s the minimum for lighting that doesn’t let you down after the first season.

    Making Light Work With You—Not Against You

    The sign of good indoor lighting isn’t the initial “wow,” but spaces that keep up. Corridors read clearly underfoot, mirrors give honest feedback, and those small, stubborn slowdowns—hesitant steps, repeated squints—finally fade. The best fixture choice isn’t about chasing lumens or trend shots, but about daily clarity: does light keep pace when your hands are full, or when routines call for speed and accuracy? Don’t just count bulbs—watch for the moments that still frustrate. Fixing the right pain point can do more for daily movement than any claim of “room-filling brightness.” Living with friction isn’t inevitable.

    http://www.lighthelper.myshopify.com

  • Focus on High-Use Car Areas to Cut Down Daily Cleaning Hassles

    Open your car door after work and, at a glance, everything looks in place. Slide into the driver’s seat and you instantly feel grit under your heel. Reach for the charger and your fingers land on crumbs wedged alongside a tangled cord. The console, spotless two days ago, now hosts lost wrappers and loose change, while the edge of your seat is smudged again—proof that even a “clean” car sabotages smooth routines in the spots you use most.

    Almost every car, even the ones you organize obsessively, develops friction zones that outpace the rest: the narrow seat edge you graze each morning, the center tray where cables never stay untangled, and the heel patch that refuses to stay clean for more than a drive or two. These aren’t just minor distractions—they slow you down, hiding small hassles inside every basic action. Each re-entry resets the mess, no matter how recent your last cleanup.

    Why Certain Messes Reset Fast—And Where to Watch for Trouble

    You don’t need a busy month to see how quickly high-contact areas fall apart. After just a handful of commutes and errands—plugging in devices, stashing receipts, sliding out for groceries—your “tidy” interior backslides. The clean dashboard means less when your heel hits a strip of sand or the phone cable scrapes over a sticky floormat. Time and effort vanish not because you missed spots, but because daily motion keeps targeting the same weak points.

    Console Trays and Charging Cables: Organized Until They’re Not

    No cord stays coiled for long in real life. Charging cables collect grit, dust, and splashes while wrappers and keys wedge beneath them. Run the cable to your phone, and every drag picks up what you missed on the floor mat. Instead of smoother charge-ups, you dig through a tangle and feel your setup unravel: snapping cords, lost pens, sticky change—basic actions becoming little wrestling matches. A neat tray at the start of the week morphs into a clutter sinkhole by Thursday.

    The Heel Patch: Permanent Wear Zone

    Every entry brings fresh fragments from outside—crumbs, street salt, playground gravel—all settling just behind the pedals. Vacuum on Sunday, and by Tuesday the patch is rough again. The rest of the cabin can look untouched, but the spot beneath your heel still gives itself away. You may not notice at first, but that roughness shapes your first impression every time you step in, dragging down the feel of the whole interior.

    Seat Edges: The Overlooked Entry Trap

    The driver’s seat edge tells the truth of repeated use. You slide across it hundreds of times a month, bringing in fibers, lint, stray receipts, or remnants of last week’s coffee. These stains and grit lines linger even after most cleaning passes. Ignore that edge and it feels “gritty” under your hand. Focus only on visible surfaces and you miss the friction that makes entry and exit quietly irritating, day after day.

    The “Clean Everything” Trap: Why It Doesn’t Last

    The urge to deep-clean every inch is strong—but it doesn’t survive daily routines. A full detail might leave your dash shining and floor mats fresh, but within days the same touchpoints bounce back with new mess. The areas you “finished” yesterday are the first to reset, because your routine targets them each drive: phone plugging, heel shifting, seat sliding. General cleaning doesn’t block the return of daily inconvenience.

    The real pattern: messes reset fastest where you make the most contact. Over-invest in total interior cleaning, and you’ll still find yourself chasing repeat offenders zone by zone.

    Real-World Friction: When Organization Still Gets in the Way

    Reach Frustration: Hidden Clutter, Same Disruption

    Picture a normal post-work stop. You return to your car with bags, reach for your phone charger—and the cord is trapped under a pile of receipts, dragging floor sand as you pull. Pulled cables knock loose gum wrappers into the tray. What was organized last weekend now slows you down, as every routine grab becomes a re-sorting chore.

    The Cable Path Paradox

    Some charging setups look pristine—until you try using them. Routing cables under the mat or behind organizers means shoes, bags, or coats repeatedly cross their path. Each phone charge turns your cable into a dirt collector, redistributing grit and crumbs between high-contact zones. Clean setups don’t always translate to zero-friction access: sometimes, going for a streamlined look just creates new movement obstacles.

    The Seat Edge Snag

    Seat covers and protectors block some stains but introduce their own drag—edges bunch, dust creeps underneath, or covers slide during entry. Even with protectors, you slide in and sense hidden sand or a sticky line that resists quick cleaning. The edge becomes a “no-solve” problem: covered, it gathers debris; exposed, it stays the first spot to look—and feel—unclean.

    How Focused Cleaning Disrupts the Cycle

    Switch from “make it spotless” to “tackle the friction points.” Real change happens when you target the exact zones that never stay clean or organized, with quick habits like:

    • Wiping the cable path along the console or mount area, so cables stop tracking in new debris every drive.
    • Quick-brushing the under-heel patch before and after regular trips, avoiding the feel of packed grit underfoot.
    • Regularly spot-cleaning seat edges during entry or exit, rather than burying them under slip-prone seat covers.

    These micro-moves outlast full-cabin detailing. It’s minutes spent on the real pressure points—giving you a car that actually feels better to use, not just to show off. High-use areas stay under control, while low-touch zones need less attention.

    Function vs. Appearance: The Difference You Feel While Driving

    A gleaming dash is easy to achieve—what matters more is whether daily actions flow without snag. Reaching for your charger, tossing a backpack on the seat, searching for keys: smooth routines depend on the structure you build around repeat use, not just how ordered it looks for guests. Many car setups feel organized until you start repeating your habits—then, micro-hassles pile up: tangled cords, uneven mats, blocked access. What passes for clean is not always workable.

    The real value? It’s in driving and never having to think about whether your phone cable will drag crumbs onto the console, or whether your heel will grind sand into the mat after three parking lots. Handle the pressure points, and inconvenience stops being a daily feature.

    More Usable, Less Ornamental: Lasting Control, One Zone at a Time

    If you keep losing ground in your car’s most-used spots, stop fighting the whole cabin at once. Notice where you reach, slide, or charge every drive—these pressure points reset fastest, no matter how neat the rest looks. Taming cable clutter, sweeping the heel zone, and checking the seat edge don’t just clean things up temporarily—they change how your car feels on the next re-entry, the next load-in, and across another week’s routines. The payoff: your car works with you, not against you, even as life reintroduces small messes hour by hour.

    http://www.drivewellsupply.myshopify.com

  • How Smart Pet Travel Bags Improve Access and Ease on the Go

    The common letdown: you load up a pet travel bag or carrier that seems perfectly organized in your entryway—until your third stop, when the real test begins. Out of the car, juggling a leash, you need fast access to wipes or a travel bowl, but now they’re buried below towels or wedged behind your dog’s squeaky toys. Supplies aren’t missing; the setup itself is working against you every time you reach in under pressure. What looked efficient at home becomes a tangle of blocked pockets, delayed cleanup, and slow restarts that kill momentum right when your pet needs calmest handling. The friction isn’t the gear; it’s the structure—and it fills your trip with small but cumulative interruptions PawGoTravel was built to outmaneuver.

    What Slows You Down: Reaching, Fumbling, and Repacking

    Pet owners know the pattern: you stop for a break, try to grab waste bags, but end up rooting past towels and half-zipped snacks while your pet twists or tugs at the leash. The wipes you thought were handy? Now beneath a shifting pile, or shoved behind a folded mat. Clean-up blends with comfort—they migrate or mix, so repacking just sends must-have items deeper and resets nothing. Each stop, what started organized slides closer to a slow-motion puzzle. The more you try to speed up—one-handed, eyes on your pet—the more the structure works against you.

    No single moment is a crisis. But add up the wrong zippers, two-handed digging, or accidental dump of the leash to the bag’s bottom—and your “quick stop” leaves both you and your pet agitated. Even a couple missed seconds at each break stretch a trip into a string of recoveries, where you’re reshuffling gear instead of moving forward.

    Order vs. Usability: Where Looks Deceive

    Segmented travel bags and layered carriers look “ready”—pet snacks, cleanup gear, jacket, all in assigned spots. This feels impressive after packing, but most systems surrender to real travel conditions:

    • Wipes hidden under bottles: you’re forced to unload during a mess, growing tension with every misplaced reach.
    • Leash buried deep: actual retrieval means half-emptying a compartment, not a clean handoff.
    • Bowl behind the blanket: every thirst stop stalls, requiring an unpacking mini-event.

    Each delay chips away at calm travel flow. A bag that’s “ready” at the start slowly delivers more fumbles and fatigue—revealing the disconnect between static organization and repeated use. Organizational pride fades when every stop repeats the same small fight with your own travel kit.

    Real Scenes: Ordinary Stops, Repeated Interruptions

    Picture a hotel lobby: your pet alert, lobby noise rising, a bag you counted on delivering a leash that’s now blocked by a harness and half-spilled treats. It’s not just slower; it shoves you into awkward repacking, one eye on your pet, one hand on zippers. At a highway rest stop, a spilled snack creates a scramble—blankets, not wipes, surface first. The wipes? Slid out of reach again, leaving hands searching and patience wearing thin.

    Now swap that with a setup that works like this: collapsible bowl positioned in an exterior pocket, waste bags fixed at the outer edge, wipes within a thumb’s reach from the side. No gear shuffle, no hesitation. You supply water or leashing in seconds, cut through to cleanup, and your pet stays settled—because the pause is as quick as you need. The difference isn’t in appearance, but in how many accidental hold-ups you sidestep at every movement.

    One Small Change: Moving High-Frequency Items Outward

    The small, real fix: migrate wipes, bowls, backup leashes from zipped centers to exterior side pockets or seat-edge organizers. Suddenly, the reach drops from hands-full awkwardness to a near-automatic grab. Repeat stops get smoother not because you packed more but because you now rarely have to fight the bag at all.

    The effect isn’t a dramatic “transformation”—just interruptions slipping away. You pull a wipe without stopping, hand water calmly, leash up before the dog gets overexcited. Travel becomes less about pausing for your bag and more about keeping your pet moving and soothed. Even if the system doesn’t look “interior-decorator neat,” it finally tracks with your stop-and-go reality—helping you recover flow instead of draining it each round.

    Hidden Friction: How Organized Setups Still Create Slowdowns

    Even highly organized bags break down in the field when owner and pet gear blend: that means keys, treats, or waste bags overlap so one tangle starts another. The biggest repeat mistake is packing comfort items—blankets or chews—over or with essentials, so a single grab triggers a full reshuffle. The neat solution, under motion, becomes a source of low-level stress and lost time.

    Over-segmentation isn’t a bonus, either. Too many pockets force you to mentally map where each piece is—or worse, check multiple doors, finding nothing first try. It’s not overload—it’s just an artificial sense of readiness that doesn’t hold up when the clock is ticking and your pet needs you to keep momentum.

    Shaping a Setup That Feels Reliable During Real Travel

    The best pet travel arrangement isn’t about picture-perfect packing—it’s about repeated, seamless reach for just-used items with zero lag or confusion, despite how many stops you make. How does that happen?

    • High-use supplies immediately at hand: Outer pockets, edge slots, or snap closures. No multi-zipper detour.
    • Separate cleanup and comfort zones: No chew or blanket between you and crisis wipes—ever.
    • Owner and pet items never mixed: You know where your keys live; treats and leashes don’t invade.
    • Tested for restart: Structure survives several refits without slowdowns. Packing once isn’t enough—the system must recover itself between moves, not degrade.

    If you’ve tested your own structure and still hit the same block at every stop, the next win isn’t just a neater look—it’s the certainty you’ll grab what you need, when you need it, at any routine interruption. Fewer fumbles, calmer transitions, less wasted motion: that’s travel flow designed not for first impressions, but for the way repeated real use always exposes weak points.

    Find more practical travel setups at PawGoTravel.

  • How Small Plug-In Accessories Transform Everyday Lighting Setups

    The difference between lighting that looks organized and lighting that works is easiest to spot after a week of real desk use. Day one, every cable is tucked, every lamp sits just so, and the power strip waits behind neat brackets. By day five, the cracks show: you reach for a switch that’s wedged behind a stack of books, cables hang visible along a shelf edge despite “hidden” routing, and the area under your hands stays weirdly dim even though the lamp beams brightly. Each minor drag—an awkward reach, a half-tugged plug, a glare hotspot that shouldn’t exist—adds up. What started as clean ends up interrupting the routine, slowing you down every time you try to work or read.

    Where Lighting Setups Meet Everyday Friction

    Every “finished” setup reveals weak points the moment you use it for real tasks. The classic move isn’t flipping a switch easily—it’s a hunt along the cable run, tracing the line behind the monitor and under floating paperwork to find the hardest-to-grab spot. Adjust a lamp just a hand’s width and the taut wire threatens to unplug, or you nudge an adapter only to see the whole cable set jerk into view. What looked streamlined now becomes a quiet source of strain that you solve with workarounds: leaning, scooting the chair, untangling, or just leaving parts semi-adjusted because the fix never feels worth the trouble.

    Tidy on the Surface, Tangled in Practice

    Installation guides and catalog shots sell appearances: no cables draped, neat lines around the desk, supports vanished somewhere below sight level. But the moment you move a light or shift a charger, the system’s limits show up. Duck under the table for a switch, see your careful cable management break as soon as you pivot the lamp, or find someone tripping on what’s meant to be out of the way. That difference—a neat photo vs. a usable workspace—doesn’t show on day one but rewrites every routine interaction over time. You notice the frictions not by looking for them, but by being interrupted by them over and over.

    Hidden Pain Points: Where Most Setups Fall Short

    Power usually arrives wherever a wall outlet happens to be. Extension cords trail quietly behind shelving, adapters sit “out of sight,” but that places switches and plugs just beyond easy reach. A right-angle plug or a sleek bracket may clean up the lines, but it often shifts the problem further from where it actually matters—where your hands go, where devices need to swap, and where you end up needing to stretch or sweep paper aside just to get basic control.

    Two Nearly Identical Desks, Two Very Different Days

    Picture a compact home office desk used by two people. Laptops swap daily, each with its own lamp and charger. The early phase: cables bracketed under the surface, visually perfect. Give it a week. The only setup that holds up is the one with outlets, switches, and lamp pivots placed on the seat side or just beneath the desktop’s front—close enough to adjust without leaving your chair. If the tidy look wins and those points are pushed to the back wall, you get brushes against cords, missed lighting at the desk’s edge, and a daily scramble to flick off a lamp or swap a charging point. The desk looks ready; living with it is a different story.

    Small Changes, Substantial Relief

    Fixing the friction is rarely about adding hardware—it’s about deliberate placement. Moving a power strip from beside the desk leg to directly under the front edge replaced floor-level tangle with cords just above knee height, hidden yet easy to reach. Adjusting the lamp or plugging in a laptop went from an arm-stretch-and-crouch to a subtle hand movement. The setup didn’t become perfect—books still pile up, devices come and go—but the difference was instant: far less interruption, no repeated bending, and easier use even for visitors.

    Repeated Use Reveals What Works–and What Doesn’t

    The first round of “fixes” often just tidy the surface. You only see what actually helps once you’ve used the routine for days. Support hardware matters most when controls, plugs, and lights fall inside the zone where your hands already move. Miss that by a few inches, and the daily routine becomes a sequence of small frustrations—pauses to reach, stands to adjust, repeats of the same workaround night after night. The best lighting supports become nearly invisible in daily life. The worst, no matter how well hidden, are noticed every single time the work gets interrupted.

    What Actually Makes Plug-In Accessories Helpful?

    Permanent fixes—rewiring, hard-mounting—take time, but a smart plug-in accessory can snap the setup into real alignment in minutes. The winner isn’t showy: a slim angle adapter that clears a charger from your elbow’s path, a bracket securing cables along a desktop edge where hands can always grab power, or a relocated support placing light right where it’s needed, rather than just where it fits. Sometimes a shift of a few inches, a better cable run, or moving a switch out from a shadow means the next tweak is unnecessary. Friction drops, routines settle, and it no longer feels like the desk is fighting back.

    The Everyday Checklist: Ask Yourself

    • Are you hunting for the same switch night after night?
    • Does your lamp force you to choose between good light or a clean reach zone?
    • Do charger cables always seem one movement from being snagged?
    • Do the plug-in supports make actual use easier—or just look less messy until you need them?

    Practical Placement: Where Plug-Ins and Supports Matter Most

    Placement wins over appearance every time. Hide every cord, but put the switch out of easy reach, and each interaction stays clumsy. Instead, plug-in accessories and cable supports make the biggest difference when:

    • They sit just under the forward edge of a desk, within the natural seated reach zone
    • Run along the front face of a shelf for fast access, not buried along the back wall
    • Mount to the adjustment side, where hands change light direction or plug in as part of the main routine

    Letting outlets and supports live only in “allowed” wall spots means dailly routines are built around inconvenience. Each scramble for a switch or stretch for a charger is a settled-for hassle you don’t need to accept—a signal the setup needs a deliberate shift, not just a cleaner look.

    Common Mistake: Appearance Over Use

    Turning “clutter” invisible often moves inconvenience into the routine itself: cables out of view, but switches awkward to use; lamp placed symmetrically, but eye-level glare every night; charger socket hidden, requiring full arm extension. The real benchmark is not whether the floor looks clear, but whether each interaction with lighting, controls, and power feels like how you want to use the room—not just how you want it photographed.

    Small Tweaks, Big Impact Over Time

    Lighting support upgrades aren’t about overhauling the entire workspace. Sometimes moving a bracket six inches or angling an adapter to match your dominant hand eliminates a nightly interruption for weeks at a time. The change is easy to miss if you’re only looking for visible tidiness—but visible cables rarely disrupt as much as poorly placed controls or unhelpful support logic. Over months, each adjustment that shortens a reach, clears a line of sight, or stops a cable snag adds up to a setup that works with you, not against you.

    The Difference Between Looking Neater and Feeling Better

    Chasing invisible cables and gallery-ready desk edges rarely solves what matters during actual use. Effective lighting setups aren’t just visually “clean”—they line up with the ways people move, reach, and adjust as habits evolve. If your lighting supports react instantly to hand movement and routine changes, you stop noticing them. If you’re still improvising dozens of little fixes each week, the setup has missed the mark. The real win is not in showroom-perfect lines, but in a room or desk that simply stops slowing you down.

    Explore practical accessories and smarter lighting supports for real-life routines at LightSupport.

  • Why Consistent Battery Power Matters for Blower Performance on Tough Jobs

    If you’ve ever tried to clear out stubborn, damp debris from a cluttered garage or jobsite—long past quitting time, knees in the grit—you know this: on real jobs, battery blowers separate themselves only under pressure. The slick numbers on each box might be similar, but it’s the way a pack holds up in the grind, not on a spotless showroom floor, that makes or breaks your day. When cleanup isn’t just another chore but your last barrier to finally heading home, every dip in power, every scramble for a backup battery, turns into lost time you’ll never get back.

    What Specs Get Wrong

    It’s tempting to grab the blower boasting the highest voltages or biggest amp-hours. Who wouldn’t? But those easy-to-compare specs lose their meaning the first time you force sawdust out from under heavy tool benches or try to blast wet leaves glued to concrete. Set two blowers side by side—numbers matching, reputation solid—and you’ll still see one start faltering when dirt piles up. Pressure drops, the motor tone changes, and suddenly you’re stuck weighing whether to gut it out or start the awkward shuffle of battery swaps. If you even remembered to charge the backup after yesterday’s job, that is.

    Where Weak Batteries Show Their True Colors

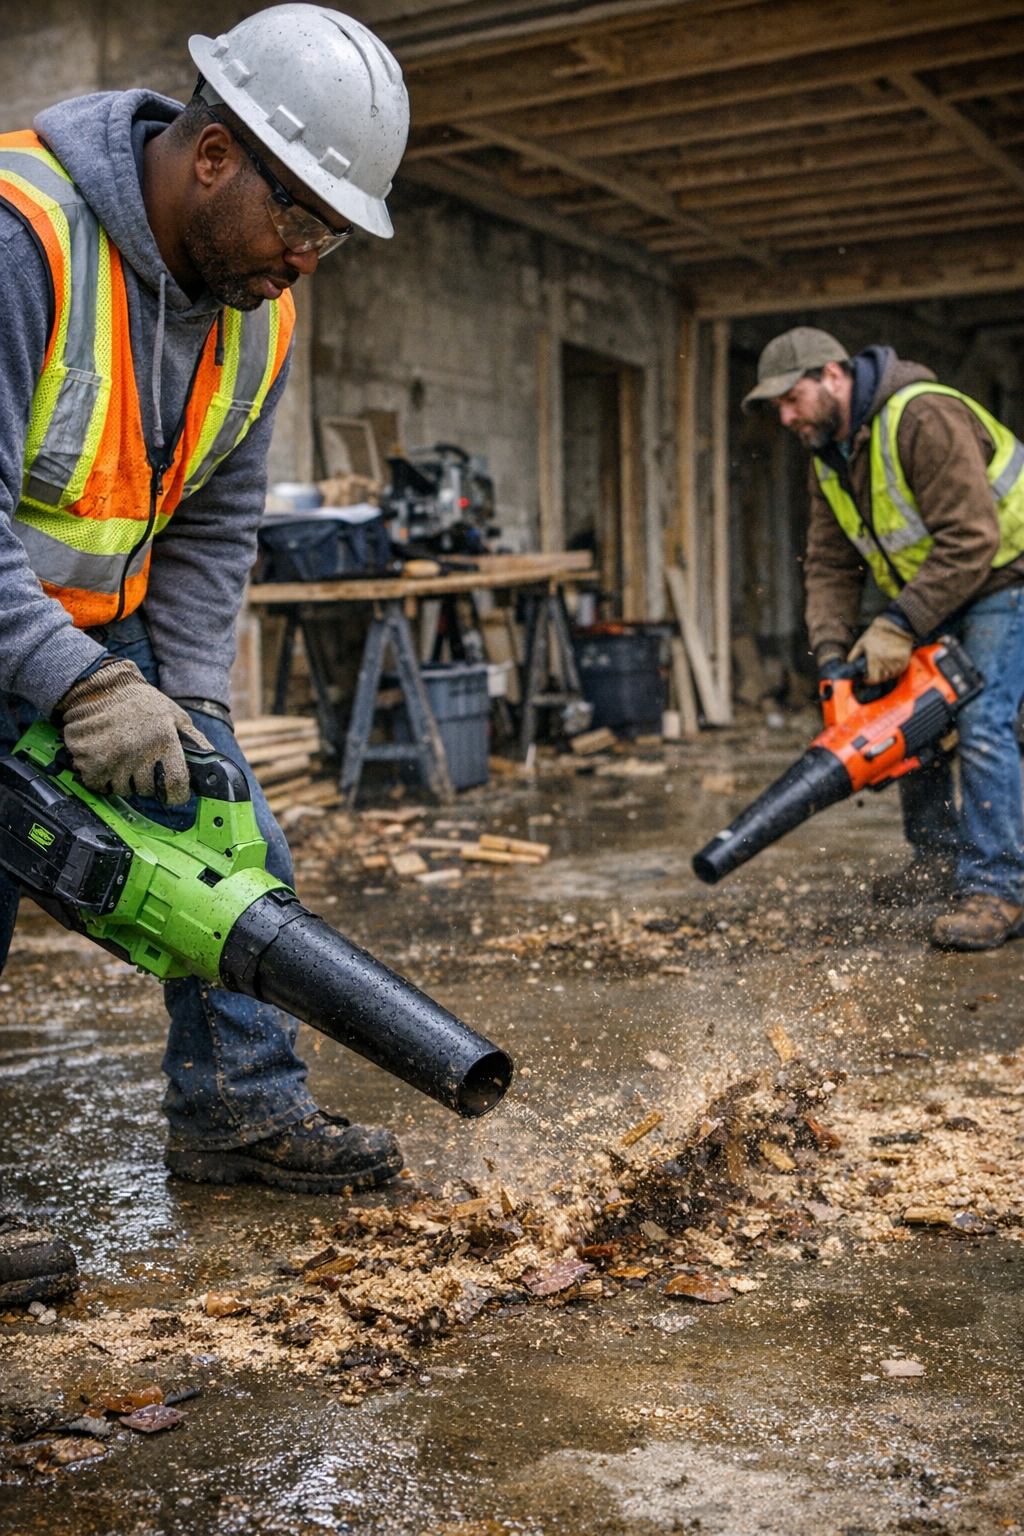
    The top layer of dust on an indoor floor—any blower can breeze through that. But once you’re pushing into corners choked with dense debris, or wrestling with wood shavings packed tight by a rainy morning? That’s when batteries that seemed equal start peeling apart. Lesser packs lose torque fast. Airflow sags unexpectedly. Handles vibrate as the tool strains, leaving behind ragged debris trails you’ll need to hit again. By contrast, a strong, steady battery keeps your pace—not just at the start, but every pass, even when the mess gets real. Instead of fighting the tool, you stay focused on clearing what matters.

    Jobsite Reality: The Breakdown Begins in the Details

    Picture this: remodeling midweek after a storm, with muddy sawdust pressed flat along the walls. You send out two blowers. Both look fine, but by the third stretch, one chokes out—a taunting blink from the battery light. Now you’re detangling battery packs, grabbing half-charged spares, trying to remember which bits of floor you’ve already done. Meanwhile, work rhythm collapses. Missed corners stack up, tools go missing under shavings, and by the time you finish, a fast end-of-day sweep has ballooned into an extra half hour lost. It doesn’t take many days like this before you notice how much those pauses and misfires drain away, both time and patience.

    The Value of Power That Doesn’t Fade

    Switch to a battery built to hold at least 80% power through heavy runs—say, half an hour or more—and the change is immediate. You make each pass without second-guessing whether the juice will last. No sluggish dropoff, no mad hunt for an extension cord, no hesitating at the trigger just to ration output. Suddenly, end-of-day cleanups run as expected: not perfect, but predictable. You finish the run, not wishing you’d brought a third battery just in case, but knowing the corners you cleaned will stay cleared until the next job rolls around.

    Recognizing Battery Fade—And the Price It Extracts

    If your blower’s force starts dwindling—if sound, pressure, or vibration shift before you’ve managed a real dent in the mess—that’s more than a nuisance. Uneven power flow is a red flag for real-world inefficiency. Anyone who’s drilled lag screws into dense studs, run a sander longer than planned, or cut through knotty framing knows this feeling: tools seem identical until they’re pushed. Productivity rises or falls not on big claims, but on quiet, steady output under strain.

    The Everyday Variables That Wreck Run-Time

    Factors the product packaging won’t warn you about: early-morning cold, a jobsite under shade, or Friday’s leftover rain soaking everything you meant to clear. Suddenly your 25-minute battery pack limps through only 18, if that. Older packs fade even quicker, especially in low temps. Real-world performance can shift not by “up to” percentages but by full tool cycles—meaning you’re cutting tasks or switching tools mid-job just to get through cleanup. You won’t find this number on the box: you’ll spot it when your team’s rhythm falls apart on the fourth battery change before noon.

    Equal Specs, Not Equal Results

    Don’t buy the illusion that “identical” means identical. Two 18V, 5Ah batteries—even from the same brand—can deliver totally different days depending on chemistry, cell matching, and how well they manage heat when pushed. By the end of a long cut, or a slow grind through damp sawdust, one battery will still be running at near-full tilt; the other will leave you scrambling for a charger while the jobsite gets messier. It’s these internal differences, invisible at retail, that separate tools you trust from tools that throw off your whole pace.

    Workflow Lives or Dies on Run Consistency

    Jobsite frustration rarely comes from a single big letdown. It’s the steady drip of pausing for underpowered batteries, circling back to re-blow edges, or having to fetch a corded backup in the middle of a rhythm. If a battery’s output stumbles halfway through, you lose not just minutes but momentum and mental focus—sometimes the most difficult thing to recover after a long shift.

    Reliable runtime is more than a convenience—it’s a real skill multiplier in shop routines and daily sweeps. Steady, powerful output lets you stay on task, finish right, and walk off without worrying about tomorrow’s backlog of patches and redo passes. Every time a battery holds its strength, your body gets a break from awkward, repeated effort. The buildup of little wins becomes the real performance edge.

    Put Your Batteries Through the Tough Stuff

    Don’t trust a label or demo video. Try this: whenever you get a new battery or tool, throw it straight at the hard work. Take on a patch of stuck leaves after rain, or clear a mix of sawdust and scraps under a table saw. Watch for not just the initial power surge, but how long force and control stay consistent deep into the job. Those that start sagging early or struggle with heavier resistance aren’t the ones that’ll help you when deadlines mount. Real efficiency is built from tools that run hard and stay steady, not tools that only look good fresh off the charger.

    For real-world gear built for daily grind—not just for glossy specs—visit Gumboll.

  • Why Modular Raised Beds Transform Backyard Gardening Efficiency

    The promise of perfectly organized raised beds fades the first time your real routine collides with their rigid shape. On setup day, the geometry is crisp: neat rows, defined corners, a sense of lasting order. But as soon as you start actually using the space, cracks appear. Swap out a planting plan, bring home unexpected seedlings, or just try to clear up at the end of a long afternoon—suddenly, what felt tidy turns cumbersome. One blocked path or unreachable corner, and you’re left zigzagging through your own setup, working around the very order you created.

    When Fixed Beds Turn Efficiency Into Obstacles

    No backyard, garden, or workspace runs on a single, unchanging routine. My first fixed-bed layout looked logical on the drawing board but unraveled halfway through the season. Rearranging plants demanded awkward over-the-bed stretches. What used to be a path now funneled every trip—hose, wheelbarrow, compost bucket—through a shoulder-width bottleneck. Corners disappeared under stray tools. Cleaning up felt like untangling a maze: dragging a full cart around dead-ends, squeezing sideways just to reach a forgotten rake, doubling back to escape from behind an unmoving wall of wood and soil.

    The same pain points recurred, week after week:

    • That stubborn bed forcing you to navigate around it instead of through it
    • The unreachable side filling with scattered tools and clutter
    • Pathways closing in until even a hand truck struggles to pass
    • Entire wall zones wasted, hidden behind barriers that refuse to shift

    Much of what looks ordered on day one quietly morphs into lost space and repeated detours. Fixed systems mask these scraps of inaccessibility as “structure” while locking your workflow into unhelpful patterns.

    Modular Beds: Layout That Adjusts to How You Actually Use Space

    This is why modular raised beds aren’t just a trend—they solve the friction that fixed designs create. Modular setups accept that routines, plans, and even moods change. The path that worked in April might be a headache in July. Instead of resigning yourself to workaround after workaround, you can shift beds to create a shortcut, open up a tight area, or reclaim a corner that’s devolved into storage—all without dismantling your entire garden or workspace.

    The difference isn’t subtle: modular means resetting your space in minutes, not losing a whole afternoon battling a stubborn layout.

    Moving From Static Rows to Usable Flow

    Visual order can be deceiving—fixed and modular beds both start out tidy. The contrast is in day-to-day use. Last season, when compost delivery ran late, I needed to snake a cart down the main aisle. With modular beds, I unlatched two side panels, widened the route, and cut straight through. Resetting afterward took seconds. The fixed-bed section, though? It forced a three-point turn through flowerpots and corners—if the cart fit at all, it barely made it without scattering soil everywhere.

    It’s not just a once-a-year inconvenience. By midseason, those “just put it here for now” moments accumulate: tangled hoses stuck in blocked zones, overflow piling up in one hard-to-reach patch, every reset dragging out as you maneuver around an unyielding footprint. Flexibility doesn’t just save time—it keeps your setup from turning against your own routine.

    Routine Obstacles: Why Layout Matters More Than Looks

    Real friction shows up during ordinary tasks. Storm clouds build, and you’ve got two minutes to rescue seedlings near the back fence. But with fixed beds fencing off the straight route, your only option is a slow detour—dodging corners, risking a dropped tray. Modular designs let you snap open a panel and create a direct line, saving your plants and your nerves.

    Reach for the hose or a tool mid-summer, and you’re forced to pick your way around beds that were only supposed to organize the space. That “unused” zone in the corner? With a fixed layout, it’s condemned to become a dumping ground for overflow. Modular beds let you expose and reclaim dead corners, reshaping work zones before they devolve into chaos after every big project.

    The Problem Goes Beyond Gardening

    The same kind of setup friction plagues garages, sheds, and workshops. An inflexible bench or storage box pins down rolling carts, forcing awkward shuffles every time you need to clear space. Modular layouts—whether beds in the yard or cabinets in the garage—make the difference between clearing a path in seconds or juggling heavy objects just to get through.

    What Makes a Modular Setup Actually Work

    Of course, the benefit isn’t automatic—it depends on doing modular right. Early on with my own beds, I hit a snag: heavy rain loosened a few connectors, leaving panels skewed and gaps that trapped debris. Quick fix? Upgraded edge supports and tighter hardware. After that, moving and relocking panels was solid and easy, even after repeated changes. No more creeping misalignment or wasted energy realigning every week.

    Some lessons for a frustration-free modular routine:

    • Don’t rush square corners or skip level checks. Those shortcuts show up as headaches every time you shift the layout or roll a cart down the line.
    • Prioritize connector strength, not just speed. Fast-to-assemble, flimsy links can loosen fast. Durable hardware pays off in reliability and smoother resets.
    • Keep the foundation level and stable. Modular beds that teeter or open gaps drain time fixing later—especially if your routine means moving heavy loads or carts through the area.

    Living With a Setup That Works Backwards

    Over time, the “perfect” first-day layout loses its shine. It isn’t the place that’s never out of line by the end of summer—it’s the one you can reset quickly and use without dread. A modular approach means fewer blocked paths, less scavenging through spillover piles in corners, and a real sense of flow that sticks around after a big cleanup or the next planting binge.

    The best setup turns invisible. When you can move, access, and reset without second-guessing your own space, you finally get to focus on work—without fighting the system meant to help you. Visual order can come and go, but a layout that flexes with your actual routine will always feel more functional, less frustrating, and more genuinely yours.

    Ready to trade a setup that stalls for one that actually works with you? See modular raised beds and storage solutions at StackNest.

  • Why Wall-Mounted Outdoor Storage Beats Floor Bins for Small Yards

    Every outdoor setup promises order—until routine use exposes the shortcuts. The most obvious sign your backyard storage is failing: you’re shifting the same tools, hoses, or bins out of your own way again and again, just to walk a clear path. What starts as a clean setup turns into a slow-motion obstacle course: you stack, nudge, and reshuffle, but each pass steals more space. Five minutes to clean up turns into ten. Even returning a single trowel becomes a puzzle. The setup that once looked “organized” now drags against daily movement—reminding you, with every delayed reset, that ‘good enough’ storage only works until real life crowds in.

    When Good Floor Bins Go Stale

    At first, floor bins and deck chests feel straightforward—pile in your yard gear, shut the lid, and move on. But outdoor routines never hold still. Projects shift, weather swings, someone needs a last-minute cleanup, and what you need most keeps crawling to the top—or worse, sliding to the bottom. Suddenly, the only way to grab your main tool is rooting through whatever you tossed in last. Every retrieval becomes a disturbance: to unearth one thing, you push everything else aside, burying what comes next.

    The pattern is predictable. You dig for the hose, but hand tools wedge in the gap, and now the bucket you used last week is blocking the only walkway. You tidy a chest, but by next Saturday, the birdseed, pool toys, and trimmer line have re-shuffled themselves under the weight of “just for now” decisions. No chaos, just a daily tax: each step requires two more. The friction builds—quiet at first, then relentless—and before you notice, even minor resets are a chore.

    The Wall-Mounted Reset: Clearing Floors, Trapping Clutter

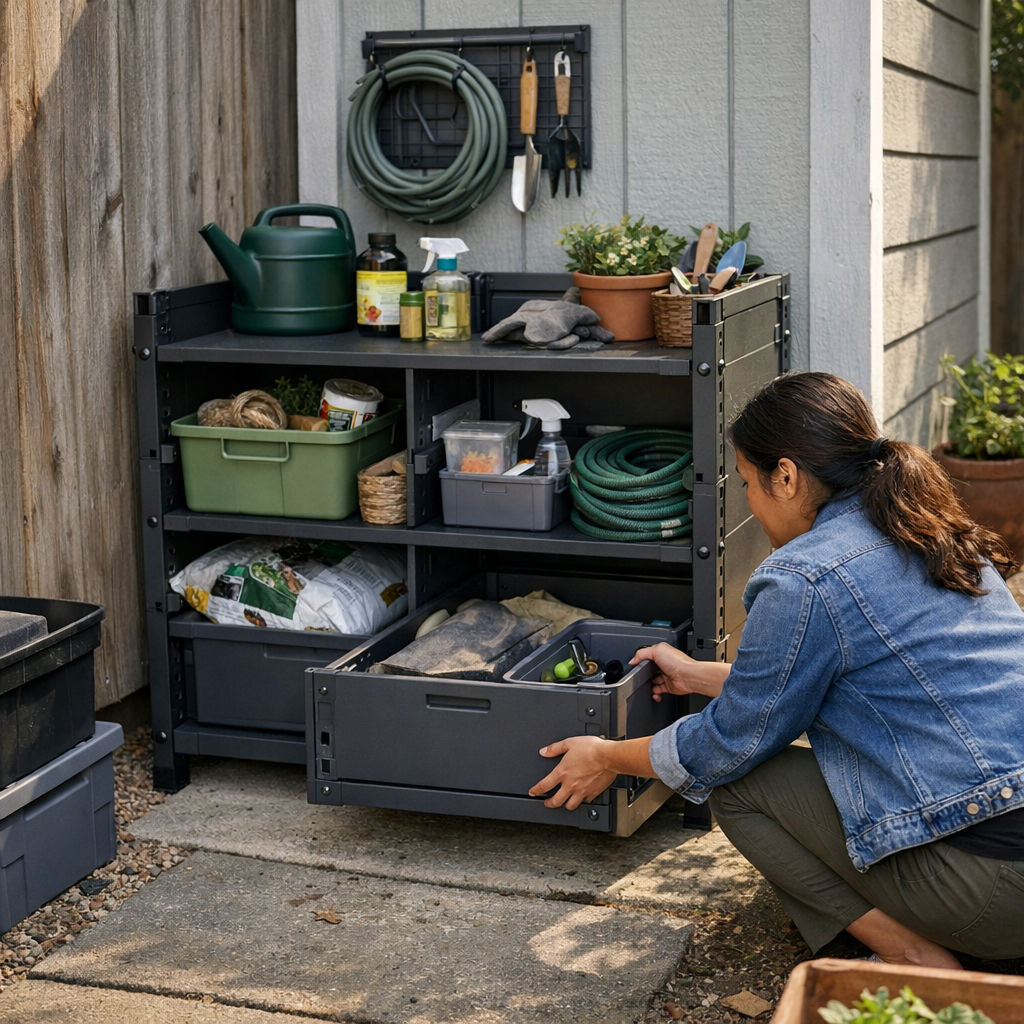
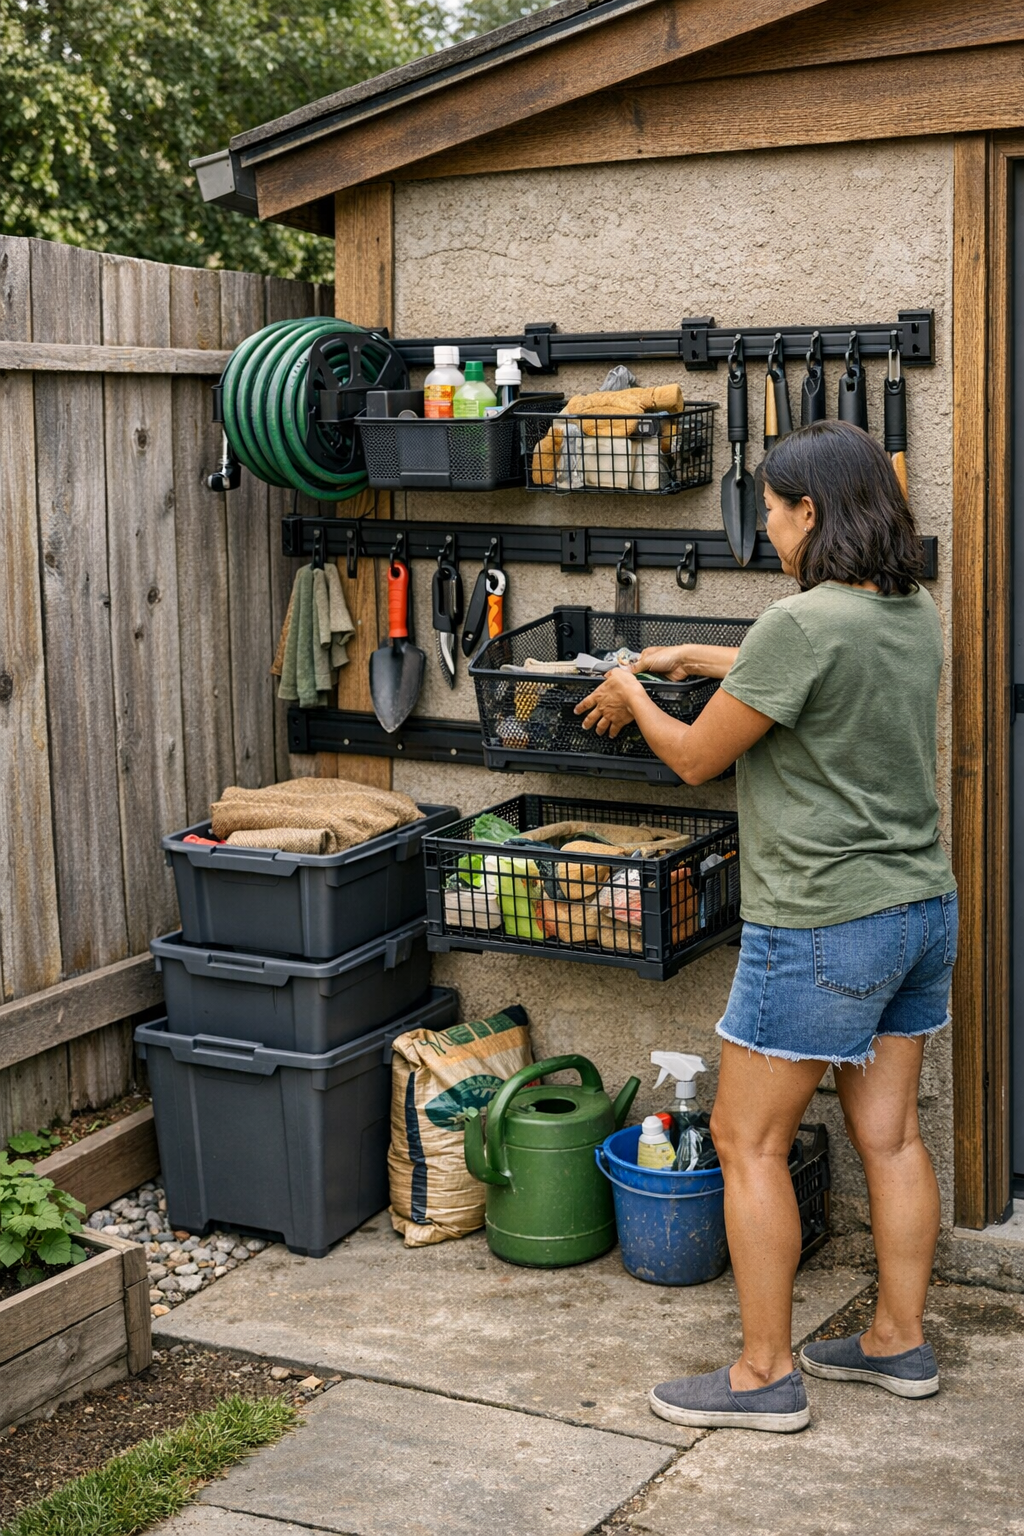
    The first time you lift everything off the ground with a wall-mounted system, the shift is immediate and visible: the path reappears, nothing blocks the doors, and every tool has its place in plain sight. Rows of hooks and rails along your fence or siding claim zero floor space, and even the clumsy items—rakes, hoses, fold-up chairs—hang in reach, not in the way. The biggest difference? You don’t have to hunt to see what’s missing. An empty hook, an off-balance basket, a loose shovel—all stand out on your next pass.

    This isn’t just about gaining square footage: with wall storage, there’s nowhere for messes to hide. Leave a trowel dangling or a hose debate unresolved, and you notice. That brief discomfort rewires your habits. There’s no “I’ll fix that later” pile swallowing your slip-ups; there’s now an unavoidable nudge to put things back in the only place they fit. Resets get faster because you either do them mid-stride—or they stare at you, waiting.

    Everyday Use Pressures the Setup—For Better or Worse

    For garages, side-yard strips, and patio-edges that double as work zones, repeated use reveals weaknesses instantly. The test isn’t whether things fit once; it’s whether they work without daily re-stacking. Say your side gate hosts both pet gear and yard tools, or the patio edge flexes between toy storage and pre-party cleanup. The line between “organizes” and “interrupts” shows up fast.

    Pushed for time? The floor bin setup fails under pressure: you move a bin to grab a broom, now the hose tangles, and the only free corner is jammed with what you used yesterday. Delay your reset and spillover increases—movement slows, clutter lingers, and it’s easier to just leave things out. Stress rises every time the setup turns a five-second return into a pileup.

    Wall-mounted layouts, especially modular rails with varied hooks and baskets, flip this scenario. Each tool is always just one reach away, and returning it takes as long as walking past. No lids to open, no stacks to disturb. Heavy, awkward gear gets a lower hook; lighter, frequent-use items go up top. If something’s missing or misplaced, you know immediately—and fixing it takes seconds, not another round of reshuffling.

    Footprint Reality: Floor Storage Pinches, Wall Storage Frees You

    True space feels bigger when you stop protecting every step. The overlooked win of wall-mounted storage is the preserved walkway: a side-yard that stays passable, a small patio that doesn’t shrink under its own organization. Floor bins and deck chests sprawl outward as gear piles up; corners fill, buckets get marooned, and you end up with a dead zone that only grows as the weather shifts. Overflow becomes easy to overlook until it blocks the door—or your next project.

    Get the setup right, and you break the cycle: no more shifting two things just to return a third, or unstacking in reverse every time you need the hand shears. Wall storage keeps each item accessible and out of the traffic flow. Now, resets are intuitive—one-out, one-back, glance and move—never a rebuild from scratch. No corners forgotten, no routes blocked, no creeping mound that swallows half your Saturday morning.

    Seen in Use: Real Outdoor Corners, Not Showroom Floors

    Think dailies: dog leash, grit scoop, or trash pickers hung low by the back gate—never trampled, never lost in a bin behind rakes and gasoline cans. Sunscreen, gloves, and yard towels live on an open basket; power tools, by contrast, migrate to the garage wall, not the party zone. With everything visible, resets are measured in seconds and the temptation to “just drop it for now” nearly vanishes. Gear comes off the wall, goes back, and unused items don’t drift toward trouble spots.

    But real setups aren’t flawless. Wall systems make every slip-up visible—and that’s healthy for your routine: a basket fills with odds and ends? You notice by Tuesday, not next month. A bulky tarp lands on the wrong hook? It’s out of place, not buried and forgotten. Instead of a crisis purge, you spot mess creep as it happens. Tweaking for season or function becomes natural—the setup reflects how your yard gets used, not just how it looked the morning after assembly.

    Reset Speed: The Real Test of a Working System

    Clutter never explodes overnight—it accumulates with a hundred tiny hesitations. Skip the reset and the next search takes longer. Floor bins mostly “look” organized, but the reality is a paper-thin order that shreds with actual use. By contrast, wall mounts drive immediate feedback: miss a return and it’s glaring. Every minor mess becomes a nudge, not a project deferred to some mythical future when there’s “more time.”

    Still, the best systems flex. Sudden rain or an unexpected yard project might mean a tool lands back on the wrong hook, or a basket acts as a catch-all for a day. But these mistakes surface quickly—they don’t crawl under the lid or vanish until next season. Fixing a slip is a matter of seconds, not sorting layers deep in a bin nobody wants to open.

    Practical Adjustments: Wall Storage Wins in Tight Quarters

    If your outdoor zone is half walkway, half storage, a few habits keep flow strong and friction low:

    • Lower hooks for heft: Heavy stuff—shovels, hoses, or spade forks—hang low so they aren’t falling into upper spaces and don’t turn the floor into a dumping ground.
    • Seasonal shifts matter: As weather changes, rotate what gets prime access. Summer’s soccer balls shouldn’t take up winter’s high-traffic hooks.
    • Designate a temp basket: One small bin as a “waystation” for overflow lets you corral midweek chaos without it spreading. As long as you clear it each week, the slow pileup never claims the whole system.

    The Noticeable Change: Mess in Plain Sight, Not Hidden

    The deepest shift isn’t just what you see—it’s what you do. Outdoor wall storage gives you nowhere to stash clutter where it won’t bother you. That’s the entire advantage. There’s no liberty to let “just for now” piles morph into permanent obstacles. Reset time really does shrink, blocked paths evaporate, and the dread of weekend overhauls fades. The system works because it refuses to hide your habits: you spot what’s off and fix it while you pass, not weeks later in damage control mode.

    Instead of a setup that goes out of style with the first busy month, you get storage that matches the pulse of your real outdoor life. That’s the break in the old cycle: space that actually works instead of pretending to, no matter what a day throws at it.

    See more practical solutions for real outdoor spaces at TidyYard.

  • Balancing Cable Concealment and Accessibility for Productive Workspaces

    A desk can look perfect but still act against you: exposed cables snake across the surface, power bricks spill into every open zone, and the first notebook you move sets off a chain reaction of snags and readjustments. Resetting after each task—the fumbled charger, the knocked pen, the adapter nudged askew—becomes routine if your setup only focuses on looking tidy. Most friction doesn’t show up in the first hour, but the second, fifth, or fifteenth: whenever you shift your keyboard closer, slide a notebook into place, or need to swap devices quickly, it’s the cables and bricks that quietly drag workflow back to the slow lane. Underneath the calm surface is where daily work gets pulled in opposite directions—organization versus reach, surface reset versus real flexibility, hidden storage promising calm at the cost of every smooth motion.

    When organization masks new friction points

    Going all-in on concealment—under-desk cable trays, buried bins, cable sleeves, closed compartments—brings instant relief: the desk feels staged, the mess quietly swept away, and every reset appears easier. But with compact desks or fast-paced routines, the problems just go underground. Reach for a new cable and you’re suddenly searching with one hand under the desk, popping open a container, or dragging the whole tray closer just to swap a charger. The surface might pass the “clean desk” test, but the action underneath starts to cost real time. A reset that should take ten seconds—plug in a laptop for a call, connect the next device—stretches into a minute of awkward reaches and half-closed cable boxes.

    The more you over-conceal, the more your workflow stalls. Clean lines above. Hidden stumbles below.

    The daily reality of switching, sharing, and reaching

    If you share a desk, run more than one screen, or regularly jump between notebook and monitor, these delays double. Say you’re switching from focused work to a meeting, or you need to connect a phone mid-session—if adapters and cables are buried out of sight, you’re crouching, hunting for the right plug, and risking a full surface reshuffle when someone nudges the wrong lead. Under pressure, each step adds seconds—seconds that pull you further from flow. The real test isn’t how a desk looks after a reset, but how often you reset and how smoothly each change actually happens.

    Contrast this with a less-polished but more honest setup: cables run the back edge, bricks sit within view, and every charger swap takes one deliberate reach. Easier access means a busier look—an upfront cost in appearance. But workflow remains unbroken, especially in shared or device-heavy stations.

    Scenes where the wrong setup drags the routine

    It’s not a one-time annoyance—it’s the drag that stacks up: stretching past a cable tray for the third time before a meeting, pulling a brick from its box while your notebook threatens to slip off the shallow surface, or scrambling for a charger as the call countdown ticks audibly from your monitor. Late in the day, the clean look matters less than how often you find yourself crawling under the desk or re-routing cables that keep escaping their sleeve. Real workload exposes these trade-offs quickly. The best intentions—confidently hiding everything day one—give way to slow resistance: the desk fighting back, every reset a minor recalibration rather than a fluid part of your routine.

    Getting the balance right: what worked in practice

    The setups that actually last keep both order and fast access in play. One practical shift: a shallow cable tray mounted right under the back of the desk. It hides cables and bricks from immediate sight but lets you reach plug ends without getting up or awkwardly feeling for connectors. The edge stays flush enough to block the clutter, but you never have to unmount the tray or crawl underneath. After a week, the “where’s my charger” pause almost disappears, and the desk resets cleanly—without stalling workflow.

    Smoother use isn’t about hiding every wire. The goal is lowering visual noise without trading away daily speed.

    Quick reference: real workstation FAQs

    Does hiding cables always make the desk easier?
    No. Full hiding reduces clutter at a glance, but if you plug and unplug several times a day, over-concealment just means more steps and more daily frustration than leaving cables semi-visible and reachable.

    What mistake frustrates most users?
    Forgetting about daily reach. The closed box or distant storage feels fine at first but gets old fast when every swap means crawling, popping lids, and tugging cables loose—organization becomes its own hurdle.

    Is partial hiding a good compromise?
    Yes. Letting cables and brick ends sit just out of direct sight—inside a tray, not buried—delivers clarity plus fast access. This hybrid approach matches real-world workstations that see frequent device swaps or shared use.

    When does a neat desk actually feel better to use?

    A neat desk works when resets are automatic: you clear space for a notebook, switch power to a monitor, and stand up without snagged feet or cables dragging off the edge. The benefit isn’t just in a morning surface snapshot—it’s by the time you’ve reconfigured for the fifth or fifteenth time that week, and each move lands right. Organization should drop friction, not delay it. If your setup feels ready for the next use, not just the next glance, the balance is right.

    The desks that really perform aren’t just about hiding work—they’re tuned to reduce interruptions, not just beautify them. When pressure builds, sharing ramps up, or resets multiply, look for systems that solve for access and order. Calm enough to keep you settled; ready enough that you don’t hesitate at the next switch.

    Explore the full WorkBasic collection

  • How Proper Tall Bottle Clearance Transforms Entryway Storage Efficiency

    Stand in any real entryway and it’s instantly clear: one tall bottle left sideways, and the “organized” zone collapses. You line up shoes, slot bags, hang a jacket—then a reusable thermos or umbrella lands with nowhere to go. The bench turns into a bottle parking lot. A cubby meant for shoes only half-contains a rain boot, which spills into the walkway. Each pass through the threshold—especially with other people trying to get out the door—becomes a shuffle, a pause, a quick decision to drop items wherever they’ll balance. What looked “neat” on move-in day turns unpredictable after a single morning in motion. The promise of a reset fades: one tall item pushes everything back out.

    When Vertical Clearance Turns Into Daily Friction

    Most entry benches and cubby racks claim to “catch it all”—until you actually use them with real gear. Watch it happen: you return home, drop your bag, and find your hands full with a tall bottle that won’t fit upright. The storage space that seemed generous on paper becomes a design mismatch—a half-inch too short means bottles fall sideways or get left balancing on the bench, inviting the next pass to knock them loose. You spot the signs: water bottles tilted, umbrellas at an angle, a sideways boot nudging into the path. The zone didn’t fill up; it got blocked. Every repeated attempt to tuck things away leads to floor overflow or a slow domino of “temporary” placements. The entry’s efficiency isn’t lost to one big mess, but to an unending series of micro-corrections: shifting, restacking, picking up what slid out of place.

    Real Scenarios: Daily Movement Reveals the Weak Point

    The limits of a setup show up fastest when routines collide. Picture these repeated-use standoffs, each exposing where vertical clearance falls short:

    • Two departures at once: A lunch bottle, taller than the shelf, sits on the only sitting spot. Now anyone tying shoes or grabbing a bag gets boxed in—one awkward bottle dictating the order of movement.
    • Returning at night: From a distance, the space looks put away. Up close, you see the truth: bottles propped, umbrellas wedged between baskets, a rain boot sticking out. Everyone sidesteps a pile that technically has a “home,” but only if you jam items in at an angle—and no one does, because it takes too much fiddling in real time.
    • Threshold squeeze: A stroller interrupts a tight entry path, and because a water bottle won’t store upright, it rolls into the gap. The walking line gets hacked down to a sideways shuffle. A little height mismatch, multiplied by shared routines, turns a wide entry into a bottleneck after a single busy run.

    Small failures become systemic: high-use items overflow into the walkway, clog resets, and spark tiny negotiations—does this bottle go back on the bench, onto the wall rack, or just get left by the door again? What seems like laziness is usually a setup that can’t handle tall, repeat-use items alongside the usual entry haul.

    Why “Looks Organized” Isn’t Enough in Transition Zones

    Entry storage that looks perfect after a deep clean rarely faces real traffic. Actual transition spaces flex with routine: kids drop muddy boots, someone brings home an oversized thermos, rain gear lingers after a storm. If the cubby or bench isn’t built for the tallest items, mess is secondary. The space simply doesn’t match the lived flow—forcing awkward splits, sideways placements, backtracking to get everything clear. The first clue isn’t always visible chaos, but a cascade of small, inefficient moves: a bottle left half-off a shelf, a bag wedging a boot, an umbrella always on the floor. In shared use, those double-handled routines add up fast—and what looked like storage becomes a daily puzzle to “fit” things instead of actually clearing the threshold.

    One Small Change: Building Enough Height for Tall Items

    The fixing principle is blunt but effective: match your vertical clearance to your tallest, most frequent threshold item—not just shoes. In one crammed household, removing a low shelf and adding a single 14-inch cubby for bottles and umbrellas snapped the space back into alignment. No more tilting, stacking, or pausing to play bottle Tetris. Routine return—two people, mixed gear—changed instantly: upright storage, one-motion resets, and no bottleneck at the bench edge. That slim margin of height absorbed real life: summer bottles, winter boots, umbrella grips. Side clutter shrank; the visual scramble disappeared. It wasn’t a transformation you notice once—it was the friction that stopped happening every single day.

    Small Real-World Tips for Smoother Return Flow

    • Check your fit before redesigning: Size vertical storage for the tallest bottle, umbrella, or boot you use weekly. Storing for “average” size repeats the same friction loop.
    • Build for “overflow” peaks: Extra height works as a buffer for seasonal gear—bigger bottles in summer, umbrellas during wet weeks, taller boots after snow. Underestimating peak use equals daily corrections.
    • Test with real rushes: Simulate two people moving through at once. If items snag, need to be angled, or interrupt the path, tweak the setup—not the routine.

    From “Looks Neat” to “Works On Repeat”

    Long-term function isn’t about picture-perfect staging. In every used threshold, the true test is how easily tall, odd-shaped repeat items actually flow back into place. The cost of poor clearance isn’t just visible mess, but the drag of constant course-corrections—tilting bottles, re-stacking gear, stepping around edge clutter—built into daily entry and exits. A system that absorbs tall everyday items in a single, upright movement makes the whole zone “feel” right, with less thought, less delay, and fewer complaints. That’s what makes organization stick—not one big change, but the little frictions you no longer deal with every day.

    Explore more transition-smart storage for real entryways at Betweenry.

  • Why Router Base Plate Flatness Is Crucial for Consistent Cuts

    The difference between a flawless routed edge and a botched one is rarely dramatic—until you’re the one re-sanding for the third time in a cloud of dust. That moment when your arms ache, your patience thins, and a tiny, almost invisible problem—a warped router base plate—wrecks what should have been a clean, fast job. The longer you work, the worse it gets. One minor deviation at the router base turns into seams that won’t sit flush, edges that look “off,” and finish quality you just can’t rescue. You catch yourself thinking, “Wasn’t this supposed to be a simple run?” Only then does the true cost of a bad base plate come into focus.

    Where Flatness Fails You: The Trouble Isn’t at Setup—It’s in the Real Run

    On the assembly bench, every tool looks ready. The router base is snug, the screws sit flush, nothing obvious dips or bows. The first test passes—usually on forgiving pine or plywood—give no sign of trouble. The catch comes later, midway through a serious job. Working a full-length maple slab, you notice an uneven drag. The router dips slightly, pressure shifts. By the end, a gentle wave shows up along joints that were supposed to stay dead-on flat. Suddenly, the line between professional-grade output and amateur repair work is as thin as the base plate gap you missed.

    What makes this friction even sharper: you don’t see it coming. At first, it’s an oddly stubborn patch of resistance or a barely visible dip. Soon enough, it shows up as steps at seams, faint burn marks where pressure dropped, wavy profiles where your edge should stay crisp. Sanding hides some of it, but repeat the run a few times—on doors, on fascia, on the face frames where details matter—and the flaws multiply. Flatness isn’t a theoretical spec; it sets the standard for whether you trust the next pass, or grit your teeth and reach for the filler.

    Small Warp, Big Consequences: How Wear Snowballs Mid-Project

    No shop tool stays factory-perfect. A slight curve in the router base—a gap thinner than a business card—doesn’t announce itself boldly. But every pass forces you to chase the correct angle, adapt your grip, and work against the grain of your own muscle memory. After hours on a big build, that 0.2mm warp shows up in the fit of every seam and the hours lost to rework. What starts as subtle “grabbing” and odd chatter becomes a pattern: the first door edge looks decent, but consistency breaks down, and your final pieces look like they swapped hands halfway through production.

    It isn’t just pride at stake—those incremental misalignments mean more returns to the sanding bench, eating shop time you needed for the next job. Worst case, a ruined edge means tossing a finished panel and burning both material and profit. What should be routine control turns into an exhausting guessing game, just to keep corners square.

    Why Router Base Plates Warp: Shop Realities, Not Just Bad Luck

    The lifecycle of a router base is brutal. Hands constantly torque screws tighter, plates take bumps from benchtop drops, and heat cycles swell and shrink edges over time. Plastic bases start to arc around screw holes after a few dropped tools; cheaper aluminum plates can bend beyond recall with one wrong knock. The visual check offers false security—the plate looks clean and the screws are tight, but the next time you route, the tool rocks ever so slightly, rhythm breaks, and shallow cuts deepen unpredictably. By the time you discover the fault, it’s usually too late—the seam is split, or a deep burn has chewed through your maple edge grain.

    Field Test: When Subtle Defects Show Themselves Under Pressure

    Consider running a 3/8” round-over across a thick maple countertop. Initially, both your go-to router and a cheap backup feel identical—until a few feet in, and suddenly a tiny ridge appears near the midpoint. On closer inspection, the suspect base plate still looks fine. The evidence is only in the cut—a lip that no amount of pressure smooths out, and sanding can barely disguise. Multiply that by a set of cabinets, and you realize you’re sanding more, working slower, and still not matching the reliable results your best base always produced.

    The Straightedge Habit: A Shop Check That Actually Matters

    The single most practical shift: check your router base with a straightedge before each big job—or after any drop, overtightening, or sudden stall. Lay the base plate on a dead-flat surface—the cast iron saw table, a scrap of thick glass—and sweep a metal straightedge across its corners. If you see daylight, especially more than 0.2mm, take action. Swap the plate, or set it aside for rough work. This isn’t fastidiousness; it’s a method to prevent unpredictable, costly rework, especially when deadlines and finish quality count.

    Shop-Worn Advice: Spend Small to Save Big

    Swapping a $25–$40 base plate stings less when you compare it to hours spent dressing seams on $100+ hardwood panels. Over months of production, the minutes recovered add up—less sanding, fewer rejected edges, more consistency across batches. In straightforward terms: a cheap base costs more in late-night rework and wasted materials than a replacement plate ever will.

    Saving Perfection for Where It Counts—But Never Ignoring Flatness

    If you’re doing demolition, quick rough-outs, or router work that’ll be buried under trim, a minor dip in the plate won’t ruin your week. But run architectural mouldings for repeat builds, or dress visible cabinet faces, and base flatness is non-negotiable. Smart shops keep a “runner” plate for finish jobs and a scratched, slightly warped spare for construction-phase mess. The distinction between the two? Visible results, not a clean spec sheet.

    Trouble Signs That Signal It’s Time to Inspect

    • Edges that suddenly dip or gouge during a run that started clean
    • Needing extra arm pressure to keep the router tracking true
    • Unexpected chatter, burn marks, or “catch and release” stalls
    • Panels that refuse to mate flush, despite careful fitting

    Especially in shared shops or high-traffic benches, a base plate’s true condition can change overnight—loosed screws, a single drop, or a tool that “walked” across a vibrating table. A two-minute check spares hours spent hunting the root cause of unpredictable, blunted results.

    The Payoff: Fewer Surprises, Smoother Workflow, Cleaner Results

    Achieving repeatable, professional work isn’t about chasing perfection on every tool or spec. But treating base plate flatness as essential—right alongside sharp bits and steady feed rates—can avert most headaches before they start. An extra glance with a straightedge lands you more predictable cuts, less fatigue from over-correction, and the sort of workflow where mistakes aren’t revealed at the finish line. It’s not a glamorous habit, but it’s one of the few that pays itself forward on every single job.

    Find more practical gear for router setups and shop work at Gumboll.