Blog

  • Why Reinforced Hinges Are Essential for Heavy Door Racks in Busy Homes

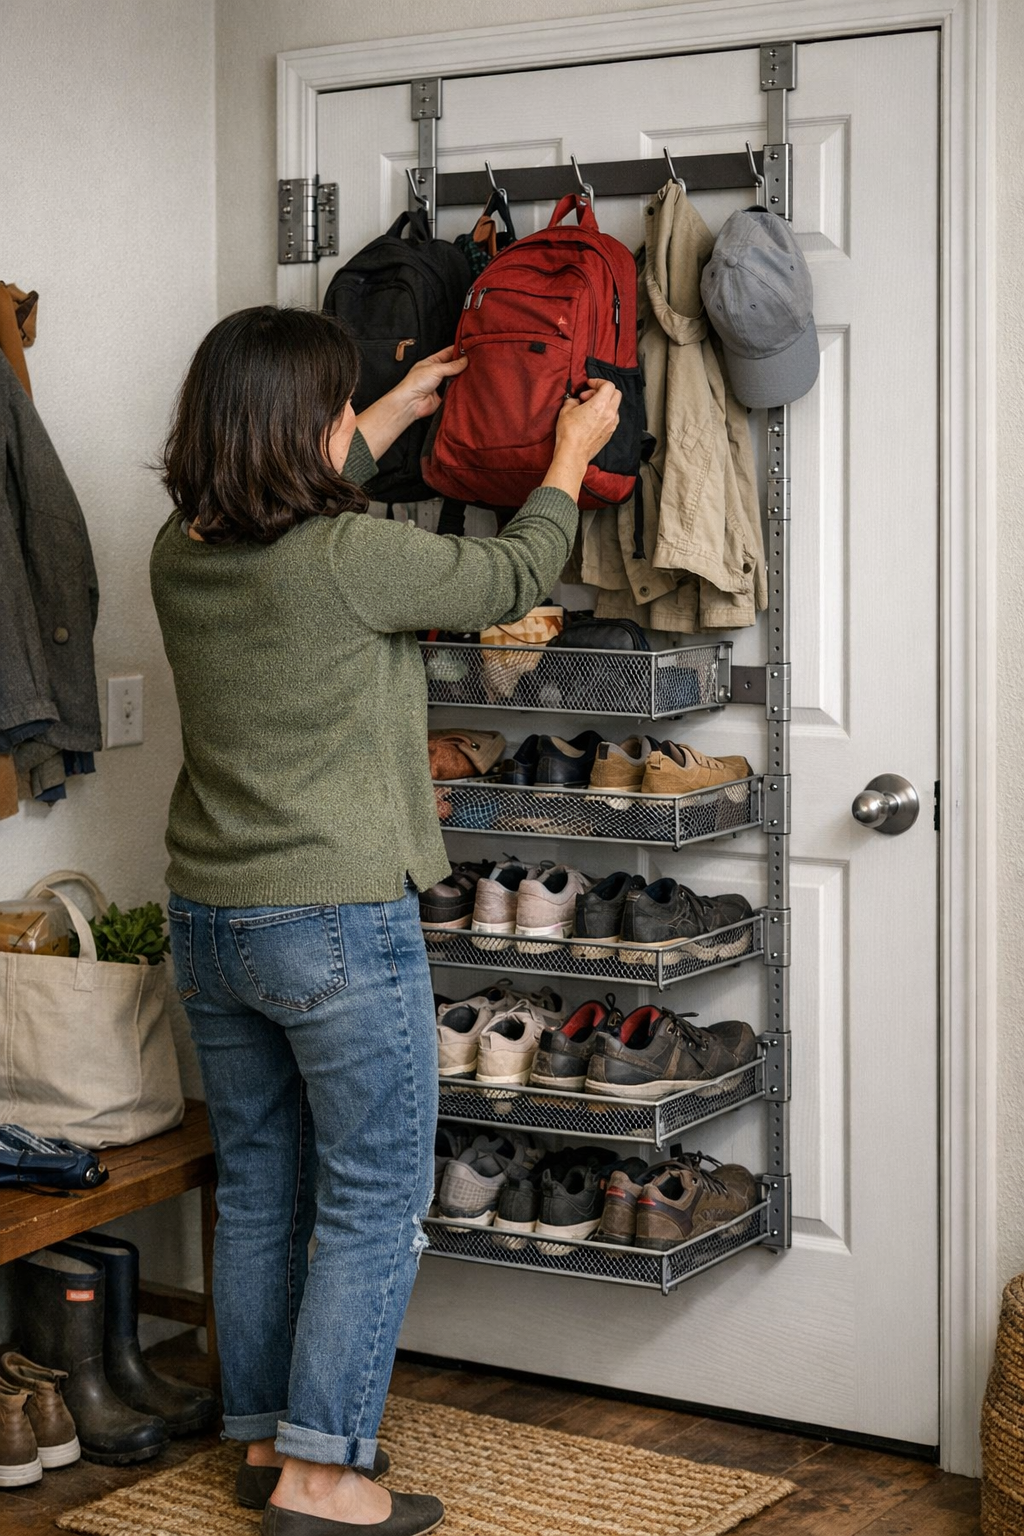
    Most entryway storage looks organized for exactly one day. You hook up an over-the-door rack, sweep the floor for that “finally fixed” effect, and watch clutter vanish—but only until real life leans on your setup. Wet boots appear, bags flop onto the nearest hook, and the careful shoe row fans out until the threshold tightens again. Drop one backpack the wrong way and the door jams; return home with groceries, edge past the rack, and suddenly the space that promised order now blocks every move. Instead of routine flow, you end up with a clean look that collapses the moment daily pressure kicks in—especially if your hardware isn’t built for shifting, repeated loads. A setup that seemed to absorb the mess slowly becomes another obstacle, forcing more resets, more sidesteps, and more friction each time you come or go.

    When Good Racks Go Bad: The Hidden Toll of Everyday Loads

    Transition spaces magnify every small mistake. Over-the-door and wall racks promise vertical storage, but each new coat, pair of muddy shoes, or slung bag doesn’t simply rest—it adds weight that strains hinges and door frames. Standard door hardware is not engineered for these shifting, daily stresses. If the rack’s support isn’t up to the job, you don’t just accumulate clutter—you compress the entry path itself, making each passage less smooth and more awkward.

    The difference shows fast. By midweek, a rainstorm swells the shoe pile; someone returns late, wedges a backpack onto an already-full rack, and now the door grinds at the frame. That slick swing turns stiff. Kids shove their gear through the bottleneck after practice, and you find yourself nudging the door just to step inside. Minor friction—an almost invisible catch, a rack that dips—builds up day by day, gradually shifting the problem from visible mess to movement-pause frustration.

    The Catchpoint: Real Scenes from the Threshold

    Most entryway setups don’t fail all at once—they just get harder to use until you stop using them well. First, the rack leans. Next, the hinge creaks. Then the door needs a special tug, or starts sticking partway. Grabbing a coat one morning, you feel the whole rack twitch. Adjusting shoes or bags becomes its own routine, a ritual of micro-rearrangements just to clear the path. The original tidy look is replaced by a set of silent negotiations at the threshold.

    This cycle plays out in homes everywhere: organized for the photo, undone by the week. Moving piles from rack to bench or spiking overflow into corners doesn’t fix the root issue—the structure just can’t keep up with the way your household actually enters and exits every day.

    Why Reinforced Hinge Support Changes Everything

    Most racks treat the door as a backdrop, not a working, moving part. But that’s exactly where everyday stress accumulates—and where weak support fails first. Ordinary hinges flex, alignment drifts, and what felt “solid” at install turns unpredictable under daily use.

    Add reinforced hinge support, and the contrast is clear.

    • The door swings like it should, even after a muddy soccer day loads it up.
    • Locks line up—no gap at the latch, no need for extra push-and-pull.
    • Redistributing clutter actually works; you’re not shuffling things just to make the rack sit flat.
    • The daily reset becomes a quick habit, not a dreaded event.

    Telltale Signs Your Setup Is Failing

    Watch for these early warnings before a small annoyance grows into permanent bottleneck:

    • The door sticks, resists, or needs a shoulder bump to move.
    • Hinges emit new noises, or the edge of the rack rubs after a busy spell.
    • The rack leans, sways, or sags—especially when the door stands open.
    • Tiny gaps widen at the latch or where frame meets jamb as alignment suffers.

    Ignore these and you risk more than paused movement—swapping cleanups for repairs, rehanging a door, or resigning yourself to a path that no longer works with your family’s routine.

    The Difference Between Organized Looks and Reliable Use

    Entryway storage systems often win on appearance and lose in real use. The true test shows up under stress: post-storm returns, gear pileups, missed resets. A Sunday-night tidy look is easy; a setup that doesn’t unravel midweek is not.

    • Are you forced to shuffle items just to get in or out?
    • Does a crooked rack or sagging mount keep you from resetting quickly?
    • Has returning bags or shoes quietly regained its original level of annoyance—just moved to a new location?

    With the right reinforcement, your threshold stays functional. Shoes and bags don’t sprawl, resets speed up, and the “drift” slows—so routines remain smooth for everyone crossing the zone, not just for the next photo or first day after cleaning.

    When Reinforcement Brings Its Own Trade-Offs

    No fix is friction-free. Some reinforced hardware adds bulk or reduces swing angle—tough on very slim entryways or doors that open flush with a wall. Always measure wall and clearance space before upgrading to heavier-duty solutions. Do a trial run with the typical gear load you expect—so you avoid trading one kind of blockage for another and can spot pinch points before they become part of daily life.

    Small Shifts, Smoother Routines: Practical Tips for Lasting Entryway Flow

    Max storage isn’t always best flow. Instead of maxing out every hook and shelf, try these fixes:

    • Hang heavier bags low and close to hinge-side mounts, where the door is strongest.
    • Assign strict drop zones for each person’s shoes or bags—mapped to real movement, not photoshoot symmetry.
    • In busy households, stagger arrivals and drop-offs to prevent pass-through pileups—especially after school or work peaks.
    • If there’s no room for error, shift heavy loads to wall-mounted units nearby instead of loading up a flexing door.

    The Real Win: Thresholds That Don’t Block Your Routine

    The goal isn’t just fewer piles—it’s less friction every time you cross the entry. A reinforced, well-matched rack keeps shoes off the floor and the threshold open, so you’re not doing the reset shuffle or nudging a blocked door on busy mornings. Choose hardware and setup patterns for real routines, not showroom silence—and you’ll see the difference: fewer backflows, snappier resets, and a threshold that works with, not against, your everyday life.

    http://www.betweenry.myshopify.com

  • Why Rearranging Your Workspace Isn’t Always True Organization

    Every reset looks perfect for a day. Bins labeled, carts lined up, floor swept, shelves squared—your garage or workbench corner finally feels under control. But a true setup isn’t proven by the calm after cleaning. It’s tested by real weeks: constant fetch-and-return, a crowded path, corners you sidestep, and old habits sneaking back in.

    Surface Order vs. Underlying Friction

    That initial sense of victory—everything in its place—fades fast once routine hits. You grab a tool and clip the edge of a cart. Bins begin clustering in the only open spot, which quickly becomes crowded. A cart, flawless in photos, now blocks just enough space that you find yourself shuffling it left, right, back, over and over as projects come and go. Resets, meant to be quick, turn into long sessions of putting away “what doesn’t fit” again.

    The illusion of neatness is easy; actual usability is harder. Fresh labels and crisp stacks might impress your camera, but they rarely hold up under the pressure of daily motion. The layouts that last are not the ones that look tightest—they’re the ones that stop fighting your routine and start flowing with it, even when the space looks half-empty.

    The Real Test: Day-After-Day Use

    Every time you work in the space, the system reveals its blind spots. Maybe you have to swerve around a cart—one hand balancing a bin, the other opening a drawer that barely clears the shelf behind it. Suddenly, “flexibility” means zigzagging to get a screwdriver. The return path for tools gets clogged because one area always absorbs overflow. You’re not reorganizing; you’re repeatedly compensating for small mistakes in the layout.

    Adding another rolling chest or sticking up extra hooks feels like progress, but it often multiplies these micro-frictions unless they genuinely fit the way you move. Suddenly, you’re dodging blocked walkways and team-lift zones that never see use—or reshuffling items that should have a simple route back after every project.

    Scene: The Perpetually Misplaced Cart

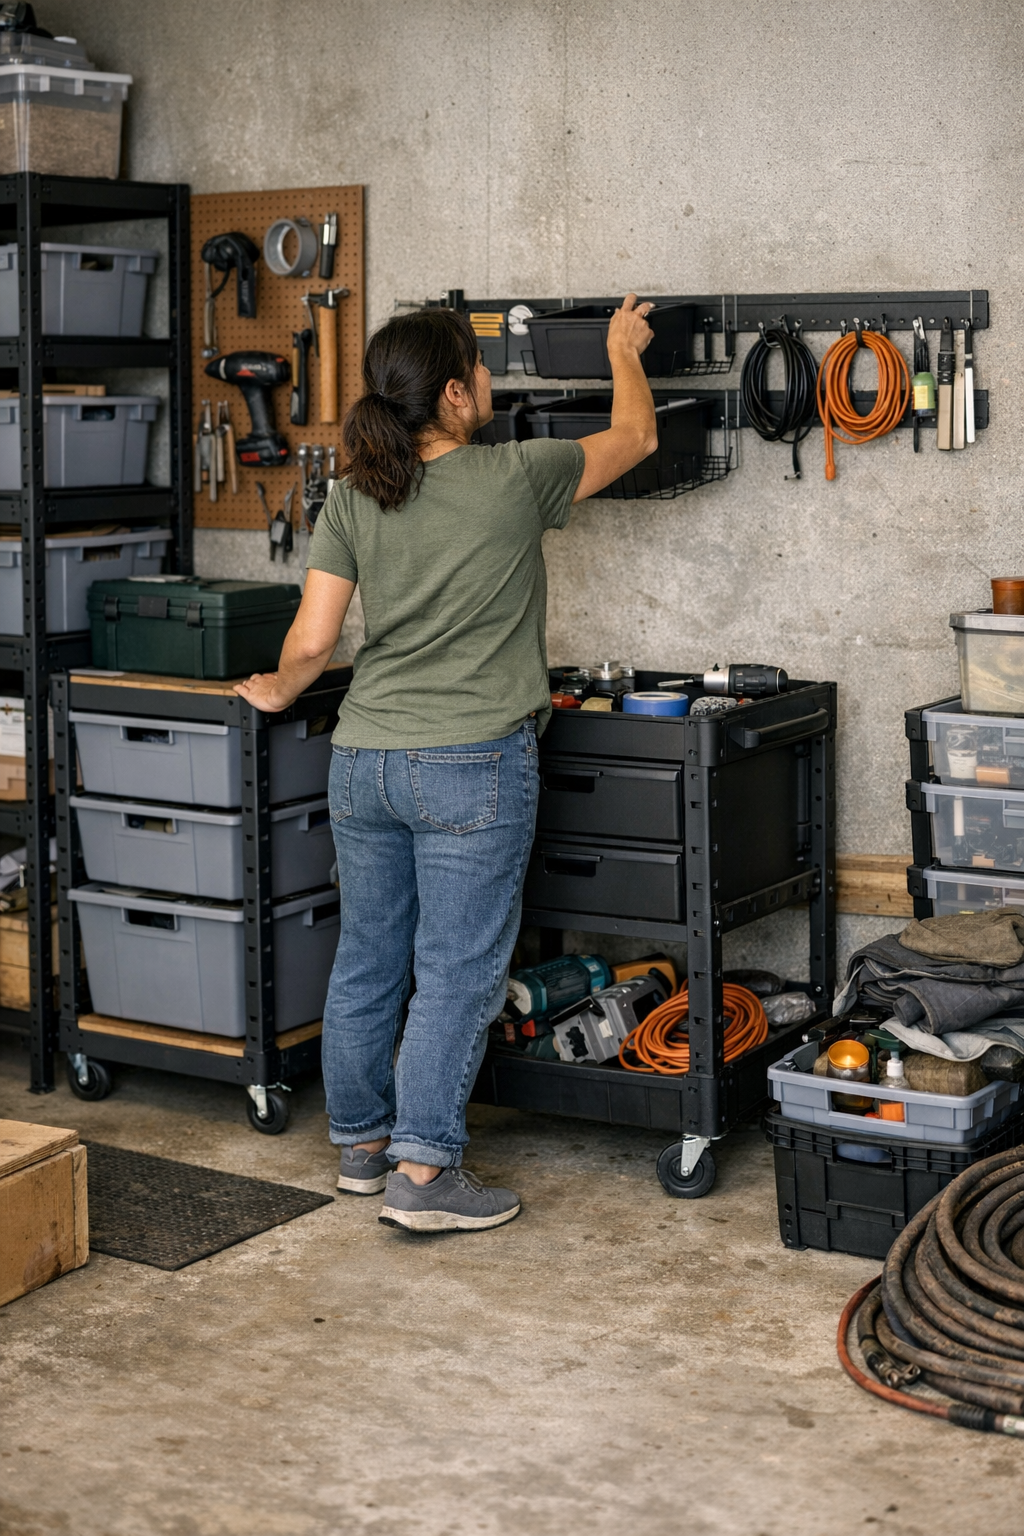
    Visualize the wall: storage bins stacked, two carts tucked underneath. That’s the ideal. By midweek, though, one cart has crept forward, then sideways—now it blocks the cabinet door you reach for three times a day. Any quick reset means nudging the cart out, sneaking around one corner, then struggling with the odd gap behind where lost bits and random tools collect out of sight. The fix isn’t another round of tidying; it’s noticing that the “perfect” lineup breaks down when actually used.

    Scene: A Wall Rail That Sucks in the Extras

    Wall rails promise easy grab-and-go, but routine exposes the truth. What started as your solution for daily tools quietly turns one stretch into a magnet for overflow: shears, odd pliers, a pack of zip ties you grabbed once and never moved. You plan to clear it later, but each week, it grows—blocking straightforward access right when you’re mid-project. The surface stays “organized” yet resists clean workflow when you most need it.

    How to Spot a Broken Routine, Not Just a Mess

    If putting things away gets slower and sloppier, the setup is telling you something. Concrete warning signs include:

    • The same corner or shelf collects random gear, turning into a reset job each time
    • Returning tools or bins means moving something else first—never a direct return
    • Main walkways get squeezed by carts or racks, breaking up your movement
    • One storage zone gets overloaded, while an entire wall sits mostly unused

    The “organized” look does not mean the system works; the real test is how little reshuffling or retidying your routine requires to bring things back to order.

    What Actually Fixes the Flow

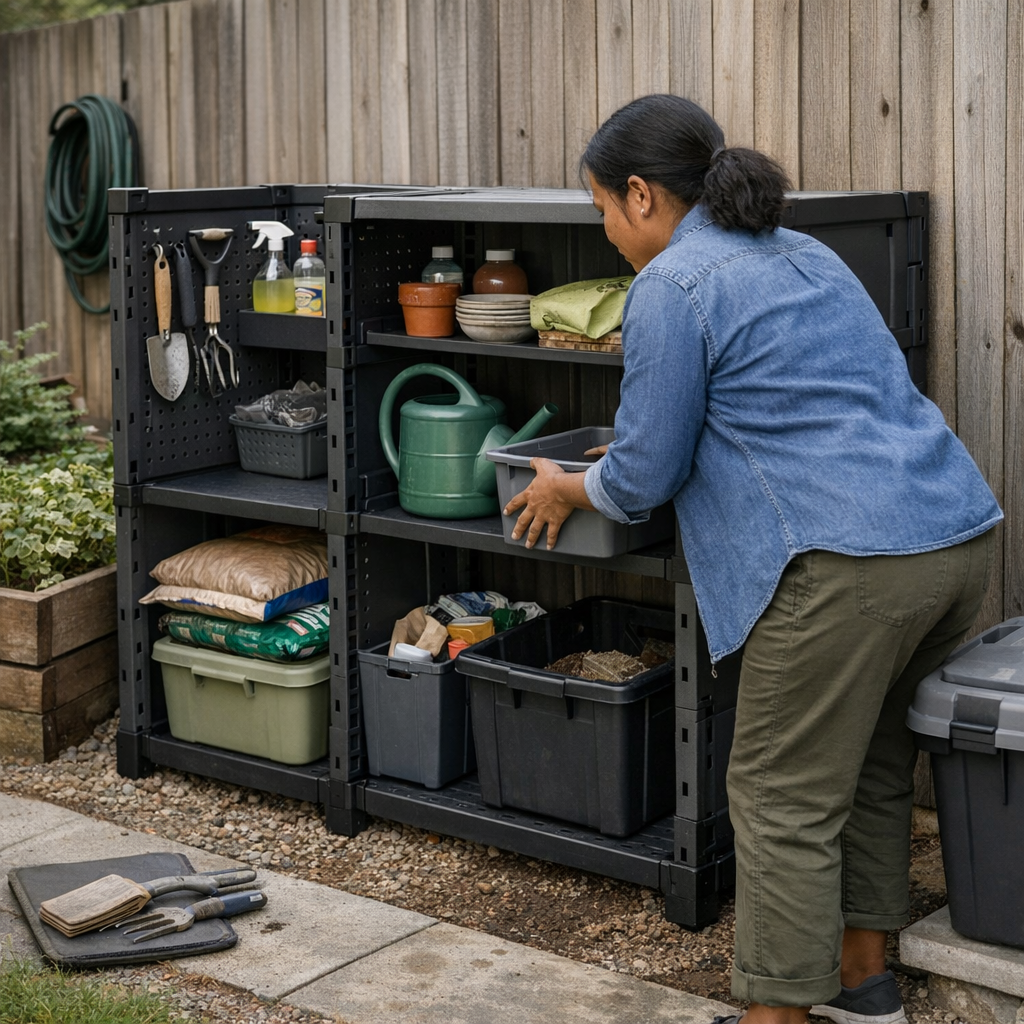
    The classic trap is maximizing every inch: carts side by side, shelves butting up, rails loaded ceiling-high. But in use, that wall-to-wall arrangement means jammed walk paths and awkward returns. The fastest fix is often the hardest to accept: leave more gap than you think you need.

    Small Gaps, Big Difference

    Try parking your rolling cart six inches off from the rack instead of flush. Suddenly, you can return a bin or reach behind without a three-step shuffle. The extra stretch of open floor feels “wasted” until it earns you fifteen faster returns that week—and those missing scuffs on the paint where carts used to bump and drag. Practical breathing room beats a flawless grid every time, especially along main reset routes and wall edges.

    Trust real ease, not flawless looks. Strategic emptiness—open zones at corners, between carts, or in front of cabinets—shrinks reset time and makes the space less overwhelming to use, even after months of clutter creep.

    Solving Overflow and Breaking Up Dead Space

    Overflow is more than clutter. It marks the spot where your setup fails to match your real path. Maybe your “overflow” bin is too far from where you always drop tools. Maybe a blocked shelf collects castoffs behind a stuck cart. Every unsorted pile signals a place where your system put appearances over convenience—and each pile always seems to return unless you rethink the zone.

    A Simple Test: Rotate the Trouble Spots

    Pick a trouble spot—a cart, an overloaded wall section, an awkward corner. Switch its location or empty it for a week. Watch what happens. Do dropped tools naturally find a new home, or does the gap fill right back up? Is access easier, or are you just shifting the friction? This small experiment exposes whether the friction is built into the layout, not just the stuff. Real fixes come from seeing where the system blocks you again and again, then opening that space up for what you actually do—not what you wish the setup would achieve.

    Lasting Setups Make Life Easier, Not Just Neater

    Setups that feel “done” usually aren’t. The real winners never draw attention: resets are quick, movement is automatic, and things land in place without you squeezing past, backtracking, or moving a cart for the third time in an hour. It’s not about perfection; it’s about a space that finally stops fighting your routine.

    You can browse practical modular storage, rolling carts, and real-use workshop systems at StackNest.

  • Optimizing Ventilation Fan Filter Cleaning for Better Airflow and Longevity

    The warning signs aren’t subtle if you know where to look (and listen). You’re deep into sanding down panels, sawdust feathering onto your boots, the fan’s hum pressing dust toward the exit. Then the pitch shifts—less zip, more drag. Not catastrophic, but you feel it: the shop air thickens, the fan’s restart drags, and even your next cut feels harder. It’s not just about comfort; tool performance and your own energy take the hit. Overlook this, and even the sharpest blade or the newest cordless drill starts to feel bogged down.

    Skipping Maintenance? The Tools Notice First

    It’s tempting to see filter cleaning as an afterthought—piggybacked onto a bench cleanup or ignored until light through the vent looks suspiciously gray. But in actual use—drilling into seasoned pine, grinding through steel hangers, sanding compound from wall repair—neglected filters put pressure where you notice it most:

    • Subtle, then stubborn drop in airflow, making dust linger over your workstation
    • Fan pitch deepens under load, adding a whine to background noise
    • Fan body radiates uncomfortable heat midway through a busy morning

    Stretch cleaning too far and you pay not just with haze in the air. Dust hovers, motors run hotter, and soon it’s not just filter life on the line but bearings, ductwork, and your patience with every clogged drill fluting or slow-to-cool saw blade.

    Why “Set-It-and-Forget-It” Schedules Backfire

    On real jobs, the clean-every-week mentality crumples fast. The pace and type of your work explode that system: two days of cutting MDF or drywall mud outpace a light week of assembly by a mile. By the time you spot caked dust on vent fins or breathe in a muskier haze, you’re already losing tool sharpness and shop stamina.

    Work Surges Don’t Wait for Friday

    Maybe you just finished a long day cutting cement board in the back shed. Dust claims every flat surface—fan grills, clamps, even the phone you set on a shelf two hours earlier. No “Friday” reset covers for Monday’s sudden grind. Those unchecked surges don’t just mean longer cleanups; the grime ends up inside tools, tightening collets and scraping bearings, costing you precision and adding resistance to every new cut or battery swap.

    Fan Feedback: When Small Changes Signal Bigger Trouble

    Not all filters behave the same, and guessing is a bad wager. Two filters, side by side, might look identical at a glance. Throw a week’s worth of belt sanding at both—the finer media chokes early, fan noise switches from hum to groan, your next drill pass throws more dust than it catches. The other filter, coarser but lower-rated, breathes easy (for now), but lets more grit slip through and line your saw’s moving parts. Look for what the fan is telling you, not just what you see with a flashlight.

    • The fan’s whine shifts lower, more strained, after each session attaching fence plates
    • Heat climbs with every run of long drywall cuts or deep hole drilling
    • Grit accumulates not just inside duct seams, but also on miters, bit trays, and battery chargers

    These signals show up most when you’re mid-task, not standing idle—thick air after a sanding marathon, fans lagging when you power-up for the next round, small upticks in hand fatigue as tools work just a bit harder with each pass.

    Saying Goodbye to Guesswork: Pressure Tells the Truth

    If you’ve wasted time on both extremes—waiting too long and cleaning obsessively “just in case”—switching to measurement instead of hope changes everything. A manometer mounted to the fan housing tells you real pressure, not guesses; for one dust-blown workshop, 50 pascals was where trouble started. Once that line tipped, quick filter cleaning meant snapping airflow and sound back to normal, every single time—regardless of how superficially clean the filter seemed.

    After every high-dust stint—planing edges, batch drilling joist holes—checking static pressure trumped every tired calendar schedule. It landed cleaning right where it belonged: after 9–12 hours of real load, not “once per week” by habit. The result? Fewer sluggish re-cuts, sharper bit handling, steadier tool pace without surprise slowdowns.

    Adapt or Burn Time

    Keeping cleaning tied to performance, not guesswork, pays off:

    • Constant airflow and a familiar fan note, even after back-to-back grinding rounds
    • Longer stretches between pricey filter swaps
    • Far less rogue grit sabotaging smooth miters or seizing up blade guides

    No manometer? Use what you have: check for fan warmth mid-way through a heavy cut session, tune in to pitch changes when the chop saw throws sparks, or spot fine powder at duct exits instead of at the main filter. These are the workshop’s way of keeping score, and they always beat the calendar.

    The Filter You Pick Changes Everything

    Swapping to a finer, denser filter mesh might make the air smell cleaner, but expect tighter windows for cleaning. Finer filters choke faster under real dust loads—especially after you spend hours sanding filler or ripping fiberboard. Coarse filters can fake a longer light-duty interval, but send more grit to tools where it does the most harm. If you just upgraded filters and suddenly find yourself cleaning more often, you’re seeing reality, not a defect. It means more dust is being caught before it gets to your hand tools and motor windings.

    Workable Cleaning: Tools, Timing, and Real Signs

    Skip the wall calendar. Let tool feel and shop air set your pace. If the fan’s getting louder, the body’s almost hot to the touch, or fine dust refuses to clear, it’s time. Pay close attention after the dirtiest tasks: sanding rough plywood, grinding old bolts, building a run of cabinets that covers the floor in sawdust. Count these as your checkpoints—don’t wait for a marked date.

    If you invest in a pressure gauge, use it as your reality check. If not, rely on the shop’s narrative: the shift in fan tone, odd warmth at the casing, grit sneaking into hinge points. These are as good as any calendar when it comes to keeping tools sharp and air clear.

    Bottom line: every less-burdened filter helps your saws cut quicker, bits run cooler, batteries last that much longer, and your own focus holds steady—without the drag of a dusty, sluggish shop. That’s productivity you feel every session, not just when you clear the vent for inspection.

    For practical fan filters and more workshop-tested tools, visit Gumboll.

  • Streamline Your Carry-On for Faster, Stress-Free Boarding Every Time

    The true bottleneck of boarding rarely announces itself until it matters: your carry-on looks perfectly organized, but nothing is where you need it when the line starts to move. At home, every slot, pouch, and zipper creates the illusion of control. But once you step into the stuttering shuffle of an airport queue—bag on your shoulder, speaker blaring, people pressing forward—the cracks in your “system” show up as delays, shifting weight, blocked access, and small moments of friction that multiply with every step.

    Packed to Impress—But Stalled at the Gate

    The first real test of any carry-on isn’t how neat it looks fully packed. It’s how fast you can grab your essentials under pressure. Even one zippered layer too deep—passport hiding under a pouch, phone wedged behind a charger—means you have to pause, fish around, and break your flow. The boarding line compresses, elbows nudge, and what felt organized turns slippery when one quick reach becomes a mini-fumble. This is not a rare disaster; it’s the ordinary speed bump that repeats every time you fly, turning a smooth line into a stuttered advance.

    This isn’t about losing items, but about how even a brief scramble for ID or ticket breaks your movement. Every unnecessary step—stopping, adjusting how your bag hangs, pulling it closer just to see inside—compounds the sense that your setup is slowing you down at exactly the wrong moments.

    Nesting and Overlapping: When Organized Means Slower

    The neatest-seeming layouts can turn on you mid-trip, because stacked “order” quickly becomes stacked barriers. At home, pouches nested into pockets and chargers wrapped tight inside toiletry bags look visually satisfying. At the airport, when your boarding pass is wedged beneath your headphones or your ID rests at the very bottom, each layer is one more obstacle on the way to what you actually need. Every document check or security bin highlights how slow this becomes in practice: unzipping, digging, repacking—none of which feel important until you’re in line, forced to repeat them with a dozen impatient travelers around you.

    Overlapping zones—chargers pressed against passports, snacks overlapping wallet space—are the main culprit. You think you’ve packed cleanly, but now each retrieval starts a mini search-and-rescue, sometimes pulling out cords or letting a lip balm tumble onto the floor. The so-called “order” creates friction: boarding, searching at security, even reaching into the main compartment once you’re in your seat all reveal how fast those layers break down in use.

    Real Boarding: Where Carry-On Layouts Succeed or Fail

    There’s no hiding from the reality of the boarding line: you might be carrying a sleek spinner or an ergonomic backpack, but if crucial items require digging through overlapping pockets, you’ll stall. Picture this in motion—one arm full, carry-on angled in the aisle, fighting a stuck zipper while the line closes in. Visual neatness loses against functional access instantly. Does finding your boarding pass require shifting your weight, unshouldering your bag, or dragging the whole thing onto your knee for balance? If so, that “organized” look is undermining every step you take.

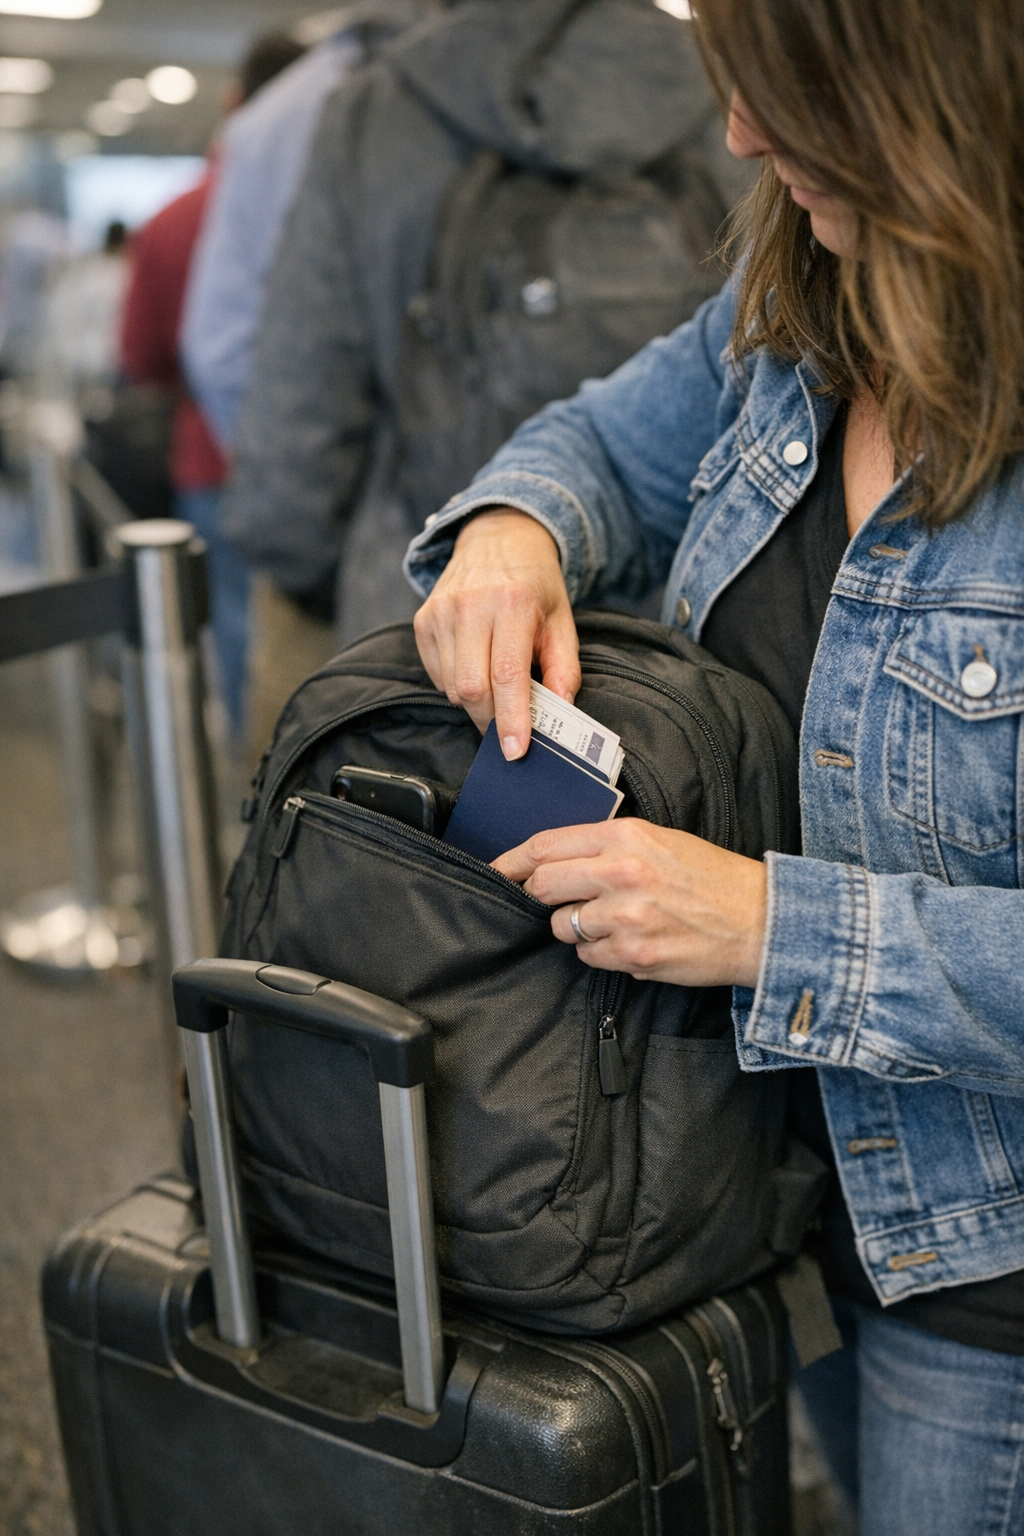
    Outer pockets easily become a trap: they appear handy but mix too many one-off necessities. Stuff your boarding pass, a wallet, loose headphones, and lipstick in the same spot, and now the cable snags, the pass is blocked, and you’re left pulling out fragments or dropping something in the aisle. The illusion of fast access turns into a bottleneck where essential seconds are lost and the crowd keeps moving.

    Practical Example: Rushing at the Jet Bridge

    Imagine you’re up next for boarding, thumb still on your phone, scrambling to free up a hand for your ticket. You stuff the phone into an outer pouch and swing your bag around for a one-handed score—but when you reach in for your ticket, the charger cord comes with it, tangling your fingers. You can’t blame nerves; this is what happens when a setup doesn’t force clear separation for the high-frequency, in-transit items. The inconvenience repeats, not because you forgot, but because the pocket is doing too many jobs at once.

    Why Dedicated Outer Access Matters

    The easiest fix for in-transit slowdowns isn’t adding more pockets. It’s subtracting confusion by assigning a single, truly dedicated outer pocket for only your key travel items. Limit it to the essentials—passport, boarding pass, ID, maybe headphones. When nothing else shares that real estate, retrieval turns from guesswork to habit: it takes one reach, not two. There is no pause to verify, no risk of fishing up a snack instead of your wallet. The motion becomes automatic, and the zip-path feels as familiar as your own jacket pocket.

    This single change isn’t about “convenience” in a vague way—it spares you from the repeated awkwardness at security trays, the mid-aisle stretch that slows seat entry, and the last-minute repack when an accidental spill dumps your essentials in public view. There’s no more accidental clutter at your feet, no document jam that leaves you standing with your bag half-open as others shuffle past.

    Repeated Access: When Good Structure Pays Off

    Try flying a full travel day—two boardings, a tight connection, and security checks—using a split-front zipper pocket for all high-frequency items. You’ll notice: the loop of double-checking, of hand-digging and “where did it go” disappears. It’s not a one-trick fix; by the time you get to your hotel, grabbing a document or headphones still takes a single move. That temporary pre-trip order holds up in the chaos—no need to mentally reset or reorganize just to keep pace.

    Design for Movement, Not Just Looks

    The most persistent failure is confusing tidy with fast. Compact packing isn’t enough—if the essentials aren’t immediately reachable, each leg of your trip exposes where things slow down:

    • Document checks become a reflex, not a pause to scan every pocket.
    • Seat entry loses its awkward shuffle—no swinging your bag around to find what’s buried deep.
    • Security trays stop being frantic dump-and-scramble moments.

    The “quick fix” of just adding another organizer rarely works. Every saved movement matters. Order that shrinks your speed isn’t order—it’s just a prettier form of interruption. The right structural change lets your carry-on help you move, rather than making every retrieval a hidden obstacle course.

    Redesign One Zone, Reduce Repeat Headaches

    The most manageable shift: dedicate one quick-access outer pocket exclusively to the core items that matter during the first and last fifteen minutes on the plane. Don’t let chargers, snacks, or toiletries steal space here. Reducing overlap is not about minimalism for its own sake—it’s the only way to cut the string of micro-interruptions that come from digging through unrelated accessories when time is tight. Nothing else should share space with your passport or boarding pass if it can wait until you’re seated.

    Most carry-on routines break down not from lack of space or lack of gadgets, but from too many access points stacked on top of each other. If you need two hands, an empty seat, or a mini-inventory in your head just to pull a ticket, the structure is working against the reality of travel movement. Add less, rethink more—one simple pocket shift beats another layer of pouches every time.

    The Difference Over a Real Trip

    Back-to-back flights, tight connections, or airport routines built on repeated boarding checks put every choice under pressure. When your travel setup separates high-frequency items into a truly dedicated, low-overlap zone, your bag stops tripping you up and starts matching your speed. The awkward mid-aisle repack becomes rare, and the repeated, low-level stress of reorganizing fades out. Your focus returns to the trip, not the tug-of-war with your own luggage. The shift is visible only during actual motion—but that’s exactly when it counts most.

    Discover practical carry-on upgrades at CarryOnSupply.

  • How Adjusting Monitor Height Transforms Your Workspace Efficiency

    A desk that looks organized can still slow you down. The surface is spotless at 9 a.m., but by the second or third workday, the cracks show: your neck clenches from a screen set too low. Reaching for a notebook means scraping past cables, a phone charger wedges itself between your best pens, and that “clean” look hides a growing reluctance to sit back down. The real issue is not clutter you can see—it’s the design bottlenecks you feel every time you trade typing for notetaking or juggle devices, with every cable drag, crowded edge, and missed reset adding friction. The wrong setup isn’t just inconvenient once; it interrupts your workflow over and over, especially when quick access and fast switches are part of your daily routine.

    When Neatness Stops Short of Real Usability

    Spend a day or two at a desk that looks neatly arranged and the same frustrations start to return. A flat-footed monitor base sets the tone: everything seems placed just right—until you find yourself leaning forward for a better look. The monitor eats up the rear half of your desk; your handwritten pad now competes with a power block or cable coiling too close. Real work becomes a sequence of micro-adjustments: shifting a charger to reach a sticky note, moving your elbow to avoid cord rub, or propping up your phone at the last open corner. The effect adds up. By midweek, the desk is officially “clear” but working at it feels slower, less inviting, and you catch yourself hesitating before every session.

    Recognizing Friction as It Builds

    These snags aren’t isolated. If you reach over the same charging cable every time you want a stapler, or have to maneuver your laptop for a comfortable writing spot, your desk’s physical arrangement is fighting your workflow. These interruptions multiply quickly in setups that look tidy but ignore repeated motion. A so-called clean desk has a cost you notice more with every switch—until a single shift in structure delivers relief you only realize after the change.

    One Small Change, Many Improvements

    Monitor height is a pivot point for real usability. Raising your screen with a monitor arm moves more than just pixels—it immediately relieves neck tension and reclaims the back strip of desk that a stand once blocked. Suddenly, cables that used to snake forward get tucked into a cable tray behind the monitor, out of the path of your mouse or notebook. The difference isn’t just tidier cable lines—it’s the way you recover usable space for trays, notepads, or a docking station right at hand instead of fighting for every inch. What once passed for “efficient enough” reveals itself as an obstacle factory the moment you experience truly open, available workspace.

    Desk Depth: Where It’s Won and Lost

    On a compact or shared desk, every centimeter at the back counts. With a fixed, standing monitor and crowded base, usable desk space melts away fast—chargers land in the center, organizers and trays drift into places you don’t actually reach. Instead of sweeping the desk clear for a task, you find yourself untangling a charger, nudging the lamp aside, or pausing every time you need something tucked behind the screen. The result: surface “order” stops mattering when the desk’s depth feels rationed and every task asks for another workaround.

    Living with a Setup That Actually Matches the Work

    Switching to a monitor arm and cable tray turns daily friction into quick, repeatable relief:

    • Handwritten notes fit beside the keyboard—no more navigating a charging cord just to jot down an idea.
    • Cables tuck neatly behind the monitor, not running through your writing zone.
    • Organizer trays and storage boxes move forward or back as needed, never blocked by awkward hardware.

    Returning to this desk, resets are a non-event: no search for a free outlet, no detangling charger bundles, no shifting piles to reclaim your working area. The monitor glides forward for a spreadsheet session, then pulls back so you can spread out papers or charge a device—smooth hand-offs, not constant rearrangement. “Organized” stops being a look and starts feeling more like flow.

    Real-World Example: The Midday Reset

    If your day shuffles between digital and paper tasks, even one thoughtful adjustment pays off every time. Picture this: after lunch, you come back and want to draw a quick diagram or leave yourself a note. No cable to move. No screen base stealing half your reach. The notebook lands exactly where you need it, not on top of a charger tangle. That absence of correction—no workaround, no body contortion, no pause—quietly becomes the real advantage, lightening your work rhythm without any conscious effort.

    Early Warning Signs Your Setup Needs a Shift

    Spot these repeated signals that layout, not clutter, is costing you actual work time:

    • You twist, crane, or shift in your chair to properly see the monitor.
    • Chargers and USB cables creep into your main workspace by the afternoon.
    • Storage trays or organizers end up out of reach, sliding behind the screen or a cable knot.
    • Every work session starts with ten minutes of minor resets just to regain a clear surface.

    Those patterns aren’t solved by adding bins or baskets. They mean your desk’s structure is at odds with your workflow. The fix is not just hiding more cables—it’s changing the physical logic: lift the screen, route the wires, free up the places you actually use.

    FAQ: Small Questions that Signal Big Friction

    What happens if my monitor stays too low?

    Low monitors invite neck strain, collapsed posture, and faster fatigue. They push storage out of reach, make cables harder to manage, and turn basic task switches into repeated workarounds.

    How do cable trays make a real difference?

    Cable trays pull wires away from the working edge, keeping your surface ready for fast transitions. No more mid-task tangle, no more charger creeping under your pad—just a reset surface and stress-free reach, session after session.

    When is it time to rethink my setup?

    When you keep skirting cables, moving gear, or adjusting posture for the same tasks daily, it’s time. Real efficiency is the setup that lets you transition—work, write, charge—without making space for every step.

    Workstations: It’s Not Just About Looks

    The real test isn’t immaculate appearance—it’s whether your desk lets you work on your terms, without repeated reset, reach-around, or silent frustration. The right structure matches your routine: monitor at the right height, cables under control, organizers and tools clearly accessible. Fix the structural choke-points, and the entire week smooths out. You’ll feel what’s missing: that steady drag of minor interruptions and the slow erosion of momentum from a desk that only ever looked tidy.

    Explore the full WorkBasic collection

  • Optimizing Shared Spaces with Smart Ceiling Light Placement

    Linear vs. panel ceiling lights: the biggest difference usually surfaces after you move past the first week—once work spreads out, cables migrate, and the smooth, symmetrical fixture overhead can’t keep up with the room’s real rhythms. That panel, so clean in pictures, leaves one side of the counter in shadow and the corners unclaimed as people gravitate toward the center for survival brightness. Meanwhile, the urge to haul in extension cords, prop up extra lamps, or nudge your chair to dodge glare starts to feel inevitable, no matter how sleek the original plan looked.

    Where Looks Slip and Friction Creeps In

    The appeal of a flush-mount panel or slim overhead rectangle is all about eliminating the mess of cables and forgetting the chaos of scattered plug-ins. But after a few normal days—papers sprawled, laptops charging, team discussions—the flaws show up as lived-in inconvenience. It isn’t that the fixture is broken; it’s that the simplest ceiling setup ignores where light fades out. The “clean” look overhead can unravel at ground level: distant desk edges sink into shadow, group work clusters in hotspots, extension cords snake between seats, and those side-table lamps you thought were gone creep back to fill the gap. The fixture may hang straight and tidy, but the everyday lighting pattern is full of blind spots.

    When Surface Lighting Falls Short in Real Life

    A centered ceiling panel makes for a tidy diagram but rarely aligns with the action below. Picture the daily routine: the main table runs the length of the room, but the brightest beam falls onto the walking path or halfway across someone’s notes. People at the far edge lean forward, shift chairs, or play musical seats for a temporary lighting upgrade. The result? The room doesn’t stay clean for long. Personal lamps reappear, wires resurface, and the initial effort at order is chipped away by workarounds and clutter hiding in plain sight.

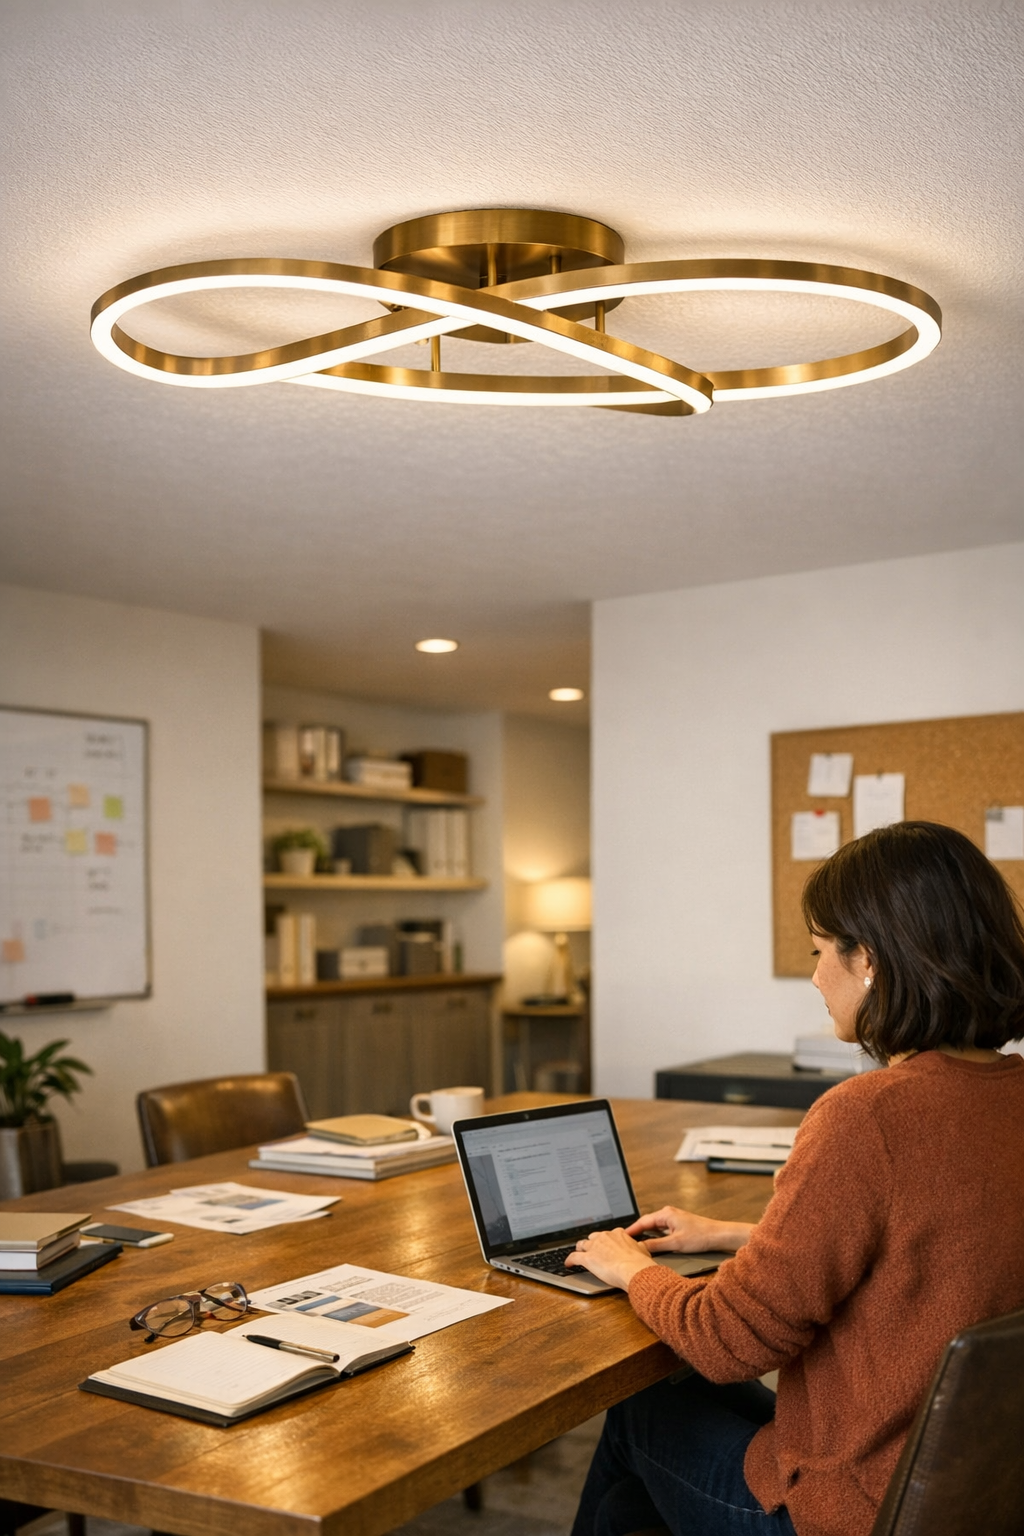
    Shift to a linear fixture, lined up directly over the working zone, and the equation changes. Run it lengthwise, not just centered, and shadows along the far edge disappear. Task coverage follows the table, not the ceiling pattern. The difference isn’t just light distribution—it’s eliminating the cycle: no one fighting for a “good spot,” fewer random fixes, and less eye strain by the end of the day.

    Spotting the Trouble Before It Settles In

    The “wrong fit” rarely jumps out at installation. It’s the subtle daily workarounds—documents drifting into dimness, arms stretched to shield screens from reflection, cables sneaking back for emergency side lighting. The room looks handled at a glance but feels unfinished the moment you’re chasing usable light or tidying up somebody else’s extension cord.

    Small Changes, Big Difference: Aligning Light to Routine

    One overlooked fix: match the fixture to the active zone, not the architectural symmetry. In a recent office reset, replacing a centered panel with a continuous 2.4-meter linear above the main table snapped the lingering shadow from the table edge into full visibility. The old tide of personal lamps vanished, and cable creep stopped. Was it flawless? Not completely; a faint dim strip near the doorway lingered. But the “make do” improvisation everyone tolerated simply faded out, replaced by a layout that held up against real use patterns.

    Lighting should move with people, with habits, with the shifting nature of the surface—not just fill a checklist or land in the ceiling’s geometric center.

    Uneven Coverage and the Return of Clutter

    Even a top-spec fixture fails if it’s undersized, dropped in the aesthetic sweet spot, or simply not built for the real way people use the room. Too-short linears or panels that only bless the center leave new busy zones in the dim. More users multiply the problem—edges darken, corners get cold, and the scramble for power and useful visibility restarts. The tension doesn’t come from installation but from the drag of adding “patch” after patch—extra lamps, creative cable trails—until the setup feels more complicated than what it replaced.

    Why the “Clean Look” Isn’t Always the Best Use

    A recessed fixture wins on cable control, but if it can’t visibly light the actual surface in play, the workaround cycle resumes. That first impression of polish breaks down by week two as the routine outpaces the overhead plan. Spot the mismatch before the extensions and table lamps multiply—otherwise, “clean” turns into “constantly corrected.”

    Reducing Cable Chaos Before It Starts

    Cable creep is relentless in shared or shifting workspaces. The moment someone can’t see clearly, their own fix—an extra lamp, a new extension—finds its way in. Soon, cords tie up walkways and clutter the floor. The way out: select fixtures with built-in cable guidance or keep installation tight overhead, directly above the main surface. Wire management up and out of the way blocks the chronic extension-cord drift and preserves the look (and safety) longer than any quick rearrangement.

    The best “clean” is the one that doesn’t unravel the moment the routine gets busy again.

    Recognizing and Addressing the Good-Enough Illusion

    It’s easy to be lulled by how finished a room looks right after setup. But when the floor is retaped with cords after a few weeks, or you’re shifting lamps yet again, “good enough” shows its limits. An overhead panel can function for balanced, square rooms or small focused tasks—but in longer, group-oriented, or single-axis surfaces, linear fixtures step up with coverage where people actually work and move. The difference is felt not in the installation, but in having less to fix every week.

    Quick Tips for Fixing Daily Lighting Strain

    • Inspect the real working zone, not just the middle: Sit or stand where the activities actually happen. Can you see every inch of your task surface, or does shadow block the edge?
    • Spot cable creep early: If new power strips or extension cords appear by week four, your overhead approach is missing a stretch of usable space.
    • Don’t accept “almost right” fixture placement: Sometimes moving a linear, choosing a longer fitting, or carefully rotating the light makes the whole surface workable—no major overhaul needed.

    Final Note: Match Lighting to Use, Not Just Appearance

    Lighting setups that survive the first month often reveal what actually matters—how much improvisation is still needed. If you keep finding temporary solutions accumulating underfoot or at the far end of a table, it’s time to question whether the lights fit the true repeat pattern. For project tables, shared desks, or daily-use surfaces, aim for fixtures and supports that manage cables and give real, even coverage, even if it means bending symmetry or revising that tidy-looking plan. Everyday usability always outlasts a first impression.

    http://www.lightsupport.myshopify.com

  • How Small Delays in Pet Care Create Bigger Daily Disruptions

    Invisible Delays: How Small Pet-Care Tasks Complicate the Routine

    Everyday pet care looks manageable on paper—grab the food scoop, refill the water, wipe a dribble, drop the brush on its hook. But in real homes, each “quick” task leaves its mark when it isn’t closed out in the moment. One misplaced scoop, one towel drifted into a laundry pile, one wipe left somewhere “for later”—and pet care shifts from smooth routine to a series of frustrating pauses. You reach for the bowl and find clutter in the way. You want to refill water, but the bottle is blocked by a stack of unmatched lids. Slowdowns like these aren’t obvious at first, but over a week, they grind routines down: visible order fades, missing basics stall your hands, and the cost is a drag you keep tripping over.

    How Deferred Care Compounds into Frustration

    Pushing chores like water refills or quick wipedowns “just a little later” never feels critical in the moment. But the next time you’re juggling dinner prep and need to feed your pet, the feeding scoop has vanished—maybe into the pantry, maybe the sink—or the bowl feels tacky because no one rinsed it last night. Instead of two easy motions, you’re scavenging for a works-for-now substitute, cleaning out stuck-on crumbs, and retracing steps. That pause isn’t minor; it becomes a friction point that comes back again and again.

    Over days, these pauses pile up: meal prep that takes twice as long because the right item isn’t in place, cleanup that never really finishes, clutter clustering in the very spot you have to stand. Essentials like pet wipes, or the brush for muddy paws, migrate and vanish just as you need them. The illusion of “later is fine” falls apart under the weight of these small but multiplying inefficiencies.

    Scenes from a Real Pet-Care Routine

    Try a mid-afternoon reset: you head to the kitchen aiming only to top off the water and toss a toy back. The towel for wiping the water bowl isn’t where you last left it—now hidden under a pile of unopened mail. The leash meant for quick yard breaks is wedged under a shoe rack. Crumbs gather under the bowl mat—a few too many to ignore, but not dramatic enough for a full cleaning session. The water bowl is filled but sports a dull ring around the edge. Each action, instead of flowing, now means detouring, digging, or pausing for tools that should have been ready.

    At night, the slowdown deepens: the measuring cup is running through the dishwasher, so you use an old mug and hope it’s close enough. The so-called “pet station” collects loose treat bins and leftovers from yesterday’s mail run, forcing you to reshuffle everything just to pour out food. Even a tiny storage container parked in the wrong spot means another reach, another shuffle, one more break in flow you can’t ignore.

    Spotting Where Routines Lose Flow

    Routine drag isn’t easy to pin on a single mistake. Instead, it’s a pattern: tools you need out of reach, items squeezed into the wrong cabinet, cleaning done twice because it never sticks. An organizer box might corral wipes and look organized until you realize you’re always stepping around it to reach food bowls. A brush hung by the door seems sensible, but when it migrates after a quick porch cleanup and doesn’t return, you’re tracking it down when muddy paws hit again. Visual order alone won’t shield you from these interruptions; it’s the small setup misses—blocked access, borrowed tools, towels out of rotation—that leak time out of the routine.

    These cracks reveal themselves over time. That towel meant only for pet spills gets used on the kitchen counter and disappears. The scoop is borrowed for flour and doesn’t come back. By the end of the week, what looked organized never quite feels workable, and “didn’t I just fix this?” becomes a recurring question.

    Closing the Gap Between Tidy and Usable

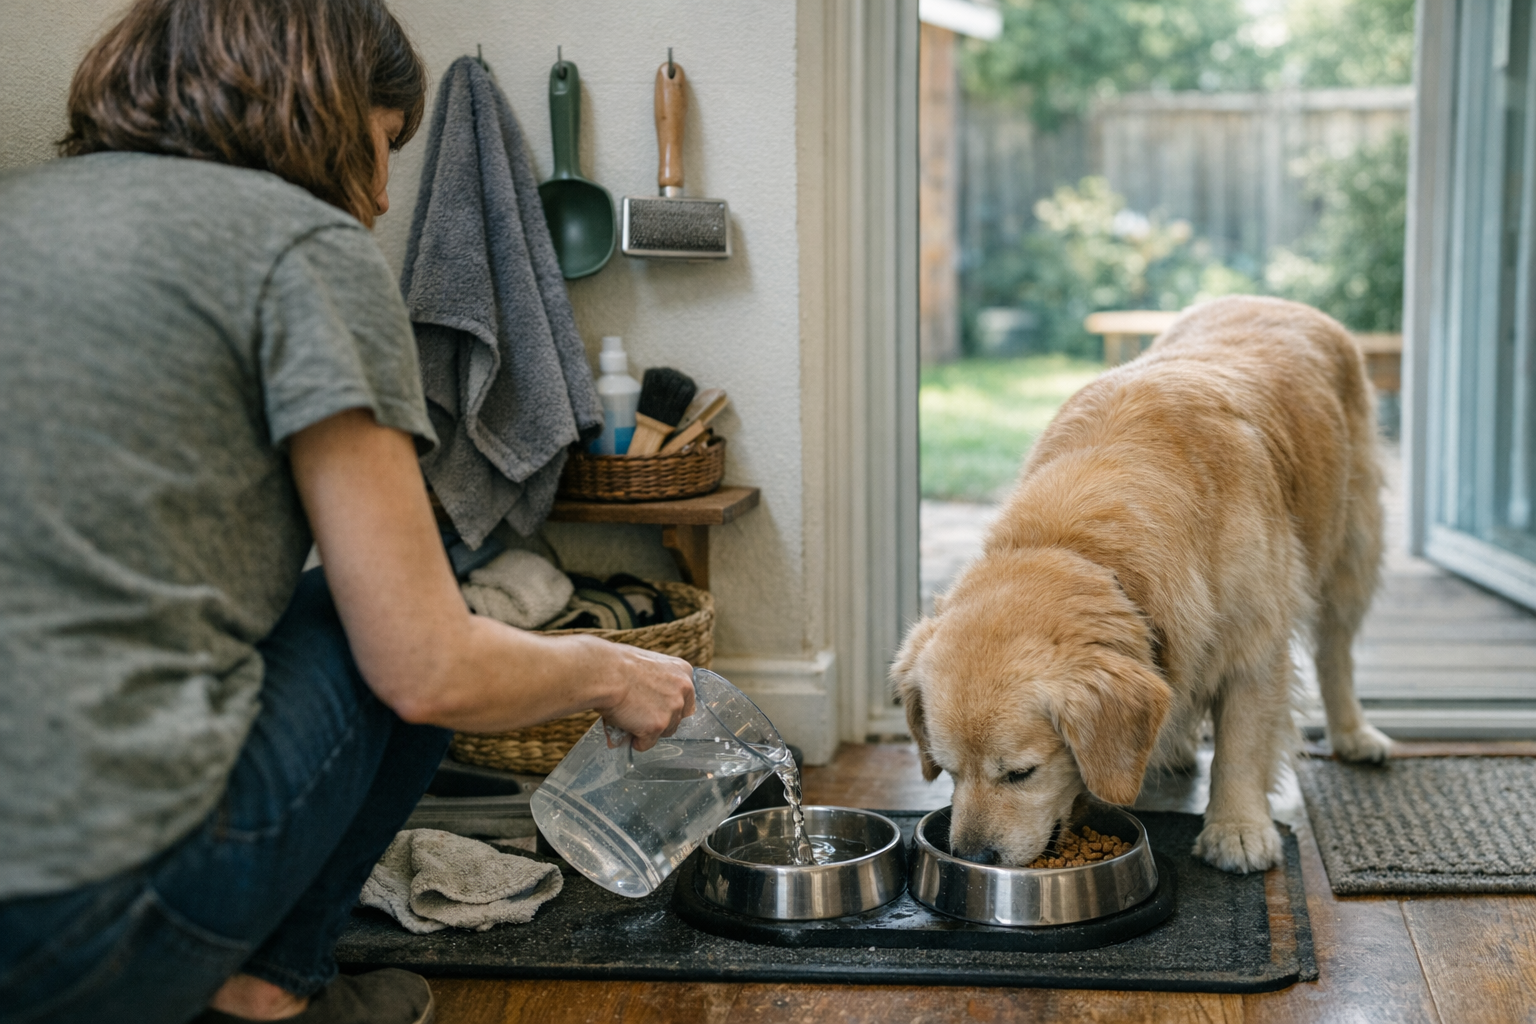
    There’s a gulf between tidy space and actually usable routine. The difference is reach—having the wipe, the scoop, the bag, right where you stand, every time. Hanging a microfiber towel directly above the feeding spot—versus stashing it across the room—makes one-handed wipedowns possible in seconds. No moving between rooms, no “I’ll handle that later,” no repeated shuffle just to deal with water on the floor.

    Apply this to other tools: a brush on a dedicated hook inside the mudroom door, poop bags clipped by the leash instead of in a bin three rooms away, refills stationed near the water bowl. Each item fixed to its real-use point closes a window where tasks get skipped or half-finished. If you have to cross a room or move a blocking basket to get to your supplies, your care setup isn’t working with you—it’s slowing you down at the same friction point, again and again.

    Building a Routine That Minimizes Reset Friction

    The setups that actually reduce routine drag aren’t the prettiest or the most color-matched—they’re the ones that make access to wipes, scoops, towels, and brushes nearly automatic. Grouping pet supplies right at the feeding or grooming zone, not scattered in storage containers that look tidy but separate from real flow, shrinks task distance and lets you finish actions in one go. Cleanup, refilling, after-walk wipes—they all turn into close-out tasks, not repeat interruptions.

    Over a few days, the benefits show. You stop circling back to finish “almost done” chores. Fewer items are left out of reach; fewer surprise messes force a late reset. For shared home spaces—kitchen, entryway, living room—these small adjustments cut collisions between pet care and everything else, producing a calmer routine without asking for perfection.

    Perfection isn’t the point. But when tools, wipes, and feeding gear are all within arm’s reach of the action, the nagging “I’ll do it later” moment disappears—so does the slow drag. The result: daily pet care resets in real time, not after it becomes a hassle.

    Shop everyday pet-care solutions built to keep routines simple at CalmPetSupply.

  • Why Strict Closet Labels Fail and How Flexible Storage Solves It

    Order That Disappears: Why Closet Organization Rarely Sticks

    Step into most homes, and you’ll spot the ritual: closet shelves lined with bins labeled “Socks,” “Hats,” “Workout Gear.” For a day or two, everything clicks—socks all in a row, hats stacked in their own bin. It feels possible, even likely, that this time the system will hold. But real life bulldozes the plan. Morning routines spill socks into the sweater bin. Hats get tossed over scarves. The neat, named surfaces start to conceal a mess that’s only getting harder to navigate. And when you’re late, you don’t have the luxury to gently file everything in the right place—so items stack up, logic blurs, and what looked organized becomes a daily scramble all over again.

    Why Label-First Systems Crack Under Real Life

    A wall of labeled baskets appeals in theory: each thing in its place, chaos tamed by crisp handwriting. But actual daily use reveals the limits. You stack folded shirts in the “T-Shirts” bin—by Friday, that bin is overflowing, so the next clean shirt perches on a pile in “Sweaters” instead. The “Gloves” basket gets invaded by a rogue scarf, then gym socks sneak in when you’re out of time. Every category starts to blur. When bins are too full, overflow isn’t rare—it’s routine. Organization that only works when everything is perfectly returned is a setup for slow collapse, not sustainable order.

    It’s not laziness; it’s the reality of how people move. Looking for a watch in the “Accessories” bin? Everything else gets jostled. Shelving winter boots means nudging aside shoes you just put away. The more a system relies on exact returns, the more brittle it becomes—one rushed move breaks the pattern, and the cracks spread.

    Beneath the Surface: The Hidden Mess in “Tidy” Closets

    Closed bins mask the drift—until you need something. Open the lid on a “Winter Accessories” box and you’ll dig past sunglasses, tangled scarves, gloves from two winters ago, and maybe a rain poncho tossed on top. From the outside, everything still looks orderly. On the inside, it’s a jumble. Every search means more rummaging, stacks lose their shape, and what should have been a quick grab becomes a mini excavation.

    This isn’t just slow or clumsy—it’s unsustainable. When your setup depends on everyone perfectly remembering what belongs where, mistakes pile up. A single off-week—one rushed laundry return, a bag of shoes dropped at the wrong end of the closet—leaves the system struggling to recover. By Saturday, “resetting” isn’t a two-minute tidy. It’s a full-on sorting session.

    The Relentless Morning Rush

    The real test happens when you’re in a hurry. Picture the start of a weekday: the “Rain” bin—intended just for umbrellas—now holds a scarf, two mismatched mittens, and a soccer jersey. Shoes are stacked three deep, so every retrieval means shifting pairs and collapsing rows. The “easy” access vanishes, and delays add up in inches—not quite chaos, but never smooth. Each day multiplies the odds that you’ll just shove things wherever there’s space, pushing the closet further from its neat beginnings.

    When Resetting Overtakes Usefulness

    The system’s cracks show in how long resets take. Need something from the bottom basket? Time to lift and restack every bin above. Labeled shelves spark their own confusion: does this thin scarf live with hats, or does it squeeze back into the “Accessories” bin with half the rest? Each unlabeled or overstuffed bin is a tiny hurdle, slowing you down just enough to skip the step next time.

    Soon, every misfiled piece becomes tomorrow’s problem. Original categories fade as people adapt on the fly. Instead of order, you get a slow buildup of hesitation—where does this go?—and what started as a five-second reset balloons into a ten-minute chore once a week. If putting things away feels like work, the system isn’t serving you; you’re serving the system.

    How Flexible Zones Rescue Everyday Storage

    The turning point comes with honest adjustment. Trying to force stricter categories and more labels usually just entrenches the drift. What actually works: setups designed for the way you live, not just the way closets look in catalogs. Open bins become easy drop zones for high-traffic items. Shelf gaps are wide enough to let you see and grab what you need without shuffling four stacks to get to a single glove.

    The shift is visible and practical. Scarves land in open bins where they’re quick to grab and easy to drop back. When a section fills up, items calmly spill into the next space—without collapsing the whole system. At the end of a busy week, resetting takes minutes, not an hour. No one wonders where to toss the extra mittens. The closet keeps working, even when the “right” bin is full or the label is ignored on a hectic night.

    The Best Setups Assume Imperfection

    The sustainable setups don’t count on everyone pausing and recalling the master plan every time. Open baskets handle daily churn, while rarely used zones or guest gear get more defined spots. There’s slack in the system—enough give so one missed return doesn’t trigger unraveling. Labels don’t stop overlap, but flexible design catches it before it spreads.

    How to Spot a Closet That Isn’t Really Working

    Watch for these classic signs your storage isn’t syncing with your routine:

    • Bins that start out organized, but end up as catch-alls.
    • Putting things away feels tedious—not quick or obvious.
    • Reset sessions keep getting longer as categories blur.
    • Indecision about where anything belongs—even for things you use daily.

    These little sticking points grow week after week, gradually draining time and adding silent stress to your routine.

    Design for Your Routine, Not the Ideal

    The answer isn’t to abandon order but to make it fit the patterns you actually follow. Use labels where they help: shelves for backup linens, or baskets at the top for out-of-season gear. But focus flexibility where things move most—open bins at eye level, dividers that let a folded stack breathe, and shelves you don’t need to reach behind just to get daily essentials. If a bin becomes a mixed bag, that’s feedback, not failure—it means the flow needs a tweak, not a stricter label.

    Small Fixes, Real Relief

    Monitor how you interact: Do you dread tackling the bottom shelf? Are the most-grabbed items buried behind closed baskets? If you’re always shuffling the same things from pile to pile, your closet’s asking for reconsideration. Try raising a bin for easier access, spreading out shoe racks to lessen crowding, or dropping rigid categories for open zones. These small shifts can add back those lost minutes—making daily resets so quick you barely notice them.

    Order That Holds—Even When “Perfect” Slips

    A closet isn’t truly organized just because the labels line up. Real order is the kind that survives the everyday mess—the one you can keep without a chore list. If your resets shrink, your access speeds up, and your stress goes down, your system is working—even if that last bin is always half-mixed.

    For products designed around daily realities—shelves, racks, and bins that can take real-life routines in stride—visit ClosetWorks.

  • Why Buffet Cabinets with Doors Outperform Open Shelving for Serveware Storage

    The tension between surfaces that look organized and storage that stays organized quickly shows up wherever serveware gets used day after day. The dining area becomes a kind of test lab: do you keep platters and bowls visible on open shelving where resets are constant, or do you hide them in a buffet cabinet, closing the mess behind doors? At first, both systems promise “order”—but once a week’s worth of dinners, rushed hands, and hasty returns have passed, only one setup lets you find what you need fast without triggering a re-sorting project just to keep up.

    The Everyday Reality: Open Shelving vs. Closed Cabinets

    Open shelving signals calm—rows of plates, cups, and platters look easy to grab. But daily action quickly unravels this order. Dust gathers on exposed surfaces. Steam and splashes mark whatever sits out. The simple act of reaching for a mug in the morning or pulling a tray at night shifts the whole row, and neat stacks start to tilt. By Friday, your shelves can look less like curated storage and more like open proof of every last rushed breakfast or dinner prep. Resetting means either constant attention or facing a messy display until you make time to restore everything to its place.

    Closed buffet cabinets seem like a shortcut to order—doors shut and the clutter disappears. They block dust and hide chaos as long as what’s inside matches how you need to use it. But push an oversized platter onto a shelf sized for bowls, or stack mismatched trays just to get the doors closed, and you haven’t solved clutter—you’ve hidden it for now. The mismatch isn’t always visible, but it doesn’t disappear; it just waits until you’re searching for a serving bowl and end up digging through piles of mixed-up, jammed-in pieces while the meal pauses and stress rises.

    Where Storage Systems Actually Get Tested

    Night after night, serveware is cycled in and out—stacks of bowls on the move, platters back from washing, glasses quickly corralled in time for guests. That’s when the real test begins. If your buffet cabinet’s interior forces you to balance three trays on top of a row of bowls just to get the doors shut, you’re setting up the next retrieval for a mini landslide. If the shelves in your open system are too shallow, or not separated by type, things go missing behind tall platters, and what needs to be accessible is instantly buried. Nothing signals a failing storage setup faster than having to pull out half the cabinet just to find a matching set—or realizing you’ve chipped a plate because it was hidden behind a teetering pile.

    Open shelving leaves these failures in plain view; after a busy week, the disorder is public, every small misplacement adding to a mess that’s on display for anyone to see. Cabinet doors contain the sprawl, but only for a while—until you’re slowed down by blocked access, category mixing, or one section turning into a catch-all overflow bin. Both setups begin to break down as soon as the layout doesn’t fit the pressure points of real meal prep, clean-up, and return flow.

    Common Scenes That Signal a Mismatch

    • Reaching around a leaning stack of trays just to get a bowl parked behind them.
    • Dragging out the entire front row to rescue a seldom-used serving piece wedged in back.
    • Opening two or three sections before you can assemble a full set of glasses or utensils.
    • Watching one low shelf collect everything that doesn’t fit—the overflow zone no one wants to sort.

    None of this is rare. It’s the reality of a storage system that almost supports daily routine—but ends up requiring extra time and reshuffling just to keep running smoothly.

    Why What’s Inside the Cabinet Makes or Breaks the System

    Cabinet doors hide, but don’t fix, an interior that doesn’t fit real use. Fixed-height shelves rarely match the mixed heights and shapes of serveware. Tall bowls force smaller plates to sprawl sideways or double stack, and awkward gaps open up where nothing fits cleanly. After just a few hurried returns, categories blur together: a ladle gets lost behind trays, stacked platters shove smaller serving pieces into corners, and the system buckles under normal use. If the cabinet’s footprint forces you to bend, reach, or shuffle every time you need something, the storage starts working against you.

    These aren’t just minor hassles. Every bottle-necked shelf, blocked pathway, or overspilling edge adds seconds to retrievals, risks chipped dishes, and makes resets a heavier lift than they should be. A buffet cabinet that once looked like a calm surface starts dragging out meal prep and making the dining area feel cramped by clutter you thought you’d contained.

    The Quiet Impact of Adjustable Shelves and Clear Zones

    This is where adjustable shelving turns the whole equation. When shelf heights flex to fit your tallest platters upright, deep bowls rest securely, and every item has a home—not just a spot where it fits for today—storage finds its rhythm. Assigning sections by use (platters upright, mixing bowls nested, utensils within reach) simplifies retrieval and makes returning items a frictionless reset rather than a complicated reshuffle. Categories stay visible and usable all week, instead of blurring after a couple meals worth of rushed returns.

    Instead of a sweeping weekend overhaul, resets become quick—a five-minute scan: are large trays still standing, are serving spoons in their zone, is overflow contained where it belongs? The difference isn’t invisible: it shows up in uncluttered footpaths, fewer chipped dishes, and shorter pauses mid-meal because you can actually grab what you need without a search-and-rescue.

    Practical Tip: Assign “Return Zones” For Faster Reset

    Tape a simple marker or line a shelf to create clear “home base” zones—one for upright platters, another for nesting bowls, a bin for loose utensils. Even in shared households or during busy weeks, these defined landing spots cue everyone to put things back where they belong. The hidden system holds up even when routines get unpredictable and turns resets from a dreaded job into a simple, almost automatic check-in.

    What Lasts Is What Matches Real Use

    Hidden storage is only as useful as its interior logic. Only when adjustable shelves, clear category boundaries, and intentional landing spots align with the real movements—what gets grabbed most, what drifts, what sticks out or crowds shelves—does a buffet cabinet reduce frustration rather than just hiding it. Watch for:

    • Flexible shelving to adapt to each season’s changing serveware.
    • Dedicated areas: big items aren’t stacked with little ones, overflow is contained.
    • Enough depth and spacing so nothing gets buried, and everyday pieces are always in reach.
    • Zones for the pieces that constantly migrate or get lost in the mix.

    On paper, any cabinet can “contain” clutter. But it’s the invisible structure—how shelves change, how return flow works, how zones fight overflow—that earns back time and calm in the real world. When the inside fits the way you actually live, the difference is not just neater storage, but a dining area that works—less frustration, fewer slow-downs, and resets simple enough to keep up with actual life, not just first-day order.

    Find practical buffet cabinet and home storage solutions that hold up under real, repeated use at Gridry.

  • Why Pausing at the Door Transforms Your Dog Walking Routine

    Everything about dog walks feels routine—until one tiny snag at the door upends everything. You reach for the leash and hit a tangle of chew toys. You grab your dog’s collar, but your coat is blocked by a tumbling water bowl. That first slow, awkward pause—or the rush to skip it—determines whether your outing is smooth or just another round of tug, shuffle, and doorway scramble.

    Most routines don’t fail in obvious ways. They fray in seconds: a leash missed for one heartbeat, paws dancing because the towel isn’t where it should be, or a missed pause that leaves your dog spring-loaded and ready to bolt. Get these moments right, and exits start neutral, even relaxed. Ignore them, and friction adds up, trapping you in a loop where “organized” setups quietly sabotage the flow of every walk, return, or quick trip outside.

    Why the Doorway Pause Decides the Whole Routine

    What breaks up the start of your walk isn’t chaos or bad training. It’s the micro-friction at the threshold—hurrying to clip the leash, tripping over gear, or expecting your dog to seamlessly follow. Skip the pause, and your dog surges ahead or stalls, dragging your routine off-kilter before you’ve even shut the door. The difference shows immediately: steady walk versus tense, jerky zigzag. This isn’t about your dog “listening;” it’s structure collapsing where it matters most—in the three feet before and after you step outside.

    The hidden cost? Every time you lunge through the door, leash tension spikes, and your dog gets more wired to treat thresholds as launchpads, not reset points. Week by week, those seconds compound, making re-entry messier, walks less focused, and even quick bathroom breaks a study in missed timing and repeated annoyance.

    Why “Just Going” Triggers More Problems Later

    Speed feels efficient—clip the leash, crack the door, move. But skipping the pause forces your dog to choose impulse over calm: a leash snaps tight, gear snags on the doorframe, and both of you stumble through a half-prepared threshold. It isn’t just embarrassing once; it’s the root of those surges, tangled leashes, and last-second barks that creep into every routine: bedtime outings, muddy re-entries, urgent runs to the yard. With every “fast start,” the door itself trains your dog to leap, not wait. You end up cleaning more, calming less, and circling back to fix what rushed motion always worsens.

    When Rush Echoes Through the Day

    Even if you think you’re shaving seconds, a skipped pause leaves bigger messes. Dogs—especially the energetic or still learning—tag the sound of the latch or the swing of the door as a green light for chaos. Surges, barks, bolting for that first squirrel, or tracking unexpected mud inside all become extensions of that one weak moment. These aren’t rare flukes—they’re predictable outcomes of collapsed structure at thresholds that get repeated all day.

    What a Useful Doorway Pause Really Looks Like

    It’s easy to call any slowdown a “pause.” But in repeated use, only a real reset works: leash short and slack above the collar, shoulders floppy instead of taut, dog looking back at you—even for a second—instead of out the door. A pause that works isn’t about asking for a sit or statue stillness. It’s seeing restless paws flatten, a tail drop, and attention flicker from outside back to the routine. The best resets take five seconds, just long enough for outside energy to cool before it can surge through the door, not just for one outing but for the whole day’s flow.

    The Real-World Cost of Skipping the Pause

    • Leash snags just when you try to close or lock up
    • Push-and-pull struggles at every transition—not just the front door
    • Walks start tense, not steady; focus scatters before you hit the sidewalk
    • Returns home stay chaotic—muddy paw prints, barking, or missed cleanup

    These aren’t background hiccups—they’re the mounting glitches that quietly erode the sanity of routine dog-life, and they almost always sneak back in when your setup “looks” tidy but fails under repeat pressure.

    Where the Routine Breaks: Real Scenarios

    The Leash Fumble Dance

    You grab for the leash and find a chewy or two tangled in it, or a crate edge partially blocking your reach. While you rummage, your dog interprets the cluster as “go-time”—shoulders coil, paws twitch, leash is clipped in a scramble. The timing is done; the window for a reset is lost, and you’re shoved straight into managing a dog who thinks hesitation means launch.

    Post-Walk Return: Setup Falls Short

    Dog’s paws caked with dirt, you’re ready at the door, but the towel hangs on a side hook or is buried behind the crate. Quick wipe turns into a hopscotch, dirt spreads across the floor, and now both you and your dog are half in, half out—grabbing, blocking, tripping over each other because supplies were stashed for “neatness,” not quick reach during rhythms that keep repeating.

    Off-Kilter Exits: Owner and Dog Out of Sync

    Your dog pauses to scan the door for sounds; you juggle a phone, a bag, maybe groceries. You both move—the dog zigzags, your bag hooks the doorknob, the leash tugs, and now you’re improvising through another off-balance exit. In months, this slips into the background as just how the door “works,” but that mis-step is structural, and blunts every return, walk, or quick let-out after.

    None of these are disasters. But when setups repeatedly force little fixes—untangling, reaching, shuffling—they break the flow that should make routines feel smoother after dozens of uses, not more jagged.

    How a Real Pause Resets the Flow

    Five true seconds at the threshold quiets the day’s chaos before it swells. Stop together, don’t rush. Door creaks open an inch; leash is fixed short, not loose. Your hand is near the collar—dog’s body softens, you sense calm in real time. Don’t wait for a “perfect” still; wait for the twitchy energy to drop. Even a glance back counts. Most of all, it’s not ceremony—it’s practical: a break between the mess of previous steps and the next thing. The small investment turns into walks with less yanking, fewer urgent resets, and re-entries that don’t demand two more cleanups before you’ve even hung your keys.

    Practical Steps for the Doorway Pause

    • Pause at the threshold. Don’t block the door fully—just create a sliver of waiting, enough for energy to settle.
    • Leash tight near the collar, not flapping mid-length where it can snag.
    • Watch for real signs of softening— lowered shoulders, tail easing, eyes flicking back.
    • Wait out the pulse. Five seconds. If your dog twitches, wait until there’s a visible drop in drive.
    • Exit in sync—not a drag or a slingshot, just one steady shared step through.

    This micro-habit adds seconds but cuts off dozens of micro-problems before they flare.

    If Pausing Isn’t Enough: Adjusting Real Setups

    Not every entryway gives you a fair chance. Distracting window, crowded mat, or gear piled for looks rather than movement. Try shifting the routine to a back door, side exit, or any less bombarded threshold—one less likely to derail the pause. Shorten the leash for closer, quieter control. If the towel, wipes, or treat pouch always prompt a detour, move them within arm’s reach of where repeated use actually happens, not just where storage is easy. Over time, these tweaks shift your dog’s rhythm just as much as your own—building a true pause into the bones of your routine. “Looks organized” is nothing when “works every day” is still a struggle at the pressure points.

    Invisible Weak Points—When “Tidy” Still Disrupts the Routine

    Entryways can look clean on a slow Sunday, but bottleneck instantly on a busy morning. The crate’s edge, a shoe rack, or a half-full water bowl that “fits” out of the way blocks movement when you’re actually using the space. In real repeated use, setups either cut friction or keep bringing it back—no matter how good they initially seem. Most routines start failing at the same stress points after a few weeks: reaching past storage to grab a leash, re-entering without fast wipe access, or retracing steps when gear isn’t staged in the line of motion. Recognizing where your dog-life setup stalls in real time—especially under