Blog

  • Maximizing Entryway Space by Managing Swing Door Clearance

    Add any storage—bench, bin, basket—near a door that swings open, and you sign up for a daily test of what fits where. An inward-swinging entry door doesn’t just limit how much you can store; it reshapes the entire path in and out, forcing split-second decisions every time you cross the threshold. The “storage solution” that looked efficient the day you brought it home can slowly become a lineup of toe-stubs, sidesteps, and small detours, especially when you have to nudge shoes out of the way or slide a basket just to get the door all the way open. Real use reveals a pattern: every inch claimed by storage is another pinch point where routines pile up, overflow drifts, and resets slow down.

    The Invisible Battle Between Door Swing and Storage

    Every swing door slices through your entryway on an invisible path—an arc that no basket, rack, or bench can cross without setting up a future collision. At first, the zone seems clear enough: the door opens, your bench tucks along the edge, maybe no one complains. But as days stack up and routines layer on, the mess builds without anyone deciding it: shoes decide their own new boundary, bags get dumped at the nearest edge, and an umbrella—soaking wet—wobbles where the door barely misses it. These aren’t mistakes; they’re natural results when the “don’t-block” line is a living, moving thing.

    Storage units, even the most compact, tend to creep into this arc. And as each bit of storage encroaches, you give up just a little more of your only open lane. Eventually, every movement gets narrower, more awkward—and the bench you thought would solve mess starts to collect extra shoes, pushing everyday flow into a real bottleneck. Scuffed paint and banged toes are just symptoms of what’s actually happening: your entry’s working space has shrunk into an obstacle course, one that refills on its own.

    How Small Setup Choices Affect Everyday Flow

    A layout that looks neat at 7 a.m. rarely survives to dinner without cracks showing. It isn’t about too much stuff; it’s about the difference between storage that looks planned and storage that gives way under stacking routines. Say you plant a deep bench beside the door or a row of bins within arm’s reach—they fit on paper, but as soon as two bags and three pairs of shoes drop down by sunset, the open path you counted on disappears. You might think you just need more discipline, but every arrival tests one core thing: can you ever get the threshold actually clear, or does each reset end up temporary?

    Repeated Use Reveals the Flaws

    Picture the weekday reset that unravels by noon: shoes that begin in rows but balloon sideways by midweek; a work bag landing on the bench’s easy-access corner—right inside the door’s swing zone; jackets tossed to the nearest hook, which crowds the fallback zone you didn’t even plan for. Suddenly someone’s backed up in the entry, shifting bags, wedging their shoulder around the door to get in or out. The meltdown isn’t caused by too much storage—it’s the slow collision between moving bodies and the arc that storage always seems to cross. If you’re moving things aside every day just to open or shut the door, it’s the layout, not just the users.

    Common Patterns: When Storage Turns Into New Friction

    The “just for now” effect: The entryway bench is a magnet for anything “just dropped for a minute”—but the minute never ends. Shoes, bags, groceries, or gear accumulate in the gap between intention and real movement, crowding the only clear zone you need on repeat.

    The overflow edge: Every system finds its weak spot—usually the bench’s far end or in front of a utility cabinet. These areas catch whatever lacks a set home, quickly turning the area you value most into the one you have to dodge or step around, even if you “reset” it nightly.

    Daily door block: If the door bumps, pushes, or doesn’t open fully even once a week, the setup isn’t working under pressure. A shoe rack that gets nudged, a basket that takes the impact—that’s not just minor annoyance, it’s evidence your entry setup is fighting your natural routines instead of supporting them.

    Practical Fixes: Reset the Zone by Respecting the Door’s Arc

    The turning point comes when you move high-traffic storage—shoes, main bags, overflow bins—completely outside the door’s swing, even if it requires ditching bigger floor pieces for slimmer wall racks or upright cabinets. For example, shifting shoes from a bulky floor bench (always drifting into the danger zone) onto two narrow wall racks cleared up the mess almost overnight. The bench didn’t leave—it just moved further down, and only items that don’t migrate land there now. The result: at least 18 inches of clear path right at the entrance, even during peak chaos.

    The amount of storage didn’t change—the main collision point did. For once, you could walk through with arms full, not dodge surprise bags or a wall of scattered sneakers. The urge to create a “dump zone” lessened, resets sped up, and nobody had to stop to move five things behind the door just to leave. It’s not just about owning less; it’s about clearing the zone where everything otherwise bottlenecks.

    What to Watch for When Reviewing Your Layout

    • Door arc buffer: Measure your door’s full sweep and add a buffer—4–6 inches beyond the arc. Any item inside is a future collision, and the closer it is, the more likely it’ll collect clutter you never intended.
    • Wall-mounted options: Racks and hooks installed above the swing zone protect your path. These excel for keys, small bags, or daily-use gear, but heavier or kid-friendly items may demand alternative zones within reach but out of harm’s way.
    • Benches/cabinets: Place these outside the critical swing—far enough along the wall that nothing crosses into the threshold. Accept the tradeoff of taking a few extra steps; quick resets and free movement matter more than squeezing in one more bin beneath the door handle.

    Real-World Tips for Living With a Swing Door Entryway

    • Test your routine: Simulate a real return—hands full, jacket half-off, bag slipping, or muddy shoes in one hand. Where do you naturally want to drop things? If your answer is “where the door must swing,” adjust that zone until easy placement doesn’t block movement.
    • Don’t apologize for open floor: Emptiness right inside the threshold is leverage: it keeps routines smooth, resets fast, and movement constant. That unused patch is the difference between an entry that feels jammed and one that gives you breathing room day after day.

    The Daily Impact: Why This Detail Matters

    Living with a swing door isn’t about making the entry look perfect, but about catching how even the “best” organized system buckles under daily, repeated use. Most setups hold their shape for an hour after a deep clean; very few survive three days of real family life without the entry path clogging, the return flow stalling, or the same four bags and pairs of shoes drifting right back into the critical lane. The trouble isn’t visible on day one—it’s in the small scuffles at the threshold: the door that never opens all the way, the bag you keep nudging, the pile that returns even after last night’s cleanup. That’s the consequence of ignoring the door’s arc: every pass-through feels tighter, and the whole entry fills with small, avoidable friction.

    The difference is immediate when you respect the space a swinging door claims. Suddenly, routines that once slowed down now glide—walking in is faster, exits are calmer, and there’s less need for constant reshuffling. The best entry isn’t packed—it lets everything return to zero with less effort, keeping the threshold ready for anything your day throws at it.

    Find transition-space storage that fits your real routine at Betweenry.
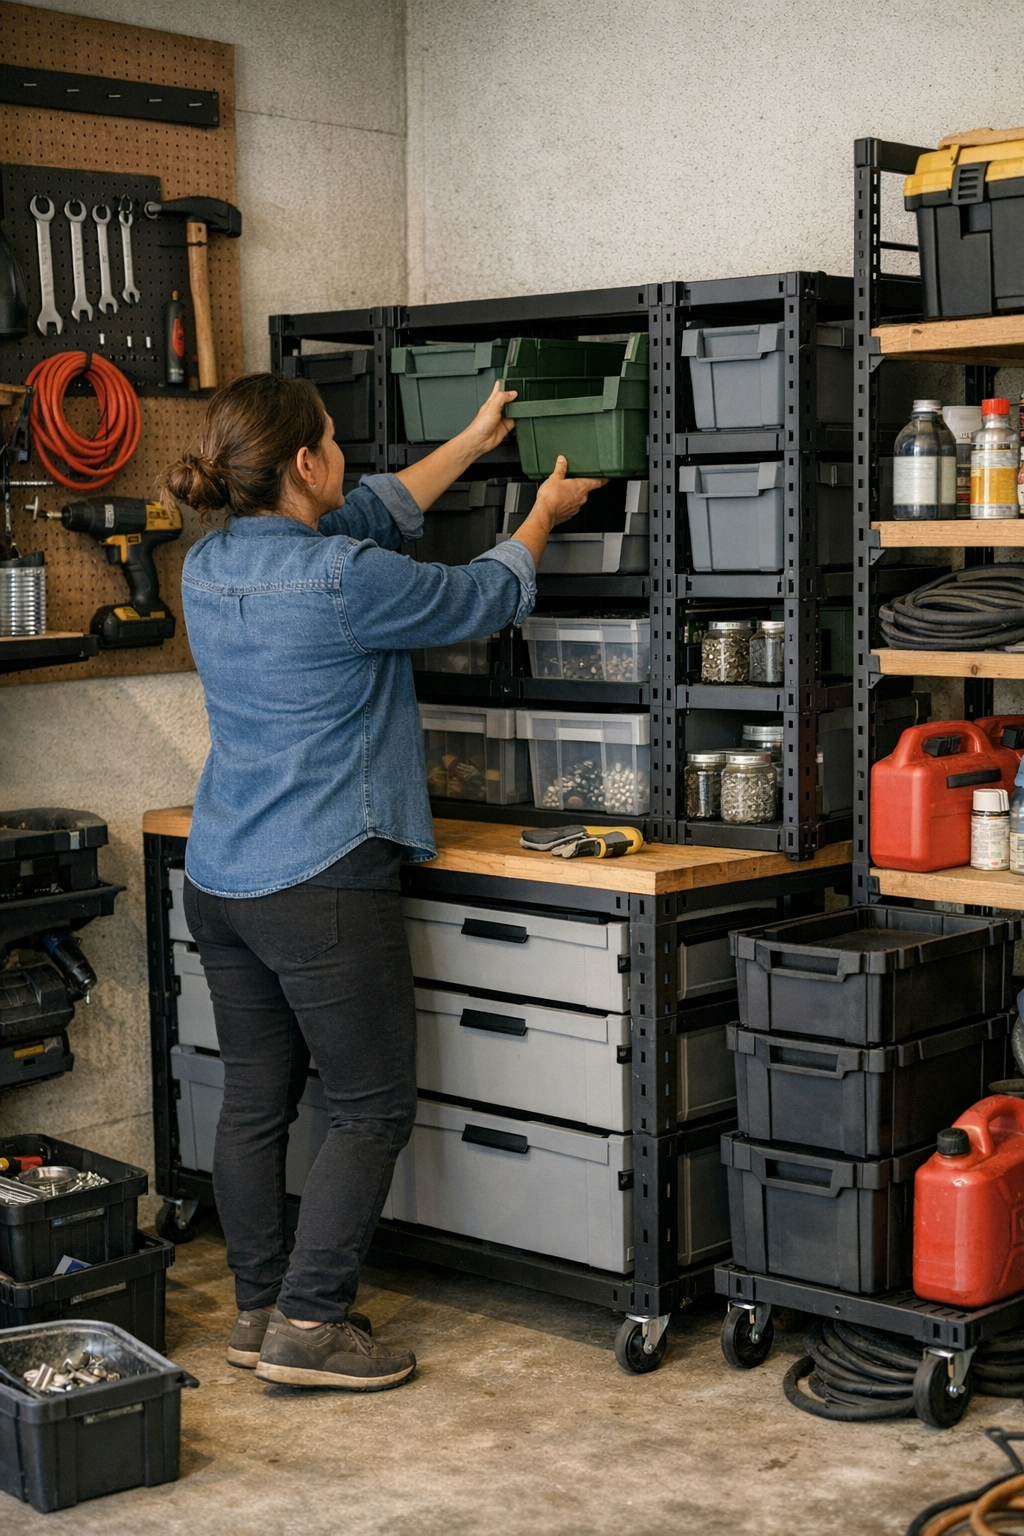
  • Why Predictable Placement Transforms Workshop Storage Efficiency

    Every garage and workspace looks perfect for exactly one day—until real life sets in. Shelves are lined up, bins are labeled, every tool has a place. The next morning, it’s still holding up. But by the end of the week, the system that once looked “done” is already fighting you: bins too narrow for what you really grab, a rolling cart that jams beside the door, shelves sagging under the “overflow” pile that’s already back. That finished look? It’s masking a new, daily battle—for every tool, every return, every bit of the path you have to clear just to work.

    When Order Is an Obstacle, Not a Solution

    It’s easy to mistake neatness for usability. The diagrams say “modular,” but actual routines reveal the gaps: a bin too snug, a shelf too tall, just enough friction that you hesitate to bother returning something the right way. Imagine it: mid-project, you walk in, keys drop on the bench, you reach for a screwdriver—except two bins have to move first, and there’s nowhere obvious left to put it back. Pretty soon, things pile up: stacked where they don’t belong, set “for now” atop a container, crowding out the system one shortcut at a time.

    This isn’t disorganization—it’s a mismatch between setup and real use. Every grumbled return or “temporary” stack is a tiny tax, and each adds up. A space that looks full of potential quietly drains momentum, until you’re choosing between a long cleanup or just working around the clutter.

    Spotting Friction Before the Reset Fatigue

    Most problems don’t announce themselves. They show up in habits you didn’t mean to form:

    • The rolling cart you planned to move freely now blocks the only walkway—and it rarely finds its way back.
    • The backup drill perches on a shelf edge because the “dedicated” bin is wedged tight and always full.
    • Cleanup keeps getting slower, every project leaving a wake of items to reshuffle or step over.
    • The back wall, loaded with hooks, ends up with the same heap collecting underneath—an “organized” pile you sidestep each time.

    What starts as a single overstuffed bin is suddenly a weekly headache: shifting stacks to clear the workbench, hunting for the missing wrench, and convincing yourself “I’ll fix this next weekend.” Resetting feels like starting over, and the old order never quite returns.

    “Boring” Placement: Why It’s the Only Shortcut That Works

    The setups that last often aren’t flashy. They’re the ones where every wrench, fastener, or pack of batteries gets a single, dedicated, boring spot. No doubled-up containers, no “overflow” tray that swallows half a dozen odd items—just a spot where you can return things in seconds and walk away.

    This isn’t about matching bins for show. It’s about shaping your storage around the rhythms you can’t escape: grabbing, using, and returning, without having to shuffle something else first. Over time, any spot that asks you to move two things just to put one away quietly falls apart. The “boring” approach—predictable, familiar, and frictionless—keeps projects moving, even when you’re tired or distracted. It removes every last excuse for letting something go “just for now.”

    Real Adjustments: Shifting from Display to Daily Flow

    The turning point is when you ignore what looks uniform and start shaping around what you use most. One corner might be lined with matching bins—until you realize none actually fit your primary hand tools. Returning a wrench means moving three containers left, getting the wrench in, then sliding them back, and ultimately skipping the step entirely. Within days, that spotless shelf evolves into a jumble of displaced tools and abandoned best intentions.

    The fix is never dramatic but always practical. Swap in a single wide bin for daily-use tools. Pull two inflexible containers, close the gap for low-use stuff, and deliberately leave a “quick return” space that’s open. Suddenly, you aren’t fighting your storage—you’re moving through it. Grab. Use. Return. Done. No domino effect, no backup, no creeping mess to undo at week’s end.

    How “Maximizing Space” Can Work Against You

    Garages and utility spaces are filled to their supposed limits: cabinets squeezed behind doors, shelves flush to the ceiling, bins crammed along the floor. But every “tightly packed” setup comes with hidden costs:

    • Rolling carts always in the way. There’s no true home for the cart once it leaves its spot—it collects clutter until someone finally digs it out.
    • Bins underfoot. Floor-level storage blocks the natural walking routes, making you sidestep or shuffle every trip.
    • Lost corners. Boxes fill dead spaces, nothing is ever truly accessible, and retrieval always requires extra steps—or gets ignored entirely.
    • Overloaded wall hooks. Each peg becomes a stacking zone until tools overlap, and the one you want is always at the back.

    A setup that fits the room can still sabotage your routine. The moment the fit is off, every project runs slower, every reset grows into a half-day job, and the promise of order becomes another to-do list.

    Function Wins: Spotting What Really Works in Daily Use

    It’s easy to impress guests with tidy rows of storage, but it’s the repeated use that tells you what works. The proof is in the daily dance: nudging the cart yet again to open a cabinet, fishing behind the same overhanging bin for the tape measure you always use, conceding that the “main” shelf is now just a dumping ground for whatever won’t fit somewhere else.

    The best systems don’t make you think twice. Every tool with real reach gets its own, instantly accessible spot—no second moves, no overlapping, no shuffling. You finish a project, tidy up in seconds, and never feel like you need to “reset” before starting the next round. The space finally works around your habits, not against them.

    Real-World Solution: The Staging Bin

    Not everything goes neatly back every time—sometimes you’re done for the night, a guest brings something back, or you’re between tasks. That’s why a single “staging” bin or shelf works as a pressure valve. It’s not a dumping ground; it’s a buffer that keeps your core system from bogging down when life happens. With it, your main setup never unravels over one stray item: mess stays contained, the rest stays easy.

    Setup That Follows Routine—Not Just Geometry

    The real test isn’t if things fit the floor plan—it’s if you’re gliding through the routine, not stepping around it. If you catch yourself shifting, squeezing, or hesitating around a spot, it’s the wrong fit. Storage should echo your rhythm: fast access, clean returns, no trail of “almost put away” tools or supplies. When the layout matches your flow, resets fade into the background. Cleanup isn’t a chore. You finish, you return, and the system is already ready for the next run.

    The best setup disappears into your habits—you don’t notice it, because nothing slows you down. Sessions end without chaos, and the system stays “reset” by default. There’s no going back to working around your own storage.

    Find modular storage, workshop shelving, mobile carts, wall systems, and more practical solutions for real spaces at StackNest.

  • Why Regular Power Cleaner Nozzle Inspection Saves Time and Ensures Quality

    Every shop regular knows the feeling: you prep your station, line up the power cleaner, stack new blades, set out a handful of nozzles fresh from the kit. Everything feels dialed—chrome bright, tools snug, workflow ready. But as soon as you hit that first stubborn join, it hits back. The jet that’s supposed to cut a razor-clean edge scatters, just a touch. The board isn’t as dustless as you’d expect. What looks perfect on the bench isn’t always sharp enough for the task once the work starts piling up.

    Precision Isn’t Just About Looks

    The shift comes slow—then all at once. You fire up the cleaner, drag it down a panel. You expect that crisp, pencil-thin line, but instead the spray widens, splinters of grit linger, and you start double-checking your passes. Maybe there’s a harsher edge to the motor’s sound, or a catch to the tool that wasn’t there before. Suddenly, your rhythm’s off. Second passes become third passes. And you’re running behind before you’ve finished your first row.

    The culprit? Not a battered nozzle—at least, not visually. The real wear hides inside: where a nozzle’s internal profile tumbles off spec after weeks of abrasive use, your laser-tight spray pattern follows it right out the door. Now, it isn’t brute failure that slows you—it’s that invisible drift, the slow leak of precision that leaves edges rough and fit questionable.

    When Reruns Replace Results

    Shop days run smoother when every pass does its job. But dull nozzles create a familiar grind: cut, sweep, spot a smear of debris or a dull patch, double back to reclean.

    This isn’t a one-time disaster—it’s the shop equivalent of a slow leak. The labor piles up: sides that don’t square, panels that need hand-sanding, fasteners that won’t seat flush because residual grit lingers. Little reruns, barely noticeable at first, become routine. Suddenly, you’re an hour over, just patching misfires up and down the line. That’s real time lost—not in the cutting or drilling, but crawling around fixing what should have been handled on the first go.

    Real Signs, Not Just Shop Lighting

    Nozzles rarely announce their decline. Even on the tenth heavy session, the threads grip, the chrome still flashes under the lights, and nothing screams “replace me.” What actually tips you off? Subtle change in the handling—a jitter of tool feedback, or a pattern that drifts just wide enough to demand more grunt work. Suddenly, your usual flow is broken.

    Here’s how it played out last month: racing against the clock on stacked MDF, I swapped in a new blade and a pristine nozzle. Each pass was easy—tight seams, no cleanup, every cut right the first time. But when I tried an older nozzle set aside “just in case”—the pattern ballooned, dust crept under the join, and the edge roughened. I ended up losing twenty minutes fixing a strip that should have taken five. No visible gouges or bends, but the cost was obvious in time and effort.

    The Quick Test That Matters

    Don’t guess—check. If the spray starts fanning out, if vibration feels different, or if seams roughen mid-job, it’s time to inspect. Shop lights help, but the foolproof test is simple: grab an inspection pin or a go/no-go gauge and check the nozzle opening. More than a hair (.2 mm) over spec? Retire it. Don’t go by how it looks; go by how it performs under real shop conditions.

    Small Tolerance, Big Trouble

    That sliver of wear—barely perceptible—translates into ragged patterns and hand-numbing reruns. Swapping early pays off: with a fresh nozzle, I knock out batch cuts and fasten without the drag of debris or the need for extra sanding. The difference is minutes per job, and real fatigue avoided. On deadline days, that margin matters.

    Watching for Wear as You Work

    Nozzle life doesn’t come with a warning buzzer. But you’ll feel the difference: spray shapes that scatter, new rattles or sudden fatigue through the handle, and passes that force you to recut panels you thought you’d finished. Ignore these cues, and you end up reliving the same avoidable mistakes—overheated tools, extra sanding sessions, fittings that almost align but never sit tight.

    Here’s the real loss: by the time you can see pitting or deformation, your workflow has been slipping for ages. Tool wear is stealthy; by the time it’s visible, your results are out the window.

    Turn Inspections Into a Habit

    This fix isn’t glamorous or time-consuming—a quick glance under the lights and one pin check before you move from stack to stack, especially after hard sessions on abrasive stock. It’s an easy habit to build: measure, replace, move on. That’s real control over your workflow—less fuss, less patching, less fatigue over the long haul.

    Whenever a nozzle seems even a shade oversized or off-round, don’t gamble on a “bonus” pass. Swap it out. The reward is immediate: nozzles shoot straight, passes stay sharp, and you trade patches and recuts for actual progress on the work that matters.

    Don’t Let Wear Sneak Past Your Radar

    In real shop life, nozzle wear rarely arrives with drama. It creeps in: patterns drift, edges fuzz, tool fatigue piles up, and each panel asks for more babysitting. Ignore the small slip-ups, and suddenly cleanup eats your afternoon. Skip an inspection, and the hidden friction grinds you down over hours and weeks.

    Build nozzle checks into your setup, and you’ll catch the drop in performance before it runs off with your time. You keep the work steady, your tools reliable, and your schedule on your terms. That’s the difference between just getting through the day—and actually owning it.

    http://gumboll.myshopify.com

  • Why Your Carry-On Setup Makes Travel Feel More Stressful Than It Should

    Travelers who pride themselves on a perfectly organized carry-on often hit the same wall: mid-trip, their “system” slows them down. On the home floor, every pouch and pocket looks under control. But try pulling a boarding pass from under stacked travel pouches with a boarding line pressing behind you, or dig out a charging cable during the pressure of airport security—what worked on the table turns into a speed bump in real use. The moment you have to move fast—boarding, security, sudden document checks—is when your carefully built structure goes from neat to nerve-racking. What seemed streamlined at home becomes a source of friction in motion. CarryOnSupply exists because almost every “orderly” carry-on creates these live travel bottlenecks.

    When Organization Creates Unexpected Slowdowns

    You leave home feeling set: nothing rattling loose, pockets clear, zippered mesh and organizers lined up. But real travel isn’t static. Pause at security, stand in a tight aisle, or juggle two bags and a passport at a boarding gate, and your cleanly packed layers don’t move with you. Suddenly, grabbing a single cable means feeling for the right pouch between toiletries and chargers, or unzipping two mesh sleeves just for a boarding pass. Every “efficient” system demands extra moves exactly when you don’t have seconds to spare—and time lost here is visible and aggravating, not theoretical.

    Visual order can blind you to operational drag. The first access might be fine: quick passport handoff, headphone retrieval. But after the second rushed repack—tray to bin, bin to seat—you’re already losing time to repeated zip-unzip cycles and stacked pouch juggling. What started out as a streamlined flow turns glitchy the minute the setup is used under real trip pressure.

    The Real Stress Points: Where Your Carry-on Structure Breaks Down

    The Blocked Aisle

    Your turn to board arrives. The line behind you grows as you reach for headphones and travel documents before stowing your carry-on. If your setup forces you into extra zippers, hidden pouches, or pouch shuffling, every second feels magnified—especially with impatient eyes watching. Order delays you. You pause, balancing objects on the seat arm, apologizing to queued passengers, all because that “organized” structure hides quick access under extra steps.

    Security Line Tangle

    Security works in strict order: liquids, laptop, documents, belt, tray. If any part of your essentials is tucked behind other pouches—boarding pass beneath your toiletry kit, charger under a stack of organizers—you pay with delay. Fumbling for a cable means opening the main compartment, re-stacking organizers in line, then scrambling to repack while trays pile up. A system that looked perfect on your bedroom floor now forces live improvisation and lost rhythm right when glances and trays are piling up.

    Layover and Long Days

    Mid-trip, with energy draining, your initial structure collapses further. Frequent pulling and repacking disturbs the neat layers; one pouch slides over another, an outer zipper jams, an urgent item is now two layers down. The third or fourth cycle—gate repack, curbside check, seat drop—proves the setup is slowing you, not supporting. What first looked organized now works against you, burdening every stop-and-move.

    Spotting the Subtle Repetition of Friction

    These aren’t minor delays. In transit, every additional pocket unzip, awkward pouch move, or scratch-around for sanitizer cuts directly into your pace. Maybe you kneel in the aisle for a charging cord. Maybe you pull out two unrelated pouches just to reach one document—feeling watched at a checkpoint as you untangle your own structure. Each micro-delay breaks flow and amplifies stress.

    The real friction: Over-layering, over-stacking, burying essentials beneath lesser-used items—all slow you down not once, but every single cycle. At home it’s invisible; after two or three retrievals, the drag shows itself in lost travel time and repeated setup fails.

    How to Rethink Carry-On Structure for Repeated Use

    After a few trips, the answer isn’t another pouch or a stricter organizational system—it’s simplifying the moves required for high-frequency items. The most effective shift? Reserve a shallow, external pocket for only your most-used essentials: passport, boarding pass, charging cables. No layers, no pouch stacking, no barrier objects. Just visible, direct, one-action access.

    This isn’t mindless minimalism. It’s a direct response to repeated-use friction. When these essentials sit solo in one dedicated spot, every checkpoint, gate, or quick tray-grab becomes smoother. You don’t break stride or upset the rest of your packing structure—just open, retrieve, and keep moving. It’s not theoretical efficiency; it’s practical access you feel on every stop, transfer, and seat change.

    Recognizing Which Setups Sabotage Flow

    Nested organizers, lined-up mesh, and perfectly squared-off tech pouches can look flawless but act like roadblocks in motion. If pulling a charger means detaching your toiletry kit, or if a document is “secured” inside, yet buried, you pay with lost moments and compromised flow. The problem isn’t messy packing—it’s packing that blocks speed and repackability through repeated steps and unnecessary barriers.

    Building a Setup That Actually Makes Travel Smoother

    The best carry-on isn’t the one that looks perfect when zipped shut; it’s the one you can operate with one hand after three rounds of access and repack. The strongest setups:

    • Keep top-priority items instantly accessible—never behind other organizers.
    • Eliminate moves where you’re forced to pull one thing to reach another.
    • Translate to quick, semi-blind repacking—no lining up pouches just for a photo finish.
    • Repeatedly survive travel chaos: dropped pouches, gate changes, nested repacks—without gradual breakdown or slowdowns by trip’s end.

    You don’t need to overhaul everything. Moving key items—like cables and documents—out of a nested pouch “system” and into a single, touch-ready section pays off most after repeated cycles. Every subsequent trip or transfer, you’re spared the slowdowns. The bag doesn’t just look lighter; it actually moves lighter through your whole travel day.

    Why “Order” Means More Than Just Looks

    Real organization isn’t about visual calm—it’s about closing the gap between how your bag appears and how it works once you start moving. If your structure forces you to pause, dig, and reorder every time, the surface neatness is just a cover for buried inefficiency. Choose setups tested by actual airport movement, not just by static preflight checks. Real travel exposes every layer that’s more performance theater than usable design.

    Find more carry-on travel solutions at CarryOnSupply.

  • How Ceiling Lighting Shapes Comfort and Usability in Shared Spaces

    The surest sign your ceiling lighting isn’t working? You start each day expecting a smooth routine, but the interruptions never stop. Glare bounces off your screen right when you need to focus. You reach for a shelf and realize you’re working in your own shadow. Your chair snags yet another loose cable—evidence that every lamp you’ve added is a patch for a larger problem: your lighting and support don’t fit the way you actually use the space. The photos looked clean and the fixture seemed minimal, but daily use exposes friction you can’t ignore—just trace the trail of moved lamps, taped plugs, and tangled lines. Most setups don’t look like trouble until you’re forced to adjust and readjust, losing focus to workarounds instead of getting anything done.

    How Quickly Bad Lighting Reveals Itself

    The difference between “looks finished” and “actually works” always surfaces by the third or fourth day. The first hour, that slim ceiling panel or flush fixture projects calm—no wires, no visible clutter. But as soon as normal routines set in—booting up your laptop, squaring up to a monitor, picking up stacks from a corner—you start chasing shadows and dodging flare-offs. What seemed like a clear, well-lit space now has cold spots and glare lines visible the moment you shift position. Add one lamp and you drag a new cord across your footpath. Scoot your chair back and you’re wrestling with a cable that wasn’t part of the plan. Each small hassle gets multiplied by repetition, amplifying how little the minimal look helps when practical lighting is missing.

    Why Minimal Fixtures Often Miss the Mark

    Visually minimal overhead lighting usually sacrifices use for looks. Most flush ceiling fixtures spill brightness all around but still can’t keep desk edges, room corners, or wall runs genuinely usable. The bloom of even light in a photo turns into patchy dimness every time you actually check the task surface, or a bolt of glare slicing into your field of vision when you sit at a screen.

    Shared and multi-use rooms make this clash worse: ceiling lights set the base level, but because they miss shelves and corners, any other lamp you add either fights the overhead glare or doubles the exposed cable chaos. The illusion of minimalism ends as soon as one “support” piece is needed—and the room’s balance is lost.

    When Looks Deceive: Clean Install, Messy Use

    You can reroute, bracket, and cover every ceiling wire, leaving a perfect surface overhead—until actual work destroys the effect. Shadows land where you want consistency. You plug in an extra lamp, and suddenly that “clean” path becomes a tangle of cords or a new tripping hazard right in your best walking line. Rely too much on the finished install and the lived experience becomes a mess of re-anchored supports and surfaces that never feel consistently usable.

    Scenes From a Frustrating Routine

    A compact workspace, a sharp low-profile fixture, and a single desk lamp—the setup looks solved at sunrise. But by lunch, reflections flicker on the screen and corners swallow detail. There’s no steady edge for work; adding a lamp means tape or another bracket, with cables coiling across the desk or floor. Simultaneously, the shelf edge you reach for is half-lit, and under-shelf lighting leaves an awkward transition so your hand still searches uncertainly for the right cover.

    Now everything requires a workaround. You’re taping cords to keep them out of wheel tracks, twisting flex arms hoping they’ll reach a blind spot, adjusting brightness by instinct rather than design. “Minimal” quickly turns to patchwork as new needs emerge—and the more you improvise, the less you trust the setup to actually help.

    When “Upgrades” Don’t Fix the Real Issue

    The cost isn’t just minor daily bother; with every fix, the routine gets heavier. Every new lamp or plug strip brings its own cable management headaches. You tack a tray under the desk only to realize another exposed channel gets in your way. Fill one dark zone and another appears across the room. Even with extra hardware, surface edges remain inconsistent, visibility shifts from hour to hour, and the impulse to “fix” things creeps back every few days.

    None of these patches solve the core mismatch. If the overhead doesn’t support the surface—if support hardware just papers over weak points—every quick fix just creates a new friction to remember and work around.

    What Actually Helped: A Real-World Lighting Change

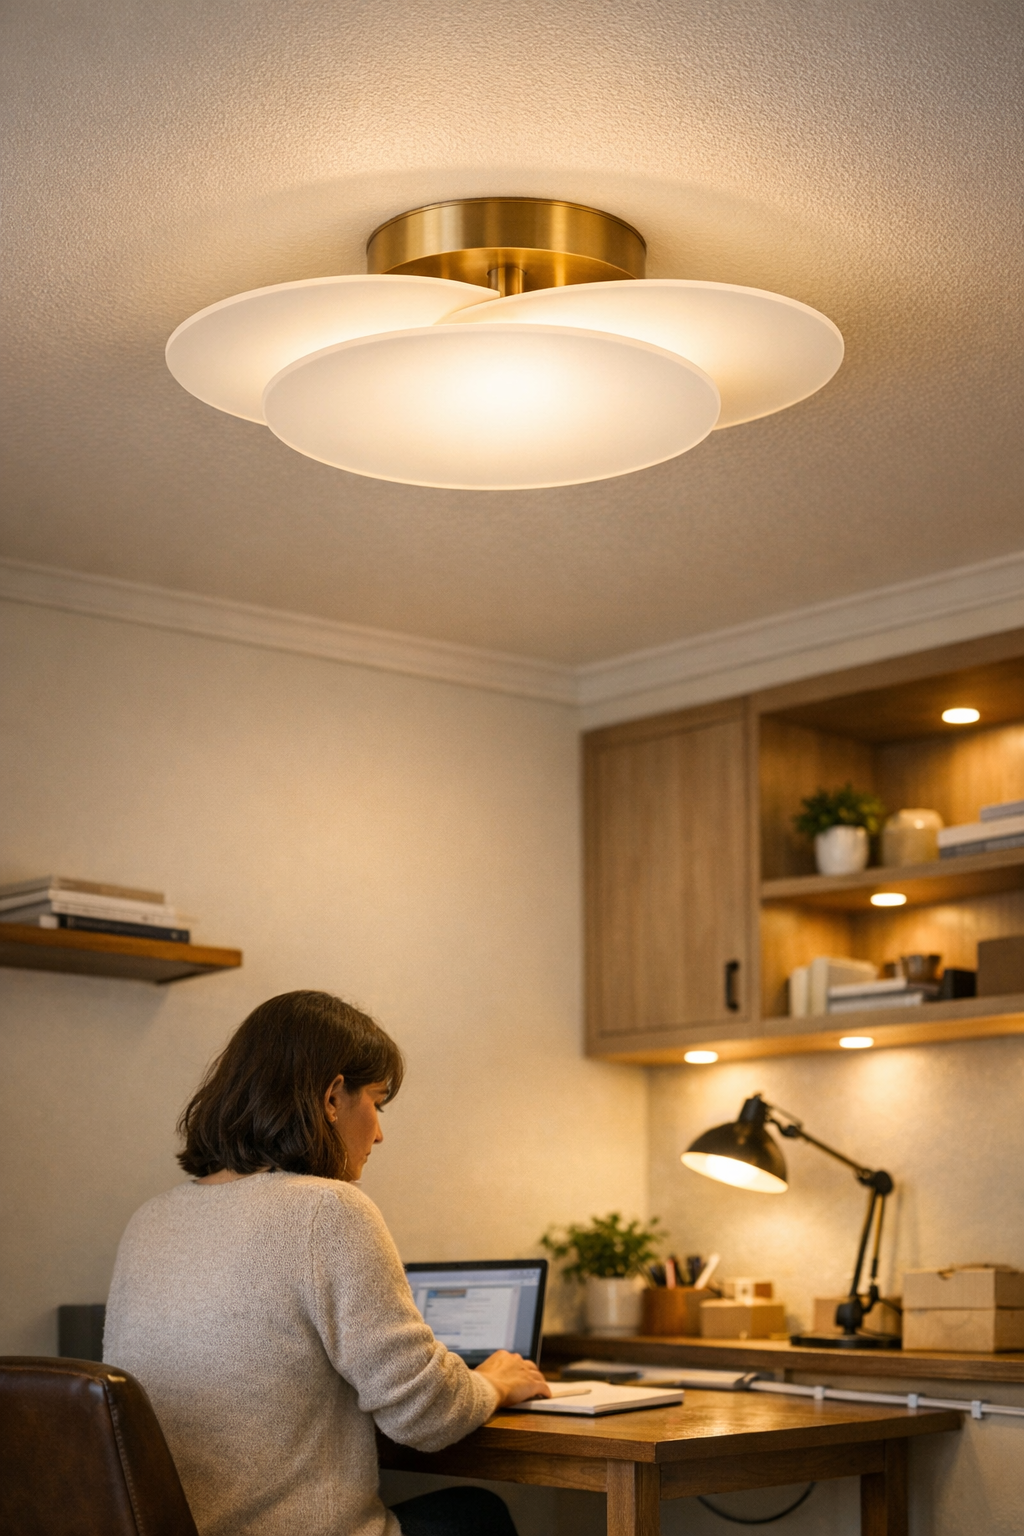
    After weeks of circling the same problems, I replaced my ceiling light with a dimmable, directional fixture—aimed so general tasks happened in an even pool, leaving targeted spots for wall and desk lights to fill. I anchored every essential cable with real brackets, running them tight along walls or under desk lips, not dragging loose over workspaces. Routine immediately changed: walls and shelves stayed visible, cords stopped snagging, and extra lamps were mostly for preference, not as a desperate patch for poor layout. The clarity wasn’t about perfection—it was about no longer losing focus to the same old avoidable interruptions.

    Tips for Sharper, Easier Daily Lighting

    Let Ambient Light Support—Not Dominate—Your Room

    Start with a dimmable or directional ceiling fixture, and set a lower base level. Your task and accent lighting should layer in, not have to fight or overtake a harsh overhead. This approach avoids harsh jumps and means additions actually solve problems instead of creating new ones.

    Beware the False Minimal: Clean Looks Can Hide Daily Friction

    A minimal fixture often means hidden discomfort: the key surfaces stay dim, fingers land in soft shadow, or glare hits your usual sightline. Evaluate fixtures during real work or shared use—track where you’re forced to move, tweak, or bring in backup hardware every day.

    Cable Management Isn’t Just “Nice to Have”

    Anchored cable runs are structure, not just style. When cords are parallel to surfaces—sheltered by proper brackets, never just looped in reach—you reduce snags, missed connections, and daily disruptions. Over weeks, this stops the low-grade friction that piles up and subtly dents your focus.

    The Payoff: Effortless Routine, Quiet Reliability

    Lighting and support that fit the real shape of your use—shielding glare, illuminating true work boundaries, anchoring cables out of the way—aren’t just tidier. They make routines flow, removing the interruptions that never appear in glossy photos but undercut every task. The test isn’t how perfect a surface looks, but how invisible the lighting feels once every movement is supported and every edge is actually clear.

    When daily work goes uninterrupted and your space stops reminding you of what’s wrong, you’ve finally landed on a setup that works—subtle, reliable, and adjusted to the room as you really use it.

    Visit LightSupport for lighting and support essentials that work in real-life use.

  • Transform Your Workspace by Lifting Cable Slack Off the Floor

    Rolling your chair to the desk should be automatic—until stray under-desk cables throw it off. Outwardly, a few coils tucked near the wall might suggest everything’s under control. But one week of actual work—moving between keyboard, notebook, and the occasional device grab—reveals the friction beneath: cables catch, wheels hesitate, and every adjustment risks a jolt of resistance under your feet. The desk looks tidy; the work doesn’t feel it. Foot nudges become routine just to shift position, and what seemed like “invisible order” steadily clutters each move, interrupting flow and breaking the promise of a ready workspace.

    Cable management stops being background detail the moment slack stays on the floor. What settles quietly in place at the start of the day turns into a web of mini-obstacles by lunch—a mental drag you barely notice until your reset speed slows, or you’re crawling under the desk for the third time to untangle, trace, or re-plug a loose cord. The risk isn’t just snags: it’s the subtle breakdown of workflow, where the desk remains deceptively neat but feels stubbornly unreliable and unpredictable as work stacks up.

    When cables “look” managed, but your feet know the snag

    Hiding cables against the baseboard with zip-ties or pressing loops into corners can fake visual calm—until you try to move. Shifting sideways to retrieve a notebook, leaning in for late-night edits, or simply adjusting your chair after a call: each move exposes the compromise. The “tidy” cable becomes a trap—sandpapering your shoes, catching toes, and forcing you to work around hazards rather than with a clear path. Workflow splinters as you dodge and nudge, focus breaking every time a coil drags or resists.

    Even tight cable box setups, meant to erase mess, just displace the real problem. You can hide a power brick, but an extra meter of cable freed from the floor never stays put. On a compact desk, there’s nowhere for slack to hide. Chair wheels hunt it down no matter how carefully you arrange things. The first serious cleaning triggers the usual scramble: unplugging half your setup as vacuuming turns order back into a tangled heap. By the end of the week, tracing cords back to power isn’t a rare event—it’s part of your regular troubleshooting routine.

    Everyday work signals the real cost of floor slack

    You notice it most when you’re not thinking about it. Shifting a notebook beside your keyboard, and suddenly the chair resists—caught by a cable you forgot was there. Digging your heel into the floor for more legroom and bumping your monitor or speaker cord until everything shifts out of place. Small reach habits—grabbing a charger, standing, or scooting in to see a shared screen—each become a calculation as slack left loose introduces just enough drag to disrupt the flow. Crowded setups magnify every interruption.

    No single cable is an isolated snag. Once a cord drifts out of its lane, interruptions repeat. By midday, it’s become reflex to nudge cords with your foot before rising. By week’s end, you’re unconsciously changing how you sit and move just to avoid knocking out a laptop charger or sending a USB hub tumbling. The effect is cumulative: every “tidy-up” still leaves you one move from the next disruption. Even after a clean reset, the sense of workspace stability and trust slowly unravels.

    Supporting cables off the floor rewires work flow

    The real fix transforms behavior more than appearance. Get slack above ground—using a cable tray or clips under the desk—and the pattern changes immediately. In my own setup, a tray set roughly 7cm from the desk’s back edge grabbed not only main cables, but the little adapters and plug-in hubs that once scraped at my feet. Suddenly, there’s no under-desk sweep before you roll forward, no steering around low drags, and no contortionist crawl just to add a device. Plugging in becomes a reach, not a ritual.

    What stands out isn’t just a neater look—it’s that the next session starts clean. You sit, shift, reach, and there’s no mental inventory of lurking hazards. Shoes, wheels, and bags drop free onto open floor. Monitors and chargers keep their connections without fuss, even after hours of changing position, stretching, or quick cleanups during a break. The interruption loop breaks; the workstation behaves as intended session after session.

    What actually changes in daily use

    Small frictions vanish. You roll straight in, reset the screen, grab what you need—no cable resistance or searching for a path. Cleaning turns predictable; end-of-day vacuuming no longer triggers chaos. In the middle of heavy work—video calls, switching from sitting to perch-standing, or reaching for drawer storage—cables stay silent, nothing else pulls attention. The cycle stops: fewer calculations, fewer forced adjustments, more time spent working, not troubleshooting.

    Quick workstation FAQ: solving cable slack for real work

    How do I keep my desk cables under control when moving constantly?

    Get slack off the floor along the entire cable route. Under-desk trays and cable sleeves pinned to the desktop stabilize cords and prevent snags, no matter how often you shift your chair or stretch across a deeper surface.

    Is a cable box enough to prevent under-desk mess?

    Cable boxes hide chunky adapters and power strips, but don’t control cable length between device and box. To actually keep slack up and away from movement paths, you need trays or clips—especially at a small desk, where every centimeter counts and foot space is at a premium.

    What’s the silent problem nobody fixes with cable slack?

    Letting slack gather on the floor turns little disruptions into a daily pattern—routine snags, dirt, disconnection. The common mistake: treating these as inevitable instead of reshaping the setup to eliminate them entirely.

    Final observation: off-the-floor support isn’t obvious—until it’s missing

    A desk can look minimalist and still underperform. Pulling cable slack above the floor doesn’t just clean up the view—it removes silent, repeat interruptions from every task. When you stop stepping on stray plugs and clipping chair wheels on drifts of slack, you don’t think about cables at all—and that’s the real goal. The best structure vanishes from attention, freeing up headspace and hands alike. You move, reset, and the desk stays ready, not just organized—a difference you only feel when you realize you’re no longer braced for interruption.

    Explore the full WorkBasic collection

  • How Instantly Wipe-Clean Surfaces Transform Daily Pet Care Routines

    Quick, efficient resets in your pet’s feeding area rarely survive a full week of real use. Bowls look tidy on day one—water, food, a mat in place—but by day three, the surface becomes gritty, corners hide dry food, and drips slide right under the mat. “Almost clean” keeps coming back. You expect a one-motion wipe, yet instead you’re nudging aside a loose bowl, tracking down a missing scoop, or wrestling a half-damp rag just to clear buildup that wasn’t supposed to happen. This isn’t a rare disaster; it’s how ordinary setups quietly slow you down—especially when the feeding area doubles as a hallway shortcut or shares space with shoe racks and late-night routines. CalmPetSupply’s world isn’t about looking organized for a photo, but about setups that don’t unravel with real, repeated use.

    Where Cleanup Routines Actually Stall

    Feeding corners don’t fall apart from messes you can see; it’s the steady drag of minor, stacked inconveniences. Dried food clings along the inner rim, water settles under a slightly warped edge, or crumbs wedge in the textured ridges of an average plastic mat. Even locating a clean rag or finding the right bowl in a reshuffled pile can throw off your routine. One small snag—like moving everything just to refill water before heading out—turns “quick cleanup” into repeat work. That single missing spoon, bowl, or spray bottle ensures resets lose their speed.

    You probably walk to refill water early in the morning and spot yesterday’s food crusted under the bowl lip. Fixing it means either breaking your stride to dig out a cleaning tool stashed far from reach, or leaving it “for later,” which compounds the slowdown. Every interruption pulls you off course, and every return to the area means starting from behind—not saving time, just deferring the reset.

    The Cumulative Cost of “Quick” Wipes

    Even strict routines can’t outpace buildup. There’s always residue in mat seams, sticky spots under food bowls, or fur drift that clings just out of swipe range. You wipe; the crumb line shifts but stays. After a few rotations—re-wiping, re-straightening, fishing particles out of grooves—what should last two minutes swallows your next ten. That’s breakfast running late, a skipped grooming pass, or an after-walk rush that leaves the setup worse off than before. Organization that calls for frequent resets or supply runs loses ground each time around.

    Homes with two pets, active children, or tighter spaces notice this layering effect faster. Each mealtime adds micro-messes, small enough to ignore until they gum up future routines and make shared spaces harder to navigate.

    Scenes from Real Pet Care Routines

    Picture a normal evening: you intend to wipe the feeding area, but your hands are already full with a leash or fur brush. The mat looks fine from across the room; only up close do you see the matted bits on the underside or dried splashes beneath the bowl. During a rushed night check-in, topping off water means dodging toys or nudging a bottle of cleaning spray out of the way just to slide the bowl free. These aren’t dramatic barriers but repeated stutters—small enough to accept, frequent enough to add up.

    The setup can start off strong: new mat, organized bowls, scoop within reach. But by midweek, filling water or dumping food leftovers means shifting every item out, wiping up under-edges, and restacking what should have stayed put. Each “quick reset” becomes a drawn-out sorting process—a drain hidden behind tidy surfaces.

    The Hidden Weak Points

    Many setups look orderly but still work against you. Mats with patterns to “hold” bowls in place trap crumbs and encourage wet spots to pool, turning wipe-downs into finger-scraping sessions. Even a non-slip tray, if it hides food debris at its seams, forces you to grab a brush mid-routine. You can wipe the top, but stubborn edges and under-mat lips make you return for missed patches. Every not-quite-clean corner delays resetting food, slows brushing, and ensures that returning a stray toy or prepping for the next walk means dealing with leftovers from the last round.

    Where Simple Materials Change the Pattern

    Setups that actually remove repeat friction have one thing in common—a surface with nowhere for mess to hide. Mats or trays with a smooth, flat base and a shallow edge mean a quick swipe clears every problem, skipping the scrubbing, second pass, or hunt for special tools. Cleaning supplies stay within arm’s reach and go unused more often, because they’re needed less. After a few days, you notice less hesitation—more willingness to refill, top off, or wipe down, knowing the whole area resets in one honest motion. The feeding area stays ready for whatever routine lands next, not just looking fine after a big clean.

    The main test isn’t how a setup looks when “deep cleaned.” It’s how little it asks during an ordinary week—resetting fast enough that the friction never builds, keeping attention on your actual care routine instead of a hidden maintenance list.

    Key Takeaways for Practical Pet Care Areas

    Surfaces that truly resist buildup—smooth, no-deep-grooves, no porous seams—let you finish resets fast and move on. Avoid mats or bowls with extra texture, raised patterns, or seams that demand picking or repeated wiping. The right choice is the one where nothing stays stuck in progress or corners you into a longer cleanup each time.

    Organization should mean more than a neat appearance. Feeding and watering routines stall when the setup creates friction with every pass: a bowl that sticks, a mat that hides damp crumbs, supplies that drift just out of reach. When you only need one wipe to finish—and nothing demands double-checking or repeat effort—pet care can actually stick to your preferred rhythm.

    The best setups do less; they don’t slow you down pretending to be tidy. They stay reliable side-by-side with your routine, not as another catch-up chore.

    For more practical insights and solutions designed for real-life pet routines, visit CalmPetSupply.

  • Small Storage Tweaks That Keep Your Closet Organized Longer

    An organized shelf is only a snapshot. Step into your closet after a weekend clean-out or admire a pantry you just sorted—everything looks under control. But by midweek, reality creeps back in. The baskets you labeled last Sunday are overflowing, jackets spill over shoe racks, and folded shirts start to lean into a single, sagging mass. The problem isn’t the room itself. It’s how fast the small details—where bins sit, how shelves are divided, what gets prime real estate—either support you through hectic mornings or quietly conspire against you by Friday.

    How “Organized” Slips Away—Faster Than You Think

    It’s easy to get fooled by how good a finished space looks on organizing day. Baskets line up neatly, snacks and cereal each have their own boxes, and T-shirts are fanned out for display. But life isn’t gentle. In a rush, you reach to the back of a shelf and drag out two things to get at the one you want. Someone tosses an umbrella into the scarf bin. Pretty soon, the borders blur and you’re back at square one, spending extra time hunting for your boots or fishing socks from under sports gear.

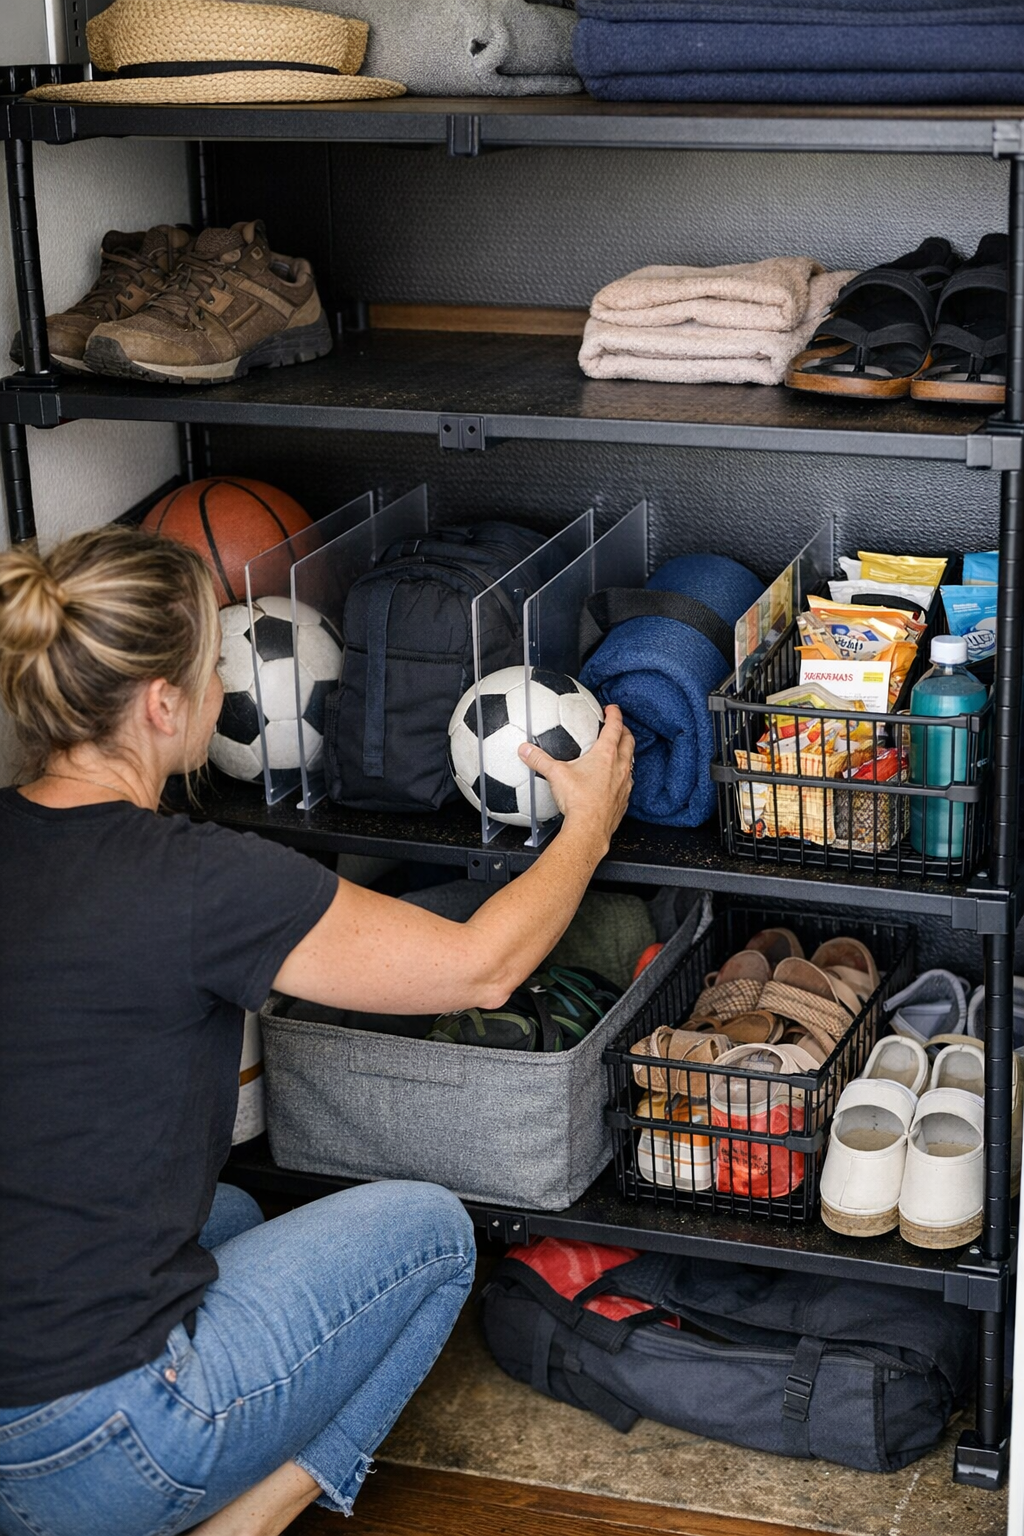
    Everyday friction in action: The entryway closet. Monday, backpacks, soccer balls, and shoes each claim a shelf. By Wednesday, gym bags are blocking the shoe rack and balls have rolled into coat territory. That “grab-and-go” confidence is gone. Instead, you’re playing item-Tetris, shifting piles to free up the space you just organized two days ago—most noticeable on the mornings you’re running late, when you feel every lost second.

    Chronic Friction: The Real Cost of Small Storage Mistakes

    Most organization failures don’t come with a bang—they wear you down with repeated, inconvenient moments. You reach for a charger and have to plow through mixed-up cords. The snacks, once separated, are now packed tight in a single basket. Folded shirts that started crisp are now slumped and collapsing, forcing you to lift two piles just to grab the one shirt you actually wear each week. It’s the subtle cost: every hesitation, every minor shuffle is a drain you only notice when you’re already stressed.

    Baskets as Black Holes and the Collapse of the Fold

    Baskets are meant to gather clutter—but when you can’t see inside, they fill with random odds and ends. Eventually, gloves, slips of mail, and surplus keys clump together in a single bin. Instead of making things easier, the basket becomes a scavenger hunt. It’s no better with folded stacks: towels or T-shirts promise efficiency, but after a few uses, the stacks lurch sideways. Each grab leaves the piles less stable, until the space below becomes dead space—just an awkward layer beneath slouching linens.

    Looking Tidy Isn’t the Same as Working Smoothly

    The biggest letdown comes when your shelves “look” organized but don’t actually feel easy to use. Maybe you’re always digging through bins to rescue something at the bottom, or you keep nudging boxes aside to read the label behind. The sense of order is there, but each routine trip—packing lunches, grabbing gym shoes, putting away groceries—takes a little too long, and the system unravels with every rushed handoff or distracted put-back.

    The Stealth Time-Suck of Manual Maintenance

    What began as a quick reset becomes a weekly slog: upend the baskets, restack the leaning piles, play bouncer for items that never stay in their lane. You lose minutes here and there, but over time, the drag is real—especially when you have to move a pile just to reach a single thing, or when whole bins get dumped out because no one remembers what belongs where. The result: you’re spending more energy maintaining the system than actually benefiting from it.

    Real Fixes: Storage That Keeps Up With Real Life

    The best setups don’t look like magazine spreads; they work for actual routines, even the imperfect, urgent ones. If shoes keep wandering into bag territory, or folded stacks keep crumbling, it’s not a sign you’re failing at tidiness—it’s a hint your setup just needs a tactical upgrade. Sometimes a simple, well-placed divider does more than any big overhaul.

    A subtle upgrade that stuck: Instead of tearing apart my entry closet, I slid a clear divider onto the shelf that suffered the worst category creep. Suddenly shoes, sports gear, and umbrellas had borders—even if someone tossed things in quickly, nothing slid into the wrong space. That five-second fix replaced my old habit of re-sorting the shelf every few days and made it actually functional. Grabbing shoes stopped feeling like defusing a pile that wanted to topple at every touch.

    Practical Tweaks With Real-World Payoff

    Dividers aren’t just cosmetic—they make physical boundaries you (and everyone else) can see and follow. Low, open bins prevent daily-use items from vanishing into deep containers, so you can grab and replace things quickly. Put the heavy hitters—the shoes you wear every morning, the most-used towels—in the front, not buried behind out-of-season gear. If stacks won’t cooperate, cut them down or corral them in cubbies: a smaller pile is far less likely to topple, and you won’t spend every evening tidying the same shelf.

    Easy Upgrades to Reinforce Your Setup

    • Draw clear boundaries: If you can’t tell what a shelf is for in two seconds, add a visible divider, a labeled basket, or even a sticky note—anything that reminds users where things go.
    • Use shallower bins: Deep containers tempt you to pack more in, but they turn into junk drawers before you know it. Shallow bins keep categories honest and essentials in plain sight.
    • Max out vertical—but don’t over-stack: Use the height of your closet or shelves wisely, but never pile things higher than you can easily reach. Over-stacking doesn’t create space; it creates chaos out of sight.
    • Fix the failing spot first: If one area keeps going off the rails, swap in a divider or break up the contents before rethinking the whole closet. Small changes often fix stubborn trouble zones.

    Organization That Actually Sticks—Even When Life Doesn’t Slow Down

    Closets and storage shelves will always drift off-course as the week barrels forward. But with simple changes—a divider here, a targeted bin there—the boundaries between categories hold longer and put-backs really are quick. True organization isn’t about a flawless look; it’s about a system that can withstand real family life, surprise messes, and imperfect routines. The end result: less reshuffling, faster resets, and a reliable sense of order that greets you every time you open the door.

    See solutions that make everyday storage work at ClosetWorks.

  • How Proper Cutout Placement Transforms Cable Management in Storage Cabinets

    The illusion of organization: where hidden cables attack daily flow

    A storage cabinet promises instant order—a smooth front, no wire jungle, all those adapters out of sight. But if you’ve ever opened a cabinet expecting calm and found a twisted heap of charging cables, you know the surface is a lie. Most cabinet setups break down at the first real test: a charger swap, an extra device, or a rushed retrieval. Instead of quick access, there’s a cluster of cords pulling against each other, tangled around adapters, forcing you to fish blindly or yank out a whole ball just to charge a phone. The visual reset lasts hours; the everyday chaos returns with the first sign of shared use, overflow, or one changed device. Storage may look organized from the outside, but the lived routine inside tells a different story—too many setups trade visible calm for recurring hassle.

    What actually happens after the cabinet door closes?

    Even if you start with device-specific cutouts and tidy anchor points, reality catches up. Someone unplugs a speaker but doesn’t rewind the cord. The power strip slides on a slick shelf. One quick charger grab at night, and three cables slip out of their channels, collapsing the system into messy overlap. Over time, every “just for now” shortcut builds up: adapters lean off their shelf, cord slack pools at the bottom, and cutouts that once made sense become pinpoints for bunched, snagged wires. The mess isn’t always visible, but the delays never disappear—you end up clawing past loose cords or bumping your hand against the tangle every time you need a device. A cabinet that looks calm at a distance quietly sabotages daily flow up close.

    When visibility hides the friction

    Hidden storage hides clutter from visitors, but not from lived-in routines. What looks crisp to guests becomes a search-and-reset loop for anyone using the cabinet. In shared family spaces or communal work zones, forgotten cables knot around each other, and chasing the right charger means tracing cords by hand, usually while something else shifts out of place. As more users drop random devices into the mix, friction doubles: a quick charge stops being quick, and the time to reset—even if you bother—grows longer with every round. The real indicator is how often you find mismatched cables stuck in the door or trailing out the back, crowding what’s meant to be an easy-access zone.

    Spotting where cutouts matter (and where they don’t go far enough)

    Cabinet cutouts promise organization, but only if they match real device zones and habits. Clustered cable holes mean cables fight for the same tight gap, stacking up at a single pinch point. If your main tablet lives above the nearest cutout, you improvise—a cable drapes at an angle, another runs across open space, and soon even tidy layouts breed runaway slack and tangle. When the placement of cutouts ignores how people actually reach in and use the storage, the result is crowding, cable bends, and cords left hanging out because nobody wants to play threading games just to reset.

    Real-use mismatch: Clean look, tangled routine

    Picture a living room cabinet transformed into a family charging station. On day one: tablets lined up, headphones hanging neatly, spares stacked. By midweek, an extra laptop appears, a couple more chargers sneak in, and the universal remote gets thrown in at the end. Cords now overlap at a single slot; adapters topple into the heap. When you need your phone in a hurry, you’re yanking on the right cord but getting three others with it—resetting the whole mess takes more effort each time, until no one bothers and chaos becomes the default.

    Small adjustments that shift daily routines

    The breakthrough isn’t another basket or color-coded tag. It’s matching each device with its own cable exit, right where it naturally sits. Three routers? Carve three cutouts, aligned at shelf level—no overlap, no wrestling cords past each other. A kitchen counter charging zone? Each phone or gadget needs its own outlet through the back, not a single exit point. Small alignment tweaks mean next-day resets take seconds: grab, return, done. When shelves and cutouts map to actual use—not just a designer’s first setup—the storage works under rush, not just under inspection.

    The measurable shift: Time spent resetting drops

    In homes and busy offices with this setup, the change is obvious—retrieval gets efficient, cables stop snagging, and the chore of reorganizing becomes rare. Instead of five-minute hunts and delicate balancing acts with power bars, you spend seconds grabbing or putting back a device. Most importantly, people use the storage as intended because friction stays low: overlap is minimized, return paths are clear, and cords no longer default to a tangled ball after the third or fourth use.

    Why retrofitting cutouts rarely fixes the issue

    Retrofitting more holes doesn’t save a failing system. Drilling new cutouts often chips paint, leaves splinters, or compromises structural corners. Worse, these improvised fixes rarely evolve with your device mix—today’s smart speaker swaps out for tomorrow’s router, leaving cable holes stranded in the wrong spot. Each afterthought cutout risks replicating the original mistake: bunching, awkward cable drape, and a patchwork of mismatched slots that invite more crowding, not less. What’s sold as a late fix can become a lasting source of friction and visual drift.

    Common mistakes (and how to sidestep them)

    The two biggest layout mistakes? Forcing too many cords through one opening and grouping unrelated devices by convenience, not use. If you end up holding a shifting power bar on your lap while untangling knots, you’re already in this trap. Every fresh device added to a pile with no extra cutout nudges the system towards complete collapse—retrieval slows, and put-back gets skipped until the hidden chaos leaks out as visible disorder. The more the storage scheme crowds different categories into a fake order, the harder any real reset or regular use becomes.

    Making hidden storage work for your actual routine

    The true measure of a cabinet, bench, or wall unit isn’t what it hides on day one, but how much it speeds (or slows) repeated use a month later. The steadiest solutions match exit points and shelf positions with real-life habits—keeping shared zones accessible, separation real, and reset friction low. No product or plan eliminates all mess, and setups drift over time. But choosing storage designed for the way you move, reach, and reset cuts down on backtracking, daily tangles, and that invisible burden of having to “fight” your organization just to live normally. When cable exits and device locations line up, chaos stays in check—and the inside never returns to that cycle of quick calm, slow mess, and invisible hassle.

    Find more practical solutions for inside-storage and cable management at Gridry.

  • Optimizing Entryway Bins to Prevent Backyard Debris Overflow

    The real test of any outdoor setup starts at the threshold: that patch by the door where routines either flow or stall, depending on what gets dragged back in. You set down a bin, thinking you’ve bought yourself order—a place for muddy gloves, stray twigs, the hand tool you nearly leave on the lawn. For a few days, it works: less chaos, more space to step inside. But friction always finds the weak spot. Suddenly, clutter reappears in the corner of your eye, and the so-called landing zone is just reshuffling the mess, not containing it.

    When Outdoor Entry Turns Into a Trap

    Bare ground by the entry is the easiest invitation for chaos. By Tuesday, wet boots have laid a trail of leaves. Thursday, garden stakes from last weekend are still propped awkwardly against the wall. Every return from the yard adds another layer—one more item dumped, one more object blocking just enough of the path that you start sidestepping or shoving things aside on autopilot. There’s no clear zone, just a growing tangle in the spot you cross the most. A reset isn’t “set it and forget it”—it’s a lopsided shuffle, again and again.

    When the Bin Makes Things Worse

    So you add a bin. Maybe it’s a repurposed tub, a wide plastic tote, or a leftover storage barrel. One week in, the real pattern emerges. The bin’s too low, so you kneel or bend every time you return pruners. Its sides are wobbly, the rim’s too high, or the opening’s narrow—so tools, scraps, and debris teeter on top, sliding free at the first bump. Walking through means swerving around half-fallen piles. Even the quick job—grabbing gloves and dropping off sticks—means wrangling with what should have been a solution, not another obstacle.

    How Overflow Steals Your Flow

    Overflow destroys the rhythm: you notice when you have to nudge a shovel just to open the door. Rakes go from “put away” to balanced awkwardly against the wall, slowly sagging into the footpath. Each tool that can’t go inside is another barrier. Reset time stretches out—shuffle, scoop, shift, repeat. Sometimes the footprint looks “contained,” but it doesn’t feel clear; every reset reveals spillover creeping out, and you’re managing the zone, not moving through it.

    Invisible Frictions Make Or Break the Routine

    Most clutter doesn’t explode overnight. It grows from those in-between moments: you rest a shears on the rim “just for now,” toss a handful of sticks in the bin but miss, notice a child’s boots wedged under the tote lip. Before you realize it, the clearing by the door morphs into a jumble of items you meant to organize. Shared-use spaces—side yards, patio entryways, garage crossings—are the worst. Everyone’s routine leaves a trace, but no one’s system fits how the area is actually crossed during a busy week.

    Why Bin Design Actually Matters

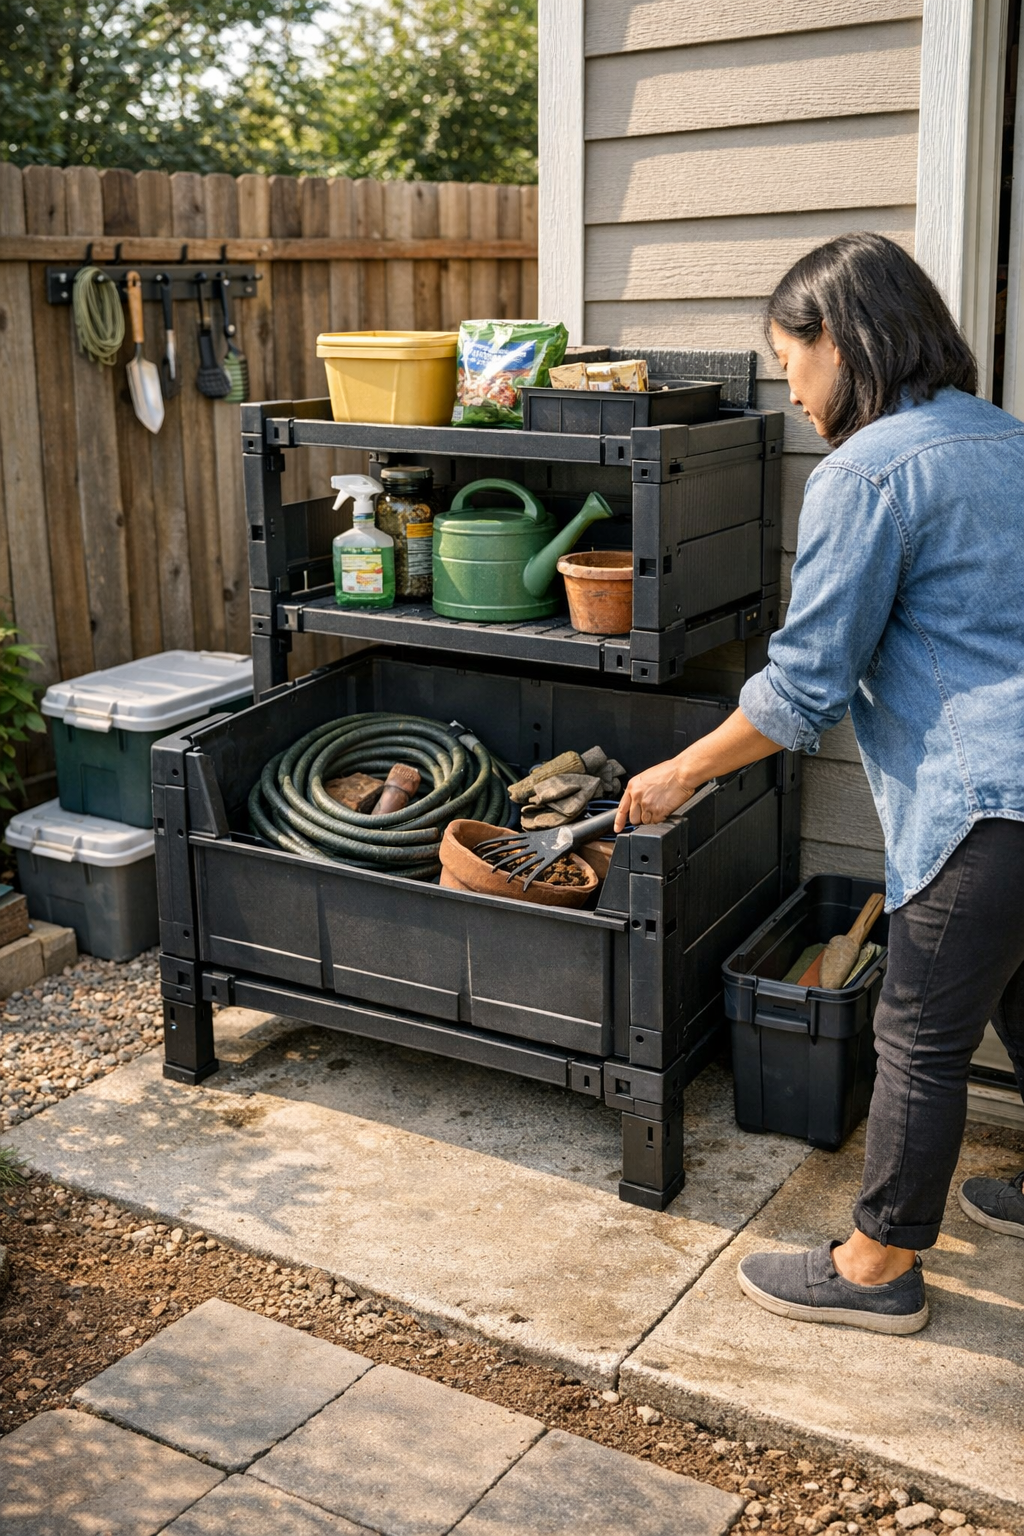
    Most bins aren’t built for outdoor flow—they’re built for capacity or looks. A better design sometimes comes down to a single measurement. A lowered front edge (no more than a foot off the ground) and a sturdy, slightly elevated base transforms the return—no crouching, no fighting against a tall lip. The broom actually sweeps out the debris instead of scattering it. Oversized tools go in, not balanced precariously outside. It makes the “reset” invisible—a quick motion rather than a repeated struggle.

    Spotting When the System Breaks Down

    After a marathon weekend—kids cycling through yard projects, a big rake-up, rain-lashed boots launching leaves inside—the pressure test is not what the bin holds new, but how worn-in the space feels afterward. Look out for:

    • Tools clogging up the zone beside the bin, stranded outside because there’s no real fit
    • Scraps teetering on the rim or sliding into corners but never quite gone
    • Needing to side-step your own system to reach the door
    • Overflow forming a new pile in the direct walking line

    These aren’t theoretical flaws—they’re interruptions you feel every single crossing. The difference between “looks sorted” and “functions clearly” is one too many resets that don’t actually clear anything.

    Real Scene: When “One Bin” Isn’t Enough

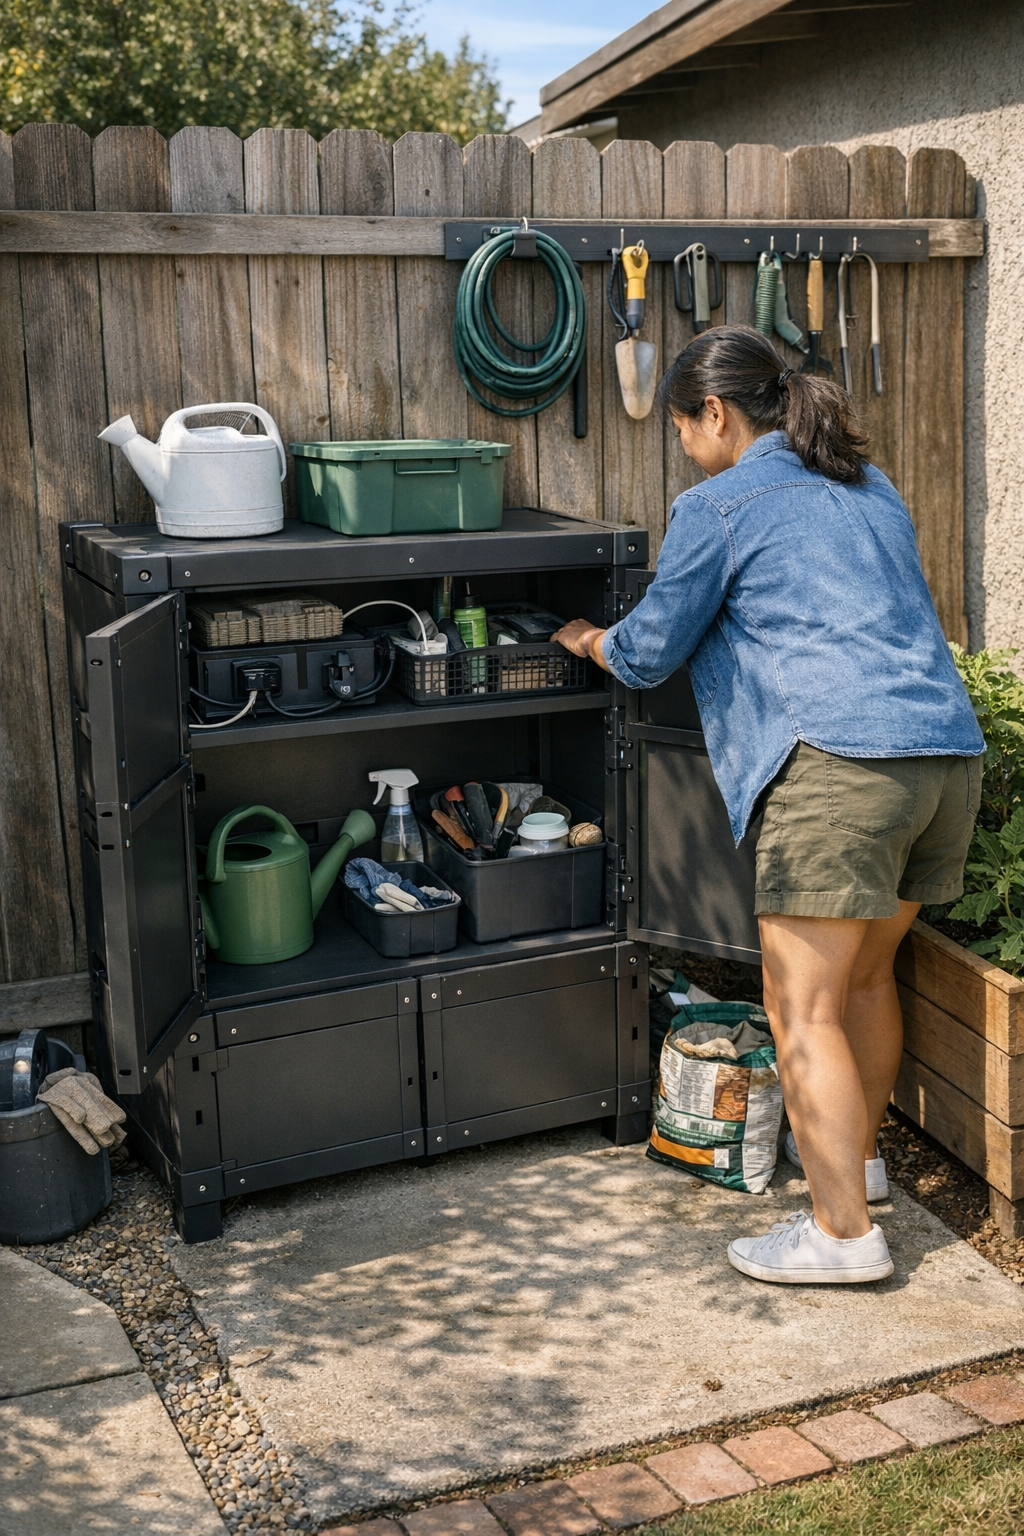
    Take a narrow strip running the length of a fence—a utility lane meant for fast grabs and landings. You set a plastic tote under the eaves, thinking you’ve finally contained the routine. Day one, it’s fine. But by Friday, the inside is blocked by a tangled hose. Old gloves pile on the far corner. Bags of soil slump against one wall, and there’s a slow ooze of twigs and mud trailing across the bricks. Suddenly, the “out of sight” look is hiding a jammed-up reset. Every time you cross, you have to dig or drag something aside before you actually use the path.

    Now swap that for a bin that’s been considered: solid, slightly lifted, with a clear edge at sweep-height. The path clears for every trip, not just the first. Tools drop straight in; leaf litter flicks from broom to bin in under a second. The dead corner stays useful—no more awkward gaps waiting to swallow boots. Even on busy days, resets don’t balloon into a full cleanup, and the area feels passable, not provisional.

    The Power of Noticing Small Setup Flaws

    Every weak detail—bin placed too low, entry edge too high, base that sags—sets up the next cycle of slowdowns. If you’re pushing bags aside just to create a landing, or picking up the same scrap pile twice, the system isn’t broken but it isn’t working for you. The moments when you notice yourself hesitating or rearranging mid-task are the clues: the layout fit the space, but not the way you actually use it.

    Entry Zone Reset Tactics That Actually Work

    • Audit your resets. Check what collects outside the bin—do the missed returns form a pattern?
    • Size honestly for returns. If half your drops are bulky or odd-shaped, upgrade to wider access and firmer sides.
    • Lift your landing zone. Even a few bricks or a solid base create a target for quick sweeps—less bending, less sifting through mud, less impromptu flood control.
    • Set a reset trigger by spill, not schedule. Overflow signals you’re about to hit a wall—reset before walking paths shrink to an awkward shuffle.

    Function First: The Real Mark Of Organized Outdoor Space

    A bin that just “looks good” lulls you into accepting slow, blocked movement and constant micro-resets. The setups that work are the ones you barely notice—where resets shrink instead of grow, and the only footprints visible are the ones heading in and out, not swirling around a tangle. Function in busy, real yards doesn’t mean zero clutter; it means every return finds a place, and each crossing happens without hesitation.

    Find practical outdoor organization solutions at TidyYard.