Blog

  • How Simple Storage Habits Prevent Rust on Oscillating Power Tools

    Your multitool is supposed to make jobs faster, not add new headaches. Yet if you’ve ever grabbed yours after weeks in “dry” storage—maybe from the cold garage or the back of a crowded van—then struggled to slot in a blade or felt a stubborn hitch changing a sanding pad, you already know the secret enemy: hidden rust. It’s rarely blatant. First comes a slight drag fitting a new accessory, then a sticky clamp that should snap, now fighting back. Pretty soon, a project that should flow starts leaking minutes and draining your patience. Tool performance fades not in a dramatic breakdown but through tiny setbacks—less speed, sloppier cuts, more fatigue by the hour.

    Why “Dry Enough” Storage Fools You Every Time

    It’s easy to think a cool, dry shelf will shield your kit. But real workshops don’t stick to neat rules. Even bone-dry air lets condensation form on cold steel after a night’s temperature drop. And tool metal loves to hold moisture—maybe sweat from last session’s quick grip, maybe summer humidity that lingers for hours between tasks.

    The problem: you don’t see it until it matters. A paper-thin smear of corrosion on blade seats and clamps saps the “quick change” right out of your multitool. That extra force needed to seat a blade? It isn’t just nuisance—it translates directly to lost accuracy, awkward grip angles, and amplified hand fatigue every session. Sometimes, rust sets in less than a week if dust and sweat ride into storage. The tool looks fine but behaves all wrong when you need real control.

    A Few Extra Seconds Change Everything: Wipe and Oil

    The proof is easiest to spot in side-by-side use. Grab two multitools—one tossed onto the shelf after work, the other wiped and oiled before storage. The first time you swap a fine-tooth blade, the neglected tool seizes up, misaligns, or sends you searching for extra torque just to lock it in. The oiled tool feels instantly different—clamps close with a smooth snap, accessories drop into position, and you don’t burn energy wrestling tiny details on an already tight job.

    Picture trimming a door casing flush against tile: if your blade mount grabs, your line slips or the multitool stalls just as you reach the edge. Or switch to detail sanding for cabinetry: every extra gram of resistance magnifies your error and roughs up your finish. Rust quietly trades away the very precision the multitool was meant for, multiplying correction work later. It isn’t dramatic failure; it’s relentless, creeping friction that chips quality and extends your to-do list.

    Where It Really Hurts: Friction at Every Step

    Resistance isn’t just psychological; it’s measurable. A sticking quick-change slot can chew up bits and blades, untighten mounts mid-use, and push your grip into unsafe wrist contortions. Miss one oiling, and you’ll find every accessory change takes longer, every pad eats more grit, and every failed line means sanding out mistakes you could have avoided. That half-minute fighting a stuck part while a drill or multitool runs at your heels adds up; so does the fatigue from every rougher hand motion forced by hidden corrosion.

    Rust doesn’t limit itself to the showpiece tools, either. Drill chucks start to skip when mounting bits. Changing to a spade bit or countersink means jiggling through resistance instead of a snappy shift. Even adjusting clamping guides—anything with bare steel—becomes effort, especially under jobsite pressure where every second counts and a misaligned bit spells rework.

    Not Just Surface Trouble: How Moisture Lingers

    Sawdust, sweat, and stickiness are stealthy allies of rust. Woodchips from a humid cut, greasy fingerprints after a long install, dust packed into slot corners—every one traps moisture right where rust loves to start. Metal left bare, even after a quick cloth-off, gives corrosion a foothold before you notice a single brown fleck. By the time you feel resistance, blade tips may already be chipped, and accessory fit can drift just enough to force extra sanding or bad cuts, draining both accuracy and tempo.

    If you move between locations—garage, basement shop, jobsite trailer—those temperature swings and bursts of damp air set up fast. One overnight reset, and accessory slots can transform from smooth to sticky before you ever see it coming.

    The Three Second Habit: Quick Oiling, Lasting Results

    There’s no magic: just seconds of real prevention. After the usual dust-off, a light spray or dab of mineral oil on mounts and contact faces throws up a barrier, buying time against moisture. This isn’t fussy maintenance; it’s the difference between days of glide and days of grind. Across real shops, this step can drop the effort needed to seat attachments by half. Clamp force falls, swaps become easy, and by the next session, your multitool responds with the snap and surety you felt the first week you bought it.

    It’s invaluable on big tasks—a full sheet install, a series of switch changes—but the payoff multiplies on small, late-night fixes and awkward angles where lost control means another late return to the shop. A few seconds of oil is simply a form of time-saving insurance that stacks up over project after project.

    Keep It Doable: Oil Where It Counts, When It Counts

    Focus on high-contact parts, not just surfaces. Skip the urge to polish every inch; prioritize slots, clamps, blade seats, and active fasteners. Build it into your post-work rhythm: brush, wipe, a few drops of oil, then close up. If your workspace is prone to condensation—garage, crawlspace, van—treat every use as a potential risk and oil each time. Climatic control, bone-dry air, or a light session? Maybe weekly is enough, but never skip after a sweaty or high-speed job.

    When your tool “just feels off”—hesitation slotting a blade, shaky clamps, a hitch changing bits—a quick check for orange dust and a steel wool touch-up can buy back smooth performance. If you spot true pitting or ragged edges, call it time for replacement; that damage signals control you can’t recover mid-task.

    Break the Friction Cycle—Project by Project

    If smooth operation is fading, don’t just muscle through—look for rust. Slowdowns—wobbly blades, sticky clamps, pads that chew up scratch after scratch—almost always connect back to moisture and a skipped oil. Start cleaning and oiling and you’ll feel the reversal: effortless swaps, tight cuts, more stamina, and control that lasts the whole session.

    Fast-paced shops, cramped garages, corners overflowing with last week’s scraps—they all tempt you to just “store and forget.” But every fix-up later, every repeat job to correct a botched edge, starts with a few seconds neglected when putting the tool away. Oil isn’t about being precious; it’s straight-up practical, and it pays for itself in smoother cuts, faster battery swaps, and less fatigue on every task.


    http://gumboll.myshopify.com

  • How Containing Cable Slack Transforms Desk Cleaning and Workflow Efficiency

    Cable slack turns “quick cleanup” into a repeat struggle across almost any desk that sees real use. Drag a cloth across your work surface and you’ll find a cord catching the edge of the wipe, blocking what should be a single-pass clean. Move a notebook aside, and instead of clearing space, you watch it snap back as a charging cable drags it into the tangle again. This isn’t rare: in any tight workstation—shared home office, compact apartment desk, multi-device surface—loose cables aren’t clutter, but the main obstacle hiding behind every “organized” look. The friction creeps in everywhere: you delay cleaning, swipe crumbs and dust into cable knots instead of off the desk, and steadily lose patience with a space that always looks clear but never stays usable for long.

    How loose slack keeps coming back

    A desk that looks tidy at a glance nearly always breaks down in motion. Take a common setup: laptop docked front and center, a monitor arm perched above, multiple cables trailing out the back to chargers or an under-desk surge strip. Sitting still, it stays presentable. Open a drawer for a supply, scoot the chair in to work on paper, swap the tablet for a keyboard—and the mess reveals itself. Slack that isn’t pinned or routed properly sags, snags, or drapes itself into the main work zone with every new motion.

    The familiar pattern: you set out to clear a mug, but a cord loops around your wrist; you go for a sticky note, and the power brick lodged under the drawer bars your reach. These snags don’t announce themselves—they quietly slow every switch between tools, every reset after lunch, every cleaning attempt. Over time, friction compounds. Each new reset starts with untangling the same useless pile, and you end up working around the very cables meant to make your setup more flexible.

    Why surface tricks rarely hold up

    Elastic ties, velcro wraps, “just tuck it back” shortcuts—all give you a clean look until the work starts. As soon as you shift position, slide a drawer, or stretch for the far edge to jot a note, those fixes unravel. Cables slowly snake toward the active space, piling in front of accessory trays or bumping the keyboard out of line. Unless slack is routed and anchored, no photo-ready surface stays reliable in real use.

    The difference gets visible within hours. You may have vacuumed the main area, but one charge cable drifting back turns every routine wipe into a dance—lift, dodge, nudge, curse, repeat. It’s not just an issue of visual order. It’s the desk slowing you down, one pointless motion at a time.

    Real containment changes the routine

    The step from neat-looking to genuinely workable is simple: slack must be contained. Under-desk trays, clamp-on cable boxes, and fixed adhesive guides force cords to follow a predictable path—usually along the back edge, exiting in a single spot high enough that drawers and knees clear beneath. In real use, the gain is immediate: you sweep the whole surface clean in one pass, never stalling to unhook a surprise tangle. Plugging in an extra device is direct—no following a meandering cable under folders and pads. Small items—pens, folders, even your phone—stop being yanked around the surface by hidden loops. The difference after a week is obvious: you can switch from writing to typing, clean up after a meal, or rearrange three notebooks with nothing catching you by surprise.

    When surface order isn’t enough

    Desktop cord wraps and desk-edge containers offer a tempting shortcut. But the minute your day involves shifting posture, moving between tasks, or clearing room for paperwork, these don’t survive. A laptop opened wider uncoils a hidden cable; a quick monitor adjustment slides an entire nest of cords forward. Shortcuts unravel fast—leaving cords creeping back into the “clean” area and doubling your setup’s reset time.

    Stable setups require more: Mounting trays or boxes under the work surface, plus adding cable clips at targeted points (just below the rear opening, or where storage units interfere), takes minutes but kills hours of repeated hassle. Once slack is tamed away from the leg space, reset drag disappears—transforming every daily device swap or sweep into a quick, single-step move. The time cost is up front, not every hour you switch context.

    What changed after anchoring cable slack

    After years of half-measures—clips falling off, makeshift “tucks” that didn’t hold—locking every power and data line inside an under-desk tray made the rest of the setup finally work. Notebooks moved freely again. Cleaning didn’t mean pausing to unloop mystery cords. The tray ran across the back edge, and cables dropped out at one controlled exit just above knee height. The daily result: resets sped up, no drive lurched toward the floor if someone shifted a chair, and desk time stopped being measured in friction points. In a shared or multi-device space, this single change does more than any “organizer” on the surface ever could. Anchored cables make their own absence felt—which is the only reliable sign of a desk you can actually trust.

    Everyday questions about cable slack, answered

    Does containing cable slack really speed up cleaning?
    Absolutely—unanchored slack drags itself into active zones, so even a basic wipe becomes a snag-hunt. Use trays or boxes and cleanup is one motion, no detours, no negotiations.

    Cable box or under-desk tray: does it matter?
    Trays work better for frequent device swaps or where you need fast cord access. Closed boxes win where the setup stays constant all day. Both block slack from returning, but trays adapt faster if your gear changes week to week.

    Why do temporary wraps never last?
    Loose wraps or quick ties buy an hour or two—then cables riffle back onto the surface after real movement. No wrap stops dust pileup or random tangles that appear under normal desktop shifting. They’re useful only if you never touch your desk between photo ops.

    The real outcome: an easier desk to trust, every day

    Containing cable slack makes the real difference: less time untangling, less manual “workaround” just to clean or reach across, less hesitation to reset the space at the end of a cycle. With cables locked down, device swaps get smoother, cleaning actually stays one step, and the surface works at its fastest—not just its tidiest. The shift isn’t about perfection—it’s about finally working with a desk that stays usable, even when the day’s shuffle restarts tomorrow.

    Explore the full WorkBasic collection

  • How Thoughtful Closet Storage Cuts Clutter and Boosts Daily Efficiency

    When the Closet Looks Right, But Works Against You

    That “after” photo moment—the closet where every shoe is lined up and every basket is tagged—only matters for a snap. The real test comes at 7:15 am, when shoes are missing, bags are buried, and the morning routine leaves fresh piles in its wake. This is where many so-called organized closets actually fail: not in how they look, but in how they get used. The corners start catching overflow, hooks go ignored because they require an awkward reach, and the reset never quite happens. If your closet starts each week picture-perfect but by Thursday feels like a detour and a balancing act, the problem isn’t you—it’s the setup that isn’t designed for the friction of real life.

    Every Extra Step Grows the Mess

    Small obstacles add up fast. The tiniest inconvenience—reaching behind a basket, crouching for shoes stashed beneath a low shelf, sidestepping a bench—sends people into shortcut mode. That means sneakers collect by the door instead of going up on the shelf. Bags slide from hooks to floors. Even a little extra walking or a single blocked spot is enough to derail good intentions. All it takes is one busy evening, and suddenly you’ve got leaning towers of laundry, bins swallowing random odds and ends, and “just this once” clutter that never fully disappears.

    It’s not laziness; it’s human nature. If you have to maneuver around hanging coats, you’ll drop your hat on the nearest surface. If shoe storage is one step too far, shoes start gathering in the hallway. What starts as a small detour quickly multiplies: a few missed spots become a full reset job, not a quick tidy-up. Habits always beat layouts designed for empty spaces, not hectic weekdays.

    Where Organized Closets Actually Break Down

    Pay attention to closets in heavy daily use—a family entryway, a shared coat closet, even an overstuffed guest closet. Friction points show up fast:

    • Reaching behind stacks erodes order quickly. That go-to hoodie somehow ends up behind boxes of rarely used hats, so every retrieval turns into a mini teardown. Within days, neatness turns to chaos—just to get dressed.
    • Bins become black holes. Those deep, pretty baskets near the door start with neat gloves and mail, but soon swallow receipts, headphones, and everything else that doesn’t have a place. Categories blur, and you’re digging instead of grabbing.
    • Folded stacks can’t survive real use. Stiff, straight piles look fine on laundry day but soften and slide into one another after a couple of searches. Instead of a quick reset, you’re restacking shirts and guessing what belongs where.

    Once storage categories lose their clarity, or putting something back means making extra decisions, “organized” becomes another form of hidden clutter. The system’s failing not because it got messy, but because it asks too much in real time.

    Looking Organized ≠ Actually Organized

    Crisp shelving setups, new rods, or matched bins might impress right after install. But run your real routine for a week and see what holds. Are shoes still paired on the rack, or spilling across the hallway again? Do shelves still show open space, or are they a jumble of mittens, hats, and forgotten bags? Good looks can mask underlying friction—because if the closet demands workarounds, the chaos creeps back fast.

    Micro-adjustments can have outsized results. One family’s hallway closet always overflowed with hats and gloves beside the door—until they lowered a shelf just six inches and added a divided bin right at hip level. Suddenly, even the quickest drop-off worked. No more overflow in the hallway—even though nothing looked that different. Some of the best fixes barely change the photo, but completely change how the closet handles normal wear and tear.

    Building Storage for the Way You Actually Use It

    Stop organizing for “someday” and build for right now. The best storage isn’t about perfect labels or everything matching—it’s about making the routine routes friction-free. Everyday grab-and-go items should live at the height you naturally reach, not on an aspirational upper shelf. If kids use the closet, double rods or low baskets mean they can actually put things away themselves, without reminders or an adult swooping in.

    Press pause on the showroom logic and look at your patterns:

    • Main shelves near the door get the most action. If putting boots away means a traffic jam or walking around someone else, expect piles to start creeping past the threshold.
    • Bins are only useful if they match your grab spots. Too big, too deep, or tucked in the back? They’ll become bottomless catch-alls, not tidy categories.
    • Deep shelves tempt you with the promise of extra storage, but the stuff in the back almost always gets lost. That’s when overflow begins: it’s easier to throw new things onto a growing pile than to wrestle with tight corners.

    Map the repeated breakdowns—where items never seem to stay put, or piles keep forming—and you’ll see where the layout fights your habits. The trick is to make it easier to put things away properly than to leave them out “for now.”

    Spot the Early Warning Signs of Clutter

    Storage doesn’t usually collapse in one big disaster. The slow creep is the real threat. Look out for:

    • Needing to unstack or move an item daily just to access something else.
    • Feeling like putting things away means more shuffling than actual organizing—a sign your system is fighting back.
    • Opening a bin and realizing you can’t tell what’s inside anymore—categories vanished, and labels ignored or forgotten.

    These are signals, not shortcomings. Sometimes all it takes is lowering a shelf, adding dividers, or shifting a bin closer to your true drop zone for the space to keep pace with your routines, not the other way around.

    Small Shifts, Real Wins: Tweaks That Actually Last

    You don’t have to gut the closet to make it work better. Start with:

    • Dropping a shelf just enough to add a slim, easy-reach basket—so grab-and-go items always land where you need them most.
    • Adding or moving dividers inside bins to stop category creep, so you don’t have to resort each week.
    • Swapping out unreachable shelves for dual rods or hooks at the height of your youngest user, turning routine storage into an easy, automatic habit.

    The best system is one that keeps its balance even as life gets busier. If clearing up after yourself and others feels faster, steadier, and less frustrating with each passing week, then your closet is working—finally matching the way you actually live, not just the way it looked right after organizing.

    For more solutions designed for real homes and real routines, visit ClosetWorks.

  • Small Setup Changes That Make Pet Care Routines More Efficient and Less Messy

    The spot where you feed your pet might look organized first thing in the morning—until the routine starts to repeat. Fast-forward past breakfast: the food bowl is empty and pushed under the cabinet, the water bowl is running low, the wipe you meant to keep nearby now sits damp in another room. Each missing item becomes another pause, another trip, another moment retracing steps instead of moving forward. What began as a “tidy setup” can unravel midweek, especially when bowls or brushes drift, bins aren’t fully closed, and cleanup tools are never in reach when the dirt actually arrives. A setup that seems ready at 8 AM is often no match for daily feeding, quick paw wipes, refills, and shared-space resets—the spots that CalmPetSupply tries to simplify.

    The Hidden Friction of Daily Pet Care

    In daily pet care, what slows you down usually isn’t the size of the mess—it’s the silent friction from tools that leave you hunting for basics in the middle of a routine. You come to refill water and the clean towel’s gone again, or you reach for kibble only to find the scoop missing under a bag left open the night before. Delays add up: every time you detour for a leash, reach over a landing scattered with toys, or unearth wipes from the bottom of a bin, you multiply the drag exactly when your attention is limited. Repeated care cycles expose what simple organization can’t fix—if access isn’t easy, friction keeps returning.

    Real-Life Disruptions (and Why They Happen)

    Picture the overlap: after a muddy walk, groceries dangling, you reach the door with your pet eager to get in. You want to wipe paws quickly, but the towel is missing—maybe in the laundry, maybe somewhere not obvious. Now, you’re left juggling muddy paws, hopping bins, and refilling a water bowl that’s lower than expected. Even as you handle one task, the next thing you need isn’t where it belongs. Over a few days, these gaps become routine stumbles: the brush goes missing again, the same bin lid isn’t shut, a quick reset turns into a back-and-forth through three rooms. These aren’t isolated annoyances—they’re frictions that slow care down whenever you can least afford the drag.

    The cause isn’t missing supplies—it’s weak return points. If the towel doesn’t have a visible hook right by the bowl, it walks away. A scoop without a single home gets swallowed in clutter. “Organized” stations break down with ordinary use: bowls drift underfoot, brushes left out mean cleanup gets delayed, wipes disappear behind stacked items. Look past the initial tidy—most breakdowns begin the first time you don’t reset everything on autopilot.

    Setup That Looks Orderly, But Slows You Down

    After a weekend re-set, the area feels in control for a day—until you start repeating normal care. Suddenly, the scoop’s been knocked behind the bin, the mat under the bowls bunches up and catches crumbs you can’t sweep easily, the brush makes a round-trip to the living room and never returns. The result: feeding gets slower, cleanup slips behind, and you start cleaning more after care—not less. The routine that looked smooth on Sunday stalls out on Tuesday night, and “temporary” missing basics linger just long enough to slow down every step.

    Patterns repeat. The bin lid’s left open overnight, so supplies disappear deeper into clutter. The “just-for-now” towel settles elsewhere and isn’t found when paws are muddy again. Small, recurring breakdowns make every round of feeding or grooming slower—and the fact that the space looked organized becomes irrelevant. Visual order that doesn’t survive repeated use is a trap: it hides the return of daily friction until you’re forced to repeat work.

    Practical Adjustments for Smoother Care

    Actual improvement comes from fixing placement and return—not buying more tools. Mount a towel hook directly above the water bowl so it’s never out of sight when you need it. Use a marker or edge cue on the water bowl so you spot low water before the next mess. Designate a single reachable spot by the door for wipes and brushes: basic items land there as soon as you’re back inside, not wherever you empty your hands. If storage bins aren’t easy to snap shut, clutter escapes by evening even if things were tidy at lunch.

    Keep all quick-grab supplies—towel, wipes, grooming brush—within the same gesture’s reach by the main entry. If you’re moving more than a step to get basics, mess or delay follows. A habit as small as closing a bin every time matters: what’s left open returns as a nighttime hazard or a missing wipe when you need one in the morning. Zeroing in on repeated weak points makes every reset after feeding or an outdoor loop happen with less drag, not just less “visual mess.”

    Defining the Pet Area and Containing Spread

    Set a feeding station well out of hallway traffic and place a washable, non-slip mat underneath. That prevents early-morning spills or quick bowl shuffles from spreading food bits through the week. Keep a shelf, bin, or basket within reach—not in view of the kitchen but not hidden in another room—for scoops, packets, and brushes. Group dailies together, and create a traffic boundary for pet gear: leads, wipes, and towels by the door, not scattered on countertops. You’ll spend fewer steps backtracking and have less pet gear leaking into main living areas—so cleanup, night resets, and last-minute care become simpler and faster even when routines get busy.

    Seeing the Real Difference: Appearance Versus Function

    Over four or five days, you spot the shift: water and food bowls don’t walk off or run dry by accident, towels hang where you expect them, the brush shows up on command—just as you finish a walk, not half an hour later. The floor stays clearer and bins hold their contents, but the real difference is in time saved: you aren’t detouring or delaying every care step. A space that resets quickly after each round of feeding, grooming, or a late-night check-in sheds invisible friction that, left unchecked, turns pet care into a chore pile. What matters isn’t a space that stays “tidy”—it’s one that stays usable after a real day with a real pet.

    In the end, the calm in daily care comes from setups that work as hard on day five as they did on day one. Small, structural fixes—clear return spots, one-grab supply zones, better bowl placement—quietly cut repeat work and make resets something you do as you go, instead of something you must fix later. The smartest improvements vanish into the routine—which is often the real signal you’ve found a setup that works.

    Looking for more ideas on simple, daily pet care setups? Visit CalmPetSupply for practical tools and routines to keep your day running smooth.

  • Why Easy Return Storage Transforms Outdoor Organization Efforts

    Most outdoor setups don’t fail because they’re too small—they fail because the reset breaks down. In the real world, side-yard strips and patio corners look organized for about a week. Then you hit the slow part: gloves draped over the hose reel, the trowel from Tuesday left on the grill ledge, that one rake you meant to return but never quite did. Every awkward return, every tool perched where it doesn’t belong, every slow shuffle through a too-deep bin—this is where “organized” quietly unravels into another edge pile nobody claims. It isn’t a lack of space; it’s the way reset friction turns each lived-in corner into clutter’s favorite hiding place.

    The Real Test: After the Job, Where Does Everything Go?

    The freshest setup always looks full of promise: tools lined up, bins labeled, wide walkways cleared. Then a normal Saturday hits. You pull a weeder, reach for a pair of gloves, toss the hose aside to run after a kid or finish lunch. That fast, the first items stall just outside their proper spots. A week later, they haven’t moved. Why?

    Because return friction is built into the details. The lid’s too heavy. The bin’s just deep enough to require digging. You have to move a bag of soil just to make space. Nothing dramatic—just enough micro-hassle, every time, that the fastest route becomes “leave it here for now.” One “later” at a time, the clear path around the garage or fence line turns into a sidestep course over abandoned tools and bags that never got put back.

    Closed Boxes: Tidy Promise, Hidden Trouble

    Closed bins tempt with the look of control: toss whatever inside, close the lid, no mess in sight. It works until you need one pruning shear lost under extension cords—so you dig, unstack, reshuffle—and the next time, that tool lands on the patio instead. The heavier or fussier the setup, the more likely the return just gets skipped. By Sunday, the “overflow” sits quietly outside the box, blocking the same path the box was meant to clear.

    Closed bins can hide a mess—but they can’t prevent the reset from breaking down. The area looks staged only at first. Give it two busy weekends, and the same gloves, empty pots, or tangled hose ends show up in the footpath, begging for another round of tidying that takes longer every week.

    Open Racks: Never Perfect, Always Easier

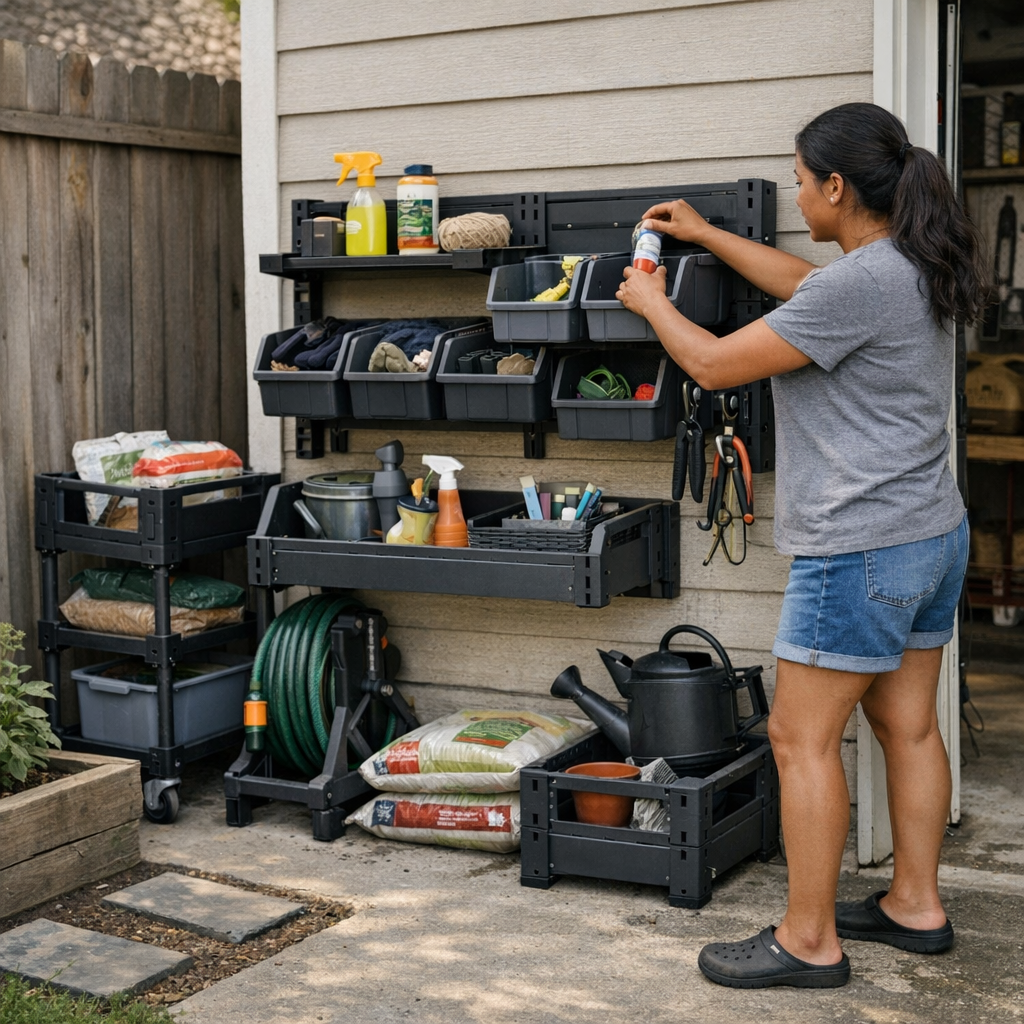
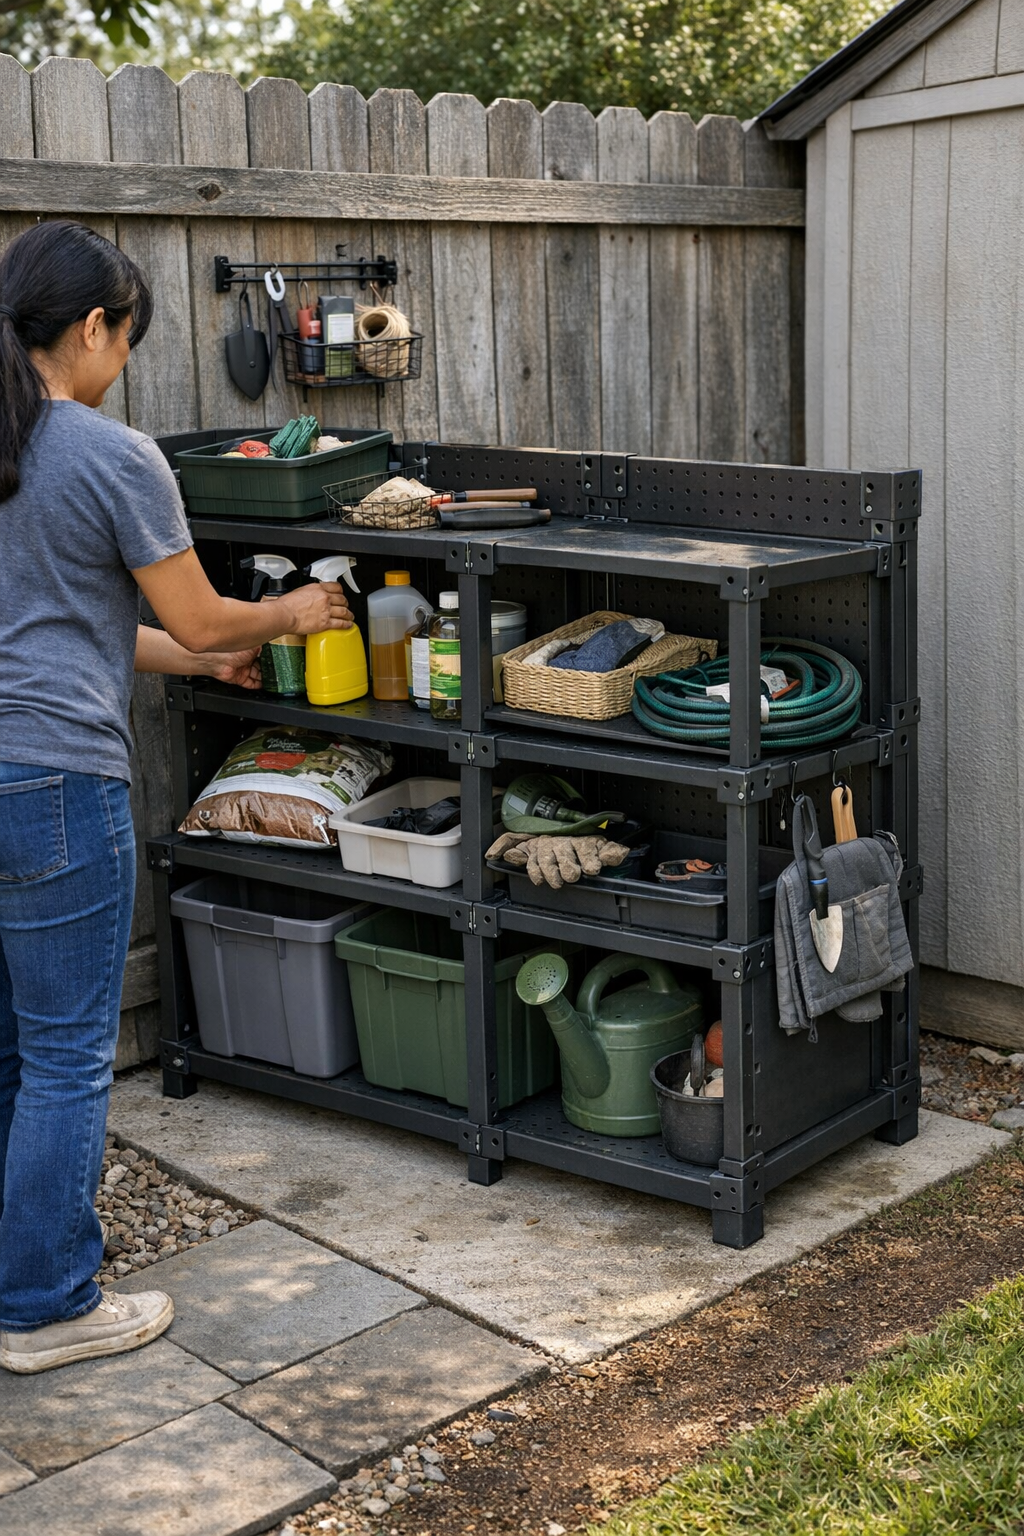
    Open racks and cubbies look exposed—hooks with garden snips, wall baskets holding spray bottles, open slots along the garage edge. But when the reset is just drop-and-go, clutter has fewer places to collect. Return a trowel? One motion, back on the hook. Grab gloves? Toss them on the open shelf as you leave the yard. No lids to fumble, no stacks to move, no out-of-sight layers. You see what’s out and what’s missing, so nothing quietly rots in a dark box for a season. It isn’t a catalog spread, but it’s workable and fast enough that the system holds even on the messiest days.

    This “mess visible, friction low” balance is what makes the open setup more than a compromise—it’s a live counter to the way outdoor zones want to slide right back to blocked movement and quiet spillover.

    Raise It to Elbow Height, Cut the Excuses

    The reset gets even smoother when open cubbies sit at elbow height—right where your hand already travels. Mount a row 16–20 inches up along your garage, fence, or patio wall. There’s no extra bending, stacking, or reaching over packed bins on the ground. Dropping clippers in a cubby or hanging the hose sprayer takes the same effort as abandoning them on the lawn—and with the right reach, the excuses disappear. Daily-use gear runs on muscle memory, the “leave it here for now” pile shrinks, and the path stays open without conscious effort.

    How Setups Turn Against Themselves

    • Floor bins that become blockers. The big storage cube against the fence seemed smart until quick-grab gear covers its lid and you quit opening it entirely.
    • Items orbit their homes instead of returning inside them. If it takes more than one step to put something away, the “just for now” pile becomes a permanent speed bump by the door or along the garage threshold.
    • Every reset begins with reshuffling. Moving three items to get to one? That’s a friction point. The more you have to clear a path, the less likely you’ll keep clearing at all.

    These aren’t accidents—they’re symptoms of setups designed to look organized, not to survive a real day’s movement. The setup isn’t the problem. The layout—where the work actually happens—isn’t matching the routine that needs to flow through it.

    Real Scenes: When the Routine Meets the Reset

    Visualize an average weekend. A set of hedge clippers hangs on the open rack just inside the garage door. Ten seconds, they’re back up after use—you keep moving. Shift that same hook too high, or tuck it behind a stack of reused planters, and suddenly the “temporary landing zone” becomes the real final stop. Four days later, you’re working around an obstacle you made by accident. Multiply this pattern by every tool and bottle you touch, and the zone goes from frictionless to blocked, fast.

    The classic deck box tells the same story. It fits the footprint, but the lid’s heavy, inside is a scramble, and the nearest tool always ends up living outside, easy to grab but never quite put away. The box doesn’t fix the clutter—it just pushes the reset further down the line. Once you’re tripping over overflow, you’re not storing smarter, you’re just shifting the pile.

    Tweaks That Actually Shift the Routine

    • Raise open storage off the ground—hung racks or wall cubbies don’t eat into floor space, so walkways stay open and gear doesn’t slide underfoot.
    • Push daily-use zones to your entry points—store gloves, pruners, and hoses by the gate, the patio edge, or just inside the garage so you’re not crossing the whole yard to reset.
    • Put quick-grab gear on the wall, not the floor—if the first thing your feet hit is a pile of loose items, the setup is already losing to clutter.

    If items pile up in front of a container or a bin goes unopened for weeks, that’s not a user error—it’s the setup sending a clear signal of friction. Shorten the reach, cut the busywork, and the overflow shrinks because there’s no labor barrier. This isn’t about impressing with order or matching magazine shots. Practical storage is about setups that run themselves between resets, not setups that demand one giant fix every Saturday.

    Choosing Systems That Match What Happens, Not Just What Looks Good

    Open storage belongs in high-turnover zones: toys, hand tools, gloves, gear that moves in and out. Closed bins make sense for bulk or off-season—cushions, holiday lights, bags of seed you use twice a year. But if a system slows you down, even by a few seconds, the clutter will work around it, and you’ll spend more time bending, stacking, or searching than actually using the space. Judge the setup by the return: When the burst of activity is over, did putting things away help you move forward, or did it just add another step to the next reset?

    The Real Difference Is in the Return Flow

    You don’t need more containers. You need setups that clear the path. Most outdoor spaces drift into chaos not from lack of storage but from layouts that ignore daily movement. Build for return flow and resets become invisible. Over time, open racks and elbow-high cubbies end up “unstaged” but quietly functional—the gear moves in and out, nothing stalls, and the zone doesn’t demand your Saturday just to look reasonable. When the setup reduces effort instead of shifting it, the space stays usable, even when it’s not picture-perfect. That’s what lasting organization looks like in practice.

    Find setups built for real return flow and weekend momentum at TidyYard.

  • Why Easy Access in Carry-Ons Transforms Your Flight Experience

    An organized carry-on isn’t truly “ready” until it can keep up with you in real airports, boarding lines, and cramped seats—when quick access matters most. That neat, compartmentalized layout you perfected on the hotel bed can backfire the instant you’re shoulder-to-shoulder at the gate or reaching for your passport while pushed along by the boarding queue. What looks orderly at rest can become a source of slow-down and missed moments in motion—especially the second or third time you need to dig for headphones, documents, or a charger before your row shuffles past.

    The Hidden Friction Behind a “Tidy” Carry-On

    Perfectly aligned pouches and maxed-out pockets sell a feeling of control. But that “hotel neat” reveals its cost at security and on the plane. Each extra layer, nested pouch, or tightly-packed cube inserts a small pause: unzip, sift, half-unpack—just to retrieve a high-use item. No amount of careful folding changes the reality that if your passport slides under organizers, or your charger blends into a web of cubes, you slow down each time access is needed.

    This is not a theoretical complaint. If you’ve stood at a scanning tray awkwardly hunting for ID or felt boarding pressure as you shuffle half your bag to find a travel document, the tradeoff becomes obvious fast. Those small holdups do not “even out” later; they add up with every checkpoint and seat change, turning neatness into repeat interruption.

    Cramped Space and Repeated Reach: Where Things Fall Apart

    The real test of a carry-on layout is how it behaves after hours in the system: five security checks, three different gate lines, or two unpredictable flights. Weakness shows when you twist in a crowded aisle to find your cable, only for it to surface tangled beneath the headphones that looked fine together during packing—but now block the only open zipper.

    Fast-forward to a boarding group lineup—one hand dragging your wheelie, the other scrabbling for your boarding pass. If that single high-frequency item lives under a stack, or requires undoing two layers of pouches, every stop piles on a sense of friction. Try it across several flight legs and watch as small inconveniences compound: wrong pouch on the first try, repeated shuffling, and the nagging sense your system is working against you.

    Typical Scenario: The Mid-Flight Retrieval Trap

    Cruise altitude, seatbelt sign off—you want your glasses, but they’re in a zipped organizer buried under two others. Cabin lights are dim, both neighbors deep in Netflix, and your carefully planned compartments suddenly force a lap-load shuffle. Each attempt means elbows near strangers and cold glances as you disturb the row. What starts as “organized” quickly becomes disruptive, proving the real cost isn’t mess—it’s the repeated, comfort-draining pause every time you reach for what should be instantly available.

    Why Full Use of Every Cubic Inch Isn’t Always Your Friend

    The urge to leverage every internal pocket is strong. Organizer loyalists fill every slip and sleeve, believing more structure equals more efficiency. But the tighter the fit, the slower the access. If your top-use essentials—passport, sanitizer, charger, earbuds—don’t live in a quick-grab spot, the friction shows up on every reach.

    Travel routines rarely stick to plan. After takeoff, you realize your phone charger is locked up in a main compartment under toiletry kits and cables. At descent, you need your ID but it’s in the bottom layer, and the clock’s ticking. Now you have a choice: uncork the entire bag in a tight seat, or do without. That “all packed away” look does nothing for in-transit flow, and the more flights you string together, the more these little failures make you question the system.

    A Practical Shift: Dedicated Pockets for Repeat-Use Essentials

    Too many sluggish retrievals make the case for a dedicated, obstruction-free pocket impossible to ignore. The outer or top section—reserved only for your highest-frequency use—changes the rhythm: one zipper, nothing stacked in front, no re-arranging required. No matter the routine shift—boarding, landing, tray tables up or down—your essentials ride in a single-use pocket. Reach, retrieve, repack: each action mirrors the last, cutting repacking drag to a minimum.

    Over several flights, this single change becomes visible: no more spreading pouches across the tray, no second-guessing where things landed after a rush, no frustration-tinted laps as you try to repack between service carts. Access and return merge into one motion—no “hack,” just less interruption and less stress looped through every segment of the trip.

    Real Use: Recognizing—and Fixing—Repeated Weak Points

    Each airport trek and seat shuffle diagnoses your setup. If you spot yourself repacking after every minor access, or hunting through two wrong pockets before hitting the right one, your layout is hiding avoidable obstacles. Rework it: separate the must-grab items, keep them at the very top or in their own dedicated side. Let real use—not static organization—dictate what stays within reach. Every routine flight becomes a field test: what slows you down signals where friction still hides.

    Movement Happens—Comfort Follows Smart Access

    Visual neatness guarantees nothing once you enter the airport’s push-pull flow. If you lose sight of your documents mid-security, or still dig for earplugs on every trip, there’s a structural flaw—not just a bad packing day. Your comfort relies on removing overlap and access-fighting layers, so your bag flexes with actual movement, not idealized order. Travel smoothness comes not from focusing on the “perfect pack,” but from cutting out those tiny, constant stops that slow you between gates.

    To find tools and organizers designed for repeat-access and real travel movement, visit CarryOnSupply.

  • Why One Ceiling Fixture Often Fails to Light Hallways Properly

    The Single Fixture Trap: Why “Bright Enough” Fails on Day Two

    Install one ceiling or wall light and the job looks finished—until real life exposes the shadow zones. The most common complaint isn’t that a room is dark, but that parts of it become unusable just when you need them: staircase landings where the next step disappears, hallway corners where keys drop out of sight, a laundry counter that’s perfectly visible at noon but falls into obscurity every morning or night. The illusion of a “bright enough” space shatters quickly in places meant for movement and tasks. One fixture might light the center, but it leaves edges, thresholds, and critical surfaces in partial shadow—the exact spots you step, reach, or search in every single day.

    Where the Light Fails: Centered Fixtures vs. Real Paths

    Lighting trouble rarely comes from weak bulbs or dull fixtures. The problem is misdirected spread and placement. A flush mount in the center of a square room might look balanced on paper, but take that setup into a narrow hallway, a stair turn, or a galley work zone, and dark patches start building up. These aren’t just cosmetic gaps. They dictate how confidently you move, whether you stop at doorways to scan the floor, or find yourself squinting into a closet that, hours before, seemed fully illuminated.

    Consider the last time you walked a hallway after dark. Did you trust your footing from wall to wall, or did you slow down near the stair turn or search for a light switch before stepping into an uncertain patch? Ceiling fixtures that seem bright overhead often cast long shadows down the wall, putting the most-used thresholds and corners out of reach. The real test comes not when you admire the room from the doorway, but when your routine puts every weak spot under pressure—pausing at a stair turn, missing a dropped shoe near the closet, or tilting an envelope under the only clear spot of light.

    Hallways and Stair Turns: Where the Setup Breaks Down

    Picture a traditional hallway: one flush-mount ceiling light, looking sleek and “done.” Stand dead center—visibility’s fine. Take a few steps toward the end, head for a closet, or turn a stair corner, and suddenly the floor blurs, profiles dissolve, and there’s a distinct urge to slow down. Kids hesitate at dim landings, adults misjudge a step with a basket in hand, and every turn becomes a pause point—not because the room is dark, but because the light’s spread doesn’t match the way people really move. Awkward hesitations cling to these friction spots, no matter how many lumens you throw at the fix.

    Work Surfaces: The Underlit Face and Counter Problem

    The single-fixture mindset is especially brutal for tasks: bathroom mirrors with shadowed cheeks, laundry counters where one half gleams and the rest fades after sundown, entry tables that pull you in to squint at paperwork or screens. You start adapting—leaning closer at the mirror, sliding a basket into that one usable patch, or shifting position to dodge the flash of ceiling-glare on tile or steel. Cranking up the wattage only makes the brightest spot harsher, does nothing for lost edges, and amplifies uncomfortable glare on glossy finishes. The divide between what looks bright and what actually works grows wider each day you use the space as intended.

    The Repeat Offender: Everyday Friction, Not Just Dimness

    Poor lighting isn’t an obvious red flag on installation day. What shows up is the accumulating irritation—each morning you slow down to check the closet floor, each night you fumble at the bottom stair or nudge laundry baskets blindly through a corridor missing just one sliver of light. Not pitch-black, but an undercurrent of frustration: pausing, double-checking, missing handles, or stepping more tentatively than necessary. Over time, these small breakdowns harden into routine. What once seemed “done” now interrupts every task that counts.

    Why More Bulbs Don’t Solve It: Placement and Layering Win

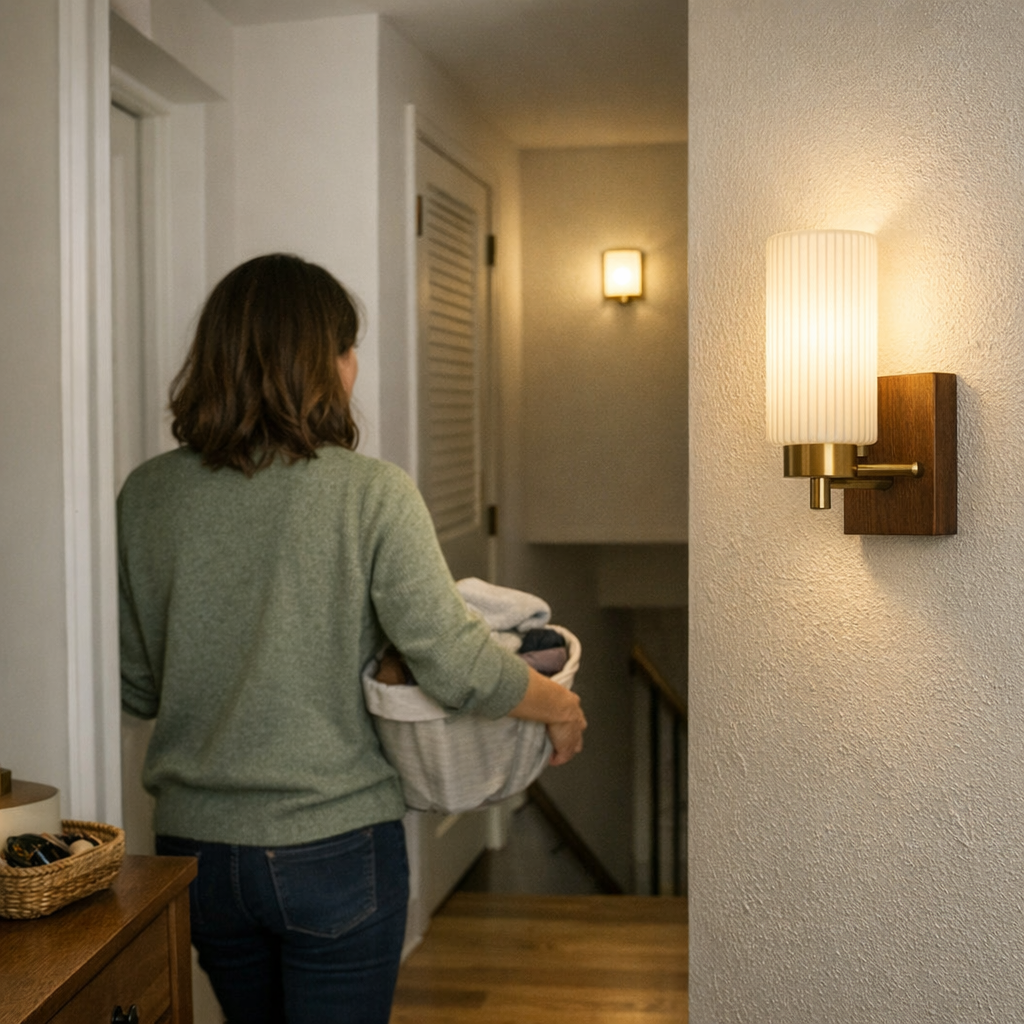
    Trying to fix spread gaps with bigger, brighter fixtures almost never works. Stronger bulbs simply spotlight the same central zone, while stubborn shadows hug the edges. The shift comes from layout: add a low-profile wall sconce near a stair bend, or a hardwired light near a closet, and you erase the most persistent dark lines—the exact places feet search and hands fumble. Layering doesn’t mean a flood of extra light. It means filling the empty strips just beyond a main fixture’s reach, smoothing the experience so movement is continuous, not tentative, and surfaces work evenly for every routine. The difference is felt immediately the next time a child rounds a stair corner, or someone crosses a once-dim threshold without missing a step.

    The Power of Two: Targeted Correction Beats Power Alone

    Long, L-shaped corridors and stair landings are repeat offenders for dark pools. One centered ceiling mount guarantees faded corners and shadow-soaked entryways on repeat. A second source—wall sconce, directional wall light, or soft panel—breaks the monopoly of overhead lighting, pushes gentle illumination horizontally, and targets the trouble spots. This isn’t about overall brightness, but about giving visibility where your feet, hands, and eyes actually go. Coverage becomes a question of path, not just square footage. Every added layer directly attacks the shadow lines that overhead fixtures habitually miss.

    Lighting Built for the Real Routine

    The best lighting isn’t measured by initial impressions; it’s measured by how little you have to adjust yourself in the third week. If you catch yourself shifting your walk at the hall’s end, angling for better mirror visibility, or bracing at a stair turn, the setup is subtly failing you every day. Recurrent pressure points include:

    • Stairway bends where the bottom step isn’t visible until after you’ve hovered a foot
    • Hallways with offset thresholds—crossing means stepping from glare to gloom without warning
    • Bathroom sinks and vanity mirrors split by uneven lighting so the face is half in shadow, half in glare
    • Utility counters lost at the edges, even though the fixture passes the “brightness test” just overhead

    None of these problems are solved by style. They’re structural signals you need even, layered light matched to the real movements your routine demands.

    Quick Fix: Field-Tested Ways to Reveal Spread Gaps

    • Trace your daily route: Stand at every door, corner, or stair you cross each day. Is the floor as visible at the edge as it is at center?
    • Layer on a mission: Add a wall sconce or directional wall light at task points or hall turns. Don’t just opt for a brighter ceiling light—fill in the shadow pools where you actually pause, pivot, or reach.
    • Test after dark or at dawn: Walk the area at low-light hours. Pay attention to steps, handle visibility, and whether the edge of a counter or basket shows clearly, not simply whether the space “looks” illuminated from a glance.

    The Real Benefit: Comfort That Survives Repetition

    What fails with “just one fixture” is most obvious on a rushed morning, when awkward pauses, blind corners, or lost surface edges slow you down or double your steps. Lighting that adapts to lived-in movement—layered, low-profile, and positioned for human routines—doesn’t just look finished, it functions fluidly day after day. The mark of a truly usable setup is when you stop noticing lighting at all—because every spot you use is finally, quietly, visible.

    For lighting that works beyond the first week, match your layout to movement, not just symmetry. Even, shadow-free light transforms a space from “bright enough, sort of” into a room that actually supports the way you live and work—no extra thought or clumsy workaround required.

    Shop LightHelper for practical indoor lighting solutions.

  • How Clear Sideboard Storage Rules Transform Household Organization

    A sideboard looks organized only until real life rewrites its rules. The smooth, closed doors promise control—a clean dining area, a reset entryway, a place for everything. But by week two, the flaws leak out over the edges: chargers creep onto the wine shelf, last week’s mail piles in the napkin corner, and the broad top is a magnet for everything you couldn’t decide on putting away. What felt like an upgrade quickly becomes a slow friction—retrievals that stall, drawers that catch, and clutter that hides better than it disappears. Suddenly, your storage solution is part of the daily reset problem.

    The Slow Fade: When Organized Looks Don’t Hold Up

    The promise is classic: sideboards tuck clutter out of sight and free up your routine. But closed storage without clear category boundaries turns fast into a catch-all. The cost shows up when you’re in motion—needing dinner napkins now but finding receipts, or reaching for a charger and sending a spill of menu cards across the drawer. You’re opening two sections to get one item, moving stacks to close what should shut easily, and each small hassle compounds. Organization doesn’t decay loudly; it just interferes quietly, until you’re spending mornings untangling cables or forgetting where the spare keys wound up last.

    This breakdown sharpens in busy, high-traffic areas. Mixed-use sideboards—trying to absorb dishes, tech, linens, mail, and the chaos of family life—lose their lines fast. With no enforced categories, anything becomes fair game, and it takes only a few rushed weekdays to blur the original setup. What was supposed to be “hidden order” becomes blind drift, with every search slowing and surfaces refilling just as quickly as you clear them.

    Beyond the Showroom—Practical Friction In Real Use

    If you’ve hesitated in front of a sideboard, mentally replaying moves—where’s the charger, which drawer for remotes—you’ve seen the danger in trusting good looks over good logic. Closed doors aren’t a fix; they’re a delay. Well-arranged shelves mask the problem until a quick retrieval turns into a block: drawers that need shuffling, a stack of folded cloth pinching a hidden pile, items wedged deep enough that “out of sight” means “as good as lost.” Supposedly smooth routines jam on the smallest snags, turning resets into scavenger hunts.

    It’s not just about missing things. When boundaries blur, every return becomes negotiable. What once stopped you from spreading out becomes its own overflow zone—mail gravitates to the kitchen or gets stacked on top, napkins float to the hallway instead of returning below, remotes land wherever there’s less hassle. Out-of-place items spark workarounds. Soon, the system’s logjam reroutes your habits: shortcuts get taken, drawers fill up unevenly, and the door becomes a physical barrier in your path rather than a helper.

    Category Drift: The Real Source of Blocked Flow

    Category drift quietly unravels any sense of order. That “miscellaneous” drawer? A symptom of fading boundaries. At first, it’s only an extra minute spent searching or shuffling. But by the end of the week, drawers resist closing, bundles wedge in corners, and items you needed for tonight’s dinner or task are unretrievable without a full reshuffle. Each convenience becomes a slow tradeoff—less time spent on initial sorting means much more lost in daily disruption.

    In family or shared rooms, this drift shows up fast: a flat surface that stays clear only until the next drop-off, sideboard doors blocking paths because no one wants to empty the pile behind them, guests slowing down the evening as they fumble to help. The true cost isn’t visible mess—it’s lost flow, blocked motion, and habits that change only to work around the latest jam.

    Giving Every Section a Role: Where Structure Beats Storage

    Resilient sideboards assign each drawer or shelf a strict single use. “Top left: chargers and daily mail only. Lower right: extra linens. Center tray: keys.” Not a loose intention, but a visible limit. The difference is sharp: clutter stops accumulating, flips and shortcuts get blocked, and the time to retrieve or return drops fast.

    In one clear reset, a dining room sideboard went from tangled catch-all to stable helper. By stripping a central drawer of its floating contents and reassigning it—one category per section, a shallow tray to stop tech from wandering—morning logjams vanished. After a week, no double-searches, no blocked drawers, no hidden piles. The upgrade wasn’t about gadgets or more organizers; it was pure rule structure fitting real-life traffic, and it held up when things got busy, not just when freshly sorted.

    Reset Routines: Keeping Structure Alive Beyond Day One

    Even the right categories slip without a reset pattern. Regular, fast resets—not deep cleans—hold the boundary. Think end-of-day shuffles: chargers to tray, mail to the assigned slot, napkins to their shelf. The repeat matters more than decorations or labels. With hidden storage, “muscle memory” is the true guide—always the same hand to the same spot, the same action building internal coordination so anyone can help, even without a label or list.

    This isn’t about stricter rules; it’s about keeping friction out of the daily path. Location reliability—reaching once, returning easily, not thinking twice—is how sideboards become assets, not obstacles.

    Signs the Setup Works—And Where It Usually Breaks Down

    When the categories make sense, you don’t notice the sideboard at all—you move through, grab what’s needed, close what was opened, and space stays open without a second thought. One-touch access, flat surfaces that don’t re-pile, and the ability for guests or family to help without searching: these are the side-effects of a working structure.

    When it’s off, the signs are impossible to ignore: paths blocked by open doors, retrievals that send you shuffling from end to end, and clutter climbing the top edge as each “just for now” turns permanent. These aren’t just aesthetics gone wrong; they’re the cost of too little structure and too much drift. The right storage doesn’t add steps, it removes friction—first, in motion, then in memory.

    Simple Tweaks That Last Through Real Life

    Small, structure-first corrections keep a sideboard in service, not in the way:

    • If a drawer keeps jamming, strip it bare and go back to one clear purpose. Only then add a divider or tray—never before categories are sharp.
    • If mixed-use pressure is high (tech, papers, keys), the top drawer needs hard limits: set it to just what’s handled and returned daily, veto overflow.
    • Try a nightly “one-minute reset”—not a full sort, only what’s needed to return stray items, smooth out napkins, and clear the landing zone. The impact is noticeable: less stalled movement, faster access, rarely a need to “fix” the whole cabinet at once.

    Most sideboards don’t fail on size—they fail when their layout fights real usage. Baskets and containers help only if you first walk through categories that survive your routine: a return flow as simple as the retrieval, not crushed by the first busy week.

    See Gridry’s full range of practical sideboards and storage systems to build your own lasting setup.

  • How Adjusting Your Grooming Setup Can Ease Indoor Cat Stress

    If grooming your indoor cat feels like a small battle each week—tense shoulders, cat inching away, fur clinging everywhere—it’s rarely about the brush or the cat’s “mood.” The real friction starts with the setup itself: a spot that looked convenient at first, but puts you and your cat at odds every time. Most owners repeat the same pattern without seeing the structural trap—awkward height, tight space, slippery floor, and tools just out of reach. This isn’t just about organization; it’s about how much extra reaching, shifting, and cleanup you accept as “normal” until it wears you down. The StillWhisker world isn’t about showpiece cat areas—it’s about spotting where repeated home setups quietly slow you and turn routine grooming into maintenance that lingers long after the brush is down.

    When a “Tidy” Grooming Spot Turns Into a Repeating Headache

    An armchair by the window or a small patch of hard flooring can look polished in a photo, but these “tidy” setups often hide daily friction. The cat grows wary well before you sit down. Each session, you nudge a chair, reach around a lamp, slide a bin closer with your foot—minor moves that stack up. Your cat, sensing your shifting or looming posture, starts tensing or ducking away right from the approach. Suddenly, something that looked controlled at first now takes longer, leaves more mess, and feels more draining every week you repeat it.

    The posture you fall into—twisted, half-standing, or always reaching over something—creates invisible pushback. Each session, that strain leaks out: a hand steadying the supply basket while holding a squirmy cat, fur drifting toward the hallway, cleanup supplies buried behind yesterday’s attempt at “swift reset.” The tidy look disappears as each awkward reach or incomplete wipe-down adds to the residue you spend weekends fighting off.

    How Setup Choices Quietly Derail Cat Grooming Routines

    It’s easy to miss how much surface and posture shape a grooming session. Sit on a chair, and almost every move becomes an “overhead” gesture—your cat shrinks away or bolts at the hint of your shadow. That two-foot height gap is all it takes to flip a calm brushing into a standoff. When the setup pits gravity against you, fur escapes under couches, brushes tumble off laps, and you find yourself running cleanup along baseboards days after “finishing.”

    These patterns aren’t random. Over weeks, you notice your cat sidestepping the supplies, or holding a tense posture the moment you approach the “grooming corner.” You clean up fur in odd corners, notice the brush is never where you left it, and spend more time prepping or resetting than actually brushing. The session now feels like a two-part job—get through the struggle, then sweep up the aftermath.

    The Accumulated Burden of an Almost-Right Setup

    Almost right is where the pain accumulates. Your cat won’t settle, so you keep “fixing” by shifting towels, moving baskets, or tackling stray fur a day late. Little by little, grooming starts to invade the rest of your space, spilling fur into entryways, storing supplies in random corners, and demanding repeat cleanups. Finishing the session doesn’t clear the slate—you’re still tripping on hair or tools hours later, staring at a supply bin wedged next to the TV stand because it never quite has a stable spot. Over time, this slow friction feels heavier than a simple reset ever should.

    Changing the Pattern: The Impact of Sit-Down Level and Surface

    The routines that work long-term share one pattern: your posture lets you meet your cat at their level, and the surface under you supports a clean finish. Dropping from a chair to the floor isn’t just symbolic—it removes the looming threat, halves the reach, and hands back control of the moment to you both. A proper mat or rug breaks up floor chill, keeps fur contained, and makes cleanup part of the session—not a separate hassle an hour later.

    At floor level with a stable mat under you, several changes hit immediately:

    • No more looming overhead—your cat stays calmer, less triggered by sudden reach-ins
    • Fur lands on the mat, not across the whole floor or under every leg of furniture
    • Shorter, direct reach—steadying and brushing is easier for both sides
    • Cleanup becomes one movement—shake out the mat, tools back to caddy, session finished

    This adjustment—low, stable seating with a surface that contains mess—often flips grooming from “get it over with” to a quick, low-stress part of the day that doesn’t bleed into every other room.

    Routine in Real Life: A Typical Grooming Scene, Improved

    Picture the standard scramble: your cat’s on the sofa, you climb a chair, tools balanced on one knee, hoping for cooperation. What actually plays out? Twisting, reaching, the brush slipping, your cat repositioning before you can finish, fur falling everywhere but the spot you intended. Now picture: you pull over a solid mat, sit cross-legged on the floor, align at eye level. Suddenly, your hands move naturally, the session runs quietly, and fur stays on the containment surface—not the wooden floor or halfway under a cabinet. Your cat’s tail stays soft, body uncoiled, and you don’t need five “almost done” resets as the session drags on.

    Clean up? The mat collects it all. One shake, done. The tools tuck away without a scavenger hunt. You’re not rerouted by stray hair or a supply pile later in the day. The difference isn’t dramatic until you repeat it for a few weeks—and then it’s hard to go back.

    What Routine Strains Really Tell You

    The warning sign isn’t in dramatic resistance—it’s in the tiny cues: the cat weaving away from your reach, fur gathering under the spot you “fixed” last weekend, the supply bin never truly finding a home. Each workaround—throwing down a towel, moving the ottoman, leaving out the brush—works for one day, but multiplies the cycle of micro-fixes. Every small inefficiency grows in weight because it keeps coming back, making each session harder to start and slower to finish. This is the real cost of a setup that looks fine but works badly when routines repeat.

    How Lowering Yourself Changes Cat Comfort—and Your Maintenance

    Sitting lower with your cat—kneeling, cross-legged on a solid mat—does more than calm them. It also shrinks the radius of cleanup and resets maintenance into a simple step. There’s no more chasing fur under bed frames or fishing for a lost brush; everything lands where you and your cat are aligned. The “looming” effect that made each approach a new struggle simply fades, and the post-session burden is now a quick shake, not a hidden project for later. This split-second reset is the difference: setup and finish are finally part of a cycle you don’t avoid.

    The Difference Between Presentable and Livable

    A basket of supplies sit neatly by the chair. The mat looks fresh. But if you’re untangling tools, repositioning yourself three times, or sweeping up fur in every corner, then the setup is passing for “presentable” and failing at “livable.” Setup isn’t just what looks good after a reset—it’s what doesn’t disrupt routine every time you repeat it. True grooming comfort shows up in the aftermath: cat relaxed, quick reset, no lingering project left behind, and nothing out of place in the rest of your home. That’s the StillWhisker setup—minimum friction, repeat-use payoff.

    Small Shifts, Lasting Effect: Rethinking the Grooming Zone

    If you’re stuck in a grooming routine that always leaves you adjusting, look for structural sticking points. Don’t hunt for more gear—trace the cycle instead: where you sit, what’s beneath you, where fur ends up, and how easily everything packs away. Watch the small resistances—a restless cat as you loom, a mat that slips out from under you, a caddy that never lands within arm’s reach. Change these, and routine maintenance shrinks down. Over a few weeks, you’ll find cleanup simpler, your cat calmer, and no slow-creeping supply pile invading joint space.

    The best sign? Your cat doesn’t bolt when the brush comes out. You handle what’s needed, reset in a single movement, and your space doesn’t betray every session with fresh little messes. It’s not about perfection or single-session magic—it’s about setups that vanish friction, session after session. That’s where practical indoor-cat life shifts from small defeats to quiet, lasting comfort. See more practical setups at StillWhisker.

  • Why Plug-In Accessory Placement Transforms Everyday Lighting Use

    If you have to twist, dig under a shelf, or reach behind clutter just to turn on a desk lamp or under-cabinet light, you’re not alone. A plug-in switch that looks “minimal” on day one often becomes a daily hassle: misplaced inline controls, low-hanging adapters, or bracketed buttons end up breaking your flow every time you need light. The fix isn’t just cosmetic—a smart lighting setup depends on whether switches, cables, and hardware actually match your routine, not just the furniture edge or wall face they’re meant to tidy up. How your light operates in regular use will show every compromise you made in placing controls and support hardware, for better or worse.

    When Placement Breaks Your Flow

    It’s easy to underestimate the impact of poorly placed lighting controls—until they start getting in your way. Maybe you hid an inline switch behind a row of books, or tucked a power brick out of sight under a shelf. For a brief moment the space looks clean, but soon the routine cracks: you freeze mid-task, nudge aside a pile of notebooks, or hunt behind a printer just to toggle the light. Each reach becomes a small interruption you never planned for.

    This friction isn’t rare. At a crowded desk, on a slim kitchen counter, or with wall-mounted LED strips, nearly everyone tries to banish cables and switches for a cleaner look. But once you start working, the “neat” finish resists the way you actually move—until the setup feels slow and slightly incorrect, day after day.

    Real Examples from Everyday Corners

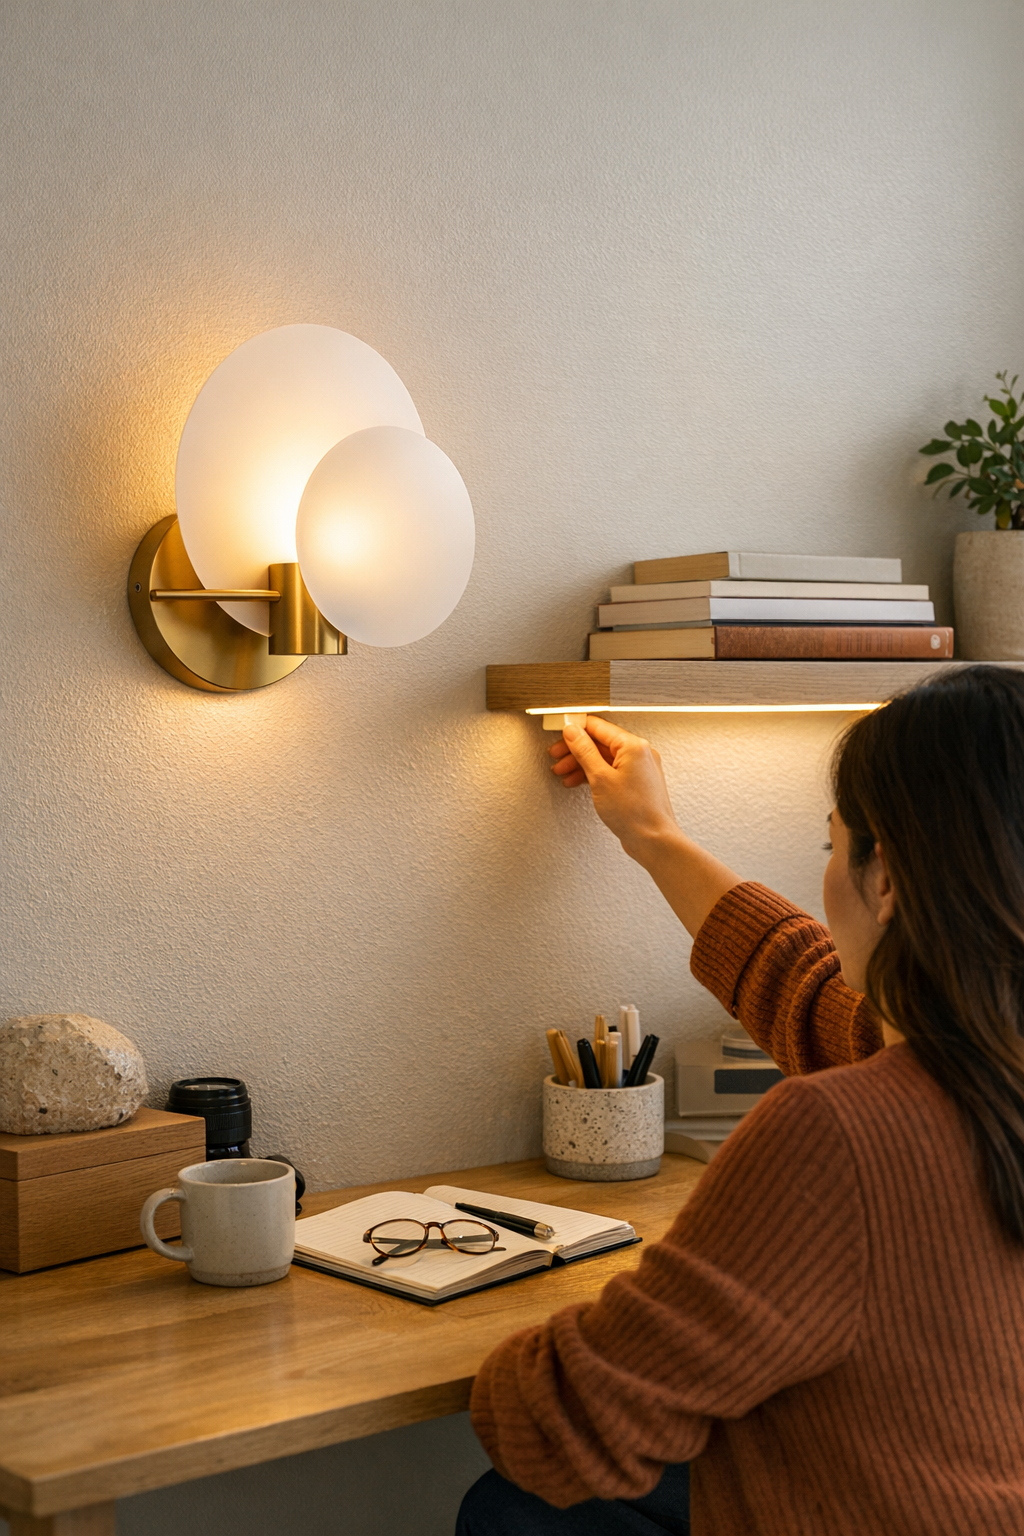
    Take a floating shelf with a low-profile LED strip: you race the cable along the back, stash the controller behind books, and step back to admire a seamless glow. But every morning proves what the setup missed:

    • Turning on the light means shifting books or reaching blind behind the display, risking a loose cord every time.
    • The inline switch dangles off the back edge, often sliding down and vanishing behind the desk. Retrieval becomes its own ritual of tiny annoyance.
    • If more than one person uses the space, the first question becomes “Where’s the switch?”—and the hidden controller forces books, cables, and small objects into constant migration.

    Or picture under-cabinet kitchen lighting: the bracket hides the cable from view, but each use demands a stretch behind jars and appliances to fumble for a stubborn toggle. What photographs as orderly quickly exposes its weak point—good for looks, clumsy for anything you actually do in the space.

    The Difference One Adjustment Makes

    Now imagine that same controller repositioned right at the forward edge of the shelf, within easy reach—no more moving stacks, no need to trail cables over your workspace. One small move, and the interruption disappears: switching the light becomes automatic, and the cable path finally respects your hand’s real pattern through the day. Suddenly, the setup aligns with how you live, not just how it looks.

    Spotting Setup Friction Beyond First Impressions

    Lighting and cable arrangements that appear neat at first can quietly unravel during actual use. You can spot a non-working setup by its friction:

    • Dragging cables and switches: Lines catch, lift, or scuff every time you shift something nearby, adding repeated stress to both hardware and patience.
    • Awkward reach-zones: Controls dangle or hide in spots that demand bending, twisting, or unnatural stretches—rarely where your hand expects them.
    • Visual clutter returning: Trying to fix the annoyance, you or others start pulling cables back into view or rearranging items, which slowly defeats the original “clean” intent.
    • Routine interruptions: Split-second pauses—just to chase a switch, secure a bracket, or fish out a power supply—add up as the real price of a not-quite-finished solution.

    Each of these was “only a small hassle” at first. But in daily cycles, the inconvenience compounds, making you notice the setup more than the comfort it should bring. A lighting plan that merely looks good isn’t enough if it stumbles every time you need it to just work.

    Better Placement Guidelines for Smoother Daily Use

    So how do you actually make a lighting setup that feels right in repeated use? Start with these patterns:

    • Stay in the action zone: Place every control directly along your natural reach path: the nearest desk edge, the forward lip of a shelf, or within relaxed arm’s length from wherever you sit or prep daily.
    • Keep cables clear of movement lanes: Route cords so they skip visible surfaces and don’t need to move every time you grab something. Avoid cable paths that snag or distract.
    • Test practicality over looks: Set the control position with painter’s tape first and run through your normal routine for a couple days. Your hand will reveal the spot that makes the most sense before you commit with brackets or adhesive.

    Good lighting and support hardware disappear into your workflow not because they’re invisible, but because you never think about them at all—they simply fit. Testing in real time exposes every “visual win” that doesn’t hold up against everyday repetition.

    The Silent Power of Support Accessories

    No lighting setup is stronger than its weakest support part. Switches, power packs, and brackets might seem like afterthoughts, but they decide whether every lamp, desk light, or under-shelf strip works with you or drains your patience. A setup built just for a portfolio photo will always lose to real-life inconvenience—visible cables, stubborn switches, unstable placements, dim task edges, or glare waiting at the wrong height. If the support logic isn’t right, every use feels heavier than it should.

    You don’t need everything hidden—you need it integrated with the way you actually use the surface, wall, or room edge. That’s when lighting goes from decorative to decisive. If your setup still slows you down, chances are it’s not the lamp’s fault—it’s how the little pieces fit the structure and habits you really have.

    For lighting and support solutions that hold up to daily use—not just appearances—explore options at LightSupport.