Blog

  • Optimizing Carry-On Organization for Comfortable Long Flights

    Your carry-on looks sharp when you zip it shut at home—but on the plane, that “order” faces a real test. The real trouble waits until you’re halfway through a flight: knuckles jammed under the seat hunting for your charging cable, a snack wedged in the wrong pouch, or your passport nowhere near reach when you actually need it. The bag that felt streamline in the boarding line quickly reveals its weak points—awkward reaches, layered cubes, and lost seconds every time you dig for the wrong item. A setup that was “perfectly packed” in your hallway becomes a clumsy obstacle course during routine retrievals or when you need to slide into your seat mid-boarding.

    When “Organized” Still Isn’t Easy: The Cabin Reality

    Surface order fools you—until you’re boxed in and pressed for space. In the security line or gate area, it all looks under control. Cubes and pouches stacked tight, zippers closed, everything in its square. But as soon as you’re crammed in the cabin, knees colliding with the next row, your setup’s real nature surfaces.

    Simple requests—reaching for a pen, headphones, or snack—turn into half-unpacking jobs. You’re pulling at one cube to reach another, stacking pouches on your lap, and shuffling loose charging wires or spilled lip balm, all while trying not to elbow your neighbor. Each retrieval adds a little more disorder. Instead of quick grabs, you’re working around your own organization—forced to reverse your packing logic every single time you need one small thing.

    Why Functional Access Matters More Than First Impressions

    Packing discipline hides structural mistakes. Plenty of travelers obsess over how their bags look in the queue—no clutter, all sections flush. But the moment you have to reach for anything after takeoff, the flaw is obvious: visual order is meaningless if every access interrupts your row, shakes your tray, or requires a noisy full-bag unzip.

    After four or five reaches, finger fatigue and cramped knees make minor inefficiencies feel major. If your charger lives beneath three “neat” layers, even the cleanest pack layout becomes a liability. The true test is rapid, silent, one-hand retrieval—without dismantling your seat ecosystem or holding up the aisle. Not just “packed well,” but functionally set up for repeated use when headspace and elbow room vanish.

    Spotting the Carry-On Pain Points In Real Time

    That One Item Always Buried

    Every routine exposes the flaw you designed in. On every flight, one essential always ends up trapped: the ID lost beneath pouches, the snack morphed into a scavenger hunt, or a cord wedged into the tightest cube. Not a big deal once, but across a trip or two, the small irritation compounds, making your bag feel more like a blockade than a toolkit. That’s when setups with no true quick-access section start breaking down.

    The Accordion Effect: Repeated Repacking in Tight Spaces

    Aisle bottlenecks and limited seat width leave no space for re-sorting. Grab a book and your toiletries come along too; try replacing a pouch quietly, and you end up restacking your “order” from scratch. By the arrival gate, the carry-on that was packed to perfection now carries the subtle chaos of a rushed repack—items lurk in the wrong spot, and you’re already dreading the next retrieval.

    Anatomy of an Interrupted Rest

    On overnight flights, even small retrieval jobs feel disruptive. The sleep mask you packed “neatly” now means sliding a hand beneath trays or footwells, risking spills or waking your neighbor. Often, it’s not worth the hassle—so you do without, trading comfort for the false promise of initial order. The cost: missed rest and a setup that resists your real needs.

    Fast-Access: The Quick Win That Changes Everything

    Simple structure beats clever stacking every time: move essentials—passport, charger, snack, pen—into a top-zip or slim exterior pocket. The real shift is clear when the aisle crowds or the seat in front reclines. Suddenly you reach what you need with one discreet motion, staying settled and not unraveling your core pack job. The more you travel, the more you notice: every effective carry-on has a visible, reachable “high frequency” section that’s never blocked by cubes, pouches, or compression straps.

    Compartment Choices: Stacks Aren’t Always Smarter

    Everyone tries to maximize inside dimensions with vertical stacks, but deep-layered cubes mean a full mini-unpack each time you want something from the bottom. With exterior-access layouts, you cut the friction—repeat retrieval is a quick grab, not a production. That’s worth more than a few square inches saved inside. The lesson: if you need it more than once in flight, it doesn’t belong under cubes or inside your “arrival only” zones.

    Lessons From Repeat Travel: What Actually Reduces In-Transit Friction?

    On repeat trips, you spot patterns. Packing for looks means fatigue down the line: every extra unzip, every cube toppled, every missed zip path adds up. The real wins go to setups that let you move only once per needed item—not setups that look perfect on the baggage scanner. A single, intentionally designed quick-access pocket is more valuable than double the packing cubes for mid-trip convenience.

    If you keep fishing out the same item mid-air, give it front-row access. If you avoid opening your main compartment because it feels like opening a mini suitcase each time, you’re ready for an outer-pocket reset. When one quick retrieval turns into three movements and two repacks, it’s not organization—it’s just delay in disguise.

    How to Reorganize for Real Comfort: Simple Adjustments That Last

    Shift your most-used items—snacks, travel docs, earbuds—into exterior pouches or flat-access pockets meant for flight, not just for packing show. Keep “in-seat” essentials spread flat, so nothing gets buried beneath a layered stack. Treat outer pockets as mission-critical space; the fewer steps between you and your everyday items, the less friction you’ll feel as time and tiredness stack up.

    Your main compartment still holds its place: stash your “arrival only” gear deep and out of mind. But for everything else you need again and again, trade that perfect, dense stack for honest, instant access. You’ll feel the improvement before the flight even lands—and every time you sidestep the urge to reorder your entire bag just to find what you need in transit.

    Shop CarryOnSupply for travel organizers, quick-access pouches, and other carry-on essentials

  • Keep Winter Driving Tools Within Easy Reach to Avoid Morning Frustration

    A car that looks organized can still fight you every winter morning. Slide into your supposedly neat cabin—floormats clean, dash wiped, bins “in place”—but the real setback comes the second you try to grab what you need and come up empty. You’re running late, fingers stiff from the cold, and instead of scooping up your scraper or charger, you’re contorting around seat corners, prying open gloveboxes, or digging through a tangled under-seat bin. “Clean” means nothing when reaching for a tool hijacks your routine—especially when it’s freezing or dark and every slow second costs you more than convenience.

    When “Organized” Isn’t Quick Enough

    It’s easy to think your interior is set up—everything with a spot. But try actually accessing what you use weekly and the illusion breaks. Getting a de-icer means sliding a tote aside or wrestling past a tangle of USB cables just to free a charger that always manages to snake under your bag. Sometimes you’re stretching from the driver’s seat for something shoved in a footwell or leaning awkwardly over the passenger seat when all you want is a flashlight before another icy commute.

    This problem doesn’t just show up in bad weather. Any routine—quick errands, back-to-back stops, sharing the car with someone else—turns “hidden clutter” into real friction. When you always have to unbuckle, lean, or empty a bin to get one tool, the neat look just exaggerates how inconvenient things really are. That slow drag of small delays repeats, eating into tight mornings or rushed afternoons and building a kind of low-grade frustration that resets every drive.

    The Trap of Tidy But Inaccessible

    Most “organization” hacks fail because they hide mess at the price of real access. Throw essentials deep into consoles or floor bins and you’re forced to break everyday flow just to reach what you need. On a frosty morning, you might find yourself down on one knee, coat picking up last week’s salt, stretching for a scraper wedged beneath a seat or blocked by a tote that was supposed to “streamline” the space. A neat trunk liner means nothing if it’s covering up the only tool you can’t drive off without.

    If you share your car, it gets worse: someone else’s idea of tidying bins means your most-used gear shifts spots—stacked deeper or switched to the other door. In one week, your “system” is suddenly guesswork, and you add another search-and-rearrange step to every morning—or skip using that tool altogether, until the next time it’s a hassle all over again.

    Cold Reality: Where Weak Setups Fail Fastest

    Cold weather exposes every small compromise. Head out after a hard frost, hop in, and instantly notice the scraper that was supposed to live in the door has migrated (again)—now stuck under a tangled charging cable or slid to the far side of the passenger footwell. One hurried reach means you’re pulling things loose, brushing grime onto your coat, untangling the charger, and realizing, once again, you’ll be late. Organized appearance can’t compete with setups that actually keep your hands moving, not hunting.

    This isn’t occasional; it’s a routine breakdown every time your setup breaks the rhythm of daily use. The longer you live with it, the more obvious the gap between “looks fixed” and “feels right” grows. Multiply that hassle by each cold start, dark return, or busy handoff, and the cost is undeniable—neatness on the surface, but a grind underneath.

    The Shift: Prioritize Instant Access, Not Just Storage

    Real improvement starts by cutting your “everyday access” down to the one or two items you truly reach for every drive. Forget about taping down every loose cable or building trunk bins for dozens of gadgets. The core is brutally specific: the single charger cable you actually use, the one scraper you always need, the flashlight you reach for in the dark. These belong within direct, seat-side reach—either in a shallow door pocket, a slim seat-edge tray, or a no-guess cubby at arm’s length. If you have to change posture, you’ve already lost seconds you can’t get back in a rush.

    Make this the non-negotiable “home zone”—items are always reset there after use, the way you automatically return the keys. Instantly, setup stops being a visual trick and starts working on the level you actually use it: drive, reach, grab, go. No shifting, no digging, no excuses in cold or rain. You save not just time, but focus—redirecting energy from hunting for a cord or scraping tool to actually getting on the road.

    Restrict Reach—Do Less, Need Less

    Squeezing everything within easy reach only brings back clutter. Narrow it to what really belongs: in winter, that might mean just a scraper and one key cable. Anything else—emergency flares you haven’t touched in a year, or a backup dog leash—lives elsewhere. If you only use an item once a month, it shouldn’t claim premium territory by your seat or door. Let “used weekly” decide what earns your closest spot.

    Sort By How You Use, Not What Category Calls For

    It’s habit, not label, that should shape your setup. Think through an average week: which tools do you actually grab, and when? Don’t fall for the instinct to build up “emergency kits” in the cabin if those items never come out until a rare breakdown. Instead, keep daily drivers—scraper, charger, maybe wipes or sanitizer—ready without digging. Let the rarely used stuff slide back into trunks, under seats, or gloveboxes, freeing the main zone for what keeps you moving.

    Use Organizers That Speed You Up, Not Slow You Down

    Visibility isn’t the fix if it just means a mess on display. Stick to slim, easy-access bins and door organizers, but keep them shallow enough that nothing stacks or buries your essentials. The right system stays open enough for a blind grab but keeps gear from drifting, spilling, or blocking the way. Don’t overfill—each added slot is just another way to hold up your reach or tempt you to store too much right where it doesn’t belong.

    Every Day, Less Friction—Even on Repeat

    The best setups earn their keep on repeat: cold mornings, late nights, quick errand runs, and shared-car chaos. Slide behind the wheel and, without thinking, grab your scraper or charger—every item has an automatic “home” in reach. No delayed departures, no kneeling on cold concrete, no wrestling a spaghetti of cables loose just to top up your phone. Over time, you notice the difference not by how clean your cabin looks in photos, but by how rarely you cuss at the clutter or stop to rearrange things before you can actually drive.

    The setups that only look under control leave you slowed and annoyed after every ordinary trip, especially as winter drags on. A tidy bin or covered tray is no win if it buries the gear you actually need when you’re rushed, frozen, or halfway into the next commute. Each time you skip a hassle—no digging, no untangling, no awkward reach—it adds up, building a routine that just works. That’s not about neatness for its own sake; it’s about structure that finally lines up with the way you really use your car, every single day.

    Organize your car to serve the routine, not just the photo. Find more practical solutions at DriveWellSupply.

  • How Proper Cable Management Transforms Desk Stability and Workflow

    You can stare at a spotless desk and still feel the drag: a cable snakes across your elbow, a charger cord nudges your phone dangerously close to the edge, your typing flow interrupted by one sliding wire. The minor tug and clutter look almost invisible at first—until another plug-in, another stretch for a notebook, or another off-center keyboard cue you to the real problem. It’s not just what’s on your desk that slows you down—it’s how cables cross, slip, and repeat the cycle of small collisions throughout your workday.

    Every ignored snag makes things worse. Charging cords have a way of creeping, pulling phones into drop zones or sending tablets skidding sideways. That mouse cable you left loose can unplug when you scoot your chair to grab a notebook. A monitor that shifts after every plug-in starts feeling like a slow leak in the whole setup. By midweek, these little resets become routine: shift, re-center, re-plug, repeat, even when the desk itself still looks organized at a glance. The friction builds wherever cables invade reach zones—especially between keyboard and screen—forcing you to fight the same hassle over and over during daily tasks, notes, or meetings.

    When “Organized” Still Interrupts: Recognizing Real Desk Friction

    A desk that looks clear isn’t always a desk that works. Hidden friction shows up fast when you try to move: cables zig-zag behind the mouse during a notebook swerve, a stray USB line lifts every time you reach for the phone, and clutter returns—this time by feel. The phone charger you line up each morning slides its way into your typing space, pushing pens, knocking the mouse, or just collecting dust in reach. Drop a few more connectors into the mix, and you’re primed for restarts and the occasional device drop, no matter how neat the setup appears.

    This is where most workstations break down: that so-called “managed” surface unravels as soon as you start actually working. It’s not about sweeping the top clear. It’s about whether your cable routes block or clear your hands—especially in the tight “swap lane” between the keyboard and monitor, where you flip between tasks and the mess shows up in motion, not just sight.

    Anchoring Cables: Which Solutions Match Your Routine?

    There’s more than one way to route cables—and each changes the work rhythm. An under-desk tray or sleeve hides most wiring, freeing up your hands and keeping surfaces open for fast keyboard/notebook switches. This difference gets sharp on cramped desks, where every inch of open reach counts more than visual order. Snap all the lines into a channel, and you can cross from typing to handwriting to screen without a cable sliding under your palm.

    But every organizing “fix” has a catch. Hide too well, and you hide convenience too. If you swap chargers, drives, or monitors often, fishing for the end of a cord under the desk turns a tidy setup into a time tax. Buried cable paths make routine reconnects awkward, especially for anyone with a mobile setup or shared workspace. For fast swapping, a simple cable box at the edge or a flexible clip sleeve keeps things both corralled and accessible—some order, some freedom, adjusted to what you actually touch. The trick is knowing where you need grab-and-go versus lock-down hiding.

    Difference Over Time: Repeated-Use Wins (and Drawbacks)

    On a desk with loose cables, every adjustment becomes a gamble. Reach for the notebook and a charger tugs a phone with it. Turn to plug in headphones and a mouse cable catches your sleeve. The payoff for anchoring—using cable trays or snap-in channels—is immediately tactile: the surface stays still, device positions hold, and the daily after-work “reset” shrinks from a tangle sort to a simple sweep. The reach path stays open and predictable, session after session.

    Still, cable management becomes self-defeating if you box yourself in. Anchored cables that can’t move at all end up requiring awkward stretches, under-desk dives, or even whole reset routines for what should be quick swaps. If your work pattern changes—think frequent monitor shifts, alternate devices, or hot-desk handovers—any ties that feel too permanent quickly become just another source of drag. The system needs to flow with how often you actually reconnect, not just look neat at rest.

    Small Realities: Keeping the Desk Fluid (Not Just Tidy)

    What reset the pattern on my own desk was simple: a clamp-on tray hidden just out of sight, anchoring most cords but leaving open loops at the edge for quick device swaps. Power strips stopped drifting below my feet. The monitor—once a sliding target after every cable change—stayed centered, no matter how many notebook flips or late-afternoon reach-overs. By the end of the week, the payoff was obvious: each plug-in felt mechanical, not like a mini cleanup. The desk went from “looks fine, feels off” to a surface that actually stayed set after every cycle.

    The system isn’t about appearances or total elimination of mess. Any workstation that forces you to slow down just to charge, swap, or move is stealing focus—even if it scores points for tidiness. Anchor cables where they don’t get in the way, and choose trays or boxes that match your change pattern, not some abstract idea of order. It’s utility first, visual calm second.

    Scenes from a Real Workstation: Where Cable Management Pays Off

    • Mid-morning switch: Keyboard shifts back, notebook comes out—no flick, no cable jerk, no phone sliding toward the edge.
    • Device shuffle: Drive and tablet plug into a hub mounted under the desk—top stays fixed, you jump between devices without snag or nudge.
    • Fast reset, no tangle: Unplug, pull a cable clear, that’s it. Everything stays lined up for the next round—no fishing under the desk, no wonky mouse, no recentering the screen.

    When these patterns get built into muscle memory, you notice what vanishes: the micro-pauses, the fingertip rescue missions, the recurring device drift. Especially on high-turnover days—with stacks of notes and constant plug-ins—it’s the lack of friction that stands out. If you keep having to “fix” cable paths, the routine isn’t working. Look for every repeat rescue; that’s a live signal your setup needs an actual reset, not just another cleaning.

    Quick Reference: Cable Management Uncluttered

    How do I stop cables from pulling or dragging devices?
    Route them through an under-desk tray, box, or sleeve—move weight and tug pressure off the surface so your devices can’t be yanked by accident.

    Will cable management block quick swaps?
    It can. Closed trays or tight sleeves slow you down if you swap often. Leave one or two key lines accessible with a desktop dock or an open box at the edge if you do frequent device changes.

    Do trays or sleeves really help in long sessions?
    Yes—anchored cables keep your reach area clean and steady, cutting down on mid-session distractions. Especially by the end of the day, the difference in energy and attention is obvious versus an always-sliding setup.

    The Real Test: Does Your Desk Work—Not Just Look—Better?

    A workstation that feels stable—even after a day of device swaps, notebook pulls, or shifting from call to call—is built on invisible fixes: cables routed out of the way, but not boxed in beyond what your pattern allows. The right cable management makes the desk feel ready for work, not just ready for photos. If you’re still pausing to move, rescue, or reset after every work burst, the cables are in control, not you. Arrange for smoother resets, and watch how quickly a “tidy” desk finally starts to work.

    Explore the full WorkBasic collection

  • Why Proper Bracket Placement Is Key to Seamless Lighting Setup

    A lighting setup that looks invisible when installed can quickly reveal its real-world flaws once you start using the space for actual work. The flush bracket hides behind the cabinet or desk until your sleeve catches, a cable droops into view, or you find yourself shifting papers just to avoid a sliver of glare. What seemed “minimal” in the still photo starts to interfere during every reach, wipe-down, or plug-in. The surface promises order but quietly produces daily friction—snagged hands, exposed wires, uneven light on key areas—that doesn’t fade, just shifts shape as your routine unfolds. The lighting world loves clean lines, but a clean look doesn’t mean a clean experience.

    When Looks Alone Don’t Solve the Problem

    Sleek, low-profile lighting is engineered to fade into the background—ideal for narrow shelves, multipurpose tables, or any surface where you fight clutter. But the “vanishing” bracket or hidden strip rarely stays out of mind once you’re back in motion. The same slim edge that disappears visually can intrude on your hand path. Brackets scrape skin during routine sorting, or a cable previously tucked flush sags exactly where you need to slide your laptop. The visual win collapses with every micro-interruption: a clean install that’s physically in the way becomes a silent source of irritation, and the hidden piece calls attention to itself every day.

    Scene: The Desk That Won’t Stay Clear

    A compact desk looks sorted: under-shelf LED strip, cable tucked out of sight, mount pressed flat to the back edge. But by midweek, paperwork and devices nudge the mounting bracket—now the “invisible” cable hangs loosely, glancing your wrist as you reach for a charger. The edge of each page lands in a thin shadow no matter how you adjust the pile. The desk stays visually crisp, but tasks pile up on top of small, compounding disruptions. Clean lines invite use, then demand correction.

    Why Practical Placement Matters More Than Minimal Looks

    Real use exposes what the eye misses: an unseen bracket isn’t unfelt, and an invisible cable can become an ongoing distraction. The “tidy” mount turns clumsy at the intersection of lighting, movement, and cleaning. Pushing a laptop forward, stacking binders close to a mounted strip, wiping crumbs from a compact counter—all can snag the part you thought would vanish. Friction comes from the overlooked crossing points, and each minor clash interrupts flow more than any visual clutter ever did. The difference between looking finished and feeling resolved plays out every time your routine collides with hardware you barely notice at rest.

    The Hidden Cost of Quick Installs

    Quick installs favor first impressions: symmetrical bracket placement, low-profile clips, cables pressed into arbitrary grooves. But a setup that scores on aesthetics alone falls apart during daily routines. Glare undealt with at the edge of a shelf, a bracket that pokes out just under elbow height, or a cable that you have to dodge every cleaning session—these are the failures that don’t announce themselves until you’re using the space for real. You hesitate before moving a file, or pause to adjust a fixture that never quite holds still. The setup never quite disappears, leaving a workspace that asks for constant maintenance.

    How Subtle Installation Choices Turn Into Everyday Interruptions

    Some setups pass the first day, only to let friction sneak in over time. One kitchen’s “floating” LED panel looked seamless—until a routine cleaning day dislodged the loose cable and caused flickering. In a busy workspace, two nearly identical wall-mounted lights told different stories: one flush against the wall, never noticed again; the other mounted just a hand-width too forward, scraping knuckles with every monitor shift. The misstep isn’t always dramatic, but it’s always repetitive—the break between use and design shows up in the small, frequent stutters of your daily routine.

    Everyday Evidence: The Test Is in the Repeats

    Most lighting issues make themselves known only after a few days of natural use. If your “minimal” setup requires you to steer around a bracket, flatten a cable that keeps curling up, or settle for dim corners and recurring glare, your system is serving looks, not function. The real test is whether the space lets you work, reach, and clean without notice—no hesitation, no correction, no persistent shadow to work around. Micro-problems build up, leaving an area that lingers in your attention for the wrong reasons.

    Small Adjustments, Big Improvements

    Most fixes are surprisingly minor: a bracket shifted an inch, a cable anchored closer to the wall, a low-profile mount swapped for a flush version. The difference? Disruption that vanishes for good. In one example, a desk known for constant cable migration settled down after the line was anchored just where hands stopped hitting it. The light stayed out of sight—and out of mind—because the cable stopped interrupting the natural path. In a kitchen, switching from a projected bracket to a flat-mount meant one less detour every night during cleanup. Small physical moves erase ongoing friction that looks tiny on paper and feels endless in practice.

    Tip: Test Before You Finalize

    Lay out your planned lighting or cable supports, then run through real motions—stack papers, wipe surfaces, plug in devices, adjust your chair. Watch which edges your hand actually contacts, spot where a cord creeps into view, feel for any sharpness or snag. Adjust the hardware before committing. This step is cheap insurance against a month of compounding hassle and overlooked distraction.

    Designing for Real Use, Not Just Visual Calm

    The real win is a setup that’s both invisible at a glance and unfelt in daily use. True background status means you never pause to think about glare on a notebook, a cable loose on a shelf edge, or a bracket digging into your wrist. No extra sweep with the hand, no sideways glance at a shadow. What you can’t see shouldn’t leave a mark in your routine. Until then, your “minimal” solution still has room to improve—because a lighting or support piece that solves clutter visually, but imposes new small struggles, hasn’t actually solved much at all.

    www.lightsupport.myshopify.com

  • Why Checking Box Depth Matters for Reliable Indoor Lighting Fixtures

    The most common—and costly—lighting mistake in hallways, stairwells, or laundry rooms isn’t the fixture you pick. It’s ignoring whether the electrical box is the right depth for the job. You can install a slim, high-tech, or damp-rated ceiling light and still end up with constant trouble: the fixture wobbles every time someone brushes past, leaves a visible gap or harsh shadow along the ceiling, or never sits truly flush. Each day, these flaws turn up in exactly the situations you notice most—navigating stairs at night, pausing by a bathroom mirror, or folding laundry under a light that can’t settle into place. Over time, that friction builds. Rooms stop feeling reliable. A space looks updated but doesn’t work any better.

    Where Box Depth Surfaces in Daily Lighting Friction

    It’s rarely obvious on day one. Maybe you install a clean-lined flush mount above the hallway or at a bath vanity. The brightness is better, but soon the fixture reveals a faint shadow perimeter—or an off-kilter rim where it should meet the ceiling. The supposed “upgrade” flickers with a sliver of movement, or the seams feel exposed every time a door slams or someone dusts. Instead of blended, the fixture broadcasts every small mismatch, and the interruption repeats every time the space is used.

    Shallow or crowded boxes are more than a visual issue. Wiring gets tight, leading to strain each time you adjust or clean. Mounting hardware that’s supposed to remain hidden starts protruding below sightlines. When a room is meant for quick, repeated tasks—stairs, entries, vanities—those visual and structural tensions never go away. Shadow bands, uneven edges, or off-center placements are not oddities; they’re constant reminders that the install wasn’t matched to the structure behind it.

    Repeated Use Reveals the Weak Spots

    What starts as a “minor” annoyance keeps surfacing, because real lighting success is measured in how the room gets used again and again:

    • Stairwells: A loose fixture throws halos onto the steps, distracting you the instant you pause at a landing and leaving dark spots in exactly the places softer light is needed for safety.
    • Bathroom vanities or mirrors: Shadow lines split your reflection, forcing you to shift side-to-side just to avoid glare or get even face light. Every close look highlights the imbalance.
    • Laundry counters and work surfaces: An unevenly anchored fixture cuts off the countertop’s edge in shadow, making it easy to misplace items or miss a spill during chores.
    • Corridors and entryways: Lights that won’t sit flush create glare patches that draw the eye away from the movement path, often making one side of a hallway bright and the other distracting or dim.

    Each time you adjust a bulb or clean around the fixture, you feel the compromise. Wires pinch tighter, mounts flex under light pressure, and those same awkward shadows or exposed screws resurface. Annoyance becomes routine, especially in spots built for quick movement and clear, usable light. Repeated use keeps revealing what the install missed.

    The Gap Between Appearance and Use

    Lighting catalogs rarely show what actually happens when a low-profile fixture meets the wrong box–not until you live with it. That supposed “invisible” mount only works when the depth behind the ceiling or wall lines up with the fixture’s needs. Go too shallow and you get tilted lenses, seams at the ceiling, and cold light leaking across the wrong surfaces. Even in spaces that look brightly lit, feet or faces fall into shadow. Harsh edges and off-angle glare creep in, showing that a bright result isn’t always a usable one.

    Imagine a hallway that’s technically illuminated but still shrouds each step in shadow—or a bathroom mirror that seems perfect until you lean in to shave or check details and find the light slicing your reflection in half. The letdown isn’t a style flaw; it’s a structural mismatch that surfaces with every routine.

    A Real-World Fix: Changing the Box, Not Just the Fixture

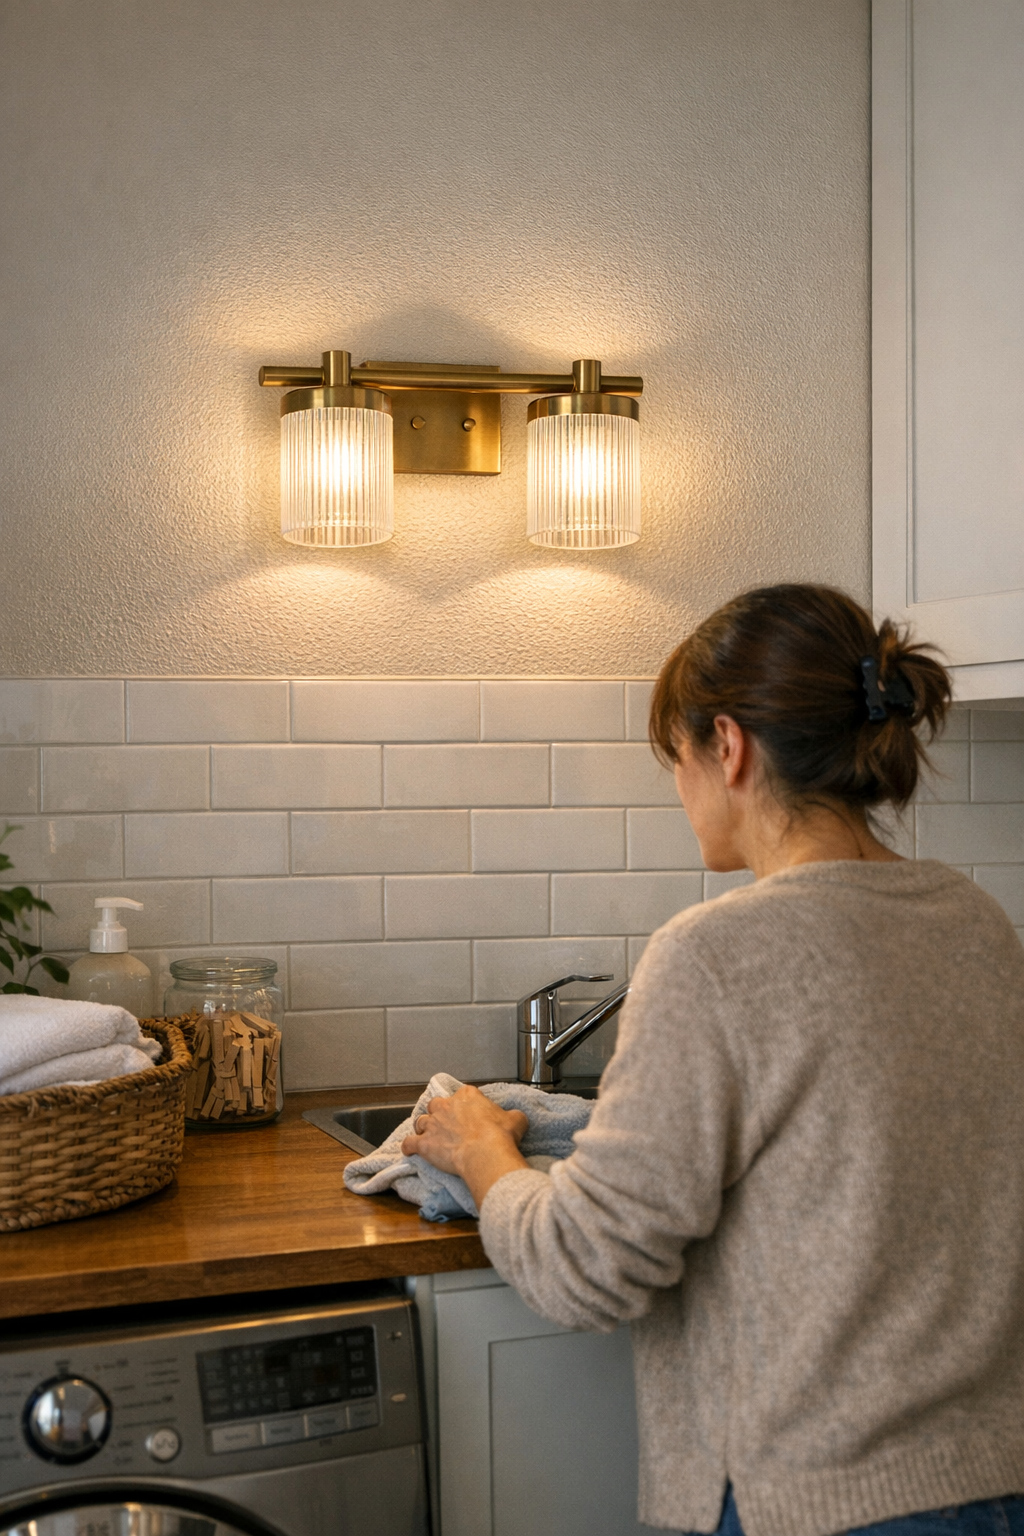
    Take a laundry area plagued by the problem. An ultra-slim LED, picked for its low profile and modern look, never sealed flat above the counter. Every time someone stacked shirts or cleaned the surface, the light wobbled—an exposed gap let in dust, wiring felt cramped behind, and uneven shadows carved lines across the tile. After weeks, the room felt makeshift, no matter how new the light looked.

    Replacing the shallow box with a deeper one changed everything. Suddenly, the fixture locked tightly in place, hiding every seam. Wires lay safely with room to breathe, and the entire counter was washed in steady, even light—no more dim edges or stark glare. That swap didn’t merely tidy up loose hardware; it removed a daily annoyance, turning a high-traffic work zone into a space that finally functioned as intended. Every movement felt steady, every task stayed visible, and the difference was clear every time the light clicked on.

    Catching Box-Depth Trouble Before It Starts

    How do you keep the problem from repeating in your next install? First, measure the box depth before choosing a fixture. Most standard ceiling or wall boxes are about 1.5 inches deep, but plenty—especially older or utility-room boxes—can be shallower. Always compare this directly to the manufacturer’s requirements. Warning signs aren’t subtle: if wires feel pinched, mounting brackets peek from under the fixture, or light leaks from unintended gaps, box depth is likely at fault.

    Signs You Need a Deeper Box

    • Fixture rocks, shifts, or refuses to sit flush even after remounting
    • Persistent shadow bands or glare lines surround the light
    • Wires feel tight or exposed with each adjustment or cleaning
    • Mounting hardware becomes visible around the fixture base

    These aren’t cosmetic details—they’re persistent obstacles. An ill-matched box turns daily routines into a series of minor corrections: shifting to avoid glare, squinting at shadowed counters, noticing uncovered screws. Letting these add up means the room works against you, not for you.

    What To Do If Your Box Depth Isn’t Right

    If you have broad access—unfinished ceilings or utility rooms—a practiced DIYer can sometimes swap a box themselves. For anything else, especially behind drywall, tile, or tricky wiring, call an electrician. Safety and long-term reliability trump saving a few minutes. Upgrading to a deeper box isn’t just about code; it guarantees that your upgraded fixture will sit solid, wires will stay protected, and the lighting will serve you as intended for years of repeated use.

    Practical Tip: Always Double-Check Before You Buy

    Don’t judge by appearance or spec alone. Before you add new ceiling lights to busy spaces—hallways, over stairs, vanities, laundry counters—spend two minutes checking how deep your box is and whether wiring can fit easily. That simple check is the difference between “quick upgrade” and months of nagging imbalance, shadow, and unnecessary strain every time someone flicks the switch or cleans the lens.

    Lighting That Works Where You Need It—Every Day

    The best ceiling and wall lights get out of your way—they serve the task, light the path, and vanish into daily routine. Box depth isn’t glamorous, but it’s often the missing link between lighting that just looks good and lighting that quietly performs. Especially where movement, visibility, and safe routines matter, don’t settle for a bright fixture that interrupts itself. Structure matters. Match what’s behind the surface to what your space demands, and let your lighting finally feel finished, not just newly installed.

    Explore the full LightHelper collection

  • Why Flat Entryway Trays Fail to Keep Wet Shoes Dry and Odor-Free

    Flat shoe trays look like entryway order—right up until real weather hits and the illusion crumbles by day three. Step inside after rain or mud and you’ll usually spot shoes neatly lined up on a shallow tray, paired with a quiet hope: that this time, grit, puddles, and mess will actually stay put. For a day, maybe two, the routine holds. But as shoes repeat their cycle—wet, then wetter, then overlapping in a row that spreads wider—the shortcomings show fast. Tray setups that promise control undercut it with every soggy arrival: shoes stay damp, muck layers build, and the “clean” zone quickly becomes another source of work, not relief.

    The Flat Tray Setup: Contained but Compounding

    Shoe trays are meant to bring calm by boxing in mess and keeping drips off the floor. They work briefly—mud is corralled, water collects, order appears. But repetition reveals the flaw: each cycle leaves behind new wetness, never enough drying. Under the surface, water accumulates and grit turns to sludge. By midweek, there’s no hiding it—open the door and the stale smell hovers, the tray’s thin order replaced by a damp, slow-building blockade where shoes rarely dry and clutter creeps outward.

    It’s not just that the damp lingers—it multiplies. If shoes aren’t cycled out fast, or if school runs and walks stack arrivals close together, the surface is always wet. Soaked sneakers and boots choke off evaporation, then extra pairs go on top, trapping everything in place. Odor barely fades before returning stronger. Instead of welcoming you home, the tray quietly signals, “Nobody’s taking care of this.”

    Where the Flat Tray Fails in Real Entryway Life

    Transition spaces run under constant pressure—boots drop, bags land, shoes migrate sideways, and within a day the organized tray turns into a bottleneck. The neat line bends outward, shoes start to overlap, and a “temporary” bag gets parked on top, soaking up the runoff. The system resets only with hands-on effort, which most avoid until things are clearly out of hand:

    • Shoes grow heavier and soggier with every cycle.
    • Sticky mud finds its way back inside, trailing past the tray.
    • What seemed like an easy helper starts feeling like another cleaning job waiting for you at the door.

    Lived movement also breaks down. If the tray blocks the natural path, each arrival slows—nobody wants to handle cold, wet footwear, and shoulders pinch as people avoid puddles. Shoes that should live on the tray spread to the edges: under the bench, clustered near the wall, or left at odd angles for quick escape. The tray contains less and less; the real zone for drop-offs and pick-ups compresses to wherever there’s still a dry spot, making even the act of entering feel awkwardly tight.

    The Hidden Friction of “Contained” Clutter

    The trap isn’t always visible. What looks like visual order is often just backed-up maintenance. The tray collects avoidance—nobody wants to reach into pooled water or touch other people’s half-dry shoes. Miss a cleaning cycle and the mud cements; the reset burden climbs. One skipped evening of cleanup and “contained” turns to “dodged.” Shoes start shifting to random corners, just to sidestep the puddles. Now the system isn’t just holding mess—it’s fueling it.

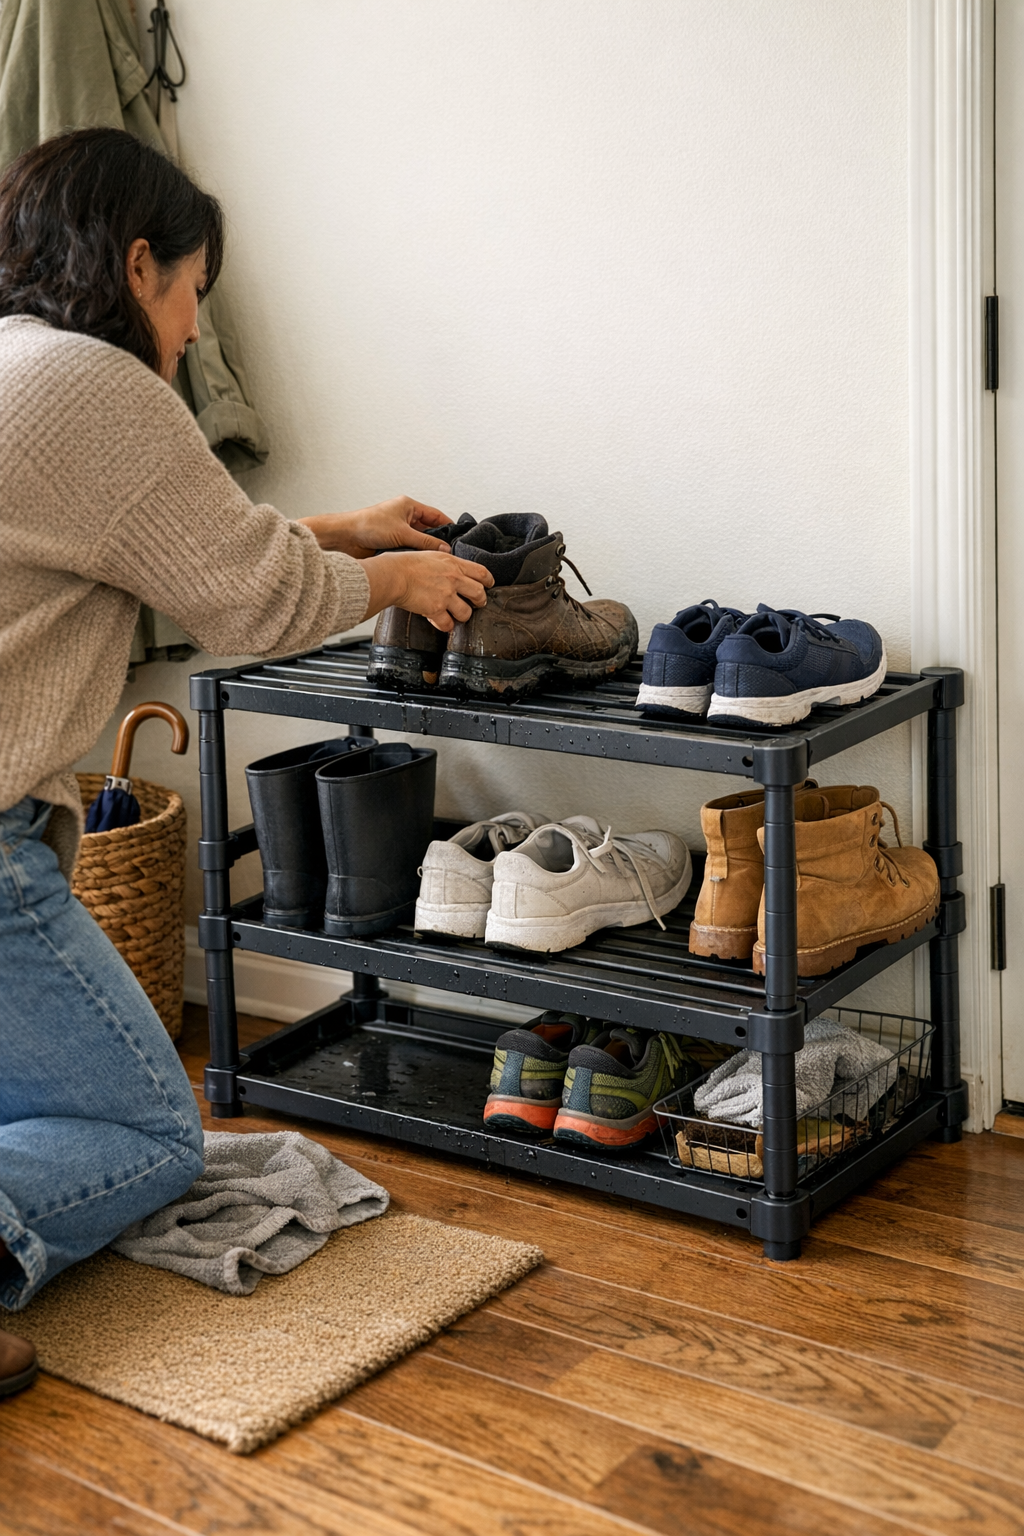
    Raise the structure even slightly—move from a flat tray to a slotted, ventilated rack—and the entire pattern shifts. No, it won’t hide every speck of dirt. But now shoes dry, water drains, air moves, and the daily reset means less direct handling of old puddles. What used to be a major cleanup drops to a quick swipe of a mat. The friction to putting things back is lower—people actually use the storage rather than working their way around it.

    Scene: Lost Shoezone, Blocked Flow

    Picture midweek: tray crowded, shoes still damp, your bag lands “just for now” on what was the one clear spot. Boots migrate to the bench edge; hats end up draped on the wall. Someone shuffles through, nudges a shoe, and spills a cold puddle down onto the floor. Suddenly the passage narrows, the “clean” zone vanishes, and the entry’s reset takes longer than you can spare.

    How Minor Elevation Shifts the Entire Experience

    Just a few inches higher, with slots or vents, and every drop-off changes:

    • Moisture drains away, so shoes are above yesterday’s puddle instead of in it.
    • Airflow underneath makes real drying possible by the next return.
    • Dirt falls below or clears off easily, turning kneeling “deep cleaning” into a simple sweep.
    • People don’t hesitate to put shoes away: the system invites rather than repels repeat use.

    Over time, these tweaks mean resetting the entryway is less of an event, and more of a step. The setup looks looser than a fully boxed-in tray, but operates far stronger—less funk, quicker recovery, and much less avoidance of the essential routine.

    Real-World Tip: Bridge the Wet and Dry With Layers

    In smaller entries where water always finds a way, layer your system: slot a vented rack above a removable mat. Shoes stay lifted, runoff drips below, and reset means pulling a mat rather than scrubbing a single deep basin. It’s the gap between perpetual wetness and a fast, one-move recovery—no more kneeling over half-dry trays just to keep up.

    When Setups Look Neat, But Don’t Work

    The risk isn’t messy shoes in plain sight—it’s setups that perform worse in daily rhythm than their design looks. Visual containment hides slow traffic, hidden odor, and the way you end up double-handling everything just to maintain the illusion. Each moment you hesitate or shuffle things again, the flaw in the system is exposed.

    Good entry storage responds every time something gets dropped, grabbed, slid, or put away—not just the first time you set it up. The difference between a flat tray and a low rack isn’t “looking a little tidier”; it’s whether returning home means one quick step or yet another reset you hope to put off. What traps mess on day one creates routine resistance by day ten.

    Small Adjustments, Noticeable Difference

    The goal isn’t a space that pretends to stay perfect, but one that actually adapts: shoes cycle in and out, airflow keeps up, and movement through the threshold doesn’t stall every time the weather turns. Over a season of repeated use, setups that let water drain and shoes dry will not only stay easier to manage—they keep the entryway a place you can reclaim, not a job you have to dread.

    Find transition storage options designed for repeated real use at Betweenry.

  • How Sideboards and Cabinets Maintain Calm in Busy Living Rooms

    No living room stays truly organized if the storage layout falls apart under daily use. Too often, what looks like tidy order on Sunday quietly unravels by Wednesday: you open a cabinet to grab the remote, but end up rooting past chargers, board games, crumpled mail, and tangled cords just to reach it. Storage that wins on style—or even feels generous at first—still fails if it can’t keep up with repeated retrievals, quick returns, or actual routines shared by everyone in the room. The moment you’re forced to set something “just for now” on top of an out-of-place pile, you know the system’s weak spot is exposed. Rarely is the problem visible at a glance. Instead, it builds underneath: hidden clutter, slow resets, and the creeping feeling that the storage is working against you, not for you.

    The Calm Room Test: Where Nice Storage Fails Under Pressure

    Nearly every living room hits a breaking point—usually not in a big mess, but through ordinary tasks. You reach for the backup remote and knock over two stacks inside a deep cabinet. You return a charger, but the right compartment is already crowded, so into the nearest empty space it goes. Each shuffling detour is minor but accumulates, revealing storage that’s not truly mapped to real use. A room can stay “for show” until routines hit friction: categories blending, items being left out, and “reset fatigue” building every time you delay tidying because putting things back has become uncertain, crowded, or tedious.

    Inside Storage: Why Structure Matters More Than Looks

    Cabinets and sideboards often promise calm just by hiding everything—until the doors open. Adjustable shelves, deep drawers, or broad surfaces become traps if their inside logic doesn’t match what actually needs to happen each day. Depth alone creates risk: a single shelf line turns into an unsorted pile, and every deep bin becomes a mixed catch-all by week’s end. Suddenly, you’re moving games just to reach mail, or unearthing last winter’s scarf just to return kitchen batteries. What matters isn’t the appearance, but whether the structure directs or diffuses daily flow. The real test always comes after several cycles: is retrieval still obvious and reset still quick? If not, tension builds and frustration replaces clarity.

    Sideboards vs. Cabinets: What Actually Endures Daily Use?

    Picture twin living rooms—same floor space, both with a sideboard and a storage cabinet. Surfaces shine on day one, but as routines cycle, differences emerge:

    • Cabinet reality: Deep shelves, fading categories. By midweek, off-season linens touch board game boxes, and searching for a game controller means moving placemats and balancing an odd pile of spare chargers. Open a door, and the bottom shelf’s contents threaten to spill or block movement. Retrieval slows. Items are often put back “later”—which then means never.
    • Sideboard reality: Clear, shallower compartments. Each zone is defined: tech gear here, daily mail there, board games above, backup chargers below. Someone grabs a charger: nothing else needs shifting, and the return path is obvious. Reset becomes quick, almost reflexive. Items left out find their way home because their zone is clear and accessible—no guesswork, no pile-up, no delay.

    To a visitor, both rooms still look tidy, but in actual use, the sideboard silently resists chaos. Surfaces stay open, walkways stay clear, and evenings end with fewer abandoned items on display. The cabinet might “contain” clutter, but only by hiding slowdowns behind its doors. Overlooked problems—like blocked access, slower routines, and missed sorting—all tell you the structure is losing the daily contest.

    The Pile-Up Pattern: How Category Drift Begins

    Most living rooms get messy not all at once, but as small mismatches build. A shelf becomes the “anything goes” zone. Someone stacks sketchbooks on chargers because the right spot is buried. A guest leaves remotes out because it isn’t clear where they belong. Suddenly, walking through the room means skirting overflows: you edge past a tightened walkway, nudge aside a side table that blocks a door, or leave one basket open because closing it means dealing with everything shifted inside. What began as a small pile turns into category drift—zones meant for one kind of item slowly absorbing every stray object within reach.

    The friction builds quietly: every time you shuffle more than one thing to return an item, the system is signaling trouble. More energy spent searching, more things abandoned “just for now,” and resets slow down. Eventually, surface clutter emerges and the setup that once looked calm becomes a daily obstacle course.

    Better Storage Logic: Dividers and Visual Cues That Actually Work

    Sometimes, a tiny structural nudge fixes what a full reorganization can’t. Add a shallow divider—or carve out fixed zones with trays or bins—inside a cabinet. Suddenly, the “dump drawer” nature dissolves. The whole mood of the room changes in under 10 minutes of work:

    • Chargers and remotes find their own zone, no longer crowding napkin storage or piling up in whatever cubby is empty.
    • Everyone in the room can return items correctly first time—even guests—because each compartment broadcasts its purpose in shape, not just intention.
    • Resets shrink: you reach for an item and replace it in one step, rather than digging around or rebalancing a precarious stack.

    But if within days you spot the same unrelated items wandering back, that’s your cue: the existing zones need further adjustment, not just another tidy-up session. Usually, a brief monthly review is enough—as long as compartments are visible and shallow, not deep and undifferentiated.

    Signs Your Storage Isn’t Working—And How to Fix It

    • You regularly shuffle three or more things just to reach one item.
    • Items languish on surfaces “just for now” but don’t make it back to their spot.
    • Overflow builds in the same zones—edges, tops, or floor clusters—even though cabinets or drawers have space.
    • Doors or drawers snag, walkways tighten, or you avoid opening a section because the footprint is too awkward.

    When these warning signs show up, don’t just declutter. Rethink the flow: often a new divider or a swap from cabinet to sideboard, or vice versa, solves more than endless re-sorting. The best setup fits the way you actually live—the rhythm of retrieval, the speed of resets, and the reality of shared, changing use—not just the “after” photo once you’ve tidied up.

    Calm Spaces Are Sustained by Everyday Compatibility

    Lasting order in a living room depends on storage that’s friction-proofed for repeat, shared use—not just organized once. A well-zoned sideboard or a restructured cabinet doesn’t just mask mess—it slows category drift, shrinks reset times, and lets anyone return items in seconds, not with second guesses. Next time you’re choosing between sideboard or cabinet, make your decision on the shape and logic inside—whether the structure fits the daily pressure points of your space. What settles the room is not the look but the logic under the surface, built for the way you’ll use it all week—not just the way it photographs on day one.

    Gridry: Storage for the way you actually live

  • Transform Your Shared Yard with Wall-Mounted Storage Solutions

    The problem isn’t getting organized—it’s staying organized through a real week in a tight outdoor zone. A new rack lands in a busy yard or along a narrow path, and for a moment, chaos seems conquered. But give it days of real use: foot traffic squeezing past, kids bringing out sports gear, quick gardening runs, someone forced to detour around boots or a heap of balls. The main route shrinks until every return trip means sidestepping another pile. This isn’t just clutter; it’s setup friction that never gets solved, just moved from spot to spot.

    When ‘Organized’ Starts Getting in the Way

    On the first day, bins in neat rows, a solid rack, or tall modular units give the backyard, garage edge, or side yard a brisk sense of order. But routines hit fast. One person grabs a trowel, another dumps muddy gloves, a soccer ball gets nudged under a shelf, boots wedge against the unit’s legs—soon every return involves shifting gear or asking, “Whose junk is blocking the walkway now?” The organization works for a week—sometimes less—until corners clog up and everyone starts calculating detours just to get through.

    This isn’t messiness; it’s a mismatch between storage footprint and lived movement. Floor racks and standalone cabinets always sound practical—until they quietly claim the strip of space the whole household depends on to move through. Once movement paths are narrowed, even the smallest item out of place becomes a daily hassle. “Easy access” turns into routine reshuffling.

    The Floor Storage Domino Effect

    Picture a Saturday: the first person drops a ball as they squeeze by. Next, a couple of boots clog the rack’s edge. Someone tosses garden gloves onto the lowest rail, aiming for “close enough.” Loose cones and balls creep beneath the shelves. What started as an organized compact footprint has swollen into a physical bottleneck, shrinking footpaths down to shoulder width. If you need the mower or have to haul bags past, you’re kicking aside clutter just to reopen the lane. Each trip out means more objects in the way and another band of awkward shuffling around the setup that was supposed to fix this.

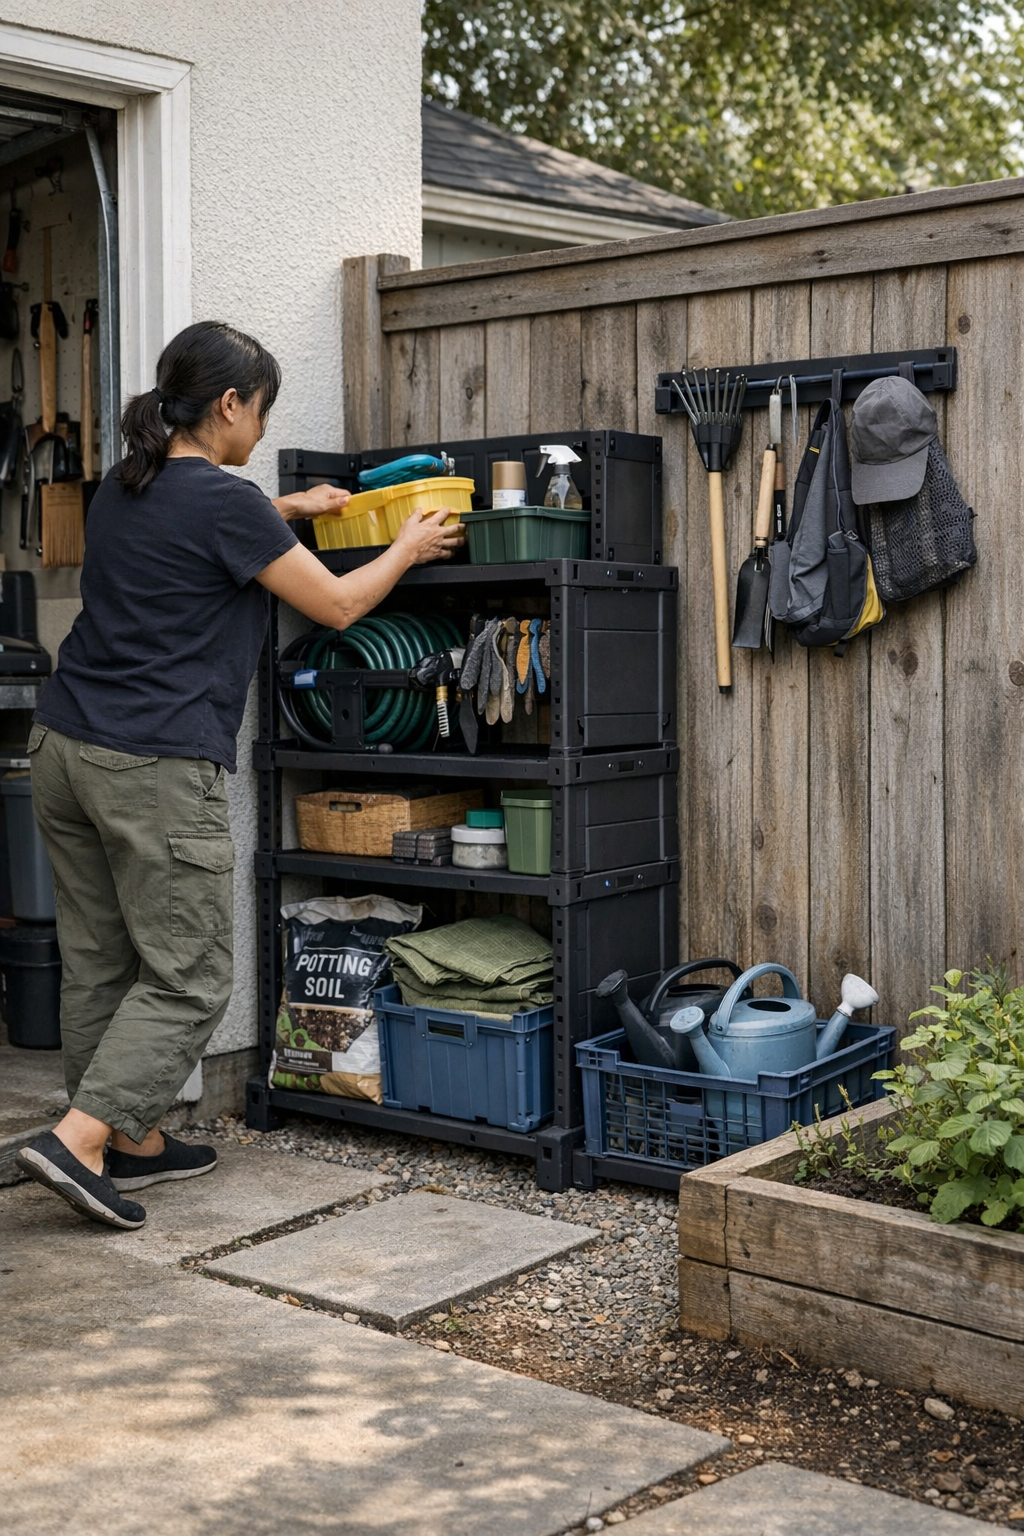
    Wall-mounted hooks and rails flip the script. They don’t just free up floor—they patrol the margins of your movement zone. Lifted storage carves out a minimum air gap for feet, wheels, bags, and bins. It’s harder to “just drop” something in the way, and far easier to see and reclaim the path when spillover happens. Packed gear doesn’t creep silently into walkways: you notice, and you fix it, not because it looks messy, but because you actually need your route back.

    Modular Systems: Useful or in the Way?

    Modular storage seems clever—until it’s scattered in the wrong place. Snap-together units line up tidily on graphs and floor plans, but in reality, a single shelf jutting past the shortcut or edging into a garage threshold warps the whole outdoor flow. Space intended for storage chokes landing zones or turns a basic return trip into a slow-motion zigzag. Instead of sorting, everyone just piles—whatever doesn’t fit “right now” lands at the nearest open patch, and resets take longer each week. All it takes is one edge in the wrong spot, and the modular promise collapses into overflow and dead ends.

    Some corners absorb modular bins well, but nothing lasts when routines shift—kids bring friends, mornings get busier, or the gardening season ramps up. If a setup blocks a route, the rest is noise: style, bins, and labels can’t overcome an awkward footprint clogging what people actually use.

    How Raising Storage Breaks the Setup Stalemate

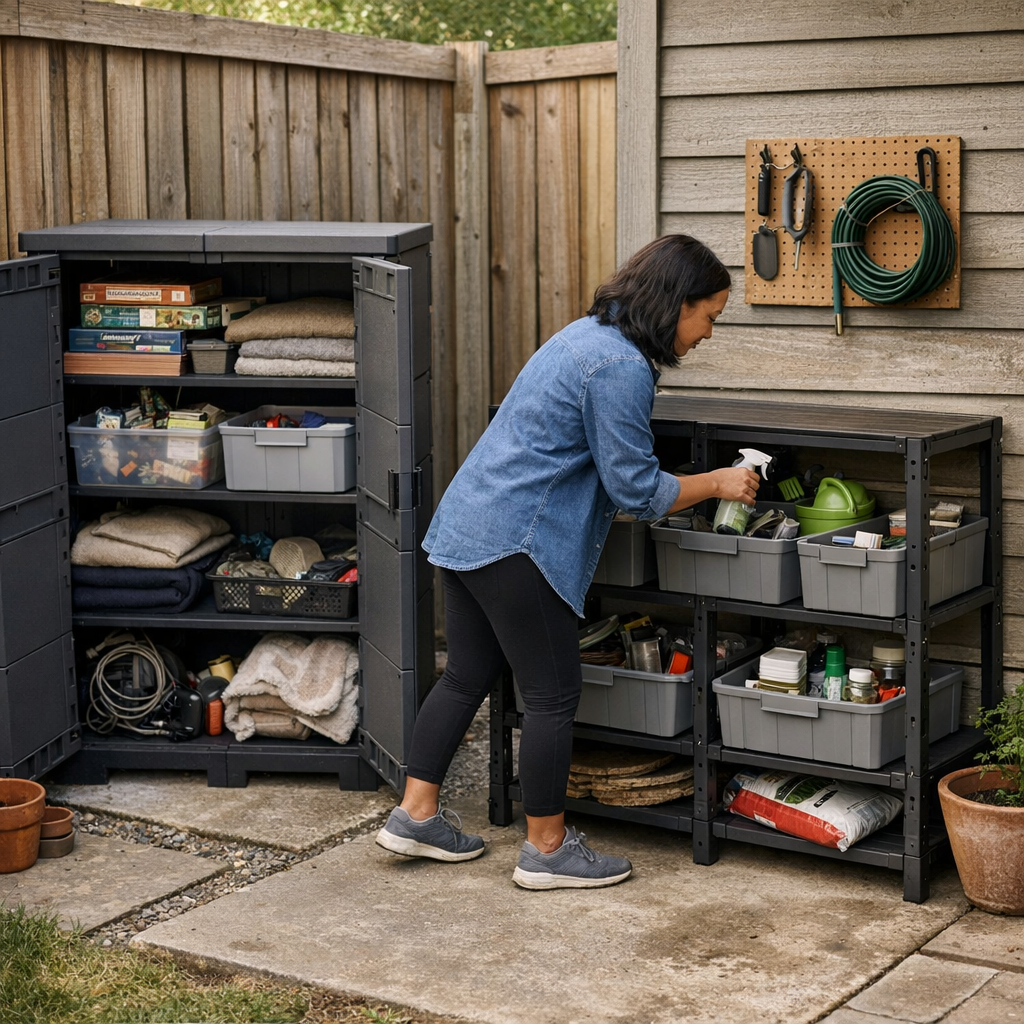
    Take one cramped yard: a freestanding rack clogs the middle, trips are lost to nudging boots out of the way, shoving gear off the path. Swapping in a wall-mounted rail—eight inches off the ground—reset the whole pattern overnight. Suddenly, there’s a real walkway again. Now a cart glides through, hands are free, and kicks underfoot are rare. Even when afternoons get messy and gear comes flooding back all at once, the main path holds. Those missing eight inches don’t just mean cleaner lines—they mean the area doesn’t collapse back into flood-level clutter after a typical Saturday rush.

    Some gear still lives by the back door, but now it makes visual sense: what doesn’t belong gets obvious sooner, tidying is quick and deliberate instead of a full reset ritual. The space doesn’t turn perfect, but resets become bearable and don’t kill momentum. The improvement isn’t spotless calm—it’s that putting gear away no longer needs an all-hands meeting or a warning sigh.

    Know When Your Storage Is Fighting You

    Gut check: if a normal trip to the shed or yard means sidestepping stray boots, rotating bins just to open the gate, or dragging a pile away from a choke point—your layout is fueling clutter, not containing it. Give it a month. Real use, multiple people, incomplete returns. If “reset” still means a full shuffle and you’re still blocked, your storage is just decoration for a problem that keeps coming back.

    See a healthier setup when most items find the same home, paths clear quickly after use—even if nothing’s photo-worthy. It’s not about perfection; it’s about bounce-back, how little time it takes to reclaim the basics after a run of sloppy returns.

    Wall Systems and Real Access (Not Wishful Thinking)

    Mounting storage clears floors fast, but only if everyone can use it. Got little kids? Shorten a rail, add reachable hooks, or stuff a shallow bin at kid-eye level. If even one family member can’t return their gear easily, boot piles become inevitable. Label the right zones or anchor a slip-resistant basket so stray boots don’t migrate. Real access beats uniform “tidiness” every time—and a few deliberate adjustments can mean the difference between quick resets and gear endlessly orbiting the floor perimeter.

    Don’t Plant Obstacles Where People Walk

    Classic mistake: tucking a modular rack, box, or bin where all return trips squeeze past. Even an inch or two, and spillover multiplies. Floors become catch-alls, reset dread grows. Blocked movement is a mess accelerator in any compact outdoor strip or garage threshold. Want a real test? Load your arms with garden gear or a ball bag and walk your layout. If you have to wiggle, slide, or shift something—start over. The path’s the priority. The rest is just organization theory until the lane works in practice.

    Quick Tweaks That Lower Setup Resistance

    Forget perfect. Real yards drift toward disorder; the goal is to slow the drift and make resets almost frictionless. If one wall section keeps jamming up, bump infrequently used hooks higher or make a “rush drop” zone near the door for overflow. If a single spot always collects debris, move high-use storage there instead of fighting the flow. Fixes here are rarely dramatic—but shaving seconds off resets or making one awkward pile disappear adds up to hours of less frustration across a month.

    Good Setup Feels Different—And Holds Up

    A storage system proves itself not by looking sharp on day one, but by surviving a month of missed returns, sudden weather, and everyone dumping gear in a hurry. The payoff isn’t just seeing fewer piles—it’s walking through the space and not having to shift your stride or negotiate a detour every time. Raising storage, even half a foot, often marks the line between a routine that flows and a routine that stops cold. In the end, reclaiming walkable space isn’t just an aesthetic upgrade—it’s the quiet return of sanity to busy outdoor routines.

    Visit TidyYard for more outdoor setup solutions.

  • Why Smooth-Closing Cabinet Doors Transform Your Workspace Flow

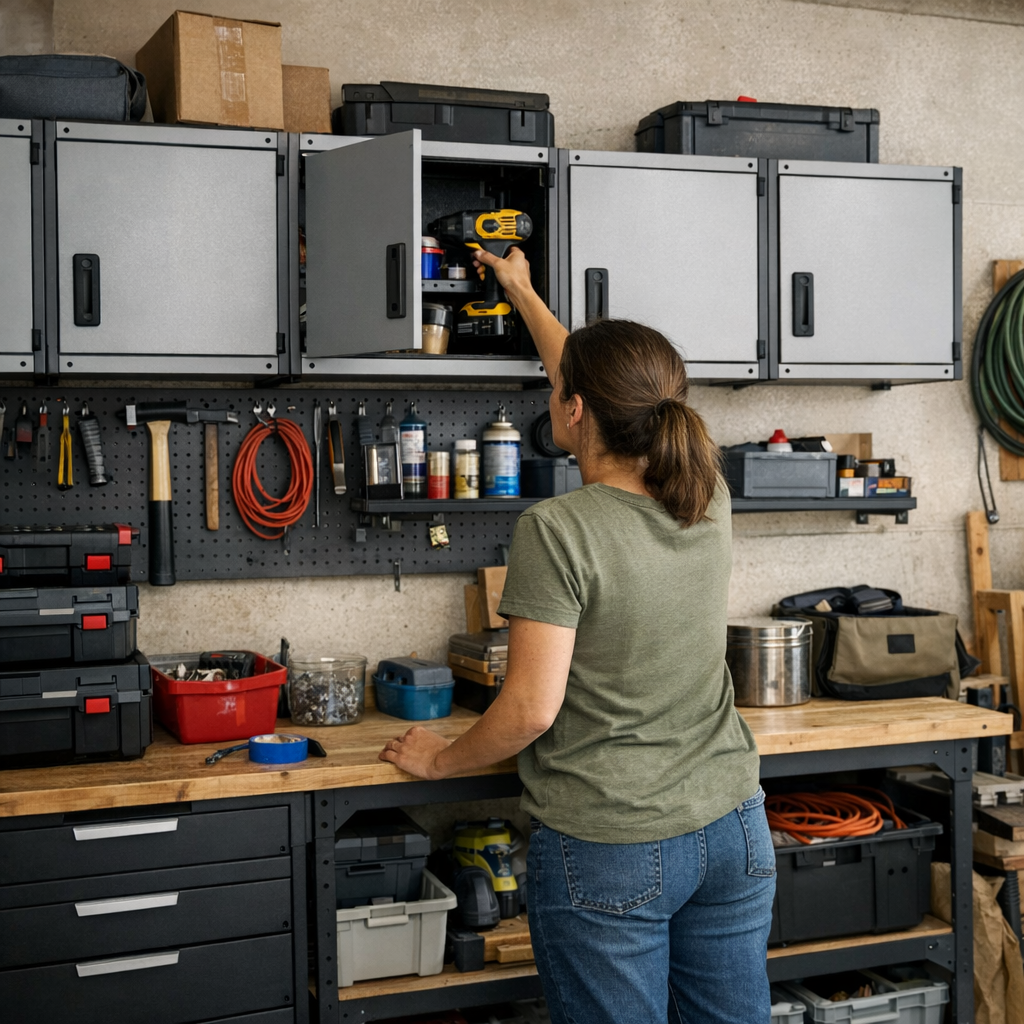
    Wall cabinets come with the promise of order, but the real verdict reveals itself in motion, not just in looks. Walk into any freshly setup garage or workshop: everything appears tight, measured, purposeful. Doors close flush, shelves are empty and inviting, and for maybe a day or two, the illusion holds. Then the routine starts. You reach, stash, grab, return, and suddenly the small flaws surface. A door whose hinge always catches. A cart you have to edge sideways—again—just to squeeze past. Each interaction isn’t chaos, but every little snag edges the space closer to it.

    Early Impressions: Visual Order, Hidden Friction

    The satisfaction on install day is real—wall storage fits perfectly and promises a lasting reset. But let a few real jobs run through—a Saturday tire swap, a scramble to find the right bit on a Tuesday evening—and the system’s tolerance for daily life gets tested. The left cabinet now bumps the shelf if you aren’t precise. That cart, which fit beside the bench on day one, now needs a two-step shuffle just to open a cabinet all the way. Handles that lined up in catalog photos start becoming daily hurdles instead of time savers.

    What unravels the order isn’t a single big mess. It’s the drip of micro-frictions: a hinge drag that means you hesitate before closing the door, a door that has to be nudged twice, the subtle pileup of “I’ll do it later” tools sneaking back onto the benchtop. Each reset is just a little bit slower, and the space starts rewriting itself around what’s awkward, not what’s useful.

    Fitting In Isn’t the Same as Flowing Well

    Plenty of setups look brilliant on paper. The wall is lined, every inch accounted for, and technically, everything “fits.” Yet fast-forward to real life, and the cracks appear: a shelf that’s just deep enough to snag long-handled tools, cabinet doors that threaten to collide if opened in the wrong order, sections crowded with bins you rarely touch because they’re never on your direct path. Friction breeds improvisation: today’s tools get stacked on the nearest cart or stashed “just for now,” and by the week’s end, you’re walking around overflow piles that seemed impossible on install day.

    One stubborn hinge becomes ten missed resets a day. The routine falters. Instead of breezing through clean returns, you’re constantly adjusting, shifting, or outright avoiding the areas that should make life easier. The visual order’s still there, but beneath it, movement slows, intent gets foggy, and the system begs for a redesign.

    The Telltale Grind: Everyday Annoyances in Action

    The reveal is always in the details: dropping a clamp back onto the shelf as dinner’s served, sidestepping a cart to grab a bit box during a hasty fix, or constantly steering around a cabinet corner that eats up path space. Maybe it’s the organizer tray you keep shifting, or the dead zone that ends up as the “overflow” pile—those awkward corners where surface clutter quietly accumulates, out of necessity, not design.

    Even the smartest modular systems slip in tight quarters. The wall’s covered in storage, yet you’re still reaching awkwardly or unlocking another bottleneck. Deep shelves become tool traps, mobile chests—ideal on day one—now block the best routes, forcing you to reroute every morning. The more you tweak, the more you realize: “full” doesn’t mean “usable.”

    Micro Fix, Macro Difference: One Hinge, All the Change

    Picture a midweek evening: you’re juggling a finish nailer, ready to stow it, and again the cabinet door jams an inch before closing. Do you force it—risking a click that doesn’t quite seal—or leave the tool out, telling yourself you’ll fix it later? By tomorrow, more gear crowds the bench, and your reset is ruined. Now imagine swapping out that basic hinge for one self-adjusting model: suddenly the door clears, swings closed without thought, and your tools actually end up where they’re meant to—each round trip seamless, not a second guess.

    That’s what keeps the system alive: near-invisible upgrades that transform daily flow. Not dramatic makeovers—just tweaks that erase friction before it multiplies.

    Judge By Routine, Not The Showroom

    Looks count, but the real measure is motion. Pressure-test every part of the setup the way you actually use it: open doors in succession, return tools mid-sprint, see what snags, stalls, or demands a workaround. That’s when tiny gaps and misalignments announce themselves—the millimeter differences that become ten-second delays, again and again, as the weeks grind by.

    What stayed perfectly square when empty can drift fast as weight stacks up: hinges sink, shelves flex, doors rub. A setup that starts stiff and sharp may, by midmonth, become a place you dodge rather than use. Every hairline misfit is a momentum trap just waiting to emerge in routine resets.

    Fix Problems Early—Or Prepare For Creeping Clutter

    Tackle friction the moment you feel it. If reaching for a tool means bracing a shelf with your knee, or you’re catching an out-of-true door twice a session, don’t let it pass. Adjustable or soft-closing hinges are more than upgrades—they’re ways to keep access smooth, movement one-handed, and surfaces from becoming permanent drop zones. Sometimes a shelf needs to shift by a finger-width, or a default hinge needs replacing with something that self-corrects or swings wider. Tiny changes now are what block messes from snowballing later.

    Tip: Install-day perfection rarely survives first use. Check again once cabinets are loaded and routines are underway. Re-align. Retighten. Minor adjustments made early stave off the fatigue of fighting your own storage week after week.

    The Payoff: Real Movement, Real Reset

    The difference starts to show—cabinets that close with a casual push, nothing grinding or lagging, pathways that stay clear no matter how many cycles you run. A setup tuned for motion means you’re not sidestepping obstacles or retracing old pile-ups. Instead, every hand return finds its place, corners stay open, and you spend more time working than setting the stage. Zones clear with a wipe, not an hour’s sort. Cabinet storage becomes a tool, not another maintenance headache.

    Getting ahead of friction pays out daily, in the way you flow through a project, not just the way your space photographs. The right tweaks let the order you see on day one actually survive week five—and make the workshop, or garage, feel like it works for you, not against you.

    http://stacknest.myshopify.com

  • Why Daily Use Reveals the True Strength of Your Storage System

    The real verdict on a storage setup isn’t the photo you snap when everything’s freshly arranged—it’s how your space stands up to the next seven days of life. Shoes once sorted end up mixed in the bin again. Sweatshirts slide into piles at the back of an overcrowded shelf. You start every morning rooting through baskets for that one missing glove, or rebalance lurching stacks before you can hang up your coat. The daily friction is rarely about how things look; it’s about whether your closet or entryway actually keeps pace with your real routines—or quietly fuels the clutter cycle behind a facade of organization.

    When “Sorted” Turns Into Work

    Baskets, dividers, branded bins—they should be shortcuts, but too often, they become the reason your routine stalls out. Maybe shoes fall into one big container and, within days, your neat rows dissolve into a single mess of mismatched pairs. Folded shirts start as sharp stacks but soon sag sideways, and you’re forced to remake the pile whenever you need something from the bottom. Every “organized” system adds its own small toll: move three things to get to one, smooth out a shelf after grabbing a tee, untangle a scarf from behind your bags.

    Each micro-disruption stacks up: digging, restacking, shifting, sighing at the heap sneaking out from behind closet doors. These aren’t background chores—they’re speed bumps embedded in your morning, turning a tidy look into hidden labor no one wants to repeat.

    What Really Matters: Fast Access or Crisp Appearance?

    When you strip away the styling, real storage decisions hinge on one question: Can you grab what you need without unraveling the entire system? On day one, nearly any setup works. By day four, cracks appear—the “all shoes here” bin transforms from contained to crammed, and stealth piles of boots and stray sneakers migrate out onto the floor. The minute putting away a scarf requires balancing a leaning stack or finding your sneakers means digging under winter boots, you can feel the system failing in real time.

    Take, for example, that deep basket at the front door. It’s pristine at first. By the next week—sandals wedge under heavy boots, one sock is missing, and you’re kicking shoes aside to get through the door. The bin isn’t a storage solution; it’s a high-walled pile-up.

    The Disappearing Act (and the Overflow)

    Bins and baskets hide mess, but they’re just as good at hiding your go-to stuff. If you need to rummage, your storage is making things harder, not easier. This is most obvious with high-traffic items—kid shoes, everyday tees, beloved hats. Meanwhile, open shelves hand you visibility—but not boundaries: jeans avalanche into tee-shirt territory, smaller items migrate, stacks tip closer and closer to collapse. Before long, the neat divisions you set up blur out of habit; shirts pile over pants, socks spill across cubbies, and putting things back becomes an act of willpower rather than a routine step.

    Entryway Ground Truth: Why the Shoe Bin Fails

    Let’s be concrete. In a shared front closet, one big shoe bin seems like a fix. For a week you enjoy a clear floor—then shoes start accumulating outside the bin, heavier boots flatten everything below, and nobody can find their sneakers without a full excavation. The mess isn’t anyone’s fault. The system demands too many steps just to get in or out the door. Hiding clutter doesn’t help if it comes at the price of daily hassle—and soon the bin becomes a waiting room for overflow, not an organizer for what you actually wear.

    The Game-Changer: Storage You Can Reset Instantly

    A swap—two tiered racks instead of a bin, sorted by type or family member—transforms the entryway rhythm. Now shoes are in the open, paired, grab-and-go. You return them with one motion. No digging, no balancing, no silent buildup of stray pairs. Resetting after school or coming home is so easy you hardly notice doing it—and that’s the upgrade most people only realize in retrospect: clutter doesn’t circle back, and the pile never reforms.

    Spotting Hidden Storage Friction

    Not sure whether your setup is pulling its weight? These are the telltale signs:

    • You usually have to move something to get the thing you actually want.
    • Piles start to lean or spread sideways after a couple uses.
    • Categories slip—bags nest with sweaters, gym shoes end up beneath snow boots.
    • What started “organized” always spills onto the floor, or you start leaving things out because putting them away feels like a project.

    These warning signs aren’t background noise. They’re evidence your system is slowing you down, quietly turning daily life into a scavenger hunt and making every “reset” longer than it should be.

    Matching Storage to How You Actually Use It

    There’s no perfect, permanent solution—but certain setups make daily life noticeably smoother:

    • Open shelves win for daily items—think shoes, jeans, sweatshirts—where speed trumps the risk of a little visual mess (as long as shelves aren’t overflowing).
    • Bins and baskets are best for backup or seasonal stuff, not your rotating favorites—anything buried is destined to get skipped or stir up stress.
    • Dividers, cubbies, and multi-tier racks hold the line where categories blur or small items scatter. These nudge routines to stick, reducing the urge to pile and reshuffle.

    If you’re constantly resetting the same shelf or basket, try splitting the space vertically (add a short rack or small divider) or narrowing what lives there (one spot, one purpose). Don’t wait for the next closet cleanout—swift tweaks beat total overhauls and make it easier to keep pace with changing seasons and shifting schedules.

    When Your Space Quietly Supports You

    The mark of storage that truly works isn’t pristine shelves—it’s forgetting about them entirely. When you stop thinking about where things go, and your morning routines flow without stops or grumbles, that’s the system earning its keep. No more rebalancing fallen stacks or playing hide-and-seek for the missing mitten. Your space flexes with you, instead of demanding resets every few days.

    No system is bulletproof. Sometimes baskets fill up, shelves grow crowded, categories slip. But when fixes are simple—a new divider here, a taller rack there—clutter never gains a foothold, and the work of “staying organized” dissolves into your daily rhythm. In the end, the payoff is more time actually living in your space—and less time managing it.

    Discover more storage options for everyday spaces at ClosetWorks.