
Understanding the Common Problem: Why Does Trim Split?
One of the most frustrating moments for any woodworker or DIY enthusiast is when perfectly cut trim suddenly splits as you nail it into place. You’ve carefully measured, cut, and aligned that piece of trim, only to hear a sharp crack as the wood gives way. The result is an unsightly split that compromises the finish and wastes materials.
Many attribute this problem to “bad wood” or simply “bad luck,” but the truth is more technical: the settings on your finish nailer or stapler often play a pivotal role in whether or not your trim splits. The force and depth at which a fastener is driven deeply affects how the wood responds—especially on delicate edges or harder boards.
Why Depth Setting Matters in Finish Nailing
Every finish nailer or stapler, regardless of brand or price point, has a mechanism to adjust the depth of the fastener. This can be a dial, a switch, or sometimes an adjustment requiring tools like a screwdriver. This setting controls how far the nail or staple is driven below the surface of the wood.
Proper depth adjustment is critical because driving a fastener too deep can create a wedge effect, pushing the wood fibers apart and causing splits. On the other hand, if the nail or staple is set too shallow, it will stand proud above the surface, which interferes with finishing work and creates a rough appearance.
Recommended Settings and Basic Guidelines
- Use nails that are typically between 1¼” to 2″ in length for most trim work.
- Adjust the nailer so fasteners sit flush or just slightly (up to 0.5 millimeters) below the surface.
- If your tool offers variable strokes per minute (SPM), use a moderate speed—roughly 50–80 SPM—to reduce impact force and minimize splitting.
How to Avoid Split Trim in Practice
A common novice mistake is to leave the nailer at factory default settings or run it at maximum power to ensure nails are fully driven. However, wood, especially softwoods like pine or pre-primed MDF, reacts differently depending on grain direction and moisture content.
Shallow nail placement near edges greatly increases the risk of splitting. For narrow trim pieces less than 2″ wide, aim at least ¼” in from the edge. For hardwoods or tougher species, pre-drilling pilot holes with a small bit (1/16″) helps prevent splitting altogether.
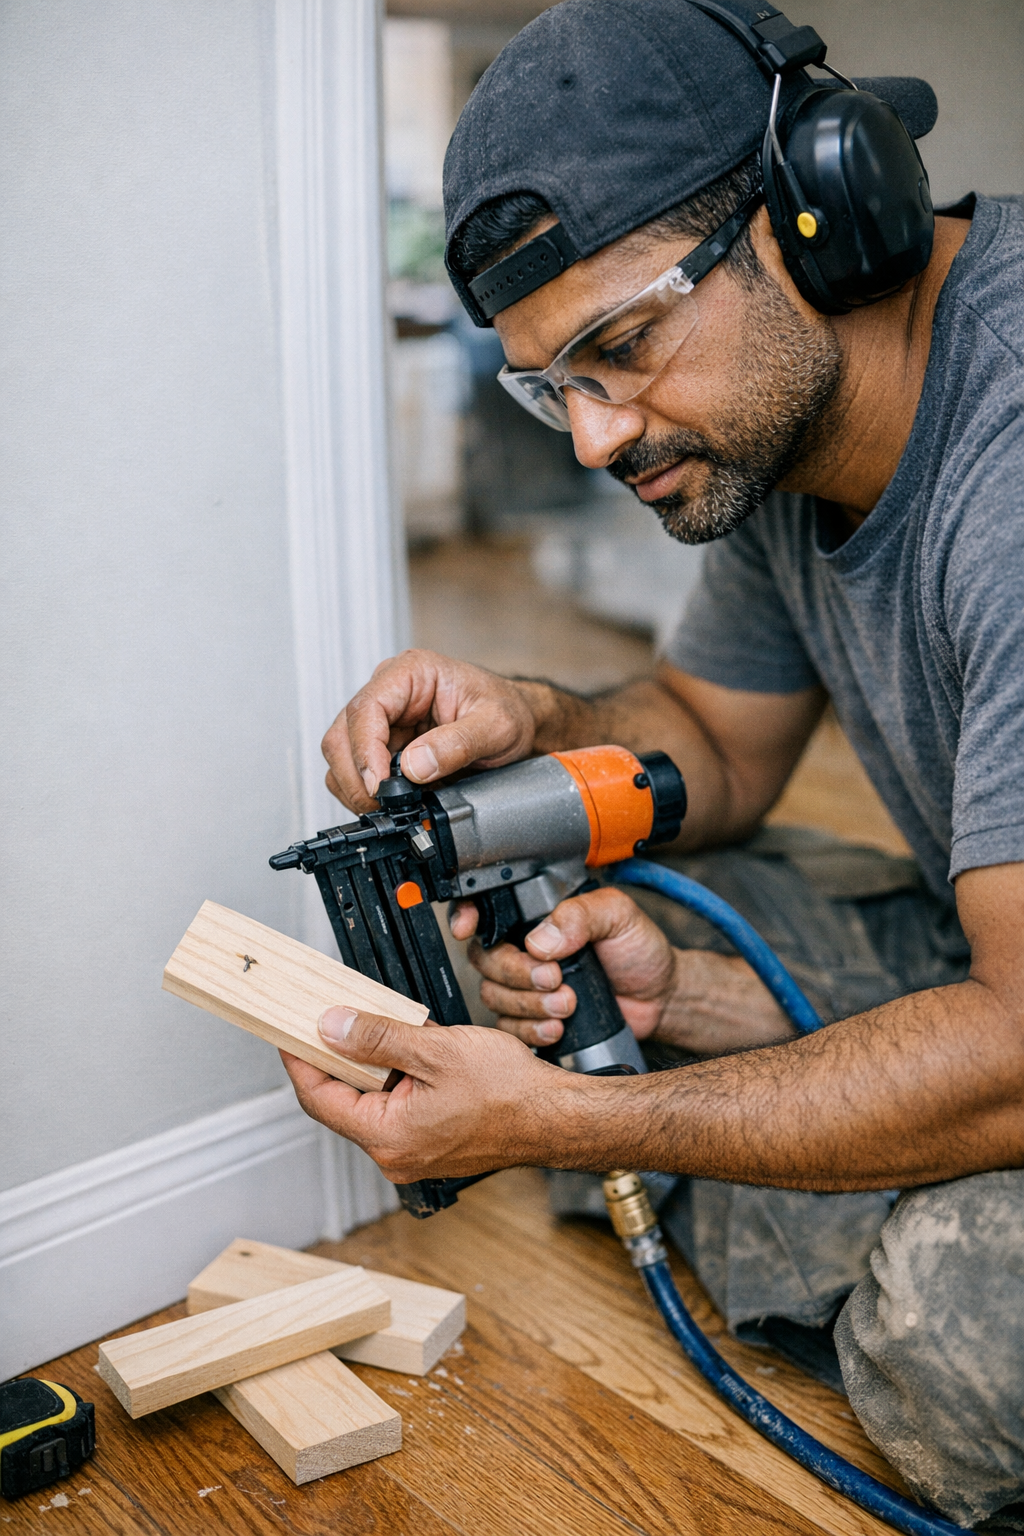
Testing Your Settings Before Installing Trim
One of the simplest yet most effective ways to avoid splitting is to spend a few minutes testing your nailer on a piece of scrap trim before starting your installation:
- Take an off-cut from the batch of trim you’re about to install.
- Set your nailer or stapler to the lowest depth setting.
- Fire a nail or staple into the scrap, then inspect closely for any cracking or splitting.
- If the fastener head isn’t sufficiently countersunk, increase the depth slightly and repeat.
- If you notice any cracks, dial the setting back to the previous safe point.
This simple test ensures you’re not working blind, and the cost is negligible compared to replacing split boards.
Acclimate Your Wood and Control Environmental Variables
Wood’s response to nailing isn’t static—it varies with moisture content and temperature. Trim that’s stored in a cold garage and then brought into a warm room can behave differently. The colder, slightly damp wood is more prone to splitting because it is less flexible.
A practical approach is to let your wood acclimate indoors for at least a day before installation. Combined with proper tool depth settings, this acclimatization drastically reduces the risk of splitting. Adjusting the air pressure on pneumatic nailers to around 70 PSI and setting the drive depth mid-range can also help during these transitions.
A Refresh Tip: Slow Down and Reassess Your Work Flow
When you get into the rhythm of installing trim, it’s tempting to set the nailer once and rely on “muscle memory” or previous jobs. However, each new house, batch of wood, or season change demands fresh settings. A subtle but powerful habit is to reset your depth adjustment regularly—even multiple times per job if needed.
Pausing briefly to retest on scrap slows the pace but enhances quality and reduces frustration. It shifts your workflow from reactive repair toward proactive prevention, saving time and material on the downside.
The Benefits of Getting Depth Settings Right
When your fastener depth is dialed-in correctly, you’ll notice immediate improvements: trim boards hug the wall smoothly without cracks or gouges, fasteners sink neatly ready for filling, and your caulking and paint jobs look seamless. Overdriven nails or staples create unnecessary sanding and patching, while shallow ones might catch or cause paint failure.
Beyond aesthetics, consistently proper depth settings reduce callbacks and rework, improving job satisfaction and professional pride. That snug, silent fit of trim is a small but fulfilling “win” every woodworking professional enjoys.
Final Thoughts: Make Depth Testing a Ritual
There is no once-and-for-all depth setting that works on every project. Wood species, grain, humidity, temperature, and even paint or primer coats can all shift how your fastener should be set.
Your best defense is a simple routine: take the off-cut from your current batch, test fastener depth before starting, and adjust as needed. Make this an ingrained habit whenever you switch trims, work environments, or tools.
That small investment in setup time ensures your trim work is clean, your materials intact, and your finishing process smooth. Split trim boards become the exception instead of the rule—and that makes every job easier and more professional.