Category: Uncategorized

  • “Unpacking Travel’s Quiet Magic: Embrace the Unexpected Journey”

    The day before a trip is supposed to feel exciting, or that’s how I remember it. Flights are booked, a new city’s out there waiting, and the passport sits on the kitchen table. This time, though, I just found myself folding laundry and stacking piles on the bed, staring at my well-worn carry-on bag and wondering if we were really doing this again. Maybe it’s the rhythm of so many trips, or just life right now. Whatever it was, there wasn’t much of that old adventure spark.

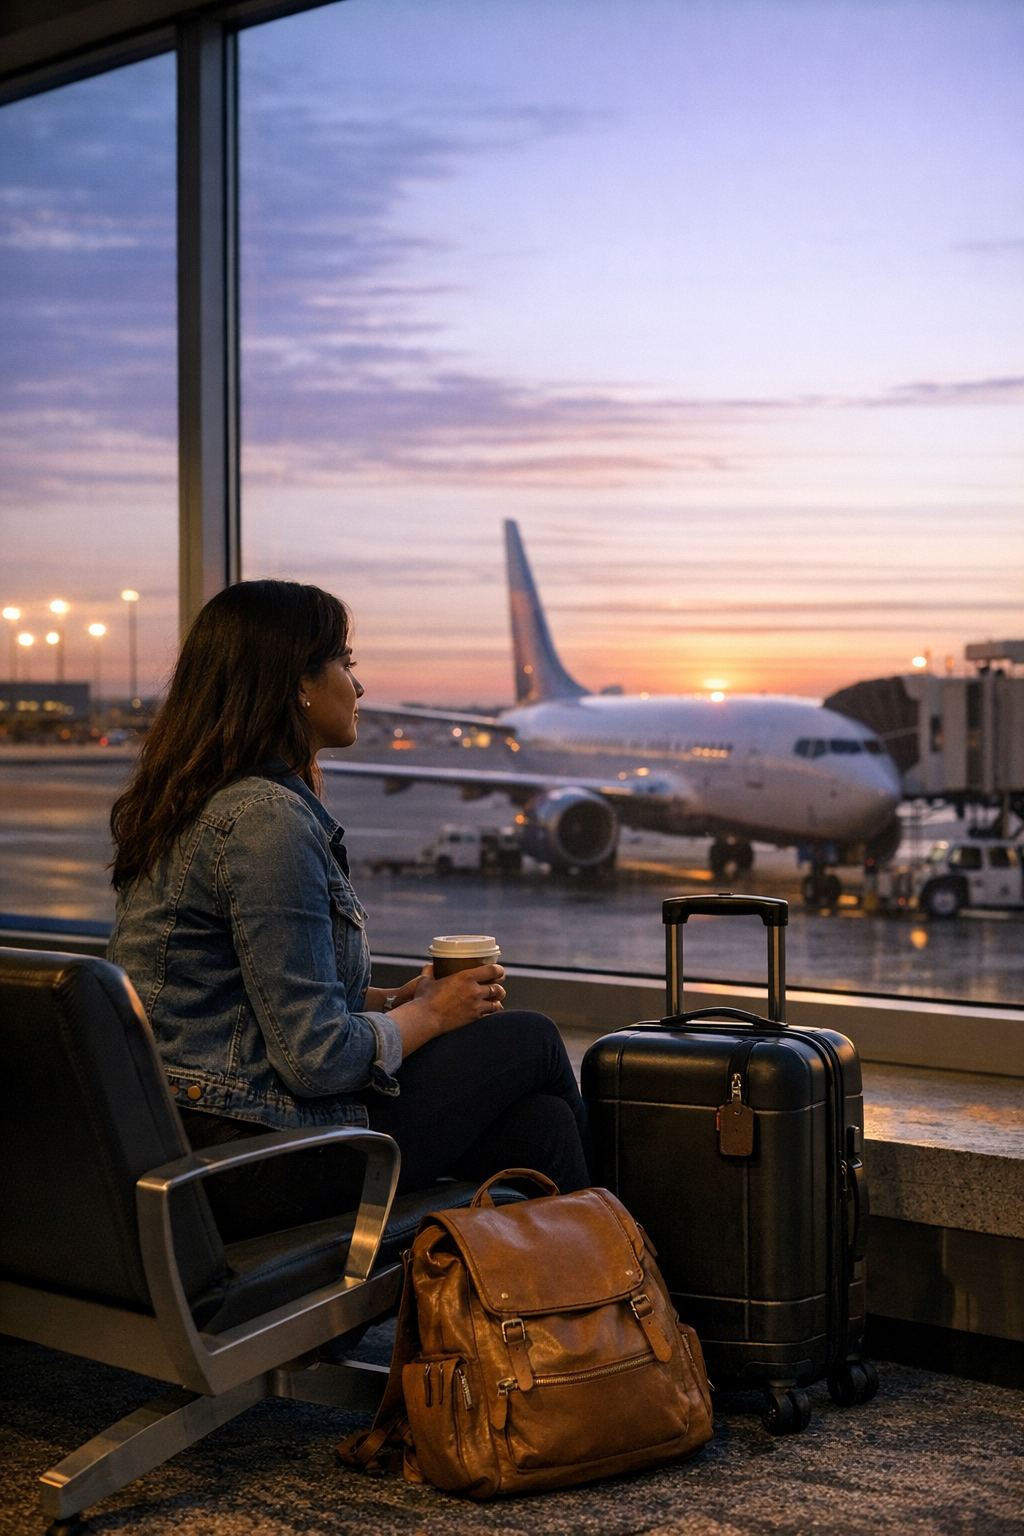
    The airport never really cares how you’re feeling. You move through the motions because you have to. I slipped through the early morning shuffle, coffee gone cold, my familiar bag trailing behind me. There’s a small comfort in routine—boarding pass scanner, politely declining to check your bag, choosing a corner to watch the screens. Even the lounge was quiet, full of people who mostly looked tired or lost in thought, not exactly buzzing with excitement. I blended right in.

    By boarding time, the sun was barely up and the world outside looked washed out and grey. I waited for that feeling—that travel tingle in your chest—but it just didn’t show up. I found my seat, shoved my bag overhead, and looked out the window. The city dropped away, as it always does, and this time I caught myself thinking about little things at home instead of the place ahead. At some point, I let go of the usual expectations.

    Travel sometimes just feels like waiting. Waiting at the gate, waiting for a nap, waiting for your feelings to catch up to your location. Cabin lights dimmed. I pulled out the same old notebook from my bag, the one I always carry, and scratched out a line or two. It helped things feel a bit more real, even if the excitement wasn’t there.

    Usually, landing comes with a little buzz—wheels down, everyone’s phones turning on, that group sigh of “we made it.” Not this time. Maybe it would kick in later, after a meal or a wrong turn on a side street. The taxi stand was noisy, the language half-familiar, and I moved through the arrivals area on autopilot, glad to be carrying just one small bag. There’s some easy relief in falling into step with a crowd.

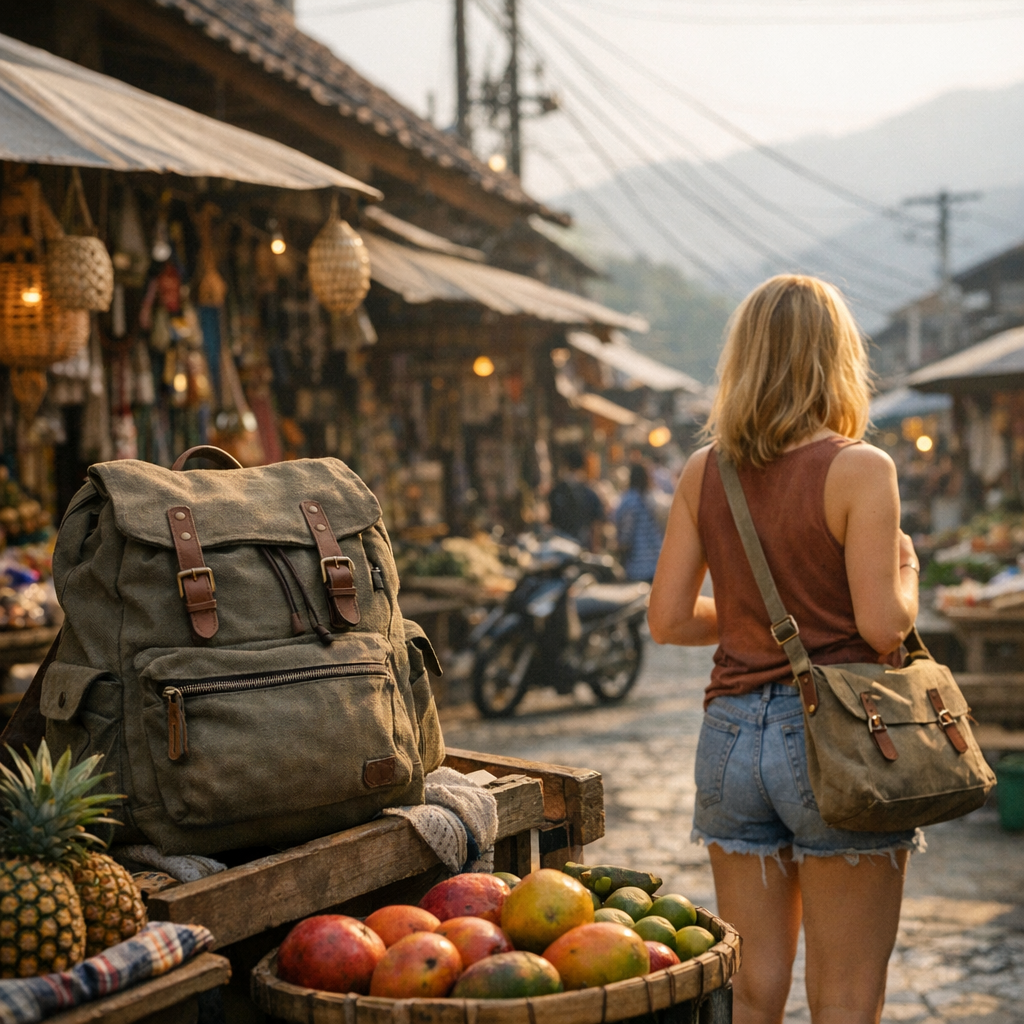
    The day rolled out in a slow, uneven way. The city was louder than I expected, with clusters of people everywhere and that late morning golden light. The air had a no-nonsense feel—different, but honest. I ducked into a busy market, leaned over crates of potatoes and persimmons, listened to vendors calling out prices with an easy laugh. I didn’t make a plan, just wandered. Now and then, I grabbed my carry-on handle, finding a little comfort in having that piece of home with me. Somewhere in these little pauses, I stumbled across http://carrysupply.myshopify.com, not really looking for anything, but drawn in by the idea of movement in all its forms.

    I started to notice the small shifts when travel stops trying to impress. Little shops with flickering lights, sharp coffee, a suddenly quiet alley. The city wasn’t performing. In these simple, unspectacular moments—bag at my feet, new coins in my pocket—travel sort of snuck up on me. I realized you can miss the good stuff if you expect too much. Slowly, I stopped worrying about how travel should feel. I grabbed a loaf of bread, stood by the river, and let myself just be there.

    Later, the weather turned grey. I took a seat by the bakery window and watched people rush past with umbrellas. No urge to see everything or post that I was here—just my bag and a notebook, jotting down whatever crossed my mind: bits of light, street sounds, the natural flow of the day.

    The flight home felt lighter. I didn’t force myself to create a “perfect last memory.” Instead, I walked into the terminal rolling my bag beside me, just glad for its familiar weight and how travel, even when it’s low-key, has a way of blending into regular life.

    Back home, I left my carry-on at the foot of the bed for a few days. There were some receipts in the pocket, a stone from beside the river. Sometimes travel doesn’t sweep you up—it just softens you a bit, and the small surprises show up later, as you unpack. If you ever need a reliable travel companion, I keep finding myself back here: http://carrysupply.myshopify.com

    Nothing really ends. The next trip starts to write itself somewhere between coming and going.

  • Travel Light, Live Fully: Essentials for Your Next Journey

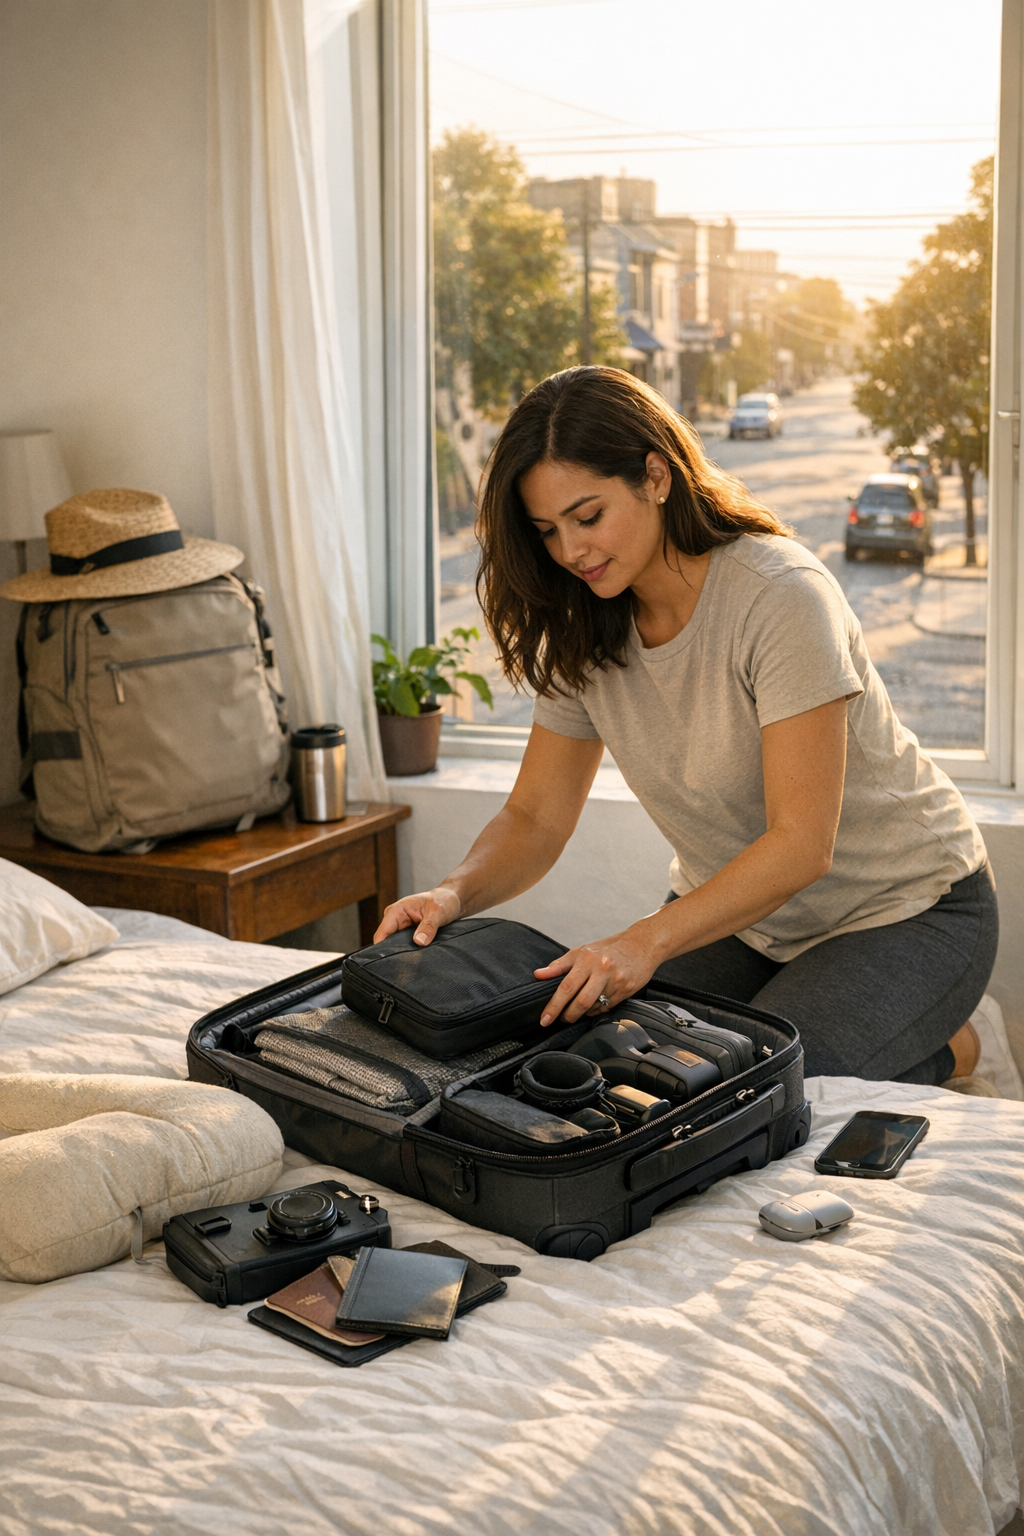
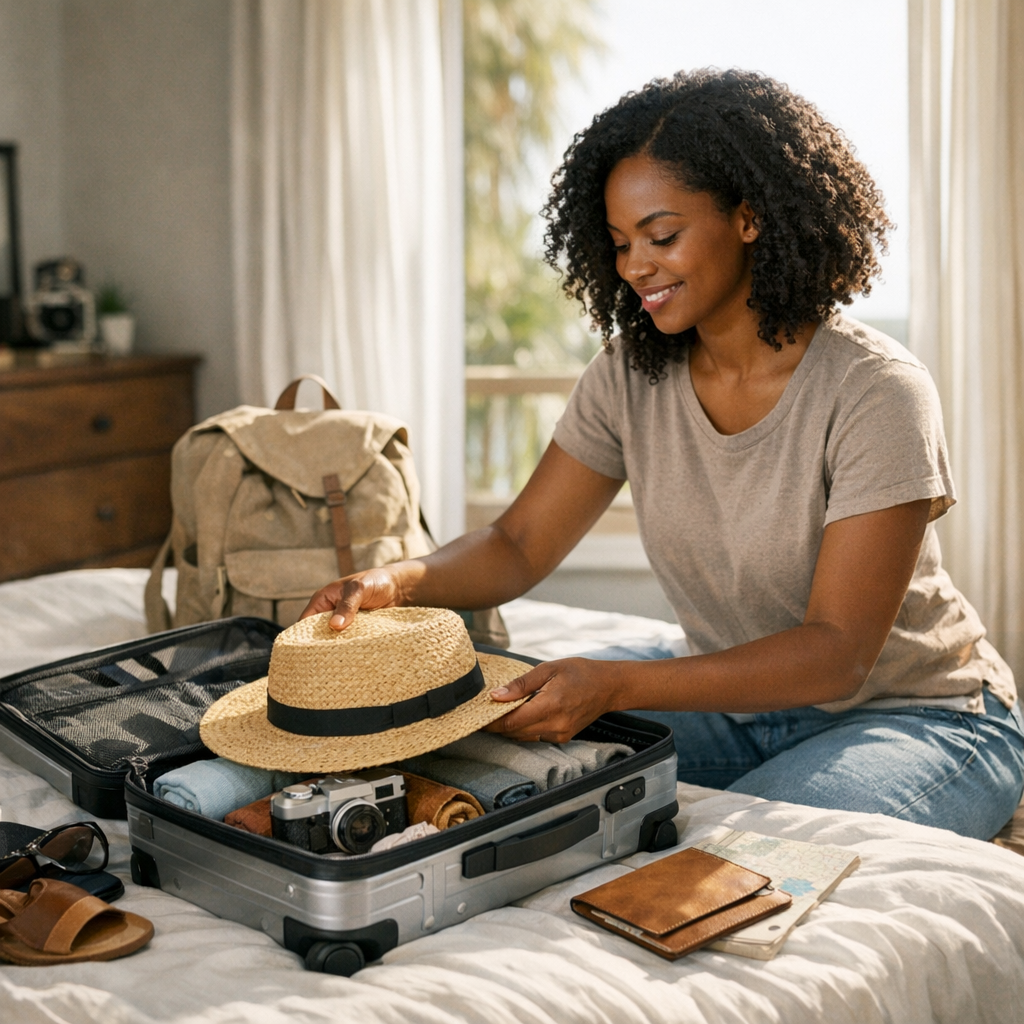
    Every trip, no matter how many times I travel, starts the same way: a couple of nights out, there’s always that familiar flicker of anticipation. I stand over my half-open carry-on, the smell of canvas coming up at me. Early sunlight filters through the blinds, dust moving in its beam, and on the floor, those early piles—shirts, easy jeans, the journal I’ll probably ignore. I’ve learned that smart packing doesn’t happen last minute. Instead, it’s a steady ritual, paring life down to what actually matters for the journey ahead.

    I like to take my time. There’s something reassuring about moving slowly, deciding what makes it in. My old reliable carry-on has been through a lot with me, and each item folded in means one less thing to think about while rushing through airports. Zipping it up for the first time is a nice, small win. Later, when I’m juggling everything at security or searching for my boarding pass with too many things in hand, I remember that bit of calm—being ready before the chaos even starts.

    The drive to the airport is always a mix of ordinary and a little special. This time, my neighbor waved from behind their garden, and I realized how even small routines shift whenever I come home. Everything in my carry-on feels both necessary and like a quiet promise—space not just for stuff, but for new memories. I sometimes scroll through shops like http://carrysupply.myshopify.com before a trip, half-wondering if a new bag or clever tool might make the next journey a bit easier.

    The airport itself hits pause on everyday life. People drift by, some excited, some tired, some impatient. My bag follows easily behind me as I move through the crowds. Packing light meant I skipped the check-in desk this time—just me and my bag, which feels good, especially while waiting through the security shuffle. I’ve seen it all in those lines: people wrestling overstuffed bags, a kid searching for a buried toy, someone realizing they can’t find their passport. That’s when I’m glad I took a few minutes at home to keep everything simple.

    Hours later, tucked near a quiet window at the gate, I let myself drift and watch the planes. My carry-on is beside me, holding a paperback, a snack or two, and an old family photo in the inside pocket. It’s a comfort whenever the travel haze sets in. I scroll my phone, browsing travel shops to kill time and see what’s new. It’s always tempting to look for a bag that might make things even smoother, even though this one mostly gets the job done.

    In the air, I really notice the payoff of packing well. Everything I might need—headphones, a sweater, a small face cloth—is within reach, not buried deep in a checked suitcase. Sometimes I glance out the window, sometimes I rearrange things at my feet. Flying always brings a kind of quiet, the engine noise taking over, my bag holding together the bits of home I like to keep nearby.

    Landing always brings the real benefit home. While most people line up for baggage claim, I walk straight through arrivals with the same bag I started with. There’s a simple kind of freedom in that—no waiting, no worrying if my stuff made it. I spot families reuniting and remember why it’s nice to travel light: there’s room for last-minute plans, a cafe stop along the way, a quick detour down a new street.

    Some nights on the trip, I find myself unpacking and repacking my carry-on in a hotel room, city noise humming just outside the window. There’s always a few new little things picked up along the way—small souvenirs, a moment or two I want to hang on to. It strikes me how what we carry shifts over the days, but the sense of what’s actually important gets clearer.

    Going home always feels different—quieter, maybe, with the goodbyes behind and the comfort of routine ahead. Walking the last bit back to my front door with my carry-on, scuffed and well-traveled, the routine clicks back in place. The wheels rattling down my drive feel familiar again.

    Now, with the bag half-open at my feet, I find myself smiling at what’s tucked inside—some things obvious, others hidden. There’s always another trip down the road, and maybe next time I’ll grab something new from http://carrysupply.myshopify.com to bring along. For now, though, it’s good to be home, with all the memories folded away for safekeeping.

  • The Simple Saw Adjustment That Transforms Every Cut You Make

    Understanding the Importance of Depth Adjustment on Your Circular Saw

    Before plunging into every woodworking project, there’s a subtle but essential step that often gets overlooked: adjusting the blade depth on your circular saw. Many users instinctively set their blade as deep as it will go or neglect to reset for different materials. However, taking the time to fine-tune this setting can be the difference between a messy, splintered cut and a seamless, professional finish—and it can keep your cuts safer and your saw running smoother for longer.

    Why Less Blade Exposure Means Better Cuts

    The circular saw blade should be positioned to extend just about an eighth of an inch below the material you’re cutting. This minimal blade exposure accomplishes several vital things:

    • Cleaner edges: Excess blade below the workpiece tends to tear and splinter the wood fibers, especially on plywood, hardwoods, or composite decking.
    • Less kickback risk: Overexposed blades are more prone to binding or catching, which can cause the saw to kick back dangerously.
    • Reduced motor strain: The saw operates more efficiently since it’s cutting only through what’s necessary, preserving both blade sharpness and motor longevity.

    For example, a typical 7-1/4″ circular saw blade spinning between 4,500 to 5,800 strokes per minute (SPM) cuts best when depth is dialed in accurately. Using the right blade—a carbide-tipped 24 to 40 tooth blade for most jobs—further improves cut quality but won’t compensate for an improperly set depth.

    Common Mistakes and Their Consequences

    One of the most typical errors is leaving the depth adjustment set too deep after a preliminary cut or not adjusting it when moving between materials of different thicknesses. As a result, the saw teeth bite unnecessarily into the table or materials below the cut, creating rough edges and increasing the chance of kickback. This mistake often leads to greater wear on blades and can quickly turn a controlled, precise saw into a tricky tool to manage.

    I witnessed this firsthand during a deck rebuilding project. Midway through cutting long boards, badly splintered edges were the norm, frustrating everyone. Then a teammate pointed out that most of us had our blade depths cranked to their maximum. Resetting the depth so the blade just barely cleared the boards immediately transformed the work: cuts were cleaner, the saw felt steadier, and the whole job became less of a struggle.

    A Simple Step-by-Step Guide to Setting Your Blade Depth

    Follow these quick steps every time before you start your cut to ensure consistent results:

    1. Power down: Always unplug the saw or remove the battery before making adjustments.
    2. Position the base: Rest the saw’s base plate flat on top of the wood you plan to cut.
    3. Adjust blade depth: Release the depth adjustment lever or knob and lower or raise the blade until it extends approximately 1/8 inch beneath the wood’s underside.
    4. Lock securely: Tighten the adjustment mechanism firmly to prevent the depth from shifting during cutting.
    5. Confirm settings: Double-check if you switch from thinner materials like 3/4″ plywood to thicker stock such as a 2×4.
    6. Choose the right blade: Use blades matched to the material, ideally carbide-tipped for durability and smooth cutting.

    Refresh Your Approach: Step Back to Speed Up

    It can be tempting to rush through cuts, especially when facing a large volume of work. But consider this: taking just a few extra seconds to pause, set the blade depth properly, and mentally prepare for each cut does more than improve quality—it changes your relationship with the tool. When you slow down briefly, you create a rhythm that reduces fatigue and heightens your focus. The saw runs quieter, vibration drops, and you move with greater control.

    This shift in pace also promotes safety, reducing common issues like binding or blade stalling. If your saw stalls, resist the urge to force it—stop, double-check depth and blade sharpness, then proceed calmly. This mindset shifts you from reactive to proactive, making every task feel smoother.

    Additional Practical Tips for Circular Saw Success

    Maintain Blade Sharpness

    Dull blades require more force and are more likely to splinter material or cause binding. Regularly inspect your blade for wear or missing teeth, and replace or sharpen as needed to maintain clean cuts and reduce strain on your saw.

    Control Saw Speed When Possible

    If your circular saw has variable speed control, adjust it accordingly. Hardwoods benefit from slower blade speeds, which reduce tear-out and blade wear. Faster speeds may be suitable for softwoods but can increase splintering if combined with deep blade exposure.

    Final Thoughts

    Adjusting the depth on your circular saw is a small step with outsized impact. From cleaner cuts and safer operation to preserving tool lifespan and your own peace of mind, this detail is what distinguishes seasoned professionals and careful hobbyists alike.

    Next time you grab your saw, take a moment to check that your blade just clears the material by a little margin. Watch how the tool behaves differently, how your cuts look, and how much smoother your projects go. Over time, this simple habit becomes a hallmark of effective, enjoyable woodworking.

  • How Choosing the Right Disc Stops Metal Burn Marks Naturally

    Understanding Metal Burn Marks and Their Causes

    If you’ve ever used an angle grinder to shape or smooth steel and noticed rainbow smudges or discoloration appearing on the surface, you’re not alone. Burn marks on metal are not only a visual annoyance but can indicate damage to the metal itself, affecting both appearance and structural integrity. These marks often show up as blue, gold, or brown hues where localized overheating has occurred due to excessive friction and heat buildup.

    The root cause is quite straightforward: grinding generates heat, and when that heat surpasses the steel’s tolerance, it creates discoloration—often referred to as burn marks. In worse cases, the metal’s temper can be damaged, making the piece weaker or more brittle.

    Why Grind Disc Choice Matters More Than You Might Think

    Most discussions about avoiding burn marks focus on operator technique—speed, pressure, and movement. While these are critical factors, the choice of grinding disc is just as important and often underestimated. Selecting the right disc can make the difference between a clean finish and a piece that requires hours of rework or even replacement.

    Grinding discs come in different materials, thicknesses, and grit sizes, each suited for specific tasks. Using the wrong disc—such as a thick, rigid grinding wheel with a coarse abrasive for a finishing pass—can trap heat and leave burn marks more readily, especially on thin sheets or delicate welds.

    Hard vs. Softer Discs

    Harder grinding discs, typically alumina-based, are aggressive and remove material quickly, but they tend to dig in and build heat rapidly. Softer, resin-bonded discs or ceramic-based discs are designed to break down gradually, exposing fresh abrasive particles and maintaining cooler operation. This slow breakdown reduces the force needed to remove material and helps avoid overheating.

    Thickness and Airflow

    Thick grinding discs (over 6mm) can trap and focus heat in a small contact patch, increasing the likelihood of burn marks. Flap discs, with their overlapping abrasive petals, allow more airflow and dissipate heat more efficiently, making them especially well-suited for finish work on steel surfaces.

    The Role of Grit Size in Preventing Burn Marks

    Grit size directly affects how much friction and heat are generated during grinding. Coarser grits (lower numbers, e.g., 36–40) remove material quickly but produce more heat, making them better suited for initial stock removal. Finer grits (higher numbers, e.g., 80–120) generate less friction and produce a smoother finish, reducing heat buildup during the final shaping or blending steps.

    Many tradespeople make the mistake of sticking with a single coarse disc for the entire job, which often results in visible thermal discoloration. Transitioning to a finer grit flap disc for finishing dramatically reduces that risk and improves the surface texture noticeably.

    Practical Tips for Avoiding Burn Marks When Grinding

    1. Use the Right Sequence of Discs

    Start with a coarse grit (36–40) for heavy material removal, then switch to a medium grit (60–80) for shaping, and finish with a fine grit (80–120) flap disc. This progression helps remove material efficiently without overheating the metal.

    2. Keep the Grinder Moving and Apply Light Pressure

    Avoid dwelling too long on one spot. Instead, move the grinder in smooth, even strokes. Let the tool’s weight do the work rather than forcing it. Applying excessive pressure or grinding at a slow speed with a hard disc is a sure way to generate heat rapidly.

    3. Choose Thin, Flexible Flap Discs for Finishing

    Thin flap discs (around 1.0–2.5mm thick) dissipate heat better and reduce the chance of burn marks, especially when finishing welds or delicate parts. Their flexibility also allows better control and a smoother surface result.

    Refreshing Your Approach: The Subtle Adjustment That Makes a Big Difference

    One subtle but highly effective adjustment is to consciously pause and check your work in increments—about every 10 to 15 seconds when working on thin material. Take a moment to let the metal cool if it feels hot to the touch before continuing. This slight change adds time but prevents heat buildup that can cause burns. It’s a gentle reminder to work smarter, not harder.

    This practice encourages patience and awareness, helping you catch potential issues early on instead of fixing damaged work later. Over time, it becomes second nature and noticeably improves your finish quality.

    Real World Experience: Lessons Learned From the Workshop

    Midway through a fabrication project involving a visible bracket, I noticed that my usual grinding disc left faint blue and gold arcs on the surface after each pass. Frustrated by the discoloration, I switched to an 80 grit flap disc and significantly reduced the pressure I applied. The results were immediate: the metal retained a natural steel color without burn marks, and the finish felt smoother. Subsequent paint application adhered better, and rework was minimal.

    This experience reinforced the importance of disc selection and technique over brute force. By matching the disc to the task and respecting the metal’s heat tolerance, better outcomes are achievable without investing in specialized tools.

    Summary: Key Takeaways for Preventing Metal Burn Marks

    • Choose softer, resin-bonded or ceramic-based discs for finishing stages to reduce heat buildup.
    • Use a progressive grit sequence from coarse to fine to minimize thermal damage.
    • Opt for thin, flexible flap discs in finishing passes to improve airflow and heat dissipation.
    • Keep the grinder moving using light, even pressure and allow metal to cool periodically.
    • Remember that patience and disc changes are small investments with big payoffs in finish quality.

    Paying close attention to these factors will help you prevent burn marks, improve surface finishes, and save time on rework—ultimately raising the quality of your metalwork projects.