Category: Uncategorized

  • The PSI Secret That Keeps Your Air Tools Running Strong

    There’s a quiet moment in every garage or workshop when the air compressor kicks on, filling the space with its steady hum and promise of power. For many, it’s just background noise. But for anyone serious about pneumatic tools, that sound signals the start of something crucial: the right PSI setting.

    Why PSI Matters More Than You Think

    PSI, or pounds per square inch, measures the force of air your compressor delivers. It might seem like a basic number to adjust—just crank it up for more power. However, every air tool has an optimal PSI range, often listed on the tool itself or in the manual. Exceeding that range isn’t just unnecessary; it can damage your tool and ruin your work.

    For years, I believed a higher PSI meant better performance. I pushed my impact wrench to break loose stubborn bolts and my nail gun to fire nails with authority. What I ended up with were jammed tools, leaky hoses, nails punched through wood, and costly repairs. The hidden cost was the accelerated wear on seals and moving parts inside my tools, shortening their lifespan.

    Understanding the PSI Sweet Spot for Your Tools

    Different pneumatic tools require different pressures:

    • Finish nailers: Usually 60–100 PSI
    • Spray guns: Often 40–60 PSI

    Setting a tool rated for 60 PSI at 100 PSI not only risks internal damage but can cause performance issues such as blown-out trim or inconsistent finishes.

    Match PSI to Your Tool’s Needs

    It’s a simple rule: set your compressor’s regulator to the lowest pressure requirement of the tool you’re using at that moment. If you switch between a spray gun needing 45 PSI and an impact wrench that prefers 90 PSI, adjust the regulator accordingly for each task. This step might feel like an inconvenience, but it’s vital for long-lasting tools and quality work.

    Real-World Example: When Lower PSI Made a Big Difference

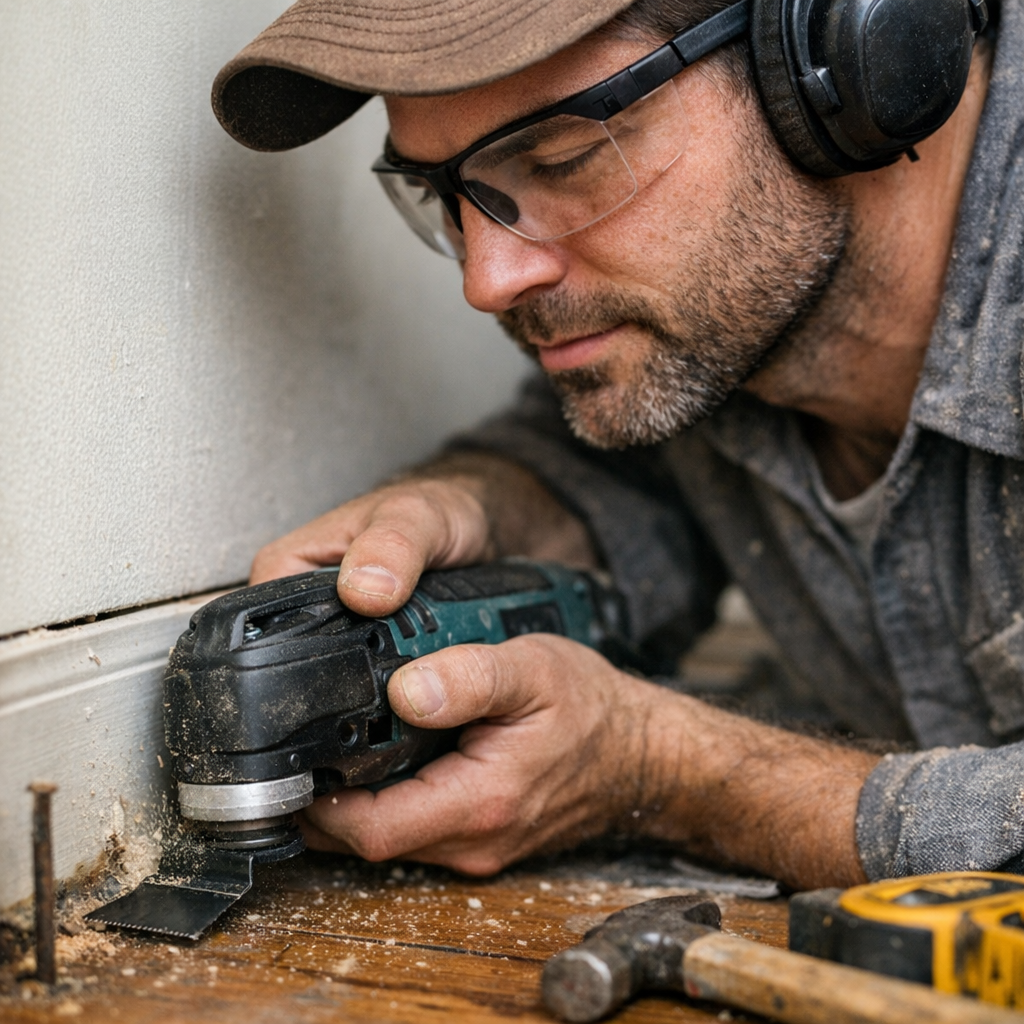
    Last winter, I was replacing baseboard trim using my old air nailer. Out of habit, I ran my compressor at 100 PSI. By midday, the nails were tearing through the trim heads, and the nailer began leaking air. I reduced the regulator to the recommended 60 PSI, and immediately the nails set flush, air leaks stopped, and the compressor ran quietly without constant cycling. The tool felt like new again, delivering reliable performance.

    Common PSI Mistakes to Avoid

    A frequent error, especially among newcomers, is running all tools at tank pressure, typically 120 PSI or more. This can cause soft-seal components to wear prematurely, resulting in seal blowouts, valve failures, and early replacements.

    How Excessive PSI Harms Your Tools Internally

    Each pneumatic tool relies on seals, o-rings, and internal valves to harness bursts of compressed air effectively. When run above the recommended PSI:

    • Seals and o-rings wear out faster due to excess force
    • Valves become gummed up, reducing performance
    • Tools lose efficiency and eventually fail prematurely

    By dialing back the pressure to the tool’s ideal range, you reduce strain and let your equipment perform as designed, lasting longer and working more precisely.

    Practical Tips for Managing Your Air Compressor PSI

    Check Regulators and Tools Before Every Job

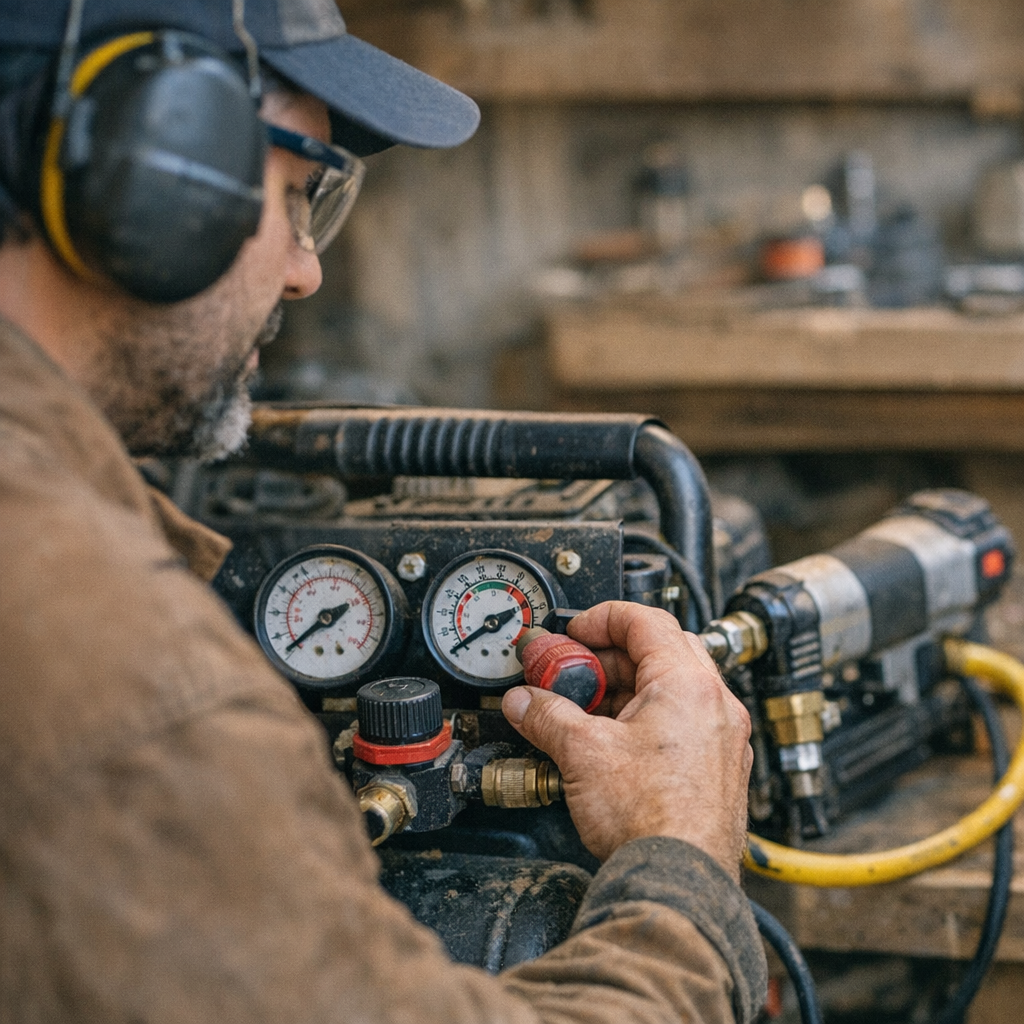
    When setting up, notice that most compressors have two gauges: tank pressure and regulated output. Focus on the regulated output gauge—it shows the air pressure delivered to your tool.

    Adjusting PSI Step-by-Step

    1. Turn on the compressor and let it reach full tank pressure.
    2. Attach your tool and hose.
    3. Turn the regulator dial until the output gauge reads at or just below the tool’s recommended PSI.
    4. Start at the low end of the range and increase pressure incrementally if needed.
    5. Test tool performance and adjust accordingly, but never exceed manufacturer recommendations.

    Label and Color-Code Air Lines

    If you operate multiple tools requiring various PSI, consider color-coding hoses or labeling quick couplers with their pressure ranges. This precaution prevents accidental damage from overpressurization.

    A Refreshing Perspective: Slow Down to Save Time

    It’s tempting to rush through your setup and dive into work. However, taking an extra minute to verify and fine-tune your PSI settings pays off. Tools aren’t indestructible; they need the right environment to succeed. By slowing down and respecting each tool’s pressure requirements, you actually save time by avoiding repairs and subpar finishes.

    Also, when switching tools, allow the compressor a moment to stabilize—gauges can lag, especially on older models. This simple habit ensures you’re delivering the right pressure consistently.

    Conclusion: Consistency Is Key to Tool Health

    Your air compressor is a powerful ally but demands attention. Giving your tools exactly the pressure they need—not more, not less—extends their lifespan and improves your work quality. Before every job, check the PSI, adjust the regulator carefully, and maintain your hoses and fittings.

    Protecting your investment isn’t about hovering over every part—it’s about creating the right conditions for reliable performance. The next time you start your compressor, ask yourself: have I set the correct PSI today? A small adjustment could add years of service to your tools and leave your work looking sharper.

  • Why Your Rivet Head Won’t Sit Flush—And How to Fix It

    Understanding the Challenge of Flush Rivet Heads

    Have you ever spent significant time aligning your rivet gun, confident that everything is set correctly, only to find the rivet head sitting proud instead of flush with your material? This is a very common frustration encountered by anyone working with aluminum, sheet metal, or plastics. It’s not just a matter of aesthetics either—improperly seated rivets can snag on clothing, compromise structural integrity, and give your work a less professional appearance.

    At its core, a rivet is a simple fastener: a shank, a mandrel, and a head. When you pull the trigger, the mandrel draws the shank to create a riveted joint. Ideally, this process creates a smooth, flush rivet head. However, you might often notice a small dome or bulge instead, where the head never fully seats against the surface. Identifying why this happens and how to prevent it can save time and frustration on any project.

    Common Reasons Why Rivet Heads Don’t Sit Flush

    Mismatched Hole Size

    The most frequent culprit behind a rivet head that doesn’t sit flush is a hole that doesn’t precisely match the rivet diameter. If the pilot hole is even slightly larger than recommended, the rivet will expand unevenly inside the material. This uneven expansion, called “blooming,” prevents the rivet head from compressing fully against the surface.

    For example, using a 1/8″ (3.2mm) rivet with a hole larger than 3.2mm can cause the shank to push through unevenly rather than spreading uniformly to anchor properly. On the opposite end, a hole that is too tight can prevent full insertion, leaving the head away from the material surface and causing a raised head.

    Material Thickness and Surface Condition

    Material layering plays an essential role. If you have a thick bottom layer with a thinner top layer, the rivet head might not seat because the softer or thinner layer flexes or compresses unevenly. This results in a gap between the rivet head and the surface.

    A practical example is riveting a 1mm aluminum panel onto a 3mm backing plate. The aluminum’s softness and thinness often let the head ride above the surface, even with the correct hole size, due to uneven compression.

    Incorrect Nosepiece or Tool Issues

    It’s easy to overlook the importance of matching your rivet gun’s nosepiece to the rivet size. Using a smaller or larger nosepiece than specified can misalign the rivet during installation, preventing the head from sitting flush. Additionally, dirty or worn jaws inside the rivet gun can grip the mandrel off-center, further complicating proper seating and causing a proud rivet head.

    Simple Steps to Achieve Flush Rivet Heads Every Time

    Use the Reverse Drill Bit Technique to Eliminate Burrs

    One of the most effective but overlooked tactics is to reverse-spin your drill bit through the hole after drilling. After you drill your pilot hole with the drill spinning forward, reverse the direction and spin the bit backward for several turns.

    This quick action cleans off burrs and tiny raised edges left by the forward drilling. Burrs can prevent the rivet head from sitting flush by acting as a tiny barrier under the head, akin to placing a microscopic washer where it’s unwanted.

    This method costs nothing and takes only a few seconds, but it significantly improves rivet seating and surface finish. It’s especially valuable when drilling aluminum or soft metals where burr formation is common.

    Maintain Proper Hole Size

    Always verify that your pilot hole diameter matches the rivet manufacturer’s specifications. A high-quality brad-point bit for metal can improve hole accuracy. If you work regularly with specific rivet sizes, consider investing in dedicated bits optimized for those sizes.

    Keep Your Rivet Gun Clean and Matched

    Regularly clean the jaws of your rivet gun by blowing them out with compressed air and checking for signs of wear or contamination. Matching the nosepiece to the rivet diameter is crucial for proper alignment and force distribution. Avoid using mismatched parts to prevent uneven rivet compression.

    Refreshing Your Approach to Riveting: Focus on Surface Preparation

    Beyond hole size and tool maintenance, reevaluate your material handling before riveting. Surfaces must be flat, clean, and clamped tightly together. Even a slight gap between sheets or layers can cause rivet heads to sit proud. Taking an extra moment to clamp or use hand pressure ensures layers remain flush throughout installation.

    This preparation shift not only improves rivet finish quality but helps prevent long-term issues such as loosening or corrosion caused by uneven stress.

    Additional Tips When Dealing with Persistent Raised Rivet Heads

    • Upgrade Rivet Quality: Choose rivets compliant with industry standards such as DIN 7337 or ISO 15977. These standards guarantee appropriate deformation characteristics for reliable seating.
    • Inspect for Tool Wear: Old or poorly maintained rivet guns can misalign the mandrel. Periodically service or replace worn parts, especially if you notice a pattern of elevated heads.
    • Test Material Flats: If working with warped panels, try to flatten or support them with jack screws or clamps before riveting.

    Why Getting It Right Matters

    Flush rivet heads are about much more than beauty—they prevent catches and snags on wiring looms, gloves, or clothing. Raised heads can also become stress points, potentially leading to cracking or failure in applications subject to vibration or impact.

    The difference between a “good enough” rivet and a perfectly seated one can impact product durability, user safety, and overall quality perception. In industries like automotive upfitting or ceiling grid construction, these details separate less desirable outcomes from professional craftsmanship.

    Conclusion

    Don’t let proud rivet heads slow down your projects or diminish your work quality. Start by making the simple but effective reverse-drill step a part of your routine to clear burrs. Double-check hole size, tool condition, and material flats. Maintain your equipment diligently, and respect the subtle nuances of layered materials. With these adjustments, you’ll be rewarded with clean, flush rivet heads that look great and perform reliably.

    Ultimately, the seemingly small details in preparation and tool maintenance distinguish a skilled craftsman from a novice. So before you move on, pause and check your rivet finish—your attention to this detail is the first step toward building something that truly lasts.

  • The Little Rivet Fit Mistake That Undermines Your Build

    Few frustrations compare to the sinking feeling you get after spending hours assembling a structure—whether it’s a metal frame, a custom rack, or a fence panel—only to later discover that your joints are coming loose. If you’ve ever used a rivet gun, you know the slow, creeping worry: did I pick the right rivet size? Did I overlook something?

    It turns out, one of the most common but overlooked causes of weak, unstable joints is using rivets that don’t fit properly—either those that are too small or the wrong length. What seems like a minor mismatch can seriously weaken the integrity of your entire assembly.

    Why Proper Rivet Size Matters More Than You Think

    At first glance, rivets come in countless sizes and styles. They’re all designed to hold materials together, right? Yes, but only if the size matches the application closely. Getting precise matters.

    For example, imagine using a 3.0mm diameter rivet in a 3.2mm hole. That mere 0.2mm gap means the rivet’s shaft cannot grip the hole’s edges securely when expanded. Even though the rivet’s back flares out, the reduced contact weakens the shear strength by 20–30% compared to a perfectly fitted rivet. Similarly, if the rivet is too long or too short for the material’s thickness, the end may not flare out properly, resulting in a loose, vulnerable joint that can come undone under stress.

    It’s a subtle mistake, but it can have big consequences—wobbly racks, rattling signs, and panels that loosen with time. The joint may look solid initially, but the wrong rivet size sets you on a path toward failure.

    The Common Challenges in Selecting Rivets

    Choosing the proper rivet is rarely straightforward for several reasons. First, holes drilled into sheet metal or other materials are often slightly oversized. The drill bit may wander, or the sheet may flex during drilling—creating a gap that’s larger than the nominal hole size. This means a rivet sized to the hole may feel loose.

    Second, manufacturers’ grip range specifications—the thickness of material a rivet is designed to accommodate—assume ideal conditions. Real-world factors like paint layers, rust, or dirt can increase thickness, pushing your rivet toward the upper limit of its grip or beyond. This can prevent the rivet from expanding correctly and fully securing the joint.

    How to Ensure a Proper Rivet Fit Before Setting

    One simple but effective trick is to physically test the rivet’s fit before you pull the trigger on your rivet gun. After pre-drilling, insert the rivet and try gently wiggling it in the hole. If it rotates or moves side-to-side, that’s a red flag. A loose fit means the rivet won’t grip tightly once set, resulting in potential failure later.

    If you spot looseness, you have two main options: select a rivet with a slightly larger diameter (if the hole allows), or adjust your hole by drilling a replacement location or resizing the hole to create a snug fit. Avoid forcing a larger rivet into a hole that’s too small; this risks damaging your materials or the rivet itself.

    In cases where a snug rivet fit isn’t possible, consider switching to mechanical fasteners like nuts and bolts, which can accommodate a range of material thicknesses more reliably.

    Practical Tip: Compare Drill Bit Size and Rivet Diameter

    To minimize guesswork, examine your tools and supplies closely. For instance, a 4.0mm rivet ideally fits into a hole drilled with a 4.0–4.1mm drill bit. The hole should not exceed the rivet diameter by more than a fraction of a millimeter. If you find a hole is too large, don’t settle for the next rivet size up without confirming it fits properly.

    Getting familiar with your drill bits, rivet diameters, and grip ranges—and confirming the compatibility of these elements before assembly—can save hours of frustration and rework.

    Refreshing Your Approach: Don’t Rush, Inspect with Care

    It’s tempting to overlook fit details when you’re under time pressure or have limited rivets on hand. But a quick moment taken before setting rivets can prevent a world of trouble later. One mindful inspection can turn a shaky structure into a sturdy, long-lasting build.

    A great way to boost your confidence is to incorporate a systematic “fit check” step into your assembly process. Before squeezing the rivet gun trigger, make it standard to test the rivet’s movement in the hole. This small habit shifts your energy from reactive fixes to proactive quality control—an approach that pays off every time.

    Real-World Example: When a Fence Panel Taught a Hard Lesson

    Last summer, I helped a friend reattach a fence panel after it was damaged by high winds. In a rush, we used leftover rivets that were slightly undersized for the thick, painted steel posts. Though initially secure, after just three weeks many joints had loosened and rattled dangerously. We had to redo the entire work to ensure stability.

    Since then, I’ve been ever diligent about testing rivet fit ahead of time. The simple habit of “wiggling” the rivet in its hole before setting has saved countless hours and eliminated the need to redo joints.

    Additional Tips for Stronger Riveted Joints

    • Use the correct rivet type for your materials: Aluminum rivets for aluminum sheets, steel rivets for steel—material compatibility matters for durability.
    • Clean holes thoroughly: Remove rust, paint chips, and debris before assembling. Imperfections not only increase grip thickness but also interfere with rivet expansion.
    • Use the recommended rivet gun pressure settings: Excessive force can deform rivets; insufficient force leads to incomplete expansion.

    Conclusion

    The biggest single contributor to weak riveted joints is the failure to account for proper rivet size and fit. Even a slight mismatch can reduce joint strength significantly and lead to frustrating loosening over time. The good news is this is an easily avoidable mistake.

    Make it a habit to inspect and physically test rivet fit in every hole before setting. Compare hole and rivet sizes closely, don’t force mismatched parts, and be willing to adapt your approach—a quick size swap or hole adjustment will pay off with durable, reliable joints.

    Small checks mean big peace of mind, saving you from expensive and time-consuming repairs down the road.

  • Why Do Oscillating Blades Dull So Quickly? Insights Revealed

    Understanding Why Oscillating Tool Blades Lose Sharpness Quickly

    Oscillating tools have become an essential part of many workshops and DIY toolkits. Their unique ability to make precise cuts, work in tight corners, and handle various renovation tasks makes them invaluable. But a common frustration among users is how often their oscillating tool blades seem to wear out or dull prematurely—even when using quality blades.

    It’s tempting to blame the blade manufacturing quality or the brand, but the reality goes much deeper. Blade dulling is often the result of how the tool and blade interact with materials and how the tool is used during the job rather than inherent flaws in the blades themselves.

    Blade Types and Their Limitations

    Oscillating tool blades vary by material and tooth design, which directly affects durability and performance. Most common blades are made of high carbon steel (HCS) and are intended specifically for cutting wood, plastics, or drywall, with typical teeth per inch (TPI) ranges of 13 to 18. Using these blades for other materials, especially tougher ones like metal, leads to rapid dulling.

    For cutting metal, blades marked “bi-metal” (BIM) or “multi-material” usually have higher TPI (18–24) and incorporate tougher steel alloys or manufacturing processes that enhance durability. Still, even bi-metal blades will wear quickly when exposed to hardened fasteners, embedded nails, or abrasive components like gravel and grit.

    A practical example comes from a DIY professional who was puzzled by blades dulling unusually fast. It turned out he was cutting recycled flooring containing tiny gravel particles—and those microscopic abrasives decimated the blade teeth. Checking and clearing the work area before cutting made a remarkable difference in extending blade life.

    How Usage and Technique Impact Blade Longevity

    Oscillating tools operate at rapid oscillations per minute (OPM), often between 11,000 and 21,000. This fast movement generates a lot of friction and heat. Users often unknowingly press down too hard, assuming this will speed up the cut. However, that extra pressure actually increases friction, causing the blade to overheat.

    Heat buildup affects the temper and hardness of the blade edge. You might notice the blade turning a bluish color or otherwise discoloring—signs that it’s losing effectiveness. Instead, applying moderate pressure, about as much as you would use when writing with a thick marker, lets the blade cut efficiently while clearing debris and reducing heat.

    On long or tough cuts, it’s beneficial to make the cut in short bursts lasting 20 to 30 seconds, allowing the blade to cool between passes. Some professionals even keep two blades on hand, alternating them to maintain a cooler operating temperature.

    For instance, while helping trim baseboards, one tool user initially pushed aggressively and ran the tool at maximum speed, wearing out the blade halfway through. Changing tactics—lowering the speed, easing pressure, and letting the blade do the work—extended the blade’s life significantly and improved cut quality.

    Refresh Tip: The Power of Controlled Speed and Pressure

    It may seem counterintuitive, but slowing down and lightening your grip often results in cleaner cuts and a blade that lasts longer. The key takeaways are:

    • Use light to moderate pressure—just enough to guide the blade without forcing it.
    • Set the tool speed within the recommended mid-range (usually between 11,000 and 16,000 OPM).

    This approach minimizes heat buildup and keeps your tool and blades operating smoothly. It’s worth experimenting with pressure and speed adjustments on your next project to see improvements.

    Material and Angle Matter More Than You Think

    Aside from blade quality and pressure, the type of material being cut has a major influence on blade life. Using a wood-only blade on metal or composite materials is a short path to a worn-out edge. Always ensure your blade is appropriate for the material—bi-metal for metal, carbide-tipped for tough laminates—and avoid forcing blades through incompatible materials.

    The angle at which the blade contacts the material is another factor. If the blade meets the surface squarely—at roughly 90 degrees—the cutting action is most effective. Angles that are too steep or shallow can increase friction on a few teeth unevenly, causing premature wear or chipping.

    Regular Inspection and Maintenance

    Taking a moment to examine your blade every few cuts can save you time and money. Look for chipped teeth, discoloration, or signs of dullness. A dull blade requires more pressure and effort, which compounds heat and accelerates wear.

    By catching early signs of blade degradation, you can swap out a blade before it negatively impacts the quality of your cuts or risks damaging the material being worked on.

    Summary: Smart Techniques to Maximize Blade Durability

    Oscillating tool blades are built to handle tough jobs but have limits affected by blade type, material, pressure, speed, and cutting angle. Proper technique transforms a frustrating routine of rapid dulling into a smooth operation where blades last through the entire project.

    • Choose the right blade for your material: HCS for wood/plastics; bi-metal for metal; carbide for hard laminates.
    • Use controlled pressure—similar to writing with a thick marker.
    • Set tool speed within the recommended mid-range rather than full throttle.
    • Maintain a 90° blade angle on the material surface.
    • Inspect blades regularly for wear and replace before issues escalate.

    Mastering these practices will extend blade life, improve cut quality, and reduce frustration. Small changes in how you use your oscillating tool add up to big savings and better results over time.

    For more insights on tool maintenance and cutting techniques, explore our oscillating tool blade collection.

  • “Master Travel Ease: Organize Essentials, Breeze Through Airports Smoothly”

    It always starts with packing. A few hours before my flight, I settle in and start folding clothes, the quiet outside broken only by traffic in the distance. There’s always a little anticipation as I drop in each T-shirt or book—knowing these choices will shape the days ahead. But at some point, I pause and ask myself: what do I need on hand, right away? Boarding pass, passport, headphones, maybe some gum. They end up scattered at first and then organized into one spot. Back in the day, I’d just jam everything into random pockets or the outer flap of an old backpack, only to fumble through everything at security.

    These days, travel feels a bit smoother. The city starts to glow as morning arrives, and at the airport there’s a mix of hustle and waiting—families navigating the maze of stanchions, solo travelers at kiosks, announcements echoing overhead. My carry-on rolls beside me, easy to pull along, and I remember how many times I tangled with clumsy bags before switching to a better setup. For those who are curious, this is the carry-on that actually solved those issues for me: carrysupply.myshopify.com.

    Having everything essential in one reachable pocket is a relief. That familiar zip—knowing exactly where things are—is a small win. As the TSA line moves, I barely have to think before grabbing my ID and boarding pass. No digging, no stress. In a busy airport, that tiny advantage makes a big difference.

    The boarding area always feels like its own little world: shiny floors, power outlets occupied, everyone just waiting, quietly united by the shared goal of getting on the plane. My carry-on is at my feet as I scroll through photos, handle emails, confident that my essentials are still right where they should be. Near me, an older couple shuffles through maps and tickets. A kid is sending a toy plane between chairs. I can’t help but appreciate how much easier mornings are when I don’t have to search for basics like my passport or wallet.

    Once I’m on the jet bridge, things quiet down. The outside world fades, replaced by recycled air and the shuffle for overhead space. I lift my bag, store it above, and settle into my seat. My headphones are easy to reach, right where I left them, and I slip into the steady background noise of the plane.

    Up in the air, I look for that first new thing out the window—fields, clouds, maybe a glimpse of coast. It’s a nice break from rushing around, a simple reminder of why I travel: to actually enjoy what’s new and leave the hassle behind. After enough trips, you learn that small annoyances like lost minutes or misplaced chargers add up fast. Sorting out the basics ahead of time really can make everything go smoother.

    After landing, everyone starts grabbing their stuff for the exit. This is when having a simple system pays off. As I click off my seatbelt and get ready for passport checks, my documents are already where they should be. Nothing’s lost or missing. Getting through customs and finding my way feels a lot easier without scrambling for loose ends.

    The city outside is a mix of new sounds, streets, and faces. I pull my carry-on behind me, the rhythm of travel as familiar as always. Each time I unzip that go-to pocket—even just for train fare—I’m reminded how much small routines shape the comfort of a trip.

    Evenings always bring that low-key nostalgia as a trip wraps up. I repack, slipping in some souvenirs, gifts, and memories from the week. I think about how the little habits, like using one organized pocket, quietly influenced the whole experience. With sunset comes that last walk through the terminal, another security line, and I realize just how easy it all feels when you’ve got the details figured out.

    Honestly, I’m convinced travel is less about making big leaps and more about finding little ways to move calmly through new places, with your basics in reach and mind clear. If you want to know exactly where I got the carry-on I finally trust, here’s the spot: carrysupply.myshopify.com.

  • Why Some Oscillating Blades Outlast Others on Hardwood

    Anyone who’s worked with oscillating tools on hardwood knows the frustration: you start with a blade that cuts cleanly through thick oak or maple, but after just a few boards, the blade starts to smoke, stall, or lose its edge. Some blades barely last an afternoon, while others endure for weeks. So what really makes an oscillating tool blade last longer when working with tough hardwoods? Let’s break down the factors that affect blade longevity from a hands-on perspective.

    Why Hardwood Is Hard on Oscillating Tool Blades

    Hardwood species such as oak, walnut, and maple are dense and rigid materials. They often contain microscopic silica deposits within their grain structure, which act like natural abrasives on cutting blades. This density also causes the blade to heat up quickly during use, accelerating dulling and wear. The combined effect means your oscillating tool blades are constantly tested when slicing through hardwood.

    Using the wrong blade is a common pitfall. For example, blades designed for softer wood or general demolition won’t hold up well on hardwood flooring or trim. High-carbon steel (HCS) blades with a low tooth count (6–8 teeth per inch) can dull within a few feet of cutting through dense hardwood. In contrast, bi-metal blades featuring a higher teeth-per-inch count and specialized tooth profiles are designed to withstand this abuse better, often lasting significantly longer.

    Key Features of Durable Oscillating Blades for Hardwood

    Bi-Metal Construction

    A durable oscillating tool blade for hardwood typically has bi-metal construction, combining flexible steel backing with durable high-speed steel (HSS) teeth. This design allows the blade to flex without breaking and resists overheating, which can prematurely dull softer blades. Look for bi-metal blades rated for heavy-duty use, which means they’re engineered to handle prolonged cuts in thick hardwood without visible tooth rounding.

    Japanese-Style Tooth Profile

    Blades with Japanese-style teeth feature a fine, double-row tooth design operating at around 17–20 teeth per inch (TPI). This profile is optimized for clean, fast cutting through wood, and it resists clogging with hardwood dust. Less clogging leads to less friction and lower cutting temperatures, extending blade life significantly.

    Wider Blade Profile and Thick Kerf

    Choosing a blade with a wider cutting profile (approximately 1-3/4″ or more) helps distribute heat across a larger area, reducing wear. A blade kerf thickness between 0.7 and 1.2 millimeters supports straight cuts without binding or twisting, which again reduces heat buildup and dulling. Stability during the cut is just as important as sharpness.

    Secure Universal Fitment

    A blade that fits your oscillating tool snugly with minimal wobble preserves the blade’s attachment tabs and ensures efficient power transfer. Loose or cheap adapters introduce play, causing excess wear on the blade’s mount points and accelerating blade failure.

    Practical Tips to Maximize Blade Life on Hardwood

    Rotate the Blade Between Cuts

    Here’s a simple but often overlooked tip: after each hardwood cut, rotate the blade slightly on its mount before starting the next. Because different segments of the blade’s edge wear unevenly during a cut, this practice exposes fresh teeth to the wood every time you start a new pass. It effectively doubles the usable cutting edge, extending blade life without extra cost. This strategy can be a game-changer on longer jobs involving multiple hardwood boards.

    Manage Speed and Pressure

    Running your oscillating tool at full speed (often 10,000–20,000 oscillations per minute) may feel like a way to cut faster, but it leads to overheating. I recommend using a moderate speed setting with a mild orbital action (if your tool has one, setting 2 or 3 out of 5 works well). Applying steady but gentle pressure allows the blade to cut efficiently without bogging down or generating excess heat.

    Regularly Cool the Blade

    Heat is the enemy of blade longevity. When making long rip cuts on hardwood, pause every 30 to 60 seconds to feel the blade temperature. If it becomes too hot to touch, allow it to cool down or press the blade tip into a scrap metal piece as a quick heat sink. This simple practice reduces thermal damage and keeps the blade sharper longer.

    Keep the Workspace Clear of Sawdust

    Accumulated sawdust acts like abrasive sandpaper on a blade’s teeth. Clearing dust away frequently during cutting reduces friction and wear. Using compressed air or a vacuum attachment can help keep the working area clean and your blade healthier.

    A Refreshing Perspective: Quality Over Quantity

    It’s tempting to push blades until they completely fail in pursuit of squeezing out the last cut, but this often backfires. Dull blades produce rough cuts, increase your workload, and stress the tool’s motor. Instead, consider replacing blades proactively—when cutting efficiency noticeably drops or you hear the tool laboring. This mindset shift means less time spent fighting your tool and more time focused on precision and safety.

    Also, invest time upfront selecting blades designed specifically for hardwood applications rather than general purpose or demolition blades. This strategy saves you repeated stops and replacements throughout a project.

    Conclusion

    There’s no magic oscillating tool blade that lasts forever on hardwood, but selecting high-quality bi-metal blades with Japanese-style teeth, using wider blade profiles, and securing a tight fit on your tool lays a strong foundation for longevity. Combine this with smart usage habits—rotating the blade between cuts, running at moderate speeds with controlled pressure, cooling the blade regularly, and clearing debris—and you’ll notice a substantial increase in blade life and overall productivity.

    Being mindful of blade maintenance isn’t just about saving money; it’s about improving the quality and efficiency of your work. By understanding how hardwood interacts with your oscillating blade and implementing these practical tips, you’re well on your way to mastering smooth, durable cuts every time.

  • The Overlooked Filter Habit That Silently Saps Suction Power

    Understanding Why Suction Power Drops

    It’s a familiar scenario: you power on your blower or vacuum with high hopes, only to realize it’s barely pulling dirt or debris. Whether you’re dealing with fine sawdust from woodworking or collecting leaves clumped inside your garage, that sudden loss of suction can make what should be a straightforward cleanup frustrating and slow.

    Many assume the motor is weakening or the machine is simply worn out. While these can be valid reasons, the root cause often goes unnoticed—your vacuum or blower’s filter is fighting a hidden battle.

    How Filters Impact Airflow and Performance

    Every blower and vacuum relies on a filter to trap dust, particles, and debris to protect the motor and prevent clogging. Over time, these filters accumulate ultra-fine dust that can build up deeply within the filter’s fibers, even when it looks relatively clean on the surface.

    This buildup restricts airflow, starving your machine of the air circulation needed for strong suction. The result is a drop in performance, increased strain on the motor, and potentially reduced equipment lifespan.

    In real-world use, I’ve seen brand-new vacuums lose half their suction power after just one day spent tackling drywall dust. Especially when dealing with fine particles like MDF or cement dust, cleaning the filter regularly, and more importantly, ensuring it’s functional, becomes critical.

    The Hidden Problem of Damp Filters

    One of the biggest mistakes users make is reinstalling a filter before it is completely dry after washing. It’s tempting to rush and get right back to work, thinking a “mostly dry” filter is fine.

    However, moisture trapped inside the filter binds with dust particles and creates a dense clog that chokes airflow. This not only reduces suction dramatically but can also encourage mold growth, leading to unpleasant odors.

    A personal experience drives this home: I once quickly rinsed my filter before a big job and replaced it after just 20 minutes of drying. Despite appearances, the filter remained damp inside. My vacuum’s suction was weak, and it took me a full week of troubleshooting before realizing it was the damp filter causing the problems. Once dried fully, suction instantly returned to normal.

    Best Practices for Cleaning and Drying Filters

    • Allow Full Drying Time: After washing, set your filter in a warm, airy place. Outdoors is ideal, but a well-ventilated indoor area with a fan works well too.
    • Position Filters to Maximize Airflow: Place the filter so air circulates through all sides for even drying. Avoid leaving it flat on a surface where moisture can pool.
    • Be Patient: Let the filter dry overnight if possible. Only reinstall it when it feels completely dry—both on the surface and deep in the folds.
    • Use Low Heat Wisely: If you’re pressed for time, tap out excess water and use a hair dryer on a low heat setting or place the filter near a heater—never directly contact the heat source to avoid damaging the filter material.
    • Keep a Spare Filter: Having an extra filter ready means you can swap out a dirty or damp one immediately, avoiding downtime.

    Refresh Tip: Change How You View Maintenance Time

    When you’re focused on the work ahead, it’s tempting to view maintenance tasks like drying filters as interruptions or delays. Try reframing this routine as an essential investment in your machine’s longevity and your own efficiency.

    Think of drying your filter fully not as waiting but as preparing your tool so it performs flawlessly, reduces future breakdowns, and grows your confidence for tough jobs. This small shift in mindset turns patience into a productivity advantage rather than a frustrating pause.

    Why This Helps You Work Smarter

    Once I made fully drying filters a non-negotiable step, cleanup became noticeably easier. The blower’s motor ran quieter, suction stayed strong throughout the job, and tasks finished faster without repeated passes. There was no more that dusty, musty exhaust smell—just solid, clean power.

    Whether you’re a contractor on site or a DIYer at home, clean and dry filters help you get the job done right the first time. Saving time and reducing machine strain add up to real results week after week.

    In Summary

    Don’t underestimate the critical role your filter plays in your blower or vacuum’s performance. Clogged or damp filters severely cut suction power, cause motor strain, and extend cleanup time.

    Make a habit of thoroughly drying your filters after cleaning and only reinstall them when they’re completely moisture-free. This simple but often overlooked step restores airflow, boosts suction, and protects your equipment’s health.

    By taking a little extra care with your filter maintenance, you’ll avoid needless frustration, enjoy smoother jobs, and extend the life of the machines that keep your work moving.

  • How Clear Lines and Dust Control Transform Cutting Precision

    Understanding the Hidden Impact of Dust on Cutting Accuracy

    If you’ve ever spent time in a workshop, you know the satisfaction that comes from a precise, clean cut. Yet, there’s a subtle factor that often goes unnoticed until it causes frustration: dust. Dust accumulation during cutting not only impacts visibility but can also cause inaccuracies that degrade the quality of your work. Over years of woodworking, many artisans learn that dust control is crucial for achieving professional results.

    Whether you’re working with hardwood, plywood, or MDF, sawdust doesn’t just clog your workspace — it can sabotage your cutlines and make repeat passes a challenge. This article explores why dust control matters and how integrating blowers and vacuums into your routine can enhance both precision and efficiency.

    The Real Cost of Ignoring Dust

    A thin layer of wood dust might seem harmless at first. It’s often regarded as a sign of productivity. However, dust collection is about much more than cleanliness. Every pass of the blade generates fine particles that quickly obscure pencil lines, scribed edges, or factory-printed guides. Once these reference points vanish beneath a blanket of sawdust, accuracy suffers.

    Visibility plays a crucial role in guiding a cut. When dust accumulates, woodworkers find themselves squinting, wiping surfaces mid-cut, or stopping altogether to clear debris. Each pause increases the chance of misalignment and errors. For example, plunge cuts performed without dust removal can quickly lose their reference lines, causing uneven or oversized cuts.

    Using aggressive orbital settings on jigsaws instead of lower, controlled speeds amplifies dust swirl and hides cut marks faster. Micro-movements of the blade triggered by tiny fragments caught in the kerf can widen the cut, leading to poor fitting joints or wasted material.

    Real-World Scenario

    On a recent site installation of prefinished maple flooring, a crew member repeatedly trimmed stair nosing pieces. Without any dust extraction, his cutting guidelines disappeared after just three passes. However, after pausing briefly to vacuum, the next piece fit flawlessly, saving time and avoiding costly material waste. This simple step illustrated how dust management is key for professional consistency.

    Why Visibility of Cutlines Matters

    One of the most immediate and visible consequences of dust buildup is loss of the visual guide line. Whether it’s a pencil mark, scribed layout, or printed guide, if it’s obscured, you’re essentially working blind. Even the most experienced woodworkers rely heavily on clear sightlines—often more than intuition or hand feel.

    Effective dust extraction by attaching a vacuum or blower nozzle close to the blade path keeps these lines clear in real time, reducing the need to stop or reposition. Professionals often keep the nozzle 3 to 5 inches from the cut to maximize debris capture while not interfering with the cut itself. For table saws, a vacuum rated at 100 CFM or higher is ideal to handle the volume of dust. For handheld tools, the priority is a snug dust port adapter that maintains suction and line visibility during cuts.

    It’s important to note that integrated dust ports on tools may not suffice when working with high-density or dusty materials like MDF or melamine. Supplementing the built-in system with a portable shop vac is a worthwhile investment for maintaining cutting precision on all project stages.

    Practical Tip: Optimize Your Dust Nozzle Position

    A small adjustment can produce surprisingly big results: positioning your vacuum nozzle about 4 inches from the blade instead of directly above it often improves real-time dust capture. This placement avoids interference, particularly when working with smaller stock, and reduces dust settling on the work surface and surrounding areas. Using flexible hose supports or magnetic brackets helps maintain consistent nozzle distance without the need for constant repositioning.

    Beyond Visibility: Dust Affects Tool Performance and Longevity

    Dust doesn’t just obscure your view—it also impacts the operational reliability and lifespan of your cutting tools. Loose debris can get into blade bearings, upset tool balance, and cause micro-vibrations that reduce accuracy. In cordless or track saws with precise blade tracking, even a slight buildup under the saw shoe can cause the blade to wander up to 2 millimeters per cut.

    Excessive dust clogging tool vents or switches can increase motor temperatures by 10–20°C, which accelerates wear and may cause premature failure during a job. This is especially true for thin-kerf blades or oscillating multi-tools where precision depends on uncompromised blade movement.

    Maintaining Focus and Professional Discipline

    Working in a dust-filled environment creates subtle mental fatigue. The background noise of dust buildup can distract and reduce your concentration levels, increasing the chance of mistakes. For those sensitive to airborne particles, eye irritation can further diminish focus during critical steps such as trimming or joinery.

    Adopting a habit to vacuum the workspace regularly—ideally after every plank, case piece, or significant cut—helps maintain a tidy environment, sharpens attention, and promotes safer working conditions. This disciplined approach translates directly into higher-quality outcomes and fewer costly fixes.

    Refreshing Your Approach: Clean as You Go

    Switch your mindset from “I’ll clean up at the end” to “I maintain cleanliness throughout the project.” This simple mental shift can redefine your workshop workflow. Consistently keeping cutlines visible and tools free of buildup reduces rework and speeds up completion rates.

    Even if you don’t have a full dust collection system, investing in a quality portable vacuum with a HEPA-rated fine filter can drastically improve air quality and cutline visibility, especially when working with engineered wood or MDF. Small, cumulative improvements add up to professional-grade precision over time.

    Summary and Key Takeaways

    • Dust obscures crucial visual guides and forces frequent stops, which increase error risk.
    • Active dust extraction using vacuums or blowers positioned close (3–5 inches) to the cutting line helps maintain visible, crisp cutlines.
    • Small adjustments like nozzle placement and regular workspace vacuuming elevate precision and tool performance.
    • Dust buildup affects tool longevity, blade tracking, and motor health, resulting in less reliable cuts.
    • Working clean and focused is a productivity and quality multiplier.

    Before you start your next cutting task, ask yourself: is the guideline as visible at the end of the cut as it was when I started? If not, it’s a clear sign your dust control needs improvement. Embrace proactive dust management as a foundational step in delivering craftsmanship that’s both precise and professional.

  • How One Simple Feed Direction Transforms Your Router Cuts

    Understanding Feed Direction and Its Importance in Routing

    If you’ve ever routed edges and noticed some cuts come out smooth while others end up chipped or rough, you might be overlooking a fundamental factor: feed direction. Despite its simplicity, the direction in which you move your router relative to the bit’s rotation dramatically affects the quality of your cuts and the safety of your work.

    Feed direction refers to the way you guide your router across the wood in relation to the spinning bit. Most routers spin clockwise when viewed from above, meaning the cutting edge moves left to right at the front of the bit. This direction of spin informs how you should feed the tool into the material for the best finish and safer operation.

    Conventional vs. Climb Cutting: What’s the Difference?

    There are primarily two ways to feed your router:

    • Conventional Cutting: Feeding against the bit rotation (moving the router so it pushes into the bit’s rotation)
    • Climb Cutting: Feeding with the bit’s rotation (the router moves in the same direction the bit is spinning)

    Most woodworking projects benefit from conventional cutting because it offers better control and minimizes tear-out. You’ll feel a slight resistance pushing the router against the spin, which helps prevent the tool from grabbing the wood and jumping forward unexpectedly.

    Climb cutting, on the other hand, can lead to cleaner surfaces in certain difficult grain situations. However, it’s riskier because the router tends to pull itself into the cut, often requiring a firm grip to keep it steady. This technique is usually reserved for final passes on small, controlled pieces or specialized applications.

    Detecting the Right Feed Direction in Practice

    If you suddenly find the router hard to steer or it seems to lurch ahead, you’re likely feeding it in the wrong direction—climb cutting unintentionally. A correctly performed conventional cut should feel smooth with manageable resistance.

    Feed direction can also affect the finish; the wrong feed tends to create burn marks, chatter, or splintered edges, especially on end grain or cross-grain cuts prone to blowout.

    Practical Tips for Managing Feed Direction and Router Setup

    1. Mark Your Feed Direction: Before routing each board or component, take a few seconds to draw small arrows indicating the optimal feed direction right on the wood. This tiny step can save you hours of guesswork and prevent costly mistakes, especially in dusty or fast-paced environments where it’s easy to forget or lose track.

    2. Match Feed Direction to Workpiece Orientation: On outside edges where you stand facing the board, you usually move the router from left to right against the bit’s clockwise spin. For inside cuts like dados or grooves, it typically reverses—feeding from right to left—to maintain the same opposing feed.

    3. Optimize Bit and Speed Selection: Use sharp bits appropriate for your material—carbide-tipped 2-flute bits work well on hardwood edges. Adjust your router speed based on bit diameter; smaller bits (up to 12mm) can run at 18,000 to 24,000 SPM, but larger bits require slower speeds (under 16,000 SPM) to prevent burning or chatter.

    Feed Direction and Material Considerations

    Materials like MDF or veneered plywood are more prone to splintering if fed incorrectly. For these, using spiral up-cut bits with narrow kerfs (3–5mm) and taking light passes of 2–3mm will reduce tear-out and preserve surface quality.

    End grain is particularly vulnerable. When routing end grain, reduce your passes to minimize chip-out or consider a very light climb cut on the last millimeter only if you’re comfortable controlling the router.

    A Refresh Tip: Slow Down and Reassess Your Cutting Process

    It’s tempting to speed through routing to finish a project quickly, but rushing often causes more problems than it solves. If your router starts to feel strained, noisy, or seems to push back against you, pause. Check your feed direction, bit sharpness, and router speed.

    Adjusting your feed speed to a steady, controlled pace is crucial. A slower feed at optimal bit speed will consistently yield cleaner edges and less effort, particularly on hardwoods and figured stock. Remember, good routing isn’t about how fast you move, but how well you control tool and material interaction.

    Common Mistakes to Avoid

    • Routing all edges in a continuous loop without adjusting feed direction—this often causes improper feeds and poor finishes.
    • Relying solely on climb cuts to speed up the process—increases risk of injury and work damage unless expertly managed.
    • Making deep passes that overload the router and bit, leading to tear-out and tool wear.

    Instead, break your routing into manageable sections. Reorient the router as needed so you can always feed against the bit’s rotation. Take multiple light passes rather than one aggressive cut.

    Real-World Experience: Avoiding Expensive Errors

    On one job, an apprentice accidentally used a climb cut while rounding over a bullnose edge on freshly sanded oak stair treads. This caused the router bit to grab and surge forward, chewing a significant 2-inch chunk out of the workpiece. The result was wasted materials and lost time—an hour-long delay to replace the damaged tread.

    This scenario underscores how subtle mistakes around feed direction can quickly translate to real-world consequences, especially on critical or expensive parts.

    Summary: Feed Direction Matters More Than You Might Think

    When routing, the simplest adjustment—feeding your router against the bit’s rotation—can dramatically improve your cut quality and safety. Combining this with appropriate bit selection, speed control, and light passes leads to the best results.

    Small habits, like marking arrows on your boards, and slowing down to reassess your setup, are practical ways to reduce errors and improve your woodworking outcome without extra cost or effort.

    Next time you pick up your router, take a moment to visualize the bit’s rotation and plan your feed direction accordingly. This tiny act of mindfulness often separates a perfect edge from a piece that demands extra sanding or worse, replacement.

  • How Hidden Heat Gun Mistakes Quietly Warp Your Woodwork

    The Versatile Heat Gun and Its Subtle Risks

    Whether you’re stripping paint, loosening adhesive, drying surfaces, or softening materials, the heat gun is an indispensable tool in any workshop or job site. Its ability to quickly apply controlled heat makes tasks easier, but improper use can cause problems that don’t show up immediately. One of the most common hidden issues is warping—materials becoming distorted or bowed after cooling down. These changes often appear hours or even a day later, creating frustrating challenges when you think the job is done.

    Why does this happen? The culprit is uneven heating that causes differential expansion and contraction within the material. This undervalued phenomenon can ruin hours of work if not managed properly. Understanding how heat interacts with wood, plastics, and composites is key to avoiding these silent pitfalls.

    How Heat Causes Warping in Wood and Other Materials

    When you apply heat to a piece of wood or plastic, that external surface heats and expands faster than the inner core. For example, if the surface reaches 90°C while the core is still around 40°C, the outer fibers stretch out more rapidly. The interior resists this expansion, and that creates internal stress.

    Once you remove the heat, the material cools and shrinks unevenly. Since different parts of the piece expanded at different rates, the contraction doesn’t balance out nicely, and permanent deformation results. In a 1-meter length of three-quarter-inch pine molding, even a short thirty-second imbalance can cause a bow of several millimeters—enough to cause installation headaches or cosmetic flaws.

    Unfortunately, repairing warp caused this way is difficult. Conventional clamping or steaming rarely brings the piece back to its original shape because the wood fibers and resins have been stressed and “set” in a new position. Prevention through careful technique is the smarter solution.

    Common Mistakes That Lead to Warping

    One frequent error is overheating a focused small area for too long. For example, you might hold your heat gun only 1 to 2 inches away at full temperature on a stubborn spot to get paint bubbling or glue melting faster. Although it looks like progress, you’re setting up uneven temperature gradients. The surrounding cooler material cannot keep up, and tensions form.

    Another mistake is using the maximum temperature setting by default, rather than dialing down to the lowest effective heat. Many jobs don’t need the gun’s full blast; lower temperatures produce gentle and more uniform heating.

    Additionally, neglecting nozzle size or distance can contribute. Small, concentrated nozzles focus heat in a tight area, increasing risk. Holding the gun too close—less than 4 inches for broader surfaces—also invites uneven heating.

    Proven Techniques for Preventing Warping

    Maintain Proper Distance and Movement

    The key to an even, warp-free application is distance and sweep. Hold the heat gun about 4 to 6 inches from the surface instead of right up close. Move the gun back and forth steadily at a pace that avoids overheating any single spot—doubling your usual sweep rate from, say, three seconds per inch to one and a half seconds per inch often works well.

    Use the Appropriate Temperature and Fan Setting

    Rather than maxing out heat, reduce it to the minimum effective range—often between 350 and 450°C for paint removal and adhesive softening. Some heat guns also allow airflow adjustment. Selecting a moderate airflow helps distribute heat more evenly without blasting a focused hot spot.

    Choose the Right Nozzle Attachment

    Wide fan or flat nozzles spread heat more gently across wood panels or molding, minimizing the risk of localized overheating. Narrow or concentrator nozzles can be reserved for very specific tasks but should not be used extensively on flat trim.

    Monitor Material Temperature Physically

    One underrated trick—borrowed from professional flooring installers—is to place your free hand lightly on the reverse side of the wood. Once that side feels noticeably warm, about 30°C above ambient temperature, pause heating and allow the piece to cool or even out before continuing. This tactile feedback prevents accumulation of hidden internal stresses.

    What Not to Do: Why Clamping Often Fails

    It might be tempting to assume that if wood warps after heating, you can simply clamp it flat afterward. In reality, materials like pine or MDF baseboards won’t reliably return to their original shape without prolonged, controlled heat and pressure treatment—something impractical on most job sites.

    This is because fibers, once stretched and “set,” resist bending back. Clamping them tightly may reduce visible bows temporarily but can introduce other problems, such as splits or creases along the fiber grain.

    Refresh Tip: Slow Down to Speed Up Quality

    It’s tempting to rush a heat gun job when paint isn’t peeling or adhesive won’t budge fast enough. But slowing your pace and applying heat consistently over broader areas prevents warp, saves time spent on redoing warped pieces, and improves finish quality.

    You don’t need to overheat. Think of it like baking a cake—you don’t want to burn the edges before the middle is cooked. Scanning gently and monitoring temperature ensures the entire material heats evenly.

    Practical Example: Avoiding Warp on Pine Molding

    When stripping paint from pine molding, I use a 1500W heat gun set at medium (about 550°C max, but dialed down to 400–450°C where possible). Holding the nozzle roughly 4 inches away with a wide fan tip, I move across the molding steadily at about 1.5 seconds per linear inch.

    I check warmth by touching the backside of the molding every 15 or 20 seconds. If it starts getting too hot, I pause and let it cool. This avoids the warped, bowed sections I’ve seen when focusing intensively on small stubborn spots for longer than 30 seconds.

    The result: paint loosens without permanent distortion, and the molding fits back in place without force or fuss.

    Summary: How to Use Heat Guns Without Warping Your Work

    • Keep your heat gun at least 4 inches away when heating broad surfaces.
    • Use the lowest effective temperature setting and moderate airflow.
    • Move the heat gun steadily, keeping sweep rates brisk to avoid overheating.
    • Choose wide fan or flat nozzles for greater heat distribution.
    • Use your hand on the reverse side to monitor heat buildup and pause before temperatures get too high.
    • Avoid lingering over single spots to prevent internal stress buildup and warp.
    • Don’t rely on clamping warped pieces to fix distortion—prevention is better than correction.

    By staying mindful of these techniques, you’ll preserve the integrity of wood, plastics, and composites in your projects. Whether you’re a DIY enthusiast or a professional craftsman, incorporating an informed, measured approach to heat gun work improves long-term results and avoids costly mistakes.

    Adjust your heating habits today to keep your next project straight, flat, and beautiful for years to come.