
Author: jaesoon_admin
-
The Simple Saw Adjustment That Transforms Every Cut You Make
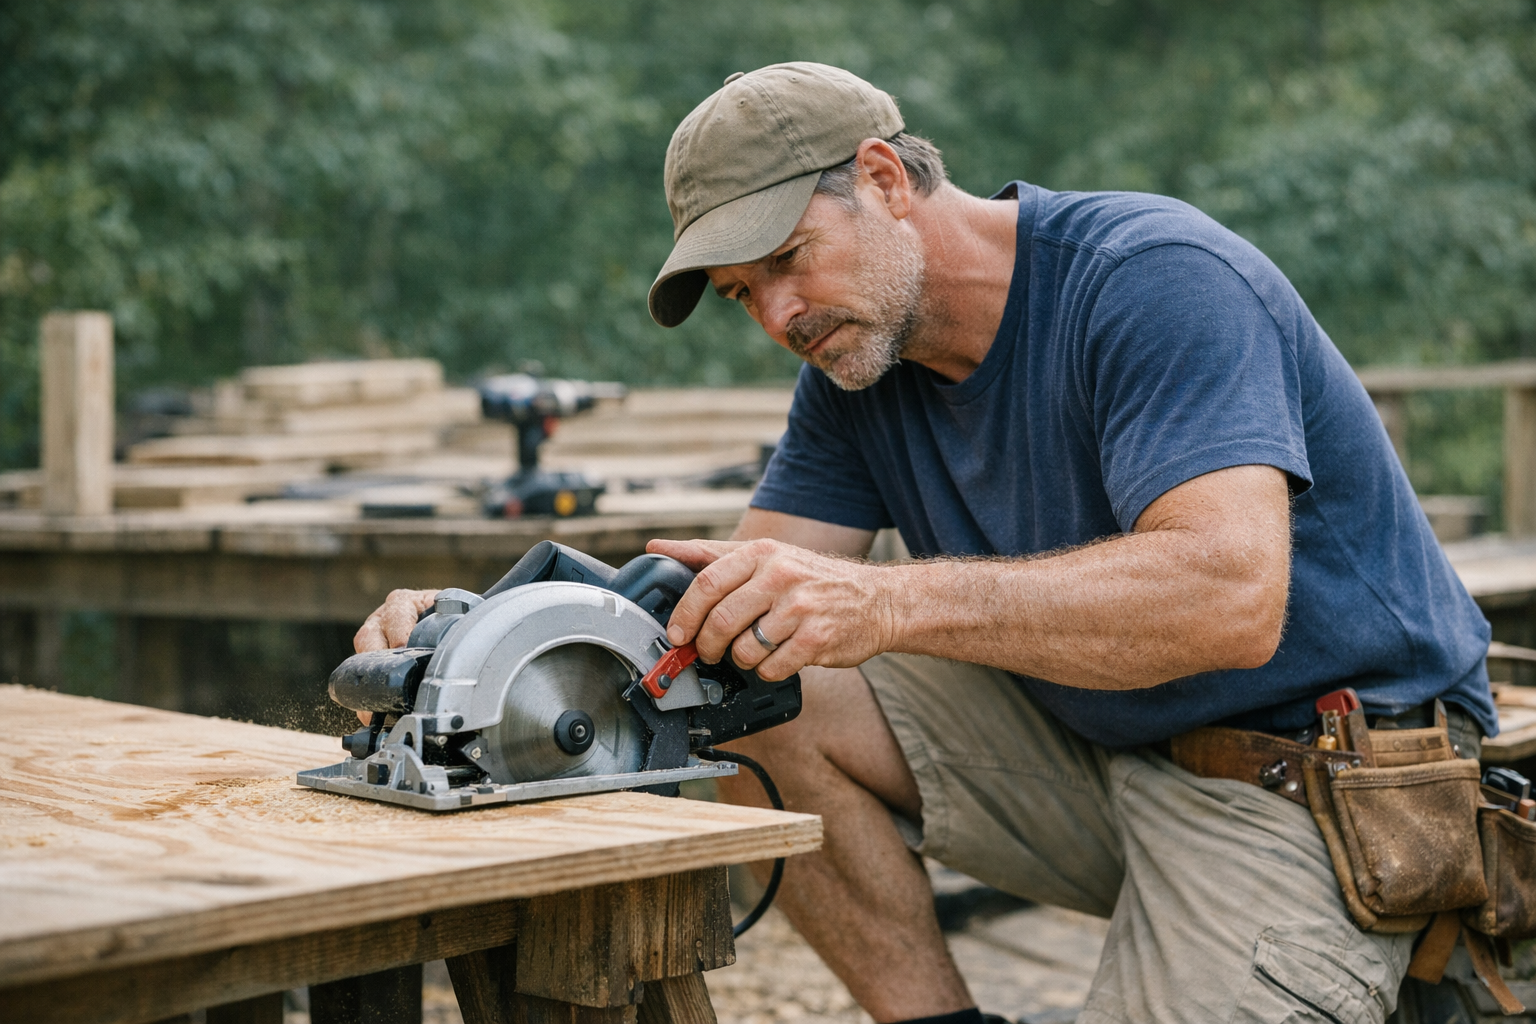
Understanding the Importance of Depth Adjustment on Your Circular Saw
Before plunging into every woodworking project, there’s a subtle but essential step that often gets overlooked: adjusting the blade depth on your circular saw. Many users instinctively set their blade as deep as it will go or neglect to reset for different materials. However, taking the time to fine-tune this setting can be the difference between a messy, splintered cut and a seamless, professional finish—and it can keep your cuts safer and your saw running smoother for longer.
Why Less Blade Exposure Means Better Cuts
The circular saw blade should be positioned to extend just about an eighth of an inch below the material you’re cutting. This minimal blade exposure accomplishes several vital things:
- Cleaner edges: Excess blade below the workpiece tends to tear and splinter the wood fibers, especially on plywood, hardwoods, or composite decking.
- Less kickback risk: Overexposed blades are more prone to binding or catching, which can cause the saw to kick back dangerously.
- Reduced motor strain: The saw operates more efficiently since it’s cutting only through what’s necessary, preserving both blade sharpness and motor longevity.
For example, a typical 7-1/4″ circular saw blade spinning between 4,500 to 5,800 strokes per minute (SPM) cuts best when depth is dialed in accurately. Using the right blade—a carbide-tipped 24 to 40 tooth blade for most jobs—further improves cut quality but won’t compensate for an improperly set depth.
Common Mistakes and Their Consequences
One of the most typical errors is leaving the depth adjustment set too deep after a preliminary cut or not adjusting it when moving between materials of different thicknesses. As a result, the saw teeth bite unnecessarily into the table or materials below the cut, creating rough edges and increasing the chance of kickback. This mistake often leads to greater wear on blades and can quickly turn a controlled, precise saw into a tricky tool to manage.
I witnessed this firsthand during a deck rebuilding project. Midway through cutting long boards, badly splintered edges were the norm, frustrating everyone. Then a teammate pointed out that most of us had our blade depths cranked to their maximum. Resetting the depth so the blade just barely cleared the boards immediately transformed the work: cuts were cleaner, the saw felt steadier, and the whole job became less of a struggle.
A Simple Step-by-Step Guide to Setting Your Blade Depth
Follow these quick steps every time before you start your cut to ensure consistent results:
- Power down: Always unplug the saw or remove the battery before making adjustments.
- Position the base: Rest the saw’s base plate flat on top of the wood you plan to cut.
- Adjust blade depth: Release the depth adjustment lever or knob and lower or raise the blade until it extends approximately 1/8 inch beneath the wood’s underside.
- Lock securely: Tighten the adjustment mechanism firmly to prevent the depth from shifting during cutting.
- Confirm settings: Double-check if you switch from thinner materials like 3/4″ plywood to thicker stock such as a 2×4.
- Choose the right blade: Use blades matched to the material, ideally carbide-tipped for durability and smooth cutting.
Refresh Your Approach: Step Back to Speed Up
It can be tempting to rush through cuts, especially when facing a large volume of work. But consider this: taking just a few extra seconds to pause, set the blade depth properly, and mentally prepare for each cut does more than improve quality—it changes your relationship with the tool. When you slow down briefly, you create a rhythm that reduces fatigue and heightens your focus. The saw runs quieter, vibration drops, and you move with greater control.
This shift in pace also promotes safety, reducing common issues like binding or blade stalling. If your saw stalls, resist the urge to force it—stop, double-check depth and blade sharpness, then proceed calmly. This mindset shifts you from reactive to proactive, making every task feel smoother.
Additional Practical Tips for Circular Saw Success
Maintain Blade Sharpness
Dull blades require more force and are more likely to splinter material or cause binding. Regularly inspect your blade for wear or missing teeth, and replace or sharpen as needed to maintain clean cuts and reduce strain on your saw.
Control Saw Speed When Possible
If your circular saw has variable speed control, adjust it accordingly. Hardwoods benefit from slower blade speeds, which reduce tear-out and blade wear. Faster speeds may be suitable for softwoods but can increase splintering if combined with deep blade exposure.
Final Thoughts
Adjusting the depth on your circular saw is a small step with outsized impact. From cleaner cuts and safer operation to preserving tool lifespan and your own peace of mind, this detail is what distinguishes seasoned professionals and careful hobbyists alike.
Next time you grab your saw, take a moment to check that your blade just clears the material by a little margin. Watch how the tool behaves differently, how your cuts look, and how much smoother your projects go. Over time, this simple habit becomes a hallmark of effective, enjoyable woodworking.
-
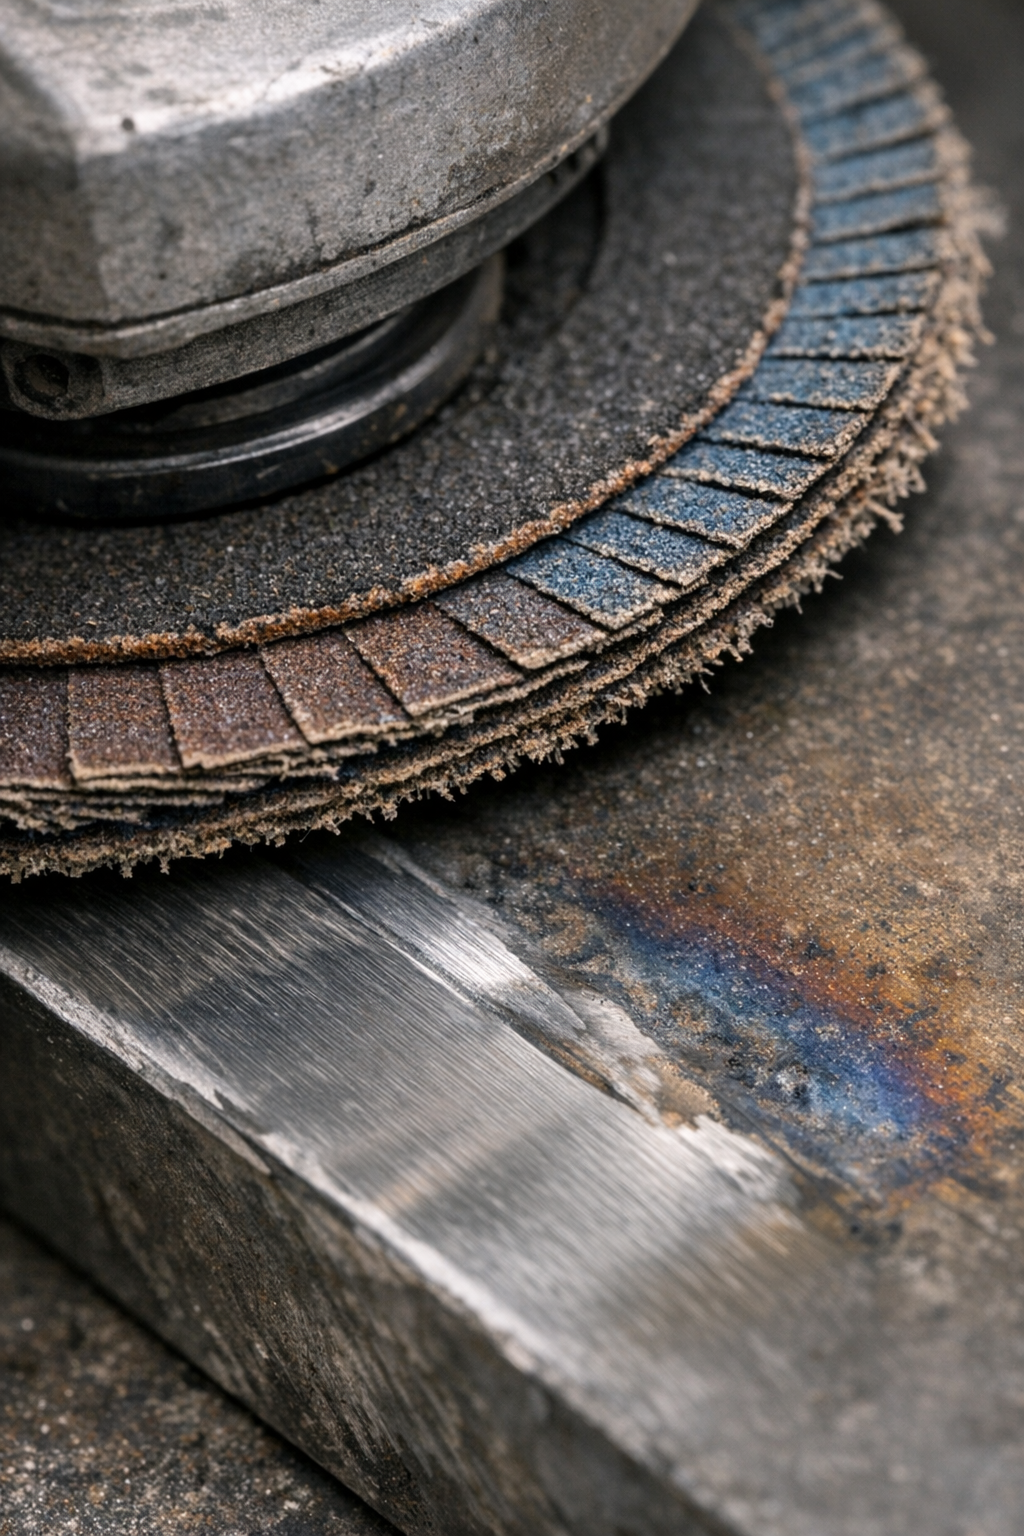
How Choosing the Right Disc Stops Metal Burn Marks Naturally
Understanding Metal Burn Marks and Their Causes
If you’ve ever used an angle grinder to shape or smooth steel and noticed rainbow smudges or discoloration appearing on the surface, you’re not alone. Burn marks on metal are not only a visual annoyance but can indicate damage to the metal itself, affecting both appearance and structural integrity. These marks often show up as blue, gold, or brown hues where localized overheating has occurred due to excessive friction and heat buildup.
The root cause is quite straightforward: grinding generates heat, and when that heat surpasses the steel’s tolerance, it creates discoloration—often referred to as burn marks. In worse cases, the metal’s temper can be damaged, making the piece weaker or more brittle.
Why Grind Disc Choice Matters More Than You Might Think
Most discussions about avoiding burn marks focus on operator technique—speed, pressure, and movement. While these are critical factors, the choice of grinding disc is just as important and often underestimated. Selecting the right disc can make the difference between a clean finish and a piece that requires hours of rework or even replacement.
Grinding discs come in different materials, thicknesses, and grit sizes, each suited for specific tasks. Using the wrong disc—such as a thick, rigid grinding wheel with a coarse abrasive for a finishing pass—can trap heat and leave burn marks more readily, especially on thin sheets or delicate welds.
Hard vs. Softer Discs
Harder grinding discs, typically alumina-based, are aggressive and remove material quickly, but they tend to dig in and build heat rapidly. Softer, resin-bonded discs or ceramic-based discs are designed to break down gradually, exposing fresh abrasive particles and maintaining cooler operation. This slow breakdown reduces the force needed to remove material and helps avoid overheating.
Thickness and Airflow
Thick grinding discs (over 6mm) can trap and focus heat in a small contact patch, increasing the likelihood of burn marks. Flap discs, with their overlapping abrasive petals, allow more airflow and dissipate heat more efficiently, making them especially well-suited for finish work on steel surfaces.
The Role of Grit Size in Preventing Burn Marks
Grit size directly affects how much friction and heat are generated during grinding. Coarser grits (lower numbers, e.g., 36–40) remove material quickly but produce more heat, making them better suited for initial stock removal. Finer grits (higher numbers, e.g., 80–120) generate less friction and produce a smoother finish, reducing heat buildup during the final shaping or blending steps.
Many tradespeople make the mistake of sticking with a single coarse disc for the entire job, which often results in visible thermal discoloration. Transitioning to a finer grit flap disc for finishing dramatically reduces that risk and improves the surface texture noticeably.
Practical Tips for Avoiding Burn Marks When Grinding
1. Use the Right Sequence of Discs
Start with a coarse grit (36–40) for heavy material removal, then switch to a medium grit (60–80) for shaping, and finish with a fine grit (80–120) flap disc. This progression helps remove material efficiently without overheating the metal.
2. Keep the Grinder Moving and Apply Light Pressure
Avoid dwelling too long on one spot. Instead, move the grinder in smooth, even strokes. Let the tool’s weight do the work rather than forcing it. Applying excessive pressure or grinding at a slow speed with a hard disc is a sure way to generate heat rapidly.
3. Choose Thin, Flexible Flap Discs for Finishing
Thin flap discs (around 1.0–2.5mm thick) dissipate heat better and reduce the chance of burn marks, especially when finishing welds or delicate parts. Their flexibility also allows better control and a smoother surface result.
Refreshing Your Approach: The Subtle Adjustment That Makes a Big Difference
One subtle but highly effective adjustment is to consciously pause and check your work in increments—about every 10 to 15 seconds when working on thin material. Take a moment to let the metal cool if it feels hot to the touch before continuing. This slight change adds time but prevents heat buildup that can cause burns. It’s a gentle reminder to work smarter, not harder.
This practice encourages patience and awareness, helping you catch potential issues early on instead of fixing damaged work later. Over time, it becomes second nature and noticeably improves your finish quality.
Real World Experience: Lessons Learned From the Workshop
Midway through a fabrication project involving a visible bracket, I noticed that my usual grinding disc left faint blue and gold arcs on the surface after each pass. Frustrated by the discoloration, I switched to an 80 grit flap disc and significantly reduced the pressure I applied. The results were immediate: the metal retained a natural steel color without burn marks, and the finish felt smoother. Subsequent paint application adhered better, and rework was minimal.
This experience reinforced the importance of disc selection and technique over brute force. By matching the disc to the task and respecting the metal’s heat tolerance, better outcomes are achievable without investing in specialized tools.
Summary: Key Takeaways for Preventing Metal Burn Marks
- Choose softer, resin-bonded or ceramic-based discs for finishing stages to reduce heat buildup.
- Use a progressive grit sequence from coarse to fine to minimize thermal damage.
- Opt for thin, flexible flap discs in finishing passes to improve airflow and heat dissipation.
- Keep the grinder moving using light, even pressure and allow metal to cool periodically.
- Remember that patience and disc changes are small investments with big payoffs in finish quality.
Paying close attention to these factors will help you prevent burn marks, improve surface finishes, and save time on rework—ultimately raising the quality of your metalwork projects.
-
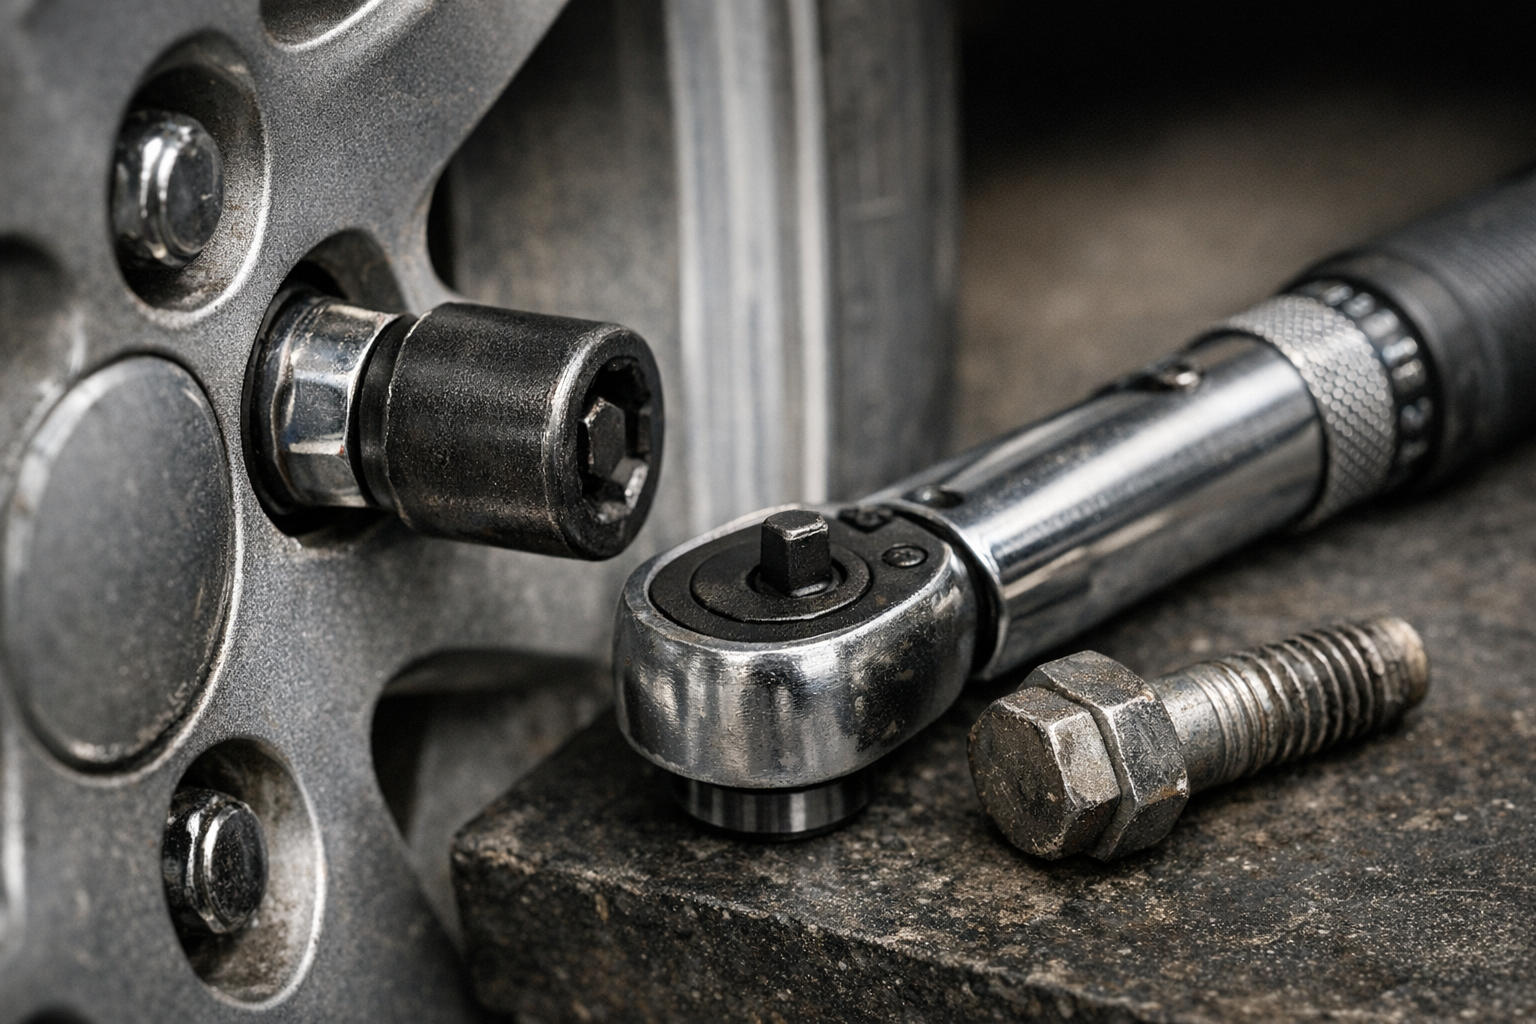
The Simple Torque Habit That Protects Your Bolts Every Time
The Hidden Risks of Over- and Under-Torquing with Impact Wrenches
We’ve all experienced it: tightening that final lug nut with an impact wrench, feeling confident, only to realize moments later that you may have either stripped the threads or left the fastener too loose. Impact wrenches are incredible tools that speed up fastening tasks dramatically, but with their strength comes a fine line between efficiency and damage.
These powerful tools can easily exceed recommended torque limits, which leads to stripped threads, snapped bolts, or under-tightened connections that loosen over time. The manufacturers provide specific torque specs for good reason, but many users rely on the tool’s sensory feedback alone—often leading to unintended damage or frustrating rework.
Why Torque Matters More Than You Might Think
Torque measures the rotational force applied to fasteners, and each bolt or nut has a recommended torque range to ensure it holds securely without damaging the threads or the surrounding material. For example, most passenger vehicle lug nuts require an 80–100 ft-lb torque. Yet impact wrenches on medium or high settings can exceed 150 ft-lbs, surpassing safe limits especially when dealing with softer materials like aluminum or zinc alloys.
When a bolt is over-tightened, you risk damaging—or stripping—the threads. On steel-to-steel fasteners, damage might not be obvious immediately, but upon disassembly, a stripped or stretched thread can turn a straightforward job into a significant challenge. On softer metals, the damage often reveals itself right away, reducing fastener integrity and safety.
Conversely, under-tightening leaves assemblies vulnerable to vibrations, which can loosen bolts over time. This is critical in applications ranging from automotive suspensions to flooring systems, where failure due to loose fasteners can cause safety hazards or accelerate wear.
Common Pitfalls: Relying on Feel and Sound Alone
One of the biggest mistakes is relying solely on the “feel” or “sound” of an impact wrench to judge if the bolt is tight enough. This method is unreliable as high-powered impacts can mask the actual resistance felt, particularly when working with varying fastener sizes or materials. A bolt can feel tight but still be far from its required torque, leading to inconsistent and potentially unsafe results.
A Simple Two-Step Process to Protect Your Bolts
After experiencing firsthand the frustration of stripped bolts and seized fasteners, I adopted a straightforward yet effective habit: I always start with the lowest torque setting on my impact wrench and finish with a manual torque wrench set precisely to the manufacturer’s specification.
Most modern impact wrenches have multiple torque settings—commonly low, medium, and high. The high setting is tempting because it’s fast and seemingly efficient, but it’s also where most damage happens. By using the low setting, I ensure that bolts are seated without excessive force applied too quickly.
Once the fastener is firmly in place, I switch to a manual torque wrench to perform the final tightening step. This approach takes an extra 30 seconds per fastener but dramatically reduces the risk of thread damage, snapped bolts, or under-tightening.
Practical Tip: Marking Torqued Fasteners
To keep track of which bolts are tightened properly—especially in assemblies with many fasteners—I use a paint marker to add a small dot on each nut or bolt head. This visual cue helps prevent accidental skipping or double-tightening and improves workflow accuracy.
Real-World Application Examples
When working with common fasteners like M6–M12 bolts or T20–T40 Torx screws found in automotive, machinery, or even heavy furniture construction, this method has saved countless headaches. Soft metals like aluminum wheels or engine components benefit the most since they’re more prone to thread damage.
Similarly, in flooring and structural furniture assembly, where fasteners are subjected to vibration and shifting, ensuring each bolt is properly torqued prevents premature loosening and structural failures.
Refreshing Your Approach: Slow Down to Speed Up
It may seem ironic, but intentionally slowing down to double-check torque settings leads to faster, smoother projects. This subtle mindset shift—from rushing to finish to respecting the precise application of torque—builds a rhythm that improves quality and saves time in the long run. It’s not about adding steps for complexity; it’s about making each step smarter.
By embracing patience and precision, you create more durable, reliable assemblies that perform better and last longer. This refreshed perspective transforms fast and sloppy work into efficient craftsmanship.
Lessons Learned and Final Advice
From personal experience, skipping the final torque verification using a manual wrench is a costly mistake. On one project, I torqued lug nuts on my car’s wheels using the impact wrench’s highest setting. Months later, removing the wheels revealed one stuck bolt ruined by stretched and fused threads, costing an afternoon of drilling and extraction.
Since then, I strictly adhere to the two-step method: low setting on the impact wrench for fast initial engagement, followed by a carefully calibrated manual torque wrench for final tightening. This approach has eliminated stripped bolts for me and improved overall work quality.
Remember, your power tools are there to make your work easier—not a substitute for accurate technique. Next time you reach for your impact wrench, take that moment to adjust the torque setting to low and commit to the final torque check with a manual wrench. Your bolts, tools, and peace of mind will thank you.
-
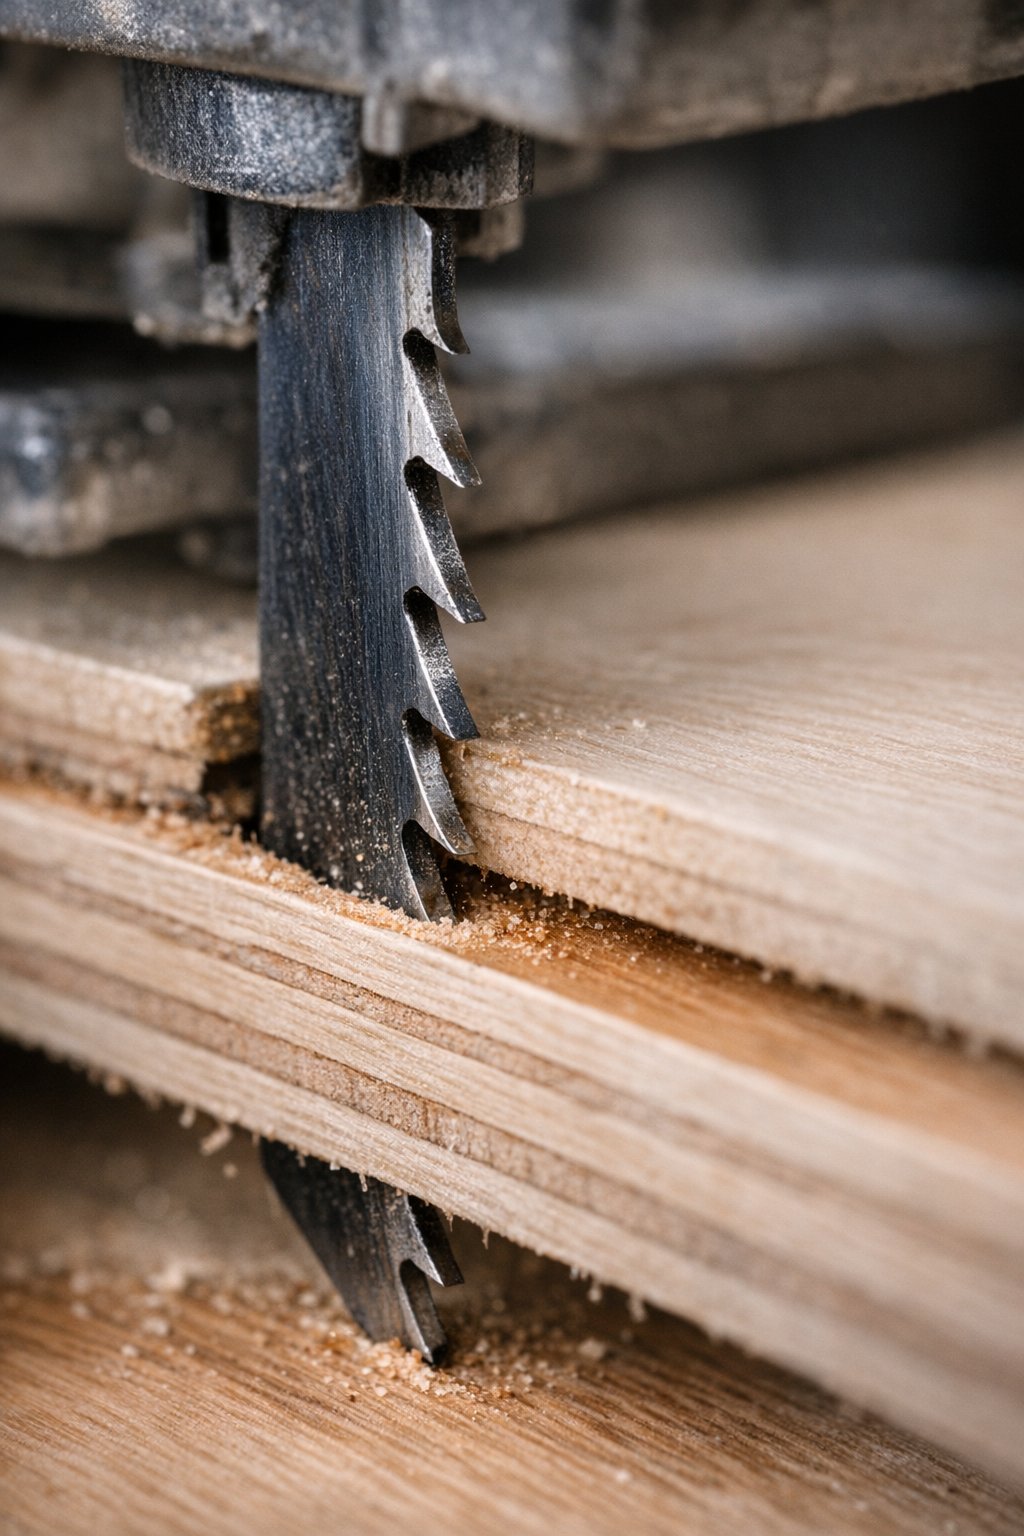
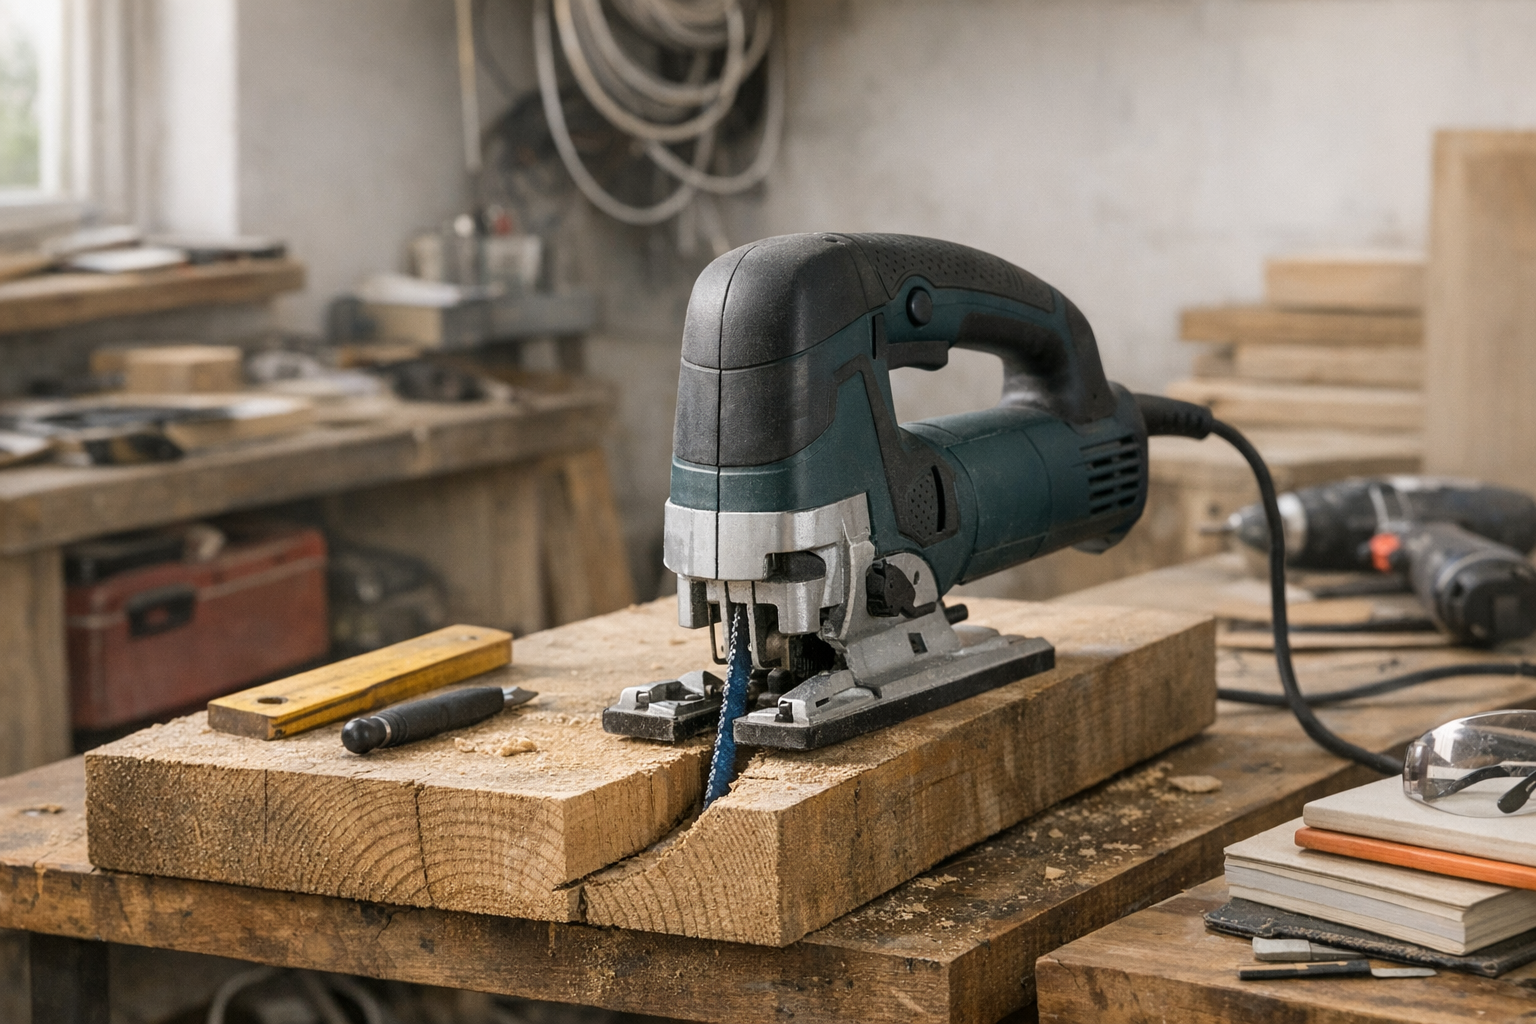
How a Reverse-Tooth Blade Transformed My Woodworking Cuts
Understanding the Challenge of Edge Splintering
Anyone who has worked with a jigsaw on plywood or veneered boards knows the frustration of seeing splintered edges after a cut. Edge splintering, also known as tear-out, occurs when the saw teeth pull wood fibers upward instead of cleanly slicing through them. This is especially problematic on plywood, laminate furniture panels, or any woodwork where clean, sharp edges are essential.
While factors like cutting technique and tool quality influence the outcome, the choice of blade plays the most critical role in minimizing tear-out. Not all jigsaw blades are created equal, and understanding their design can help you achieve professional, splinter-free finishes.
How Tooth Design Affects Splintering
Standard jigsaw blades feature upward-pointing teeth meant to cut on the upstroke. This upward motion naturally lifts wood fibers on the top surface, often causing splintering on the visible side of a board. The problem worsens with plywood and veneered materials because the thin top layer easily tears as the blade exits.
Using a blade with the wrong tooth-per-inch (TPI) count can make things worse. For delicate surfaces, blades with 10 to 20 TPI offer a good balance—fewer teeth tend to rip fibers, while too many can generate heat and burn the wood.
Implementing a thin-kerf blade (around 1 mm) reduces the volume of material removed per cut. This subtle difference means less resistance and a smoother finish, further decreasing splinter risks.
Reverse-Tooth Blades: The Key to Clean Cuts
One of the most effective ways to prevent splintering is to use reverse-tooth (or down-cut) blades. These blades have teeth pointing downward, which means the cutting action maintains pressure on the wood fibers at the top surface, preventing them from lifting and tearing.
When the blade travels upward through the board, the downward-pointing teeth slice the surface fibers cleanly. This produces glassy smooth edges on the top—the “show” side—without splintering or chipping.
From personal experience and many woodworking projects, swapping to a reverse-tooth blade made a dramatic difference on visible shelf panels and decorative plywood. It removes the need for excessive sanding or post-cut edge repairs, saving substantial time and effort.
Optimizing Your Cutting Setup
To get the best results with reverse-tooth blades, match your jigsaw’s speed and feed rate accordingly. A cutting speed between 1000 and 1800 strokes per minute (SPM) usually provides a solid balance. Too fast, and the blade heats up and dulls prematurely; too slow, and you risk melting or rough cuts.
Feed pressure also matters. Apply moderate, steady force allowing the blade to do the work rather than pushing it aggressively. Attempting to force a cut through dense plywood or melamine can cause the blade to wander or burn the surface.
Practical Tip: Use a Sacrificial Scrap Board
Clamping a thin scrap board directly on top of your workpiece is a simple but highly effective trick to reduce edge splintering. This sacrificial layer provides several benefits:
- Holds surface fibers in place to prevent them lifting
- Absorbs exit pressure as the blade leaves the material
- Dampens vibration, stabilizing the cut line
When you remove the scrap board after cutting, you’re left with a flawless top surface. For best effect, match the sacrificial board’s thickness and density to your workpiece (around 6–10 mm plywood works well). Too thin and it won’t protect enough; too thick and it may interfere with cutting depth or blade control.
Blade Quality and Maintenance Matter
Not every reverse-tooth blade is reliable. Cheaper blades may overheat, leave burn marks, or dull quickly, especially on tougher materials. Investing in well-made blades with fine, precise tooth sets designed for veneers, laminates, or plywood will ensure cleaner cuts and longer service life.
Look for blades made from high-carbon steel (HCS) or bi-metal constructions. Bi-metal blades are tougher and resist dulling, holding their edge 2 to 3 times longer than basic carbon steel alternatives in medium-density fiberboard.
Keeping your blades clean is vital. Resin and dust build-up increase friction and heat, accelerating wear. After cutting, brush off debris or blow it out with compressed air to keep the blade running cool and sharp.
Cutting Technique and Blade Orientation
Most woodworkers cut with the visible side facing upward. This is perfect when using reverse-tooth blades, which protect the top surface. However, with standard up-cut blades, the best approach is to put the show face down, as the splintering tends to occur where the blade exits.
By matching blade orientation and tooth direction, you can ensure the cleanest possible finish on the side that matters most. This is especially critical when working with high-value plywood or premium veneers where edges must be paint-ready or glued seamlessly.
Refresh Tip: Manage Your Cutting Rhythm
Long continuous cuts, especially through dense melamine or hardwood plywood, can cause blades to heat and warp, leading to scorched edges or uneven cuts. To prevent this, let your blade rest for a few seconds after every 40–50 cm of cutting. This brief pause cools both the blade and motor, extending blade life and preserving edge quality.
Common Pitfalls and How to Avoid Them
- Too Fast Cutting Speed: Rushing fades edges and burns the wood. Maintain moderate speed for clean results.
- Incorrect TPI Selection: Using blades with too few TPI on veneers leads to tear-out; too many can overheat quickly.
- Ignoring Blade Maintenance: Dirty blades degrade performance – keep them clean and sharp.
- Not Using a Sacrificial Board: Overlooking this simple measure can mean extra sanding or damaged edges.
Conclusion
Edge splintering can derail even the most carefully planned project if not addressed properly. By focusing on the right blade type—primarily reverse-tooth blades—paired with appropriate cutting speed, feed pressure, and sacrificial clamping boards, woodworkers can consistently achieve clean, professional cuts.
This combination reduces tedious sanding, preserves valuable materials, and elevates the quality of final work. Whether you’re a hobbyist or a professional, these techniques will enhance your jigsaw cutting results on plywood, laminates, and veneered panels.
-
Why Jigsaw Blades Bend on Thick Cuts—and How to Stop It
Understanding Why Jigsaw Blades Bend on Thick Material
If you’ve ever struggled to make a straight cut with a jigsaw through thick wood or plastic, you know how frustrating it can be when the blade starts to bend or wander off course. Despite how simple jigsaws seem, cutting deeper into thick stock often reveals an unexpected challenge: the blade flexes, causing curved or uneven cuts.
This isn’t just a matter of a cheap blade or faulty tool. It’s a complex interaction involving blade design, material characteristics, and technique. Let’s break down what’s really happening inside your jigsaw as you cut through thick material.
The Physics of Blade Bending
Jigsaw blades are intentionally thin—usually between 0.6 mm and 1.2 mm thick—to allow them to move quickly and make curved cuts easily. However, this thinness also makes them vulnerable to deflecting under pressure. When a blade is cutting through wood thicker than about 2 inches (50 mm), more material pushes against both sides of the blade, creating friction and resistance.
The deeper the cut, the more leverage the blade has to bend sideways. If you push or speed up the cut too much, the blade bows under the load instead of cutting straight down.
Common Causes of Blade Bending and How to Avoid Them
1. Blade Selection and Geometry
Blades with fewer teeth per inch (TPI), such as 6–10 TPI, allow faster cutting but tend to be more flexible. Finer blades (14–24 TPI) have higher stiffness and hold straighter cuts in thick materials, though they cut more slowly. Also, blades designed for deep cuts are usually wider and thicker (around 7 mm wide and 1.2 mm thick) and made from bi-metal or high-speed steel (HSS), which offer better resistance to bending.
2. Incorrect Orbital or Pendulum Action Settings
Many jigsaws feature orbital action that moves the blade in an elliptical pattern for faster and more aggressive cuts. While great for thin or soft materials, orbital action increases lateral forces on the blade when cutting thick stock, causing it to flex and wander.
Solution: When working with thick materials, set the orbital action to zero or the lowest setting. This keeps the blade moving straight up and down, minimizing side stress.
3. Excessive Feed Pressure and Speed
Applying too much pressure or pushing the saw through thick material too quickly forces the blade to bend. Conversely, cutting too fast increases friction and heat, further softening the blade and leading to deflection.
Solution: Let the blade set the cutting pace. A typical speed range for thick hardwoods or dense plastics is 500–1000 strokes per minute (SPM). Resist the urge to muscle your way through the cut.
4. Tool Misalignment and Base Plate Angles
If the base plate isn’t perfectly square to the blade—often a subtle 1–2 degree tilt—it worsens blade deflection on deep cuts. Over time or with impacts, your jigsaw’s shoe can become misaligned.
Solution: Use a carpenter’s square or try cutting a test board. If the cut isn’t perpendicular, inspect and adjust the base plate or seek repairs. Even small angles off vertical translate to visibly crooked deep cuts.
5. Dull or Damaged Blades
A dull blade doesn’t cut efficiently; it scrapes instead, generating excessive heat and causing the blade to soften and bend. You may also notice burn marks or smoke.
Solution: Replace blades regularly, especially before deep cuts. Keep extra stiff bi-metal blades on hand designed for your material type.
Real-World Experience: Lessons from the Workshop
Early in my woodworking journey, I treated jigsaws like magic sticks: point, cut, done. But thicker boards revealed the limits quickly. My blades would bend, wander, and sometimes break.
The game-changer came when I consciously slowed my pace and paid attention to the blade’s behavior. Instead of forcing a cut, I allowed the blade to “lead.” If the blade moaned or the cut started to stray, it was a signal to relax my grip and ease off straight away.
I also started to pause every 30 to 60 seconds during thick cuts. This brief rest lets the blade cool down, preventing heat-induced warping and increasing blade longevity.
Refresh Tip: Shift Your Mindset from Rushing to Listening
It’s easy to get tunnel vision when focused on finishing a project quickly, but stepping back can bring surprising improvements. The next time you feel tension or frustration while cutting, pause and listen to your saw. How does the blade sound? Is it cutting smoothly or laboring? Does it seem to be bending? Let this feedback guide you rather than pushing harder.
Tips to Achieve Straighter Cuts on Thick Material
Choose the Right Blade
- Opt for wide, stiff bi-metal blades with a thickness around 1.2 mm for stability.
- Match TPI to material density: 10–14 TPI works well on hardwoods and plastics.
- Consider blades labeled for plunge cuts or thick-stock use.
Adjust Your Saw Settings
- Set orbital/pendulum action to zero for cleaner, straighter cuts in thick stock.
- Use moderate speed (500–1000 SPM) based on material resistance.
Perfect Your Technique
- Feed the blade gently, let it do the cutting.
- Pause regularly to let the blade cool, especially on cuts deeper than 1–1/2 inches.
- Inspect and straighten the base plate if necessary.
When Cutting Thick Materials, Patience Pays Off
Blade bending isn’t a failure or a sign that your jigsaw can’t handle the job—it’s a natural consequence of physics. The right combination of blade choice, saw settings, and a bit of patience transforms a frustrating challenge into a manageable process.
Once you master these subtle adjustments, you’ll notice straighter, cleaner cuts and less material waste. Your blades last longer, and your confidence in tackling thick stock will grow.
Remember, a jigsaw that feels like an extension of your hand—not a tool you fight against—comes from understanding the tool’s physics and tuning your technique accordingly.
-
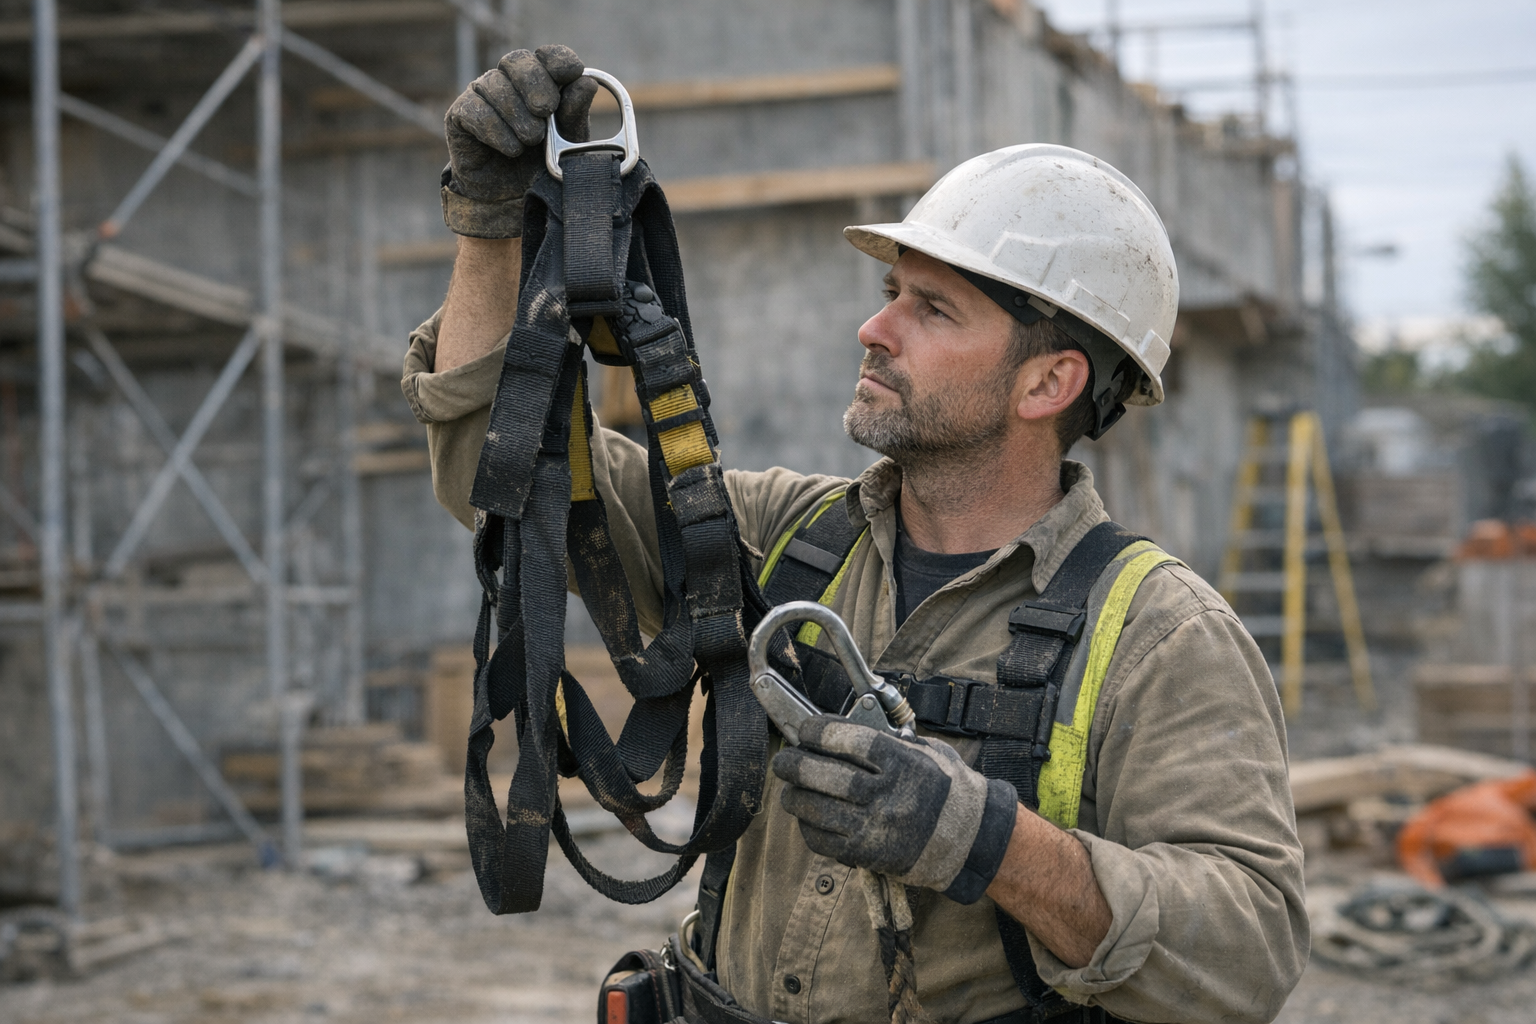
Why One Small Twist Quietly Undermines Your Safety Gear

Every worker who uses fall protection gear knows the importance of safety checks before climbing or working at height. Securing your harness and lanyard properly can make the difference between a safe shift and a life-threatening accident. While many people focus on fall hazards, one often overlooked risk is how a small twist in a lanyard can silently degrade its strength, sometimes without visible warning.
The Hidden Danger of a Twisted Lanyard
Picture a busy job site. You clip in quickly, checking your harness but giving less than full attention to your lanyard’s orientation. Maybe the webbing crossed over itself, or you stepped on it, introducing a half twist without realizing it. This minor misalignment may feel negligible, yet it sets off a dangerous chain reaction.
The internal fibers of a lanyard are designed to carry distributed loads along their length. When twisted, the fibers experience friction and bending stresses that they don’t normally encounter. Each movement causes microscopic abrasion inside the webbing, gradually weakening the structure long before any external damage becomes visible.
According to international standards like EN 354 or ANSI Z359.13, lanyards must withstand forces up to 22 kN (about 5,000 pounds) to ensure reliable fall arrest performance. However, repetitive twisting is not part of these test conditions. In real-world use, a twisted lanyard can lose tearing resistance repeatedly under normal load cycles, and the breaking strength may degrade significantly over time.
How Twisting Affects Load Distribution
During a fall, the harness’s dorsal D-ring and the sub-pelvic and thigh straps are engineered to share the arrest forces efficiently—roughly 60–70% through the pelvic and legs, with the remainder through the shoulders. This distribution minimizes risk of injury and suspension trauma by reducing localized stress and pressure.
A twist distorts this load path. Instead of forces traveling straight along strong, aligned fibers, the load concentrates on kinked or pinched sections that aren’t designed to handle such stress. This increases the chance of fiber breakage and potential failure at loads well below the rated breaking strength.
Moreover, improper alignment can shift load onto sensitive anatomical structures, increasing risks of circulation impediment during suspension. Suspension trauma, caused by restricted blood flow in the legs under hanging conditions, can develop quickly—potentially within minutes.
Recognizing and Managing Twist-Related Wear
One challenge is that early damage from twisting is often hidden inside the webbing or in areas obscured by equipment. Visible signs might be subtle: stiffened segments, hard spots, or slight creases that don’t feel natural. Because of this, reliance solely on visual inspections can lead to missing early warnings.
A simple but highly effective method is performing a tactile check every time you gear up. Run two fingers along the full length of the lanyard from anchor to harness connection, feeling for any unusual stiff areas, raised fibers, or twists. If you detect even a minor twist, unclip and gently shake or straighten the lanyard before reconnecting. This “Twist-Check” habit takes only seconds but strongly reduces the silent buildup of internal stress.
Real-World Example: The Cost of a Neglected Twist
On a rainy afternoon, a seasoned worker hurried to secure his anchor point before wrapping up the day. Clipped in but distracted, he only glanced at his lanyard visually and didn’t feel for twists. Later, he noticed an unfamiliar tug beneath his shoulder blade. Investigating, he found a tight twist near the connector—a spot prone to rubbing during motion and moisture exposure.
If this issue had gone unnoticed during further workdays, the lanyard could have deteriorated internally to the point of failure, particularly under dynamic loading. This near miss highlights why the extra attention to lanyard alignment is critical for safety.
Practical Tips to Prevent Twist-Related Failures
- Perform the Twist-Check: Before starting work, run your fingers along your lanyard’s entire length to identify and correct any twists or kinks.
- Be Mindful During Movements: Avoid stepping on your lanyard and be careful when moving around anchor points to prevent unintentional twisting.
- Inspect Frequently: Regularly check your lanyards for any abnormal stiffness, bulges, or discoloration. If any damage is suspected, remove the equipment from service.
- Train Your Team: Share knowledge about twist-related wear with colleagues to develop a culture of safety vigilance.
Refresh Tip: Shift Your Focus to Daily Micro-Checks
Safety isn’t just about big actions like using harnesses or anchors correctly; it’s about cultivating small, consistent habits that catch problems before they grow. Incorporating a quick tactile check of your lanyard into your gearing routine not only prevents silent material fatigue but also resets your mental focus. This moment of mindfulness sharpens awareness and helps ensure you’re fully engaged before climbing or working at height.
Why Small Actions Matter—Preventing Catastrophic Failures
Many serious fall protection failures start with seemingly insignificant missteps. A single twist in the webbing might not cause immediate problems but can cascade into critical damage under real-world conditions, especially when combined with moisture, dirt, and normal wear.
Creating a routine that includes the Twist-Check interrupts these silent damage pathways, maintaining your gear’s full rated strength and protecting your safety margin.
Conclusion
The next time you prepare for work at height, remember that the safety of your lanyard depends on proper alignment and attentive care. The twist may be small, but its impact can be deadly. By taking the few seconds to run your fingers along your lanyard, straighten any twists, and maintain a tactile inspection habit, you safeguard yourself and your coworkers from preventable accidents.
Routine care and awareness are your best allies in preserving the life and strength of your fall protection gear. Safety is a daily responsibility that starts with small details—don’t underestimate the power of a simple twist check.
-
The Silent 5-Second Habit That Could Save Your Life Today
Why a Quick Harness Check Matters Every Time
Every day on the job, just before you climb up a scaffold or secure yourself to a harness, there’s a brief but critical moment. You might glance at your gear and ask yourself, “Did I really check this thoroughly?” It’s tempting to rush, especially if you’ve worn that harness dozens of times with no issues. But that small pause for a quick inspection can literally mean the difference between a routine workday and a catastrophic fall.
Safety gear is designed to protect, but it wears down with use. Harnesses endure rough conditions—exposure to weather, dirt, chemical spills, and accidental damage during transport and storage. Overlooking minor wear and tear can lead to serious failures when you least expect them. That’s why developing a consistent 5-second harness check routine is a vital habit for anyone working at height.
Common Hazards That Wear Out Your Harness
People often assume, “If it looked fine yesterday, it’s fine today.” However, harness webbing and hardware can degrade quickly depending on usage and environment. Some typical issues include:
- Frayed or cut webbing: Even a small nick or thin spot can reduce the strength dramatically. The synthetic fibers used in harnesses carry high loads—but damage weakens their integrity.
- Dirt and chemicals: Mud, grit, and especially solvents can embrittle or corrode materials, hidden from casual sight.
- Bent or corroded metal buckles: These are critical for secure fit and connection. Rust or damage compromises locking mechanisms and load-bearing capability.
- Twisted or misrouted straps: Webbing must lie flat to distribute force evenly in a fall. Twists can cause localized pressure points and increase injury risk.
Regulatory standards like EN 361 in Europe or ANSI Z359 in the U.S. mandate minimum strength requirements (often 15kN or more in static tests) for harness components. Any visible damage puts your harness out of compliance, regardless of how minor it looks.
How to Perform a 5-Second Harness Check
Taking just a few seconds before each use to inspect your harness can prevent a lifetime of regret. Here’s a straightforward routine anyone can apply:
- Hang the harness by the dorsal D-ring: Grab the back D-ring and let the harness dangle freely. This simple step straightens out all straps, making it easier to spot twists, misalignment, or tangling.
- Run your hands along every strap: Feel for rough patches, thinning, or cuts. Use your fingers to detect any raised threads or irregularities invisible to your eyes. Even a small catch can indicate hidden damage.
- Inspect buckles and connection points: Open and close all buckles to check for smooth movement and full closure. Any grit, stiffness, or deformation can affect locking ability during a fall.
- Check the lanyard connectors and carabiners: Make sure gates close fully and locks engage properly. A jammed gate or partial closure is a frequent cause of tie-off failures, especially if environmental elements like sand or ice are present.
- Verify fit and adjustment: Ensure straps are flat, untwisted, and adjusted properly. Thigh straps should be snug but not too tight (allow 2–4 finger widths). Poor fit increases suspension trauma risk if a fall occurs.
Understanding Suspension Trauma and Proper Fit
Incorrect harness fit isn’t just uncomfortable; it can be dangerous. Suspension trauma occurs when blood circulation is restricted during prolonged hanging, potentially leading to unconsciousness within minutes. Properly adjusted sub-pelvic straps distribute forces evenly across the pelvis and thighs, reducing pressure points and improving blood flow.
When a fall is arrested, the dorsal D-ring channels most shock loads through the harness: roughly 60% through the thigh straps and the rest via shoulders. Ensuring straps aren’t twisted or loose helps keep these forces balanced and lowers injury risk.
A Real-World Example: The Power of Hesitation
A colleague once spilled his harness onto a gritty, damp surface right before a climb. Without his usual check, he almost strapped in. But a brief 5-second review caused his hand to catch on some frayed webbing near a buckle. Taking an extra moment to examine detected a hidden cut beneath the stitching. Replacing the harness that day likely saved him from a horrific accident.
In contrast, a coworker who skipped proper adjustment one day ended up suffering a classic suspension trauma event after just ten minutes working suspended off a roof edge. His thigh straps were too loose and twisted, restricting circulation. He required prompt medical attention due to numbness and swelling.
Refresh Tip: Make Your Checks Automatic and Stress-Free
Check routines can feel like just another chore, especially early mornings or during busy shifts. But a simple mindset shift can help — view the 5-second harness check as an act of respect toward yourself and your team. It’s less about compliance and more about ensuring you return home whole.
Try combining the check with another morning ritual, like tying your boots or pulling on gloves. Linking actions turns the check into instant habit—no extra time, no mental clutter.
Benefits Beyond Safety: Confidence and Awareness
Consistent quick checks do more than catch gear issues. Over time, you develop a tactile familiarity with your equipment. You’ll notice subtle changes—how the buckles feel when they’re slightly loose, or how webbing ages and handles stress.
This heightened field awareness builds confidence. Instead of second-guessing your setup mid-shift, you get that reassuring sense, “My gear is solid, and I’m ready.” That calm certainty can improve focus and reduce accident risk overall.
Final Thoughts: Is Your Routine Enough?
Ultimately, safety on heights demands more than rules or regulations—it requires steady habits and disciplined awareness. Taking just five seconds to inspect your harness before every climb isn’t an inconvenience; it’s a crucial step that protects your life.
Ask yourself honestly: does your daily routine leave room to detect small problems before they escalate? Building that extra moment into your workflow can turn a simple habit into a lifesaving reflex.
Remember: Your harness is your lifeline—not just another piece of equipment. Treat every check with respect, and you’ll climb with greater confidence, every time.