Author: jaesoon_admin

  • Why Visible Storage Transforms Everyday Car Clutter Into Order

    A car interior that looks organized almost never stays that way under real, repeated use. Fast commutes, quick errands, and back-to-back stops expose design flaws instantly: chargers jam inside closed compartments, phones slip into unreachable gaps, and “tidy” storage turns into a scavenger hunt by the third or fourth drive. The line between an organized car and one that actually works for everyday routines isn’t just cosmetic—it’s measured in seconds wasted, items lost, and frustration that keeps returning.

    When Order Looks Right but Feels Wrong

    Factory layouts promise neatness with deep center consoles, sealed glove boxes, or slim door pockets. But the moment routines take over—fishing for gum at a stoplight, juggling keys and groceries, or charging on the go—these same compartments invite trouble. What’s out of sight doesn’t stay in mind: you reach for your cord and hit a tangle, sunglasses hide under street maps, and receipts crawl out from seat cracks with every turn.

    Returning to your car after a day out, the illusion drops: you’re forced to dig through the armrest for a charger you needed two minutes ago, or shove aside a pile of wrappers that seemed “handled” just one trip earlier. Small clutter lands right where you need fast access—seat edges, floor corners, cup holders—making a supposedly organized cabin feel clumsy whenever you’re in motion.

    The Repeated-Use Reality: Why Clutter Returns

    Prettiness fades when car traffic rises. Front-seat floors become the hold zone for bags or gym shoes, and quick handoffs override any hope of keeping smaller essentials neatly buried. Compartments with lids or zippers are rarely used once you’re actually pressed for time—so phones wind up on seats, snacks get jammed into visible ledges, and anything not instantly reachable just drifts out of order.

    Say you end a call as you pull in to park. If “putting your phone away” means popping a lid and cramming it into a shadowy bin, you’ll skip it half the time and let the phone ride shotgun until it eventually slides toward the door. Every ignored moment adds up—multiplied by rushed departures, changing passengers, and last-minute charging. Mess outpaces memory, and cleaning means chasing things that escaped the compartments entirely.

    Persistent Friction in Familiar Zones

    Clutter has its favorite landing zones: seat edges fill with receipts, center trays pile up with loose change and wipes, door pockets get stuffed when cup holders fail to fit another bottle. The source isn’t too many accessories—it’s the lack of visible, open storage in your high-use grab zones. And every extra second spent searching equals a little more friction injected into your routine.

    Hidden Storage: The Double-Edged Sword

    Packed bins and zippered organizers hide clutter—for about a day. Try retrieving a tangled charging cable while merging, or digging out wipes with one hand during school pickup, and the hidden solution feels like a trap. Convenience always beats aesthetics under real-world pressure: a neat surface with a jammed interior still leads to routine disruptions, lost time, and more “temporary” stashing that never gets reversed.

    Over a busy week, that deep compartment or covered tray quietly fills with “just for now” stash—random mail, snack packs, dead chargers—until cleanout day exposes the backlog. Visually clean doesn’t mean functionally better. Out-of-sight order breeds its own chaos, especially once the shuffling of daily use starts.

    How Visible Storage Changes the Routine

    Open organizers, center trays, and catch-alls in sight make the difference obvious. Instead of defaulting to any open ledge, your hands reflexively return the key, cable, or sunglasses to a seen, natural spot. No brainpower lost on digging or remembering. This small structural change—adding a slim tray or visible bin in the zone you most often reach—interrupts the cycle of drift and disappearance.

    This doesn’t demand overhauling your whole layout. Just a shallow, clearly-placed organizer lets your most-used items return instantly and stay put—removing both hidden mess and the slow drag of recurring searches. Extra, less-needed gear can live in the doors or trunk, while your in-and-out essentials stay always at hand, without friction or hunt time.

    Real Scenes: When Setup Makes the Difference

    • Returning to your car with groceries in hand, you drop keys and phone into a visible tray—no more half-blind pawing by the seatbelt or watching a phone flip out onto the floor.
    • On repeat school runs, snack wrappers and receipts land in an open trash bin—no more scraping under the seat two days later.
    • When switching drivers, nobody asks, “Where do I put my sunglasses?” They’re dropped in the same open pocket every time—accessible, obvious, and done.

    Each of these small shifts attacks specific pain points: cleaner re-entry, less missed gear, and faster transitions without the routine drag. The car adapts to your habits, not the other way around.

    Why Clutter Keeps Returning—Even in Neat Cars

    Organizing for looks isn’t enough. If your storage doesn’t match the daily motion—grabbing, dropping, swapping, and charging—mess always returns. A pristine console on Saturday is crammed with missed items by midweek, and anything not open or at hand is quickly forgotten. The high-traffic spots tell the real story: when “storage” means hidden, order falls behind nonstop access, and the neatest setup feels slower, not easier, after a few rounds.

    The right organizing setup isn’t about showroom minimalism. It’s about making the car adjust to the churn of actual use—meeting clutter at the source, not weeks later, and sparing you the repeated penalty of re-sorting every trip.

    Making Each Drive Smoother—Not Just Neater

    The payoff for real-world organization isn’t visual—it’s more fluid entry, quicker exits, and fewer moments spent swiping mess aside. Once the most-used items claim their visible zone, the time you’d spend cleaning out forgotten bins or chasing wayward cables almost disappears. The everyday cues—quicker handoffs, less gear lost, easier seat swaps, and less hesitation before starting the drive—all reveal the difference between a car that stays neat and one that actually runs smoother, week after week.

    Find real, repeated-use car storage solutions at DriveWellSupply.

  • Transform Your Workspace with an Under-Desk Cable Tray for Smooth Movement

    If you’ve kicked a charger, fished under your desk for a USB cable, or spent work time untangling adapters beneath your chair, you already know: desk-surface tidiness isn’t the same as actual usability. Cables taped to the leg, cord bundles behind the monitor, or a carefully coiled power strip may look neat, but under the surface, friction reappears fast. It drags against your feet, clutters your reset path, and turns “organized” back into awkward the moment you change your seat, grab a notebook, or switch devices. Workspace photos don’t show this—the daily payoff and daily cost only show up in use.

    When a “Tidy Desk” Isn’t Enough

    The real test isn’t how your desk looks at 9 a.m.—it’s what happens when you shift position after an hour. You reach beside the keyboard for a notepad, and your foot catches a cable loop that’s resurfaced behind your ankle. Swapping a laptop or plugging in new gear, you discover the bundle that held together for the photo doesn’t flex with you. Suddenly, cable drag and power-brick tug set boundaries for where your feet and chair can actually move. Every adaptation—pop up to adjust a monitor, scoot to the side after lunch—turns up new snags.

    With each attempt to reset, the organizing layer splits: a desk that looked ready for a “clean setup” snapshot eight hours earlier now has cords dangling, adapters drifting under your wheels, and a surface that resists clutter while the zone below your knees grows unpredictable. The problems aren’t dramatic but they add up—routine movements become little negotiations, posture suffers, and “ergonomic” arrangements need constant reacquainting to stay effective. What stays hidden out of sight is what quietly interrupts your day.

    Moving Cables Overhead: The Behavior Shift

    An under-desk cable tray isn’t about the photo—it’s about clearing your movement zone for actual work. Once cords, chargers, and adapters move overhead, the workstation stops fighting your legs and starts behaving like an environment tuned for repetitive, real-world use. The tray acts as an anchor, rounding up the slow cable drag that usually slips back into your path: no more nudging a rogue plug before you get up, pausing to rescue something stuck under the chair wheel, or tensing your ankle every time you scoot in or out.

    The improvement isn’t just at install—it accumulates with each routine. The phone charger that always slid off the desk disappears from your mental checklist. Instead of pausing to tiptoe through a reset, you settle in, adjust, stand up, and switch devices as your workday demands—less micro-fiddling, more forward motion. The tray keeps dozens of small interruptions from accumulating into a bigger, harder-to-diagnose problem.

    Placement Matters: Not Too Far, Not Too Close

    Installing a tray is one of the few times you dictate—and then feel—the cable pathways during real movement. Put the tray tight against the desk edge, and your knees hit it every time you sit down. Slide it too far back, and cables slip off, reappearing where your heels want to rest or swing. Over days of routine, the sweet spot—often about ten to twelve centimeters from the edge—feels right because it disappears under your natural range of motion, not because of a template. Tune it to your actual sessions: lean forward, scoot your chair, let your feet fall where they want to—if the tray interferes, move it. Specific fit beats generic symmetry every time.

    Where the Real Gain Appears: Day-to-Day Use

    The difference sharpens after several cycles, not on day one. Typing in the morning, sketching to the side in the afternoon—you notice nothing gets in the way as your body, not just your hands, shift work modes. A week later, you realize the daily questions—did I just unplug something with my foot? Why is my charger dragging?—fade from your mental overhead. Resetting the desk becomes automatic, not tedious, because stray cables don’t creep into the leg space where you actually reclaim focus between sessions.

    This isn’t just “ergonomics,” it’s about knocking out the disruption zone between organized and actually usable. When all your repeat-use charging (laptop, phone, monitor, light) stays corralled overhead, you stop tiptoeing and start working. Desk trays won’t make clutter vanish, but they will keep friction out of your essential movement area—the real bottleneck most fixes miss.

    Even Small Setups (and Small Changes) Count

    On compact desks, under-desk real estate is brutally limited. Built-in drawers, slide-out organizer units, or cramped file boxes are helpful until stray power cords wedge into the same path. A tray that actually matches your daily motion doesn’t just tidy—it keeps storage from swapping one frustration (piles everywhere) for another (trapped legs or snagged toes). Even a short or side-mounted tray can clear the main walkway. The payoff is visible: your storage units work, feet move cleanly, and you avoid the reset-rework spiral that wastes real minutes every week.

    Practical Checks Before—and After—You Install

    • Test your real movements—pretend you’re grabbing a notebook, stretching mid-session, plugging in, or sliding between keyboard and sketchpad. Where do your feet and knees naturally fall?
    • Do all cable routing while actually sitting, not from a standing view. If you only optimize what’s visible on the empty desk, friction returns the minute you start using it for real work.
    • Accessibility beats perfection: choose a tray that lets you swap out devices efficiently. Trying to “seal” the mess might solve visual clutter, but if every new adaptor needs a crouch-and-search, you’ve simply swapped one problem for another.

    The first week after install, you don’t just notice fewer tugs and less wrestling with your chair. The aftermath of a meeting, a reset between tasks, or midday energy drop doesn’t require a legroom overhaul. Most days, you won’t remember the tray—just that work flows with less debris, physical or mental, in the way.

    Quick FAQ

    How do I choose the right tray size?
    Pick a tray that supports all major device cables without intruding into your movement zone. For most setups, leaving around ten centimeters from desk edge to tray limits knee and foot interference. Always trace your actual cable runs and device chargers first, not just guesses from a product sheet.

    Will a tray make plugging or unplugging harder?
    Not if you leave room. Overfilling or fully enclosing trays can create new friction (or lost adapters) during cable swaps. Go for open access you can reach without a hunt—organization that trades away ease-of-use isn’t organization, just visual tidying.

    What if my desk has crossbars or limited mounting space?
    Even desks with undercarriage hurdles can use trays—just offset the install, use a shorter tray, or split cables into two paths. Partial cable management still solves most movement issues, as repeated workspace friction almost never comes from the entire undersurface at once.

    Order Underneath = Flow on Top

    Whether your setup juggles multiple devices, shares a compact surface, or rotates regularly between seated and standing work, surface-level sorting only gets you so far. The shift comes when cabling, power strips, and chargers move up above the leg zone—into trays tuned to your actual pattern of use. That’s when the “neat” desk starts behaving—reset after reset, session after session. You’ll see tidiness but feel the real win: freed-up routines, fewer interruptions, and a sense of space that persists through real work, not just when the desk is still and unused.

    Explore the full WorkBasic collection

  • Why Lighting Accessories Make or Break Your Workspace Setup

    Most lighting setups seem “finished” the minute they’re installed—until real use exposes their limits. What drags a tidy surface back into chaos isn’t the bulb or brightness, but loose brackets, peeling cable guides, plugs knocked crooked, and “invisible” supports that quietly shift out of place. The true problem isn’t that light looks wrong, but that cables creep across your sightline, a lamp falls out of aim, and you end up working around a setup that was supposed to make things easier.

    When Looks Deceive: The Day-One Setup vs. Real Living

    You mount a low-profile under-cabinet strip, feed the cable through its track, and the kitchen suddenly looks resolved—clean lines, edges squared, shadow eliminated. But by the second week, after your daily coffee routine and a few rushed lunches, stress points start to show. The bracket that held firm now rattles when a cabinet door swings; a once-straight cable sags out of its channel after catching on a bag handle. Little by little, friction takes over the space.

    The lamp that started perfectly aimed has wandered off-target. You find yourself with just enough glare near your laptop to start using only half your desk. The area feels less usable, and every fix—re-tucking the cable, turning the light back—becomes an extra nuisance built into your day. Appearance holds, but function unravels with every bump, reach, and stretch.

    The True Test: How Accessories Shape Lighting That Lasts

    The weakest part of a lighting setup often isn’t what you see; it’s whatever holds things where you need them, every time. A flimsy bracket or cable sleeve might disappear into the background at first, but over weeks, these small pieces shape whether your routine flows or grinds. A support that can’t handle a sideways tug translates into cables migrating onto the counter or a task light never quite pointing where you want it.

    Where Failure Shows Up First: Everyday Pressure Points

    Weakness rarely screams at once. Instead, it’s the steady spiral—a bracket creaks every time you nudge the screen, a cable works loose after shifting the keyboard, a plug tilts after a rolling chair presses sideways. “Finished” slowly becomes “fragile.” What signals trouble:

    • Cables you’re always re-routing to keep out of sight or reach
    • Lamps slumping, refusing to hold position as you work or cook
    • Shadows appearing right at the prep or writing zone’s edge
    • Spaces you avoid because the light stops making the area usable

    Setups Under Real-World Pressure: Scenes from Everyday Spaces

    Ceiling Panels vs. Under-Cabinet Strips: Invisible but Not Equal

    A flush ceiling panel keeps mounts and wiring out of mind and out of the way—nothing to snag, nothing to disturb. When supports are buried and stable, this calm sticks around. Glare stays contained, and there aren’t loose cables threatening to catch on your ladder or dust mop. Move to an under-cabinet run, and every motion tells a different story.

    Under a busy kitchen shelf, a mounting point weakens with each door swing. Yesterday’s cable management loses grip, so cords droop just low enough to catch your jacket or brush against what you need. “Tidy” stops lasting beyond one hectic week, and clutter creeps in wherever hands, bags, or kitchen tools circulate.

    Desk Edges and Shared Tables: Small Failures, Big Impact

    Set a slim LED strip along a shared table or perch a lamp under a shelf, and day one impresses—unified line, clean perimeter. But elbows lean, bags slide, cords come and go. Cheap adhesive at desk edge pulls loose and curls away. A power cable slips forward until it hangs off the tabletop, the light bar bends just a little further every day. Function fails quietly—the last third of the workspace goes dim, and people sidestep to any spot that stays reliably lit. You catch yourself avoiding the “good” side, because it can’t stay good.

    Small Fixes, Real Payoff: When the Right Accessory Changes Everything

    Stability doesn’t demand a new fixture; it starts with a deliberate fix at the most abused spot. Replace a slumped adhesive bracket with a screw-on mount at the desk edge. The cable finally stops sliding off, the light bar stays in line, and the routine—write, grab, stretch—no longer ends in cable slip or light aim drift. Over a week, tinkering disappears and the surface quietly stays in order.

    One solid anchor at the right pressure point brings the whole setup back to reliable use—restoring edge light, protecting desk area, keeping glare out of your eyes, and letting the upgrade pay off beyond its appearance.

    Clutter, Glare, Instability: Knowing When to Rethink Your Setup

    Notice any fix you repeat—re-aiming a lamp, rescuing a fallen cable, tightening a bracket after every busy week. These are signals your setup doesn’t match reality. Adhesive that fails after every surface wipe, trays that let cables squirm loose, unstable clamps that float until they irritate. The “wear and tear” isn’t wear; it’s the wrong support for your actual pattern of touch and movement.

    Look for persistent friction: glare you can’t dodge, clutter building at a single pinch point, light always shifting out of place. That’s the moment for a targeted fix—a real mount, a clipped cable, a proper plug brace. Ignore it, and the daily battle with your lighting becomes just another source of slow, steady frustration.

    Tips From Real Use: What Lasts and How to Spot Weak Links Early

    • Anchor in high-contact zones. Desk edges, door zones, and busy shelves need hardware that won’t peel off or loosen with normal movement.
    • Organize cables by structure, not shortest path. Route along back edges or under lips where they’re protected, instead of letting them dangle where they get knocked loose with every motion.
    • Take time with your pressure points. Ten extra minutes spent mounting a bracket at a stressed spot means weeks where you’re not resetting the same cable or lamp every day.

    Why Living With Light—and Its Supports—Matters Most

    Task lights, panel runs, and accent bars rely on the quiet resilience of every support, channel, and bracket. The real difference between a lighting setup that fades into your routine and one that sabotages it: reliability that doesn’t draw attention to itself. The right accessory quietly endures repetition. The wrong one interrupts your flow day after day—and sets off the slow undoing of even the most beautiful result.

    The job isn’t done until your lighting still works the way you need it, after real use has tested every detail. Prioritize real support, deliberate anchors at high-stress points, and accessories that answer repeated contact—not just a polished first look.

    Find supports and accessories made for practical, repeated use at LightSupport.

  • Why Ceiling Lighting Alone Slows Down Your Daily Cleanup Routine

    Everyday cleaning shouldn’t be a hunt for crumbs you can’t see. Yet, in most homes, basic overhead lighting creates glaring blind spots—surfaces “look” lit but force you to hunt in shadow for every last streak and crumb. If you’ve ever circled back to the same edge, leaning in just to catch what the main light misses, you’ve felt how badly the wrong setup steals time and turns quick cleanups into drawn-out, second-guessing routines. The repeated frustration isn’t just annoyance: it’s the cost of lighting that works in theory, not in use.

    Why Standard Ceiling Lights Miss the Mark in Real-World Cleanups

    The default option in most daily-use rooms is a single flush-mount ceiling light. On paper, the wattage covers everything. But stand anywhere but the exact center—scrubbing a counter, leaning over the sink, or shifting down a hallway—and the illusion breaks. The middle stays bright while edges fade, surfaces streak with shadow, and the very spots you touch disappear at odd angles.

    The constant scenario: center glare, edge neglect. A counter’s working edge sits in dullness even if its middle gleams. Hallways have a pool of light that fades as you near the door, turning movement into hesitation. Mirrors betray you from the side, lighting one cheek and leaving the other ghosted in the dark. The payoff: missed grime, repeated swiping, and movement that’s slower and less confident—room after room.

    Everyday Scenarios Where Lighting Friction Adds Up

    1. Countertop Cleanups and Missed Edges

    In the kitchen, you’re already tired, and you’re wiping down the counters at night. Shadows pool along the back edge and around the faucet. Leaning over to inspect your work, your head or elbow throws even darker shade. The overhead flush mount does little for the far side; you find yourself reaching and tilting, cleaning the same patch twice or more. Bit by bit, the cleanup drags, not because you missed a spot, but because your lighting did.

    2. Hallways That “Look Bright” But Feel Dull to Move Through

    You walk through a corridor lit by a central ceiling light. The floor ahead looks safe, but a step to the side and the wall loses definition. Turning the corner, a shoe rack or bag blend into shadowed edges. You end up either slowing your step or brushing the wall—never quite trusting your movement, even when, from a distance, the hallway “seems” lit well enough.

    3. The Bathroom Test: Surfaces That Stay Uneven

    In bathrooms, a single mid-room fixture dazzles the white sink center while leaving both mirror and faucet in patchy dimness. Grooming means shifting your angle to catch real detail, wiping means fighting both glare and shadow. Every motion turns into a recalculation—never just a single, confident pass.

    From Showroom Brightness to Real, Usable Illumination

    Apparent brightness from the threshold doesn’t guarantee usable light at eye level or work height. The true test: as you move through cleaning steps, does every surface reveal what’s left undone—or do you always have to adjust your angle, backtrack, or squint for confirmation? Overhead-only setups impress at first glance and fail during real routines, revealing the limits no catalog photo shows.

    Solving these blind spots doesn’t require an overhaul—just layering the right types of light where they close routine gaps:

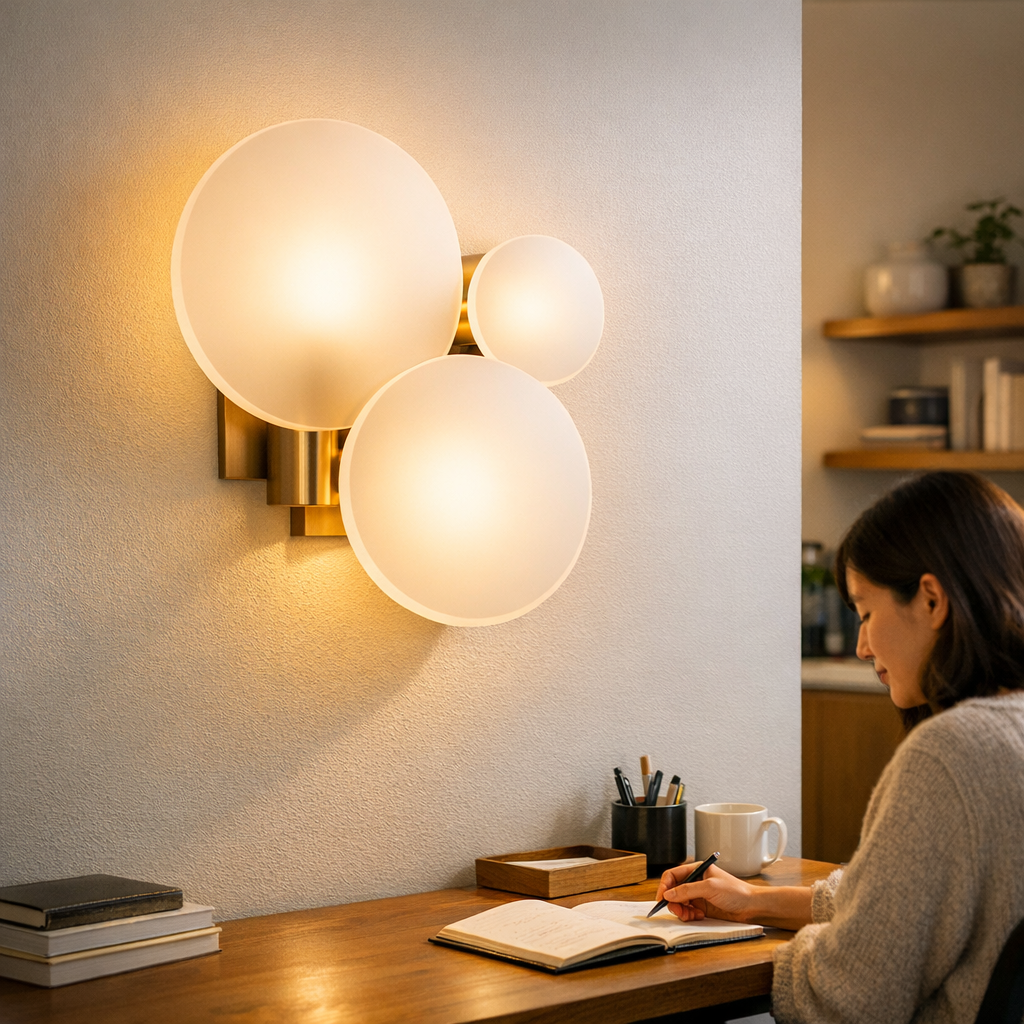
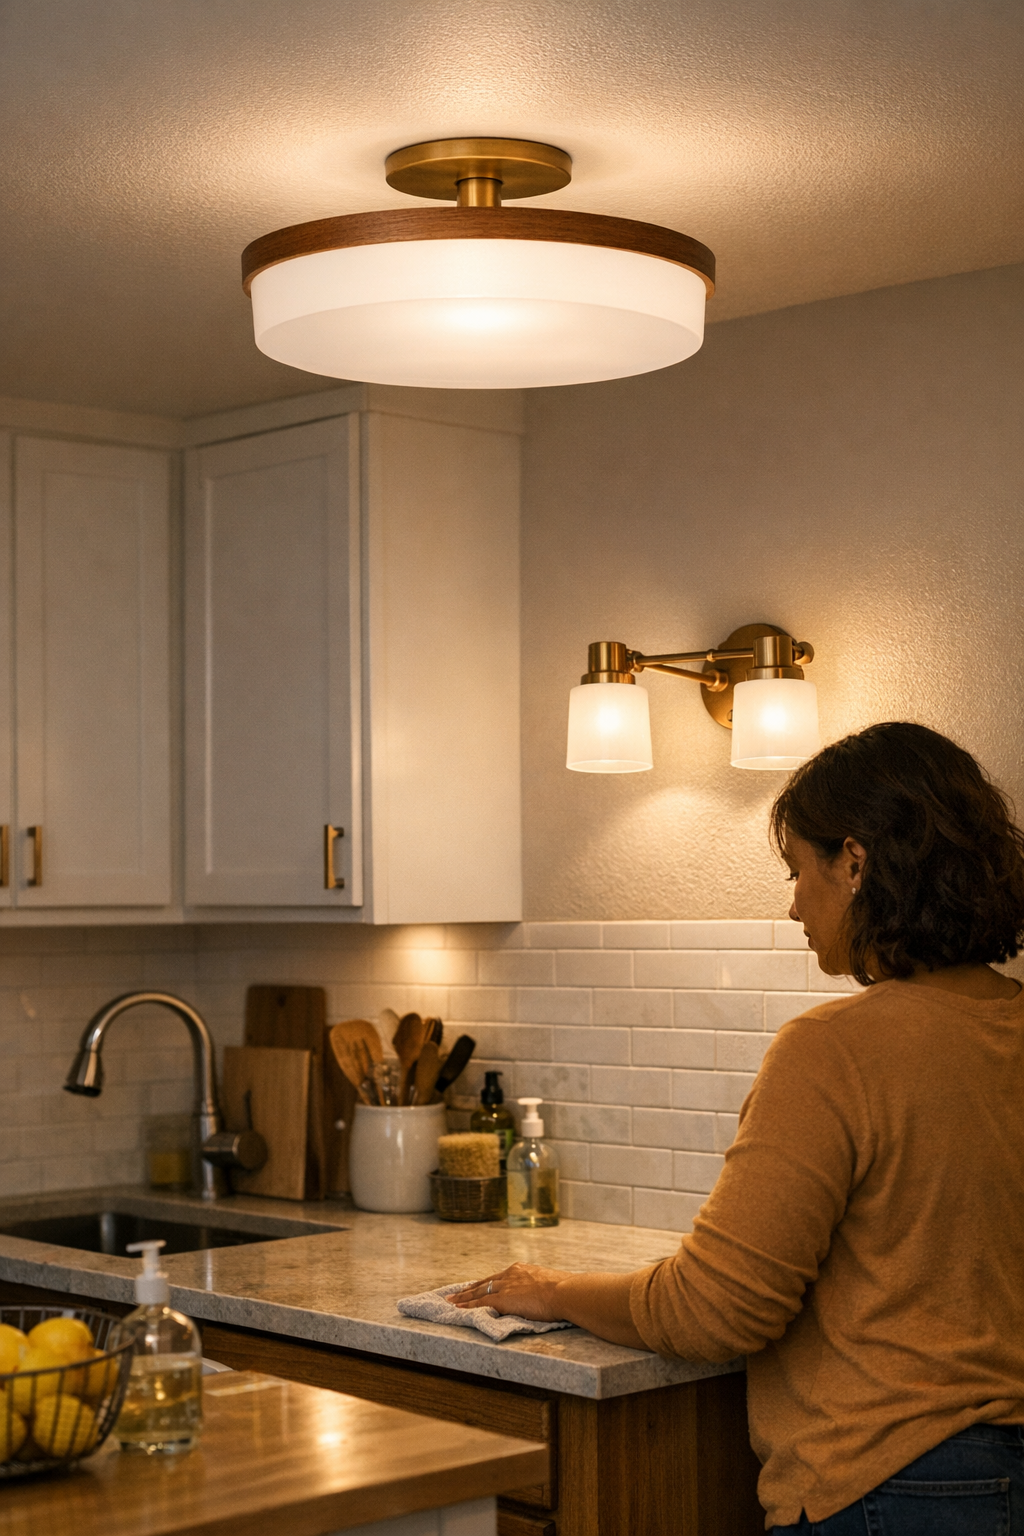
    • Wall sconces by worktops erase shadow lines where dirt collects and overheads can’t reach.
    • Under-cabinet strips, especially in kitchens or utility corners, push even, damp-safe light right down to the hands and backsplash—no missed crumbs, no long reach-around.
    • Square-diffused flush mounts overhead, paired with low-glare wall fixtures, fill the entire room with usable illumination, not just broad, unfocused glow.

    The Visible Shift: Faster Routines, Fewer Misses

    Upgrade a single dome light to a square flush-mount plus a shallow wall sconce at the critical counter, and you see the change where it matters: hands stop flattening along backsplashes, no more circling the faucet, no more hunting a better angle. Glare drops. Side shadows flatten out. That nervous pause—“Did I actually get it all?”—just vanishes.

    Routines tighten: kitchen, bath, or hallway, surfaces show dirt or water marks on the first pass; nobody’s looping around for another check. The goal isn’t decorative perfection—it’s clarity at every edge and comfort in fast, repeated movements, even if you’re hauling laundry or cleaning at an odd hour.

    Do Small Rooms and Tight Corners Still Benefit?

    In small, packed-in kitchens or cramped laundry alcoves, a single shadow means every mess is more obvious and movement is more awkward. Overhead-only setups amplify the annoyance: cleaning turns into squinting and triple-passing already-tight spaces. Targeted fixtures—under-cabinet bars, wall sconces placed at problem spots—erase these dark patches, turning dead corners into usable space without the constant mental second-guessing.

    Damp-Rated Lights: Reliable Illumination Where It Matters Most

    High-moisture zones like bathrooms and laundry rooms push ordinary fixtures past their limits. Steam, condensation, and humidity turn average lights hazy, and you’re left with uneven, unreliable spread—glare here, dim zone there. Damp-rated ceiling or wall fixtures keep output even and steady, no matter the weather or the routine. The upgrade isn’t glamour—it’s real-time confidence, less wiping blind, and one fewer source of nightly friction.

    Choosing Lighting that Supports the Routine, Not Interrupts It

    The best setup isn’t the prettiest—it’s the one that cuts through daily hassle. When ceiling and wall lights work together:

    • Work surfaces are fully visible from first wipe—no leaning, no circling, no double-checking in the dark.
    • Edges and corners finally stay found: even runs of cabinets, stair turns, and entry nooks reveal mess or trip hazards instantly.
    • Movement flows without stop-and-start: you move at your real pace—not the pace forced by “almost bright enough” lighting.
    • Cleanups shrink down to their real size. Most of all, the routine itself gets quieter, because light isn’t something you have to work around anymore.

    In spaces defined by movement and detail, lighting that bridges the gap between “looks bright” and “actually clear” isn’t a design extra—it’s the difference between a routine that drags and one that just works.

    http://www.lighthelper.myshopify.com

  • Why Fixed Liners in Entryway Storage Complicate Cleaning Over Time

    Why “Organized” Entryways Don’t Stay That Way

    Day one, your entryway looks under control: shoes slotted under a bench, bags tucked inside neat storage, maybe a new liner or two. But by day three, the gap between organized appearance and actual routine blows wide open. Shoes multiply and drift into the walking path, bags teeter and spread at the bench, and that “easy-clean” setup now hides tracked-in grit, pet hair, and muddy streaks just below the surface. What looked manageable at first—especially in a high-traffic or family entry—gets quickly undermined by the logistics of real daily use. Resetting order isn’t just about tidiness but about friction: how much work it actually takes to reclaim usable space while traffic keeps flowing in and out.

    How Fixed Liners Create Hidden Cleaning Headaches

    On install day, a fixed liner in your bench or storage zone feels like a game changer: everything crisply in place, covering exposed edges, ready for real life. But give it a week of shoes coming and going—soccer cleats after rain, lunch bags that leak, dropped coats, the pattern of a dog’s fur swirl underfoot—and a hidden mess builds up fast. Fixed liners don’t move; neither does the dirt they absorb. Every time you stretch to vacuum under a bin or try to catch crumbs stuck deep in the seam, you realize there’s no straightforward way to reset the area. Cleaning turns into a contortion routine around obstacles, not a simple refresh. The bench edge becomes a collection zone for damp socks, shoes edge outward, and each pass worsens the embedded mess under your so-called “clean line.”

    The struggle isn’t laziness—it’s structural. Fixed liners block full access. You wipe and vacuum what you can reach, but dust and grit pool at the seams, just beyond your stretch. After a weekend with bad weather, hitting “reset” means emptying the whole setup just to address a mess that’s hidden by default. Most postpone it, and the cycle of ignored dirt and clutter gets locked in.

    When Daily Drops Turn a Reset Into a Project

    Look closer after a busy week: kids’ shoes angle wider until the row blocks the path, backpacks slide halfway off the bench, umbrellas drip by the cabinet. Fixed liners absorb the fallout, holding onto every granule and darkening into a layer of residue just out of sight. The visual order is lost at the edges: you start stepping around piles instead of through a clear zone. Each time you mean to “fix it later,” the mess compounds, requiring a full disassembly when you finally run out of runway. The threshold zone is no longer a reset point—it’s a semi-permanent traffic jam.

    Removable Liners: The Fast Track to Clean Slates

    The moment you swap in a removable tray or bin, you notice the difference isn’t about looks but speed of reset. Now, when soil or fur builds up, instead of wrestling with corners, you lift the tray or liner straight out, shake it off outside, and—if needed—quick rinse, back in. Suddenly, returning the entry to baseline becomes a two-minute break, not a looming project. Shoes can spread, traffic can spike, but the real bottleneck—awkward access—vanishes. Even one well-placed removable underlayer blocks the buildup cycle a fixed liner traps, keeping maintenance a reflex, not a chore.

    Repeated Use Beats Perfect Setups

    Display models and picture-perfect entry setups sell a promise: every shoe lined up, baskets flush, edges sharp. But once your routine kicks in—kids, pets, work gear, weekend mud—it’s the ease of reset that decides whether the area works. Removable liners match the churn of actual life. Shoe rows snake wider day by day, but cleanup doesn’t stall: snap out, shake, slot it back. No tools, no tilting heavy bins just to chase after one pebble. Restoring order becomes part of moving through the door, not an extra job left lurking until you can dedicate a whole afternoon. Reset speed and surface access become your real defense against permanent mess.

    Maintenance Gaps: Why the Wrong Setup Slows Everything Down

    Every threshold zone has a weak link—usually the spots you avoid cleaning because the setup gets in the way. Fixed liners form pockets where crumbs, leaves, and hair drift just out of reach, left to collect until the inevitable heavy reset. As shoes splay into the doorway and dropped gear claims the bench, surface cleaning barely touches what’s buried below or behind. Small inefficiencies—shuffling bags, stepping around blockers—mount up. With every skipped reset, the line between “transition space” and “overflow pile” gets harder to redraw. Real order isn’t about a one-time display but about how little effort it takes to return things to functional.

    The tell is what happens on week two: after a few storms, a couple rounds of visitors, and routine gear flow, does cleaning take seconds—or does it require moving everything and fighting the built-in barriers? Removable underlayers adapt; fixed liners make every reset harder.

    Making Fast Resets Part of the Routine

    The reality of a busy entryway is relentless: the surface cleans rarely keep up, and complicated setups just encourage delays. The only reset that actually happens regularly is the one built for shortest path—grab, lift, dump, return. Placing an extra removable tray under the outdoor boot row means you can catch heavy mud days without breaking your stride. Keeping a spare liner lets you swap when the first gets soaked—no waiting or scrubbing, just a quick exchange that keeps the space usable. With pets, a ribbed tray makes the bulk of fur a one-shake task. These aren’t tech upgrades; they’re structural concessions to how transition spaces are bombarded daily. The difference: reset doesn’t stall, and the zone stays part of the working routine instead of becoming background clutter.

    Choosing What Holds Up to Real Traffic

    If your entry sees steady flow—weather, gear, paws, and backpacks mixing at all hours—the choice between fixed and removable is really about reset friction, not just storage volume. Fixed liners deliver surface order on day one, then shift baseline maintenance into a spiral of delays and avoided chores. Removable bases break the buildup loop, restoring quick, full access so your home’s entry never has to become a permanent work zone.

    Ultimately, transition-space storage isn’t about perfection—it’s about whether you can return to clean in two steps, not ten. When reset is easy, order survives rain, soccer cleats, pet hair, and weekday rushes—making the threshold a passage, not a pileup point.

    http://www.betweenry.myshopify.com

  • Optimize Sports Gear Storage with Large Underbed Bins for Faster Retrieval

    Storing sports gear almost always looks “good enough”—until the second week of real use. You think the floor baskets or hallway hooks will hold it together, but what actually shows up is a pattern of interruptions: the missing left shoe behind a stack, the shin guard caught under a backpack, the stumble at the door as you sift through piles for gear that’s drifted away from its home. The problem isn’t just visual clutter—it’s how a weak retrieval path keeps hijacking your routine, turning what should be quick grab-and-go into repeated delays. Most setups break down not from one big mess but from five small frictions in a row.

    When “Organized” Still Slows You Down

    Shelves and baskets promise fast access at first, but gear’s natural drift takes over. Shoes stretch outside their zone. Glove pairs break up—one hiding behind a box or another family’s coat. Balls roll into corners you never intended to use, and so the “system” dissolves back into a full-room hunt. Every “reset” means rummaging through more layers, not less.

    Hooks get overloaded, baskets crowd out the walkway, and the routine grinds down: not because you don’t put things away, but because things refuse to stay sorted after just a few days of real activity. Each round gets a little slower, a little less predictable, until sorting feels pointless and retrieval always means retracing steps.

    Why Underbed Storage Changes the Routine

    A shift to underbed bins forces a real reset point, both physically and visually. Instead of open shelves absorbing new overflow and baskets turning into mini junk drawers, the bin creates a hidden but predictable zone: every piece goes back under one bed. Retrieval is single-location—either it’s there or it’s not. There’s no chase through three rooms or six drop baskets.

    That shift clears the floor for movement (and stops you tripping on a lost cleat), but the bigger win is time— you can check, reload, or return gear with one motion, not five. Still, this setup isn’t magic. If the bin fails in structure—flimsy, poorly sized—it simply hides the friction instead of removing it.

    The Common Pitfalls of Underbed Bins

    The wrong bin can sabotage the whole routine. Too shallow, and you end up shoving, folding, and compacting gear until it’s just a hidden tangle. Too deep, and the bin swallows smaller pieces—another version of the lost-item loop, only now less visible. A lid that doesn’t close means daily friction as pieces escape, and a featureless bin risks turning everything into a horizontal jumble. Instead of vertical stacks, you’re left with an endless sideways dig every time someone needs their sock or band. You still dig; now it’s just under a bed.

    Overflow Corners and the Case for Two Bins

    Overflow happens fastest with growing gear or shared family use. The “one big bin” approach invites cramming: socks vanishing under pads, balls wedged in corners, the lid always half-open as categories bleed into one another. Two bins cut the density: one for shoes and pads, the other for balls and small loose gear. Instead of emptying a giant jumble to find one mouthguard, you make one short check—and nothing rolls across the floor in the process. Dividing items also makes resets lighter and lets each bin take on a specific role, not a catch-all burden.

    Zone Dividers: Small Fix, Big Upgrade

    Internal structure inside the bin is what makes the routine stick. Even just a removable divider or soft section keeps items in place—shoes one side, pads and bands the other—so you don’t end up shaking out an unplanned mix each trip. After practice, everyone knows which pocket or section gets their gear. The scramble disappears: a five-second glance and grab replaces the ten-minute dump-and-search.

    The benefit isn’t perfection—it’s speed and fewer misses. Now you see immediately what’s missing (and what’s overdue a wash), without sitting down to upend a muddy heap. Kids can self-sort, duplicates don’t pile up, and practice starts with fewer “where is it?” moments.

    The Real Test: Can You Retrieve in Two Moves or Less?

    Storage setups reveal their value when you’re in a hurry. Can you pull and open—a single sequence—and get what you need, or do you still have to fish around for the last piece? Deep, undivided bins make it easy for pieces to vanish, especially if multiple people share the space. If categories mix, the reset cycle slows: you start seeing mix-ups, lost items, and a new round of shuffling just to cover basics.

    This isn’t just a “deep bin problem.” Oversized bins that don’t fit the underbed footprint can’t pull out cleanly. If you have to shift other furniture or lift half the bin to see inside, you lose the very gains the system should give. The right setup removes roadblocks—not just visually, but for your actual routine.

    What Works in Tight Spaces

    Rooms with low bed clearance or awkward legs typically don’t fit a one-size bin. Flexible, soft-sided options or using two slimmer, paired bins lets you split the space, avoid overfilling, and easily slide bins out even in the tightest setup. This stops bins turning into overflow zones out of necessity and keeps each return simple—no more dragging a heavy, half-stuck container out just to grab one item.

    Keeping Things Clear—Literally and Structurally

    Clear bins—or those with small windows—let you verify what’s inside immediately, breaking the “out of sight, out of mind” problem. Dividers (even color-coded, for kids) make the return flow automatic, not a guess. Instead of wondering where something was left, you see what’s missing before it becomes a crisis.

    One real-rule to prevent headaches: Dry everything fully before stashing—one damp sock in a sealed bin keeps the whole zone smelling bad for weeks, and washable liners only help so much.

    The Real Gain: Flow, Not Just Appearance

    Visual “order” can be a setup that looks good for a day but fails under pressure. The actual upgrade? A reset routine that resists breakdown over busy, unpredictable weeks. When a storage solution—divided, clear, sized to fit your room—lets you reset quickly, keeps stuff in predictable zones, and stops overflow from spreading, the space finally works with you instead of against you.

    A setup that survives five back-to-back practices and a muddy, rainwashed all-gear return is what proves itself—because any system can look calm in a photo, but daily friction is what tells you when it’s time for a change.

    Explore functional underbed storage and more at Gridry.

  • How Protecting Walkways Transforms Outdoor Storage Efficiency

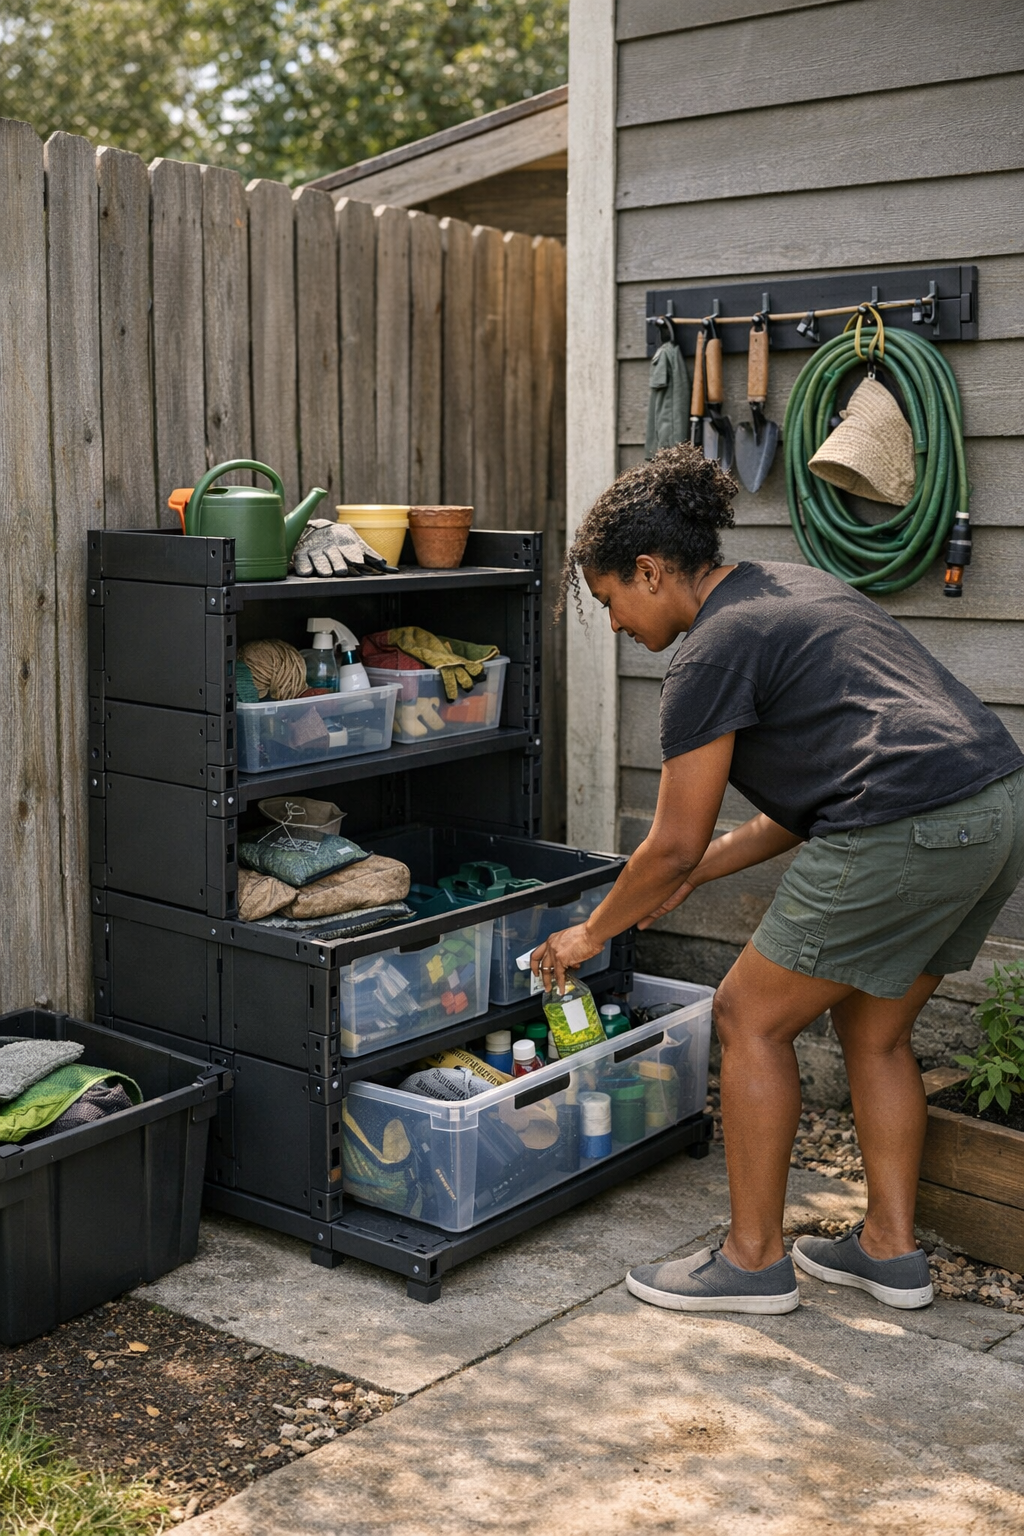
    Out in the yard, every storage decision shows up in how you move—not just how the space looks. Most outdoor storage setups start with hope: you install a trim shed, a tidy wall rack, or modular bins along the side fence, and for a moment, the disorder recedes. But then real life floods back in—garden work, trash runs, a weekend of bikes and bins—and the walk zone collapses. The route that felt “clear” on day one now demands a shoulder twist, a shuffle, or a full stop just to dodge a rake, a rogue pair of boots, or a storage unit edging too far into your path. The layout still reads as organized, but every pass through the area pulls you deeper into a slow-motion obstacle course. Eventually, the friction isn’t dramatic—it’s a buildup of hesitation, one minor interruption at a time.

    Why Footpath Space Is the First Thing to Guard

    The real trap of outdoor storage is the invisible squeeze: the path that looks wide enough until real use crowds it. All it takes is a shed edge, a freestanding shelf, or a rolling tote pushing eight inches into the walkway. Nobody grumbles at first, but soon retrieving the garden fork means skirting a hose, nudging past an awkward stack, or negotiating space with someone hauling bags behind you. What should be a one-step handoff becomes a sequence: slide this over, shift that back, step aside. It’s the same in side-yard strips and patio edges—tiny encroachments that, over several busy days, turn free movement into a slow dance of sidestepping and apologizing.

    The moment routines get even a little hectic, storage starts to leak into the path. You cut across the garage threshold during a project, drop gear in the first open spot, and by the end of the week, you’re unlocking a silent contest between what belongs in storage and what’s simply in the way. The “open” walkway dissolves into new clutter hotspots, faster than you’d expect.

    How “Organized” Storage Becomes a Bottleneck

    Even the cleanest-looking modular wall or perfectly matched bins can create trouble when they overreach the real boundaries of movement. Picture a fence lined with storage that looks streamlined—but pushes the circulation path just out of line. On a regular week, the cracks appear quickly: carry mulch sacks, steer the trash can, pass a second person with a shovel. That slim extra foot taken by storage means the main route kinks at a critical moment, so returns get messy. The rake you always reach for leans out to catch your sleeve. The wall holds your tools, but now the entry fills with scatter—seed packets, pruners, gloves—none of it in its place because the route is too tight to keep clear through daily use.

    Movement gets blocked not by lack of storage, but by the footprint that isn’t quite honest about how much passage it needs. The space looks fine on paper, but in reality the flow chokes off, and with every interrupted trip, frustrations multiply. By midweek, your “system” demands too much from anyone just trying to return a single item without causing a pileup.

    Stacking, Shifting, and the Sluggish Reset

    The stubborn giveaway of a broken setup is the quiet decay into pointless reshuffling: pausing to slide a hose so you can park the mower, wedging a bin sideways just to close the gate, or stacking gear in a clear spot thinking you’ll shift it later—which, let’s be honest, drags on for days. Wall space gets filled, but not helpfully; one awkward corner keeps pulling in overflow, becoming a “temporary” holding spot that never empties out. Even when the yard starts organized, returning things becomes fraught with minor negotiations, until suddenly reset isn’t a quick end-of-day habit but a dreaded overhaul.

    The Turning Point: Guarding Pathways Harder Than Storage Volume

    Everything changes when you treat the footpath as untouchable. Not more “decor,” not a wider cabinet, but a hard line: storage ends here. The best setups cut storage units to fit the true movement zone—wall systems pulled flush, rolling racks that can clear the line when activity ramps up, nothing crossing the path, not even “just for now.” That single rule keeps corners from becoming magnets for overflow and lets movement snap back to instinct. In real terms, this means no sidesteps with arms full, no hunting for clear floor, no losing energy to awkward shuffle routines. The storage becomes background, not a recurring part of the job.

    Even after a high-traffic weekend, the mood flips: you walk through hands-full, reset goes fast, and nobody ends up muttering about sorting out the side yard again. The difference isn’t pretty on a checklist—it’s a path that stays free without reminders, so the gear returns itself almost as quickly as it leaves.

    Visible Signs a Setup Is Working Against You

    • You have to move or tip something every time you want to step through the “clear” route.
    • Stray tools, boots, bags, or garden supplies show up in the main walk zone after each use—even though storage is “not full.”
    • Putting away one item forces you to reshuffle others or leave things half-stored just to clear space.
    • Corners accumulate extra gear for days—never truly reset, always waiting for a “later” that rarely comes.
    • Everything looks put away, but moving through the area feels slower with each passing week.

    Small Tweaks That Clear the Path for Good

    Protect the path first—even if it means scaling back storage units or narrowing a wall organizer by a few inches. In reality, a slightly smaller system that keeps every foot of walkway usable pays off daily, while spacious units that block movement will always create work. During planning, tape the path boundary and never let a unit cross it. Position rolling carts or bins so they can slip into dead space, not the main lane. After every busy stretch, walk the path: do your feet move straight through, or do you find little piles waiting for later? Adjust, clear, repeat—the goal is to make the uninterrupted walk automatic, not an exception you have to fight for.

    The easiest benchmark: if you can walk the route in the middle of the busiest week, arms full and focus elsewhere, without thinking about what you’ll have to move next, the storage is pulling its weight. That’s the difference between looking organized and living organized, and it’s where real outdoor setups finally start to hold up.

    For more practical ideas on making outdoor storage function better, visit TidyYard.

  • Why Your Organized Cabinets Fail During Real Daily Use and How to Fix It

    The Neat Setup That Doesn’t Last

    Anyone who’s ever lined up a set of cabinets or snapped together a modular shelf knows the momentary satisfaction of a picture-perfect setup. For a day or two, every bin and tray sits in the right spot. But as routines kick in, friction pops up fast—cart wheels catch, tools float from assigned spots, narrow pathways become obstacle courses, and corners meant for “overflow just for now” turn into permanent dumping grounds. The truth is, setups that look finished on Saturday crumble by Wednesday under the pressure of real use.

    When “Storage” Only Looks Organized

    The real test isn’t more space—it’s smoother movement. There’s a quiet difference between stashing things away and building a setup that keeps pace with you. Cabinets and racks promise order on install day, but repeatedly shifting carts just to clear an aisle, sliding a door around a bin you didn’t plan for, or lifting three trays to reach one screw—that’s where cracks appear. Day by day, these micro-obstacles slow you down and pull energy out of every routine. Organized storage that interrupts your flow is just another form of clutter.

    Seven Days In: The Real Scene

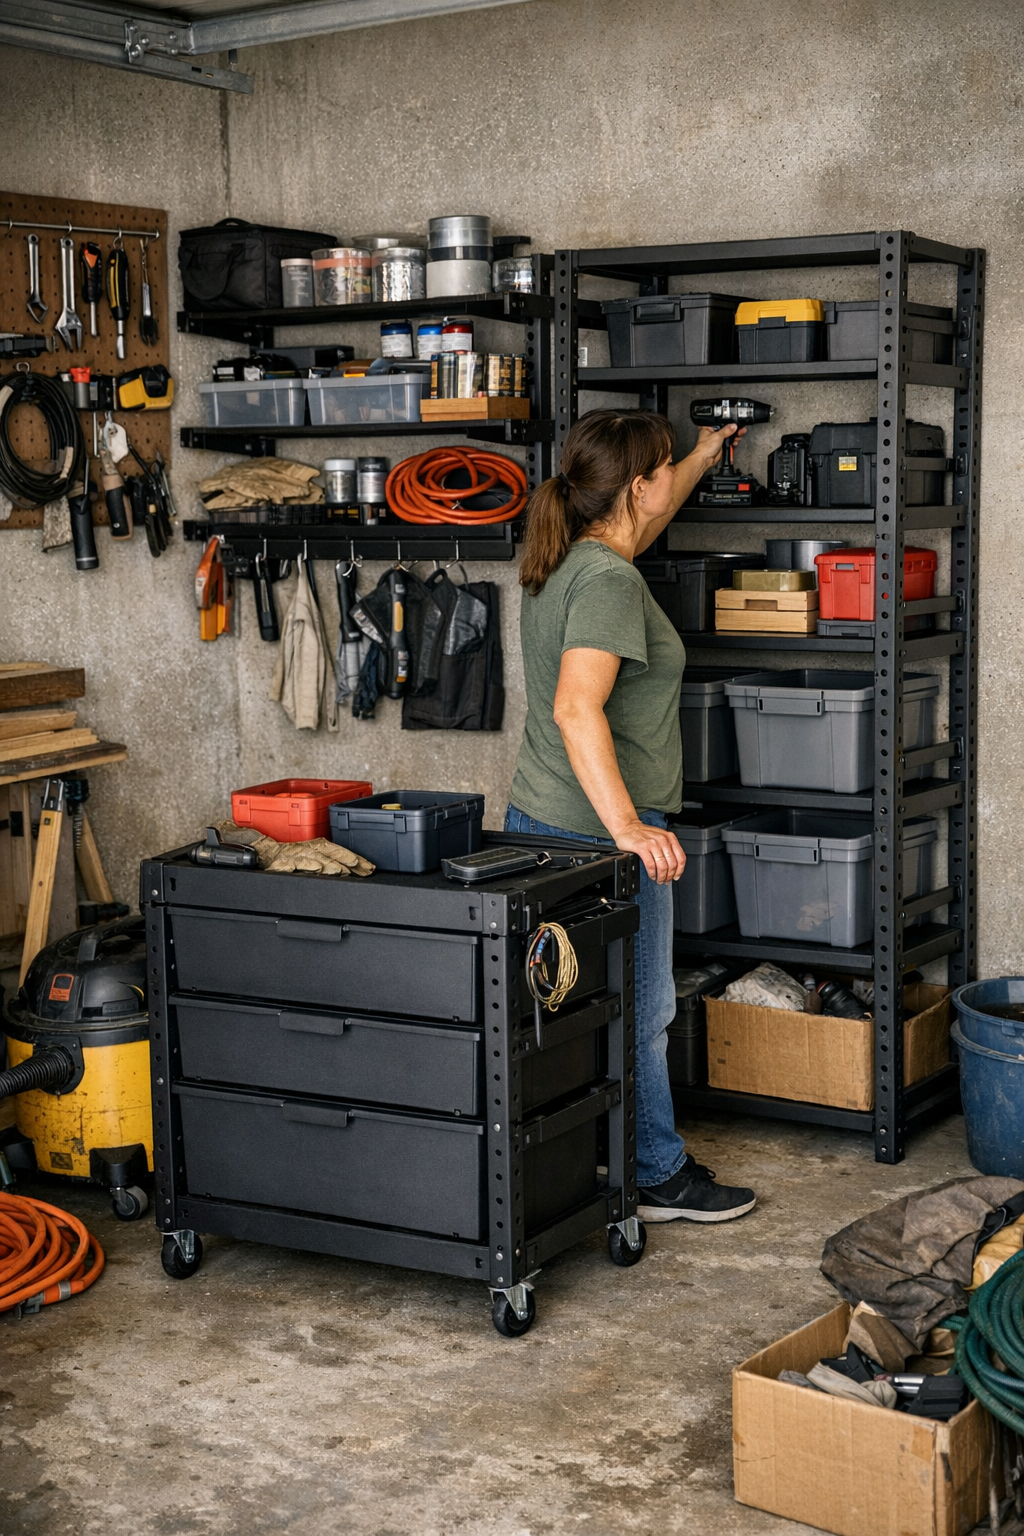
    Picture your garage or utility shed after a week of everyday projects. The shelf that started spotless now hosts “temporary” piles—garden gloves over toolboxes, a bag of fertilizer wedged behind painting supplies. The rolling cart looks parked and perfect, but every time you bring in the mower you’re forced to shuffle it back and forth just to pass. Need a box of screws? You’ll be restacking bins again, because the “logical order” from day one never survives five hurried returns.

    Tools start living on the workbench because the wall-mounted rack forces you to thread past protruding hooks or other bins just to hang them up. The one awkward corner—too small for real storage—collects everything with no home until it becomes a mini-landfill. No single moment is dramatic, yet each missed return, each detour or workaround, chips away at the tidy illusion.

    Where Setup Friction Sneaks In

    If you recognize these signs, the system is underperforming:

    • Paths that shrink as carts, bins, or doors jut into the aisle
    • Stacks or piles left “for the weekend” that quietly settle in
    • Flat surfaces buried under tools in limbo between use and put-away
    • Drawers and cabinets swinging open more often than closed, because it’s a hassle to use them
    • Feeling boxed in—moving sideways instead of striding through the space
    • Return routines getting longer, not sharper, week by week

    These triggers reveal a system that stores, but doesn’t serve. Setup pressure exposes where theory falls short of lived reality.

    Looks Organized…but Blocks You All Week

    Walk through any setup that’s supposed to be “done.” Row after row of cabinets may look sharp but force you to inch along a narrow chute, especially when both sides eat up the aisle. Stacking trays sound smart until “retrieving one” becomes solving a small puzzle. Wall racks—great in the blueprint—often end up as logjams, demanding an awkward reach every time. With each day of real use, pathways close in, piles emerge, and minor hassles quietly turn into the new routine. Visual order can mask a setup that’s actively slowing you down.

    Small Layout Tweaks, Big Everyday Payoff

    Most real fixes are about inches, not overhauls. One simple shift—moving adjustable, open-access shelves to a single wall—freed enough aisle width that carts could park without trapping you in. Suddenly, bins went back in place without shifting neighboring trays. Redesigning for open movement (not maximum storage) pried those lost inches back and made everyday resets snappier. Who needs another cabinet if you unclog the path you already use?

    Take stock after a week of normal churn: Is your main route still open? Can you reset tools fast? Or does every return risk triggering a pile-up “just for now”? Minor changes—grouping high-use items in arm’s reach, repositioning carts closer to the door, leaving one wall spare—create setups that bend to your real routine, not just your layout plan.

    Return Flow Is the Real Barometer

    The best setups almost disappear during use—you move, grab, and return without breaking stride. If you catch yourself detouring, ducking around corners, or mentally putting off the reset (“I’ll put this away later”), the system is leaking. Test yourself: Late in the week, walk your most common paths. Where do you detour, reach, or get jammed up? Adjust one element—a shelf height, a cart position, a bin location—and watch the space open up. Sustainable order comes from how easy it is to maintain, not from a quick install-day snapshot.

    Build Storage Around Routine, Not Just Floor Plan

    The right solution depends as much on habits as on square footage. Wall-mounted organizers are gold in tight corners—if nothing nearby blocks the approach. Open shelves beat deep cabinets if you’re always rotating large gear. There’s no single answer, but setups that follow your rhythms—not just the room’s geometry—hold up week after week. Pay attention to where you pause, pile up, or hesitate: that’s where friction quietly builds.

    What Actually Works, Week After Week

    The true mark of a solid system is not how much it stores or how “finished” it looks, but whether it holds together under routine pressure. Most of the time, improvement means making common zones easier to reach and resets simpler—not adding more places for overflow to hide. Smooth-functioning setups reveal themselves in how little you think about them—and how rarely things start piling up for “later.” Clarity and movement outlast neatness every time.

    Find modular storage systems, cabinets, mobile units, and workshop organization that actually work under real-world conditions at StackNest.

  • Choosing Shelf Dividers That Keep Deep Closet Shelves Organized Over Time

    The deep shelf in your closet promises more space—but in real life, it rarely lives up to that hope for long. At first, bigger shelves seem like the answer. You line up fresh dividers, maybe set some bins, and pile in your sweaters, sheets, or off-season clothes. But a few weeks later, you’re right back to frustrated digging. Stacks slump and spread, categories dissolve, and the simple act of grabbing a t-shirt can send an entire row sliding forward. The real challenge isn’t finding “storage solutions”—it’s creating a setup that actually keeps up with the chaos of daily living, rushed mornings, and the constant coming and going of real stuff, not showroom props.

    The Trouble With Deep Shelves: Space That Hides More Than It Helps

    On paper, deep shelves mean you never run out of room. In practice, they encourage overpacking and forgetting. Every extra inch lets piles stretch—and that’s when clothes start spilling over or drifting backward into the darkness. Need the towels you stuffed in the back? Prepare to unstack half the shelf to reach them. Reach for a single pullover and three more come along for the ride. If you’ve ever found a month-old sweater hidden behind a wobbly row, you know how quickly generous space turns into a black hole.

    Most deep shelf layouts ignore how we actually use our closets. Even with dividers, the wrong setup crowds things so you’re constantly shifting stacks, chasing runaway piles, or straightening after every “just one thing.” What started as a fix becomes a recurring annoyance—and most products only half-solve the problem.

    Why Most Shelf Dividers Stall (Or Fail) in the Real World

    Try a few types and the differences reveal themselves within a week. Acrylic dividers make the shelf look neat, but if you stuff soft sweaters next to those hard edges, the stacks turn curved, and grabbing one piece often bumps the rest out of shape. Wire frames flex—great for jumbled towels or bags—but their give means jeans or heavier piles sag and spill, and the boundaries you set start to blur. Bins group things nicely for the first day, but become clutter collectors with hidden socks, tangled scarves, or forgotten accessories buried below. You trade visible clutter for invisible overflow.

    Over a typical month, here’s what happens: categories merge, stacks tip or blend, and what used to be “grab and go” now means digging, restacking, and quietly cursing that one divider that shifts every other day. Routines slow down. You spend more time resetting the shelf than actually using it. Daily storage is constant friction, not the streamlined experience you hoped for.

    The Real-Life Test: Where Dividers Work (And Don’t)

    Imagine you’re late, reaching for that one shirt behind a high pile. The acrylic divider keeps its line, but as you tug, the whole stack wobbles—now you’re smoothing everything just to close the door again. With wire dividers, the rows look fine on Sunday, but by Friday, T-shirts and jeans have drifted over the lines, and you’re mushing piles together “just for today.” Bins organize on day one, but by day three you’re hauling down entire boxes to find a single pair of gloves, making the closet feel more like a puzzle than a tool. Each fix handles one issue but brings a new wrinkle into play.

    Small Changes That Make a Real Difference

    Big improvement doesn’t necessarily require a total overhaul—or another long afternoon spent reorganizing. Sometimes, switching from three narrow dividers to just two wider, sturdier ones makes your stacks resist sideways drift. A well-notched, grippy acrylic divider planted two inches behind the front edge creates easier grab zones—folded shirts stay upright and you can scan what’s there without re-stacking. Spacing is crucial: cramming too many dividers blocks access, but too few let things lean and blend.

    One practical shift: Instead of packing in dividers, aim for about 18-inch zones. This forces you to limit each section to what actually fits, keeps piles stable, and means resets after a hectic morning are as simple as nudging things back into place—rather than re-doing an entire system.

    Bins: When They Work, When They Don’t

    Bins seem like the ultimate shortcut—they tidy up stray items in one move. But unless the bin fits the shelf’s depth and your actual items, problems show up quickly. Small things sink out of sight or slide under larger pieces, and over time, the “grouped” system turns into a hidden jumble. Bins help manage seasonal gear, but for everyday essentials, they can make things harder to see and slower to grab—especially when you need something at the bottom or back. Instead of solving clutter, the wrong bin just changes where the mess collects.

    Wire Dividers: Flexible Friends With Short Memories

    Wire dividers flex for bulky or odd-shaped items—think floppy duffel bags, extra linens—but that very flexibility is their downfall for anything heavy or stacked tall. A few days in, heavy jeans start to bow the wires, sections blend, and your quickly folded “separate” piles become indistinct. Wire is forgiving, but not strong enough to hold the line where you need reliable zones most.

    How Anchoring and Spacing Beat Shelf Drift

    Whether you choose acrylic, wire, or another style, the key is how securely each piece stays put under daily stress. Locking, slip-resistant bases anchor dividers so you’re not finding them halfway down the shelf by Friday. Consistent spacing—enough that clothes breathe, but not so much they tip—keeps the system from unraveling into “miscellaneous” by the end of the week. And even the best divider can’t defeat overstuffing; once you try to force in “just one more,” lines disappear and disorder creeps in again.

    Routine tip: After restocking laundry or switching out seasons, take ten seconds to check divider positions—and resist cramming in extras “just until next time.” That short pause keeps everything aligned longer and prevents the slow slide back to chaos.

    Looks Organized? Or Feels Organized?

    There’s a difference between a shelf that looks sorted after setup and one that makes sense in the thick of your week. It might photograph well on Sunday night, but if by Wednesday you’re straightening stacks or repacking bins, the system isn’t working for your real routine. Functional storage means each section stays tidy with quick, imperfect resets—no shuffling, no silent collapse when you grab that last T-shirt before work.

    The point isn’t showroom perfection. It’s lasting clarity—visible categories, fewer disrupted stacks, and a closet you can trust when you’re in a hurry. You know it’s working when you can grab what you need and return it without fuss. Anchored dividers, thoughtful spacing, and realistic limits help your shelf support life as it actually happens, not how you wish it would go.

    Solve the deep-shelf shuffle for good—see daily-use storage options at ClosetWorks.

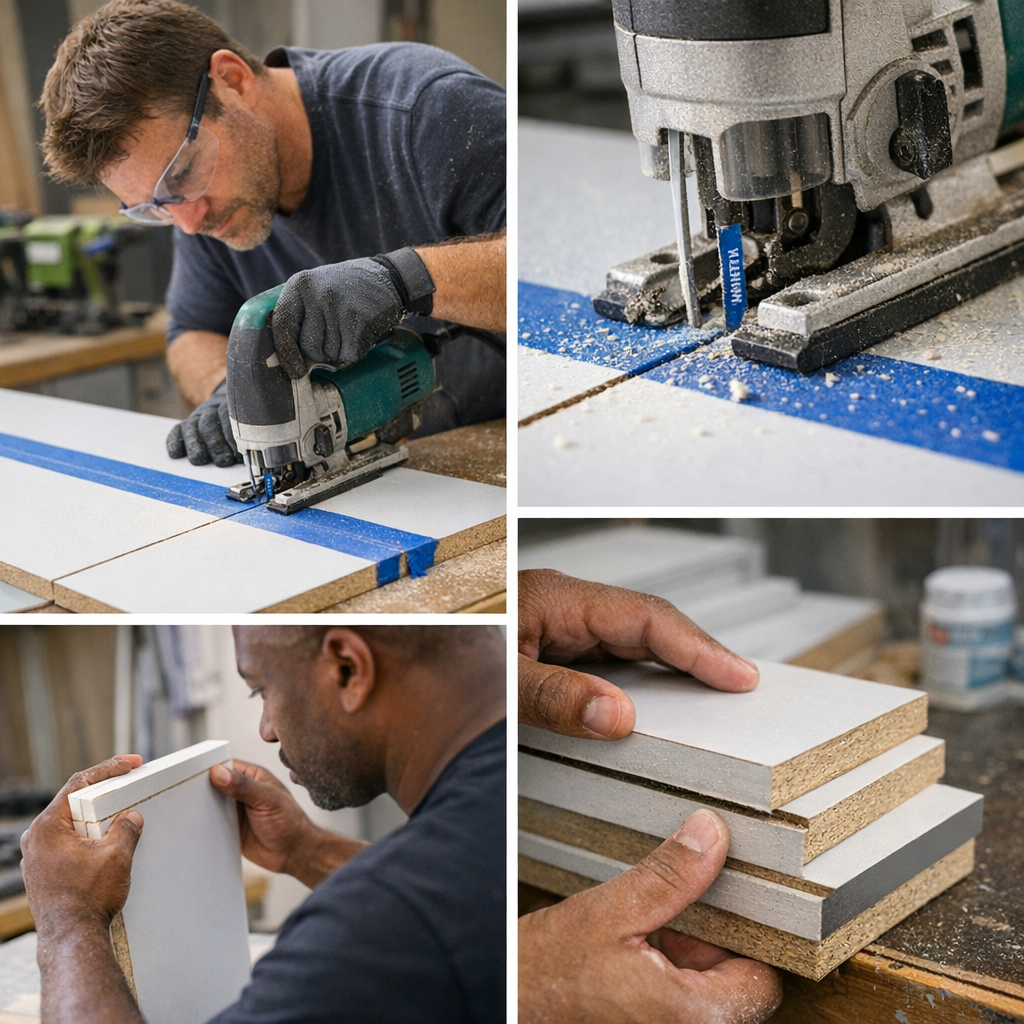
  • Choosing the Right Jig Saw Blade for Flawless Laminated Board Cuts

    The first few cuts almost lull you into confidence. You clamp down a sheet of melamine, snap your go-to jigsaw blade into place, and the cut feels smooth. The edge looks decent—no glaring chips, no tear-out. You lay out a second panel for shelves or closet inserts, and again the kerf seems tidy. The trap is right there: the belief that your “standard” wood blade is all you need. But that easy start rarely holds. Soon enough, the flaws creep in—invisible at first, then impossible to ignore as the project drags on, panel after panel.

    Misleading Beginnings—When Trouble Starts

    Anyone shaping a batch of laminated boards knows the pattern. The first cut feels fine, maybe the second. But by the third, the shallow confidence wears off. Small chips appear along the laminate face. Corners look uneven, and the cuts stop lining up flush. A project that started clean is now a patchwork of sanding, manual alignment, and masking mistakes. That “good enough” blade quickly becomes the root of a pile of small, time-sapping headaches—glue lines that flake apart, edges that no longer match, and visible flaws along what should be a crisp finish.

    Why Standard Wood Blades Fall Short

    It’s easy to think any blade labeled “fine finish” will handle sheet goods—after all, wood is wood, right? But if you’ve ever watched a jigsaw hesitate or snag through melamine, you know better. A general-purpose wood blade, even when sharp, bites too aggressively into hard laminate. Instead of slicing, it chews: you feel the jigsaw fighting your hands, teeth rattling and wandering. The cutline gets ragged, vibration travels up your arm, and you’re forced to steer harder just to keep a straight path. Each pass sounds harsher, sometimes even burning or melting plastic at the edge. Suddenly, you need to spend extra minutes sanding or stash the panel somewhere the damage won’t show.

    Switch to a purpose-built laminate blade—think upward-facing teeth, 10+ teeth per inch, marked for sheet goods—and those flaws fade fast. The blade slides through the face layer, not under it. The jigsaw hums at a steady pitch. You finish a board and move right to the next, not bogged down by cleanup. The difference is in the feel: less resistance, more consistent control, and a near-complete end to edge crumbling. It isn’t a miracle, but it’s a very real shift in the quality of every cut.

    The Stack Test—Where Consistency Falls Apart

    Where blade choice matters isn’t in that first satisfying slice—it’s in repeatability. Imagine trimming a run of eight white melamine panels for a home office build: the difference really shows on cuts four, five, and six. With a standard wood blade, heat builds, the teeth dull, and you’re fighting to keep the jigsaw straight. Each successive board has a little more chip-out than the last. Stack the finished pieces and edge alignment goes off—the tight, square shelf corner you had in mind shifts into a gap you’ll be filling with caulk or wood putty later.

    All of this chips away at more than just the results. Fatigue sets in. Hands tense up against vibration, wrists absorb the jigsaw’s kickback, and concentration drifts after wrestling through uneven resistance. By the end of even a short batch, you end up chasing blade errors across every downstream task—filing, gluing, compensating for inconsistent kerf, or re-marking panels that should have just fit in the first place.

    The Mid-Project Blade Swap

    No one wants to stop mid-job, reach for the blade case, or break their stride. But if you’re honest, there’s always a moment—usually after the third disappointing cut—where you know a change would save you far more time in the long run. Replacing a worn general blade with a dedicated T-shank laminate blade (10 TPI or higher, reverse-tooth if possible) isn’t just a fix. It’s a reset. Suddenly, cuts regain that first-pass quality, the jigsaw follows the line, and the edge holds up even after you’ve run a dozen boards. Post-cut sanding turns into a two-swipe routine, not a major production. And you get clear, predictable results the whole way through—no need for confidence checks after every panel.

    Field trick to keep in your pocket: For especially slick or high-gloss laminates, lay down a strip of painter’s tape over your cut line. You’ll see chip-out drop even more. Blade and tape together, you can hold edge fraying under a millimeter—enough to avoid fillers or paint touch-up, even on show faces.

    Recognizing Cut Quality—And When to Intervene

    Laminates rarely scream disaster after a single cut. But when you find yourself reaching for the sanding block after every board, or nudging corners to fake a flush fit, stop blaming the tool or the board. The culprit is almost always the blade. If cut speed slows, vibration ticks upward, or edge damage shows—even in the slightest—treat it as your end-of-blade warning sign. These moments are clues: blade fatigue creeps in slow, then ruins three panels in a row before you catch it. Changing blades or bits isn’t wasted time—it’s prevention, trading thirty seconds now for hours saved correcting flaws later.

    The lesson holds for drilling, sanding, even driving screws into particleboard: when results start slipping, don’t just push through with more force or faith. Trust your senses. If an accessory feels off, intervene before the mistake repeats across your entire batch.

    Consistency Beats Perfection

    What proves a tool setup isn’t the beauty of a single cut—it’s what happens when you work through the eighth, the tenth, or your tired, last panel of the day. Repeatable, controlled results stack up into real progress. The right jig saw blade, made for laminates, keeps projects moving predictably. Clean edges mean fewer repairs later. Less vibration means energy in your hands, not lost to the tool. Instead of wrestling for every good board, you’re lining up panels that fit, simply and reliably. No magic, just the difference between fighting your material or letting your tools help you win.

    Small changes—like swapping blades before issues build—don’t just upgrade your cut lines. They improve every phase of the job, from first layout to final install. When cut quality matters, switch early. You’ll spend less time fixing, more time building, and every panel will prove the payoff in your hands—not just in the sales pitch.

    Visit Gumboll for tools, accessories, and upgrades for the jobsite and workshop.