Author: jaesoon_admin

  • How Dehumidifiers Transform Humid Laundry Rooms and Entryways Efficiently

    Humidity is the hidden sabotage in every entryway and laundry drop zone, quietly wrecking routines long before you notice a mess. Shoes that never quite dry, bags going musty overnight, towels clinging to dampness—these small failures pile up until every return trip across your threshold means pausing, rearranging, and settling for gear that feels halfway reset. Order on the surface hides a slow, sticky traffic jam underneath. One rainy week, and you realize: even when everything looks lined up—bins in place, bags stacked, floors swept—the zone still works against you. The difference between an entryway that helps and one that hinders usually begins here, in the buildup you can’t see but can feel every morning with a pair of clammy shoes or a bench that never quite loses its burden.

    Where Humidity Hides in Transition Spaces

    Most transition spaces—especially narrow entryways or those bordering laundry—become moisture traps, no matter how tidy they appear. Air stagnates just at bag-drop level, keeping shoes damp and slow-cooking the reset process. The real friction points? Open shoe racks hugging the floor soak up run-off from shoes and boots. Deep bins promise containment but gather every drop that drips off jackets and umbrellas. Under-bench stashes, though out of sight, trade clutter for a slow-cycling damp cycle, leaving shoes on the threshold between “almost dry” and “not quite ready.”

    Each night’s reset ends up half-finished. Morning means toeing into last week’s moisture and shuffling bags that seem to collect a humid undercurrent no matter how often you rotate them. The signals show up quietly—the swampy edge that never clears, or shoes that seem to trade places in search of real airflow. The things you set down keep a record, and the price is paid in daily inconvenience.

    Why Neat Isn’t Always Functional: The Clutter Lag

    Your entryway may look under control at first glance. But once humidity stakes its claim, small problems multiply:

    • Bags “dropped for a second” on the bench end up parked there for days, blocking both seat and reset path.
    • Shoes aligned neatly at night have migrated by morning, each pair chasing a drier corner along the floor or crowding the one spot that almost dries out.
    • Temporary drying racks inch outward, tightening the main walkway and demanding extra navigation for every trip in or out.

    Hidden friction always outlasts visible clutter. What looks organized in a photo feels stalled in use: each “grab and go” becomes a slow search for something not too wet to wear, with overflow starting to pulse out from under the bench or crowd the sides. True function is measured not by appearance, but by how little you have to think about resets or sidestep yesterday’s mistakes.

    Small Shifts, Noticeable Change: Elevation and Airflow

    Anyone who’s slogged through a stormy stretch knows how fast a neat entry slips into recovery mode—coats and shoes multiply, every reset takes longer, and what worked on a dry day starts falling apart. The fix isn’t aspirational—it’s practical: work with airflow, not against it.

    What shifts the daily tide: Lift your storage. Raising shoe racks or bag cubbies at least 6-8 inches above the floor lets air reach the problem zones. Wall-mounted open-back units installed just above bench height multiply airflow, letting thick-soled shoes dry by morning instead of next week. Leave a two-inch gap between items, and suddenly, the dehumidifier can circulate air around everything—no more wet pockets building up behind the last row of boots.

    The results show up in small, repeatable wins:

    • Overnight resets actually complete—the morning check stops revealing “almost dry” excuses
    • Odors and mildew get cut off before they spread
    • Return routes clear up, and the threshold stops accumulating semi-permanent overflow

    This isn’t about an “organized” look, but a real shift: your entry stops being a workaround and starts supporting a routine that moves, dries, and resets on time—even when the forecast refuses to cooperate.

    Facing Real-World Constraints: When Space or Layout Won’t Cooperate

    But plenty of transition areas simply can’t fit deep shelving or a wide bench. In narrow halls or shared utility passageways, every inch counts, and compromise is constant. Clutter moves from visible piles into the tightest corners, and the real battle is against crowding your walking path, not just your storage plan.

    For these compressed scenarios, work with the space:

    • Slim, vertical racks—mobile or wall-mounted—lift gear off the ground without stealing floor space and can be shifted at night to chase dry air
    • Shelves set back from direct entry splashes or out of the cross-breeze prevent gear from languishing in a drip zone or permanent draft
    • A little extra space between pairs—even just a hand-width—beats stuffing every inch and guarantees dry outs actually happen between uses

    In these setups, blocked paths and collision points multiply fast. The more your storage lets gear breathe, the less time you’ll spend untangling a slow-motion jam at the doorway. Every step you don’t have to repeat is one that gives your entryway back some breathing room—literally.

    What About Storage Cabinets and Hidden Moisture?

    Cabinets can trick you: they hide visual clutter but trap every bit of humidity unless they vent or remain propped open. Even a dehumidifier can’t reach inside a sealed cabinet, turning those perfect-looking shelves into low-level swamps for shoes and gear. That’s why semi-open wall units, vented cubbies, or modular shelves always outperform closed boxes when the real test is daily drying, not just keeping up appearances.

    Quick Q&A: Entryway Dryness Essentials

    How do I keep shoe storage dry in a humid entryway?

    Lift racks or cubbies at least 6-8 inches above the floor, leave a small space between each item, and run a dehumidifier right where gear lands. Placement and spacing matter just as much—sometimes more—than the machine itself.

    Does a dehumidifier help closed cabinets?

    Not unless those cabinets can vent or stay partially open; otherwise, moisture just settles in, hidden until the next reset fails.

    What’s the best move if space is extra tight?

    Go vertical: use a skinny wall-mounted shelf or a small rolling rack you can pull out of the way at night. Even a little elevation buys hours of drying you otherwise lose to ground-level gloom.

    The Real Test: Reset Speed and Daily Movement

    Transition spaces fail quietly—not because they’re messy, but because the setup can’t keep up with real flow. If you’re moving yesterday’s bag to reach the bench, nudging wet shoes sideways, or starting every morning with a check for leftover damp, the zone is stalling. Raise, space, and ventilate your storage, and resets get easier, not just less cluttered or “prettier.”

    The entryway that works isn’t one frozen in order; it’s the one where your routine moves freely—shoes and bags dry overnight, paths stay clear, and each return doesn’t spark another rearrangement. That’s the threshold worth trusting, no matter the weather outside.

    http://www.betweenry.myshopify.com

  • Anchored Cable Management Enhances Focus and Streamlines Desk Workflow

    A desk that “looks” organized can still wear you down if every reset drags a cable into your reach zone or forces a clumsy workaround. You’ve seen it: the desktop is spotless, monitors lined up, but power cords migrate across the workspace every time you slide your chair back in, or a headphone cable reappears under your forearm just as you get going. That silent cable drift isn’t just messiness in disguise—it’s a micro-interruption that stacks up, breaks your focus, and exposes gaps between visual order and functional flow. The desk may photograph as “clean,” but if you find yourself chasing charger wires or correcting cable paths multiple times a day, your setup isn’t actually working for you.

    The hidden cost of drifting cables

    Cable drift doesn’t just ruin the look—it chips away at your routine, one interruption at a time. If power cords hang loose, or you catch a USB cable while reaching for a notebook, that tiny catch disrupts your pace and stalls the work you started. Swap devices, pivot your chair, or tilt a monitor and the cables reset themselves in your hand space again. The cost isn’t just appearance—it’s the loss of a clear, ready work area. Over time, what’s supposed to be simple access—plugging in, grabbing the right connector, keeping the edge clear—turns into an endless loop of fixes that slow every transition.

    How “organized enough” can still fail in daily use

    Trays, clips, and sleeves can make a surface look sorted for a few days, but repeated use exposes the limits. Twist your screen mid-call or slide a work notebook closer, and unanchored cables rebound into cleared zones, brushing your hand or hovering exactly where you meant to write. Add too many clips, and you flip the problem—removing or swapping a device becomes a slow un-snapping sequence, not a fast plug-and-go. Order for its own sake can work against the real goal: a desk that adapts and stays predictable even as you move and multitask.

    The trouble is, most cable “management” aims at appearance, not cable behavior. Adhesive clips lose grip after a week of use or heat; desk-top sleeves soon gather crumbs and dust, and start to block charging ports. True predictability comes from under-desk trays placed right in the active zone—not locking cables so tightly you’re stuck, but anchoring them where drift stops being a problem. When cable movement is actually intercepted—not just hidden—routine plugging, grabbing, and switching finally stops feeling like a chore.

    Where workstation setups start to break down

    If you cycle between dual screens, a laptop, and stacks of paperwork, cable slippage usually shows up before lunch. You leave for a call, return to a cord now sprawled under your mouse, or nudge a monitor only to have an HDMI line swing into your notes. None of these disruptions ruin your setup—but each one pulls you out of the zone just enough to derail smooth work. The more times you clear the same spot, the less organized your routine actually feels.

    By late afternoon, the side effects are obvious: you’re shifting cables instead of working, untangling power just to reset, and steering your mug around wires that crept back while you were away. “Organized” doesn’t deliver if cables can’t be trusted to behave the same way, every time you start your next session. True flow depends less on a tidy surface and more on cable paths that don’t change unless you want them to.

    An anchored cable tray: the smallest change, the biggest difference

    Switching from scattered surface clips to a single anchored cable tray under the desk broke the reset cycle at my own workstation. Adhesive clips always gave out just when things got busy; sleeves at desk level became another spot for dust and cord creep. Installing a tray exactly two inches from the back edge of the desk kept charging lines accessible but kept slack hidden. Now, only cable ends poked out, the monitor base stayed uncluttered, and notebook space no longer vanished under coiled wires. Desk depth felt bigger. Snack plates stopped balancing on top of tangled chargers.

    The change wasn’t about making things “look” neater—but making the 30-second reset after each project disappear. Instead of untangling and clearing clutter, it’s now: pull the cable, plug in, done—no extra step, no drift, no overnight surprises. After two weeks, I stopped even noticing where my cables lived. That missing friction is the mark of a setup that finally works: real attention returned to the work, not the fix.

    Practical checkpoints for your own setup

    How can you tell your current cable control is slowing you down?

    If you’re pushing wires out of the way whenever you type, tracking power cords in your side vision, or stopping to reroute the same cable after every break, you’re working around a hidden distraction—no matter how smooth the setup looks on camera.

    Can too much cable management make things worse?

    Definitely. Over-tight trays or wrapped-up sleeves turn a flexible desk into a rigid grid—good luck swapping devices or reaching a USB mid-task. The target isn’t freeze-dried order, but steady predictability and fast access. The best-anchored trays keep cables from breaking into your routine but flex when your devices (and your workflow) require it.

    What’s the most common desk mistake?

    Mounting trays out of reach, or letting loose sleeves spin across the top surface. Either makes access worse—or does nothing once cables return to their old habits. Smart placement puts trays inside your actual reach, intercepting cable swing but not burying the ends. That’s how the edge stays clear and device swaps stay effortless.

    What matters most: does your desk “feel” easier after each use?

    The real marker for cable control isn’t the day it’s installed—it’s after your routine puts it to the test, over and over. If setup tweaks mean less time spent clearing space, less untangling, more sitting down and starting work, you know the structure is earning its place. Every small failure—like a charger that takes too long to grab or a line that creeps back into your writing zone—is a sign that function still lags looks.

    Perfect cable setup isn’t invisible—it’s unnoticeable because it no longer interrupts. When your cables finally stay anchored, and reach space goes unbroken the whole day, you have a desk that delivers real flow behind the appearance. That’s where workstation friction actually vanishes—and where “organized” finally means easy.

    Explore the full WorkBasic collection

  • Why Ground-Level Storage Slows Your Workflow and How to Fix It

    The comfort of floor storage is always temporary. At first glance, the bins along your garage wall or the crates at the edge of the workshop look deliberate—labels crisp, floors swept, everything lined up for action. It’s a transformation you notice immediately. But by Wednesday, those same neat lines force a slow shuffle: bending for the lower bin, shoving a stack aside to reach the bucket underneath, inching a cart just to clear a path. That sense of control unravels every time you hunt for a tool or make space for the next project. The system that’s supposed to keep you moving quietly becomes what stalls you mid-routine.

    Order That Only Holds on the Surface

    There’s a crucial gap between storage that fits the room and storage that fits the way you actually use the room. Floor-based rows of bins deliver a sharp first impression—until repeated grabbing, returning, and shifting churns that order into a daily obstacle course. The slip is so subtle you hardly notice it at first: ducking beneath a low shelf, sliding a bin a few inches, leaving one out “for now” because the next job is coming up fast. But these small detours pile up fast. Before you know it, the bin by the door is always askew, and your main pathway is a zigzag around another stack growing in the corner. What looked efficiently stored now shapes how—sometimes even whether—you get the job done.

    The Cumulative Drag of Repeated Moves

    Picture unloading new supplies midweek. The intention: quick, easy access. The reality: bins edge-to-edge, barely enough room to wedge in another container. An open box half-blocks the entrance. Your first project is now a slow step-and-shift routine—buckets moved, bins nudged, hunting for a part that’s buried under last project’s leftovers. Each week, categories blur as labels land on the wrong bin, and the top layer becomes a precarious stack that dares you to pull from the bottom. Over time, “organized” becomes an endurance test of stacking, restacking, and working around your own system.

    Blocked Paths, Dead Corners, and the Hidden Cost

    The breakdown happens quietly, away from that first-day order. It’s not a pileup overnight—it’s a space that loses its flow, task by task. The cart doesn’t go back where it belongs because bins block the route. Wall space below knee level fills with storage, but above it, nothing is usable; gear overflows into empty corners that were supposed to stay clear. Floor bins—once a tidy grid—become a real-life Tetris: bump one, and the others shift off-mark. Now the space isn’t flexible, it’s stuck—forcing improvised piles, awkward detours, and a pattern of always working around clutter instead of clearing it.

    Everyday Friction, In Practice

    • You try to grab a drill at the back—but two bins and a cart are blocking access, so you pull out half the row, only to put them all back minutes later.
    • Resetting for the next project means balancing stacks, hoping the lid stays on. An accidental shove and it all slides off-mark—again.
    • That simple evening repair takes longer; the path you cleared last weekend is now blocked by an overflow bin from Monday.
    • You realize you’re carving out more time managing storage than working on the project itself.

    Why Real Routines Outpace Floor Storage

    If your bins store holiday décor or untouched archives, floor setups work for a time. But day-in, day-out use—gardening, repairs, the workbench routine—reveals the friction fast. More bending to dig beneath the last stack. More detours when a cart or hose blocks the “main” route. Tools and parts never quite make it back to their slot, so categories blur; overflow bins migrate from one zone to another, turning spatial order into a moving target. In setups with any real rotation, the footprint that looks organized on Sunday becomes the slow-down you dodge all week long.

    When Visual Order Becomes Practical Disorder

    You don’t notice efficiency slipping away until it’s gone. Suddenly, every retrieval has its own obstacle course: stepping over the end of a bin line, twisting around an out-of-place cart, bending and re-stacking more often than actually using what’s stored. The path is “clear” only if you’re willing to rework it—so you start avoiding certain supplies, or stacking odds and ends elsewhere “just for now.” What was meant to speed up projects now eats up whole afternoons with routine shuffling just to restore that illusion of order.

    The Game-Changer: Lifting Storage Off the Floor

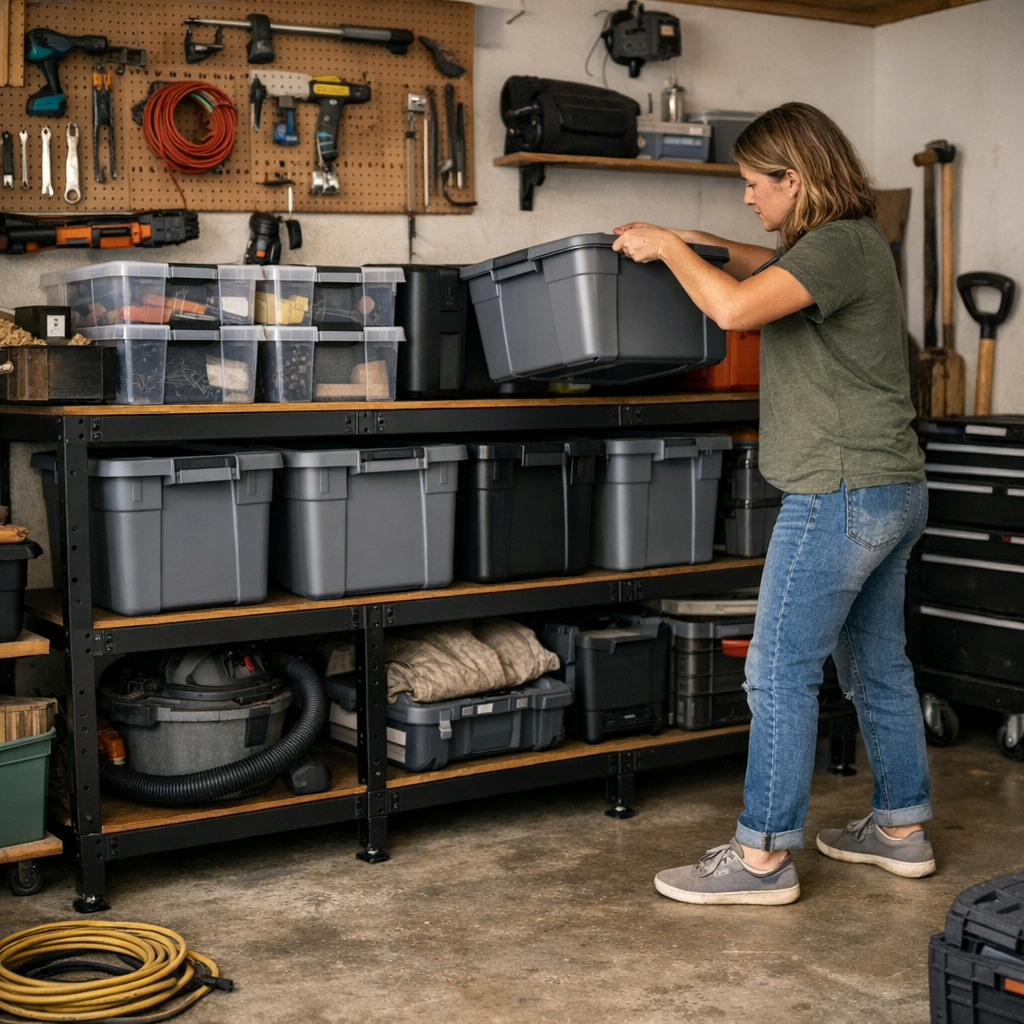
    In one garage, the breakthrough came not from buying more bins, but from lifting storage a modest six inches off the floor. Suddenly the daily bends, shuffles, and stumbles faded. Carts rolled cleanly underneath, aisles stayed open, and bins became easy to access—no toppling, no triple-stack, no detours needed. Without adding a single square foot, the difference in everyday movement was immediate: the setup actually encouraged order to last, not unravel.

    This isn’t magic—just a smarter use of space. No more sliding boxes to get the one you need. No more dead spots in the corners. Cleaning up stopped being a full-on production; it became a two-minute reset. You could finally see and reach everything in one step. The whole footprint performed more like an active workspace—and less like a storage unit you dreaded sorting.

    Four Ways to Quiet the Daily Friction

    • Break the stack habit: Store bins in a single layer. Toppling, digging, restacking—it all disappears. Need something? One move. Done.
    • Lift with intention: A low platform or modular shelf means rollers fit beneath, bins pull out fast, and you’ll stop using open floor as overflow parking.
    • Spot the overtime signals: If you’re bending, shoving, or re-sorting bins more often, your setup’s overdue for a rethink. The moment it slows you down, change it.
    • Test your reset: Returning things to place shouldn’t feel like a chore. If it does, your system isn’t built for repeat use—fix the pain before it becomes baked into your routine.

    Let the Workspace Move With You

    No setup eliminates all effort. But the right one keeps friction low, even when projects, tools, and routines change. Floor storage might look decisive, but if every return to your garage, workshop, or shed brings a new obstacle or detour—even a small one—the organization is only skin-deep.

    Refining your layout doesn’t demand a total overhaul. Just raising storage, rethinking the footprint, or swapping stacks for modular shelves can flip the routine: no more sidesteps, no more daily blockages, and no more abandoning projects because it’s not worth the reach. If resets feel like a chore or your “organized” area leaves you reshuffling, don’t blame yourself—pivot the setup. Protect your pathways, keep your best gear within arm’s reach, and build a space that actually works with you, not against you.

    Find modular storage solutions built for real-world use at StackNest.

  • Avoid Costly Lighting Mistakes by Marking Fixture Placement Thoughtfully

    Most indoor lighting mistakes don’t announce themselves all at once. They reveal their flaws every time you reach the stair landing and hesitate because the next step disappears in dimness. The bathroom mirror looks well-lit—until morning hits and you’re forced to lean or squint just to shave or see both sides of your face evenly. What looks “done” at first glance quickly exposes glare, blind spots, and shadow patches as soon as you begin your daily routine.

    Where “Good Enough” Fails: When Repeated Use Uncovers Awkwardness

    You can meet measurement guidelines and still end up with lighting that sabotages daily comfort. The blueprint might check out. But when you pace the same hallway every night, the slight dark edge at each end creeps in. Cross the living room and realize that one reading chair stays in half-shadow, no matter how many times you nudge the lamp. Or step into the bathroom and watch the difference: one cheek bright, the other sunk in grayness, the result of a “centered” fixture that never took real reflection lines into account.

    These aren’t dramatic flaws. They’re subtle annoyances that stack up. A semi-flush ceiling fixture, placed a few centimeters off center in a corridor, can cast a persistent shadow you learn to avoid without even thinking. A wall sconce on the stairway, installed a touch too high, leaves the lower steps unlit—enough to make you slow down at the turn. These mistakes don’t show up in still photos, but they wire themselves into daily movement: small hesitations, involuntary squints, extra steps just to find clear visibility.

    Mirror Lighting: Shadow Imbalance and Persistent Glare

    No flaw draws attention faster than the bathroom mirror that throws your face into uneven light. Vanity lights, “properly” installed by number, can create persistent shadows or a direct glare line slicing across your eyes. The visible imbalance is instant—one side washed out, another left dull, the effect only growing worse if the fixture sits just a fraction too high and bounces straight into your sightline. Every basic task—brushing, shaving, makeup—becomes unnecessarily awkward, all for want of a few centimeters’ difference in placement.

    The Real Cost: Patching, Scarring, and Recurring Frustration

    Missing the mark with lighting isn’t a quiet mistake. Every attempt to fix it—moving a flush mount, realigning a sconce—leaves patched holes in drywall, visible blemishes, or mismatched paint spots that don’t quite disappear. Even a small error can haunt you: you see the patch each time the light turns on, or find yourself still pausing at the same dim spot. The result is a space that looks finished but never feels fully comfortable, with each workaround becoming part of your routine.

    Movement Paths Overrule Measuring Tape

    The difference between “good” and “actually good” lighting comes down to how the setup follows movement, not just where the tape measure says a fixture belongs.

    If you only mark placements by drawing lines on paper, you’ll miss the spots that matter—where your shadow always falls as you lean over the kitchen sink, or where the stair sconce fails to reach the bottom tread. The practical fix is simple, but often skipped:

    • Mock up live placements: Hold the fixture or tape it temporarily where you think it belongs.
    • Walk every path: Take the routes you’ll walk at night—hallways, stairs, kitchen routines, mirror moments.
    • Check from use angles: Open doors, move along counters, use the space as you do in real life, and watch for surprise shadows or stray glare.

    It’s rarely more than a two-centimeter correction that solves the persistent shadow or erases the daily squint. One exact scenario: a bathroom mirror lit perfectly head-on when standing straight, but the moment you open the door or lean sideways, a dark wedge appears. Shifting the fixture mark just slightly can dissolve these phantom shadows, saving you that morning frustration for years to come.

    Minor Shifts, Major Difference in Daily Flow

    Tiny misalignments nag more the longer you live with them. In the laundry room, the flush mount positioned closer to the door might leave the wall cabinet in constant shadow—a hassle that gets under your skin each time you reach for supplies. In kitchens, even bright rooms expose their weaknesses if the under-cabinet strip misses the working edge or leaves a corner dark. Food prep slows, and what’s supposed to be bright, usable space becomes another task to work around.

    Spot the Signals: How Misaligned Lighting Shows Itself

    You don’t need an expert’s eye to notice when your lighting isn’t working. Watch for:

    • Hesitating at a stair turn because the bottom vanishes into shadow
    • Turning or ducking at the bathroom mirror to dodge a harsh shadow line
    • Shifting your desk or seat to avoid glare cutting across your work
    • Crossing a hallway where the light seems to vanish near the far wall
    • Reaching for a counter or sink edge that’s never fully lit, even in a bright room

    These aren’t one-off inconveniences—they become part of your daily pattern if left unresolved.

    Avoid Repeating the Patch Job: Check Placement in Real Time

    Don’t gamble on perfect placement from a drawing alone: Test fixtures in their real positions before final installation. Use painter’s tape or a temporary hook, turn on the light, and walk the space. Let shadows, sightlines, and coverage show their truth before you ever put a hole in the wall or ceiling.

    Spending ten minutes to check—before anchors and drills—can save you hours of repairs and years of eye-rolls each time the glare or shadow returns. Minor tweaks in mockup allow you to catch the persistent annoyances early, instead of living with them day after day.

    Lighting for Real Life: The Difference Between “Bright” and Truly Clear

    A room can look finished and still force you to pause, squint, or step around the same awkward shadows forever. The setups that actually work anticipate movement, task spaces, and the risk of uneven spread—so you don’t find yourself dodging the same problem every time you walk through or look in the mirror. Hallway flush mounts that cover both ends, stair sconces that light every tread, under-cabinet lights that reach the full work area—these get chosen for how the space is used, not just how it looks when empty and new.

    Start with the flow of daily life—where you stand, walk, reach, and look—then mark fixture locations to fit those behaviors. Spaces lit for real use don’t just look good; they feel easier every day, with no hidden friction or puzzling shadow trying to trip you up.

    For practical lighting that fits real life, see the full range at LightHelper.

  • Why Flexible Car Organizers Improve Daily Driving Convenience

    Looking organized isn’t the same as being usable when it comes to car interiors. That crisp-looking seat cover, streamlined cable run, or row of bins might impress after a quick cleanup, but the real test starts the second you put the car through its paces. Day after day, the same trouble zones come back: a cable snags your jacket as you slide in, yesterday’s bin has shifted an inch after a hard brake, or that “perfect” phone mount now blocks your charger port during a rushed stop. The polished surface holds together, but real-life routines start picking apart every weak spot—often in the exact places you thought you’d solved.

    Where Car Organization Breaks Down During Repeated Use

    Most vehicle organizers look solid out of the box. You close the door, everything feels in place—for about a drive or two. It’s only after three days of errands, school runs, or work commutes that the cracks show:

    • Cables creeping back across seat edges, forcing you to move them aside every time a passenger jumps in or you slide your bag over.
    • Seat-side organizers that promise structure but inch forward at each quick stop, demanding another fix as soon as you reach for something inside.
    • Trays and dividers that need both hands, slowing those coffee-and-groceries balancing acts you actually do twice a day.
    • Emergency kits packed perfectly—until any real use means pulling out half your cargo area just to access or repack them.

    The images on the box match your car only until reality kicks in: halfway through a busy day, one awkward movement brings the whole “neat” setup back into question. Tidy cars can feel surprisingly slow and cumbersome if every access point starts demanding its own workaround.

    The Build-Up of Small Interruptions

    You rarely abandon a car setup over one big failure. It’s the steady buildup of micro-frictions: pushing an organizer back to buckle up, untangling cables for a quick phone call, or knocking a sanitizer bottle over as you shift your gym bag. It barely registers for the first week—then you find yourself dreading that next pause when the setup doesn’t adjust to you.

    Even “minimalist” interiors find their breaking points over time. The early satisfaction from seeing every item slotted in fades, replaced by:

    • The same small bottle rolling out and rattling across the floor at corners, mocking your dividers.
    • Chargers that need unplugging and re-routing each time a friend rides shotgun or you shift the seat to fit a coat.
    • Over-stuffed bins you can’t access without shifting three things just to get what you grabbed most last week.

    Flexible Setups: Absorbing Movement, Not Blocking It

    Good car organization bends with you—or it just gets in the way. The shift isn’t dramatic. It’s switching from rigid storage and tight-fitted accessories to solutions designed with repeated movement in mind. A cable path with enough slack to sway, a mount that turns toward whoever needs it, bins that nudge over rather than wedge in place—these quirks don’t stand out on a showroom day, but become obvious the third time you try to load groceries in the rain or reach for your charger on the go.

    The Moments When Flexibility Really Matters

    • Fast re-entry: Door swings open, you toss your keys, and nothing snags, falls, or tugs loose when you reach for your phone or charger—routine isn’t interrupted by resistance.
    • Seat adjustments: With a flexing cable route, the whole charging circuit moves smoothly as you or a passenger adjust. No unplugging, no trapped cord, no one holding up entry.
    • Loading and unloading: Cargo organizers slide or adapt just enough for odd-shaped boxes, instead of holding up the line and forcing everything else out of place.
    • Shared use: Organizers and mounts respond to the next driver, not hold last week’s “perfect” position rigidly—so you don’t start every trip by dismantling someone else’s setup.

    Flexible systems eat up those little collisions between you and your things. Instead of announcing order, they quietly stop disorder from creeping in every time your routine demands a new move.

    How Small Tweaks Transform Real-World Car Use

    The setups you notice least are usually doing the best work. Swapping out a fixed phone mount for a pivoting one, re-routing a charger line, or choosing an organizer that slides—these aren’t cosmetic. Each one cuts down a line of friction at your seat, console, or trunk corner. Over hundreds of everyday actions, those seconds saved and hassles avoided add up: fewer mid-drive corrections, less distraction when loading up, no mental scorecard of what’s going to go wrong on today’s second stop.

    A cable route that adapts to your seat, a bin that holds but doesn’t block, and a cover that protects without bunching at the edge—these are the fixes that keep you from circling the cleanup cycle or bracing yourself for another small snag. The car isn’t just neater; it’s less in your way.

    Recognizing When It’s Time to Switch

    If you’re repeatedly:

    • Shifting your bag to reach around a rigid mount or trapped cable
    • Pushing bins back into place during every drive
    • Pausing when loading, charging, or seat moves overlap and slow each other down
    • Seeing yesterday’s clutter reappear where you just organized

    That’s your signal. If the setup turns every small access into a new task, it’s working against your real use. This is where a flexible swap pays off—where one quiet adjustment now saves you five small interruptions a week later.

    Choosing Flexibility at Key Car Touchpoints

    The practical trouble spots keep repeating: seat edges, console spaces, trunk corners. These aren’t just dead zones to fill with tidy boxes—they’re where movement, reach, and clutter fight it out every trip. The gear that survives is the gear that flexes: a phone mount that rotates as hands and seats shift, a cable route that bends before it bunches, a tray that moves over instead of locking in place. Maybe less photogenic, but far more usable when a normal day throws twice as many errands at you as planned.

    “Perfect” interiors rarely survive contact with real life. Instead, seek the setups that keep the pace: fast re-entries, unblocked cables, bins you access in a second. That’s where a car stops looking merely cleaned up and starts acting like it’s built for your routine, not someone else’s ideal. Find flexible, field-tested organization solutions at DriveWellSupply.

  • How Smart Outdoor Storage Saves Time and Keeps Your Yard Tidy

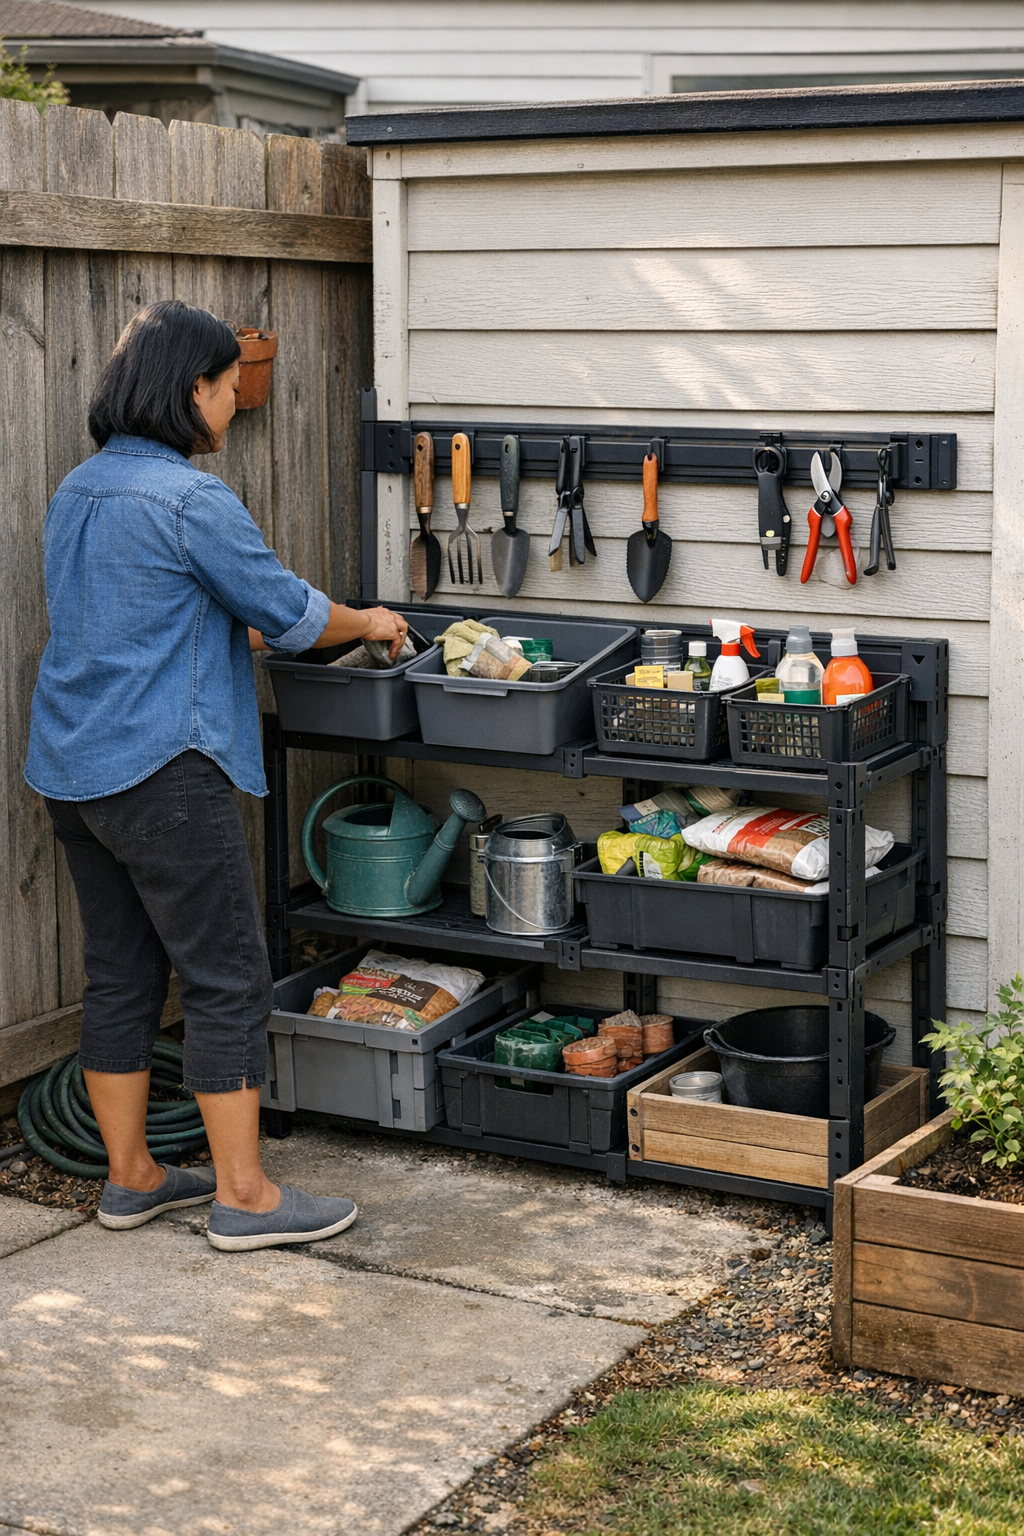
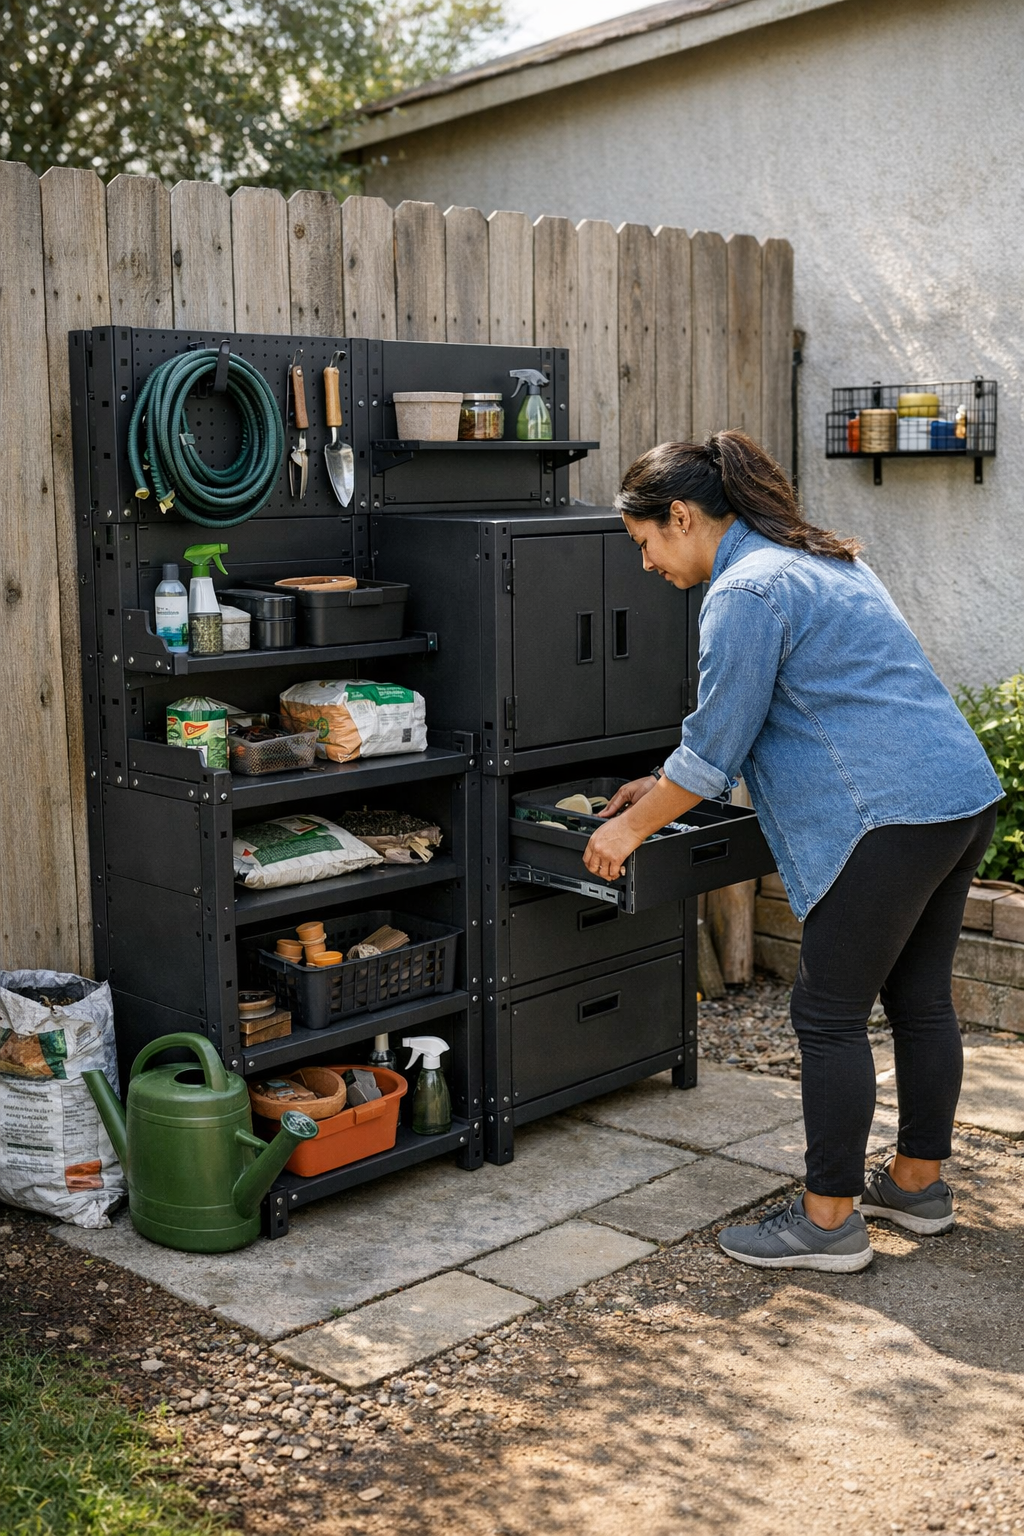
    Most outdoor storage looks tidy—right up until your yard actually gets used by more than one person. It’s easy to nod at a wall of hooks or a row of bins and call it organized, but within a weekend of kids, housemates, or visiting relatives grabbing and returning tools, the friction sets in fast. A garden corner that starts efficient becomes jammed and unpredictable—a trowel lost under spades, a rake wedged sideways, a bin lid refusing to shut. The routine slows, the path clogs, and what was “storage” turns into a quiet mess with every round of use.

    Why Shared Tool Storage Breaks Down So Easily

    Disorder creeps in the moment people use the yard differently. A setup that handled solo use suddenly reveals blind spots: one person lifts a rake onto a top hook, someone else can’t reach and leans it in a corner, another just drops their tool at the nearest available spot. A small shovel blocks a broom’s handle; a tangle of gloves piles up behind bins. Every quick return becomes a rearranging act. By the end of the day, what should be a two-second task stretches into shuffling, tugging, and digging for what you actually need.

    The design of bins and racks promises clarity, but repeated use exposes their weak points. Bins designed for “overflow” rapidly swallow everything—handles tangled, trowels buried, smaller gear impossible to fish out without pulling half the contents onto the grass. Wall hooks, mounted too high or too tightly, become unreachable for some and ignored by others. Soon, tools are abandoned below, and the wall “storage” becomes mostly wall decoration. Pathways constrict. The reset each evening drags out, and the corner meant for quick storage becomes a bottleneck instead.

    Blocked Paths, Stalled Resets, and the Cost of Overflow

    Walk along any fence-line or side-yard utility zone that sees real use, and you’ll find the story: organized hooks for brooms and rakes, a mid-sized bin for hand tools, a space cleared for the wheelbarrow. By midweek, a familiar creep begins—a shovel propped against a bin because no hook fits, then another tool on top “just for today.” Bin fills up? The spillover lands on the ground, transforming a path into an obstacle course. By Saturday, getting the hose means moving a rake, three spades, and the lid of a bin that now serves as a makeshift shelf.

    The end of a work-heavy day doesn’t bring a quick reset. Instead, it’s a hunt through buried gear, sorting gloves from plant supports, undoing tight clusters of handles, or recovering a lost kid’s toy from the dead corner where overflow always piles up. The ten or fifteen minutes of “reset” rarely splits evenly; it falls to whoever is left cleaning up, again and again. Over weeks, frustration outweighs organization, and the rounds of effort just reinforce the trap.

    Crowded Floors and Wall Space That Doesn’t Help

    Grabbing another rack or bin feels like a solution, but the effect is usually more clutter—floor space gets choked, not cleared. Small tools slip beneath larger ones, and that extra bin for “miscellaneous” quickly fills with everything no one wants to put away properly. The wall may have five more hooks, but if they’re out of reach, too bunched, or tucked behind some plastic storage, they’re just decoration. Each return turns into a minor puzzle: where does this actually go? If you have to push things aside to make room, your system is already giving out.

    It shows in the daily patterns: a wheelbarrow blocking the path to the shed, a rake stuck against the gate, a rolling tangle at your feet every time you open the storage unit. The surface “tidy” only lasts until real movement happens. Every extra step—moving three tools just to return one—just slows things down and makes every task feel heavier.

    Small Adjustments That Actually Rescue Your Flow

    True improvement rarely means adding more storage—it means adjusting to your routines. After lowering the most-used tools to arm’s height, close to the entry, spontaneous pileups practically disappeared. Breaking up wall space by category—pruners here, digging tools there, handles with room to breathe—does more than look neat. Suddenly, anyone returning something can see what goes where, and nothing blocks another item’s spot.

    One change made a bigger difference than expected: marking a 60 cm “clear zone” near the wall—a strip where nothing is supposed to sit, ever. If that path gets blocked, it’s a fast sign the system failed, so it gets fixed right away, not left to stew. The result? Resets are faster, even when two or three people return tools at once. Instead of dodging piles, they actually use the space as intended.

    Real-World Fix: Assign and Adjust

    Hooks and racks only work when assigned—mixing everything together is a guaranteed mess. Specific assignments build real habits: pruning gear always on reachable hooks, heavier tools grouped tightly, less-used items tucked out of the path. Dumping “miscellaneous” into one giant bin creates a black hole for anything you want to find later. Every stray item is a sign to reconsider the routing, not make another pile.

    Imperfect Setups Are the Real Test

    No outdoor organization lasts pristine through storms, weekend projects, or a yard full of kids. The true win isn’t photo-perfect storage, but the way a setup resets under pressure. If every tool can return without shoving, stacking, or blocking the next movement, that’s the difference between a functional yard and another space eaten by frustration. Consistency matters more than perfection—systems that forgive messes and reset quickly actually survive real use week after week. That’s what keeps the path open, your time intact, and your corner of the yard shifting with the rhythm of real life instead of stalling out with every busy weekend.

    http://tidyyard.myshopify.com

  • How Proper Storage Preserves Laser Level Accuracy Over Time

    The real difference between a go-to laser level and one you quietly dread using isn’t obvious on day one—it exposes itself by the fourth layout, halfway through a dusty week, when the clock’s ticking and the beam refuses to land where you need it most. If you’ve ever hustled back onto a site after a weekend, full intent on making clean marks for cabinet mounts or framing lines, only to discover your once-crisp laser is smeared, shuddering, or unexpectedly off, you know that creeping frustration. Maybe the first job back, you assume a dying battery or a quick lens wipe will fix it. But when you’re adjusting your handsaw mid-cut or redrawing drill points yet again, it’s not bad luck—it’s the slow payoff of rushed storage and skipped care. In real shop and site life—squaring tiles on uneven board, punching reference holes for dowel jigs, or firing up a row of anchors—precision isn’t optional. A laser you can’t trust means extra checking, slower movement, and mistakes that stick around until the punch list.

    Behind the Closed Case: Where Laser Levels Actually Wear Down

    Forget what the slick exterior promises. Inside, months of use in a gritty garage, a muggy basement, or that back-of-truck toolkit leave subtle damage. The real trouble isn’t a dramatic fall or caked mud—it’s what builds up quietly in bad storage habits.

    Picture a late night after drywall sanding—tools everywhere, debris on every flat surface. You shove your laser back in the case—batteries untouched, glass streaked, the inside of the box catching stray grit. At next setup, it powers up like normal. But by the second project, as you shift from rough patching to a tight tile line, the beam splits, blurs, or won’t hug the edge you’re cutting. Now you’re aiming a drill and second-guessing every mark, losing momentum with every slow correction. That’s not just annoying; it’s where workflow really grinds down.

    Where You Notice the Failure—And What It Costs

    Laser issues rarely interrupt in the first five minutes. They show up halfway through a ceiling grid install, when you realize lines aren’t parallel and have to re-chalk. Or right as you’re setting anchors for shelving, and the beam drops out on one side of the room. What looks like normal wear is more often dust inside the housing, damp battery contacts, or corrosion you’d never spot until accuracy matters.

    How Bad Storage Steals Your Precision

    The biggest storage mistakes rarely finish a tool off immediately—they drain your trust and pile up extra work. Tiny routine shortcuts accumulate:

    • Clouded or streaky beams, making detail work almost impossible when tracing cut lines or drilling pilot holes
    • Balky, unreliable power—especially with battery corrosion sneaking in after a few humid days inside the case
    • Loss of calibration after being jammed tight in the box or rattled around between jobs
    • Minutes lost re-drawing or verifying every layout line because you can’t trust the projection
    • Frustrating corrections—like shaving down a fresh cut because a faded line led you off-mark

    On real jobs, “just a few minutes” of lost time multiplies fast. Redoing fastener placements, miscutting panels, or fidgeting to get an anchor back into plumb chews up the energy you should be putting into making progress. When you can’t trust your beam to stay true, you compensate—not with precision, but with caution and fatigue.

    Actual Site Moments: When Storage Habits Show Up

    Walk onto a fresh project, stacks of plywood and hardware ready, anxious to rip through layout and start cutting. You set the laser for the opening pass—expecting a sharp, steady line. But what you see is a patchy, dull mark that disappears against dark board or skates across a glossy tile. By hour two, midway through fastening brackets or tracing for an outlet box, you’re back to the tape measure, recalibrating by hand, and wasting energy chasing the right reference. Waving a shirt sleeve at the optics or swapping batteries in a hurry does nothing for the beam’s focus under harsh lights or reflective surfaces. From there, the whole task list—drilling, screwing, trimming—gets slower and more error-prone.

    Now put your workflow beside that crew member who always preps their kit: batteries out, glass cleaned, everything dry. Their laser fires up instantly, line dead-on across the full distance—even after a rough unload or stray nudge. While you’re rubbing grit off the lens and re-checking your square, they’re tightening fixtures, making clean drill points, and actually finishing.

    The Compound Benefit of Simple Habits

    The takeaway? That fellow tech’s laser shrugs off battery swaps, scaffold bumps, even the odd spill without going rogue. A wiped lens and dry contacts mean their projection stays tight—inside 1–2mm—over room-length stretches. Instead of wrestling with missing marks or drifting beams, they move on to actual work: controlled, accurate cuts; faster mounting; less backtracking and tool fatigue. Over time, that margin of control translates directly to cleaner installs and smoother days.

    Building Storage Discipline Into Your Routine

    Laser level care isn’t complicated or slow. It’s about small choices, every shift, before the box closes:

    • Clean with the right cloth: After dusty jobs—sanding, grinding, demo—use a proper optical or microfiber cloth to wipe the lens. Skip paper towels or shirt sleeves: these scratch glass, dulling beam clarity for every line thereafter.
    • Always remove batteries if the tool’s off duty more than a couple days. Even premium batteries can leak, ruining your contacts and adding invisible resistance. A quick battery pull means the laser is ready, not unreliable, when the next run starts.
    • Slip a silica gel packet in the case, especially if you store gear in basements, garages, or see temperature swings. That little packet keeps humidity from creeping into sensitive contacts and circuitry.
    • Never park your tool “just for now” in dusty, sticky, or damp spots—like a bench next to a finish sander or a trunk with an open glue pot. The random storage move that “won’t matter this once” is usually where the next problem starts.

    Field-Tested Storage Questions Answered

    Is leaving batteries in for a few weeks really a problem?

    Absolutely. Even a short stint with batteries inside means corrosion risk—and the more humid or varying the site, the higher the odds it creeps in. If you want the laser to power up right when the walls go up or concrete’s waiting, pull the batteries. Get your rhythm down: if you wouldn’t leave the charger in your drill, don’t trust batteries sitting in your laser over downtime.

    What’s the right way to clean the optics?

    Use only an optical-grade or microfiber cloth—the kind made for camera lenses. Rags, tissues, or abrasive wipes leave scratch tracks that scatter the beam and wash out your reference. If you’ve been cutting tile, grinding mortar, or running abrasive saws nearby, make lens cleaning the very last step before packing up. Your eyes—and your drill bit—will thank you.

    Why do some lasers give up accuracy so much sooner?

    Frequent offenders: batteries left in, glass never cleaned, tight-packed then forgotten in a tray full of sawdust. Small corrosion, ground-in grit, and skipped calibrations all combine to downgrade performance. Ignore it for long, and you introduce errors—awkward cuts, re-drilling, endless cross-checking—that slow every part of the job.

    What You Gain: Trustworthy Lines, Fewer Mistakes

    Keep your laser level clean, dry, and battery-free between jobs and it stays dependable—not just for today’s layout, but on every cut, drill, and fixture install after. Neglect the routine, and the problems sneak up the moment things get busy. You waste focus, redo work, and wind up questioning even the best gear just when speed and accuracy matter most.

    Stock up on reliable tools, trade-tested accessories, and real-world jobsite equipment at Gumboll.

  • Transform Your Bedroom with a Drawer First Habit to Reduce Clutter

    The dresser top looks like an easy win—a blank surface you can finally keep organized. But a few days into real use, signs of failure start to show: sunglasses stack with loose mail, tangled chargers edge out what actually matters, and even a newly placed tray ends up crowded with leftovers you meant to sort “soon.” What was clear space on Saturday becomes a weekday obstacle course, slowing you down when you need speed and routine. The problem isn’t visible mess alone. It’s the gradual loss of simple retrieval: “just resting here” turns into “where is it now?” as overflow and edge creep take hold. For anyone with limited surface area, the gap between looking tidy and actually functioning grows with every unsorted pile and delayed reset. In the world of storage and organization, this is the warning sign—a surface that collects overflow isn’t working, no matter how calm it seems after a clean-up.

    The Hidden Costs of Cluttered Surfaces

    Using your dresser top as open storage feels practical at first: headphones tossed on the tray, keys left by the lamp, books and chargers always in view. But each shortcut—each item left out—injects invisible friction into your morning and night. The pattern is easy to spot: by Monday, you’re shifting receipts to find your watch, lifting mail to reach a pill bottle, tracing a vague memory about where you left your earbuds. The surface stays deceptively “organized” until it quietly collapses under micro-delays. Every retrieval is that much slower, and the mental drag piles up until you either let the clutter rule or spend another chunk of time restoring order—again. When a storage zone can’t survive repeated, varied use, it’s not helping, it’s quietly getting in your way.

    Why “Drawer First” Changes the Routine, Not Just the Look

    Moving to a drawer-first strategy isn’t about hiding chaos; it’s about aligning storage with how you actually move and reach during rushed routines. Dressers with limited top surface are most vulnerable to category pile-up. Invisible overlap breeds active friction. The shift happens not in a single clean-up, but as you force the issue: headphones, prescriptions, spare change—all rehomed in actual zones, not lost to the next surface drift.

    This is habit more than philosophy. Everything but daily-use or genuinely display-worthy essentials moves under the surface. A clean top signals: “These are in daily motion.” The rest—vitamins, stray receipts, tech—finds its way into drawers chosen for reach, not just storage space. The reward comes on busy mornings, when your movements track cleanly and you’re not stalling out on a random backup charger or stray paperwork blocking the thing you need most.

    Routine Meets Resistance: A Real Day’s Friction

    Picture a real Wednesday: only a few minutes to get ready, and you’re still swiping aside old mail, hoping your keys aren’t under the newest pile. Even after purging, stuff returns: your charger tangled with receipts, headphones wedged beneath a paperback. Every grab takes two steps, not one. It isn’t chaos, but it’s not smooth. By week’s end, the surface demands another triage—resetting what drifted, sorting what lost its spot. This is the bottleneck most setups ignore: a system that can’t keep up with daily spillover or recover fast enough after a typical week never truly works.

    Making the Drawer Work: Practical Setup Choices

    The real advantage of drawer-first isn’t that mess disappears—it’s that you carve out a route for each item that matches your hand’s habitual path. Hidden storage only works if the flow matches routine. The win is in the reset: putting things away doesn’t stall you, and retrieval runs on autopilot, even in a rush. If your system forces extra steps, the surface will fill again because the path of least resistance always wins.

    This demands honesty about what earns surface access. A nightly book, a phone charger dock, one simple decor piece: the rest goes below. Drawers need structure—trays, bins, honest categories. Not magazine perfection, but true guides. Without this, “out of sight” just means “misplaced.” The key is obvious, reachable homes that slow down category drift and make end-of-day resets brief rather than burdensome.

    Dividers and Bins: Small Changes That Outlast Motivation

    Drawer breakdown isn’t about laziness—it’s about vagueness. Open trays for medication at the front. An in-drawer bin for all things tech: chargers, batteries. A pocket for go-to accessories. No need for micro-categorizing—just predictable, honest zones you can toss things toward in real time. If the system fits your reflexes, it survives Monday through Friday, not just Sunday night resets. The aim isn’t a one-time showroom: it’s a living grid that guides stuff back to its spot as easily as it leaves.

    When the drawer flow is right, end-of-day tidying is a scan and a toss—not an excavation. Retrieval is simple and the surface can stay clear without being “policed” into emptiness. The system works because it has guardrails, not because you suddenly became the world’s neatest person.

    Recognizing—and Respecting—Natural Limits

    No storage solution erases chaos forever. New stuff appears. Routines stretch and break. But a resilient drawer structure absorbs the inevitable: renegade items get a short-term home without derailing everything else, and the top surface stays usable instead of beckoning the next pile.

    The trick for oddball or temporary items: a labeled “active” tray inside the drawer—tickets, a short-course prescription, borrowed headphones. When the window is up, you clear the tray, not another stack on the counter. This one change turns a high-risk chaos zone into a buffer that flexes today and resets cleanly tomorrow.

    When Out of Sight Means Out of Mind (and How to Avoid It)

    Hidden storage can easily backfire if it doesn’t stream with your actual movements. Closet drawers, underbed bins, sideboard compartments—all valid, but only if the location fits the routine. When you must open three drawers to nab daily meds, or dig to the back for the chargers you use every day, stuff lingers outside longer. Category drift and lost items usually trace back to set-ups that ignore movement: if the return flow isn’t quick and retrieval isn’t nearly automatic, even the best-looking system will break down on a busy morning.

    The difference in a practical layout: routine items always land right where your hand reaches first—no hidden piles, no brainwork, no reshuffling. That’s the mark of order that survives repeated use, not just deep cleans. The result isn’t only in appearance, but in the actual loss of delays and excuses for letting the surface overflow again.

    When Looks Deceive: The Illusion of a Tidy Dresser

    Trays, dishes, a neat row of bottles—easy to stage, easy to lose. Within a few days, the pretty surface is a landing zone for whatever didn’t fit below. One glove, an extra charger, notes from last week, paperwork waiting for “later.” The illusion of order always gives way as overflow stacks up. Each time, the system needs rescue: more effort, another half-reset. Even attractive storage props are just shells if there’s no real structure underneath steering what returns where and at what pace. Surface tranquility is a fragile accomplishment once your actual routine resumes.

    The setups that perform for real recognize that visible order is temporary, but a structure beneath that matches your living patterns lets you recover in minutes, not hours—even when the week turns chaotic.

    Where Systems Work—and Where They Break Down

    Some hidden storage fails for practical reasons: deep drawers force stacking and slow retrieval, crowded zones blur categories, and too much micro-organizing kills speed. Over-dividing a drawer means extra friction returns—soon you’re back to daily piles because the “system” adds effort instead of easing it. Any setup that regularly triggers multiple drawers, floor piles, or reshuffling between zones is quietly generating work instead of saving it, especially in mixed-use or limited-space bedrooms.

    Drawer-first, when built around reach and honest categories, drops the reset cost and blocks clutter at the source. It frees floors, defends surfaces from overflow, and—most important—doesn’t stall out when you need to recover during the week, not just after deep cleans.

    Living with the System: Sustainable Order in Daily Life

    The look of a surface at its best is never the test; the measure is whether you can actually recover when real life hits. The right storage structure isn’t a style win—it’s a rescue plan. Every “where did I put—?” moment is shorter, every return easier, every slip reversed before it grows into a new mess. When your dresser stops dragging your routine or collecting friction, its low profile signals space is being used the way you need it now—and you won’t need a full reset just to see the top again. The change starts under the surface, but you feel it everywhere: clearer retrieval, fewer stalling points, and a repeatable way back to order, not just a cleaner look.

    If you’re ready to build a setup that stays out of your way and supports your routine—not just your Saturday tidying mood—find more practical storage solutions at

  • How Thoughtful Pet Travel Organization Improves Every Stop on the Road

    The difference between a pet travel bag that looks organized and one that actually works on the road only reveals itself under pressure—at the third stop, the fourth attempt to grab wipes, or the moment you need a leash with one hand while steadying your dog with the other. That bag that seemed “trip-ready” on the kitchen counter quickly drags you into small, repeating hassles. Treats slip beneath blankets, quick-clean supplies vanish under toys, and every pause becomes a mini scavenger hunt. If you find yourself rearranging at every break, you’ve already lost precious travel rhythm—most so-called “prepared” setups cannot survive real movement without constant reshuffling.

    When “Organized” Stops Working on the Road

    A travel bag that promises perfect order at home rarely survives the first shuffle of a real trip. It all unravels quickly: the first sudden stop splinters neat rows, a roadside clean-up pushes comfort items into access slots, and a snack break turns unreachable wipes into the source of a new mess. Travel with pets is mobile and unpredictable—where your initial arrangement collapses is almost never in the photos.

    In use, weaknesses become obvious: wipes work their way behind pouches, seat-side pockets jam when pressed against the car door, and “smart dividers” designed for order actually make the leash impossible to snatch when speed matters. Appearance at rest is meaningless; only structure that supports messy, real-life restarts holds its own under travel pressure.

    Tricky Reaches and Repeating Interruptions

    The same pattern emerges for almost every owner: exit the car, pause, then fumble. Bowls wedge under travel blankets, wipes hide behind zippered pockets, and the leash you need ends up under everything else. Each supposedly “smart” pocket adds friction when it requires a detour—moving a comfort item, unzipping multiple layers, and finally reaching the thing you actually need after seconds lost to reshuffling. The initial sense of readiness evaporates as every basic action—grab, clean, calm—demands a workaround.

    These delays rarely come all at once. Instead, they seep into the trip as a series of minor slowdowns—a treat pouch out of reach here, a set of wipes requiring two-step access there. Ten seconds here, twelve there, but at every stop: compound friction. Only in repeated use does the cost become obvious—the system slows you down, breaking flow every time you need a quick restart.

    Carrying Transitions That Don’t Keep Up

    Many setups calm the visual mess at the cost of creating new obstacles. If you’ve ever balanced a restless pet with one hand while fishing past a blanket, a bowl, and a side pouch with the other, you know how quickly a bag’s “logic” falls apart. Stationary order disappears under shifting bags, tangled backseat belts, and sudden stops. Pocket placement that makes sense on a calm countertop stalls you when the trip starts moving in fits and starts.

    The Overlap Trap: When Items Block Each Other

    The most common error is packing for looks, not access. Comfort gear—blankets, plush toys—tends to land on top because it fits easily. On the move, this means every water break or wipe-down turns into moving the same item again and again. Overlap doesn’t just look untidy; it repeatedly slows you when it matters most, trading faster access for superficial order.

    Cleanup gear in particular nearly always gets buried: wipes jam behind bowls, treats get edged out by a plush, or hydration tools slide under a dog mat. In a real mess, the very things you need first are often the least reachable. Efforts to organize by visual separation actually lock essentials behind layer after layer, sapping your momentum the minute real travel disrupts your plan.

    Pattern Failures and the Cost of Slow Recovery

    Repeated use exposes every weak spot. The first stop goes fine—memory sharp, items freshly placed—but by stop three, reaching for essentials means guessing wrong, rechecking, or unpacking half the bag just to reload wipes. Suddenly, every action earns hesitation. Structure that seemed pristine at home stalls the trip at every turn, bit by bit.

    It’s not just about items mixing together. Even visually separated pieces go wrong: a leash that demands two hands to retrieve, wipes that can’t be pulled with a finger, bowls stacked too far from the carrier opening. Multiplying slowdowns turn each stop into waiting and repeat minor misfires, and you’re left feeling less in control with every round of re-entry.

    Building Access Into the Flow of Travel

    Dividers and tighter pockets aren’t the fix—these often create new access barriers. The solution is structure that supports repeated exit-grab-cleanup cycles, not simply a tidy appearance. Changing a single slot—moving wipes to a top-facing elastic pouch, or using a carrier with a single, wide-access panel—shrinks wasted movement for essentials.

    Separation without overlap is the key shift: leash clipped to the exterior, wipes pulled from a top opening, bowls in their own easy-reach section—never locked behind comfort gear. The goal is not to make the bag look untouched after every stop, but to allow for grab-use-go without second thoughts or forced repacking.

    What a Real-World Upgrade Looks Like

    One owner changed the wipes from a zipped inner pocket to a front elastic pouch—suddenly, muddy paw clean-ups took seconds, even while holding the leash in the other hand. Another switched to a carrier with a quick-snap snack panel, cutting nervous pet fumbles in the parking lot. Trips felt less interrupted, even if the setup no longer looked photo-ready by the fourth stop. The change wasn’t perfection, but movement felt smoother and less driven by the bag’s limits.

    Signals Your Setup Needs a Rethink

    If you’re routinely fumbling, reshuffling, or second-guessing where an item is mid-trip, the friction isn’t a one-off. These repeated irritations signal a structural problem in your current setup, such as:

    • Cleanup gear always ends up at the bottom, not at hand
    • Essentials—leash, treats, or bowls—keep getting blocked by blankets or toys
    • Recurring confusion about where things are at stop three or four
    • Tasks require both hands when only one is free
    • The same slow-down repeats itself, no matter how carefully you re-pack

    Every one of these is a trace of function being sacrificed for the illusion of order. The real test isn’t a photo finish at home, but whether you can reach key items instantly when travel is unpredictable and stops come fast and often.

    The Real Win: Smoother Flow, Not Just Cleaner Looks

    After the first few outings, the line is stark: what “works” in a staged kitchen rarely works at a backseat or park gate. No setup erases every snag, but arrangements that prioritize access, not just order, let you keep moving instead of hesitating or reshuffling. Every time the right structure erases a step, your routine gets less interrupted—and while the solution may never look as neat, the difference in how you travel is real, noticeable, and pays off most when you’re already in motion.

    Pet travel isn’t about keeping a bag untouched; it’s about a setup that shrinks interruption, lowers repeated drag, and turns each stop from a restart headache into a quick, confident action. If your current bag slows you instead of smoothing your day, it may be time for a setup designed for movement, not just for looks.

    Ready to upgrade your setup for real-world travel? Find solutions made for real pet movement at PawGoTravel.

  • Choosing Between Wire and Solid Shelving for Everyday Closet Use

    The real test for closet shelving comes long after installation—once life and clutter move in. Right away, a wall of wire or solid shelves looks crisp, promising control. But within days, the surface you trusted starts pushing back: stacks listing sideways, shirts smudged with dust or with sleeves sagging through metal grids, accessories blurring categories, and bins morphing into drop zones instead of keeping anything contained. It’s never just about what looks neat in photos. It’s about the hidden everyday friction—those micro-delays and constant mini-resets that either make storage feel manageable, or make every closet visit another round of tidying up something that won’t stay put.

    Shelf Surfaces Shape How (Un)Organized Your Routine Feels

    Shelving choice is hardly background—it sets the rules for how you interact with your stuff every morning. Wire and solid shelves aren’t just structure; they dictate access, encourage or fight disorder, and quietly shape the daily rhythm of getting dressed, grabbing linens, or corralling entryway clutter. Their tradeoffs don’t show up in a static snapshot—they emerge through repeated, ordinary use.

    Wire Shelving: Light, Flexible, and Relentlessly Imperfect

    Wire shelves win points for their open look and easy adjustability. In a crowded hallway closet or laundry nook, the airiness and instant visibility feel like relief—until real routines expose the sneaky drawbacks:

    • Stacks fall apart with every grab: Tug out a shirt in the middle, and the neat pile turns slouchy. A sweater sleeve threads through the grid, pulling the rest off balance. By the second laundry day, lines that looked so disciplined slouch, droop, and slide toward the gaps.
    • Soft clothes lose shape—fast: Thicker sweaters, knits, or scarves take on the wire indent pattern. Piled high, they start to bulge and sag, refusing to stay square. Those tidy folds you painstakingly made Sunday night? Gone by Thursday morning.
    • Small things tumble or vanish: Rolled belts, light shoes, even gloves or beanies migrate through the shelf gaps or slip behind bins—creating hard-to-see, hard-to-reach mess zones that clutter the floor or get lost in the shadows.

    If everything lives inside sturdy bins, wire shelving copes. But try stacking soft piles directly, and you’re forced into constant touch-ups. The result: every “quick grab” becomes a little project—straightening stacks, fishing a lost sock, or re-lining up collapsed rows just to keep some order alive.

    Solid Shelving: Predictable Support, New Problems to Solve

    Solid shelves seem to promise a fix: one smooth, gap-free surface under every stack. Shirts, pants, bins—everything sits level, categories look crisp, and piles hold their shape. But the trade-off is slower, subtler:

    • Dust sneaks in and stays: Especially behind stacks or under baskets, dust and lint collect in dead spots you barely notice. Pull out one item and discover a film, or worse—have to wipe down the whole shelf before adding clean laundry.
    • Sections can clog and lose distinction: Fill solid shelves edge-to-edge and airflow drops; the “back zone” becomes out-of-sight, out-of-mind. Suddenly, work pants stretch into casual jeans, stray socks drift behind storage boxes, and you’re not entirely sure where the off-season pile stops.
    • Cleaning becomes a recurring chore: Unlike wire, where most dust falls through, solid shelves demand attention. Miss a cleaning cycle, especially with pets or open windows, and lint builds in corners—and gets subtly ground into fabric as you retrieve clothes.

    The upside is obvious: you can pull out a shirt mid-row and—so long as you fold reasonably well—the rest of the stack remains upright. Categories are easier to hold firm. But unless you’re someone who regularly wipes down surfaces, solid shelves quietly collect the invisible grime that transforms “organized” into “stale.”

    Routine Friction: Where Real Closets Really Lose Ground

    Mornings expose the gap between shelved optimism and real use. You reach into a wire shelf for a favorite sweater—the sleeves have wriggled through the grid, dragging out half the pile. Now there’s a scarf trying to escape through the back, and two t-shirts are wedged under a basket. By Wednesday, you’re taking time to rebuild the stacks, just to keep the closet looking passable.

    Or maybe it’s the entry shelf for kid gear: on a solid shelf, hats and gloves stay stacked—until dust starts nesting behind out-of-rotation mittens. You’re forced to lift every basket just to swipe up the dust bunnies, and fleeting organization mixes with that subtle, stale feeling by the weekend.

    The friction isn’t abstract. It’s visible: stacks topple, bins become junk drawers, and designated shelf sections lose their borders. Category lines blur and resets get slower—not dramatic, but persistent enough to matter.

    Small Tweaks That Shift the Whole Closet Experience

    Sometimes, a weekend tweak makes hours of weekly maintenance vanish. Add a felt or fabric liner atop solid shelving and suddenly scarves and tees stay square—edges stop drooping, piles resist sliding, and you don’t have to rebuild stacks on the fly. It’s not perfect, but core categories hold longer between resets. Each reach retrieves the item you actually want, rather than unleashing a minor avalanche.

    Wire shelves benefit from shallow bins or semi-rigid baskets, containing the worst spillovers. Still, the wire’s structure means loose piles want to sag and splay. You nudge one thing and another shifts—and there’s no hiding the reality: wire surfaces make you manage the mess more actively, with less payoff for every round of tidying.

    The real strain isn’t purely visual—it’s cumulative. You burn extra minutes hunting a sock dropped behind a bin, re-folding shirts slipped off the pile, or wiping up that lint patch before setting down fresh bedding. When “organized” turns into “lots of extra steps,” every reset feels less worthwhile.

    The Mix-Match Method: Designing for Your Actual Routine

    Most closets can’t—and shouldn’t—be all wire or all solid. The best routines come from mixing surfaces and adjusting for use:

    • Dedicate solid shelving to daily-used, stackable items like shirts, sweaters, and linens—anywhere a stable, flat zone slows the collapse of piles and keeps categories clear between washes.
    • Reserve wire shelving for out-of-the-way or high-up storage, overflow jackets and shoes, or as base surfaces for baskets and bins—where visibility and airflow matter more than perfect stack discipline.
    • Layer in soft liners, fabric pads, or low dividers if certain sections—especially for delicates—keep sliding into disarray or attract dust.

    Your closet doesn’t need to be showroom-perfect—it just needs to work better on Tuesday morning than it did on Monday. You notice the improvement not because it always looks perfect, but because you’re no longer forced into constant reshuffling, rescue missions for lost items, or fighting categories that collapse overnight. The rhythm becomes: reach, grab, move on—with a reset that actually lasts longer than a week.

    Storage That Actually Keeps Up With You

    Both wire and solid shelves start with a promise: a closet that looks and feels under control. But daily frictions—tilted piles, slow resets, sneaky dust, unruly bins—quickly reveal what works and what doesn’t. Build around how you use each shelf: what needs more support, what can handle more airflow, and what just can’t afford to get neglected. The best setup is the one that adapts alongside your actual routine, keeping categories visible, piles steady, and resets quick enough to feel like progress instead of another round of chores.

    Shop ClosetWorks for more practical closet systems and shelving solutions