
Understanding Tear-Out in Router Work: What Causes It and How to Prevent It
Anyone who has worked with a router on wood knows the sinking feeling: you’re routing a crisp, clean edge, fully focused, when suddenly that harsh noise rings out—the bit catches unexpectedly, sending a jagged splinter ripping out of your otherwise smooth surface. This flaw, known as tear-out, can quickly derail the appearance and quality of your project.
Why does tear-out happen? And, far more importantly, what practical steps can you take to minimize or avoid it? Getting to the root of tear-out means understanding the interaction between the spinning router bit and the wood fibers, as well as how your technique influences the outcome. Let’s explore the causes of tear-out, how to recognize vulnerable fragile spots in your workpiece, and effective strategies to improve your results.
What Actually Causes Tear-Out?
Tear-out occurs when wood fibers are lifted or torn rather than sliced smoothly by the router bit. The spinning blade cuts fibers ahead of it, but if fibers aren’t properly supported or if cutting parameters aren’t optimized, those fibers can break away unevenly.
Key Factors Leading to Tear-Out
- Grain Direction: Routing against the grain can lift delicate fibers instead of cleanly cutting them. Understanding grain flow and routing with it whenever possible reduces tear-out.
- Bit Sharpness: A dull or damaged bit doesn’t slice cleanly, instead tearing fibers and causing rough edges. Regularly inspect bits for dullness and use high-quality carbide-tipped or spiral up-cut bits for cleaner cuts.
- Feed Rate: Moving the router too quickly increases force on the fibers and can cause splintering, while moving too slowly risks burning or chatter marks. Aim for a steady, balanced feed aligned with bit speed—commonly between 14,000 and 18,000 RPM—and adjust based on wood hardness and bit size.
- Workpiece Support: Unsupported edges, especially at end grain or corners, are prone to splintering. Fibers without backing support easily pull away during cutting.
- Bit Type and Tooth Count: Choosing the right bit profile and the number of teeth is critical. For example, high-tooth-count spiral bits (two or more flutes, 1/4″ shank) are excellent for hardwoods and plywood and reduce tear-out significantly compared to basic straight bits.
Spotting Trouble Zones Before Routing
Tear-out isn’t equally likely across every section of your wood project. Recognizing areas at risk allows you to adopt specialized strategies to protect those spots.
Common Vulnerable Areas
- End Grain: Edges that expose end grain fibers tend to tear more readily since the fibers run perpendicular and are weakly supported.
- Corners and Curved Profiles: Sharp transitions and curves often lack backing support or place uneven stress on fibers.
- Veneered and Highly Figured Woods: The thin veneer layer, or irregular fibers in figured woods, may delaminate or peel in long strips under a router bit.
When routing unsupported grain at an outside corner, for example, using an aggressive bit profile or one that removes too much material in a single pass can instantly result in break-out.
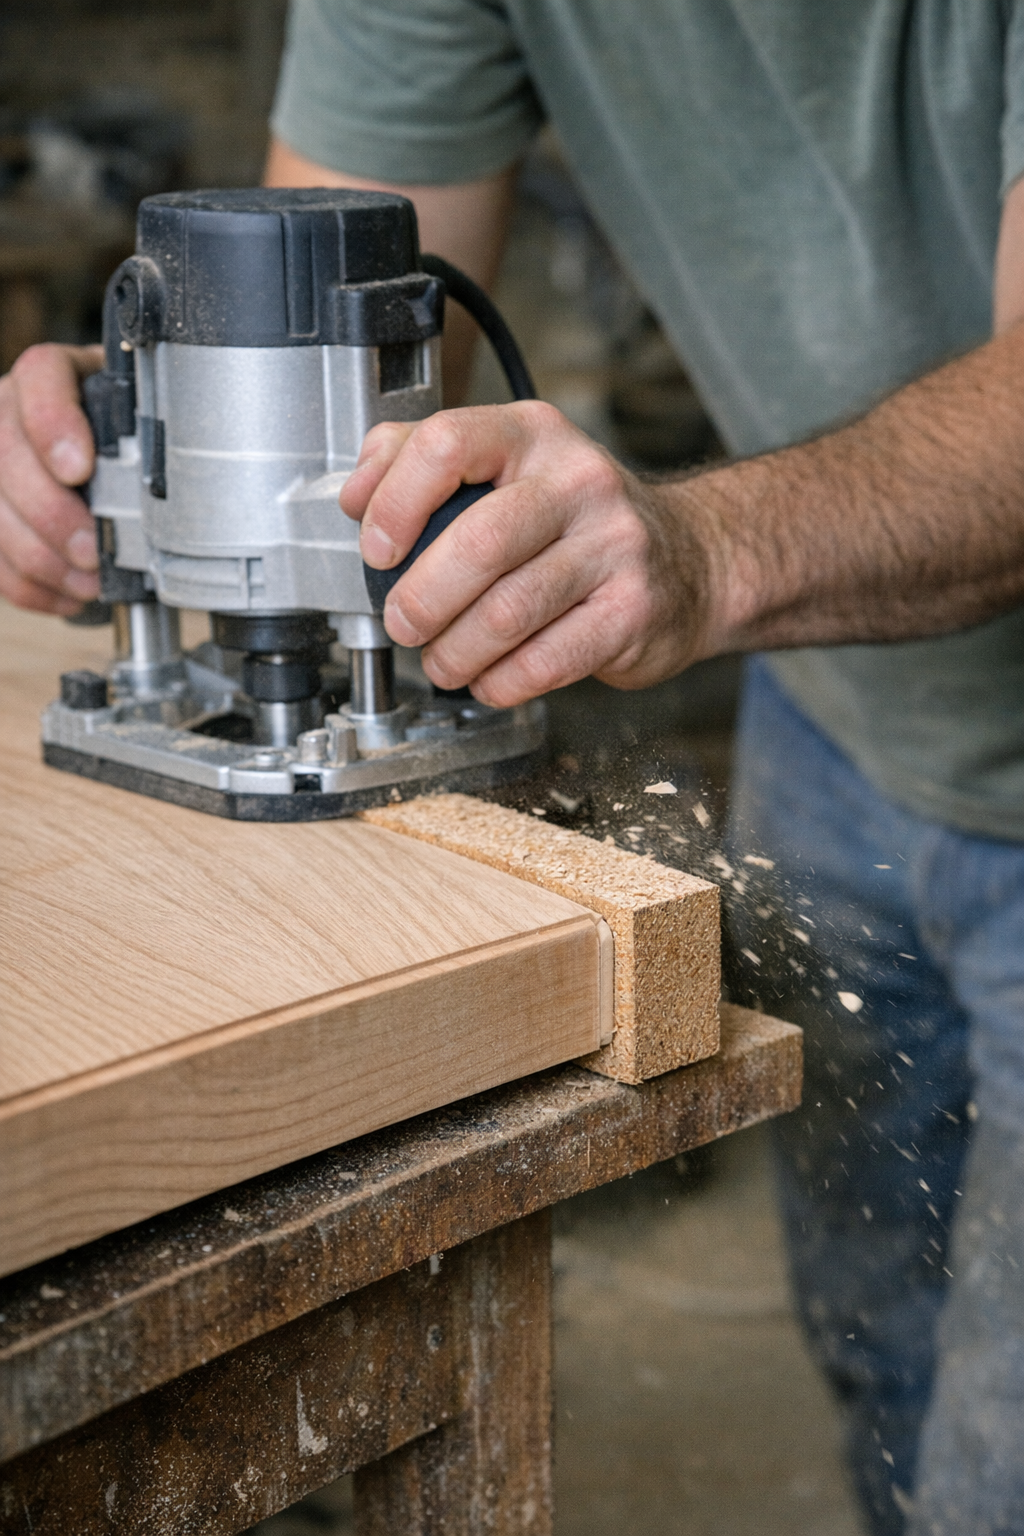
Simple Yet Effective: Using a Backer Board
One of the most straightforward adjustments that dramatically cuts tear-out is to clamp a backer board flush behind or beneath the workpiece edge you’re routing. Though it might seem like a small extra step, the results speak for themselves.
When the router bit reaches the end of the cut, instead of gouging into unsupported fibers, it cleanly slices into the solid backer board. This transfers any splintering or tear-out to the sacrificial scrap rather than your finished piece.
This technique excels when working on tabletops, door edges, shelves, and other projects where exposed end grain or edges must remain flawless. It costs a little time to set up but can save hours of repairing or replacing damaged material.
Additional Tips for Cleaner Routing
- Route End Grain First: Beginning with the vulnerable end grain edges allows any minor tear-out to be cleaned up later when routing adjoining sides.
- Take Multiple Shallow Passes: Instead of attempting to remove all the material in one deep cut, adjust your bit for shallower depths—around 2 to 3 mm (about 1/8 inch) per pass. This reduces strain on fibers and yields smoother edges.
- Test Grain Direction and Bit Rotation: Make test cuts on scrap to determine if climbing or conventional routing produces a cleaner result. Climb cutting (moving with the rotation rather than against) can reduce tear-out in some scenarios but requires steady control to avoid the router “jumping.”
- Adjust RPM for Larger Bits: For larger router bits (over 1 inch diameter), reduce the router’s speed to prevent chatter, heat buildup, and chip-out.
Refresh Tip: Listen Closely While You Rout
One subtle but powerful skill is training yourself to listen to the router’s sound during operation. Smooth, consistent humming generally means the bit is slicing cleanly. Conversely, a rough, rattling noise often signals an impending tear-out or aggressive fiber lift.
By paying close attention and stopping immediately if you notice a change in tone, you can adjust feed rate, routing depth, or technique before damage occurs. This moment of mindful listening becomes a simple preventive checkpoint that can save your project.
Making Tear-Out Manageable
While tear-out can never be entirely eliminated—after all, wood is a natural and unpredictable material—understanding its cause and applying thoughtful strategies make it far less frequent and always manageable.
Using sharp, well-maintained bits, routing with awareness of grain direction, employing backer boards, and taking shallow passes go a long way toward producing consistently clean edges and profiles. Coupled with experiential feedback such as sound cues and strategic routing order, you’ll find tear-out transforms from a dreaded problem to a minor annoyance.
Reflect regularly on your workflow and setup, and you’ll develop the discipline to identify potential tear-out risks before they happen, ensuring your craftsmanship remains precise and professional.
Summary
Tear-out during routing is primarily caused by routing against grain, dull bits, improper feed rates, and unsupported wood fibers—especially at end grain and corners. Mitigating tear-out involves using sharp, appropriate bits with sufficient tooth count, routing in multiple shallow passes, employing simple backer boards to support cuts, and tuning feed speed and bit RPM to the material.
Listening attentively to your router’s sound and testing routing direction in scrap can further minimize risks. These small adjustments add up to cleaner finishes, less wasted material, and a more satisfying woodworking experience.