
Introduction: The Subtle Art of Air Pressure Adjustment
If you’ve ever stopped mid-project, frustrated by nail heads sticking out or sinking too deep, you’re tapping into a common challenge in compressed air nailing: dialing in the right air pressure. For woodworking enthusiasts and professionals alike, understanding how to adjust your compressor’s air pressure settings is fundamental to achieving a flawless finish. The pressure dial on your compressor isn’t just a casual setting—small tweaks can make a significant difference in nail depth and overall project quality.
Let’s explore why air pressure is a critical, yet often overlooked, factor and how to develop practical habits that guarantee consistent nail penetration with brad nailers, finish nailers, and staplers.
The Crucial Role of Air Pressure in Driving Nails
Compressed air tools like nailers and staplers typically operate within a standard air pressure range—usually between 60 and 120 psi. But within this range, just a few pounds per square inch (psi) can dramatically affect how your nails or staples set. For example, an 18-gauge brad nailer often performs best between 70 and 90 psi, while larger framing nailers that drive 2″ to 3½” nails prefer pressures from 90 to 120 psi depending on the hardness and thickness of the wood.
Getting this balance right is vital because:
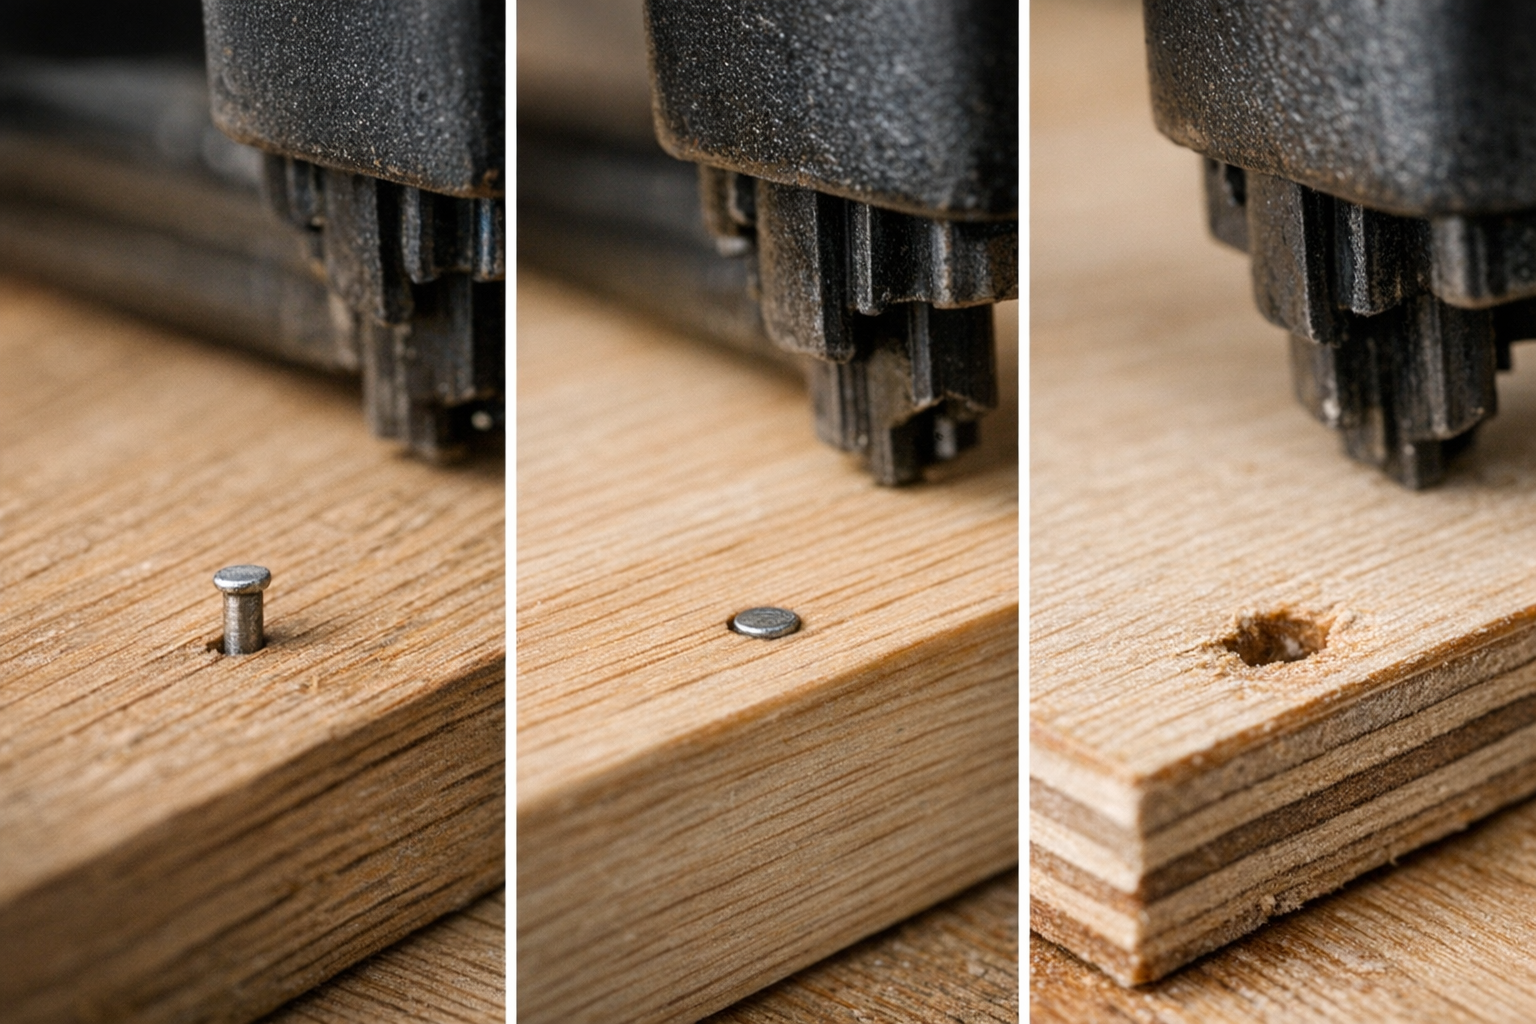
- Too low pressure: Nails won’t fully seat, leaving heads proud of the surface and necessitating time-consuming countersinking.
- Too high pressure: Nails can sink too deeply, damage softer woods, split trim, or crush wood fibers, creating unsightly results that require patching or replacement.
Think of air pressure not as a fixed number but as a live adjustment informed by material, fastener type, and tool feedback.
Real-World Scenario: Saturday Trim Work Goes Sideways
Imagine working on built-in shelving installation with a reliable brad nailer. Early on, you notice nails barely protruding across pine trim, then switching to plywood causes nails to bury almost out of sight. Initial assumptions might blame nails or wood quality, but very often, the culprit is the air pressure setting. Adjusting it by just a few psi can mean the difference between a clean finish and a patchy, slow job.
Matching Air Pressure to Wood and Fastener Variations
One key takeaway for any woodworker is there is rarely a universal optimal PSI setting. Take your pine trim and oak door casing — different densities and grain structures require varied driving force. Likewise, plywood and MDF respond differently, often absorbing nails differently due to their construction.
Fastener specs also change the game. A jump from a 1¼” 18-gauge brad to a 2″ variant typically means increasing pressure by around 10 psi to ensure proper seating. With this in mind, here is a quick guideline to help:
- Softwoods or shorter nails: Start on the lower end of your tool’s pressure range.
- Hardwoods or longer fasteners: Increase pressure gradually, testing for flush results.
A Simple Testing Habit to Save Time
Before you commit to nailing a full run, develop the habit of performing what professionals sometimes call a “two-pair test.” This means firing two nails or staples into a scrap of the same material you intend to use, under your current PSI setting. Then examine the fastener depth:
- If nail heads are too high, incrementally increase the pressure by 5 psi and retest.
- If nails are driven too deep, reduce pressure by 2–5 psi and try again.
This quick, no-fuss method prevents costly overcorrections that might otherwise damage your materials or slow the project.
Beyond Air Pressure: Other Factors Impacting Nail Depth
While PSI is the primary control, several additional variables can influence nail setting depth and quality.
- Moisture Content of Wood: High moisture or softer woods allow nails to penetrate more deeply than expected. Pressure should be lowered slightly when working with damp or soft lumber.
- Fastener Length and Gauge: Longer and thicker nails require more power. For instance, shifting from an 18-gauge 1¼” nail to a 16-gauge 2″ finish nail usually demands 5-10 psi higher pressure.
- Tool Cleanliness and Maintenance: Debris, oil buildup, or sawdust inside the nailer’s firing mechanism diminish driving power, causing inconsistent depth even if the PSI is correct.
- Consistent Compressor Output: Fluctuations in tank pressure or cycling frequency can cause uneven nail depth between shots. Ensuring the compressor’s recovery time and tank pressure align with your tool’s needs promotes steadier performance.
Refresh Tip: Slow Down and Listen to Your Tool
When work gets hectic, it’s easy to turn up the pressure aggressively to fix problems. But blasting nails in isn’t the solution—it often worsens the finish and stresses the materials. Instead, take a deliberate pause and “converse” with your tool: Listen carefully to the firing sound and observe nail seating closely. Small pressure tweaks and tool maintenance create a rhythm that ultimately improves speed and quality. This shift in mindset—from forcing the tool to fine-tuning it—changes the game on every project.
Routine Maintenance: The Unsung Hero of Consistent Results
Between jobs or material changes, make it a quick habit to do a fast tool check:
- Disconnect the air hose, invert the nailer, and gently tap to clear debris around the firing pin and driver blade.
- Wipe down the barrel areas to remove sticky residues like glue or oil buildup.
- Verify that the strokes per minute (SPM) setting matches both your nailer’s specifications and the material you’re working on, avoiding misfires or shallow nails.
These small maintenance steps ensure your pressure adjustments actually translate into reliable nail seating, rather than chasing mysterious depth inconsistencies.
Potential Pitfalls if You Ignore Air Pressure Calibration
Ignoring air pressure tuning can lead to a cascade of problems including:
- Misaligned or uneven trim that requires sanding, patching, or replacement.
- Split or crushed wood fibers that undermine structural integrity and aesthetics.
- Time lost with manual nail sets or additional finish work.
- Tool jams from staples set too deeply or uneven fasteners damaging mechanisms.
- Increased frustration and lower overall job satisfaction.
Professionals know the smoothness and cleanliness of a final project hinge on these fine details. It pays to invest moments in PSI adjustment rather than hours fixing avoidable mistakes.
Step-by-Step: My Nail and Stapler PSI Adjustment Routine
- Start with the manufacturer’s recommended mid-range pressure (e.g., 80–90 psi for 18-gauge brads, 100–110 psi for 16-gauge finish nailers).
- Perform a two-pair test firing into material scrap.
- Inspect head flushness carefully and adjust in small increments (±5 psi).
- Perform quick cleaning if seating is inconsistent or tool feels sluggish.
- Confirm your compressor’s tank pressure and recovery time consistently supply enough air.
- Always retest after switching material or fastener size.
- Maintain proper strokes per minute (SPM) or tool cycling speed as per manufacturer guidance.
This process isn’t glamorous but transforms your work from frustrating and patchy to smooth and professional. It also arms you with a reliable system easily repeatable project after project.
Conclusion: Treat Air Pressure as a Dynamic Partner in Your Craft
Consistently perfect nail depth isn’t about setting a number on a dial and walking away. Rather, it’s a dynamic interaction between your compressed air tool, fasteners, material properties, and most importantly, your attention and technique. Small, methodical adjustments paired with routine maintenance and test firings dramatically reduce finish work and re-dos.
Develop a habit of listening, adjusting, and cleaning your tool regularly. When you treat air pressure as a nuanced factor instead of a fixed setting, your finished woodworking projects—be it trim, cabinetry, or delicate plywood—reflect a superior level of craftsmanship. The difference is subtle but undeniable, and those tiny decisions add up to consistently better results and more enjoyable builds.
If you want to explore compatible air nailers, staplers, or accessories, consider browsing a curated collection to find tools suited for your needs.